
Need to recover your Mac from a backup? There are multiple ways to do it depending on how you backed up your data. This article covers different methods to restore Mac from a backup – whether you need to recover Mac from an external drive, Time Machine, iCloud, or other backup and restore tools.
And if you’re here because you already restored your backup and had overwritten your data as a result, we’ll show you how to get it back. Read on.
Table of Contents
How to Restore Mac from a Backup
Below, we provide step-by-step instructions to 5 different methods to restore backup on Mac. Before proceeding, we recommend that you back up your existing data to avoid overwriting them with backup data.
Method 1: Time Machine backup
Time Machine is a native Mac backup and restore tool that you may know can save snapshots of your files and folders. Its other feature is the ability to back up your entire Mac. To restore your Mac from backup via Time Machine, you’ll need to launch the app in Recovery Mode. We’ll show you the entire process in the guide below.
To restore backup on Mac using Time Machine:
Step 1. Turn your Mac off and connect the drive that contains your Time Machine backup.
Step 2. For Apple-based Macs, hold the power button until you see “Loading startup options” onscreen. For Intel-based Macs, press the power button and immediately press and hold the Command and R keys until you see a spinning globe.
Step 3. Select Restore From Time Machine Backup and click Continue.
Step 4. Follow the wizard to select your Time Machine drive and choose a backup.
Step 5. Select your main drive as the destination for your Time Machine backup files and confirm. Note that this process will overwrite existing data with backup data. If you have important files on your computer, back them up first.
Method 2: Local backup
If you created a local backup by cloning your drive to an external drive, you can restore Mac from your external drive through the Disk Utility app in Recovery Mode.
To restore Mac from Disk Utility using a clone:
Step 1. Turn off your Mac and connect the drive that stores drive’s clone.
Step 2. For Apple Silicon Macs, hold the power button until you see “Loading startup options” onscreen. For Intel-based Macs, press the power button and hold the Command and R keys until you see a spinning globe.
Step 3. In the recovery screen, select Disk Utility and click Continue.
Step 4. From the list, choose your Mac’s hard drive. Then, go to the Restore tab at the top of the screen.
Step 5. For Restore from, select the external hard drive that contains the clone backup. And for Restore to, choose your Mac’s hard drive.
Step 6. Finally, click Restore. Wait for the process to finish.
Method 3: iCloud backup
Did you enable iCloud for your Mac? While not technically a full Mac backup, iCloud can save your Contacts, Calendars and Reminders, Bookmarks, Notes, Files, Photos, Videos, and other files. It will store this data for 30 days until permanent deletion.
To restore your data from iCloud:
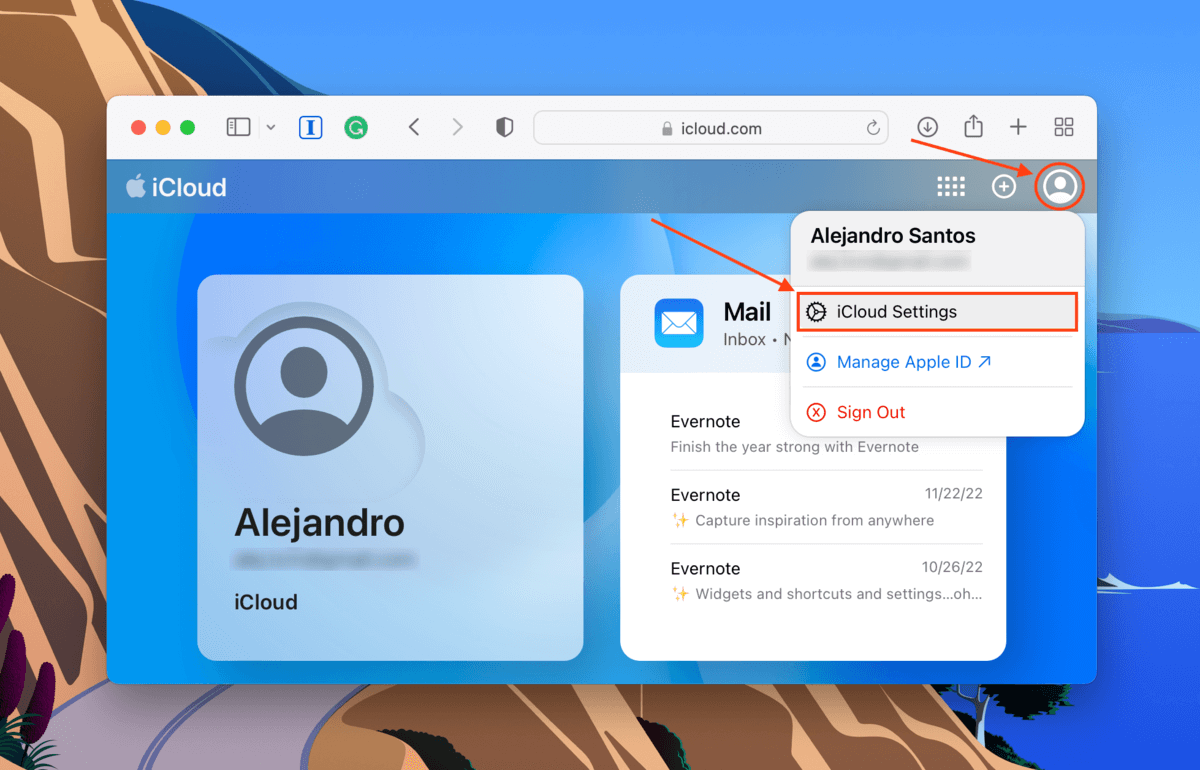
Step 1. Launch Safari and log into iCloud.com.
Step 2. Click the user button > iCloud Settings.
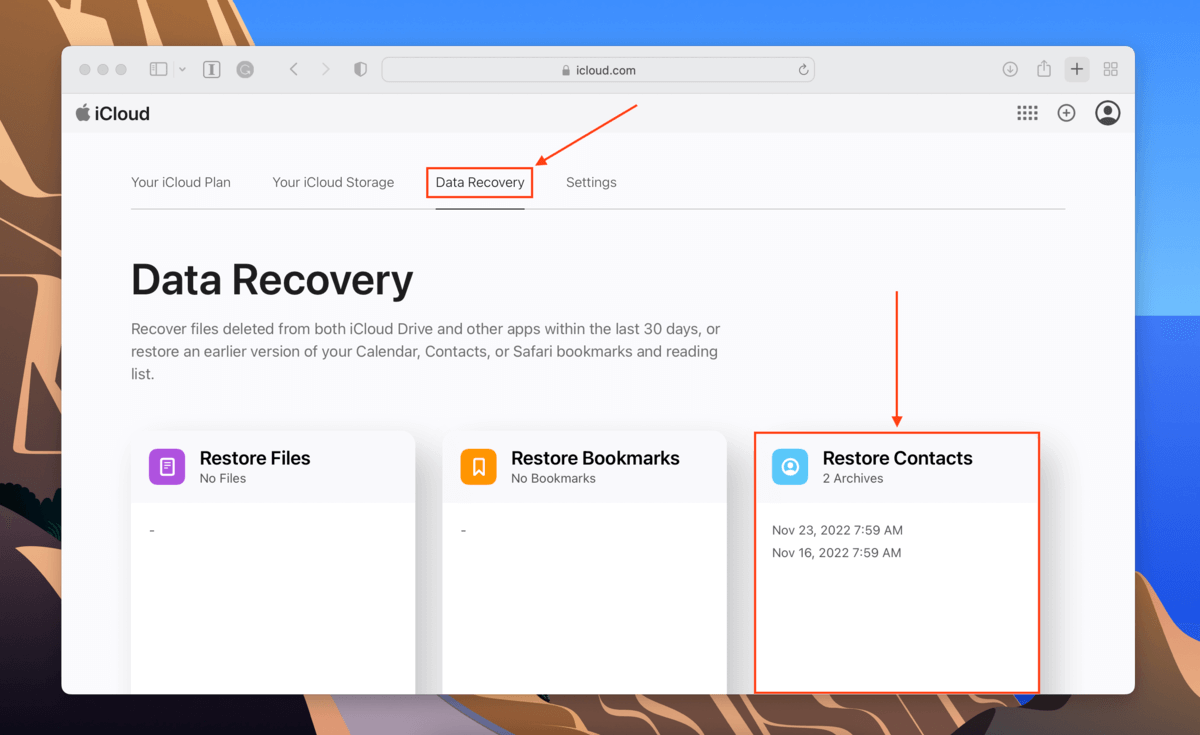
Step 3. Navigate to the Data Recovery tab and click one of the data categories.
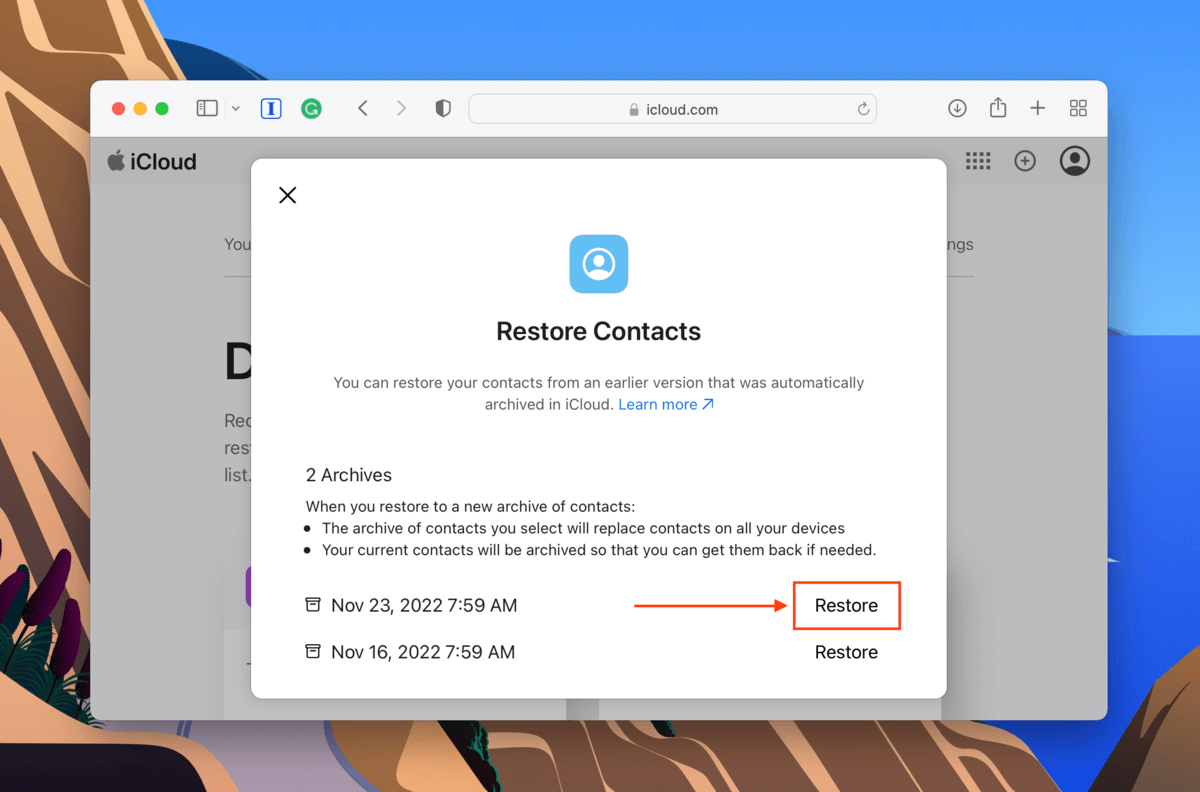
Step 4. For some categories, you’ll find a Restore button to the right of each archive that you can click. For others, you’ll have the ability to select multiple files before clicking the Restore button.
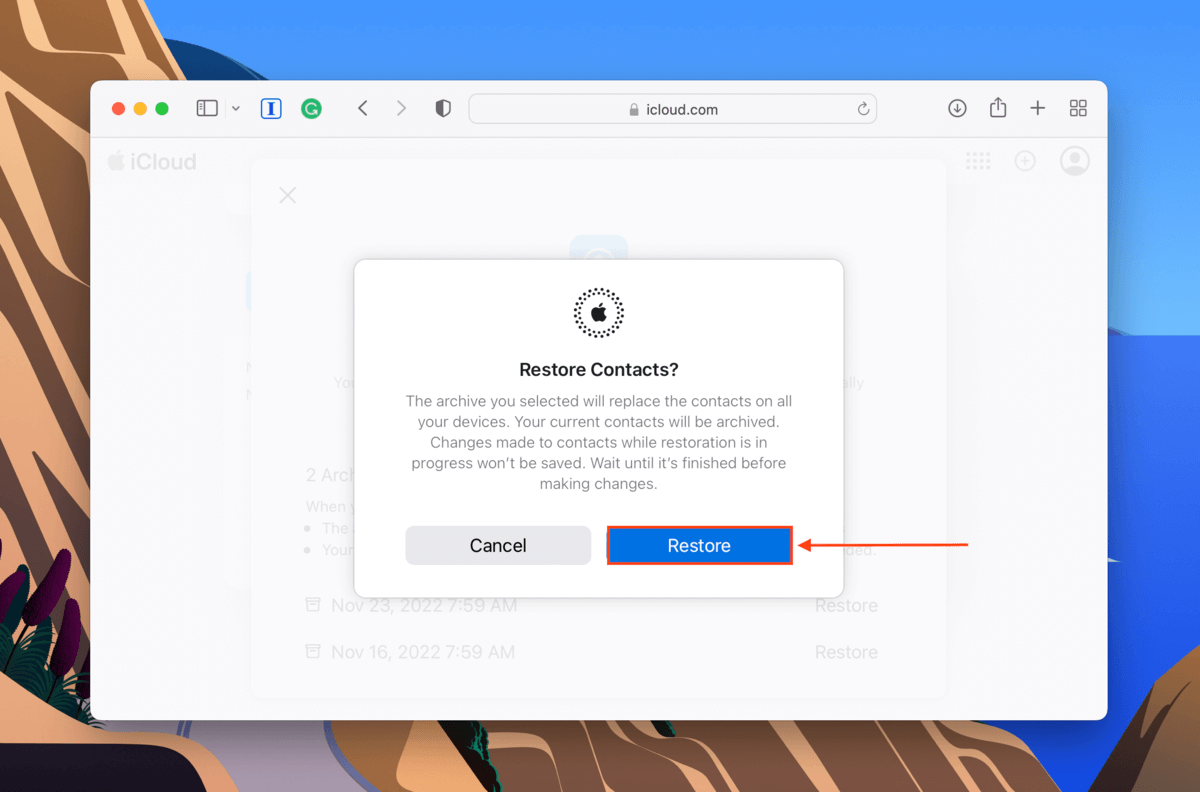
Step 5. Confirm the restore when prompted to get your files back!
Method 4: Another Mac
If you want to restore a new Mac from backup or transfer your data to a different Mac, you can use the native tool Migration Assistant to do it seamlessly. Just make sure that both Macs are updated and that any antivirus software is turned off.
Step 1. Connect the two Macs using a compatible cable.
Step 2. On the other Mac, launch Migration Assistant (Finder > Applications > Utilities).
Step 3. Select From a Mac, Time Machine backup or Startup Disk and click Continue.
Step 4. On your Mac, launch Migration Assistant and click Continue.
Step 5. Choose the option to transfer your data to another Mac and click Continue.
Step 6. On the other Mac, select your Mac and click Continue.
Step 7. Confirm the security code shown on the two Macs and click Continue on your Mac.
Step 8. On the other Mac, select the data you want to transfer and click Continue.
Once the process is complete (it might take a while), you’ll be able to log into your user account on the other Mac which should have all your old data.
Method 5: 3rd Party Backup Software
If you used 3rd party backup software to secure your data, review the developer’s website for instructions on how to restore their backups specifically. For example, you can restore Mac from a SuperDuper! Backup by using the backup drive as the startup disk. But if you only want to restore the clone created by the SuperDuper! App, you can follow the same steps we provided in Method #2 (works for any cloning app).
Is It Possible to Recover Files Overwritten by Backup
Did you restore a backup from an external hard drive on Mac and overwrite your existing data as a result? Recovery chances are pretty slim due to the overwriting… But not impossible. The system overwrites data in a certain order, starting from the beginning of the disk. If the data you want to restore is closer to the end, it may be recoverable.
However, you’ll need the help of data recovery software, which can extract and rebuild data directly from the file system. The instructions below feature a tool called Disk Drill.
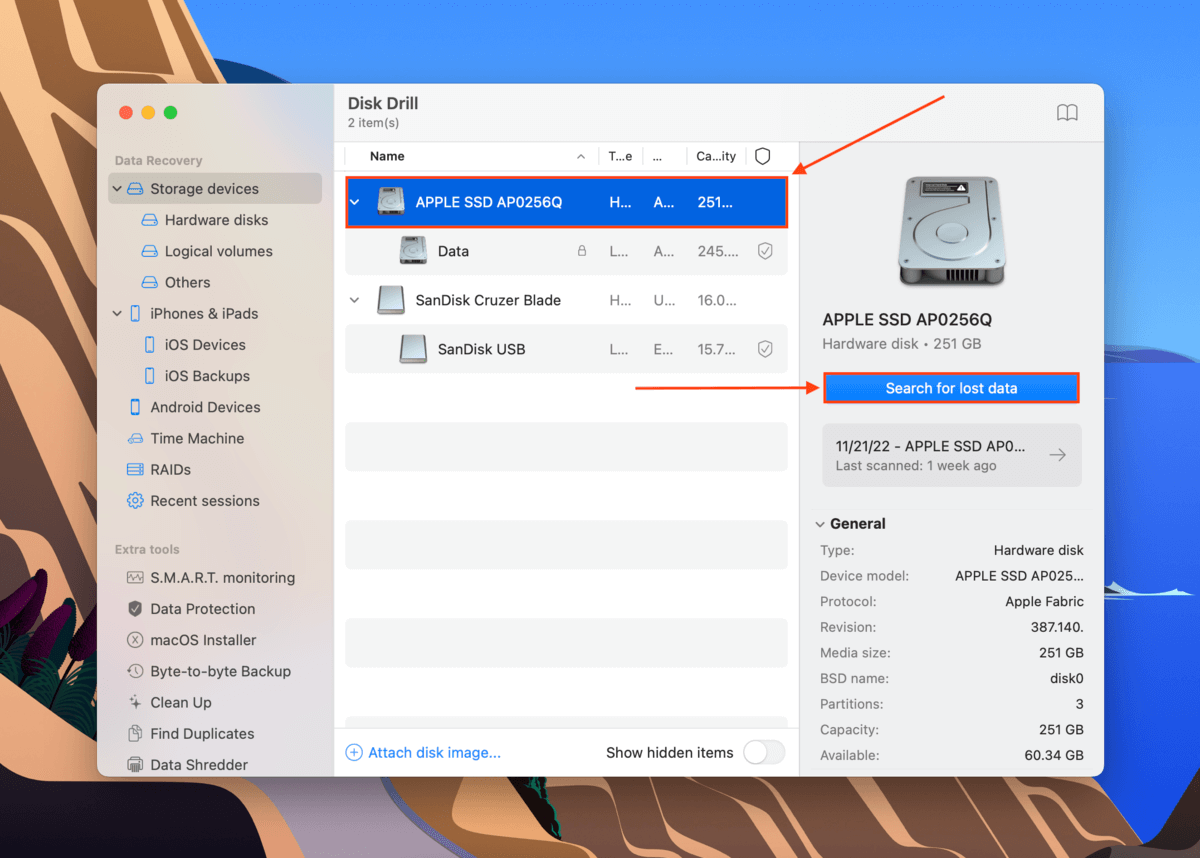
Step 1. Connect a storage device to your Mac, ensuring that it has enough space for the data you want to recover.
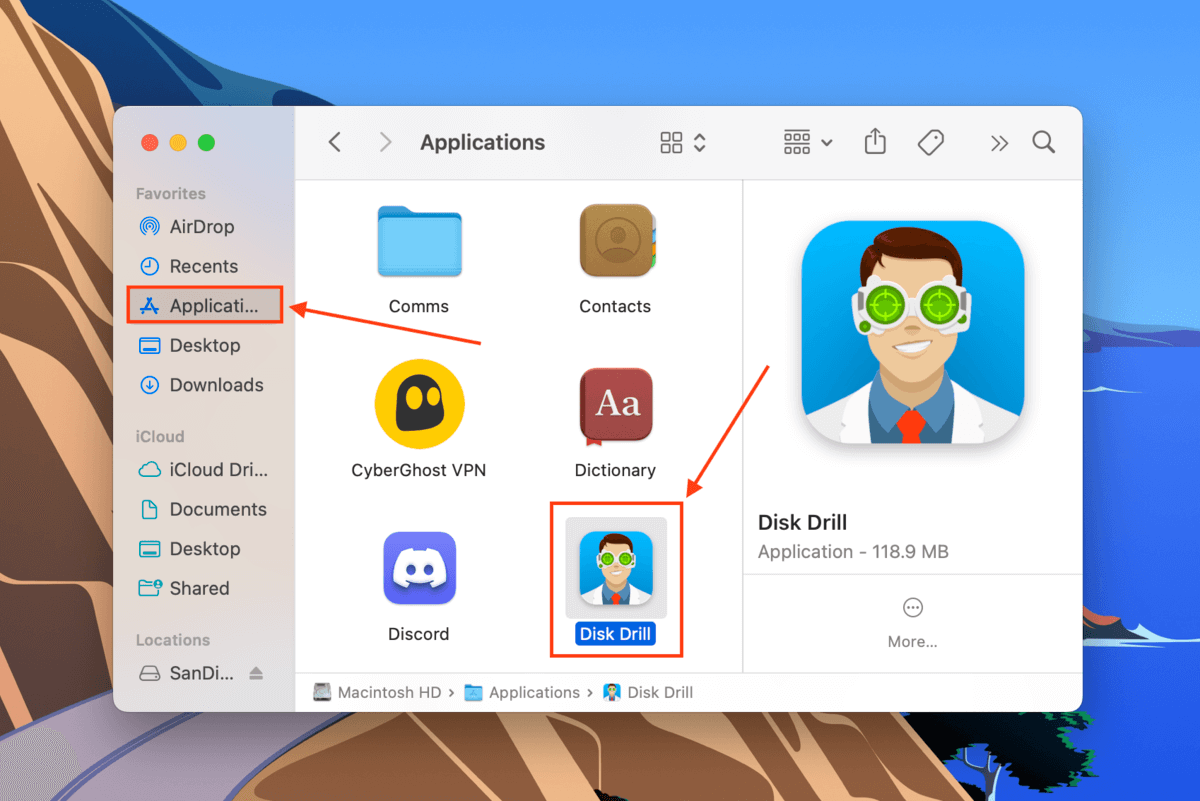
Step 2. Download and install Disk Drill.
Step 3. Launch Disk Drill (Finder > Applications).
Step 4. Select your Mac drive from the list and click Search for lost data.
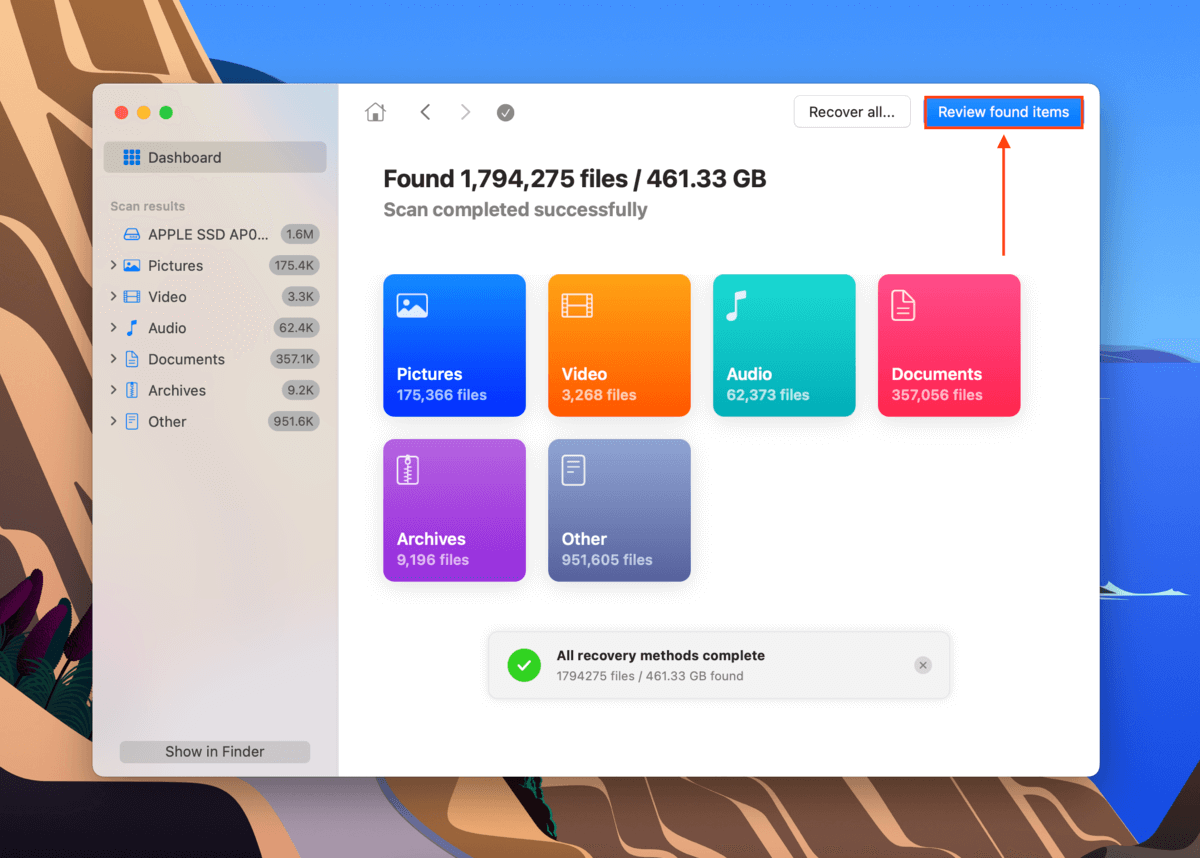
Step 5. Wait for the scan to complete, then click Review found items.
Step 6. If you only want to restore specific files, you can use the search bar (click the magnifying glass) or filter data by type using the left sidebar. You can also preview files by hovering your mouse pointer beside them and clicking the eye button that appears.
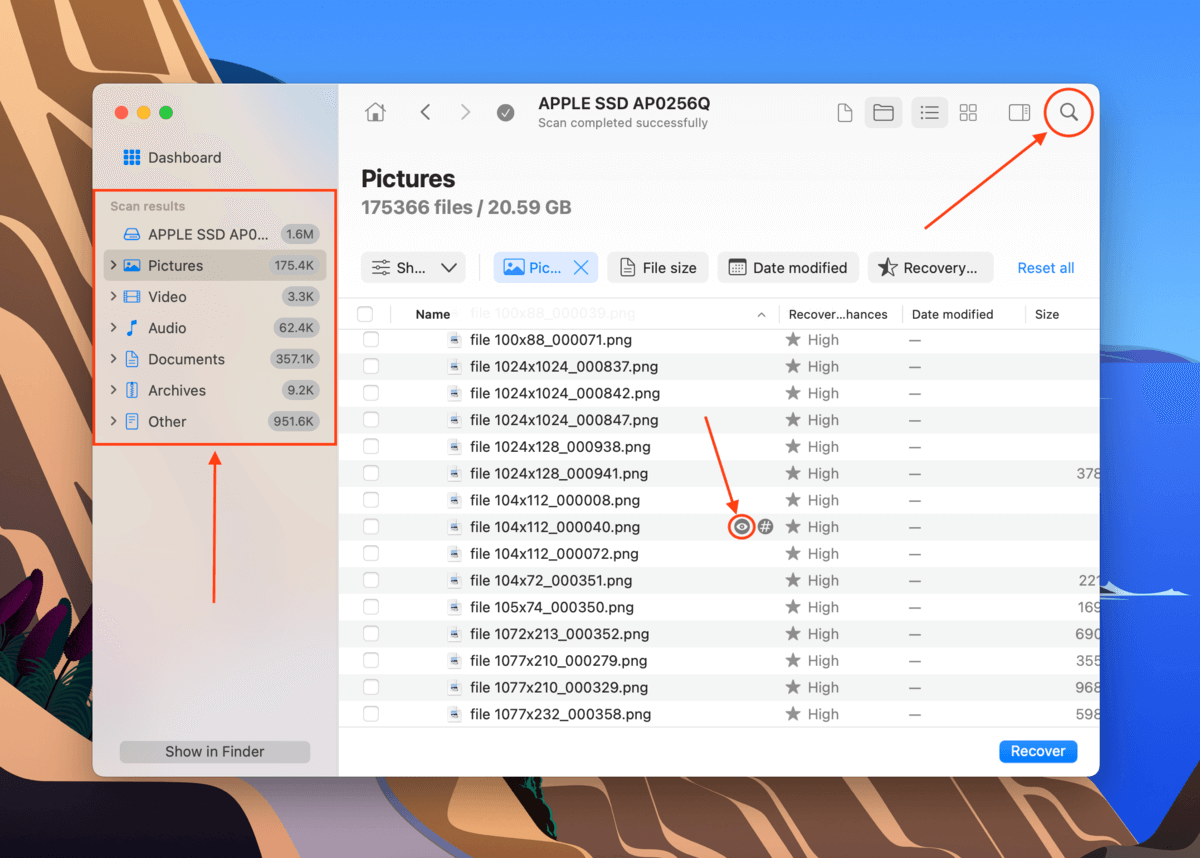
Step 7. Use the boxes on the left to select the files you want to restore. You can also click the checkbox at the top column to select everything Disk Drill found. Then, click Recover.
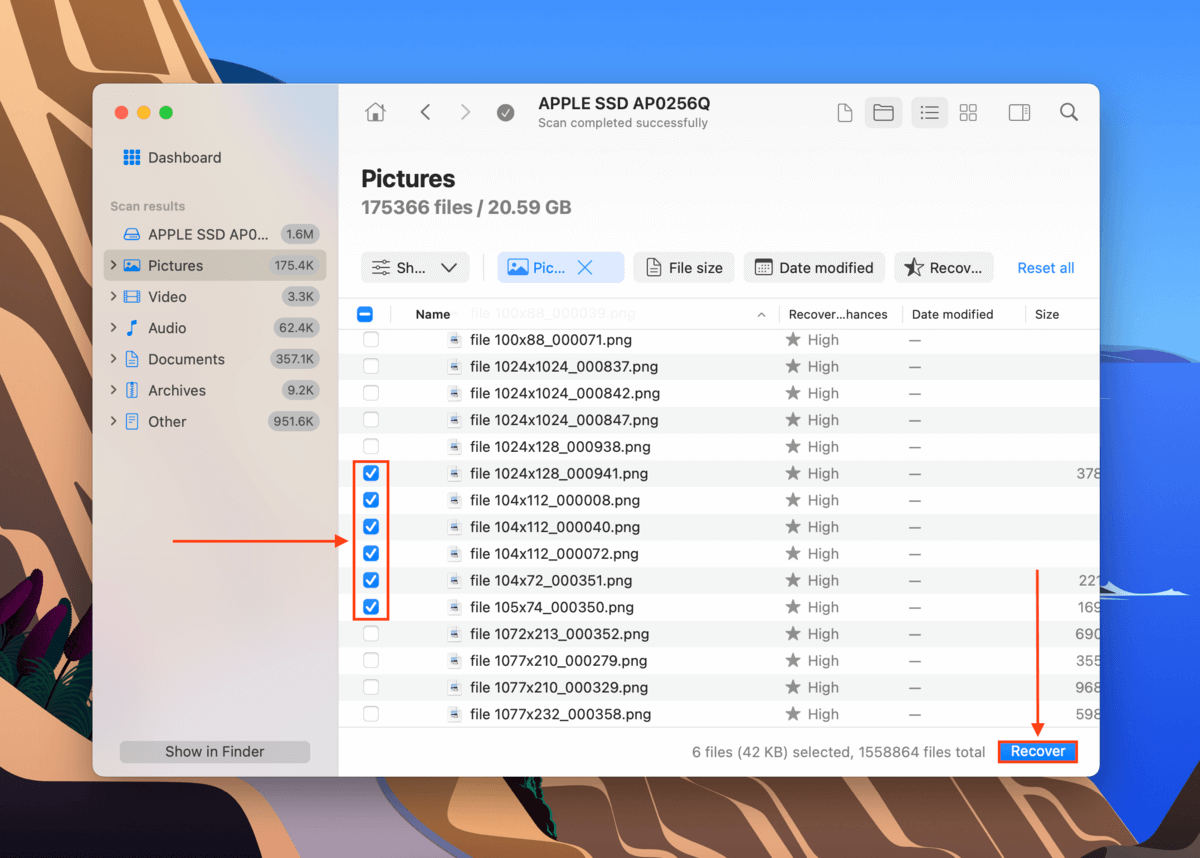
Step 8. Select the storage device we connected in step 1 as the destination for the recovered files. We want to avoid overwriting data while the recovery is in process. Then, click Next to proceed with recovery.
Conclusion
There are a lot of ways to restore Mac from a backup – as many as there are to back up your data. Fortunately, most backup tools make it easy to restore your data through their apps or by using native Mac apps like Disk Utility. However – I know this sounds redundant – make sure to back up your data before restoring your backup! The process of restoration overwrites your old data, which makes it really tough to recover the files you lost even with a data recovery software like Disk Drill.
FAQ
To restore your Mac from a backup, try any of the following methods:
- Restore Mac from a Time Machine backup.
- Restore a clone of your Mac from a local backup.
- Download your data from iCloud.
- Transfer your data using Migration Assistant.
- Use third-party backup software.
To restore your Mac to a specific date, you’ll need to use Time Machine through Recovery Mode. This method assumes that you enabled Time Machine on or before the date you want to restore to. Once you are prompted, select the Time Machine backup with the data you want.
To restore Mac to previous date without Time Machine, there are two ways: (1) if you cloned your drive on the data you want to restore to, you can use Disk Utility in Recovery Mode to restore your Mac to that state. Or (2) if you used a third-party app to back up your data, check if it saves dated backups.


