Time Machine is a powerful native backup tool that gives Mac users an easy way to protect their data. It’s capable of locally saving micro-backups of files and folders (called “snapshots”), as well as total backups of entire disks with gigabytes worth of data.
Time Machine gives users a lot of options for recovering data, depending on their needs – it can be confusing to navigate through them all. Read on to learn each Time Machine recovery process and figure out which one best suits your needs.
Table of Contents
What Does Restore From Time Machine Backup Mean?
Restoring from Time Machine backup means recovering the data you saved onto your MacBook using a special backup file produced by Time Machine itself. There are 2 types of restores you can do:
- Snapshot. Store local backups on your Mac as “snapshots” – these are past instances of your files and folders. You don’t need your backup disk to access them.
- Full Backup. Backup of your entire MacBook on a separate storage drive. Takes longer to restore than snapshots, as the data is usually ten to hundreds of gigabytes in size.
If you want to know more about creating backups, read our full guide on How to Use Time Machine.
How to Restore Files and Folders with Time Machine
The most convenient way to restore individual files and folders is by using Time Machine’s snapshot feature. Here, you can see all the different past versions of your files and folders saved since you first enabled Time Machine to automatically store this data. Here’s how to restore it:
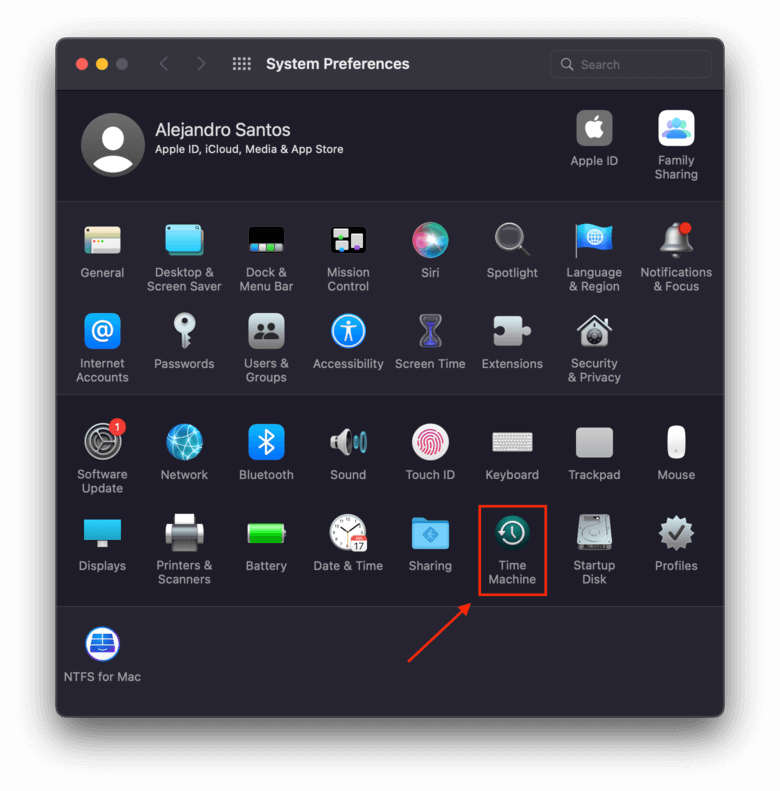
Step 1. To open Time Machine on Mac, launch System Preferences > Time Machine.
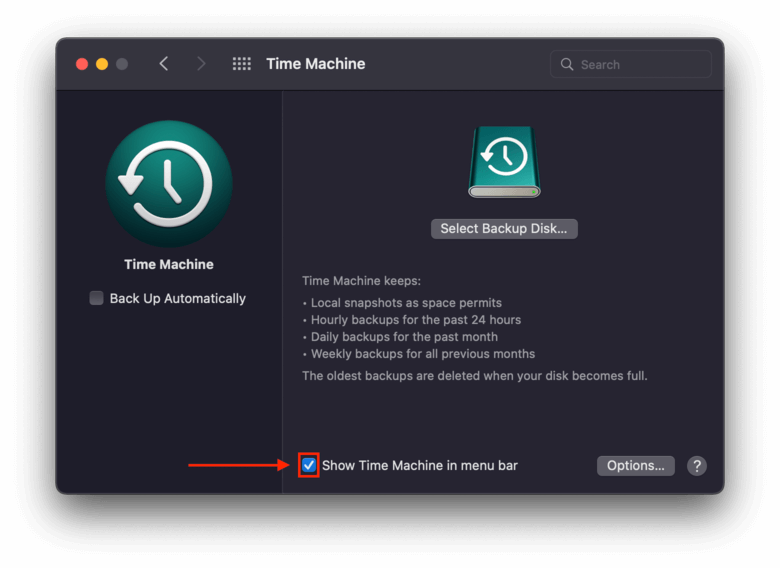
Step 2. On the Time Machine window, tick the box for the “Show Time Machine in menu bar” setting.
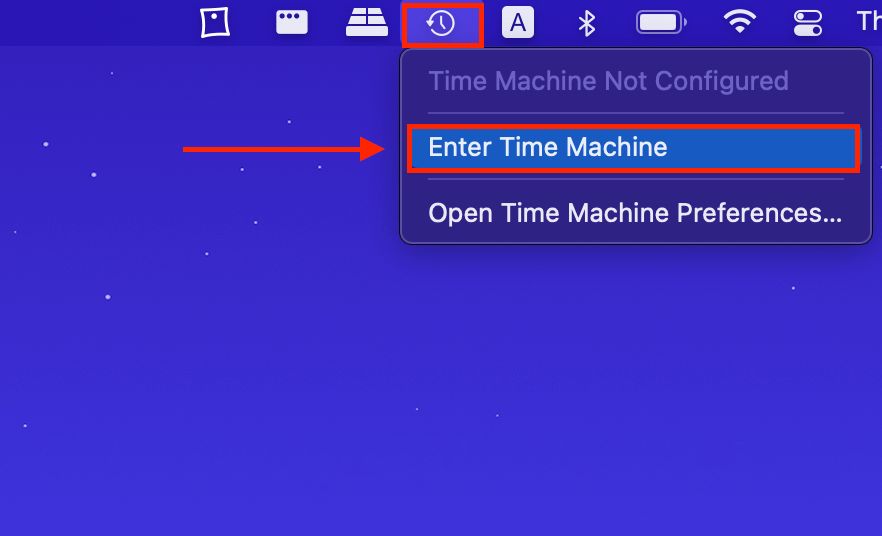
Step 3. On the top-right corner of the Apple menu bar, click the Time Machine button and select “Enter Time Machine.”
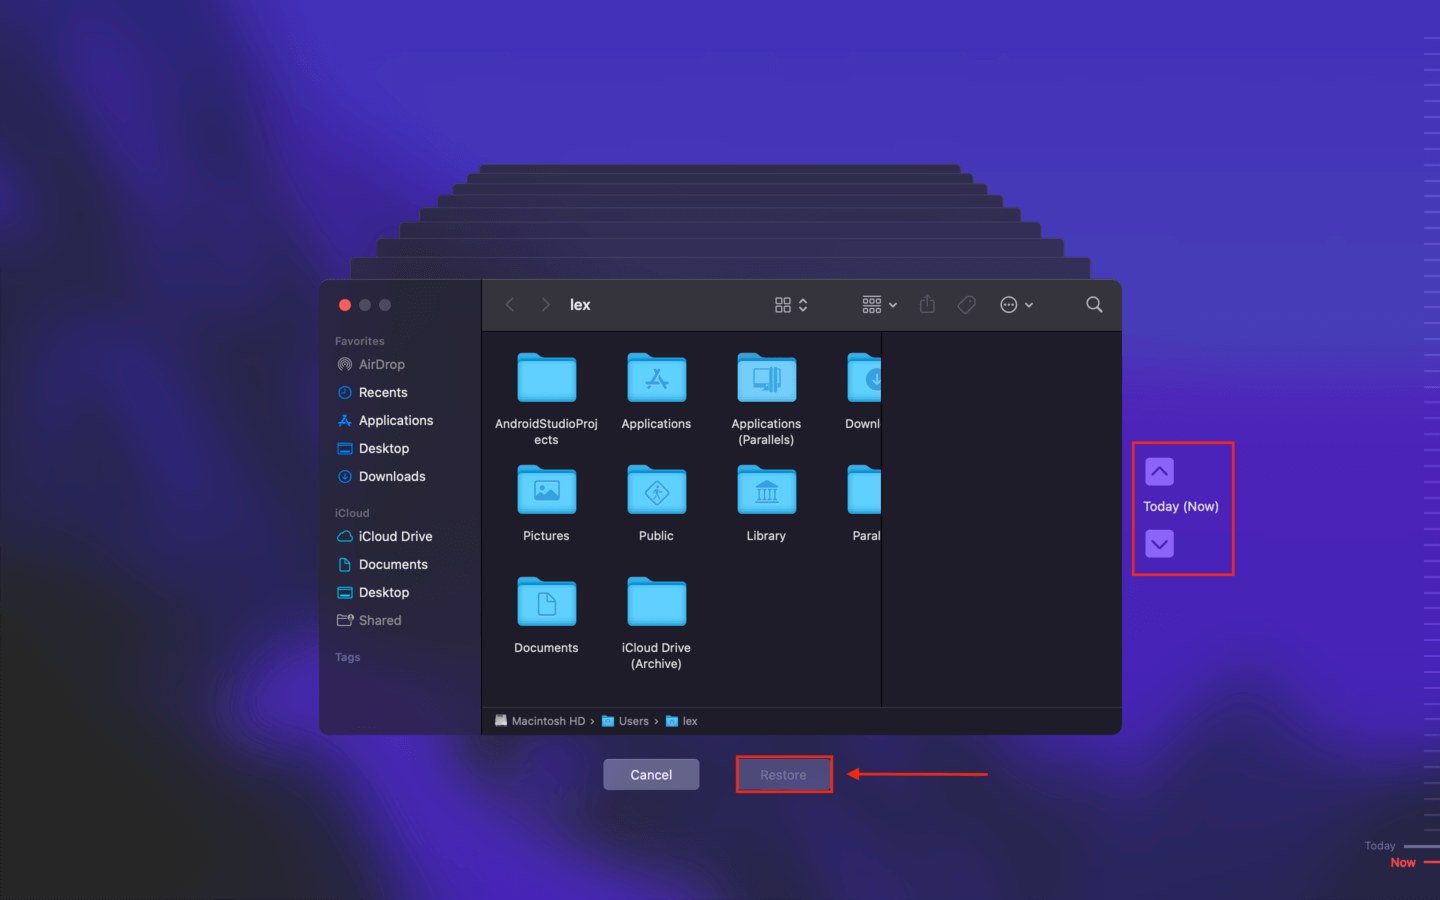
Step 4. Browse through snapshots using the arrow buttons on the right side of the screen. Select the snapshot you want to recover, then click “Restore”.
How to Recover Files Without Time Machine Backup
There are situations where Time Machine won’t work. If your backup was accidentally deleted or corrupted, or you formatted your system without saving it, or if Time Machine wasn’t configured in the first place – you won’t be able to use it to restore your data.
Fortunately, there are other ways to recover your files, such as data recovery tools. For this article we’ll be using Disk Drill, since it’s easy to demonstrate.
Step 1. Download and install Disk Drill.
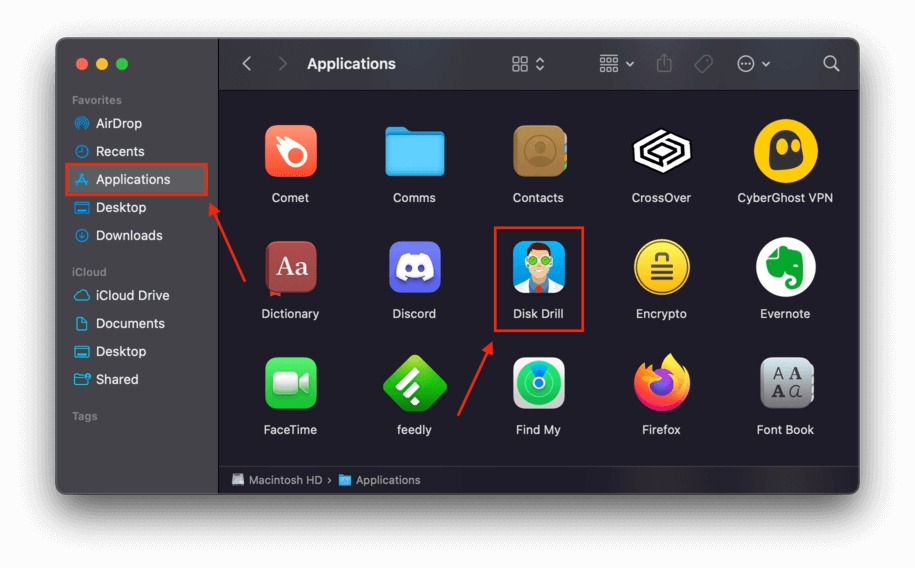
Step 2. Launch Disk Drill by opening Finder > Applications > Disk Drill and double-clicking its icon.
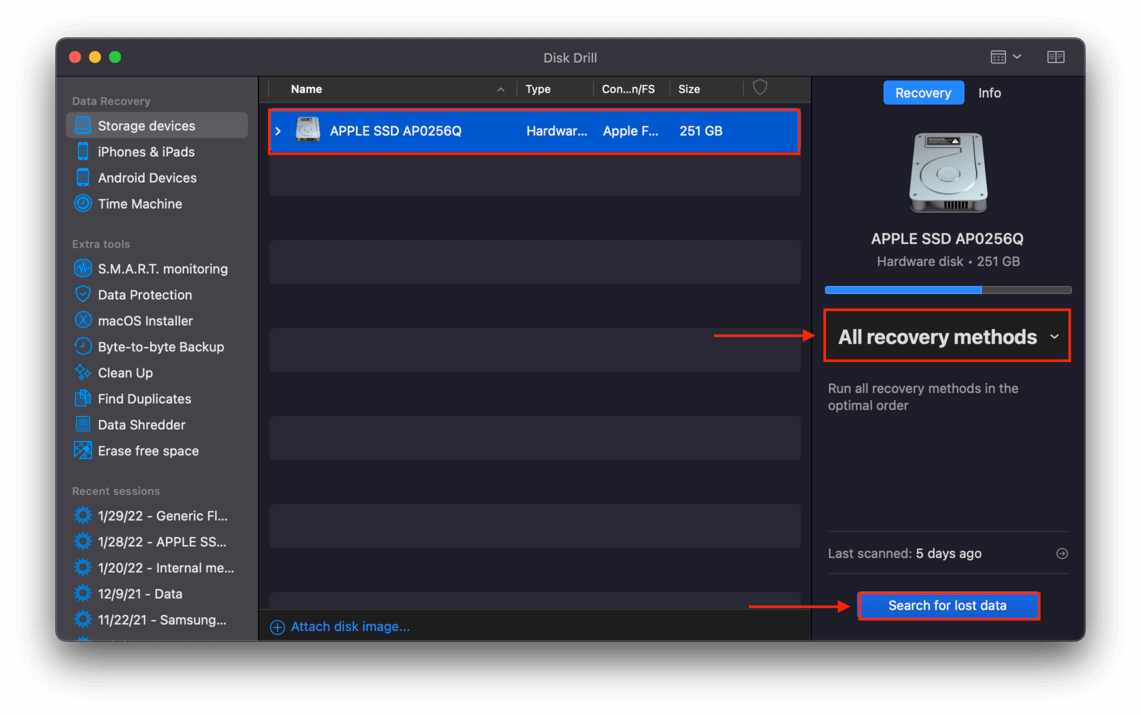
Step 3. Select the drive that last held your missing data, leave all settings to default, then click “Search for lost data” on the bottom-right corner of the screen.
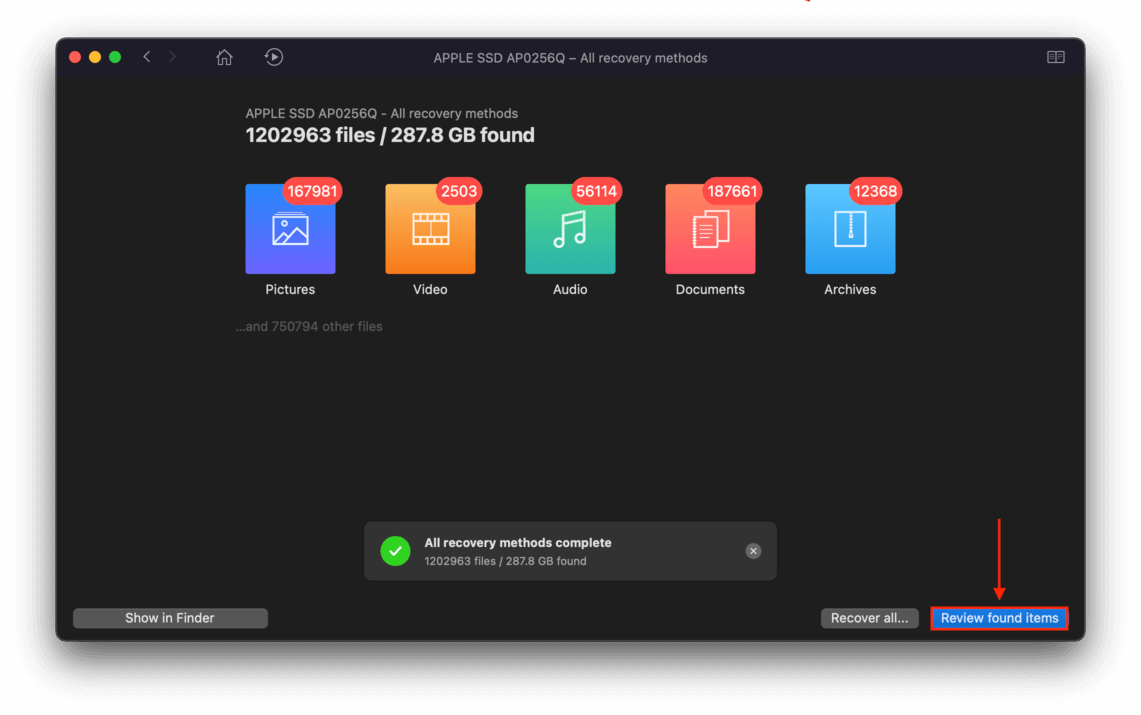
Step 4. Wait for Disk Drill to complete its scan for the best chance of finding your lost files and folders. When the scan is done, click “Review found items.”
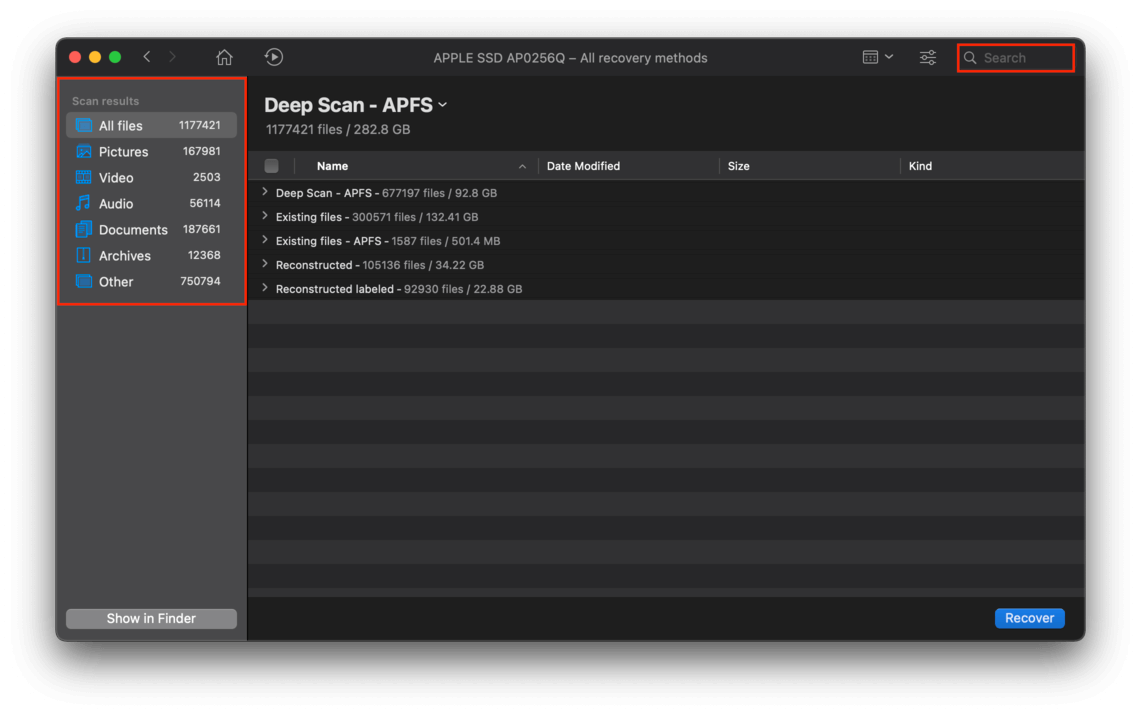
Step 5. Browse through the scan results and narrow your search by using the search bar on the top-right corner of the window, or view results by file type by clicking through the filters on the left sidebar.
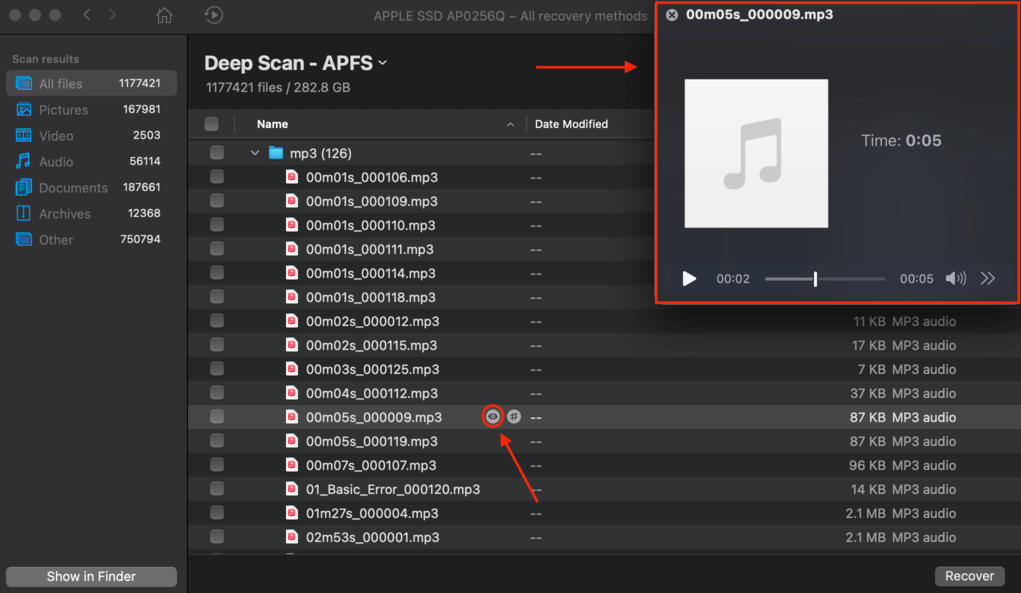
Step 6. You can also preview any of your files by hovering your pointer to the right of their file names and clicking on the eye button that appears. This will open a window that displays a preview of your file.
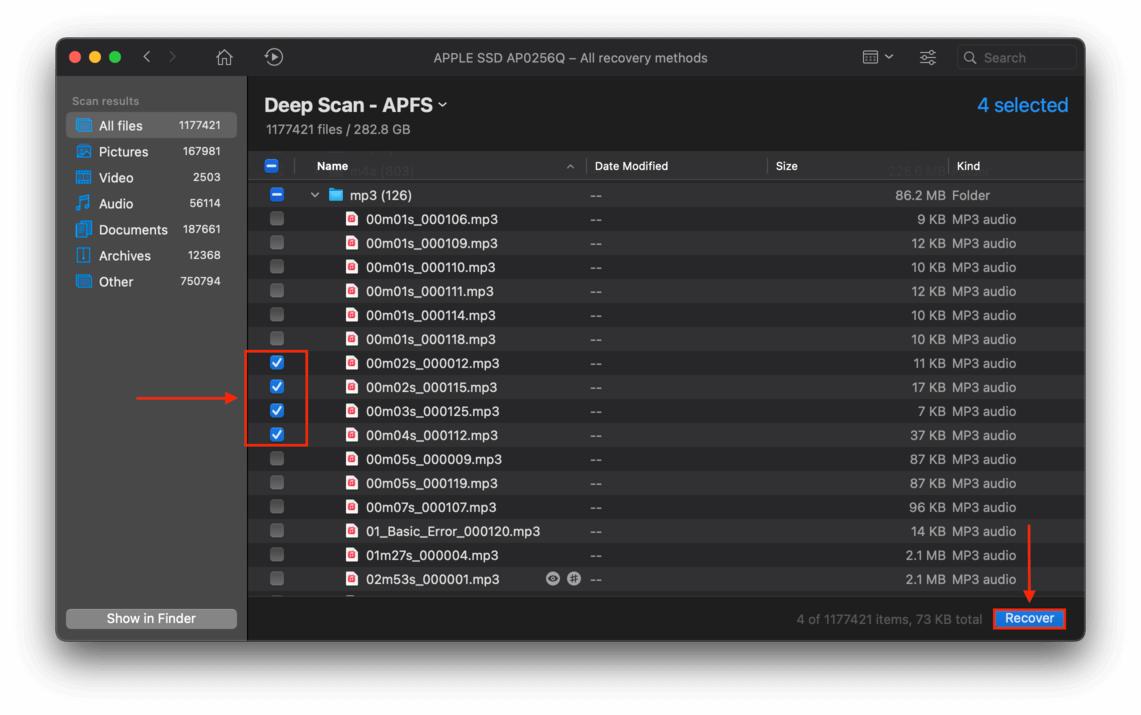
Step 7. Select the files you want to recover by ticking the checkboxes to the left of their file names. Once you’ve selected all the files you want to recover, click the “Recover” button on the bottom-right corner of the window.
Step 8. On the dialogue box that appears, choose where you want to save your recovered data, and click “OK” to proceed with recovery.
How to Fully Restore Mac Hard Drive From Time Machine Backup
One of Time Machine’s most useful features is the ability to restore an entire drive’s worth of backup data. You can even restore from Time Machine after a clean install in case you want to reformat your system. To access Time Machine backup from another Mac, do the following:
Step 1. Plug in the drive that contains your Time Machine backup.
Step 2. Turn off your Mac, and boot into Recovery Mode’s Utilities window. To do this, shut down your Mac, then hold the power button until you see “Loading startup options” on-screen. Click “Options”, then click “Continue.”
Step 3. On the Utilities screen, click “Restore from Time Machine” then click “Continue.”
Step 4. Select the drive that contains your Time Machine backup, then click “Continue.”
Step 5. Select the backup version you want to restore, then click “Continue.”
Step 6. Finally, select your MacBook’s hard disk as the destination for recovery.
Once the process is complete, Mac will apply your backup and restore your data.
Is it Possible to Restore Files From Time Machine to Another Mac?
Yes, it’s possible to restore your Time Machine backup to another Mac. macOS has a native tool called “Migration Assistant” that makes it super convenient to copy all your documents, accounts, applications, and settings from a Time Machine onto a new Mac.
Step 1. Plug in the external drive that contains your Time Machine backup (you can also transfer data from another Mac – the process is quite similar).
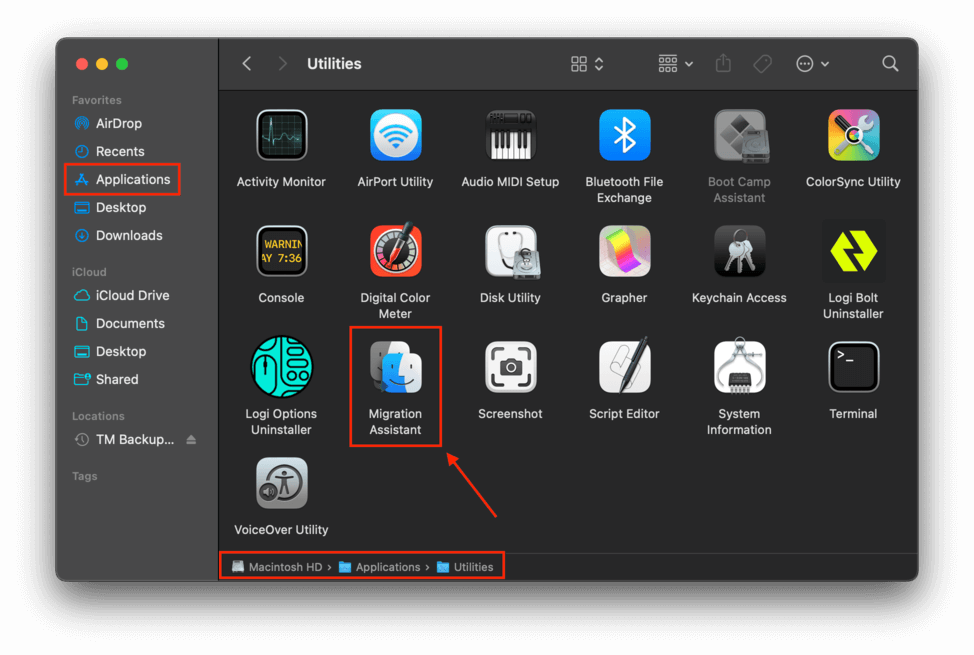
Step 2. On the MacBook on which you want to apply the Time Machine backup, by opening Finder > Applications > Utilities > Migration Assistant and double-clicking its icon.
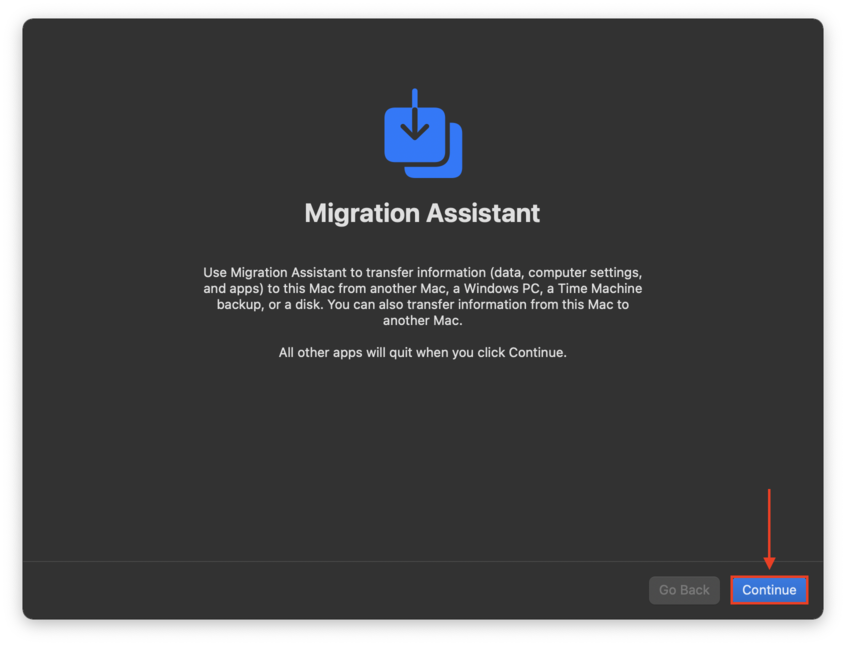
 Step 3. On the Migration Assistant initial window, close all open apps then click “Continue.”
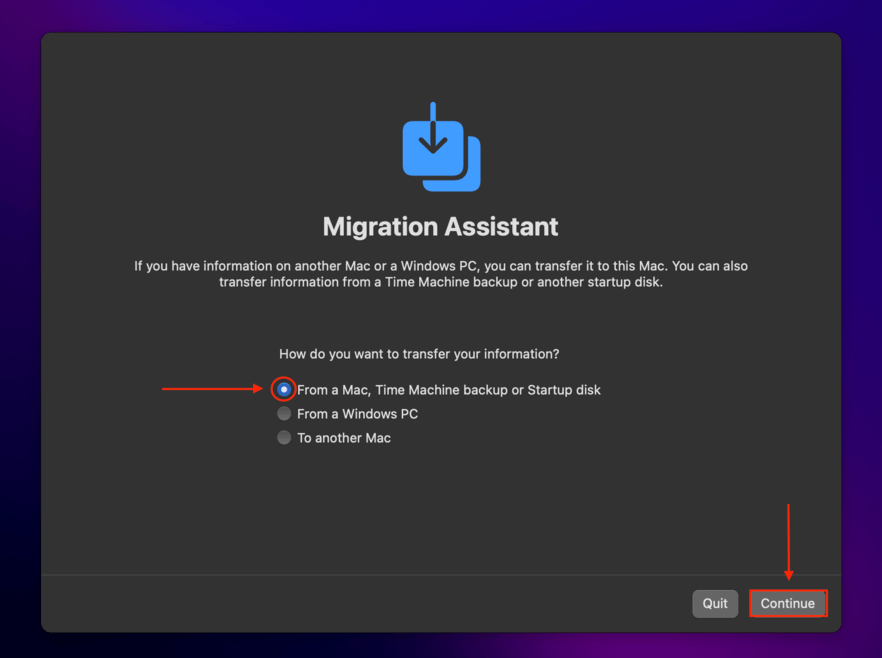
 Step 4. Select “From a Mac, Time Machine backup or Startup disk” and click “Continue.”
 Step 5. Click your Time Machine backup disk, then click “Continue.”
Step 6. Select the backup version you want to restore, then click “Continue.”
Step 7. Tick the checkboxes to the left of the information you want to transfer, then click “Continue.”
Depending on the size of your backup, it may take up to a few hours to complete – after all, Time Machine is restoring your entire disk.
FAQ:
To fully restore iMac using Time Machine, do the following:
- Plug in the drive that contains your Time Machine backup.
- Enter recovery mode by turning off your Mac and holding the power button until startup options load, then selecting “Options” (Apple Silicon). Or by restarting your MacBook and holding down (CMD + R) as it boots (Intel).
- Select “Restore from Time Machine” and click Continue.
Follow the on-screen instructions – depending on the size of your backup, the process might take a few hours to complete.
The short answer is: it depends on the amount of data you’re trying to restore. If you’re recovering local Time Machine snapshots, it can take a few seconds to a few minutes to restore individual or small batches of files.
If you’re recovering one or two (or more) gigabytes worth of data using Recovery mode, it can take up to a few hours to completely restore your backup.
Here are a few troubleshooting tips you can try:
- Make sure your backup drive is connected securely, without any USB hubs or adaptors.
- Repair your backup drive using Disk Utility’s First Aid feature.
- Start over – use Disk Utility to erase and reformat your backup drive and try Time Machine again.
- Check if you’re recovering a compatible format. There are issues with recovering Time Machine backups that are formatted with HFS+ on an APFS disk. This happens often to users who are upgrading from macOS High Sierra to one of the more recent macOS versions.
If none of these work, your drive might be the problem. Try using another storage device to save your Time Machine backup.
Make sure you’ve enabled Time Machine on the Apple menu bar. To do this, open System Preferences > Time Machine, then tick the box beside “Show Time Machine in menu bar.” Enter Time Machine using its newly enabled button on the Apple menu bar.
In this window, you can browse snapshots to look for and restore your deleted photos.


