
Need to retrieve deleted emails on your iPhone? Depending on how you have your device set up and whether you created any backups, you have a couple of options. It’s also possible that your email message wasn’t actually deleted, but misplaced.
This article covers every scenario (and some of the most popular mail providers on iOS). We’ll show you how to retrieve deleted emails on iPhone, whether you have a backup or not. We also demonstrate how to find missing emails and provide mini-guides for the most popular mail providers on iOS. Read on!
Table of Contents
How to Find Disappeared Emails on iPhone
Just because your emails are missing, it doesn’t automatically mean they’ve been deleted. It’s possible that they may just be buried in the forest of mailboxes on your mail app or even in some rogue folder you forgot about. You have also archived them by accident.
See if your email isn’t just hiding from you by using the 2 methods below.
Method 1: Locate Your Emails on iPhone Using Search
Most modern mail apps have a search tool that can help you locate your emails faster. Depending on the app, the search tool may have more advanced features and functionality.
For example, the native Mail app can search many different parameters and offer suggestions based on the first few letters or numbers you type. We’ll demonstrate this functionality in the guide below.
To find emails on your iPhone using the search tool in the Mail app:
Step 1. Open the Mail app.
Step 2. If it displays the correct mailbox, proceed to Step 3. If it displays the wrong mailbox, tap Mailboxes in the top left corner.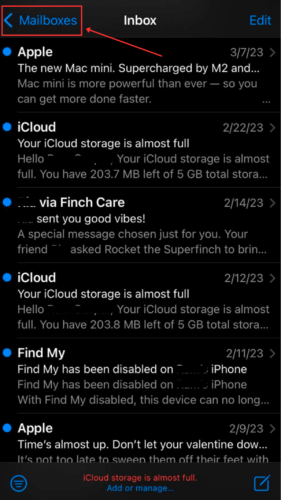
Step 3. In the Mailboxes menu, tap on All Inboxes or a specific mailbox that stores the emails you want to recover (e.g. Archive).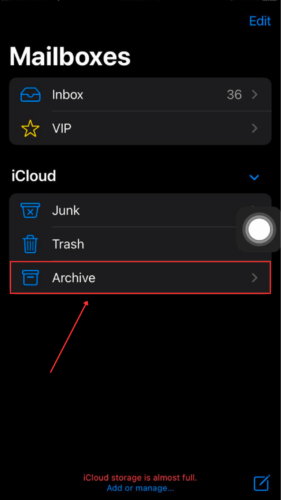
Step 4. Drag the screen down slightly to reveal the search bar. Here, you can search emails by exact date or month, address, subject, attachments, links, and even content from the email body. Further manage your search by using one of the Suggestions.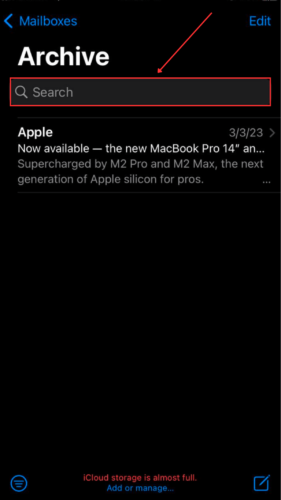
Method 2: Check Archive
The Archive folder is basically Trash-lite. While the Trash folder permanently erases deleted emails, the Archive folder will store your emails until you delete them. Its purpose is to keep your Inbox and important folders uncluttered.
Due to the iPhone’s swipe gestures, it’s absolutely possible to archive an email by accident.
To restore emails on your iPhone from your archive to another folder in your mailbox:
Step 1. Open the Mail app.
Step 2. If the app displays the Mailboxes menu, proceed to Step 3. If the app displays a specific inbox, tap Mailboxes in the top left corner.
Step 3. In the Mailboxes menu, expand the mailbox of interest and tap on the Archive button.
Step 4. Tap and hold the email you want to move and tap Move Message… Alternatively, you can open the email and tap the folder icon on the bottom of the screen.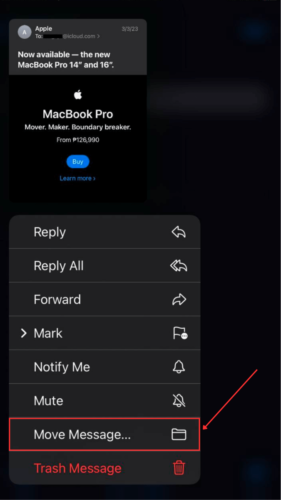
Step 5. Tap on the folder where you want to move the selected email.
How to Recover Deleted Emails on iPhone
If your missing email can’t be found by the search tool and it isn’t in the Archive folder either, it’s probably deleted. Fortunately, you can recover deleted emails on your iPhone as long as you act fast. There are also multiple ways to do it depending on your setup.
Below are step-by-step guides for 6 reliable methods to recover accidentally deleted emails on iPhone:
Method 1: Undo Deletion With a Shake
The “Shake to undo” gesture has been on the iPhone since iOS 3 (2009) and it’s still available even on the latest iPhones (iPhone 11/12/13). It allows you to undo or revert the last action you did – such as deleting an email. Using this gesture, you can undelete the email from your iPhone.
To retrieve emails on your iPhone using the Shake gesture:
Step 1. If you accidentally delete an email, shake your iPhone.
Step 2. When prompted, tap Undo.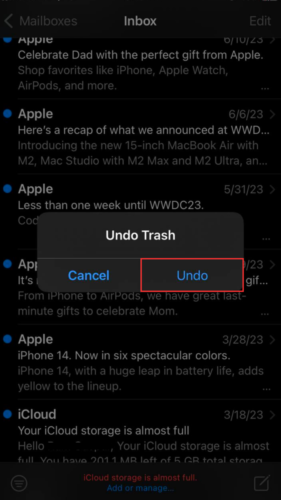
Method 2: Restore Email From the Trash Folder
Whenever you delete an email, it gets sent to the Trash folder. This is the case for every modern mail app on the iPhone. However, it doesn’t stay there forever – depending on the app, an email stays in the Trash folder for 7 days (Yahoo and AOL) or 30 days (Apple Mail and Gmail).
As long as you can see the deleted emails on your iPhone in the Trash folder, you can restore them to their original folder. However, the process is a bit different depending on the app you use. We’ve prepared guides for the most commonly used mail apps.
For default Mail app:
To recover trashed emails on your iPhone using the default Mail app:
Step 1. Open the Mail app.
Step 2. If the app displays the Mailboxes menu, proceed to Step 3. If the app displays a specific inbox, tap Mailboxes in the top left corner.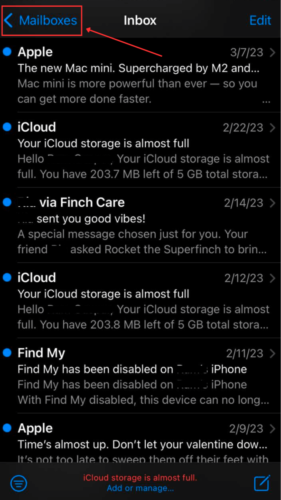
Step 3. In the Mailboxes menu, expand the mailbox of interest and tap on the Trash button.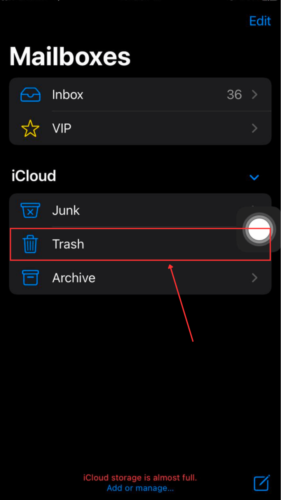
Step 4. Tap and hold the email you want to move and tap Move Message. Alternatively, you can open the email and tap the folder icon on the bottom of the screen.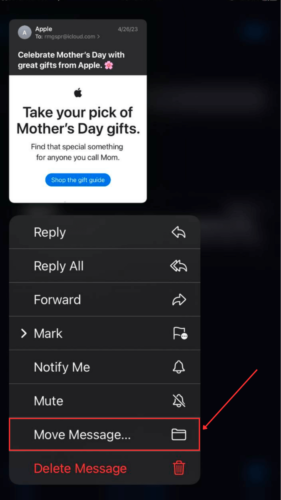
Step 5. Tap on the folder where you want to move the selected email.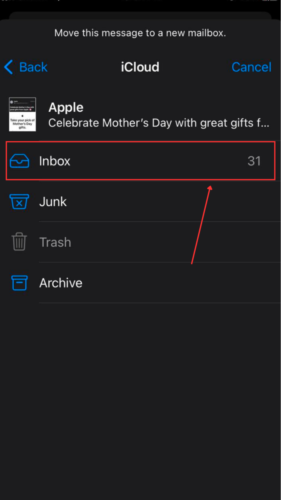
For Gmail app:
To recover permanently deleted emails from Gmail on iPhone:
Step 1. Open the Gmail app.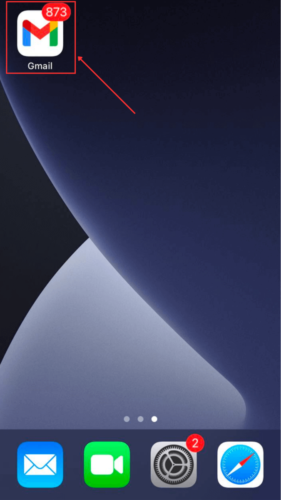
Step 2. Tap the Menu button (3 lines) in the top left corner of your screen.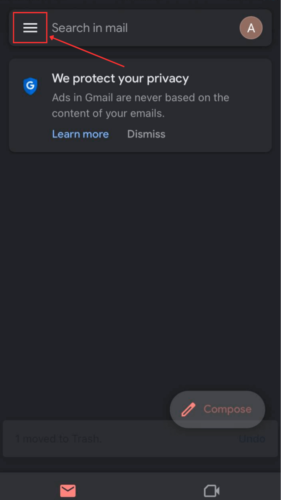
Step 3. Tap the Trash button.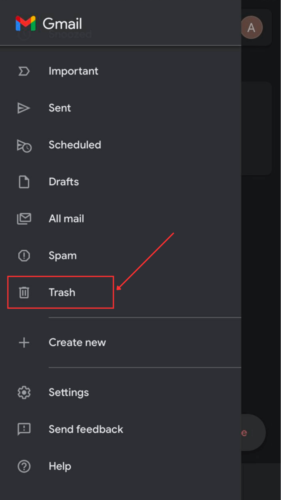
Step 4. Tap on the email you want to restore.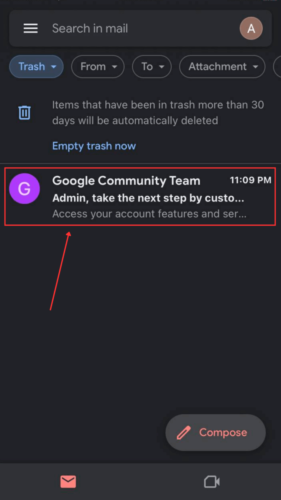
Step 5. Tap the 3 dots in the top right corner of the screen > Move.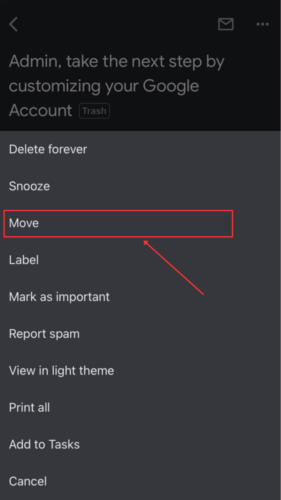
Step 6. Choose the location where you want Gmail to move the deleted email.
For AOL app:
To retrieve deleted Trash emails on your iPhone using the AOL app:
Step 1. Open the AOL app.
Step 2. Tap the Inbox button in the bottom-left corner of the screen.
Step 3. Tap the Inbox button again and tap the Trash button.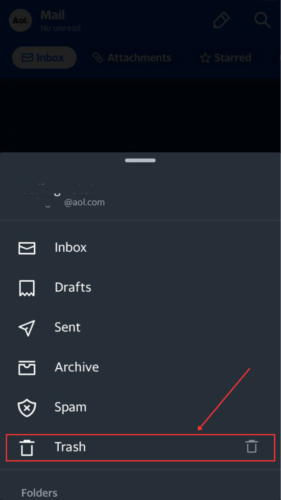
Step 4. Tap on the email you want to restore to open it.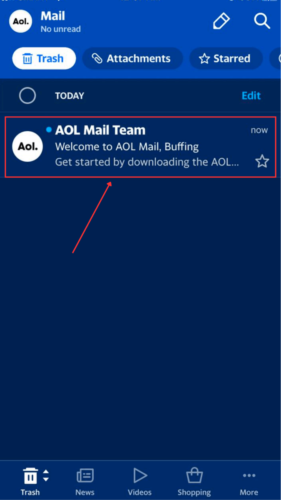
Step 5. Tap the Move button in the bottom of the screen.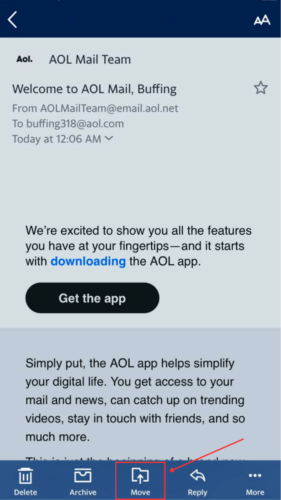
Step 6. Choose a location or create a new folder, where AOL will save the restored email.
For Yahoo app:
To retrieve deleted Yahoo emails on iPhone:
Step 1. Open the Yahoo app.
Step 2. Tap the Inbox button in the bottom-left corner of the screen.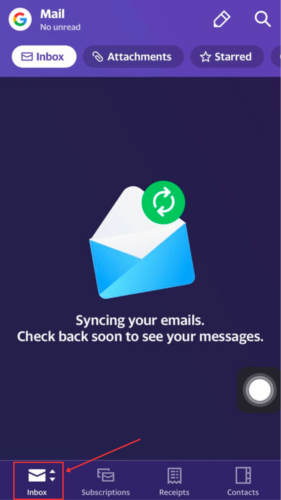
Step 3. Tap the Trash button.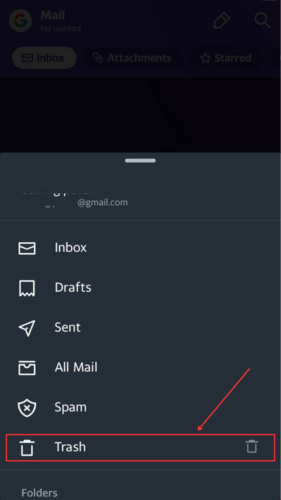
Step 4. Tap on the email you want to restore to open it.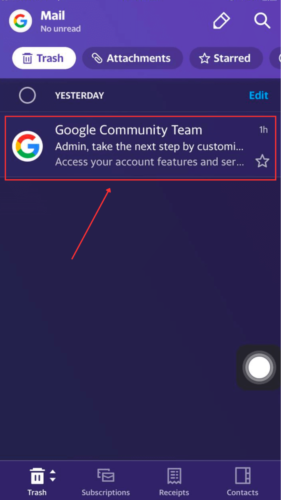
Step 5. Tap the Move button in the bottom of the screen.
Step 6. Choose a location or create a new folder, where Yahoo will save the restored email.
Method 3: Use Data Recovery Software
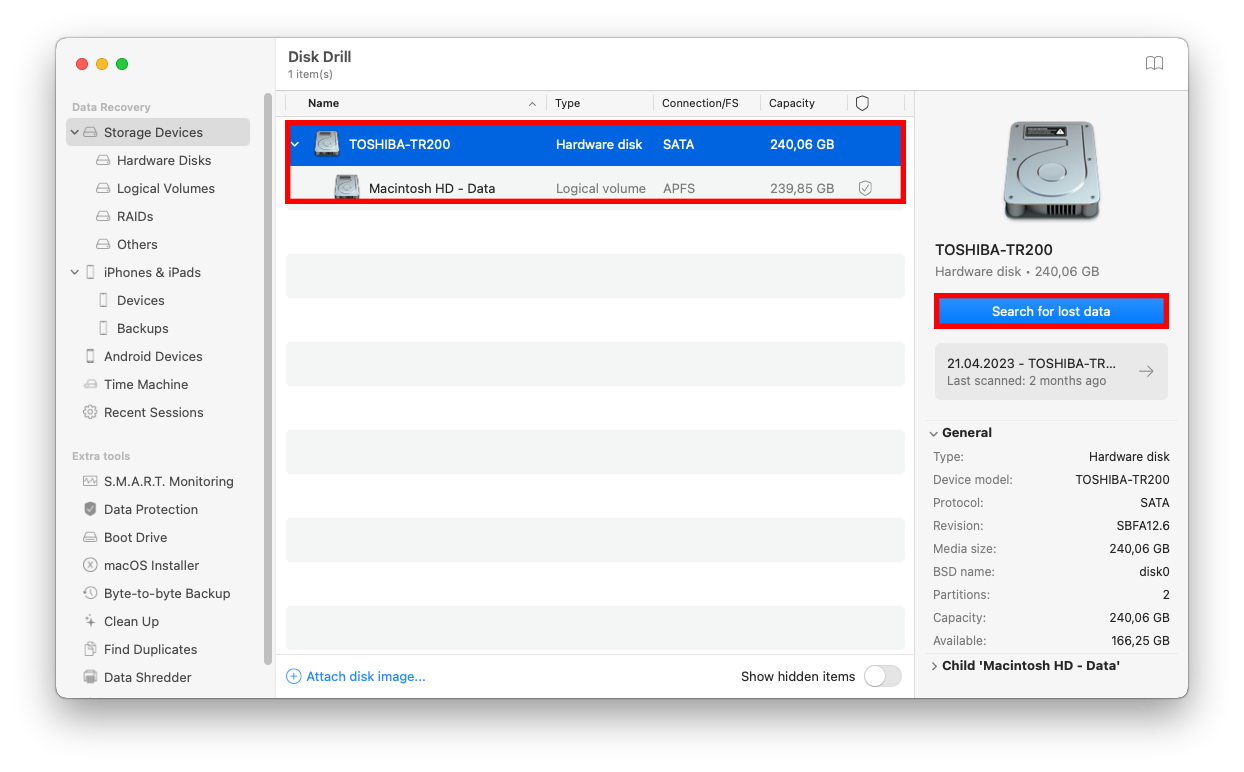
What if your email is no longer in the Trash folder (because you deleted it or 30 days have passed) and you didn’t create a backup before deletion? If you’ve also used Mail app on your Mac then you’re in luck – you can to use Mac Data recovery software to extract the mailbox data. It can recover emails deleted from the Trash folder in your mail.
We’ll be using a tool called Disk Drill to demonstrate the process. The Mac version fully supports mac data recovery and recognizes almost all Apple-based file types. Disk Drill is also super easy to use so you can pick it up and start recovering data immediately (which is the goal, because your recovery success rate decreases as more time passes).
How to recover permanently deleted emails on iPhone using Disk Drill:
Step 1. Download and install Disk Drill.
Step 2. Launch Disk Drill (Finder > Applications).
Step 3. Select your default drive and click Search for lost data.
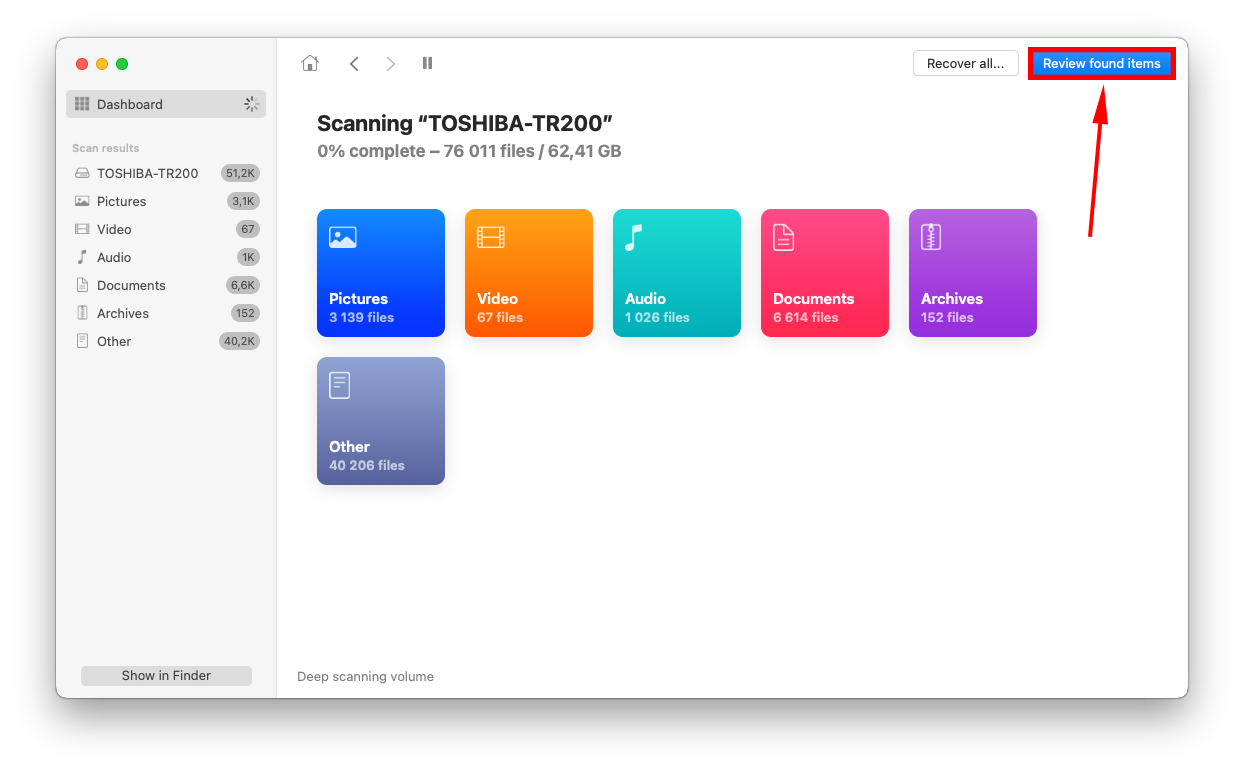
Step 4. Once Disk Drill is done scanning your Mac, click Review found items.
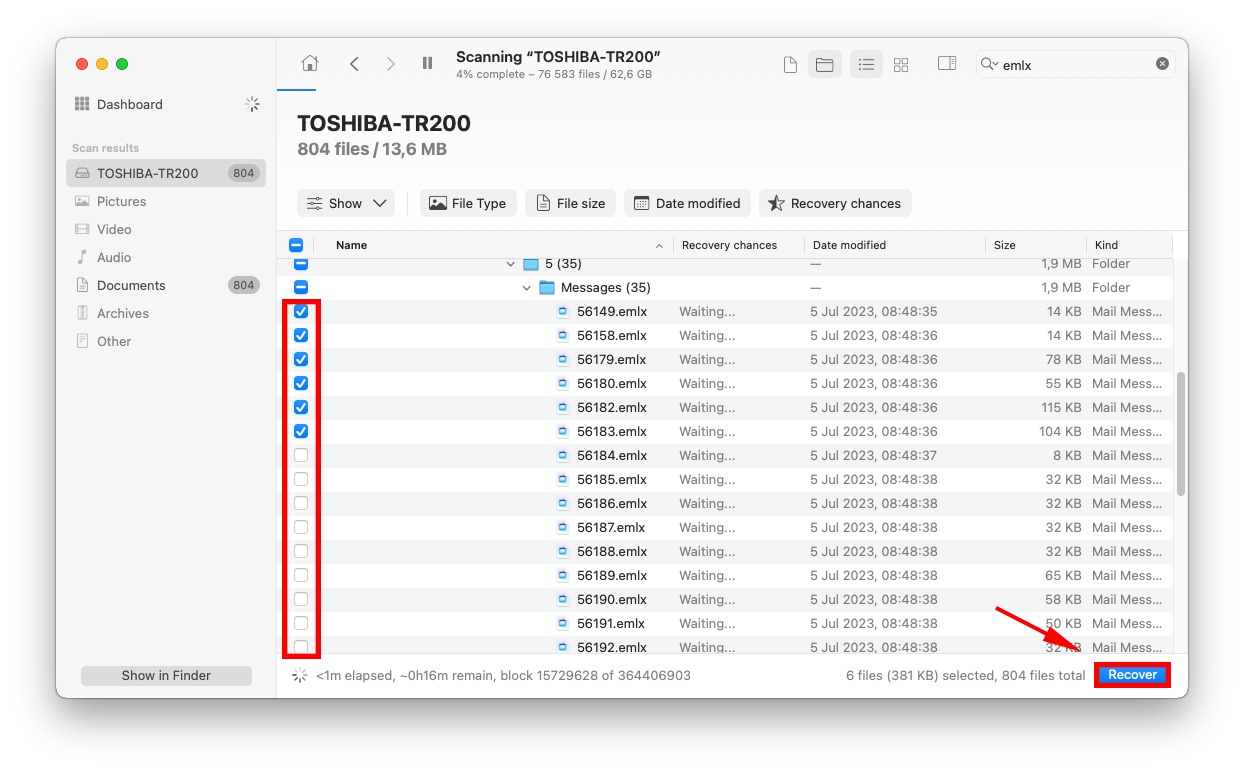
Step 5. Select the email message you want to restore and click Recover.
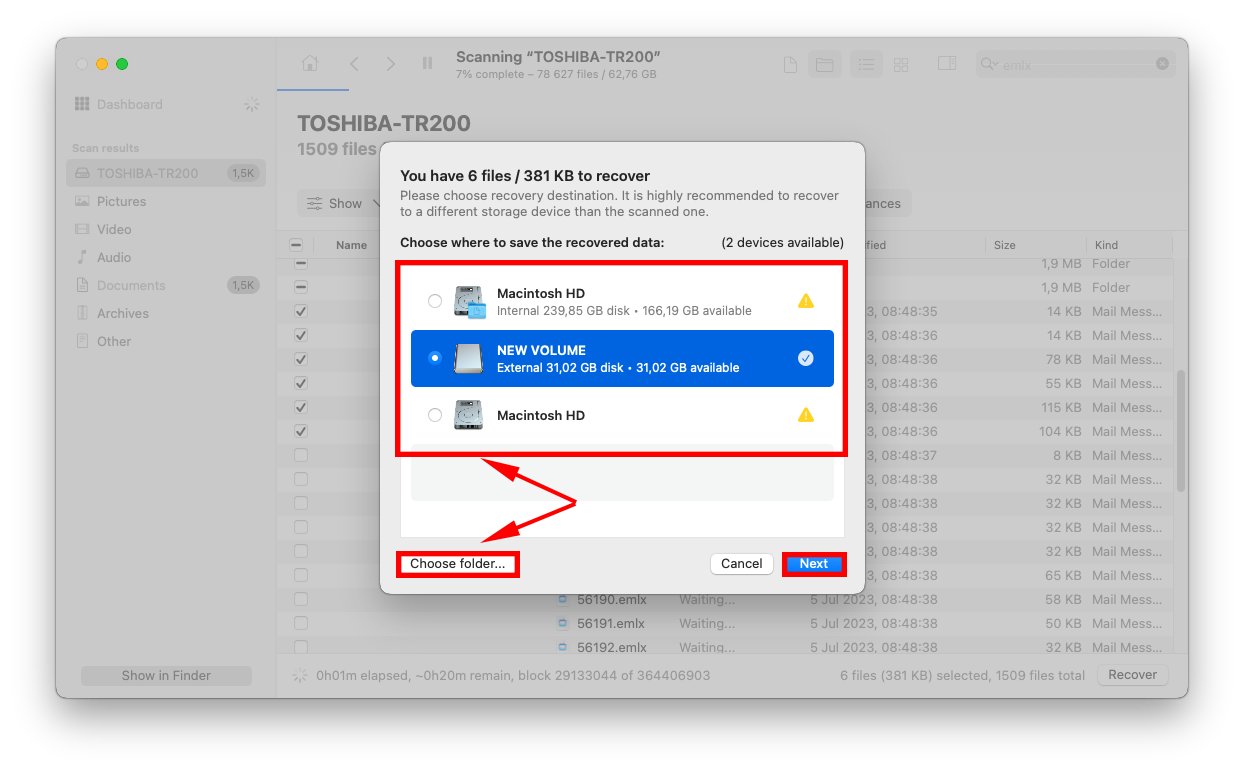
Step 6. Choose a location on your Mac where Disk Drill will save the restored emails. Then, click Next.
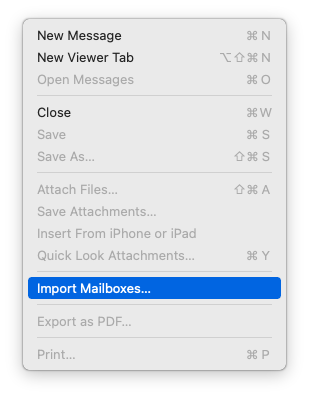
Step 7. Now, open the Mail app on your Mac.
Step 8. On the Apple menu bar, click File > Import Mailboxes.
Step 9. Select Apple Mail.
Step 10. Locate the emails you restored in Step 6 and click Choose.
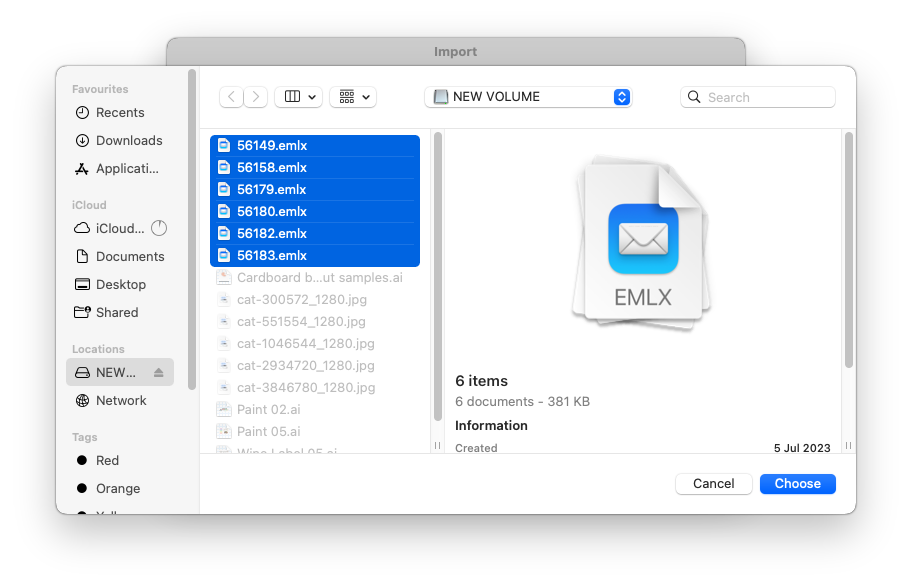
Step 11. Click Continue to proceed with the import process.
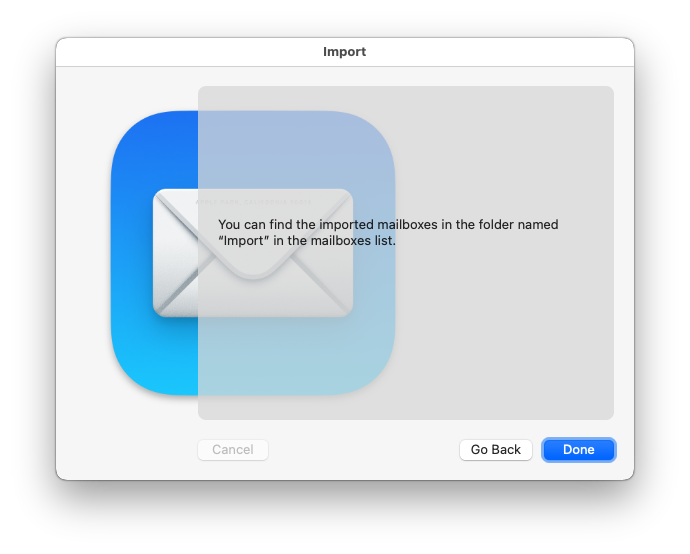
Step 12. Once the process is complete, click Done. You should now find your recovered email back in your Mail app.
Method 4: Recover Emails From iCloud Backup
Did you enable iCloud backups before you lost your emails? You can restore your iPhone from an iCloud backup, which will restore it to the same state as when the backup was created.
In other words, it will restore the Inbox on your iPhone to the state it was in before you lost your emails. This is a good option if you accidentally deleted all the emails on your iPhone.
To recover permanently deleted emails from iCloud:
Step 1. Open the Settings app.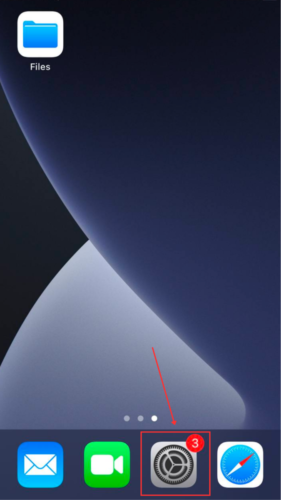
Step 2. Tap General.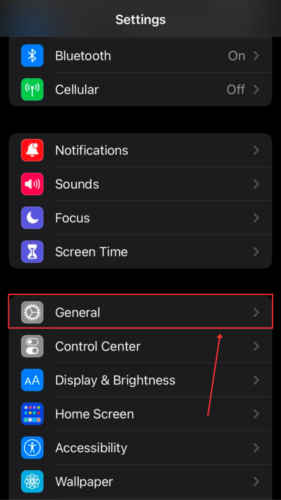
Step 3. Scroll down to the bottom and tap Transfer or Reset iPhone.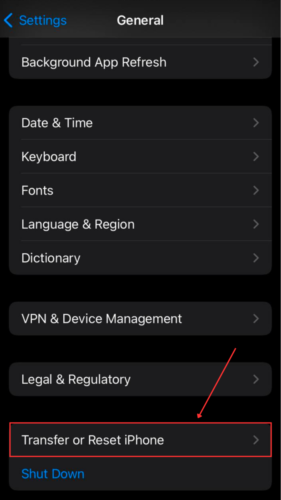
Step 4. Tap Erase All Content and Settings.
Step 5. Then, follow the on-screen instructions and wait for your iPhone to reset (which it will, multiple times).
Step 6. Once you see the Apps and Data screen, tap Restore from iCloud Backup.
Step 7. Log in when prompted and select the backup version you want to restore.
Method 5: Restore Emails From Your iCloud Account
If you deleted emails from your iCloud account, recovery is simple. Just like traditional Mail apps, iCloud Mail has its own Trash folder.
You can access the Trash folder via any browser and restore your files under 2 conditions: (1) you didn’t delete it again from the Trash folder and (2) your emails have been in the Trash folder for 30 days or less. After 30 days, messages in the Trash folder are permanently deleted.
How to find deleted emails on your iPhone and restore them from iCloud:
Step 1. Open a browser on your iPhone![]()
Step 2. Log into iCloud.com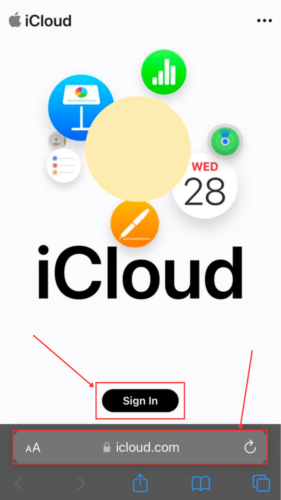
Step 3. Tap the Mail icon.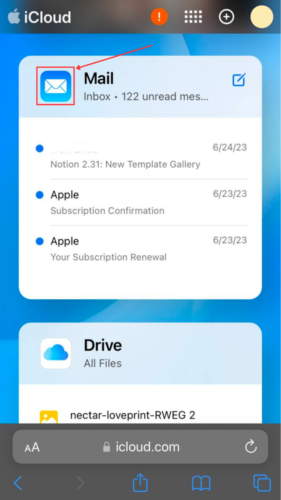
Step 4. If you see the main Mailboxes menu, proceed to Step 4. If it displays a specific mailbox, tap Mailboxes in the top left corner.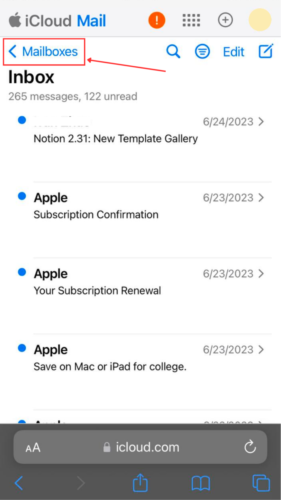
Step 5. In the Mailboxes menu, tap Trash.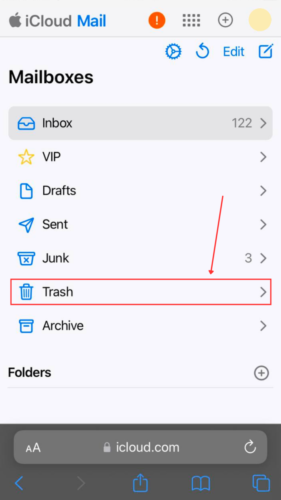
Step 6. Tap on an email to select it and tap Move in the bottom of the screen.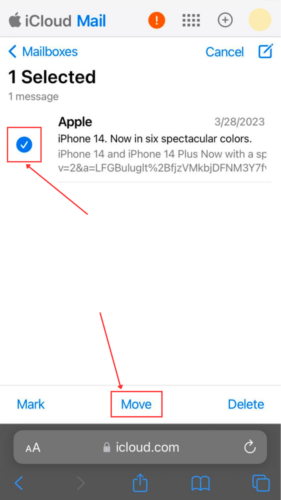
Step 7. Tap the folder you want to move the email to and tap Move.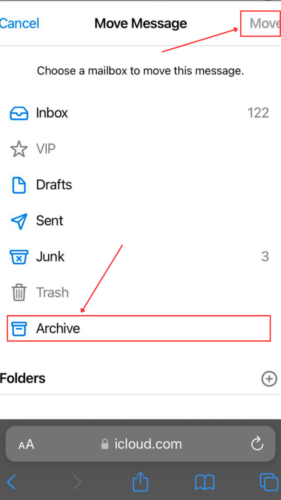
Method 6: Contact Customer Support
Depending on your provider, you may be able to request a backup copy of your email directly from their database (emails are usually encrypted, so don’t worry). You may also be able to retrieve old emails on your iPhone this way. Try reaching out to your provider’s support team. Unfortunately, there’s no guarantee they can help.
Conclusion
Erasing an important email feels like instant doom – so remember that we have a lot of methods to recover disappeared emails on your iPhone. It’s even possible without backups as long as you have the right tools.
That said, data recovery is never a 100% guarantee. You can ensure that your data is always safe by making it a habit to create backups.
FAQ
To find archived emails on iPhone 6:
- Open the Mail app.
- Navigate to the Mailboxes menu.
- Tap Archive. From here, you can delete or move your archived email to any folder you want (including your Inbox).
Yes, you can retrieve deleted emails on an iPhone 11. Here are some tips:
- Recover emails you mail provider app’s Trash folder
- Recover emails from your iCloud Mail’s Trash folder
- Restore your iPhone from an iCloud backup
- Use data recovery software
Yes, you can recover a deleted email folder on iPhone 13. Here are 3 methods:
- Use data recovery software
- Check the Trash folder in your provider’s email app
- Restore your iPhone from an iCloud backup


