
Missing files after Mac update? Ideally, that’s not supposed to happen. But there are different ways a macOS update can go wrong, leading to situations that result in data loss.
Fortunately, any data you lost due to the macOS update is usually recoverable. However, you’ll need to act quickly and use the correct methods to avoid permanent data loss. In this article, we’ll teach you how to recover missing files on Mac that disappeared after a recent update.
Table of Contents
Does Upgrading MacOS Delete Files?
Does upgrading macOS delete files? Under normal conditions, NO! You should find all of your data in the same place after installing a macOS update. But it doesn’t always happen that way.
There are 2 common scenarios where upgrading macOS may result in data loss:
- Interrupted macOS update. Let’s say you’re in the middle of updating your Mac to Monterey, Ventura or Sonoma and a power surge shuts off your Mac. Such interruptions create different situations that may result in data loss. For example, your system may become unstable and corrupt your files. It may also encounter errors while attempting to roll back the update in response to the system instability. Lots of things could go wrong.
- Not enough space. If the macOS update you’re trying to install requires more space than what is available on your system, you will be prompted to free up space yourself or allow macOS to do it for you. While macOS will do its best to delete temp files, caches, and other non-essential items, your important files may be at risk of deletion.
How to Recover Files Lost After Mac Update
So you notice missing files after updating macOS and you’ve deduced that your update went awry or you didn’t have quite enough space. Regardless of what caused the data loss, you still have a good chance to recover your files as long as you act quickly.
Depending on how you set up your Mac, there are a few different methods you can try. We prepared step-by-step guides for each of them below.
Method 1: Use Data Recovery Software
Data recovery software is a powerful tool that can restore files in any data loss scenario, such as missing desktop files after a Mac update. It can bypass the operating system entirely and pull data directly from the file system.
We’ll demonstrate this process using a tool called Disk Drill. It’s fully optimized for the latest macOS and Mac file systems (HFS+ and APFS). It also recognizes over 400+ file signatures, which is super helpful if you lost a variety of file types in the process of updating macOS.
To retrieve missing files after Mac update using Disk Drill:
Step 1. Download and install Disk Drill.
Step 2. Connect a storage device to your Mac, ensuring that it has enough space to store the recovered data. Then, launch Disk Drill (Finder > Applications).![]()
Step 3. Wait for Disk Drill to finish scanning your Mac drive. Then, click Review found items. Search for lost data.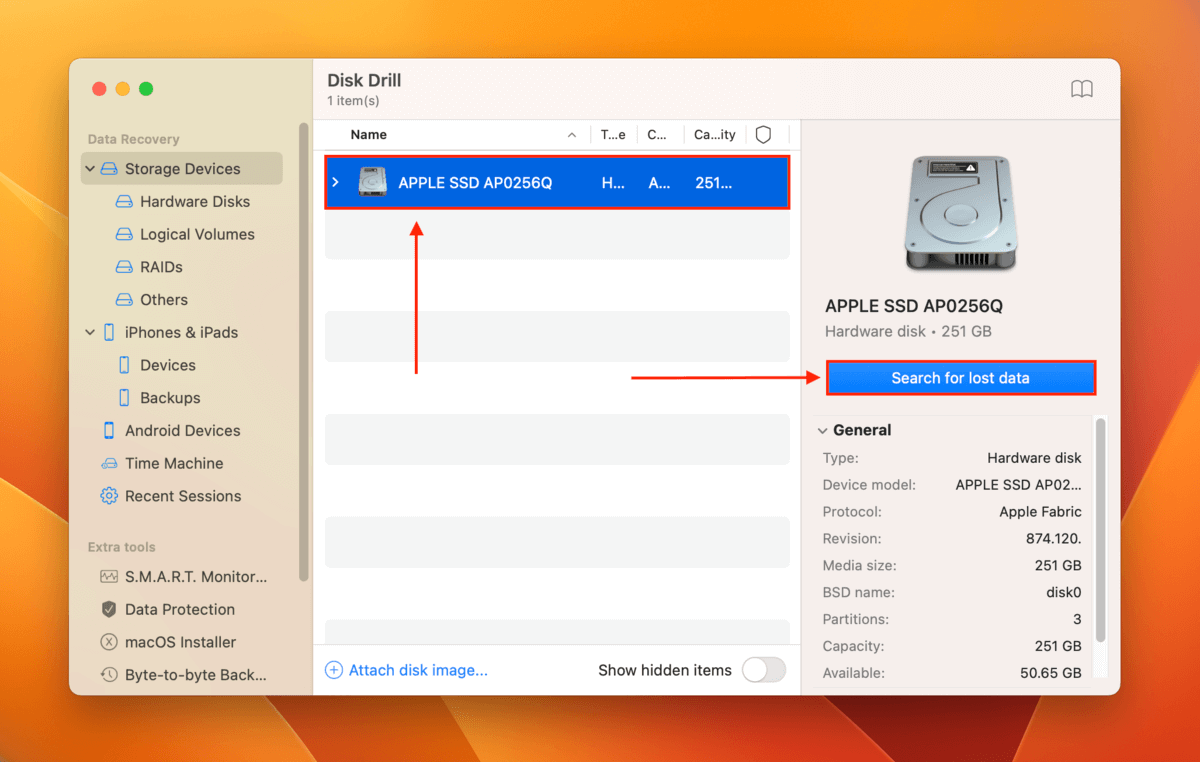
Step 4. Wait for Disk Drill to finish scanning your Mac drive. Then, click Review found items.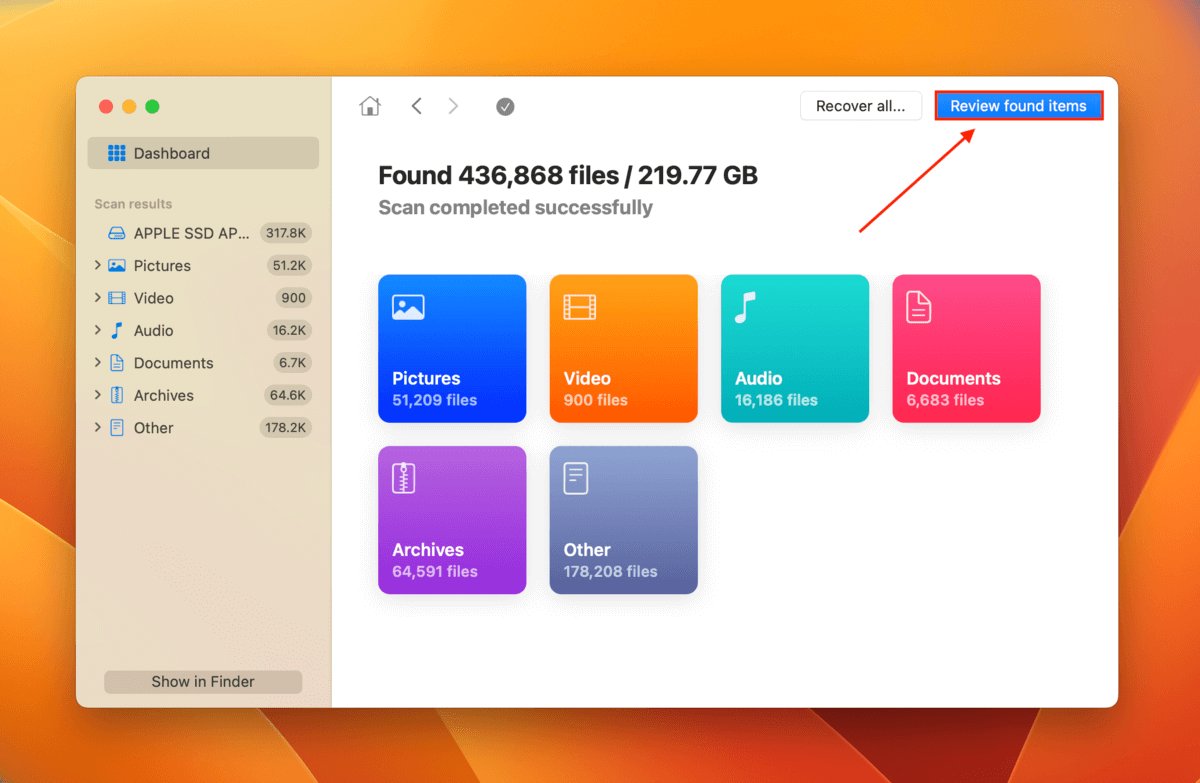
Step 5. Expand the Deleted or lost and Reconstructed tabs to browse the files recovered from your Mac. You can filter your data by type or use the search tool to locate specific files. Clicking on a file will display its preview in the right panel.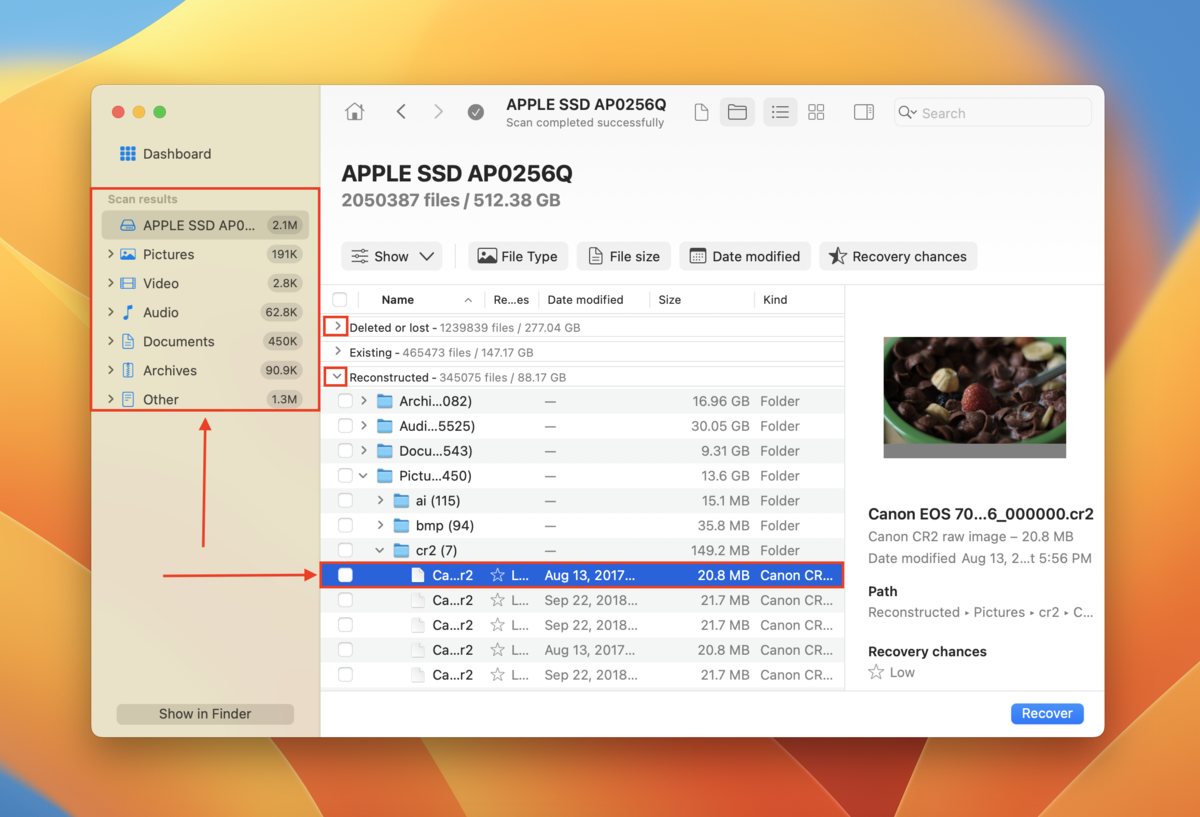
Step 6. Mark the boxes in the leftmost column to select the files you want to restore. Then, click Recover.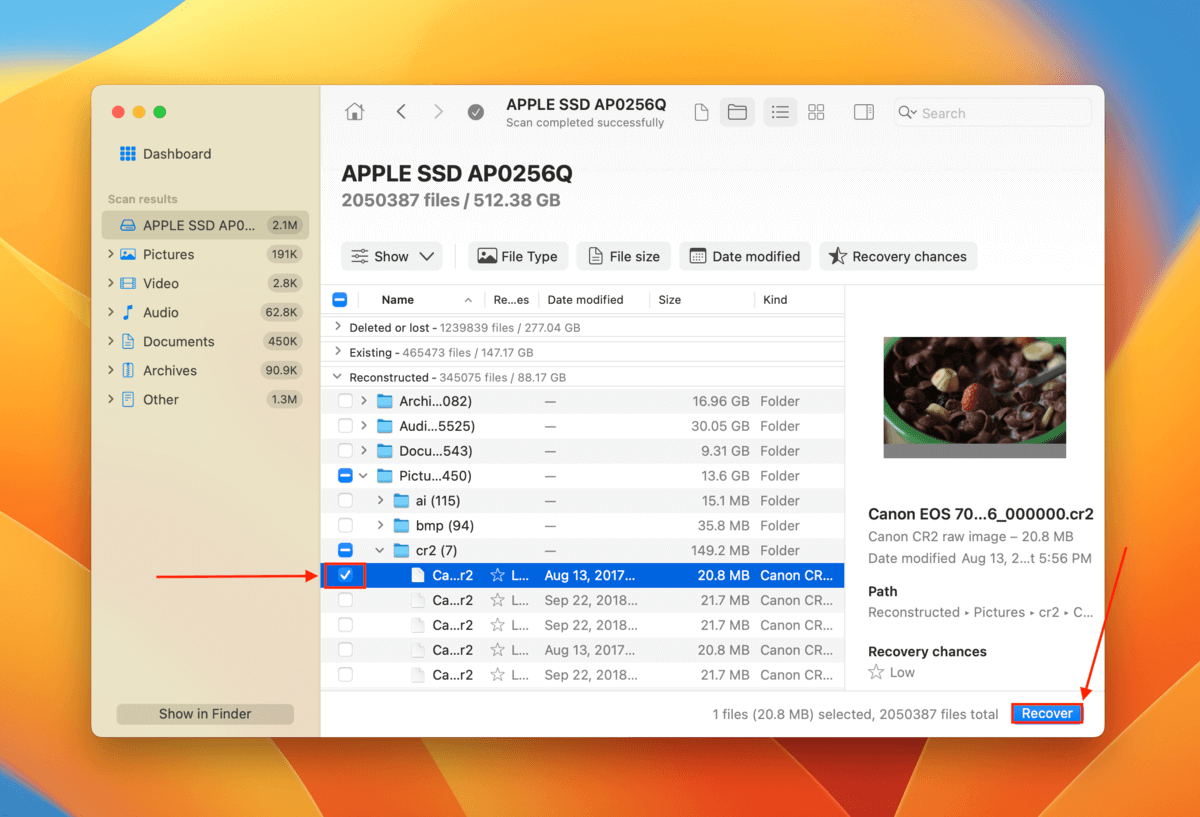
Step 7. Choose a location on the drive we connected in step 2 where Disk Drill will save the recovered files. Don’t save it to your Mac, because it may overwrite your data. Once you’ve selected a location, click Next to complete the recovery process.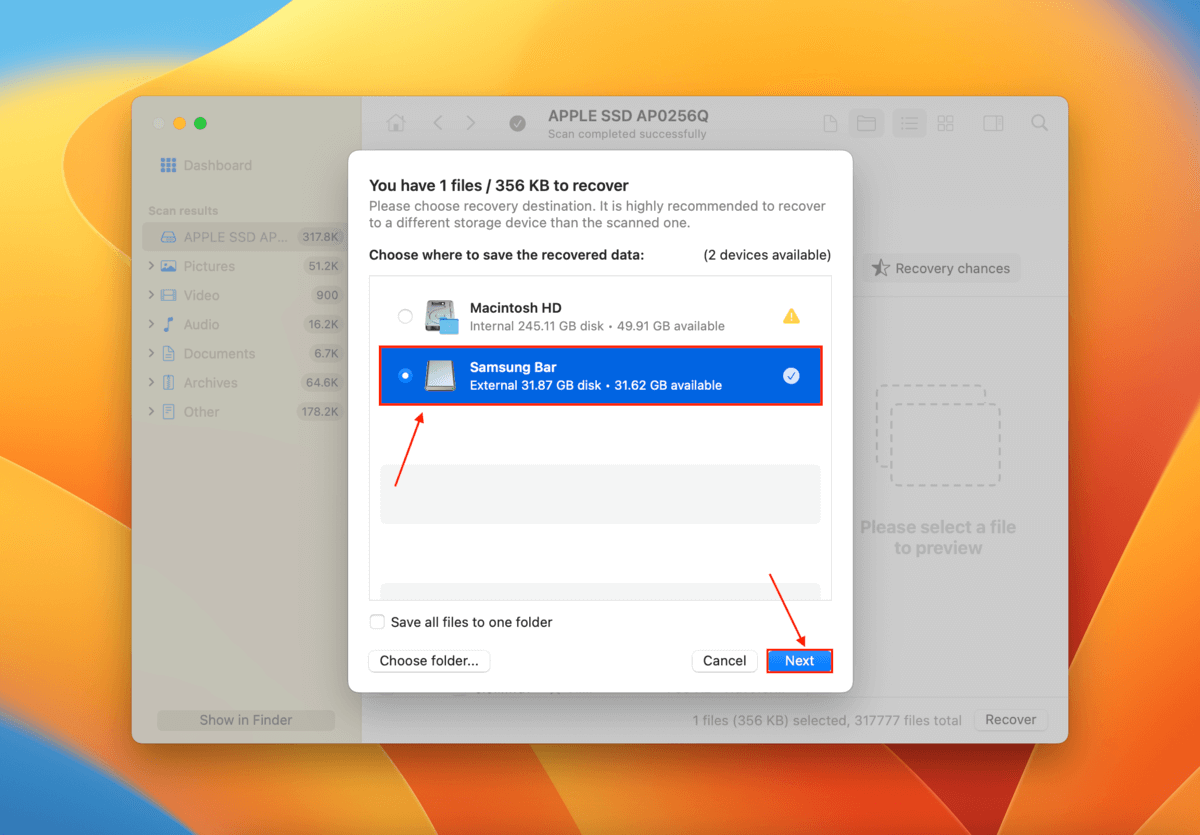
Method 2: Check the Trash for Missing Files
The standard file deletion process for Mac is for files to be moved to the Trash folder, not to be immediately erased from the system. This acts as a safety net for users. When macOS deletes files to make space for any reason, it also follows the standard deletion process.
In other words, it’s possible that the files deleted by the macOS update are in your Trash folder.
To recover missing files after Mac update from the Trash folder:
Step 1. Click on the Trash folder’s icon on your dock.![]()
Step 2. Locate your missing files. If you find them, right-click > Put Back.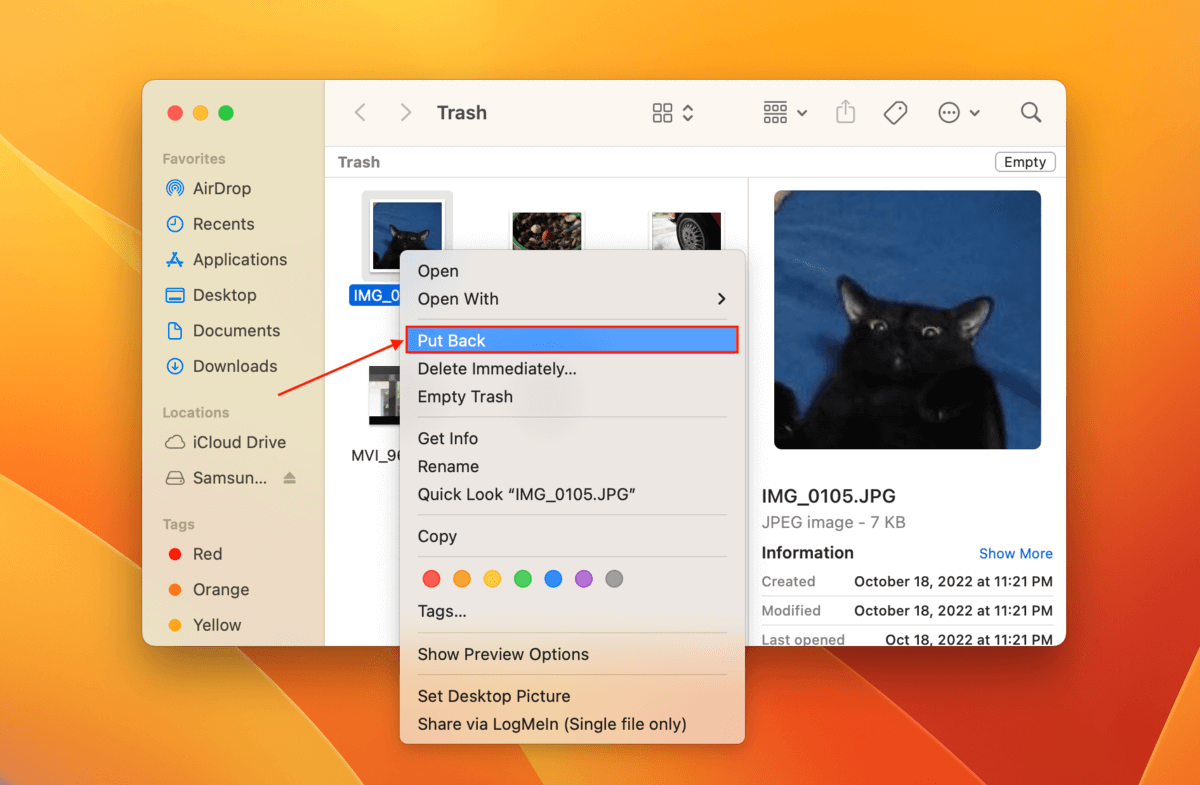
Method 3: Use iCloud Backup
If you enabled iCloud backups before installing the macOS update, you may still have copies of your missing data in the cloud.
In fact, iCloud has its own data recovery tool for iCloud files. You can use it to recover deleted files from iCloud-enabled folders.
To recover your missing files from an iCloud backup:
Step 1. Open your browser and log into iCloud.com.
Step 2. Scroll down to the bottom of the page and click Data Recovery.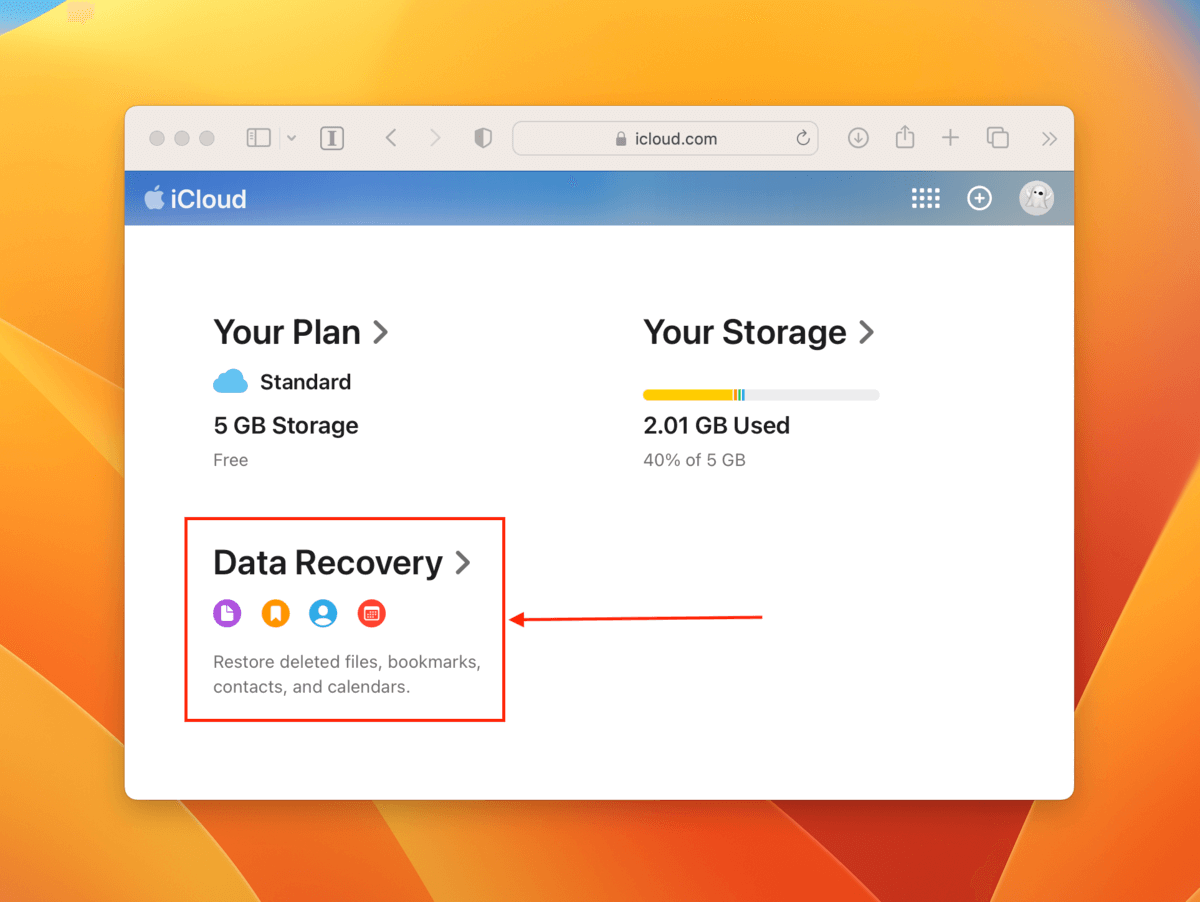
Step 3. Click the file category you want to recover.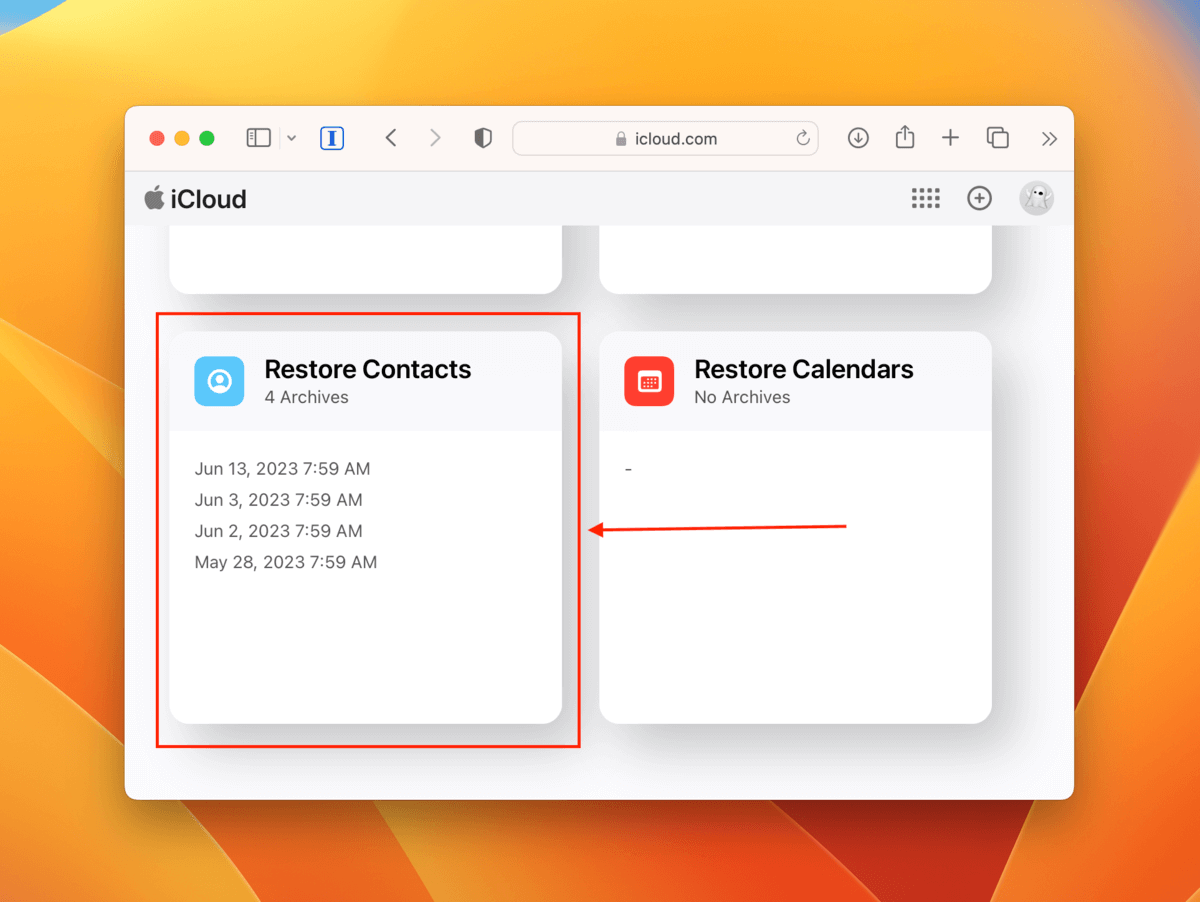
Step 4. In the dialogue window that appears, click Restore beside the file you want to recover.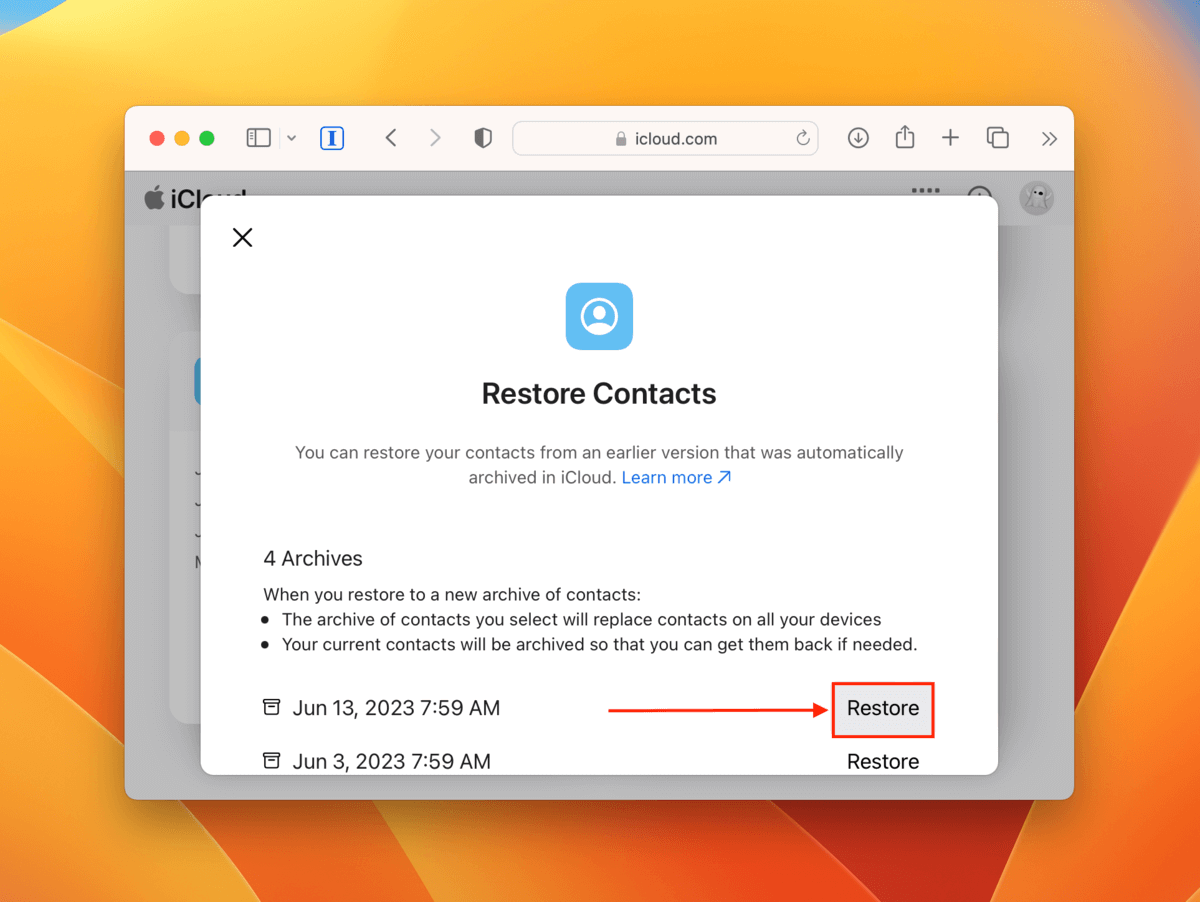
Once the recovery process is complete, you should find your data in their original location in your iCloud folders.
Method 4: Use Time Machine Backup
Time Machine is a Mac backup and restore tool that captures “snapshots” of your files and folders. “Snapshots” are a copy of your data in its current state.
If you enabled Time Machine backups on your Mac before updating macOS, it should have saved a snapshot of the folder containing your missing data before the data was deleted. Using Time Machine, we can attempt to restore the data from that specific snapshot.
To recover deleted files from a Time Machine Backup:
Step 1. Connect your Time Machine drive to your Mac. Then, on the menu bar, click the Time Machine button > Browse Time Machine Backups.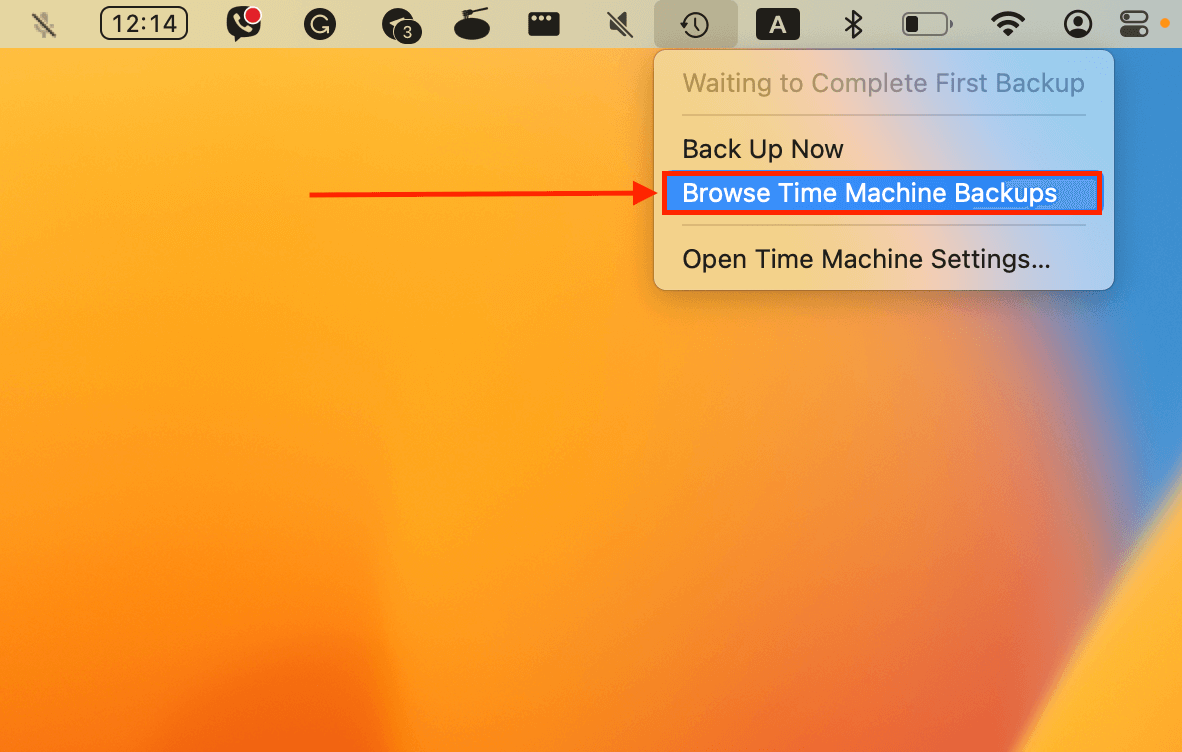
Step 2. Navigate to the folder where your data was last stored. Then, use the arrows on the right to browse through previous versions of the folder until you find one with your missing data. Select the files you want to recover (you can click and drag to select multiple files) and click Restore.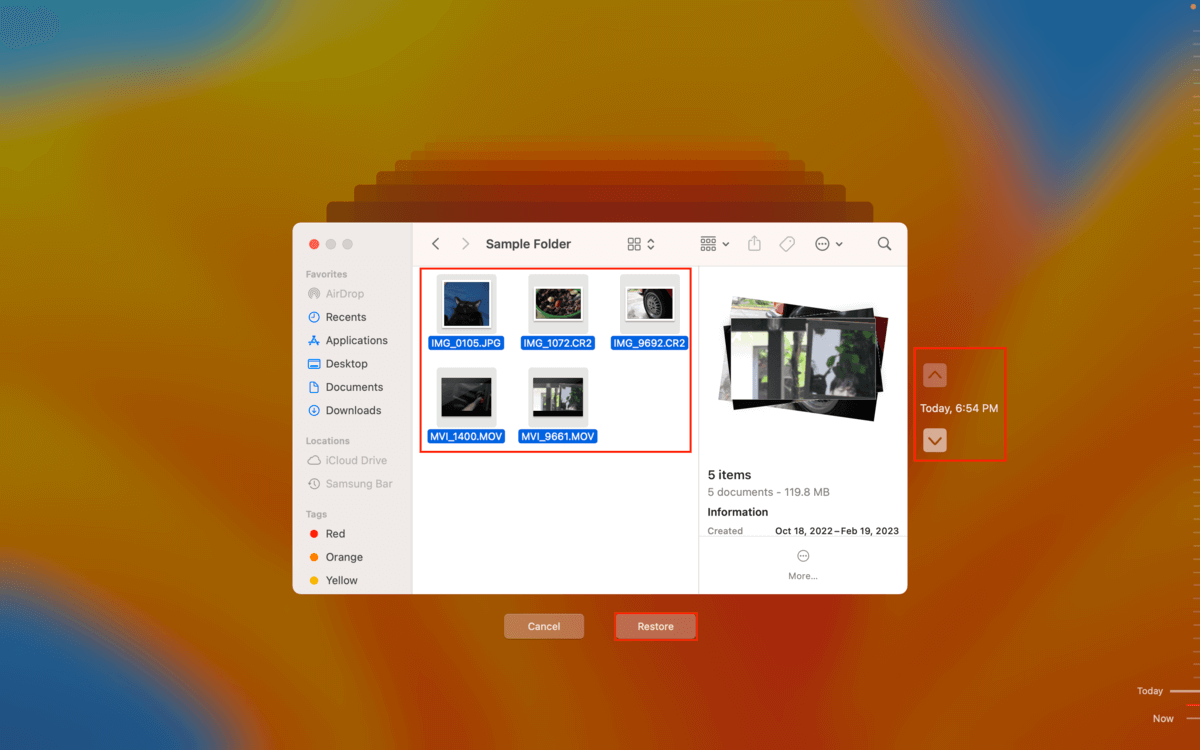
Once the data from your Time Machine backup has been restored, you’ll find your missing files in their original location.
Conclusion
Deleted files are the last thing you want to find after updating macOS, but it’s a common occurrence nonetheless. Fortunately, recovery is still possible as long as you act quickly and avoid overwriting the lost data with new files.
It’s even easier to recover your files if you enabled iCloud backups or Time Machine backups beforehand. If you didn’t, this is your sign to do it! It’s especially wise before making any major changes to your Mac, like updating its operating system.
FAQ
Yes, it’s possible to recover deleted files on macOS Ventura. You have 3 options:
- Use data recovery software that supports macOS Ventura
- Restore your deleted files from an iCloud backup
- Restore your deleted files from a Time Machine backup
No, macOS Monterey, nor any macOS for that matter, don’t delete files directly. However, a macOS update may prompt you to free up space if your Mac doesn’t have enough storage to accommodate it. If you opt to skip manually deleting files, macOS may erroneously delete files on your behalf.
If the documents folder is missing on your Mac, here are the possible reasons why and what to do about them:
- Finder preferences – You may have disabled the Documents folder from being displayed in Finder. Open Finder and click Finder > Settings and modify the Sidebar settings. This menu also helps if your desktop icons disappeared after an update.
- Hidden – The folder may have been set to hidden by you, another user, or by software. Open the folder that contains your Documents folder and hit the Command + Shift + > keys.
- Accidental deletion – Your documents folder may have been deleted by you, another user, a virus infection, or other event. Restore your data from an iCloud backup or Time Machine backup if you have one. If you don’t have any backups, use data recovery software.
This also happens often to data on your desktop. Fortunately, you can use the same information above to recover desktop files on your Mac.


