
It’s one thing to recover recently deleted files that may still be present in the Trash folder, and it’s something else entirely to recover overwritten files whose original versions have been deleted from a Mac some time ago. If you’re currently trying to solve the latter issue, this article is just what you need because it explains four different—but equally effective—ways to restore overwritten files.
Table of Contents
Where Do Overwritten Files Go?
Okay, but what happens when you overwrite an image called Cat.jpg with an image that’s also called Cat.jpg? In that case, the reference to the original file is replaced with the reference to the new file, but the data the original reference pointed to remain on the hard drive until new data is written in its place.
Modern operating systems like macOS do this because it’s considerably more efficient than replacing the reference and overwriting the data in one go. For starters, the new file could be considerably smaller than the original one, so it wouldn’t even be possible to overwrite it. More importantly, however, it takes less time to change a simple reference than it does to shuffle a large number of ones and zeros.
How to Recover Accidentally Replaced Files on Mac
If you need to recover a replaced file on a Mac, then you have several methods to choose from. We recommend you go through them in the order we present them in this article because that’s how you can achieve the best data recovery results with the least amount of effort.
Method 1: Data Recovery Software
Data recovery software can find files whose references no longer exist because they have been overwritten. That’s because recovery software scans the entire hard drive sector by sector, using advanced algorithms to detect recoverable files in the vast sea of ones and zeros.
Disk Drill is a great example of recovery software for Mac that you can use to quickly and painlessly recover replaced, and here’s how it works.
- Download and Install Disk Drill on Your Mac. Before you download the free version of Disk Drill, make sure you have a suitable storage device ready because you don’t want to save it to the same location where the overwritten file is located since that could make it impossible to recover.
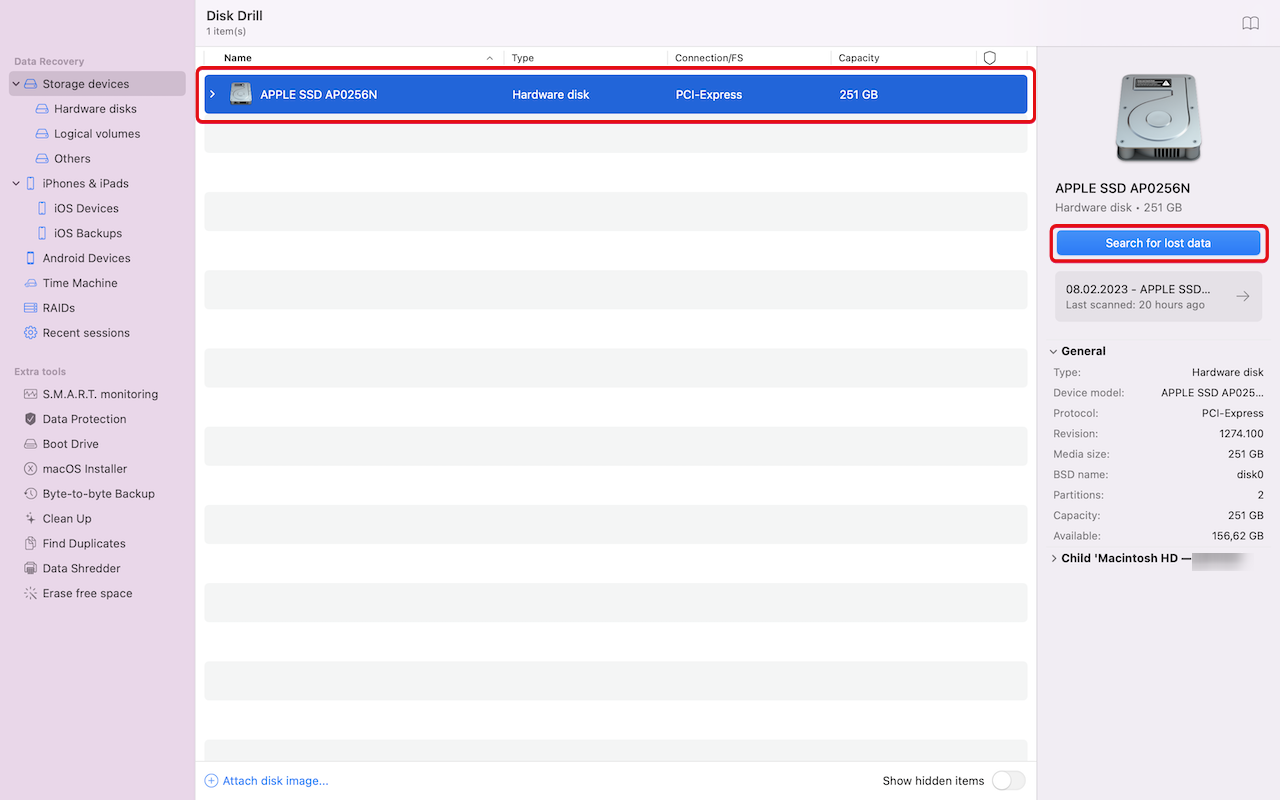
- Launch Disk Drill and click the Search for lost data button next to the storage device where the overwritten file is located. Disk Drill will scan it and present you with a list of recoverable files.
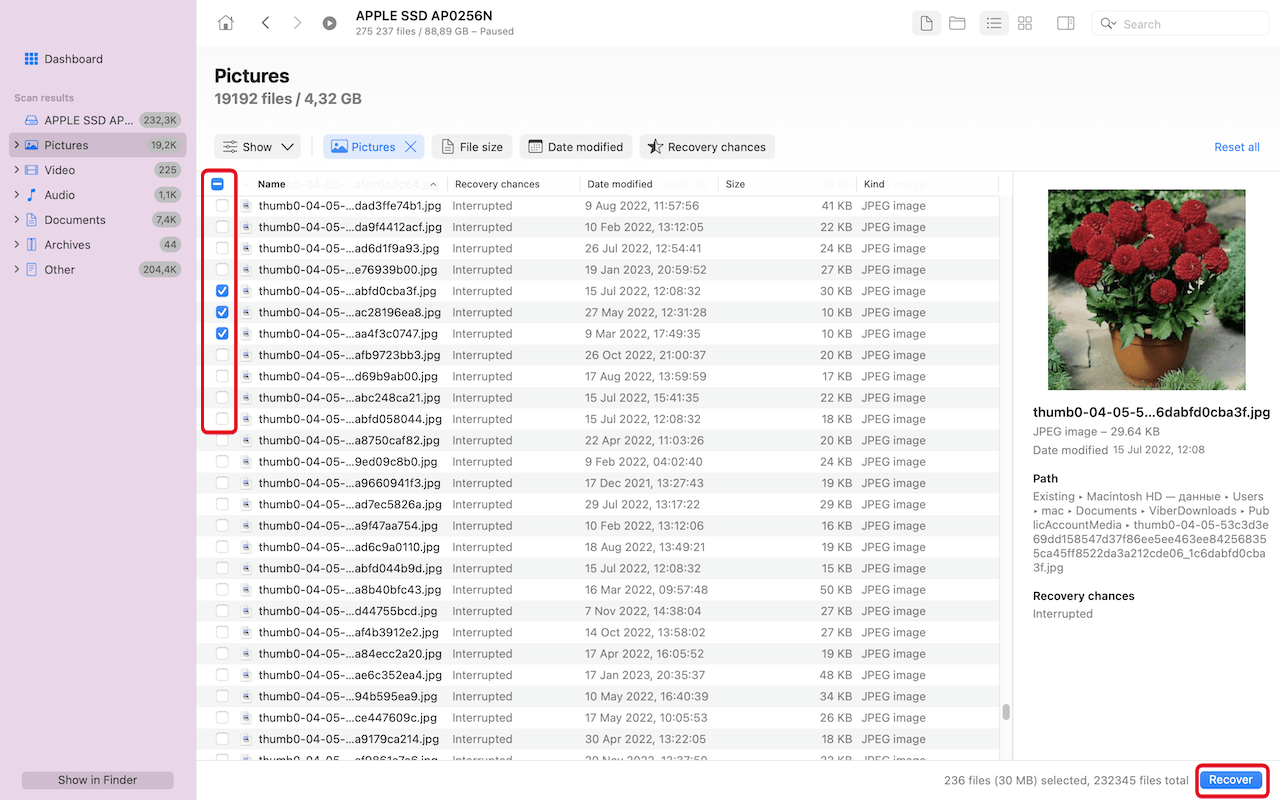
- Select the overwritten file and click the Recover button. Disk Drill will ask you to specify a recovery location. Again, select a different location than the one with the file you’re trying to recover.
✅ Check out the full Disk Drill review here
Method 2: Local Backups
To retrieve a file replaced with another file from a local backup, you might be able to just copy it from your backup location using Finder, but most Mac users rely on Time Machine, Apple’s backup software application distributed as part of macOS.
Time Machine creates incremental backups of files on your hard drive and selected locations, and it lets you go back in time and recover any older version with a few simple clicks. Here’s how:
- Start by opening Finder and navigating to the folder with the overwritten file. You can quickly open Finder from Spotlight (⌘ + Shift) or by clicking on its icon in the Dock.
- Click the Time Machine icon located in the Menu Bar and choose Enter Time Machine. Almost instantly, Time Machine will display the most recent version of the selected folder in front of all previous versions that have been backed up.
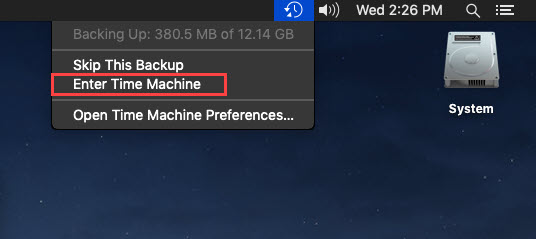
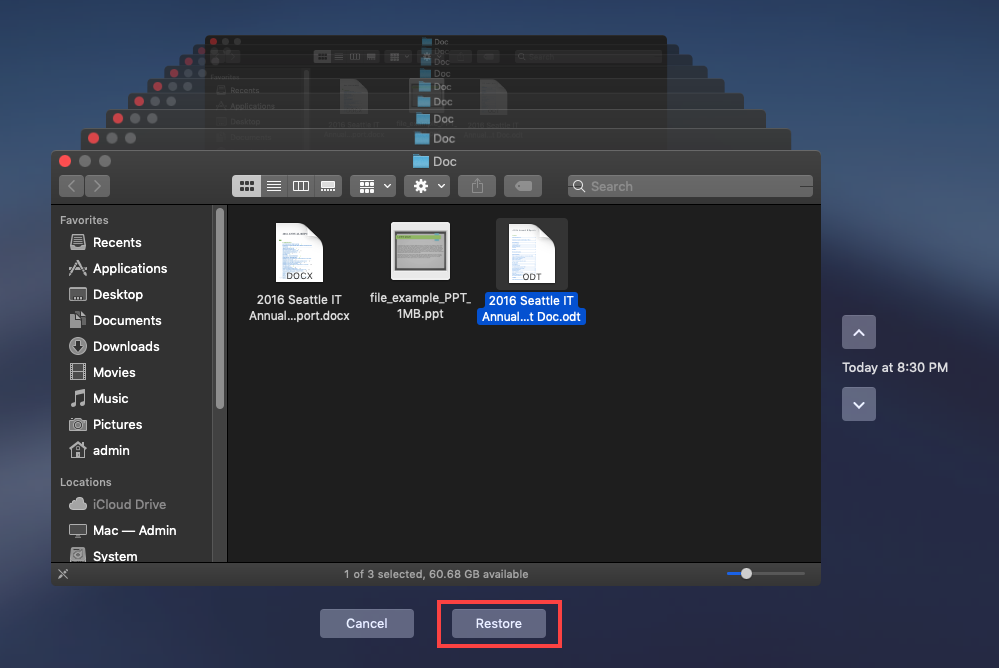
- Select an older version of the folder with the overwritten file, highlight the file, and click Restore.
Method 3: Cloud Backups
You can, of course, also recover overwritten files on Mac without Time Machine. For example, many cloud backup services keep a history of changes made to files, allowing their users to quickly and easily restore older versions of files.
One such cloud backup service is Dropbox, and what’s great about it is that you can use it to store up to 2 GB of files for free. To recover an overwritten file from Dropbox, you don’t even need access to the Mac computer the file was stored on. All you need is a web browser and a minute of spare time.
- Launch Safari or any other web browser and log in to your Dropbox account. You may be asked to provide a second form of authentication, depending on whether you’ve activated two-factor authentication.

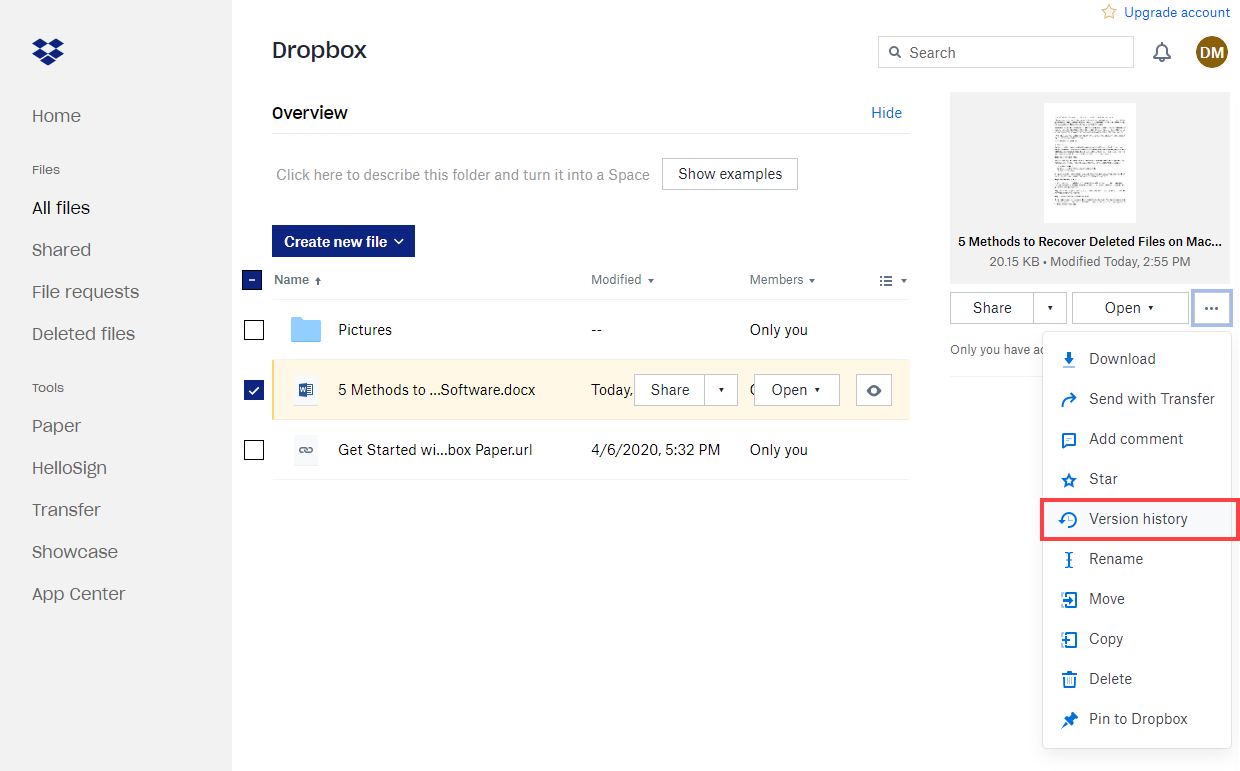
- Navigate to the folder where the overwritten file is located and open the most recent version of the file. Click the three horizontal dots from the right toolbar and select Version history.
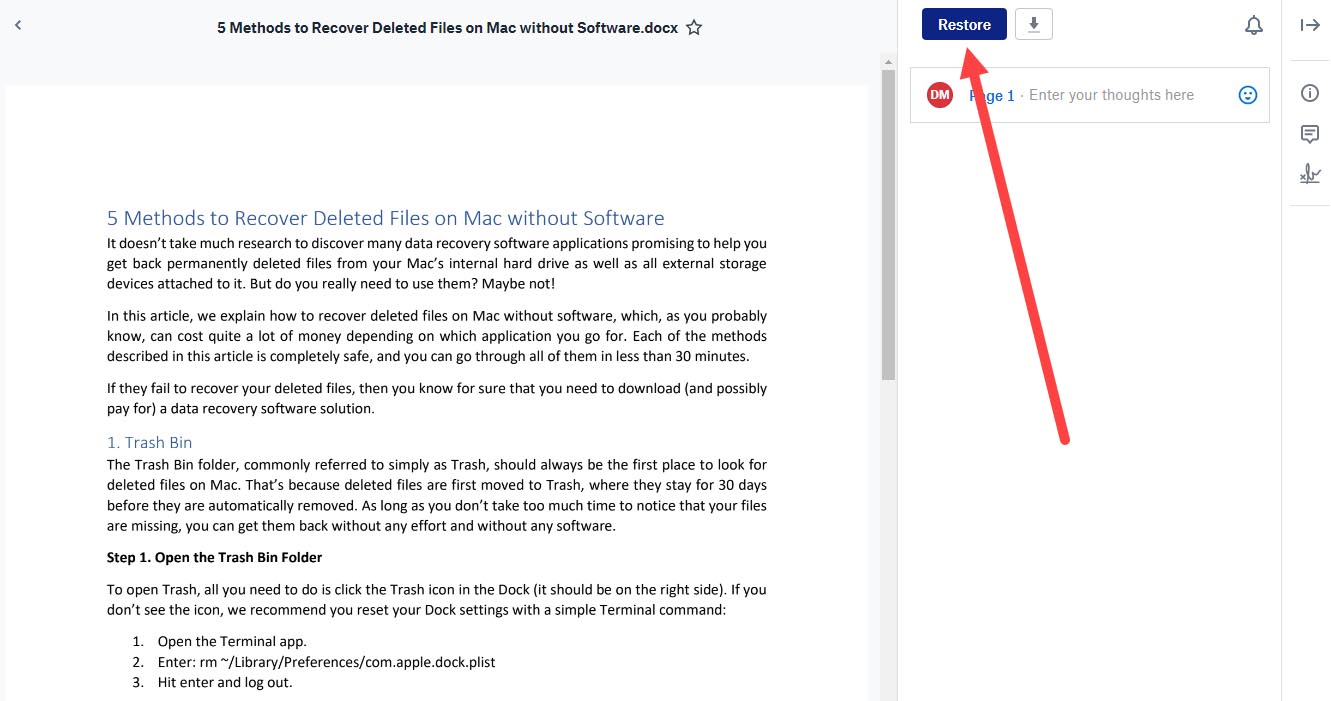
- Click on the version you want to restore. Preview the file to verify that you’ve selected the right version and click Restore. That’s how to recover replaced files on Mac using Dropbox, but other cloud storage services work similarly.
Method 4: App Specific Options
Some applications on macOS come with built-in version management systems that can save your day if you’ve overwritten a file by mistake. Since we can’t possibly describe every single application with this feature, we’ll focus on a couple of the most commonly used ones: Apple Pages and Microsoft Word.
The two popular word processing tools offer built-in options to revert to previous versions of your documents, providing a safety net in cases of accidental overwrites. Here’s how they work:
Apple Pages (Revert To):
- Open the overwritten file in Apple Pages.
- Click the File menu, select the Revert To option, and then click on Browse all versions.
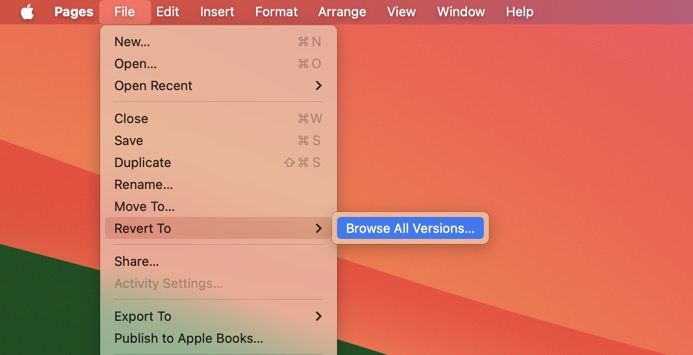
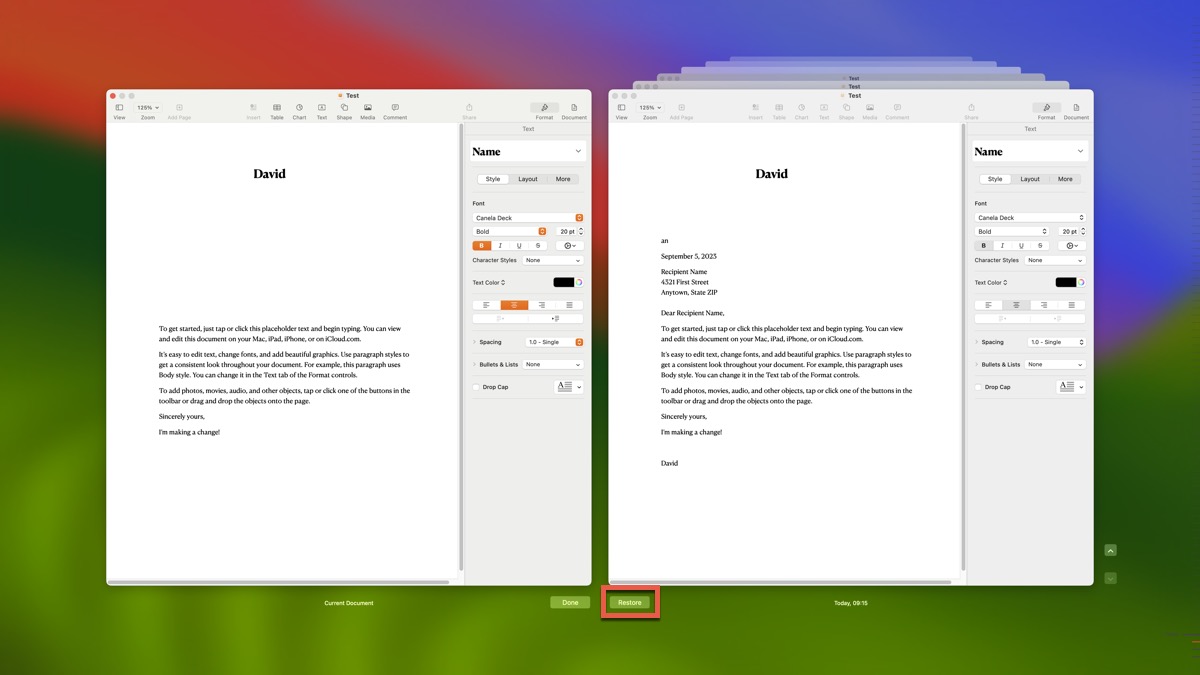
- You’ll be taken to a Time Machine-like interface that shows past versions of the document.
- Browse through the versions until you find the one you wish to recover.
- Click the Restore button to replace the current file with the older version.
Microsoft Word (Version History):
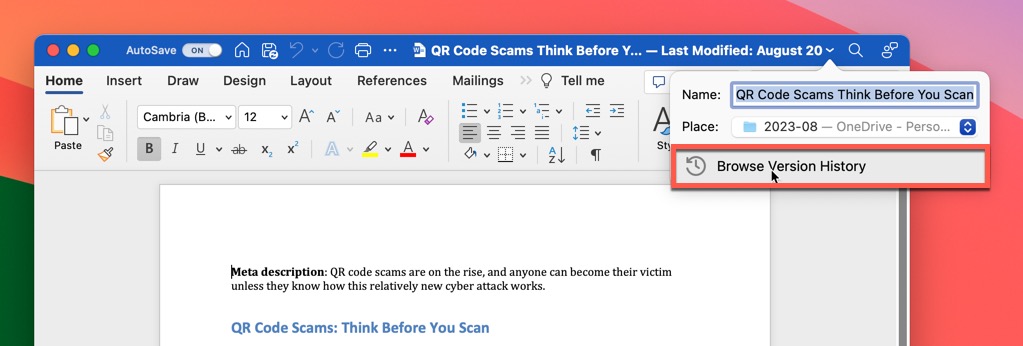
- Open the overwritten file in Microsoft Word.
- Click the document name in the title bar.
- Select the Browse Version History option.
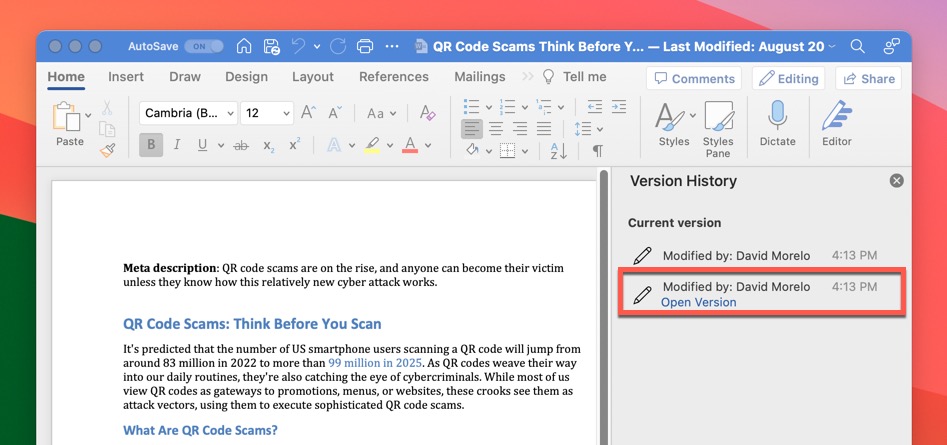
- Find the version you want to restore in the Version History sidebar.
- Click the Open Version button.
Other popular Mac apps with file recovery capabilities include Adobe Photoshop, Excel, and PowerPoint.
Conclusion
As far as data recovery goes, overwriting a file is worse than deleting it because deleted files can usually be found in the Trash folder. Fortunately, macOS and its apps provide an array of methods to recover those overwritten files. Whether it’s employing specialized data recovery software like Disk Drill, reverting to a local backup via Time Machine, recovering from the cloud, or utilizing built-in app features in programs such as Apple Pages or Microsoft Word, there are multiple solutions you can explore.
FAQ:
You can recover a file that was replaced by another file with the same name using the following procedure. You need a backup of the original file for this method to work.
- Rename the second file that replaced the original with a new name.
- Connect to your backup and recovery tool.
- Locate the original file and restore it to your computer.
You now have both files under two different names and should be able to proceed with your work.
If you are using Microsoft Word, the following procedure can be used to recover an overwritten file on your Mac.
- Open the file that has a previous version you want to recover.
- For Microsoft 365 for Mac, select the name of the document on the application’s title bar and then choose Browse Version History.
- In Office 2016 or 2019 for Mac, select File > Browse Version History.
- Select a version to open it in a new window. It can now be saved to another name so both the original and new versions of the file are available.
Yes and no. If you’re talking about deleting the reference to the original data (the icon and everything it represents), then overwrite does indeed mean delete. But if you’re concerned with the actual data stored on the hard drive, then overwrite doesn’t necessarily mean delete—at least not immediately.
In many cases, it takes days, weeks, and even months for the original data to be overwritten. Until that happens, the data can still be recovered with the help of special data recovery software, which can be extremely useful if you don’t create backups on a regular basis.


