
HFS/HFS+, or Hierarchical File System, was the standard file system format for MacBooks until Apple dropped macOS Sierra. If you’re using a MacBook that was released before 2017, you’re likely running HFS/HFS+.
Good news! If you’ve recently experienced data loss due to a power outage, virus attack, drive corruption, or you just accidentally deleted your files – you can still recover an HFS/HFS+ drive, as long as you move quickly. This article outlines the immediate steps to take the moment you notice your files are missing. Read on.
Table of Contents
What is HFS File Format and How It Differs From HFS+
HFS/HFS+, which you can find in Disk Utility as “Mac OS (Extended)”, is a file system format optimized for Mac hard drives – as opposed to the Apple File System (APFS), which was developed for newer Macs with solid state drives.
HFS+ is an update to the original HFS format, built to address larger volumes and handle data storage more efficiently. Since HFS is pretty much obsolete, and data recovery instructions are the same between these two formats, we’ll only be referring to HFS+ for the rest of the article.
Since HFS+ is an Apple drive format, you can’t use or even read an HFS+ partition or drive on Windows. Try to use it, and Windows will simply return a “USB device not recognized” error.
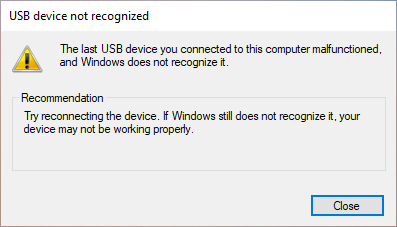
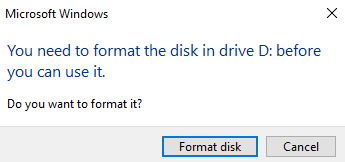
Often, Windows will even prompt you to format the drive to a compatible system such as exFAT, FAT, or NTFS – but that means all your files will be deleted in the process.
Further attempting to engage with a file system that is incompatible with the Windows operating system will likely return errors and may eventually cause data loss. If this has been your experience, or if you accidentally allowed Windows to format your drive to a compatible system, the next section will help you recover any data you lost in the process.
How to Recover Data Deleted from an HFS Drive
If you’ve accidentally deleted data from your HFS drive, those files and folders haven’t totally been erased. They still exist within the file system, marked for deletion. If you continue using your drive as normal, you’ll eventually overwrite that data which makes it impossible to recover.
However, as long as you act quickly (and stop using your drive), it’s easy to recover your HFS+ partition or drive using a data recovery tool. For this article, we’ll be using Disk Drill as it’s very easy to use even for beginners. Let’s start.
Step 1. If the HFS drive you want to recover is the same one that is running your operating system, plug in an external storage device where you can save your recovered data.
Step 2. Download and install Disk Drill.
Step 3. Open Finder by clicking its icon on your dock.
![]()
Step 4. Navigate to the Applications folder, then double-click the Disk Drill icon.
![]()
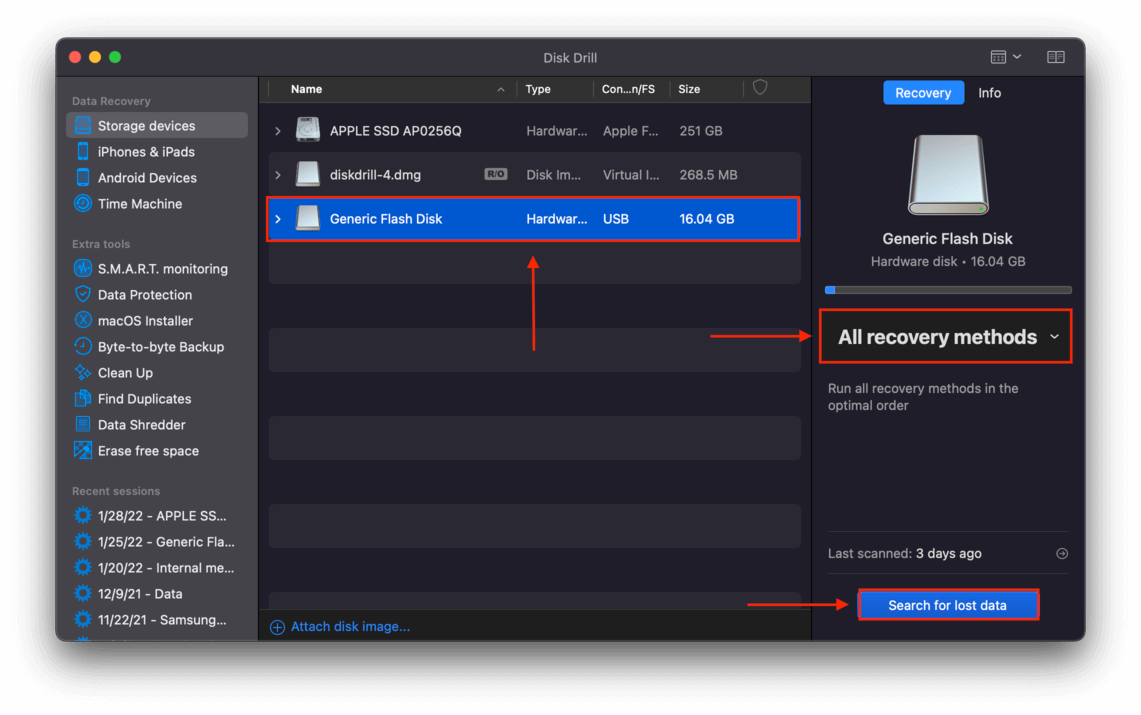
Step 5. Select the HFS drive that contains your missing data, leave all settings to default for the best results, then click Search for lost files on the bottom-right corner of the window.
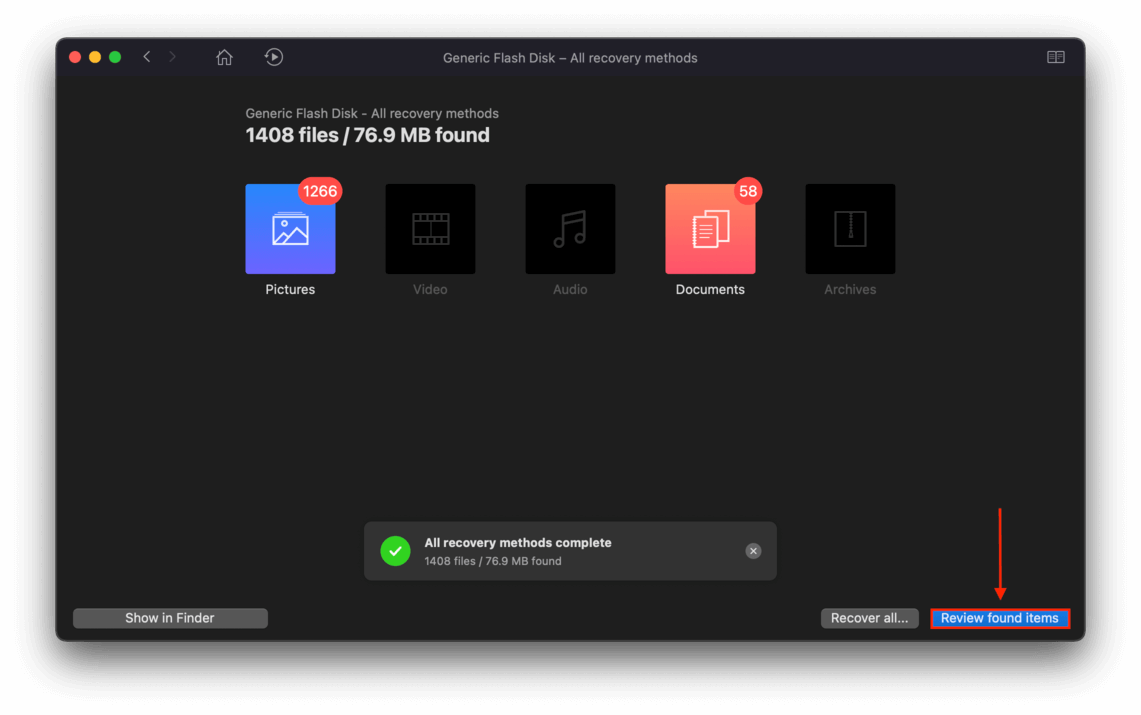
Step 6. Wait for Disk Drill to complete its scan, then click Review found items.
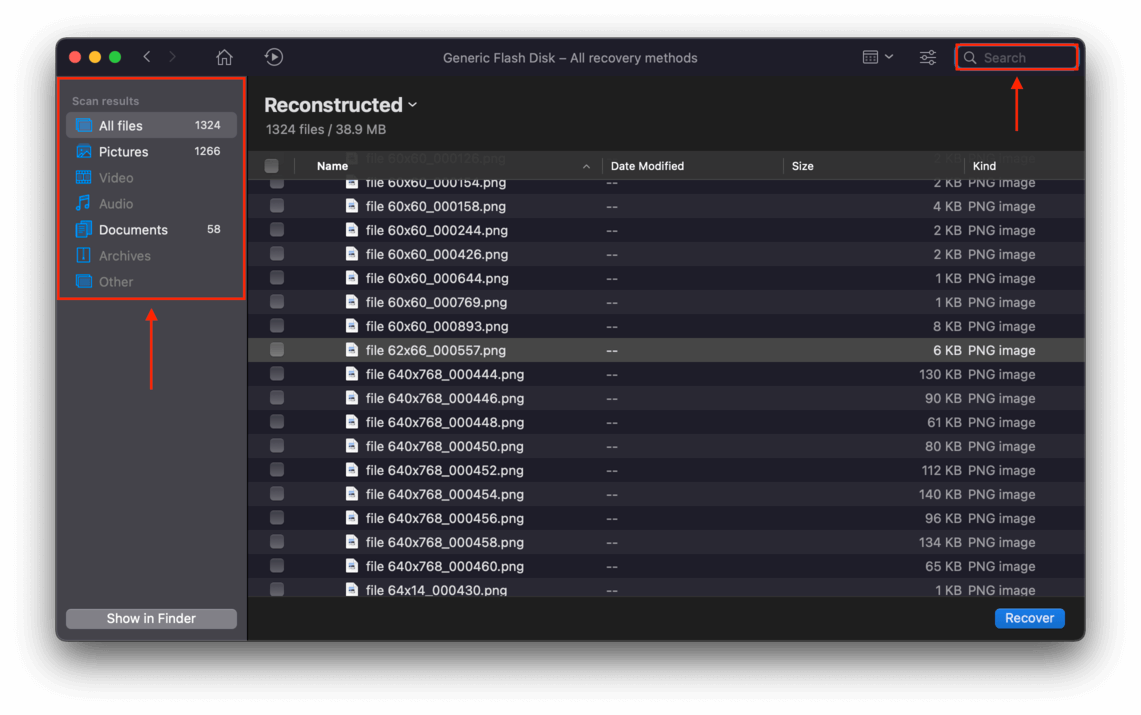
Step 7. Browse recovered items faster by using the search bar on the top-right corner of the window or by filtering files by type using the sidebar.
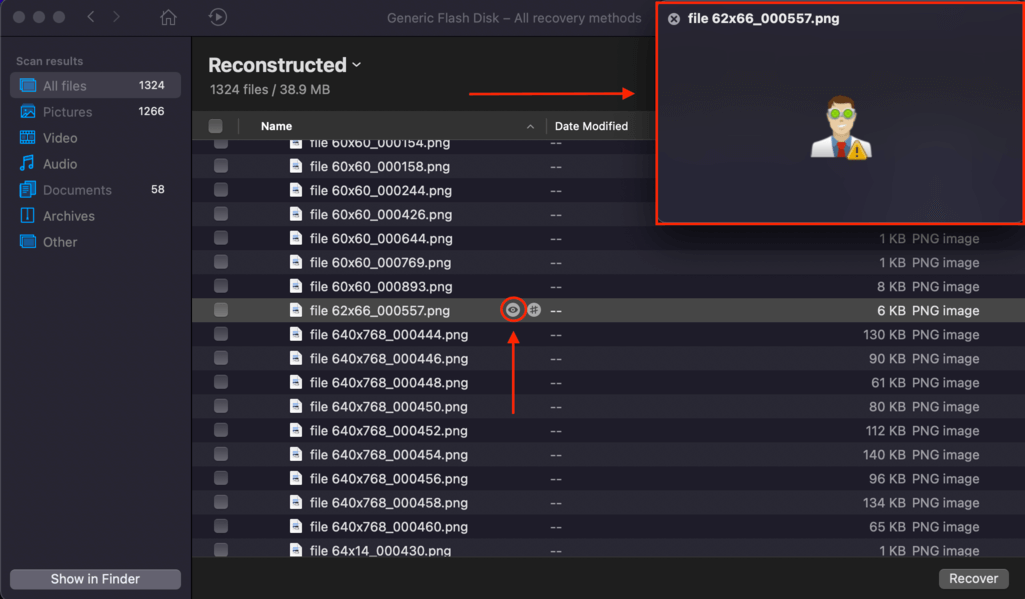
Step 8. You can preview your files by hovering your pointer to the right of the filename, then clicking the eye button that appears. This will open a preview window displaying your file.
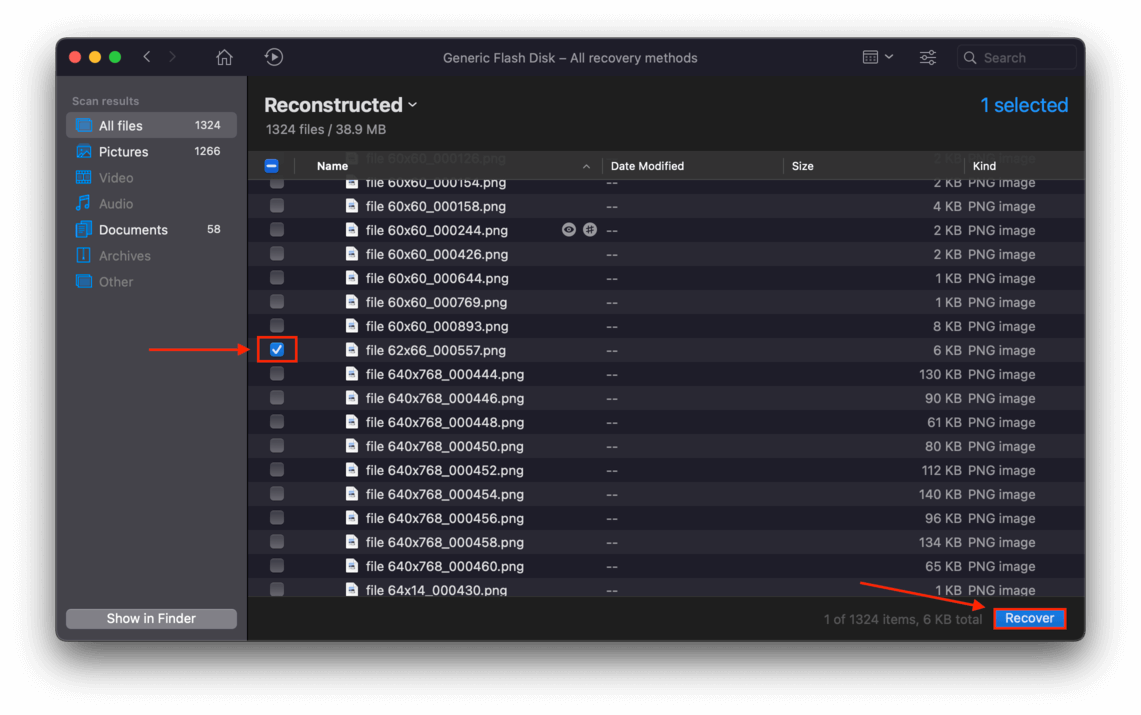
Step 9. To select the files you want to recover, tick the checkboxes to the left of their file names. Then, click Recover.
Step 10. On the dialogue box that pops up, use the dropdown menu to select the destination where you want to save the recovered files. If you’re recovering data from the same drive that is running your operating system, make sure to save your data on an external storage device. Finally, click OK.
Main Reasons of Data Loss on HFS Disks
Even though HFS+ is still considered a reliable file format, it’s still prone to corruption and data loss. Here are the most common culprits that users may encounter:
| Reason | Description |
| ⏏️ Improper Ejection | After accidental file deletion, improper ejection is the most common reason for corruption and data loss – especially if you pull the drive out while it’s writing data. |
| 🗃️ Formatting | If you formatted or reformatted your HFS disk, the process wiped the data. |
| 🦠 Virus Attacks | Nasty virus attacks can corrupt files and entire drives. |
| 🧲 Degradation | Data can decay even if you don’t use your disk because hard drives lose their magnetic orientation over time. |
| ⚡ Power Outages | If the power goes out while you’re writing data, the interruption of the process can cause corruption. |
| 🔨 Physical Damage | The most problematic case of data loss occurs when it results from physical damage, such as scratches on the HFS/HFS+ drive’s spinning disk or excessive heat. In this case, immediately stop using that drive to avoid permanent data loss and send the drive to a professional data recovery center – they have the right tools and facilities to repair physically damaged drives. |
Conclusion
HFS and HFS+ formats are still widely used today, as not everyone has transitioned from hard drives to solid state drives. And despite being older technology, they’re still reliable (and sometimes even better suited) for certain situations.
In this case, they have the advantage of being optimized for hard drives, which are known to have a bigger window of opportunity to recover deleted files. However, prevention is still the best cure – we at Macgasm believe in religiously backing up our data. If you want to learn how to back up your own data, read our guide on How to Use Time Machine on Mac Like a Pro.


