
Apple File System (APFS) is a proprietary file system introduced by Apple during the runtime of macOS Sierra. While APFS is generally better designed to protect against corruption and data loss, you still need to be careful of the usual culprits, like software issues, virus attacks, faulty hardware, and accidental erasure or formatting.
In this article, we explain the APFS data recovery for hard drives on Mac with a step-by-step guide and easy-to-follow screenshots. Read on.
Table of Contents
What is an APFS File System?
To answer this question, let’s first understand what a “File System” is. Simply, it’s how a drive organizes its files and folders. An APFS (Apple File System) is a relatively new system built exclusively by and for Apple machines, and it’s supposed to be way faster and more efficient, more secure, and easier to back up.
It’s optimized for solid state drives (SSD), although it can run on common traditional media like hard drives, external flash storage, etc. When installed on an SSD, it engages with data a bit differently from traditional devices – so if you’re trying to recover data from an SSD, go to this section of the article.
Common Problems with APFS Volumes
APFS is one of the best file systems to date because it’s efficient and reliable. However, it’s a relatively young technology with a few issues that need ironing out.
1. Data-Breaking issue with APFS-formatted Sparse Disk Images
For most users, this is a minor bug that will most likely never affect them. However, for those who often clone drives using sparse disk images, being unaware of this issue could cause a gut wrenching case of data loss. Let me explain. ![]()
A disk image is a computer file soft copy of a disk volume or a data storage device. It’s essentially a “clone” that you can mount as a virtual drive. A “sparse disk image” is a disk image that grows and shrinks with the data you write on it.
If you only want to clone 100GB of data, that sparse disk image will only be 100GB in size. It’s also limited by the actual size of the underlying volume – so you obviously can’t clone 100GB into a 50GB volume.
Herein lies the bug (discovered by Mike Bombich, owner of Carbon Copy Cloner). If you attempt to clone data on a sparse disk image with APFS formatting, it won’t tell you if you’ve already hit the limit of the underlying volume. It will continue the cloning process seemingly without issue. Even checksums won’t reflect anything alarming.
However, when you attempt to open the files, you’ll find that the data you tried to clone beyond the limit are all corrupted. Because you weren’t notified that you crossed the threshold, you were actually cloning your data “into the void.”
2. Time Machine Incompatibility with HFS+
This is another bug that will again affect only a minority of users – but it really does suck for them. Time Machine is a backup utility natively built into Apple machines. Not only can it take local “snapshots” that give you access to previous timelines of your machine, it can also copy everything on your system.![]()
If you’re using macOS Sierra and higher, you’ll be able to use APFS – which is highly optimized for cloning and snapshots.
However, if you performed a Time Machine backup while you were still using HFS+, you won’t be able to convert it to APFS without erasing your data or formatting the drive. This is simply due to structural differences with the file systems.
How to Recover Data from APFS Hard Drives
APFS is more efficient at clearing up data (more on this below), which makes it a bit harder to recover. Fortunately, as long as you haven’t overwritten any of the data you wanted to recover with new files, you can use a data recovery tool like Disk Drill to get your files back fully intact. Here’s how:
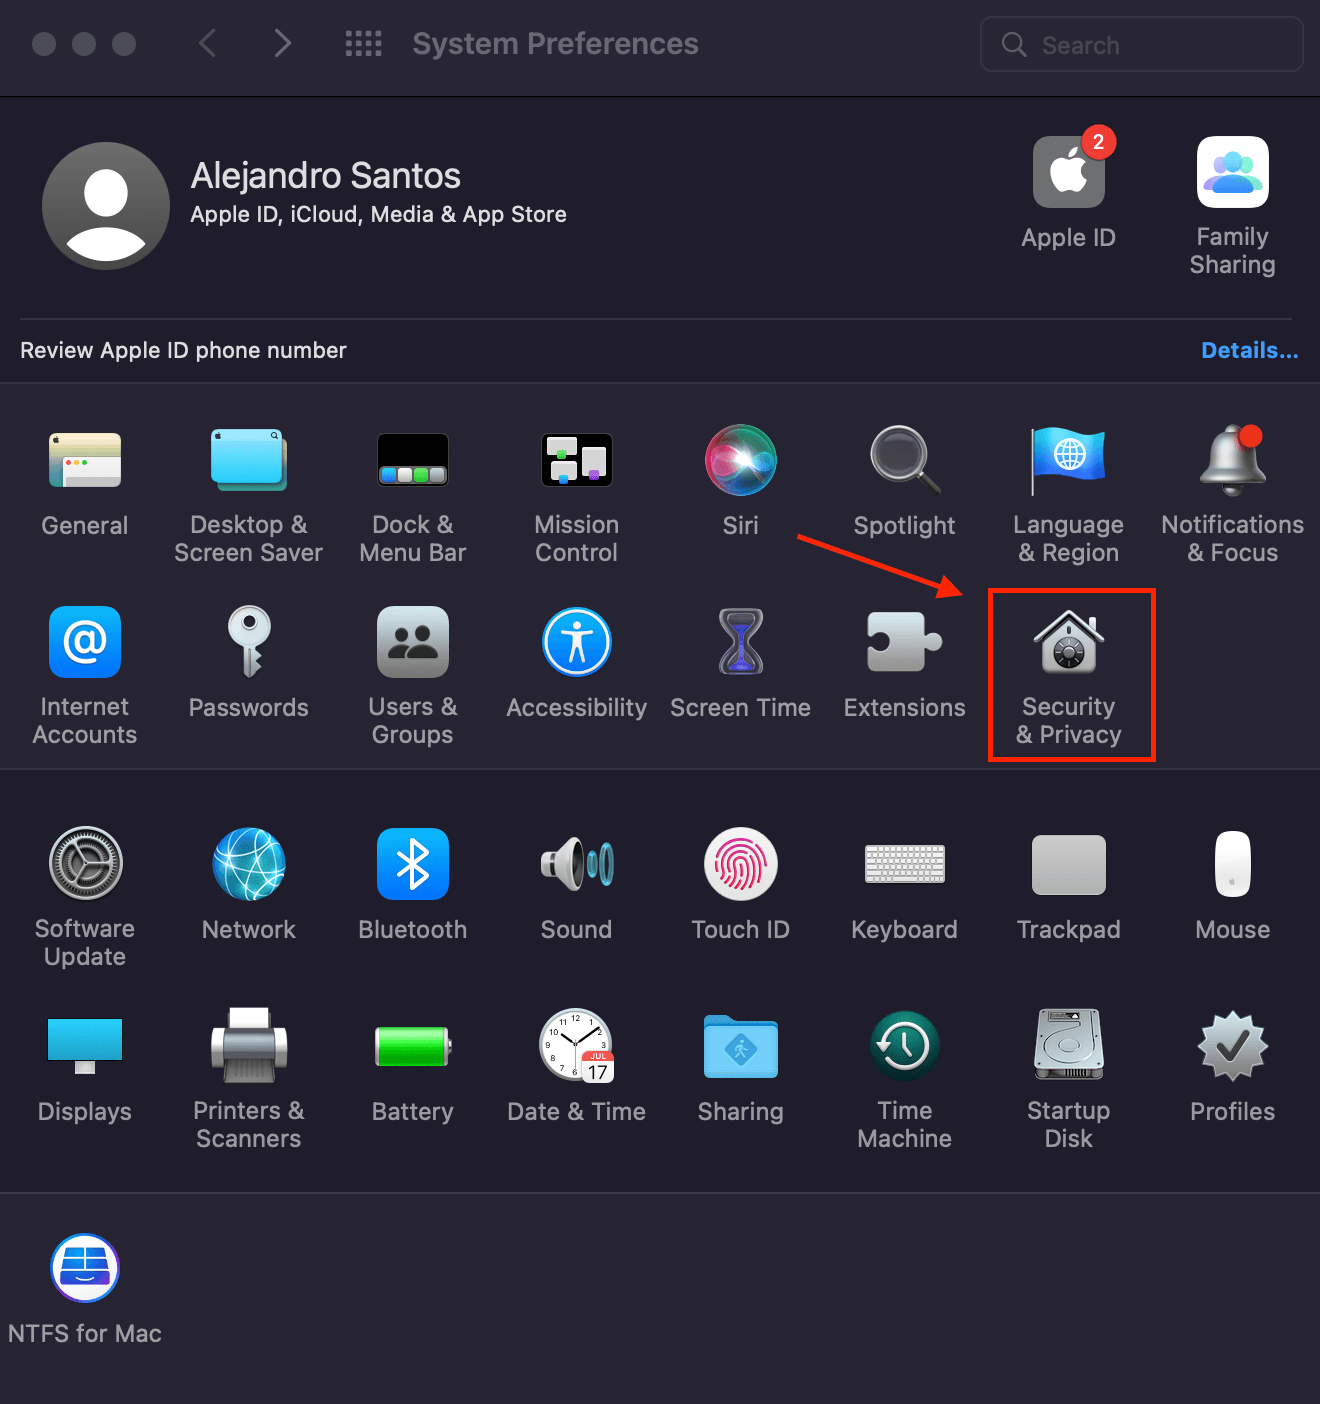
Step 1:Make sure your drive is decrypted. To do this, go to the Apple Menu on the top left corner of your screen, then click System Preferences > Security & Privacy > FileVault tab. If FileVault is off, proceed to step 3.
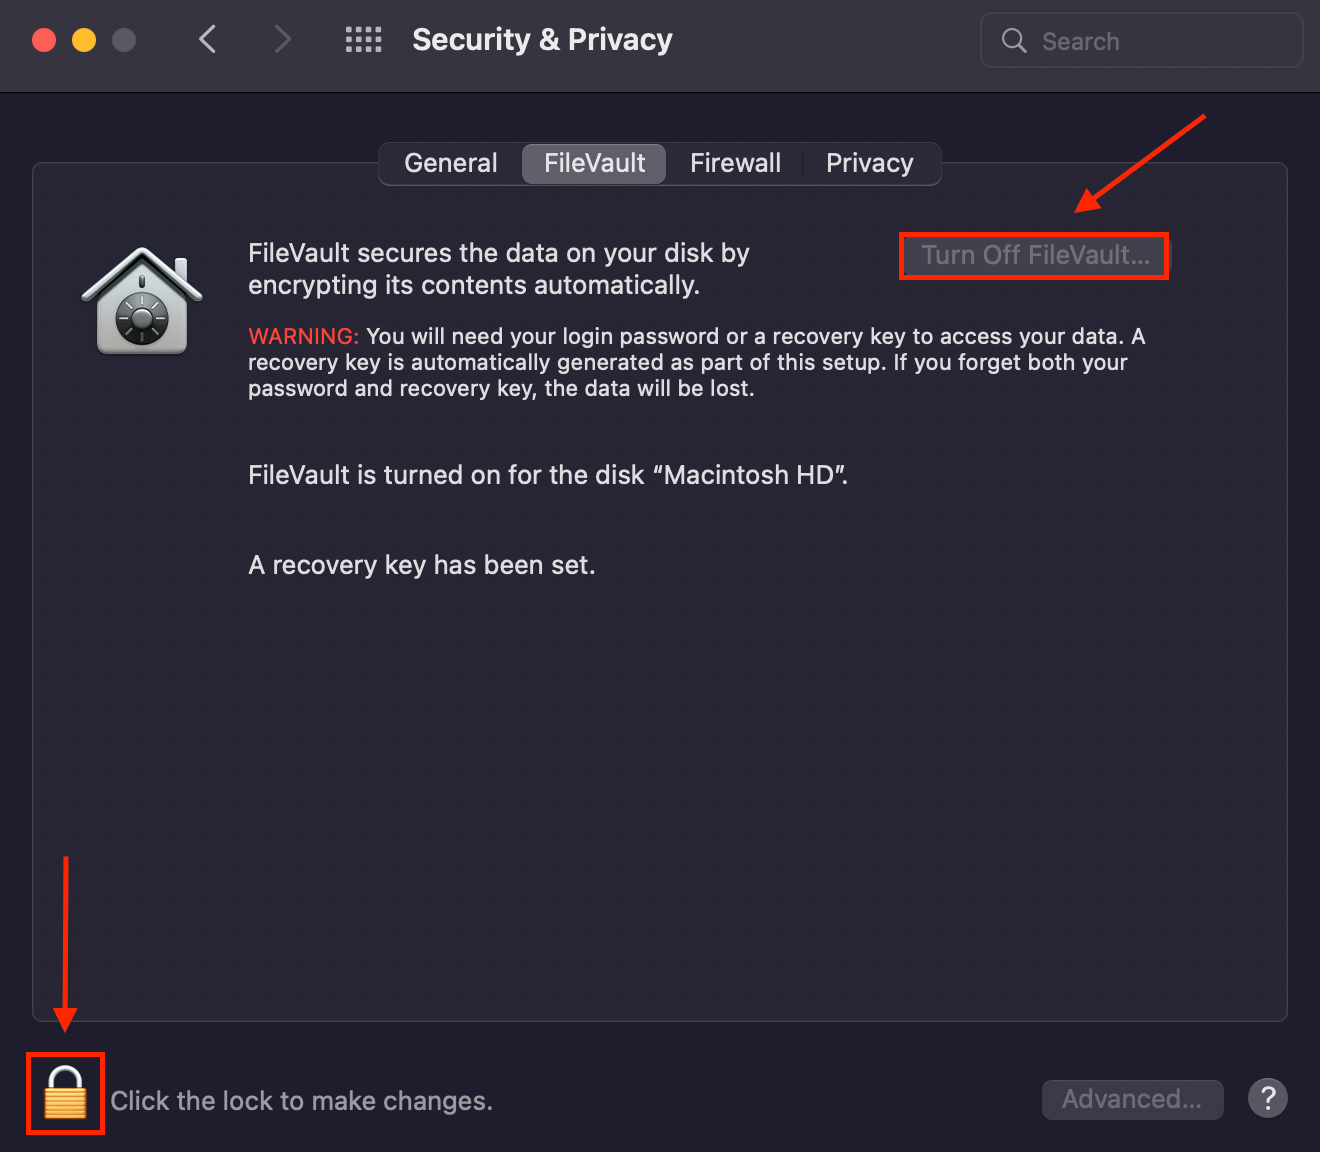
Step 2:If FileVault is on, that means that your data is encrypted. To decrypt it, click the lock icon and enter your password to change your settings. Then click “Turn Off FileVault…”
Step 3:Now that your drive is decrypted, we can proceed with data recovery. Download and install Disk Drill.
Step 4:Make sure your APFS hard drive is connected, then launch Disk Drill by using Spotlight Search (CMD + Space) or by going to Finder > Applications > Disk Drill.

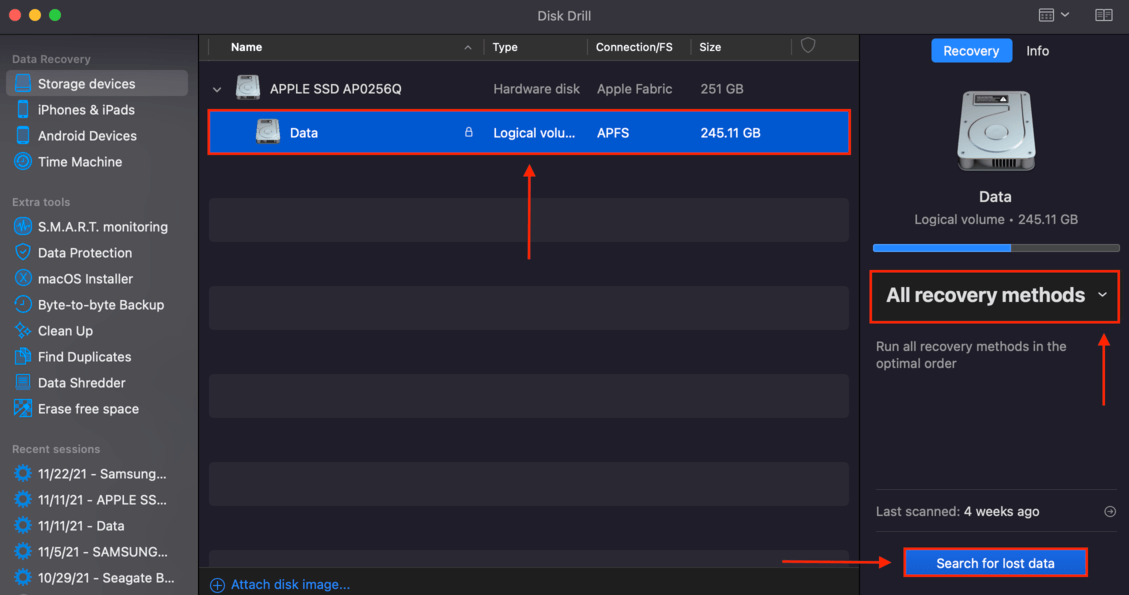
Step 5:Click on the APFS volume (or entire drive) that you want to perform the recovery on, then select your preferred scanning method – let’s choose All recovery methods for this example. Next, click “Search for lost data.”
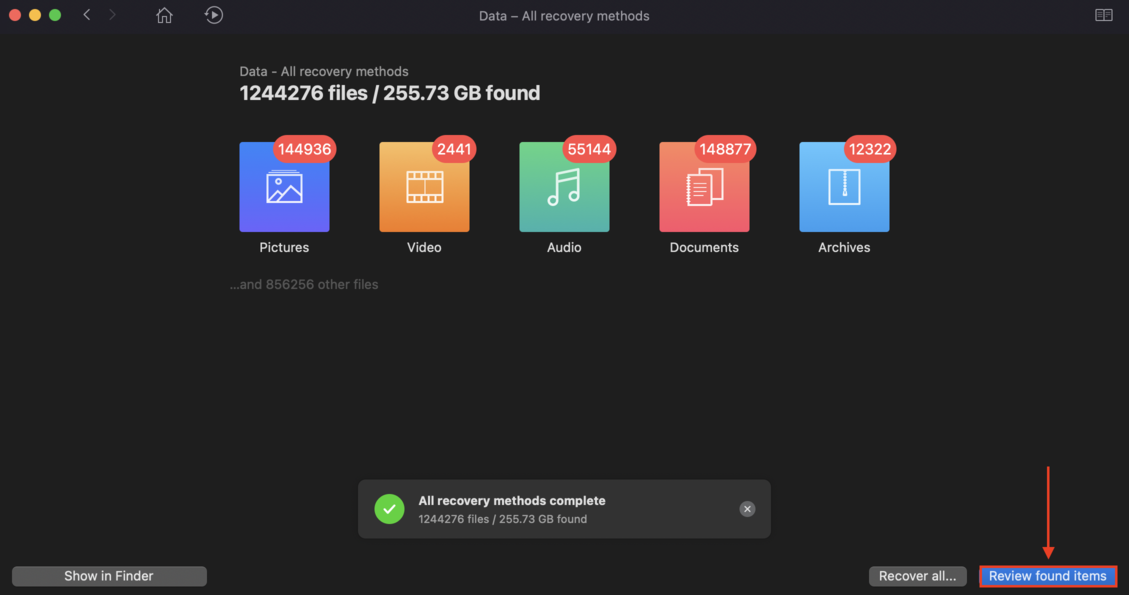
Step 6:Wait for Disk Drill to complete its scanning process then click Review found items. If you want to recover specific files, you can actually start browsing the files Disk Drill already found by clicking one of the file type categories.
Step 7:At this point, it’s a good idea to preview your files. Fortunately, Disk Drill lets you preview as many files as you want for free – just hover over a specific file and click the eye button that appears.
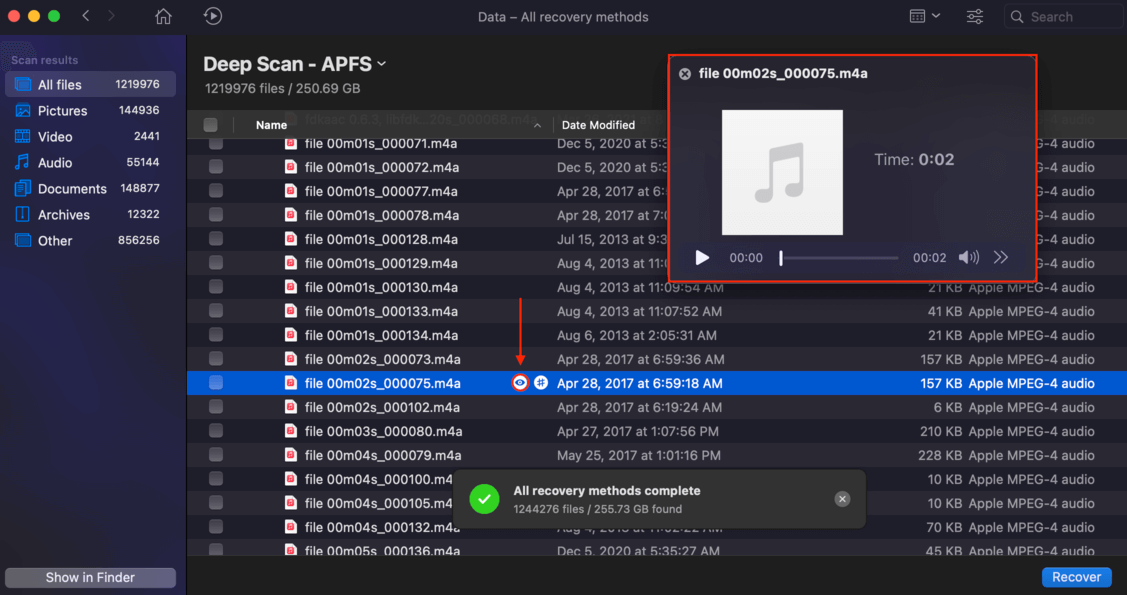
Step 8:If you want to recover specific files, tick the boxes beside the ones you want to recover, and click Recover. If you want to recover all files, leave all the boxes black and click Recover.
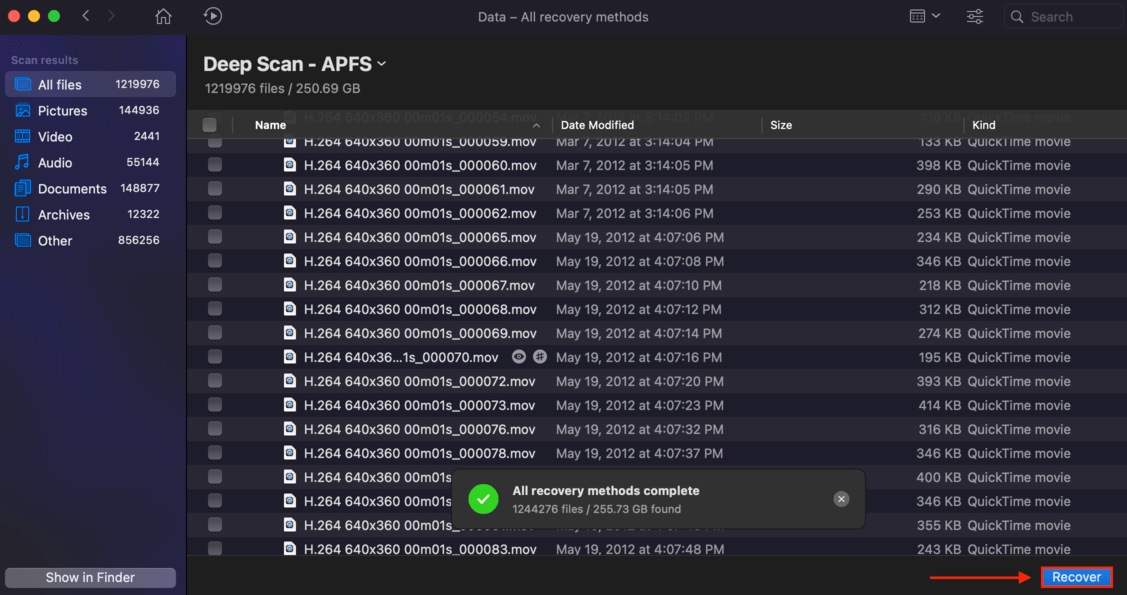
Step 9:On the popup that appears, choose the destination folder for your recovered data, then click OK to begin the recovery process.
Is it possible to recover data from an SSD formatted to APFS?
It’s possible, under one condition: that the TRIM feature installed on SSDs hasn’t yet wiped your data. Let me explain: when deleting files on an SSD, a process called Garbage Collection relocates your existing data in order to get rid of invalid or unwanted data. To do this, it has to work in the background to identify what data is considered “invalid.”
Most modern SSDs can invoke the TRIM command – whenever you delete a file, TRIM fires off information to your SSD, letting it know that that data is invalid. This makes the garbage collection process much more more efficient.
As a result, SSDs perform way faster, but makes it harder to recover data as compared to hard drives and other traditional media. Fortunately, it’s not impossible.
If you need to recover files from your SSD, we wrote a whole step-by-step guide on the process: How to Recover Deleted Data from SSD on Mac.


