
Mac can’t read Windows drive formats and vice versa – that means that you’ll have to convert your hard drive to make it compatible with a specific operating system. However, the process typically wipes all your data.
This article is a guide to convert a Mac formatted drive to a Windows drive without losing data. We go over the different file formats and the operating systems they’re compatible with, how to back up and format your drive, and how to recover data in case something goes wrong.
Table of Contents
Why You Need to Format Mac Hard Drive for Windows
Typical Mac hard drives use the APFS (Apple File System) or the HFS+ (Hierarchical File System Plus), while Windows drives use NTFS, FAT32, and exFAT. They’re unfortunately incompatible with each other, with the exception of exFAT, which is readable both by Windows and Mac – so for this guide, we’ll be converting a drive from APFS to exFAT.
To convert a Mac drive to exFAT, you’ll be using the process of formatting.
How to Convert Mac Hard Drive to Windows
For this process, you’ll need 3 tools: a backup utility, a tool to recover data (just in case), and Disk Utility for the actual formatting process – fortunately, macOS already comes with Disk Utility installed. The data recovery tool we’ll be using, called Disk Drill, can recover data even from formatted drives.
1. Back Up the Data From Hard Drive
In order to format a Mac drive for Windows, you’ll first need to erase it. I can’t stress enough that it means that you’ll be wiping all the files and folders from that hard drive – there’s no other way to do it. So the first thing you have to do is back up your data.
For this guide, we’ll be using Disk Drill – it’s a data recovery tool that offers a free backup feature (as well as a data recovery tool, which we’ll be covering later in the guide). Here’s how to do it:
Step 1. If you don’t want to use your OS drive for your backup files, plug in another storage media (not the one you’re formatting).
Step 2. Download and install Disk Drill.
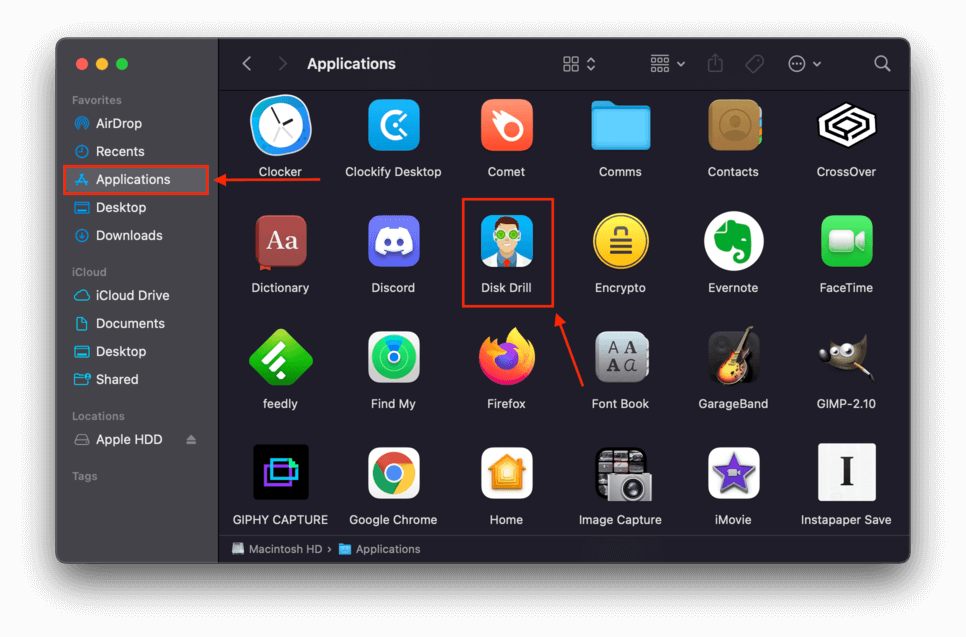
Step 3. To open Disk Drill, first open the Finder app from your Dock.
![]()
Step 4. Next, navigate to the Applications folder, then double-click Disk Drill.
Step 5. On the left sidebar under Extra Tools, click Byte-to-Byte Backup.
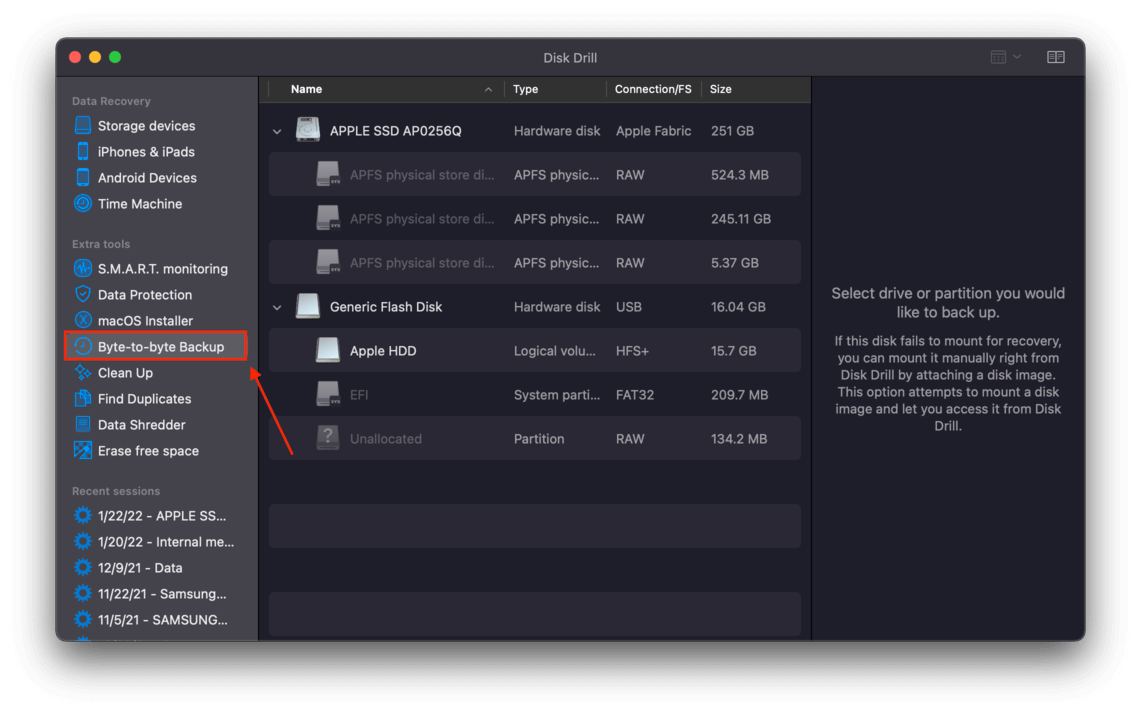
Step 6. Click Ok, let’s do it.
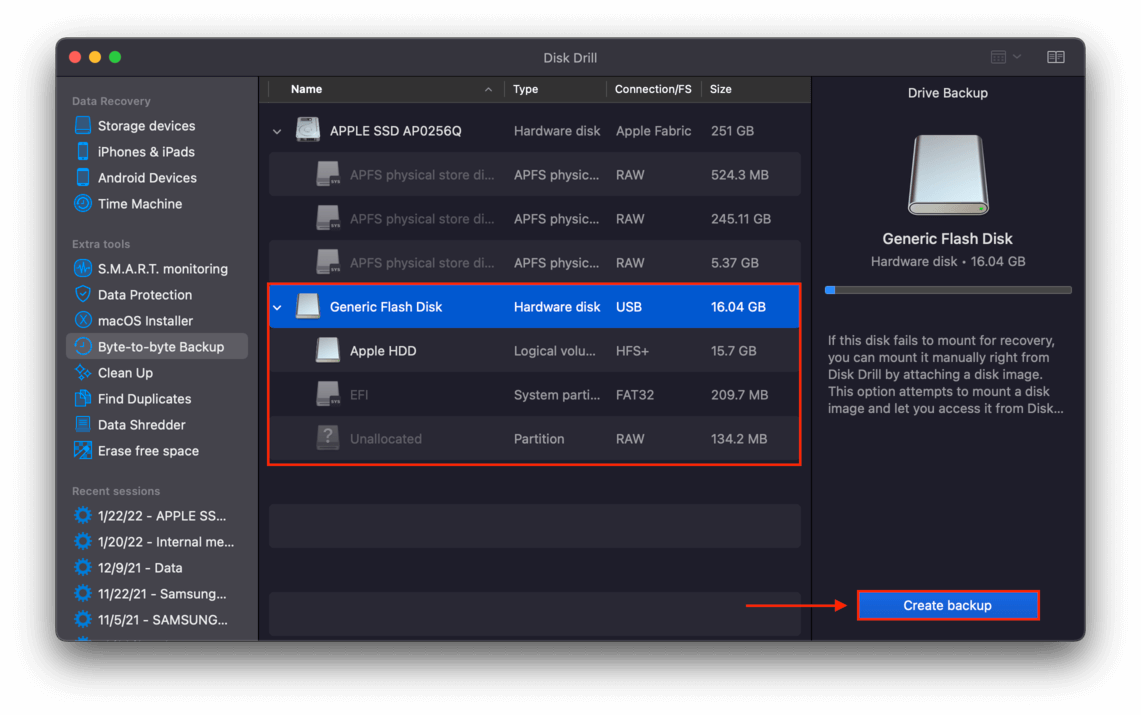
Step 7. Select the drive you want to backup, then click Create backup.
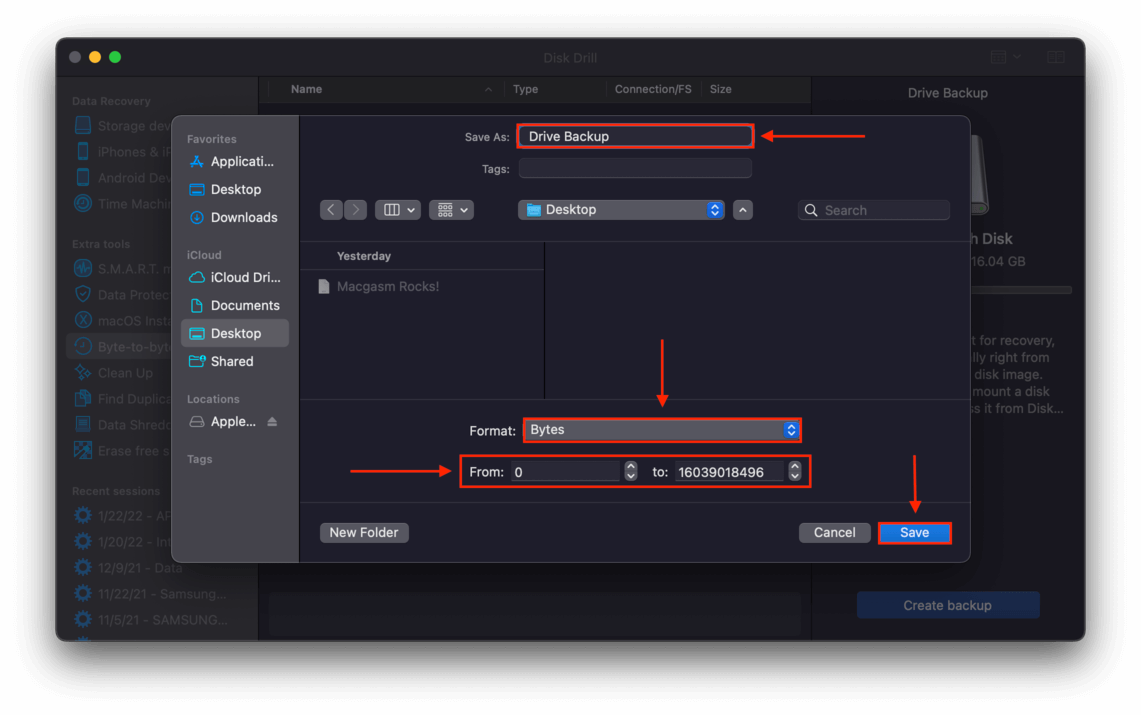
Step 8. On the window that appears, select where you want to save backup and whether you want to format your backup by bytes or sectors (bytes is fine for most cases). Next, choose how many bytes of the drive you want to back up using the numbered range dropdowns menus. Finally, click Save.
Step 9. Wait for the backup process to complete.
2. Erase and Format the Mac Drive
Once you’ve safely backed up your data, you can proceed with formatting your drive. To do this, you’ll first need to erase it. Fortunately, macOS has a free native tool called “Disk Utility” that can take care of the entire process.
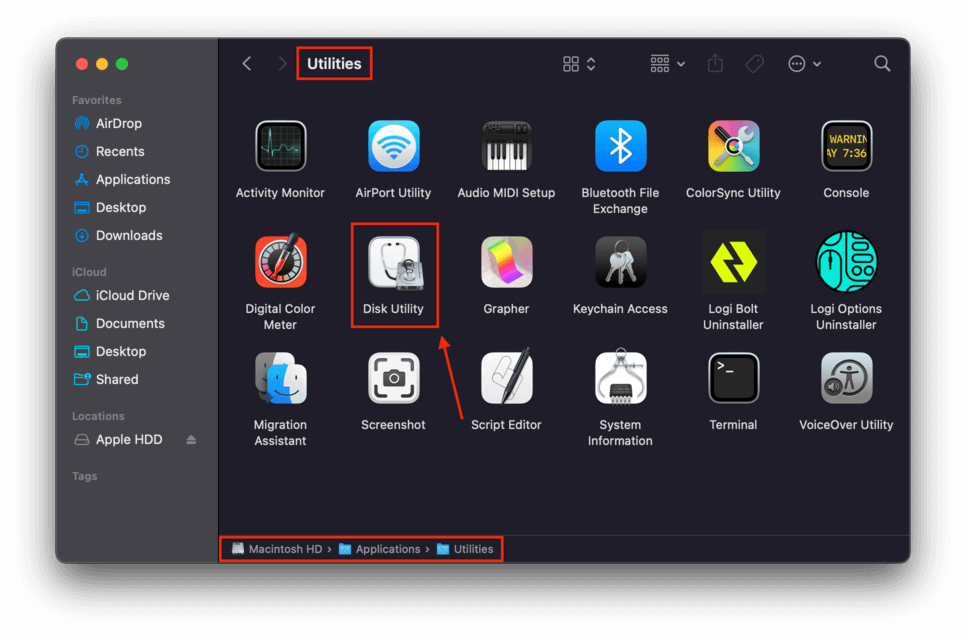
Step 1. Open Disk Utility by opening Finder > Applications > Utilities > Disk Utility.
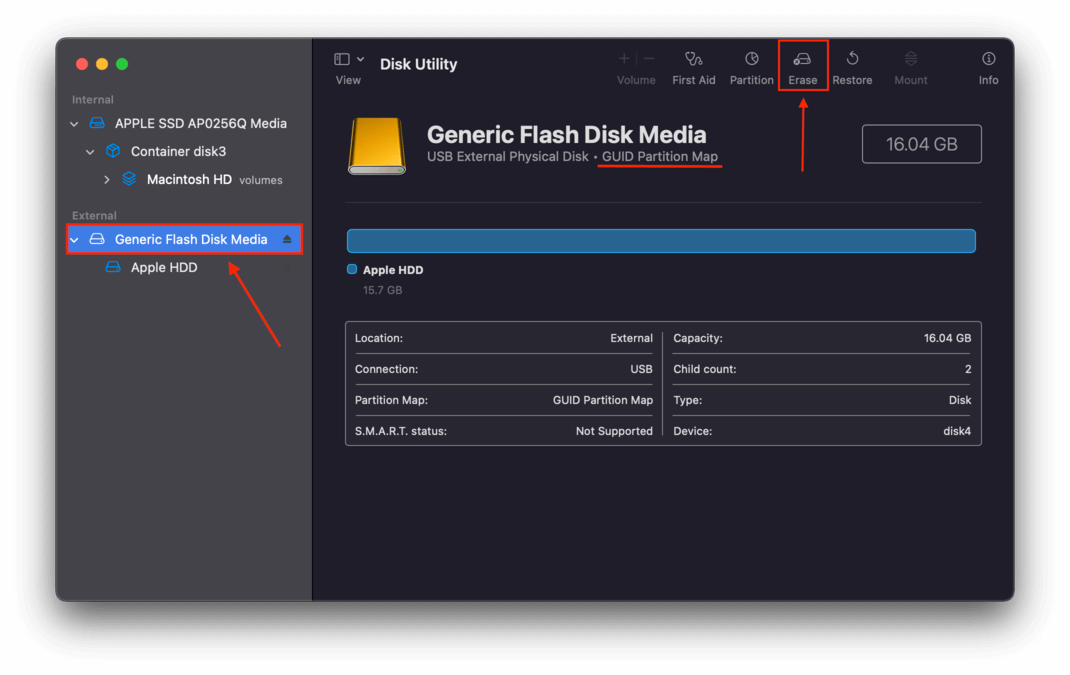
Step 2. On the left sidebar, click the hard drive you want to format for Windows. Then, click the Erase button at the top-right corner of the screen.
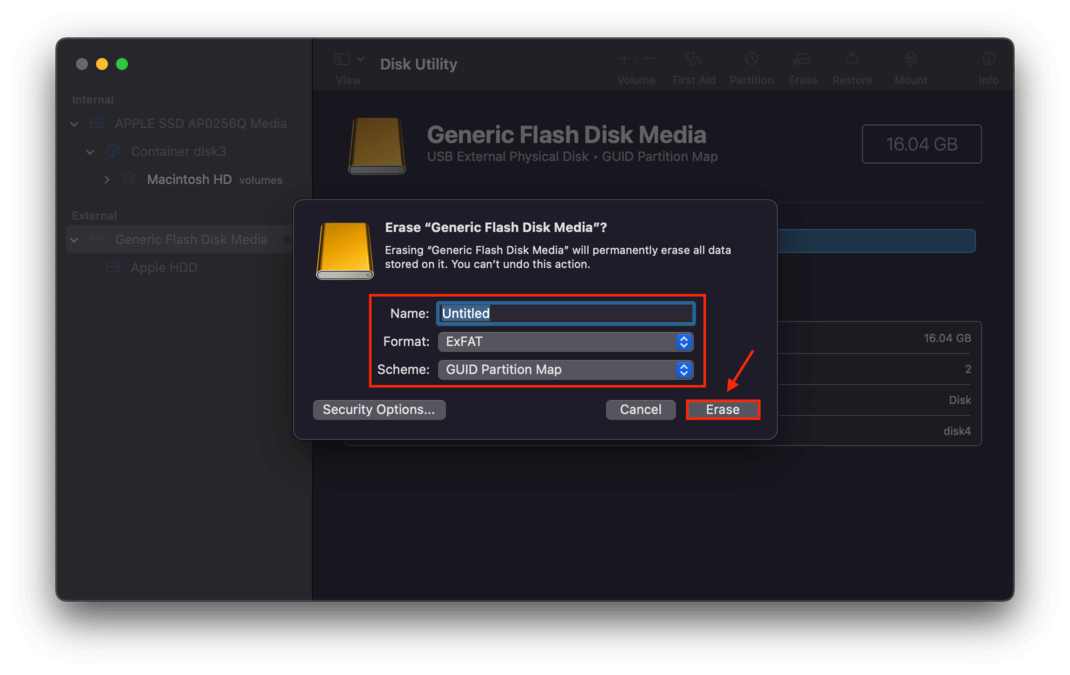
Step 3. In the dialogue box that appears, choose the Name, Format, and Scheme of your drive. Choose exFAT for the Format, and GUID Partition Map (known as GPT to Windows users) for the Scheme. Finally, click Erase.
Step 4. Wait for the process to complete to successfully reformat your hard drive from Mac to PC.
Once you’re done with this process, you will end up with an exFAT-formatted drive, which is readable by both Windows and Mac.
What to Do If You’ve Lost Files After Formatting
If you were not able to back up your files before formatting, don’t panic – you can restore them using data recovery tools. For this article, we’ll be using software called Disk Drill. Thanks to its user-friendly GUI, it’s super easy to recover as much data as you need, whether you’re restoring a partition or an entire hard drive – even if you’ve never used this kind of tool before. Here’s how:
Step 1. If you didn’t use Disk Drill to back up your files, go ahead and download and install Disk Drill.
Step 2. Launch Disk Drill by opening Finder > Applications, then double-click the Disk Drill app.
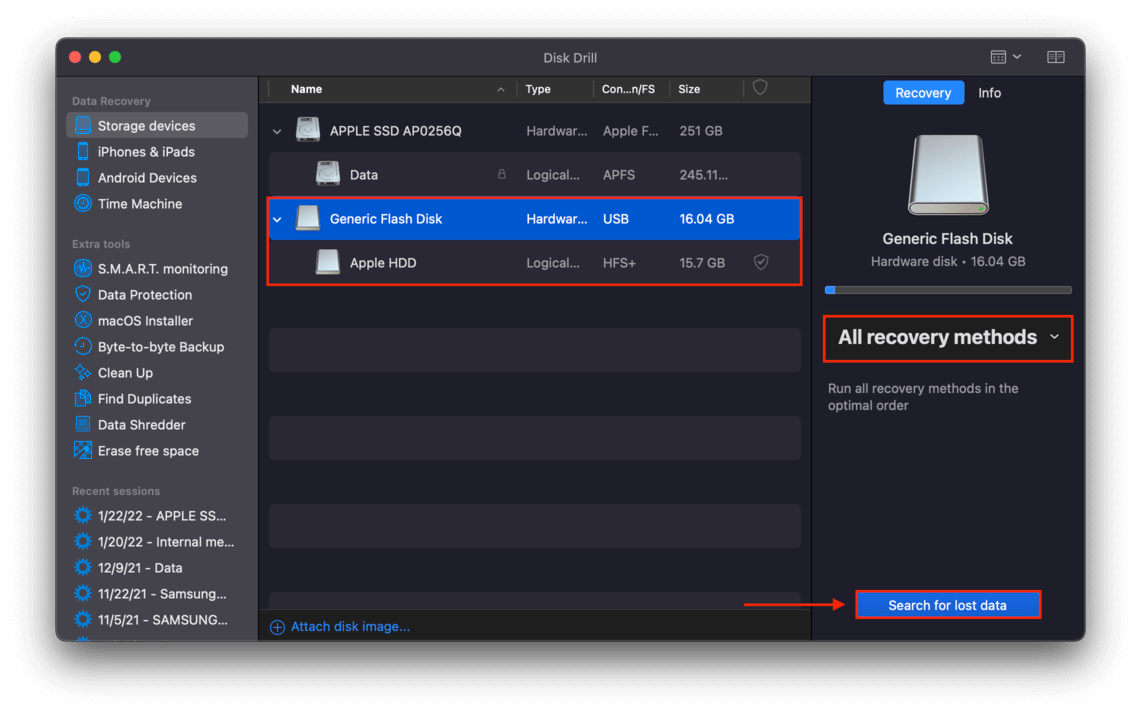
Step 3. Select the drive you just formatted, leave all settings to default, then click Search for lost data.
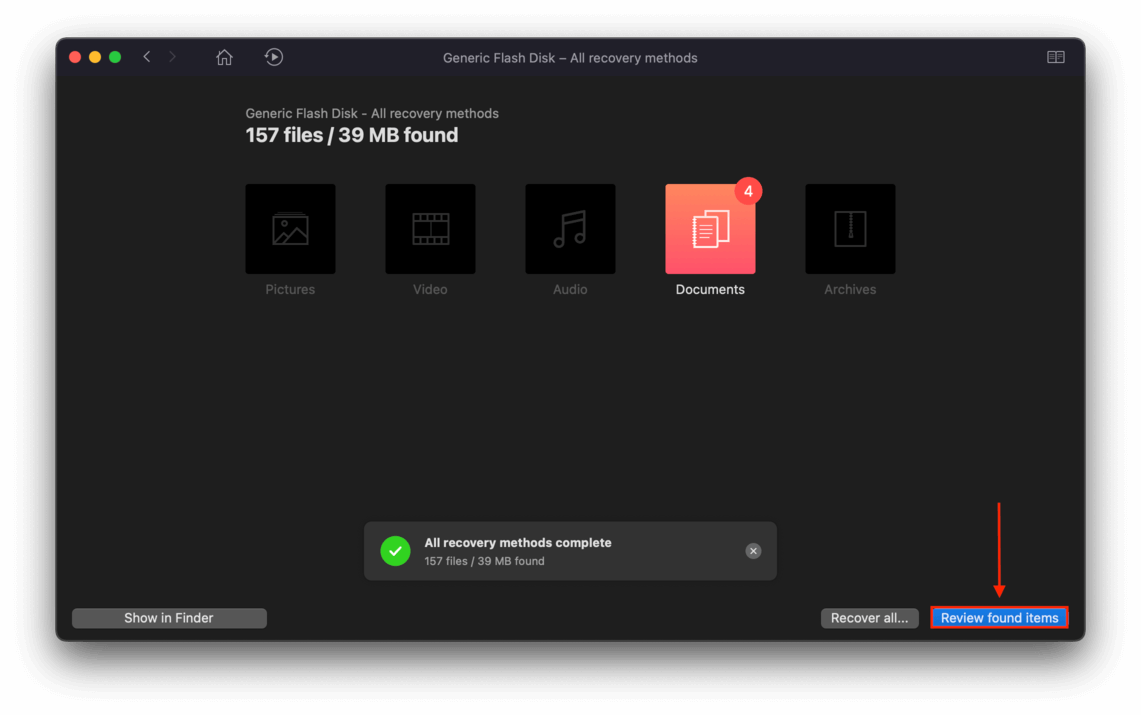
Step 4. You can wait for the scan to complete before proceeding, or you can begin browsing what Disk Drill already found – it will continue to populate the results list anyway. Click Review found items.
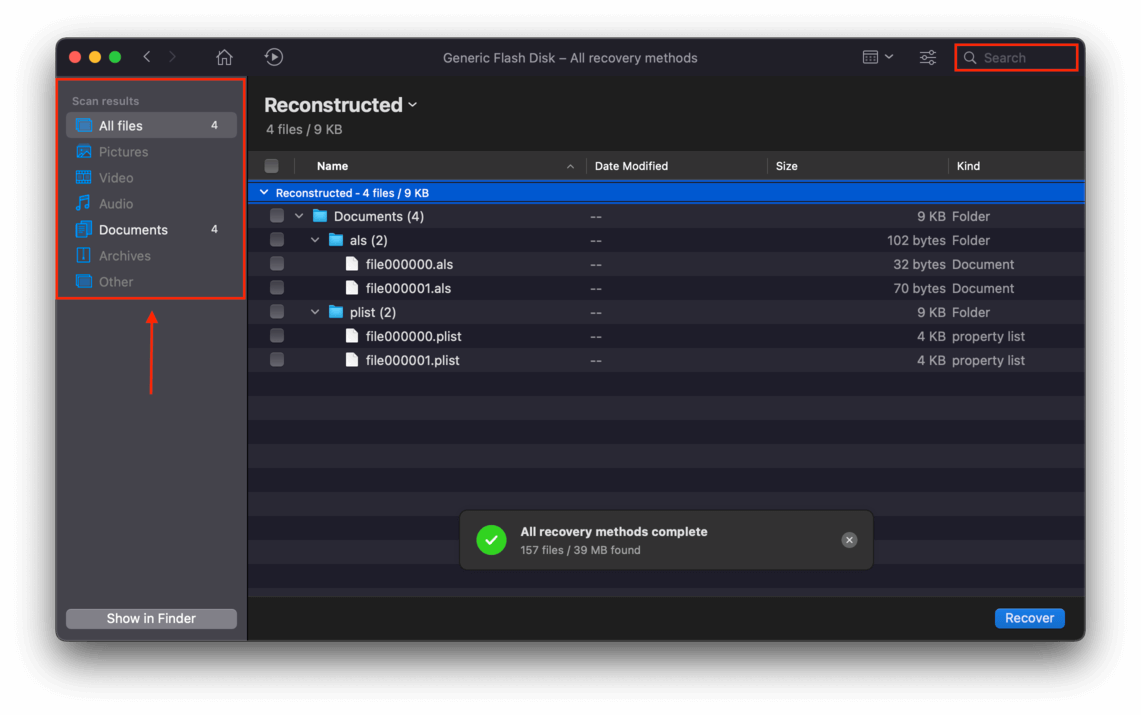
Step 5. Browse the results list for your hard drive’s lost data. You can use the search bar on the top-right corner of the window and the file type categories on the left sidebar to make your search more efficient.
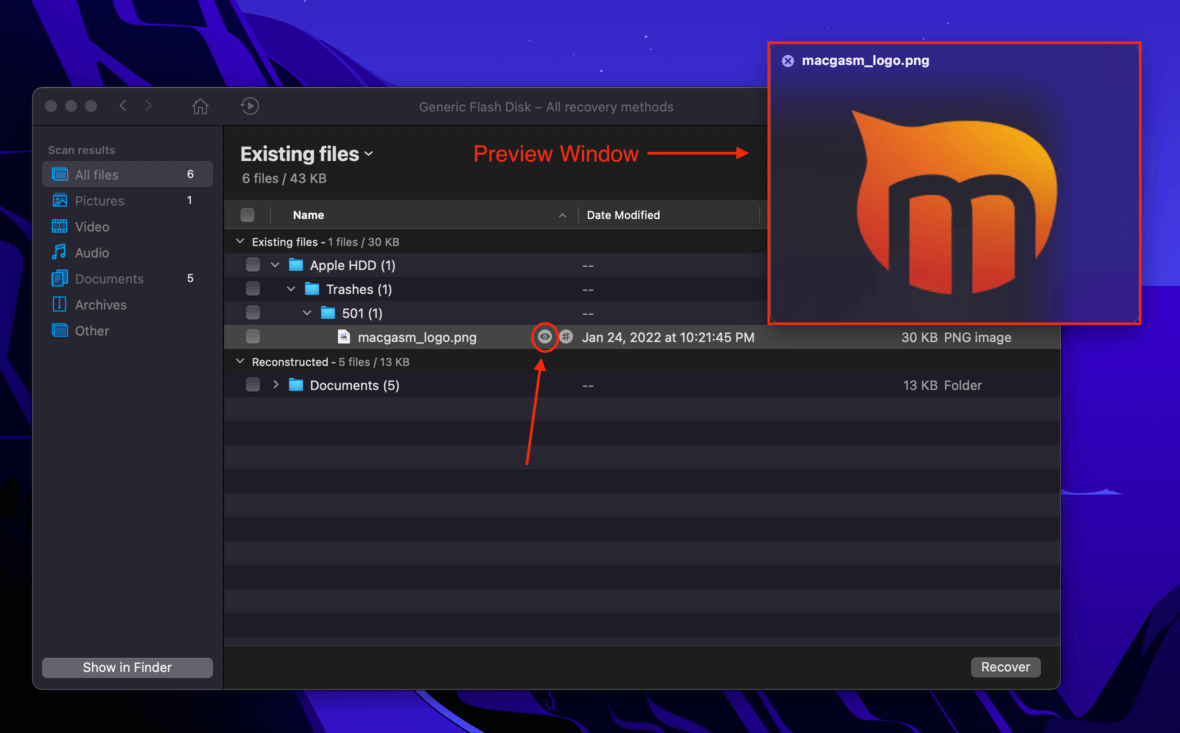
Step 6. You can preview your files by hovering your pointer to the right of their file names until the eye button appears. Click it to open a preview window for that file.
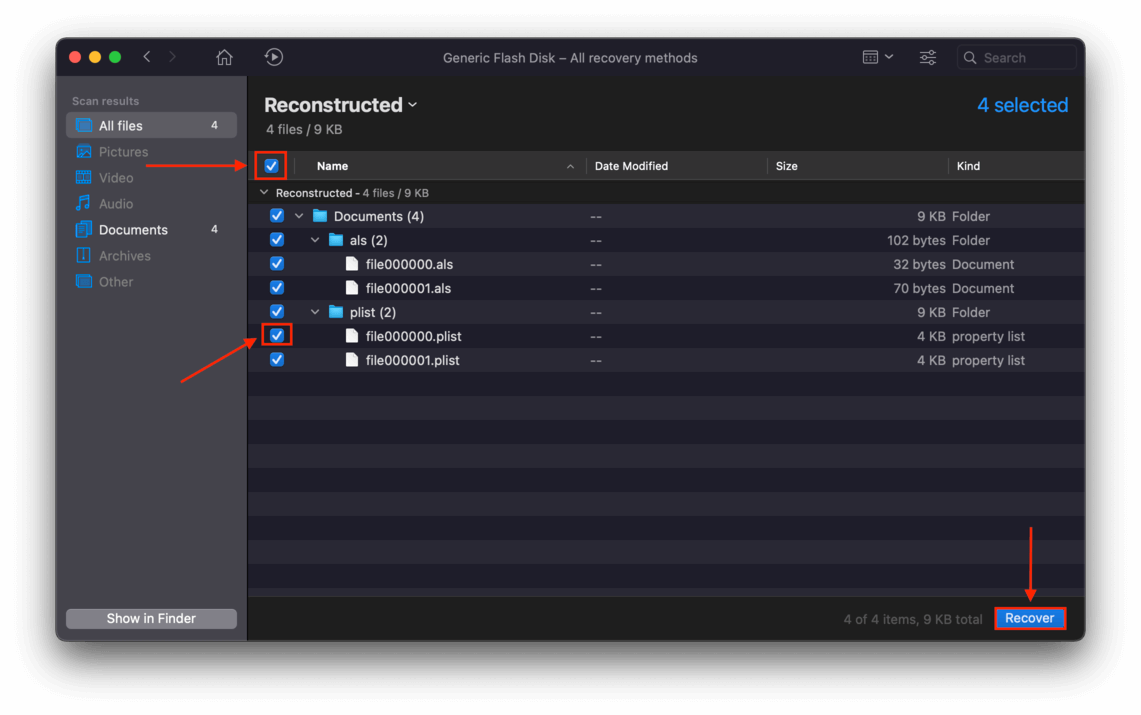
Step 7. Select the files you want to recover by ticking the checkboxes on the left, or select all the files Disk Drill found by ticking the checkbox on the top-left corner. Once you’re satisfied with your selection, click Recover.
Step 8. On the dialogue box that appears, use the dropdown menu to choose the destination folder for your files. Make sure it’s on a drive from the one you’re recovering data from. Then, click OK.
Conclusion
Formatting a hard drive for both Mac and Windows can be daunting, especially if you’re doing it for the first time – disasters can still also happen even to tech-savvy users. This guide offers best practices that ensure that you can successfully use your Mac hard drive for Windows without losing your data in the process.


