
WD hard drive not showing up on your Mac? It’s more common than you think. Fortunately, it might just be an easy fix depending on what caused it.
Below, we quickly discuss the 4 possible reasons why your WD My Passport for Mac is not working. We also wrote a list of all the (free) fixes ordered by difficulty with step-by-step instructions and screenshots to guide you along the way.
Finally, we show you how to restore data from a newly formatted drive should formatting be the only way. Read on.
Table of Contents
Why WD My Passport Won’t Show Up on Mac
Diagnosing your drive will give you a better idea on how to avoid this problem in the future. There are 4 common reasons why WD My Passport is now showing up on your Mac:
| Reason | Description |
| 🖥️ macOS display settings | macOS lets users decide what devices they want to be displayed both in Finder and on the desktop. Maybe you changed these settings and you didn’t notice. We’ll show you how to change it back in the next section. |
| 🔌 Drive not mounting | macOS needs to mount your drive not only to be able to read and write data to it, but even just to recognize it. There are a bunch of plausible reasons why your WD My Passport for Mac is not recognized – in fact, fixing a non-mounting drive is easier than diagnosing it. We included all possible solutions in the next section. |
| ⚡ Corruption | Corruption can cause your drive not to mount properly or even initiate a connection with your Mac. Corruption can also be caused by many things: virus infections, improper ejection, buggy software, and more. |
| 🔨 Physical damage | WD My Passport drives are susceptible to heat damage, waterlogging, and scratches as a result of dust, debris, or dropping/bumping it. This can cause corruption and other logical damage that usually result in data loss. |
How to Fix WD My Passport That Isn’t Showing Up on Mac
Depending on why your Western Digital hard drive is not showing up on your Mac, there are multiple fixes we can try. We ordered this list by difficulty, so you can try them one by one.
Fix 1: Check Your Display Settings for External Drives
First, let’s make sure that your drive isn’t just hidden. macOS allows users to change what devices get displayed both on the desktop and in Finder. So if you’re expecting to see your drive in those places but it only appears in Disk Utility (Finder > Applications > Utilities), this may be the case. To unhide your drive from Finder and your desktop, do this:
While Finder is open, hit Finder > Preferences on the Apple menu bar. In the “General” tab, make sure “External disks” is selected.
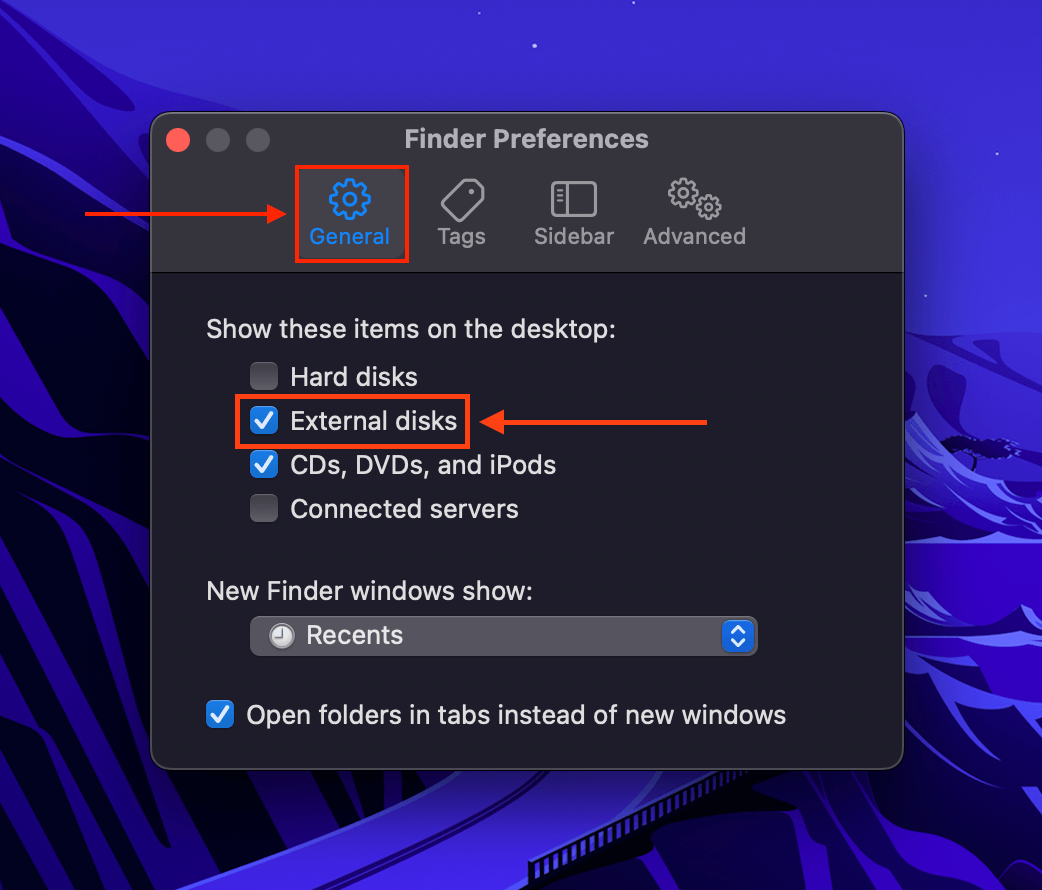
In the “Sidebar” tab under “Locations”, make sure “External disks” is selected.

Fix 2: Reboot Your Mac
Your Mac could have gotten stuck while refreshing itself in the process of mounting your drive. This is especially true if your WD My Passport for Mac is not showing up when you have a lot of apps open. This means macOS ran out of enough resources to mount your drive.
Reboot it and avoid opening too many apps while working with your drive.
Fix 3: Use Another Cable/Port/Mac
This may seem obvious, but try swapping cables and ports. Macs are notoriously vulnerable to dust and debris, so it’s not impossible that a dirty port is preventing your Mac from recognizing the WD My Passport. Cables are also easy to break but don’t always show damage on the outside. You can also try cleaning your equipment with a dry microfiber cloth.
If you already cleaned your ports and connectors and you’ve tried multiple cables, connect your WD My Passport to another Mac.
Fix 4: Use Disk Utility’s First Aid Tool
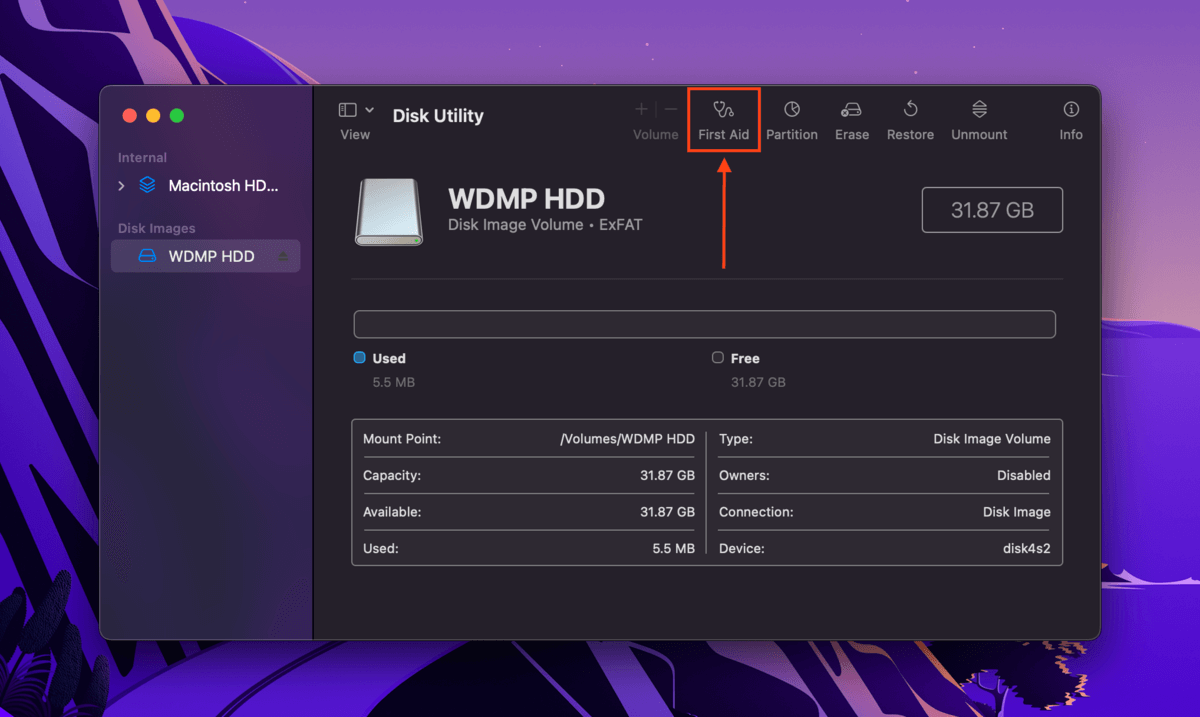
Even if your WD My Passport is not showing up on your desktop or in Finder, it may show up in Disk Utility. Disk Utility’s First Aid tool automatically scans for and repairs file system errors, and has helped many users fix their corruption problem.
Launch Disk Utility (Finder > Applications > Utilities), select your drive, and click “First Aid.”
Fix 5: Reset Your Mac’s NVRAM (For Intel-based Macs)
NVRAM (nonvolative random-access memory) stores data about device connections. This includes startup disks and external disks. Resetting NVRAM will let your Mac redo its connection with your hard drive with a fresh memory.
To reset your Mac’s NVRAM, turn off your device. Then power it up and immediately hold the following keys: (CMD + Option + P + R). On older Macs, let go once you hear the second chime. For T2 Macs, let go once you see the logo appear the second time.
Fix 6: Format Your WD My Passport Drive
If none of the above fixes work, your last resort is to format your drive. This process will fix 2 issues: (1) if you’re using an incompatible file system, you can reformat your WD drive and use one that is compatible (such as ExFat, FAT32, or NTFS). (2) Severe corruption, errors, and viruses that were not addressed by other repair methods will all be wiped at once.
To format your WD My Passport drive:
Step 1. Launch Disk Utility (Finder > Applications > Utilities). Then, select your drive and click “Erase.”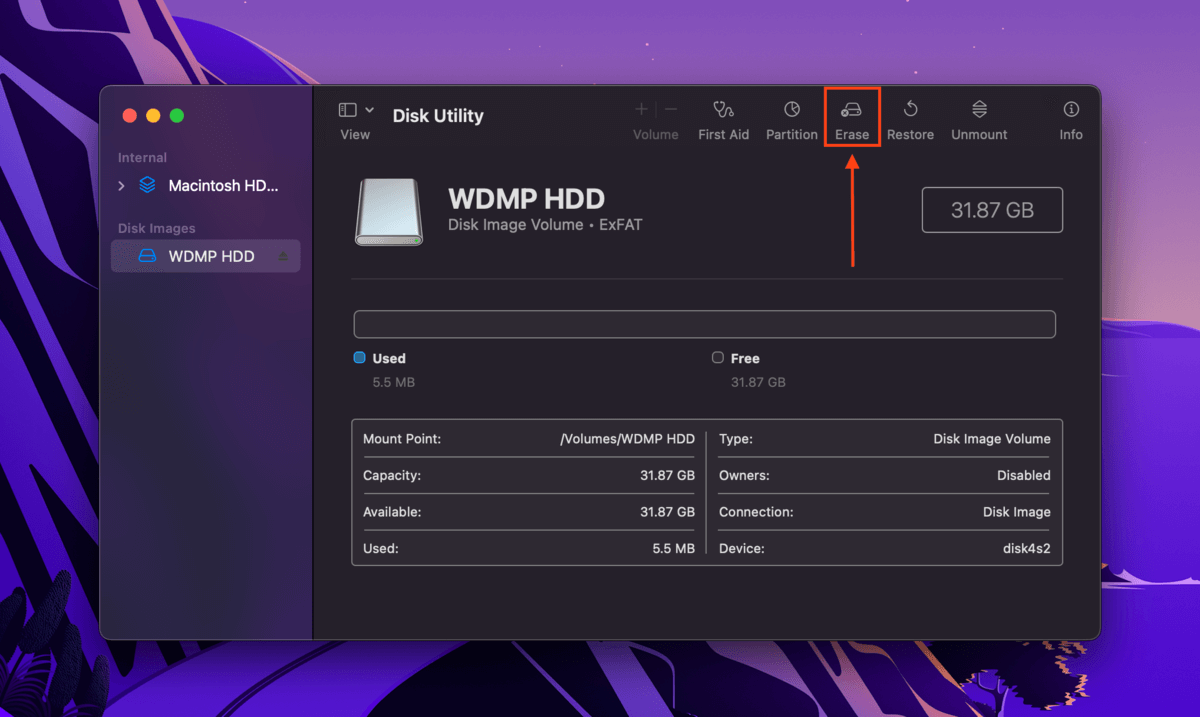
Step 2. Name your drive and select its new Format (we suggest ExFAT maximum compatibility).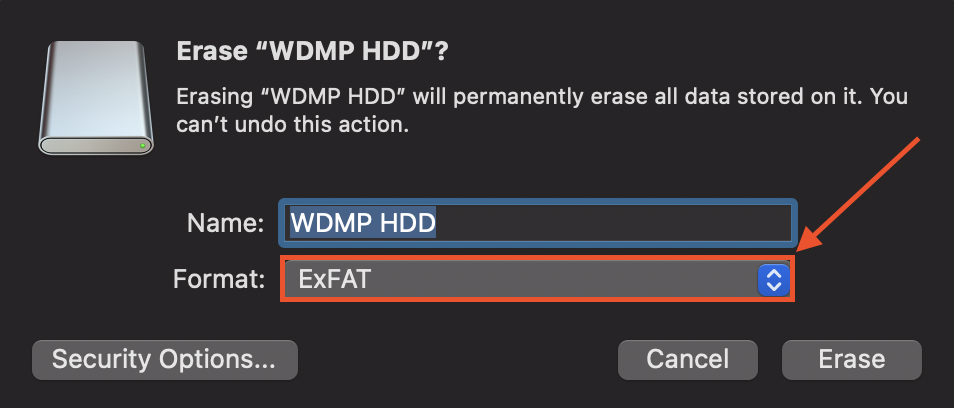
How to Recover Data from WD Drive that Isn’t Showing Up
If you ended up having to format your drive, you’ll notice that it’s empty – after all, wiping the data on your drive is part of the process. Fortunately, we can restore data from formatted drives using data recovery software.
For this article, we’ll be using Disk Drill. Like Disk Utility, Disk Drill can usually detect a drive even if it doesn’t show up in Finder. We use Disk Drill a lot for Macgasm articles because of its excellent recovery rate and beginner-friendly GUI (graphical user interface), making it the perfect demo software for our readers. Here’s how to use it:
Step 1. Download and install Disk Drill.
Step 2. Open Finder > Applications, and double-click the Disk Drill icon.
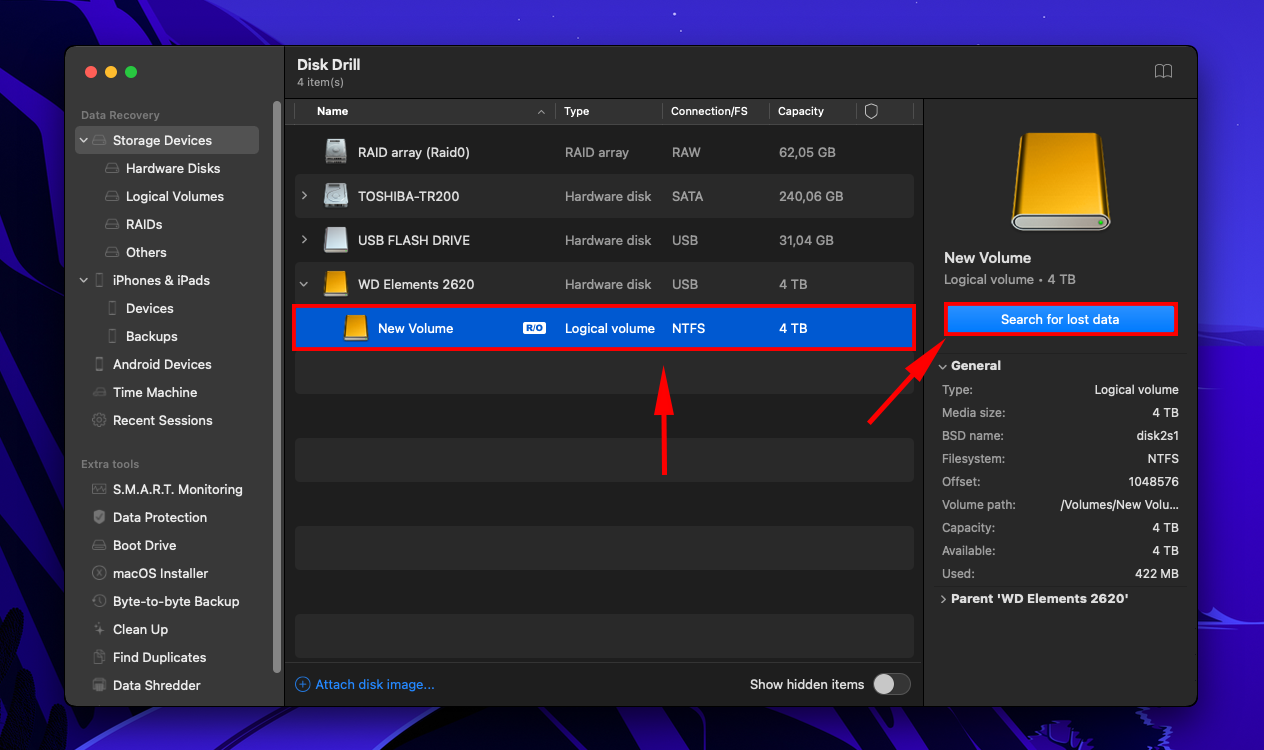
Step 3. Select your WD drive and click “Search for lost data.”
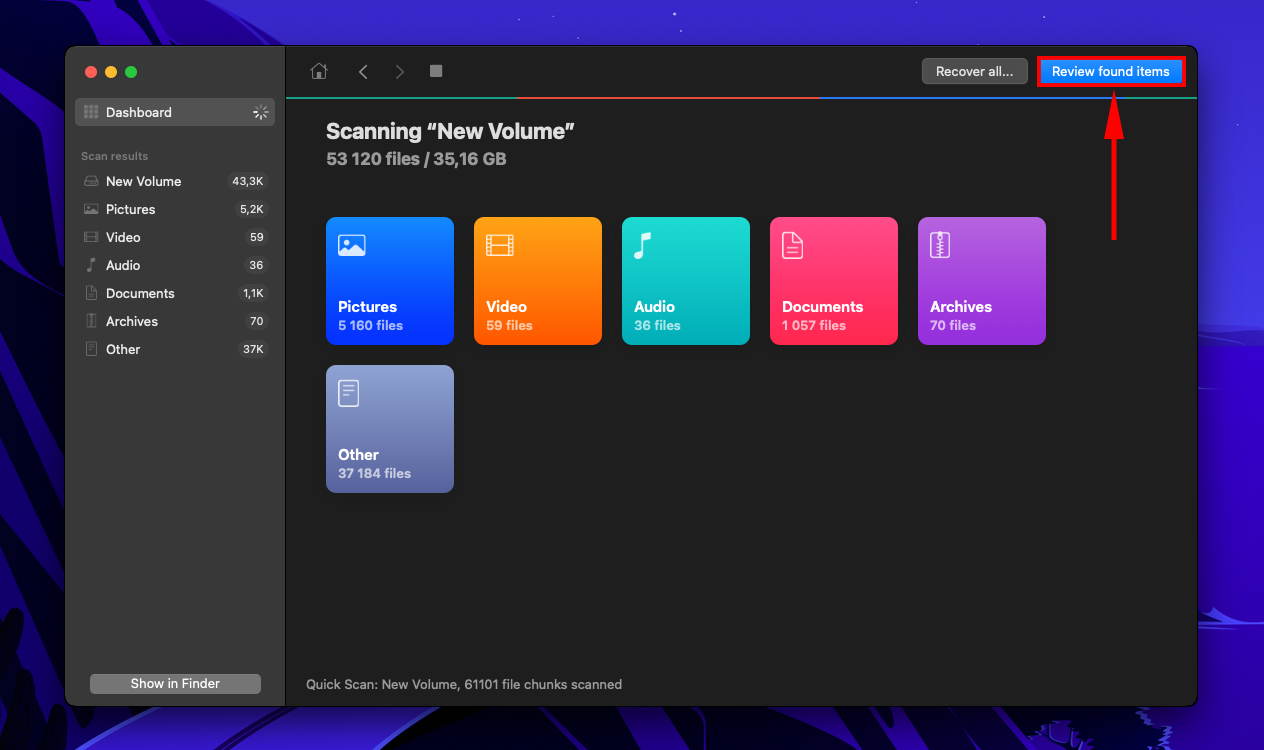
Step 4. Once Disk Drill is done scanning your drive, click the “Review found items” button.
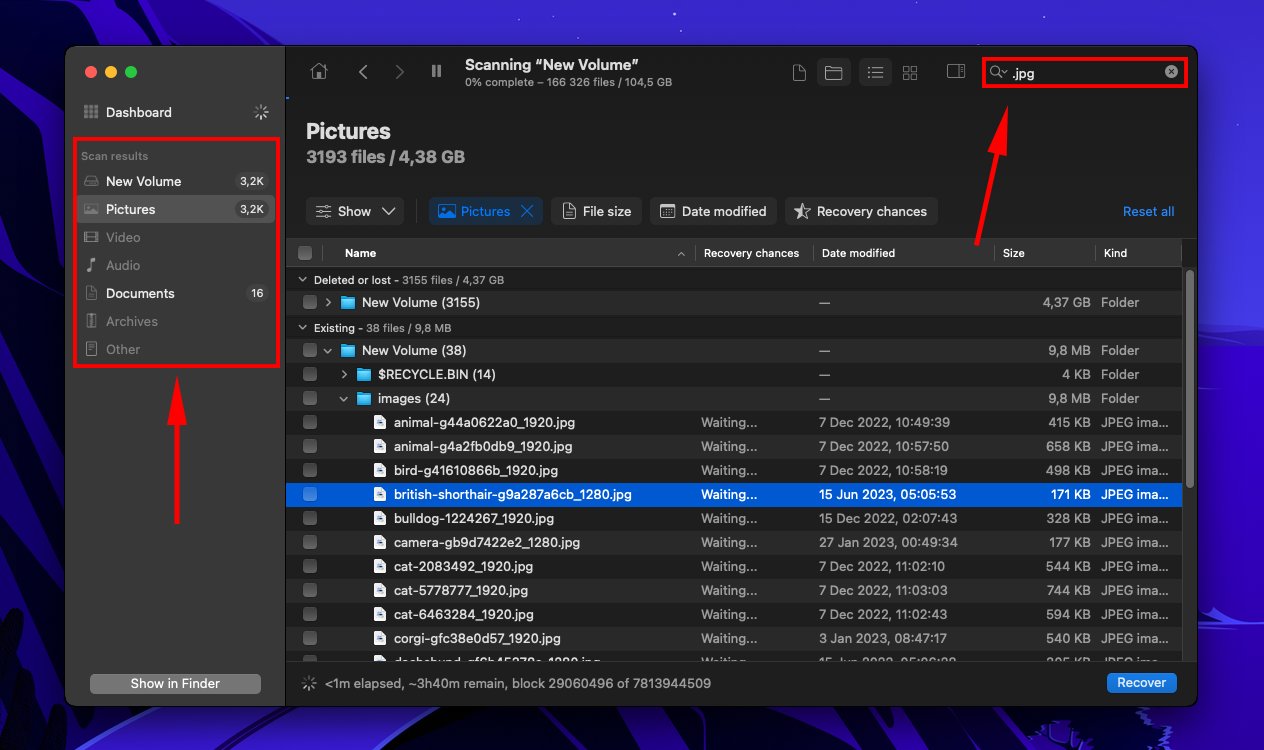
Step 5. Find the files you need faster by using the filters in the left sidebar or typing file names or extensions in the search bar.
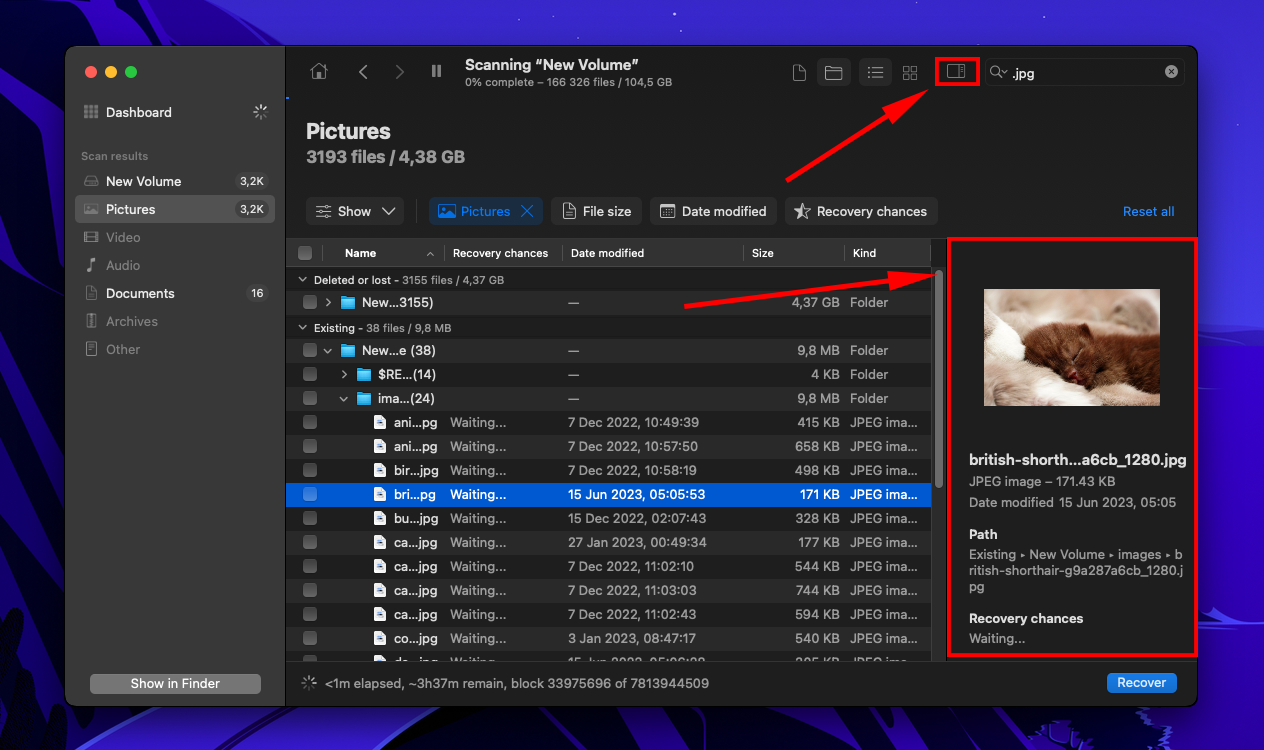
Step 6. You can also preview your files. Hover your mouse pointer to the right of any file name and click the eye button to open a separate preview window. Or, if you prefer, you can enable preview panel by clicking icon on top of the window.
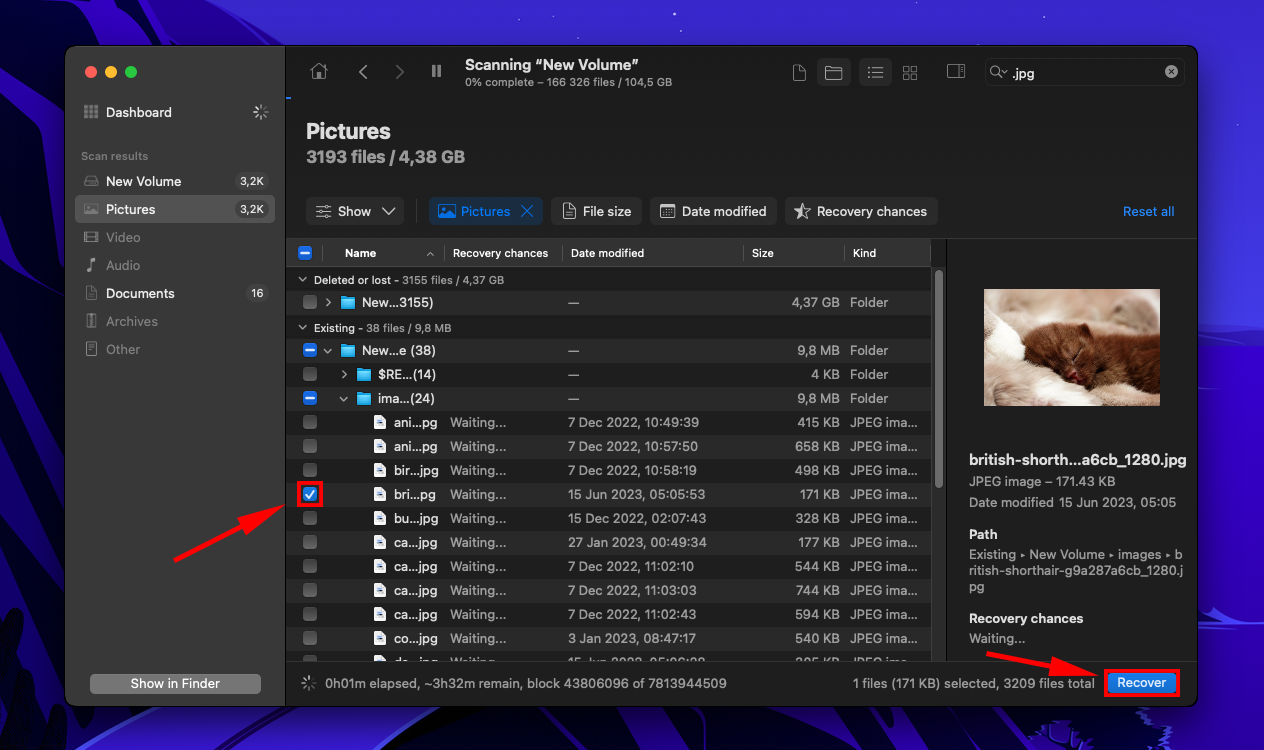
Step 7. Tick the boxes beside the files you want to restore, then click “Recover.” You can also leave all the items blank and click “Recover All.”
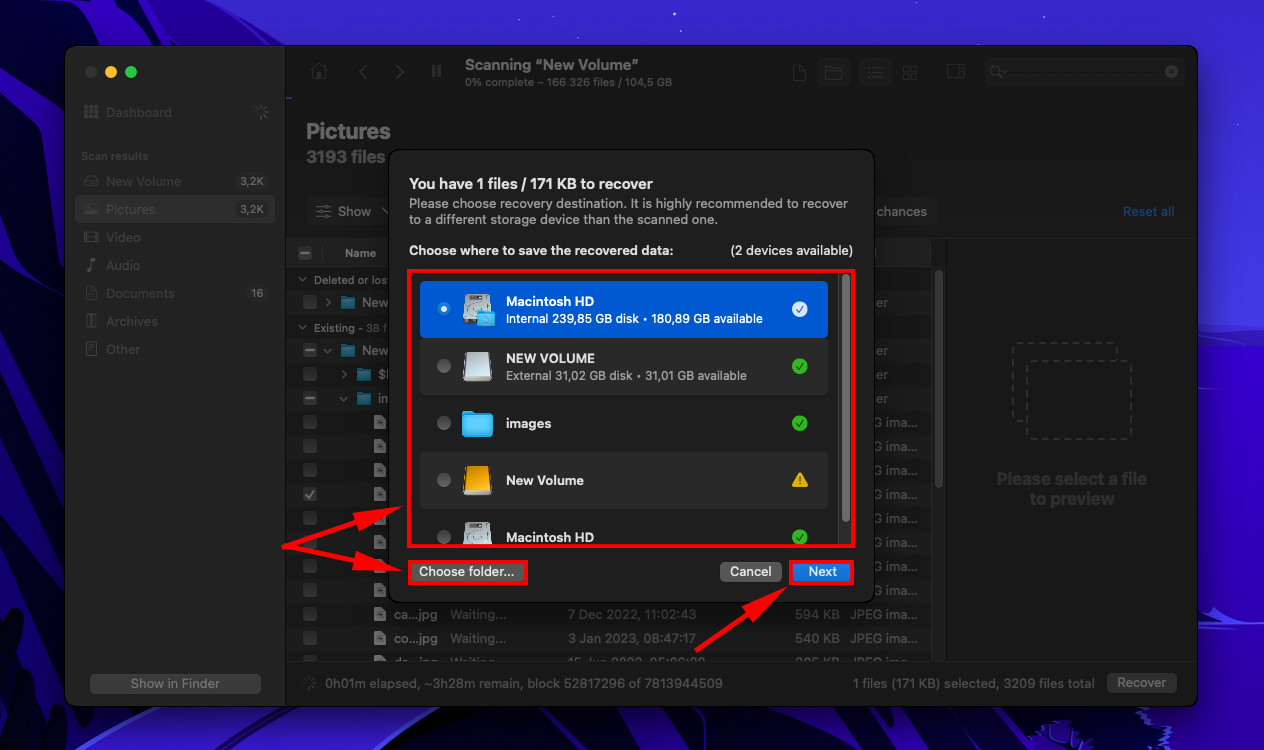
Step 8. Select a folder on your computer where Disk Drill will save the recovered files. Then, click “Next.”
Keep Your WD My Passport Drive Healthy
It’s inevitable to have problems with any storage device once in a while – but you can build some good habits around your drives to prolong their lifespan.
Here are a few best practices to keep in mind:
- Handle your drive with care. Hard drives are especially prone to corruption and damage due to their spinning disk. Light bumps or drops (especially when the device is in use) can already scratch the disk, causing issues.
- Always safely remove the drive. Disconnecting your drive without properly ejecting it can result in corruption and damage over time (as you are interrupting its read and write processes).
- Avoid overheating. Too much heat can warp and damage the drive’s mechanical components.
- Regularly back up your data. Keep an updated copy of your data so you can regularly format and defragment your drive to keep it running optimally. And storage devices are consumable, so they will fail eventually.
- Keep your drive clean and dust-free. Dust and debris can cause micro-scratches on a drive’s sensitive mechanical parts. This is enough to cause corruption or damage.
Conclusion
There is a wide range of possibilities that can cause your WD My Passport to not show up on your Mac. It may be a hardware issue, a change of settings, or severe corruption or damage. Fortunately, there are fixes for most of them – just note that you may wipe your data in the process, so make sure you’ve secured your files before proceeding.
In fact, we strongly encourage you to regularly back up your files in the future (using Time Machine or some other backup software) so you’re free to repair your drive whenever this or any problem happens again. And make sure to keep your drive safe, clean, and far away from the sun or water!
FAQ
- Connect your WD Passport to your Mac, then launch Disk Utility (Finder > Applications > Disk Utility).
- Select your drive from the left sidebar, then click “Erase.”
- For Scheme, choose “GUID.” For Format, choose “ExFAT.” Name your drive, then click “Erase.” If you are setting it up to be an internal drive, choose HFS+ or Mac OS Extended (Journaled) for its format.
Remember that formatting your drive will wipe the data.
- With Finder open, click “Finder” in the Apple menu bar > Preferences
- Make sure “External disks” is selected in both the General tab and the Sidebar tab.
Yes, the WD (Western Digital) Passport is compatible with macOS right out of the box. However, it needs to have a Mac-compatible file system installed (such as HFS+ or APFS) in order for you to use it.


