
SD card not showing up on your Mac? If you’ve got important files stored on it, like photos and videos, you may be at risk of losing them – so keep reading. Because of their form factor and the nature of their usage, SD cards are prone to all sorts of problems that may lead to inaccessibility.
Fortunately, most issues are fixable by yourself with the right tools and knowledge. You also have a window of opportunity to restore your SD card data before it’s permanently lost. In this article, we’ll show you how to fix an SD card that is not showing up on Mac and how to restore its lost data before it’s too late. Read on!
Table of Contents
How to Find an SD Card on Mac
When everything is working properly, your Mac will recognize the SD card when you plug it in via the memory card slot. As soon as your Mac reads the SD card, it will show up in the following locations:
- Finder. You will find your connected SD card and any other external storage devices in the left sidebar in Finder under Locations (or Devices, if using an older macOS). Click on the SD card’s name to access its contents.
- Desktop. When enabled in Preferences, your SD card will appear on your desktop as soon as macOS mounts it. If you think you may have somehow disabled this option, read this section of the article to re-enable it.
- Disk Utility. Disk Utility can show all connected disks, even those that are not yet mounted and allocated. If you can’t find your SD card in Finder or Desktop, it should show up in Disk Utility. You can find Disk Utility in the Finder > Applications > Utilities folder.
If you can’t find your SD card in the locations we mentioned above (especially Disk Utility), it’s likely that your Mac didn’t recognize or even detect the memory card at all. A bug or error may be blocking the connection and preventing your Mac from communicating with the device. In the next section, we’ll cover common SD card issues that lead to this scenario.
Why is My Mac Not Reading an SD Card?
It’s a good idea to try and diagnose your SD card’s problem, so you can identify the best solution – we listed those in the next section. Below are the most common reasons why your Mac won’t recognize your SD card.
- Faulty SD card reader. Your Mac is not reading the SD card due to a faulty card reader or port. Try another card reader in another port.
- Corrupted SD card. Virus attacks, sudden power outages, improper ejection, any read/write interruptions can cause your SD card to get corrupted.
- Mac settings. Certain settings on your Mac may have turned off the display of external disks.
- Outdated drivers. You may be using outdated drivers, which is why your MacBook doesn’t recognize the SD card.
- Incompatible file system. macOS supports the following file systems: HFS/HFS+, APFS, FAT32, NTFS (read only). SD cards formatted with another file system may not show up in Finder.
- Problematic macOS update. If your SD card won’t show up after a recent update, it may be a bug.
How to Fix MacBook Not Reading SD Card Problem
This section covers all the fixes that users can try on their own. But first, visually scan your SD card and your MacBook’s ports to check if there’s no physical damage. Interacting with a physically damaged storage device may worsen the problem and result in further data loss. If you’re sure nothing’s broken or heat-damaged, proceed with the following methods:
Method #1: Clean the connectors
If you tend to use your MacBook in areas with a lot of dust (for example, if you live near a construction site), your device can accumulate dust in its ports. This prevents your SD card from being fully inserted into your mac, making connection inadequate. The same thing can happen to your USB card reader’s cable head. Use a soft, lint-free cloth and a toothpick or barbeque stick to push the cloth to get the corners.
Method #2: Try another SD card reader or Mac
If your ports were damaged (or your card reader is faulty), try another computer or card reader. If a different Mac recognizes your SD card, then your Mac is likely the problem.
Method #3: Force Quit Finder
In some cases, Finder may have frozen or malfunctioned, preventing your SD card from showing up in the sidebar. These are usually caused by a lack of resources (RAM) or triggered by temporary software glitches. In this situation, you can force quit Finder and see if your SD card shows up when it restarts (it restarts automatically).
To force quit Finder, hit the Option + Command + Escape keys simultaneously. Then, select Finder and click Relaunch.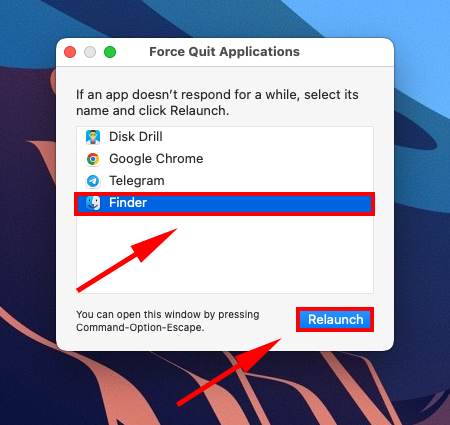
Method #4: Restart your Mac
Your MacBook may have been interrupted while it tries to refresh itself, which might be why Finder isn’t reflecting your SD card. Restart your Mac to get it unstuck. It doesn’t really matter if card is inserted or not during this process, but many users find removing card before rebooting to be more reassuring
Method #5: Check the settings of external disks displaying
To make sure external disks show up on your Mac (specifically, in Finder and on your Desktop), do the following:
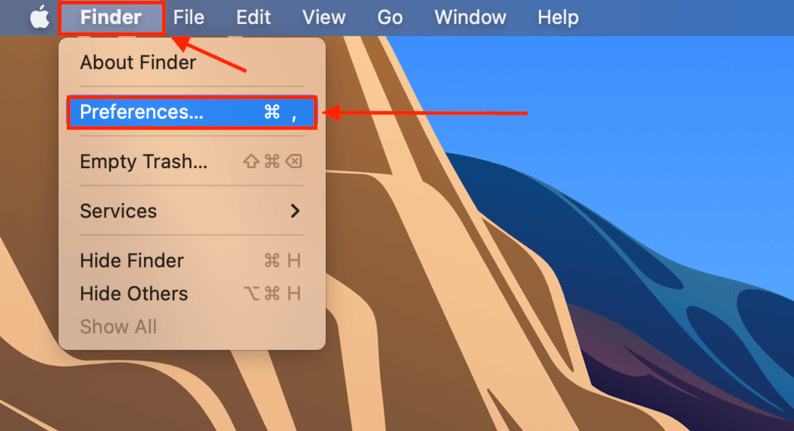
Step 1. Open Finder. Then, on the Apple menu bar, click Finder > Preferences.
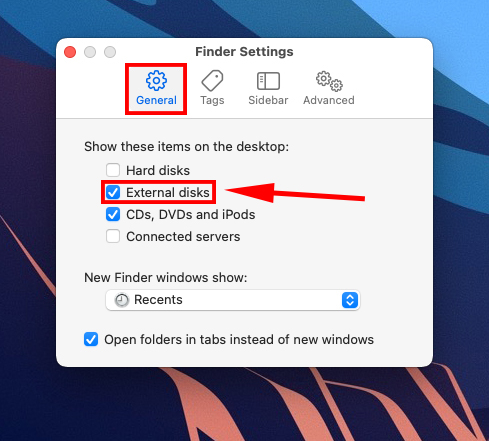
Step 2. Go to the General tab, and tick the checkbox beside “External disks.”
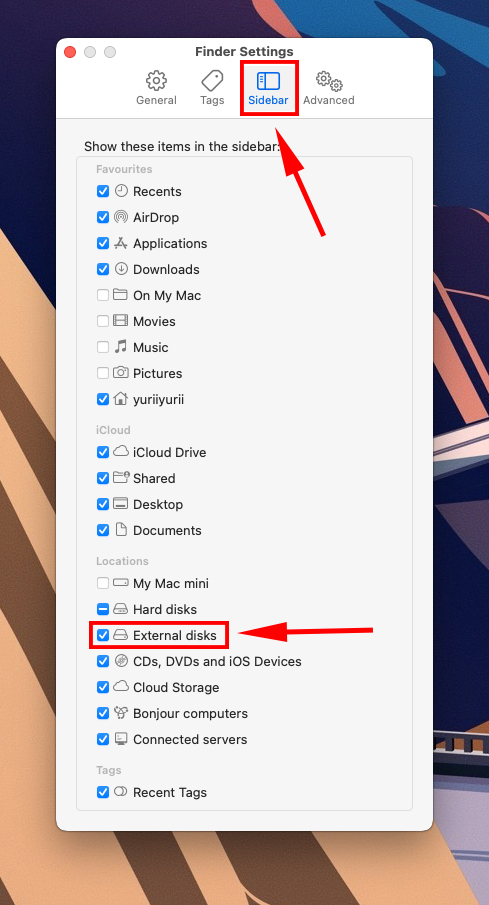
Step 3. Next, go to the Sidebar tab and tick the checkbox beside “External disks” under the “Locations” section.
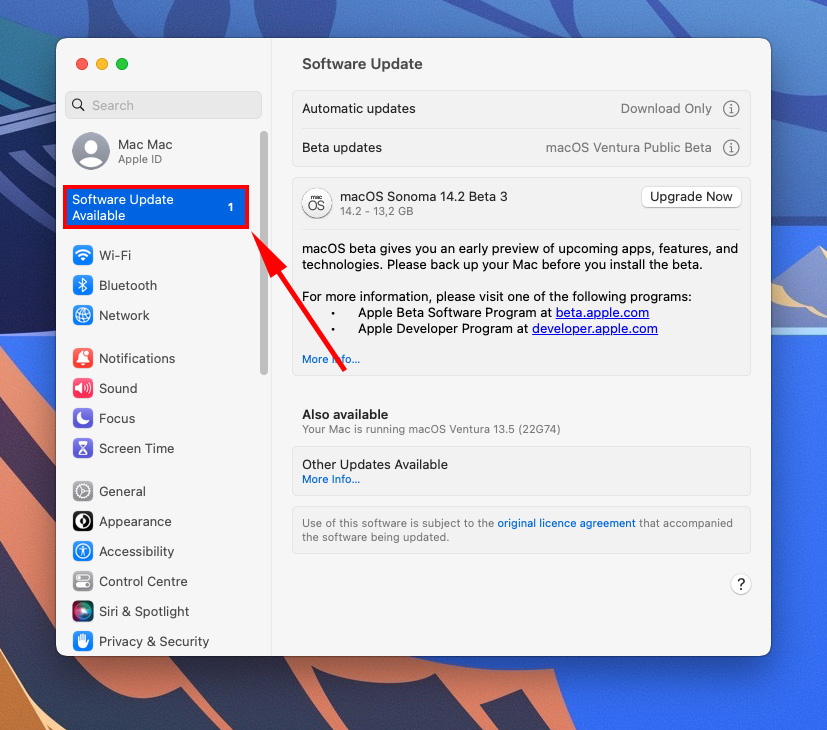
Method #6: Update the drivers
If you haven’t recently updated and your Mac is not recognizing your SD card, you may be using outdated drivers. You’ll have to update macOS. Open System Preferences > Software Update to begin the process.
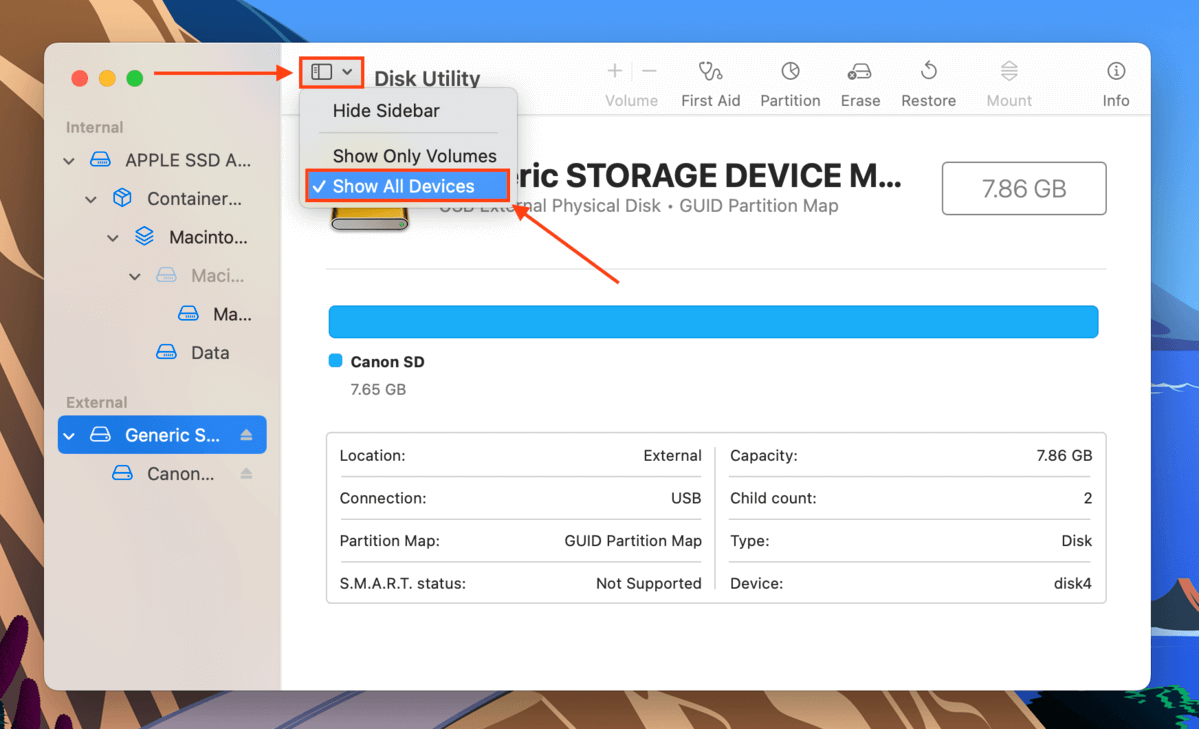
Method #7: Show All Devices in Disk Utility
Your SD card may only be hidden from the list of devices in Disk Utility, as it’s possible to alter the settings to only display volumes. To display the drives themselves, connect your SD card to your Mac and launch Disk Utility (Finder > Applications > Utilities). Then, click the View button > Show All Devices.
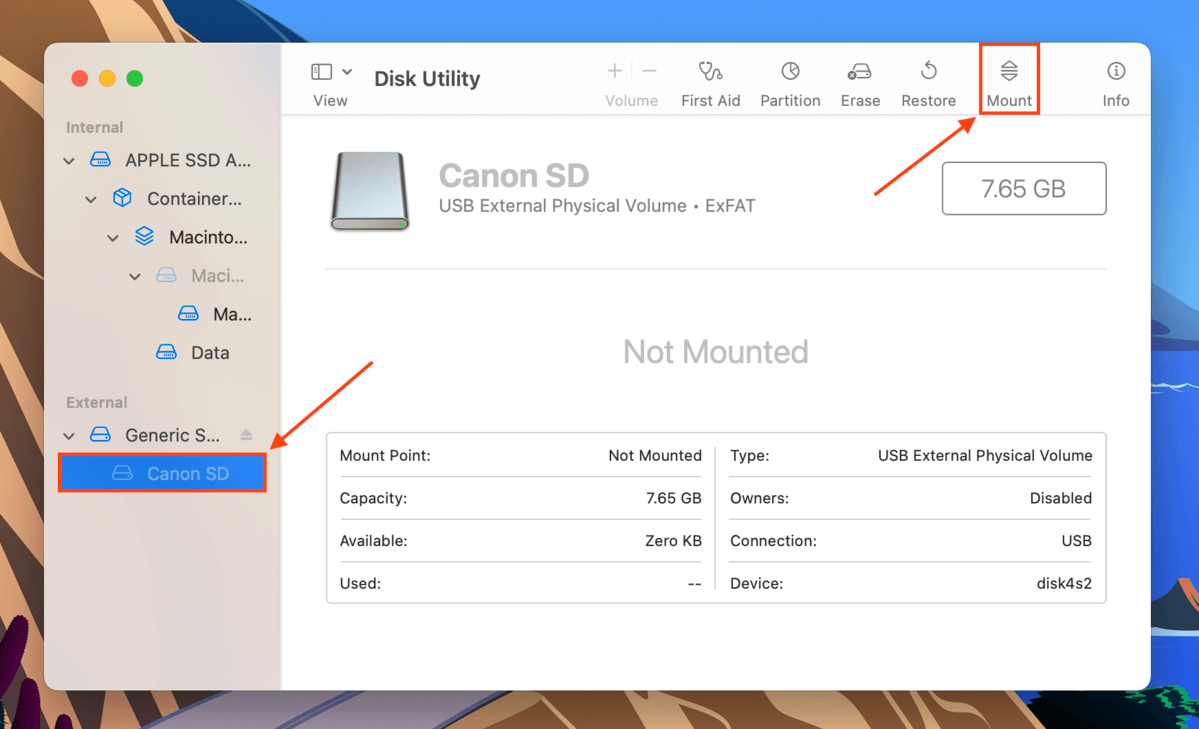
Method #8: Mount SD Card in Disk Utility
If your SD card appears in Disk Utility but its name is greyed out, it’s not mounting. This prevents your SD card from showing up on your desktop or in Finder. Fortunately, Disk Utility also has a mount tool. To mount your SD card using Disk Utility, connect your SD card to your Mac and launch the Disk Utility app (Finder > Applications > Utilities).
Then, select your SD card from the left sidebar and click the Mount button at the top of the window.
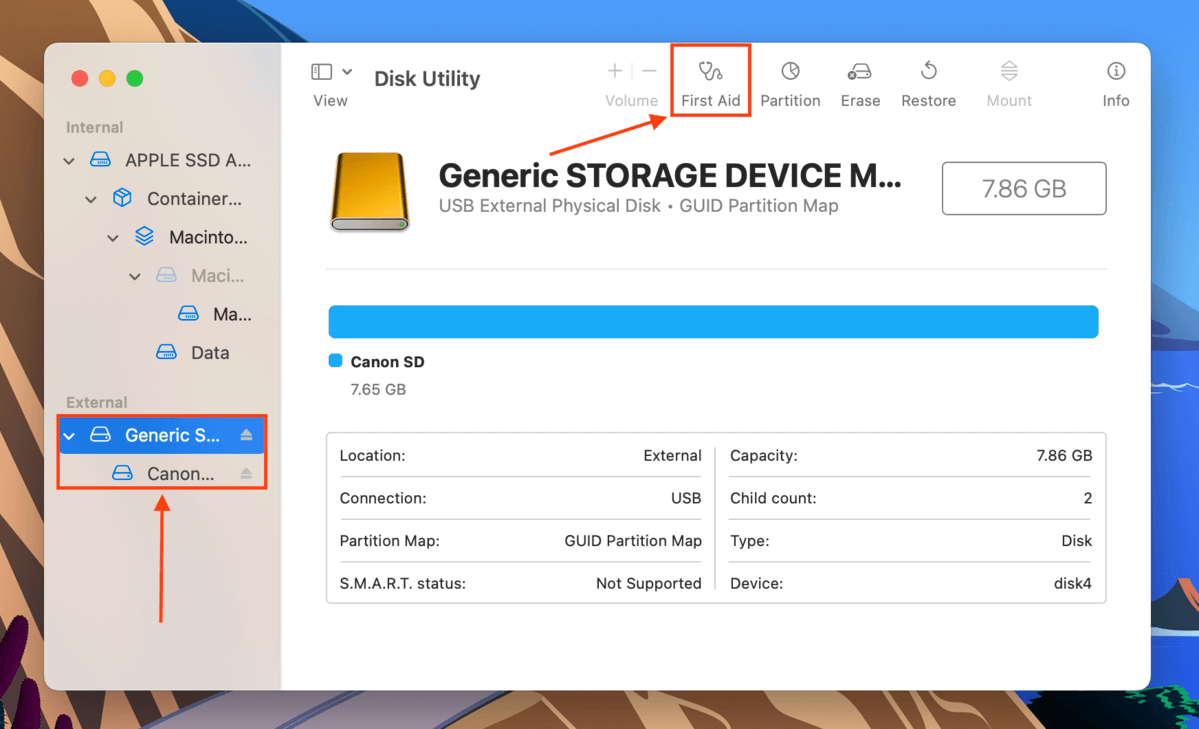
Method #9: First Aid in Disk Utility
First Aid is a built-in repair tool in Disk Utility that scans and fixes corrupted drives. When your SD card is not mounting due to corruption, there’s a good chance First Aid will work. To use First Aid, connect your SD card to your Mac and launch Disk Utility (Finder > Applications > Utilities). Select your SD card from the left sidebar and click First Aid at the top of the window.
Method #10: Reset NVRAM/PRAM
NVRAM/PRAM are memory chips that store basic system information even when your Mac is turned off. When you reset it, it performs a system refresh that could fix a misbehaving Mac. Except for some peripheral settings that will be changed back to default, there should be no risk of data loss. To reset the NVRAM/PRAM:
Step 1.Shut down your Mac. Then, turn it on again.
Step 2.As soon as you turn it on, immediately press and hold the following keys: Option + Command + P + R.
Step 3.When you hear the startup chime for the second time, release the keys. Your Mac will operate as usual in its default settings. Try to mount the SD card normally to check if it works.
Method #11: Format SD card
If none of the methods worked, your SD card may have been severely logically damaged that only a format can fix it. However, performing a format will delete all your files – so make sure to secure your data first. Once your data has been secured, we can use Disk Utility to format your SD card.
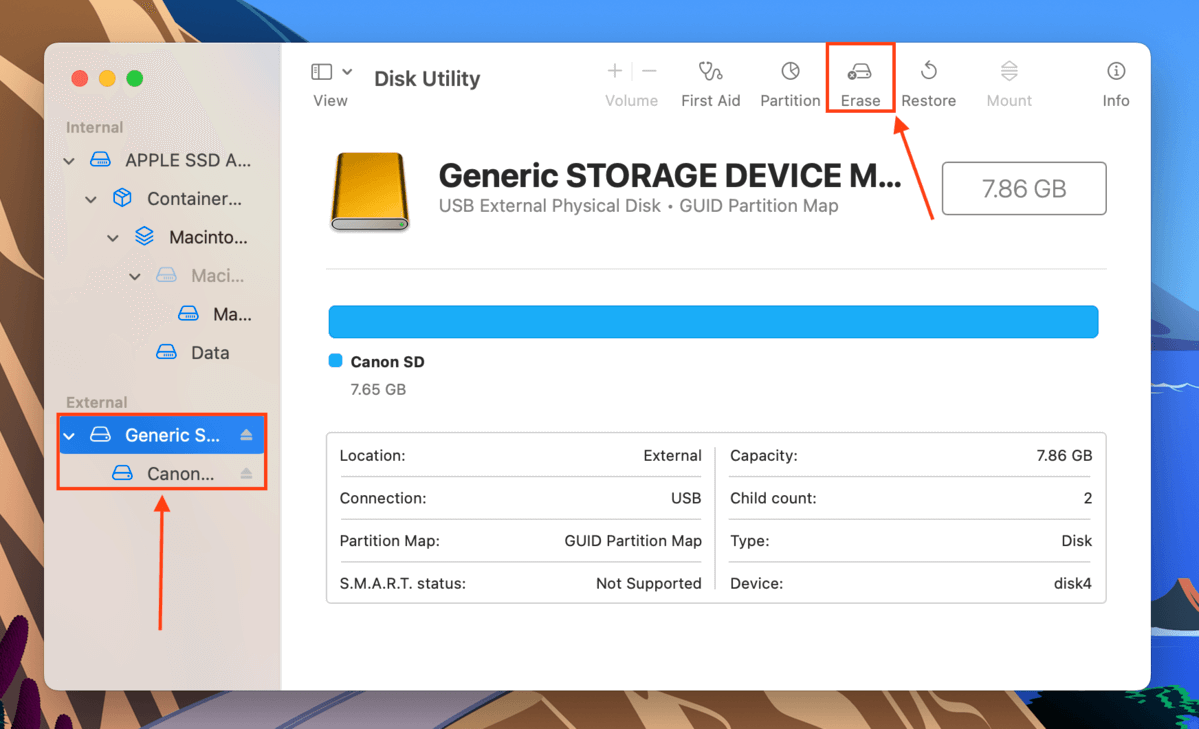
To format your SD card with Disk Utility, connect your memory card to your Mac via your card reader and launch Disk Utility (Finder > Applications > Utilities). Then, select your SD card in the left sidebar and click the Erase button at the top of the window.
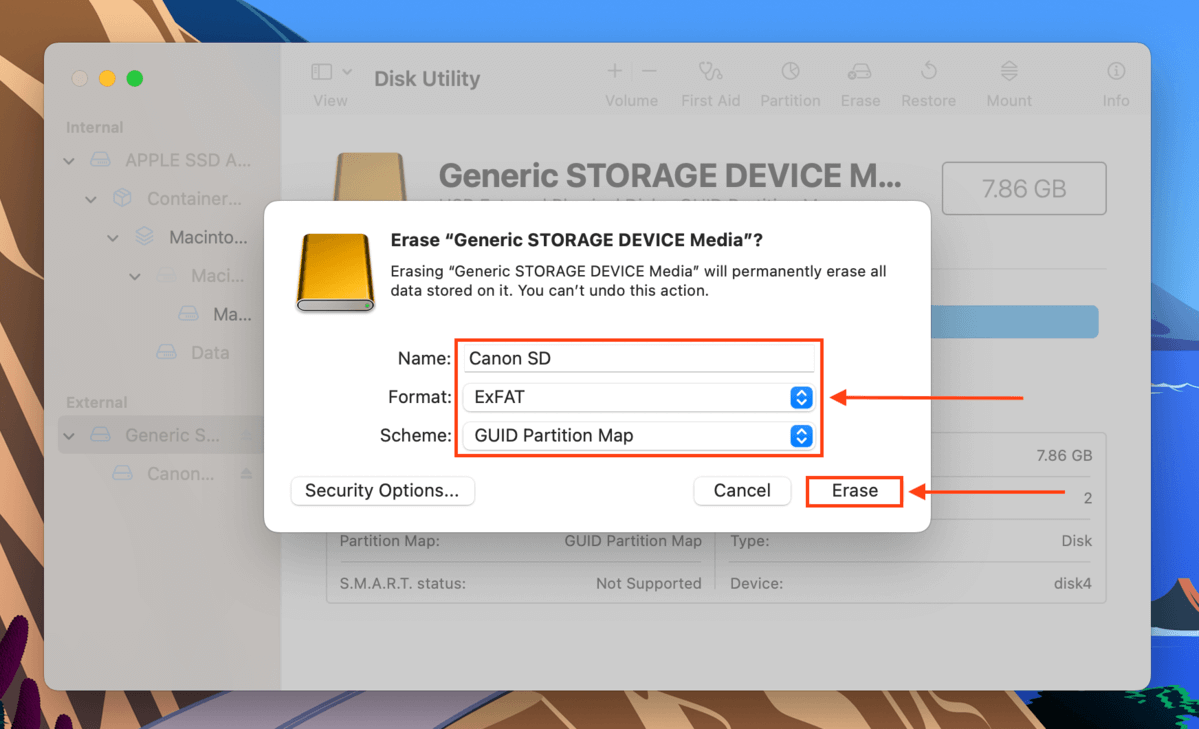
In the dialogue box that appears, name your SD card, select ExFAT as its format, and choose GUID Partition Map as its scheme. Then, click Erase to proceed.
How to Recover Disappeared Files From an SD Card
Once you’ve regained access to your SD card, you’ll possibly find that your data has gone missing. This may have to do with the issues that caused your SD card to malfunction in the first place (such as corruption). To restore your files, you need to use a tool called data recovery software – it’s an app that can extract and reconstruct lost or corrupted data directly from a storage device’s file system.
For this article, we’ll be using Disk Drill. It’s a well-known data recovery app with a user-friendly interface and powerful recovery capabilities. We chose for this guide because it supports most well-known brands (like SanDisk, Transcend, and Sony), as well as lesser-known names (like Johnziny, xD-Picture, and EgoDisk).
Disk Drill also has one of the biggest file signature databases among its competition; it supports many RAW file types, which is perfect if you use your SD card with DSLRs and other high-tech cameras that use extensions like CR2 or NEF. We’ll demonstrate how to use it in the guide below:
Step 1. Using a card reader, connect your SD card to your Mac.
Step 2. Download and install Disk Drill.
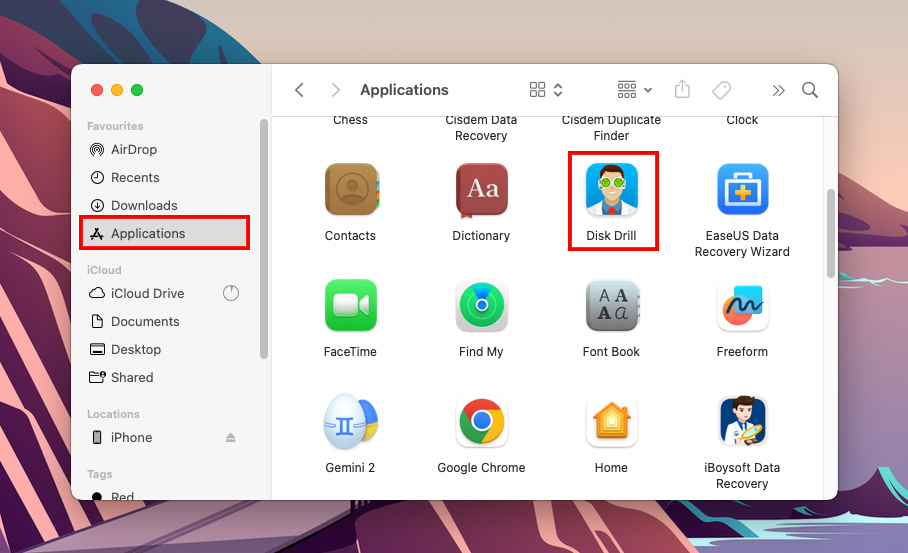
Step 3. Open Disk Drill by launching Finder > Applications > Disk Drill.
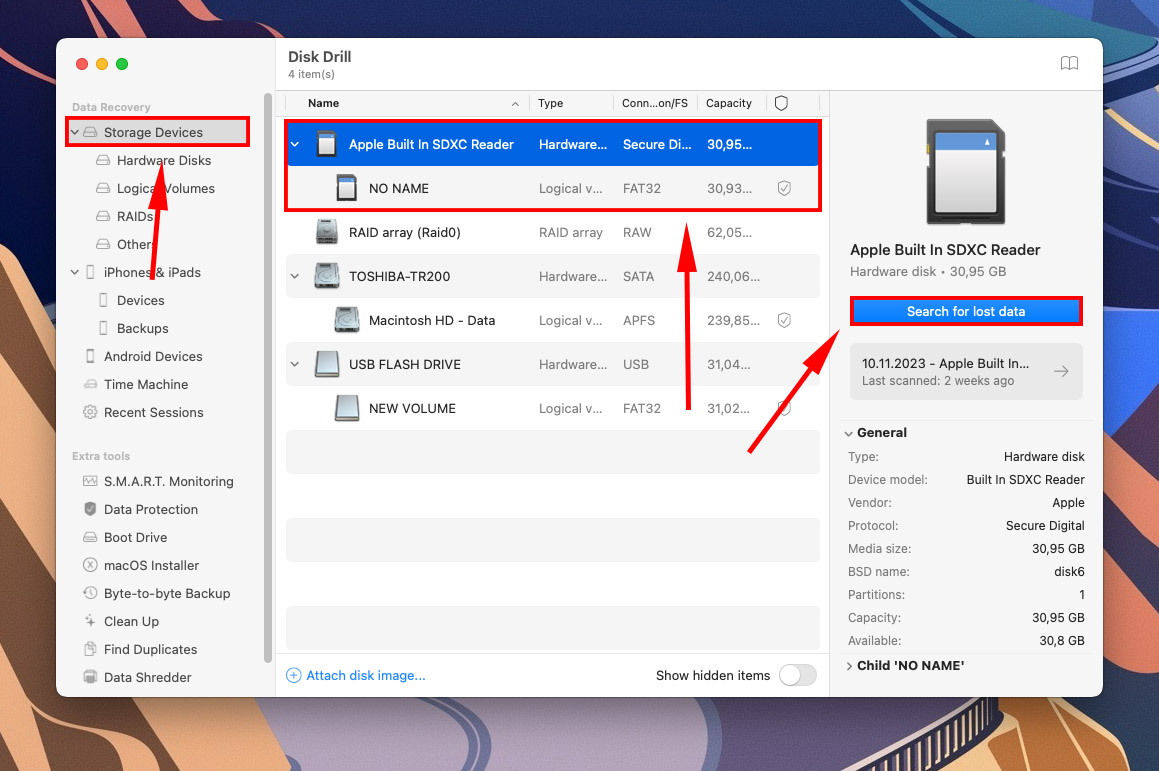
Step 4. From the list, select your SD card (it may appear as “Generic Flash Drive” depending on the card reader), and click “Search for lost data.”
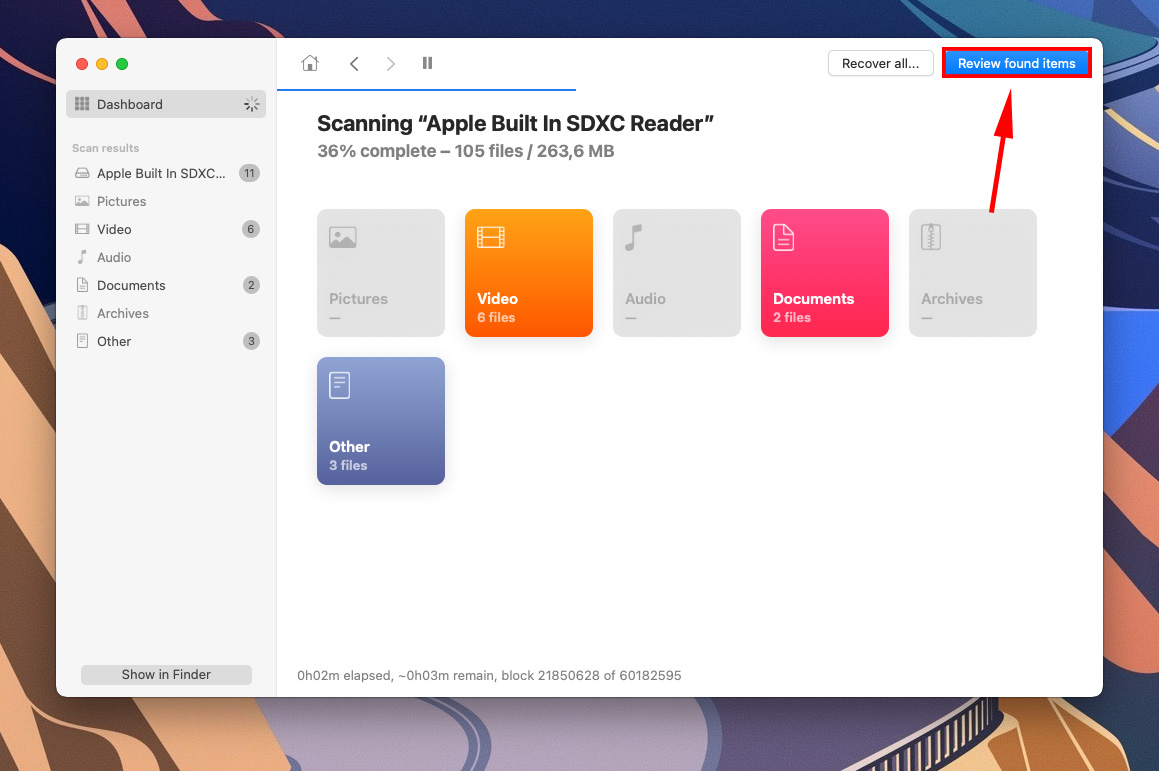
Step 5. Disk Drill will now scan your SD card. Once it’s done, click “Review found items.”
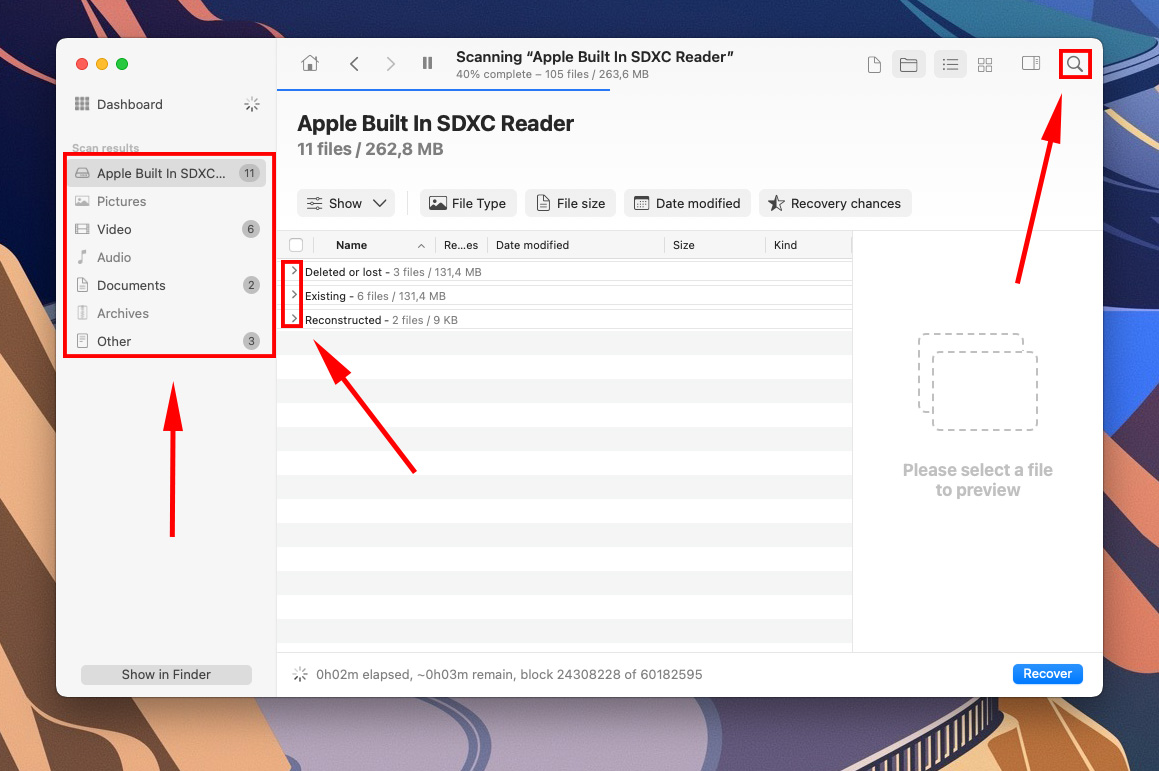
Step 6. Browse the results for your lost files. You can use the search bar or the navigational sidebar to narrow down your search. Click the toggle buttons to expand the file list.
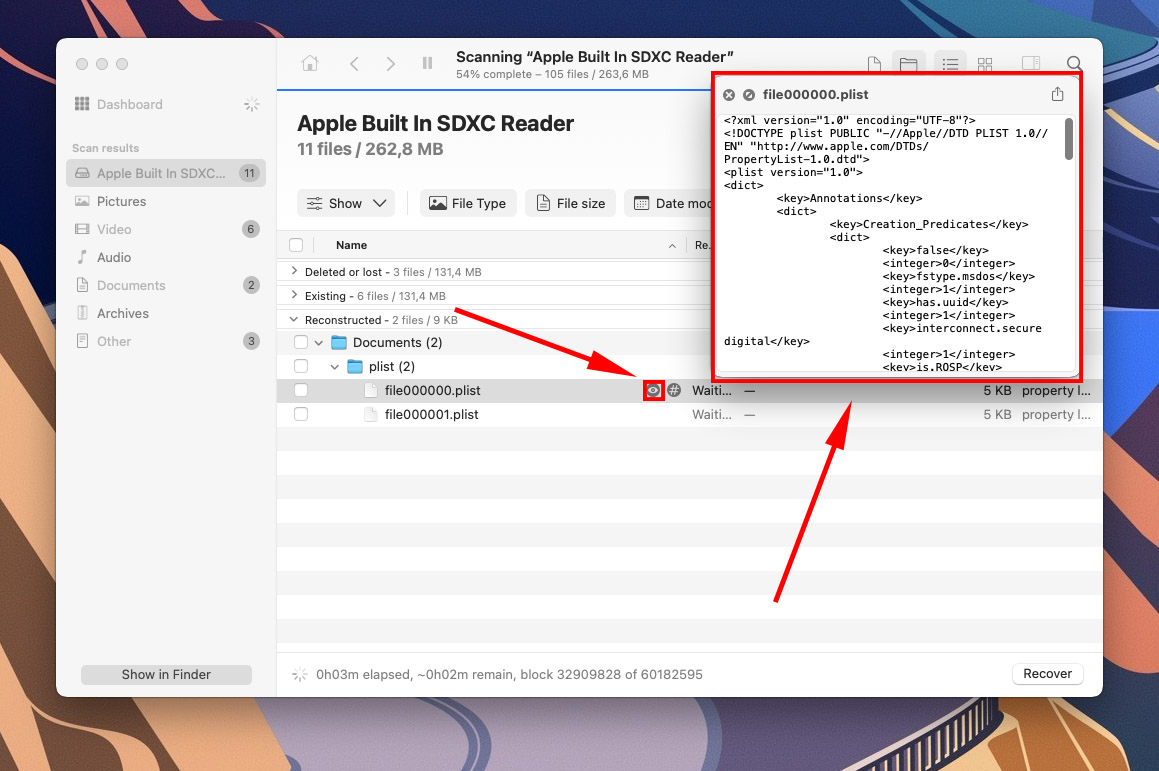
Step 7. On this screen, you can preview the files Disk Drill found by hovering your pointer beside their filenames and clicking the eye button that pops up. This will open a preview window displaying your file.
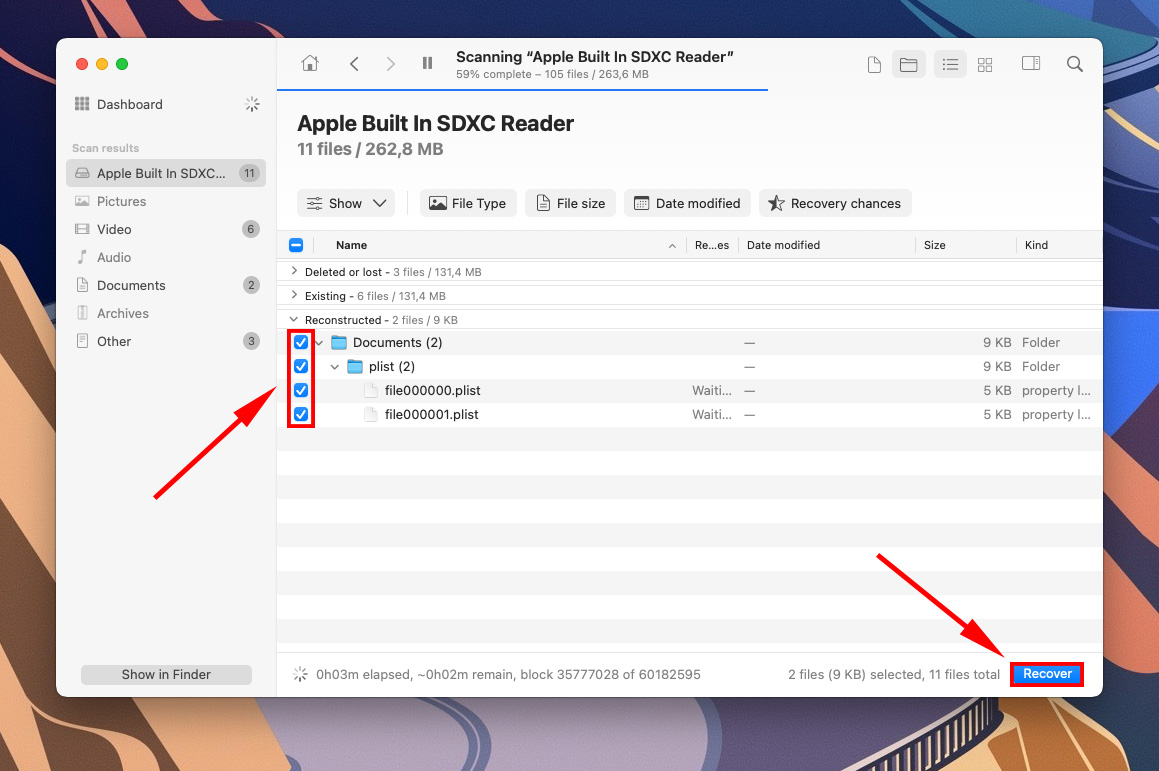
Step 8. Select the files you want to recover by ticking the checkboxes to the left of their file names. Then, click “Recover.”
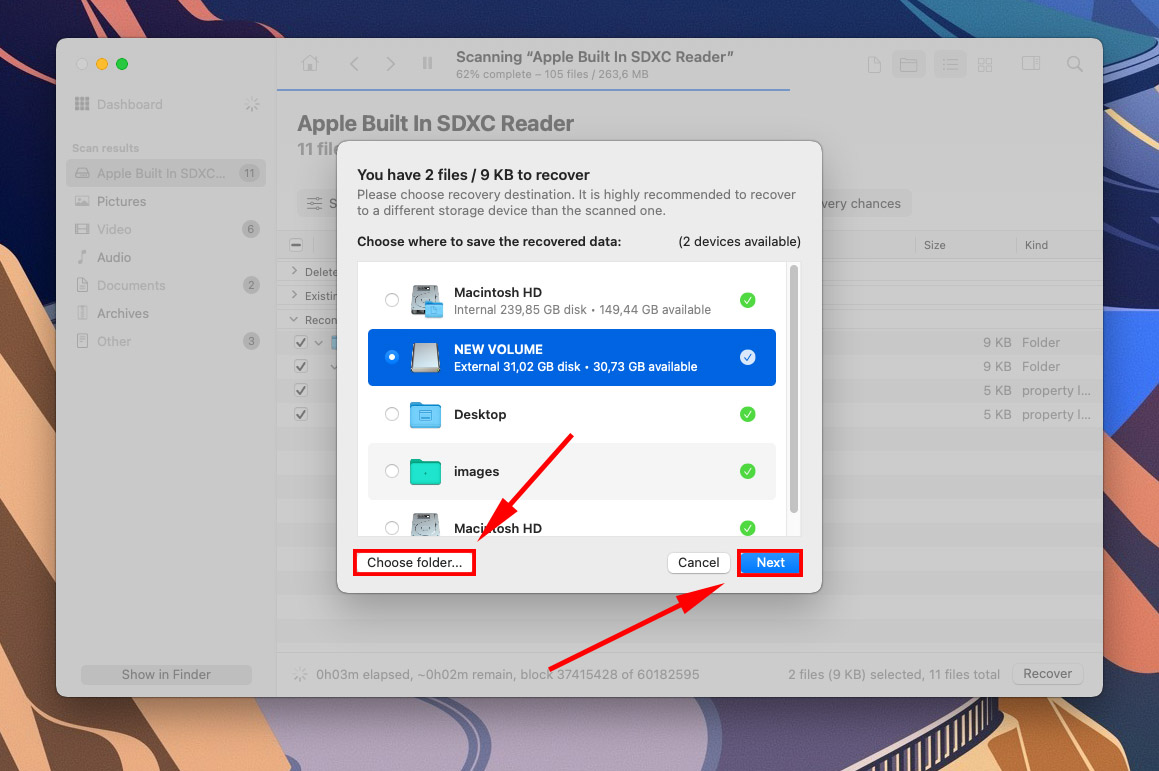
Step 9. Select a location on your Mac where you want Disk Drill to save your recovered files. Do not save them to your SD card, or you might end up overwriting your data.
Conclusion
While many modern SD cards are built to endure a lot of punishment, no storage device is immune to physical damage and less so to logical damage, like software errors and corruption. Fortunately, almost all issues (except physical damage) are fixable by the user with the right tools and knowledge. Even if you lose your data, you still have a chance to get it back.However, all storage devices have a finite lifespan. They suffer wear and tear over time and won’t perform as reliably as they used to – especially if they often get errors. Eventually, you may encounter permanent data loss. With this in mind, we highly encourage you to routinely back up your memory card, especially after saving important files (like precious photos and videos).
FAQ
- Restart your Mac in case it got interrupted while refreshing itself.
- Update macOS to update your drives.
- Enable “External disks” in the Finder Preferences > General and Sidebar tabs.
- Clean your ports.
- Try connecting another SD card or connect your SD card to another Mac.
We recommend using another card reader or Mac to check whether your SD card is really the problem. If your SD card is the problem, you can use the tools in Disk Utility (Mount, First Aid, and Erase) to fix it. Note that the Erase function will wipe your data. If the problem lies with your Mac, you can try resetting the NVRAM/PRAM. You can also enable External Disks in Finder > right-click your SD card > Get Info, or simply try rebooting your Mac.


