
If your partition, your hard drive, or Disk Utility’s own tools are greyed out, it’s a good indication that something is wrong. It may be as simple as an incompatible file system or a malfunctioning port. While fixing the root of the problem is pretty simple, it hinges on identifying the correct issue in the first place.
In this article, I’ll show you 6 ways to fix greyed-out elements in Disk Utility based on the specific issues that caused them with detailed breakdowns and step-by-step screenshots. Read on!
Table of Contents
How to Avoid Losing Your Data When Fixing Greyed-Out Partition
Before we proceed with troubleshooting the greyed-out partition in Disk Utility, I STRONGLY encourage you to secure your data first. By their nature, many fixes (that actually work) will eventually lead to data loss (e.g. formatting).
Using a tool called data recovery software, you can directly access and extract your data from your Mac’s file system – even when it’s greyed out or misbehaving in some way.
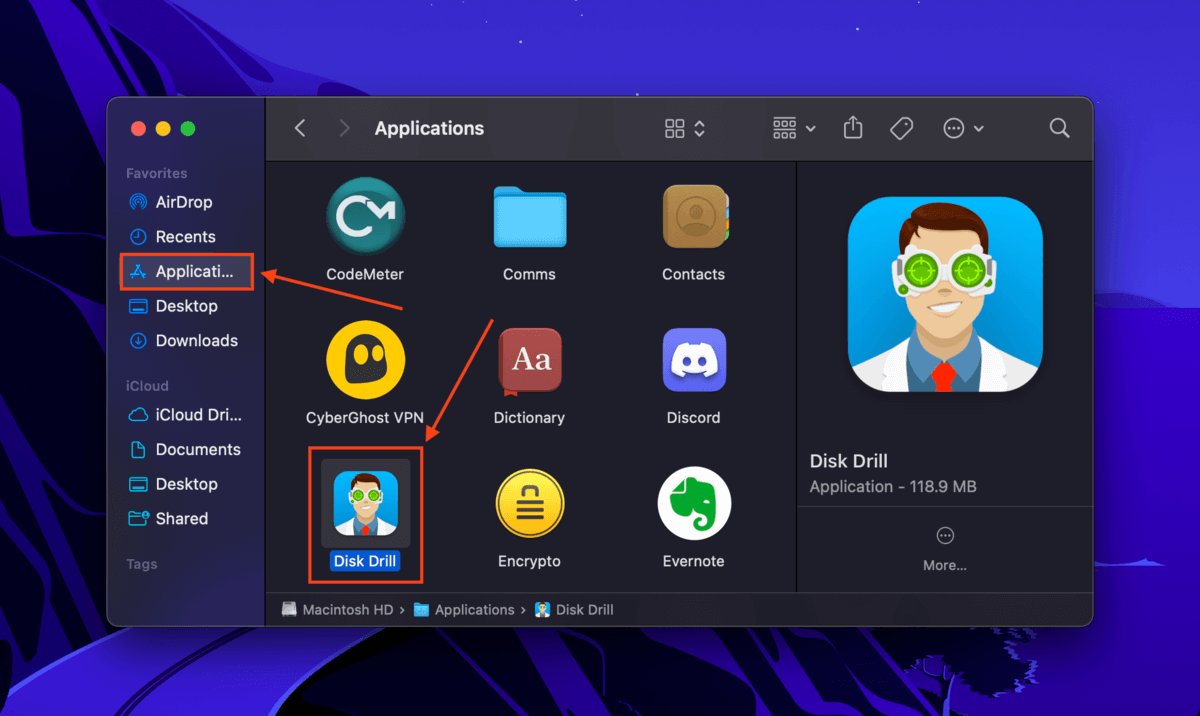
I’ll demonstrate this process using an app called Disk Drill. It’s highly optimized for Mac and it’s been shown to work even when Disk utility struggles to interact with the user’s drives.
Step 1. Download and install Disk Drill, then launch it from the Finder > Applications folder.
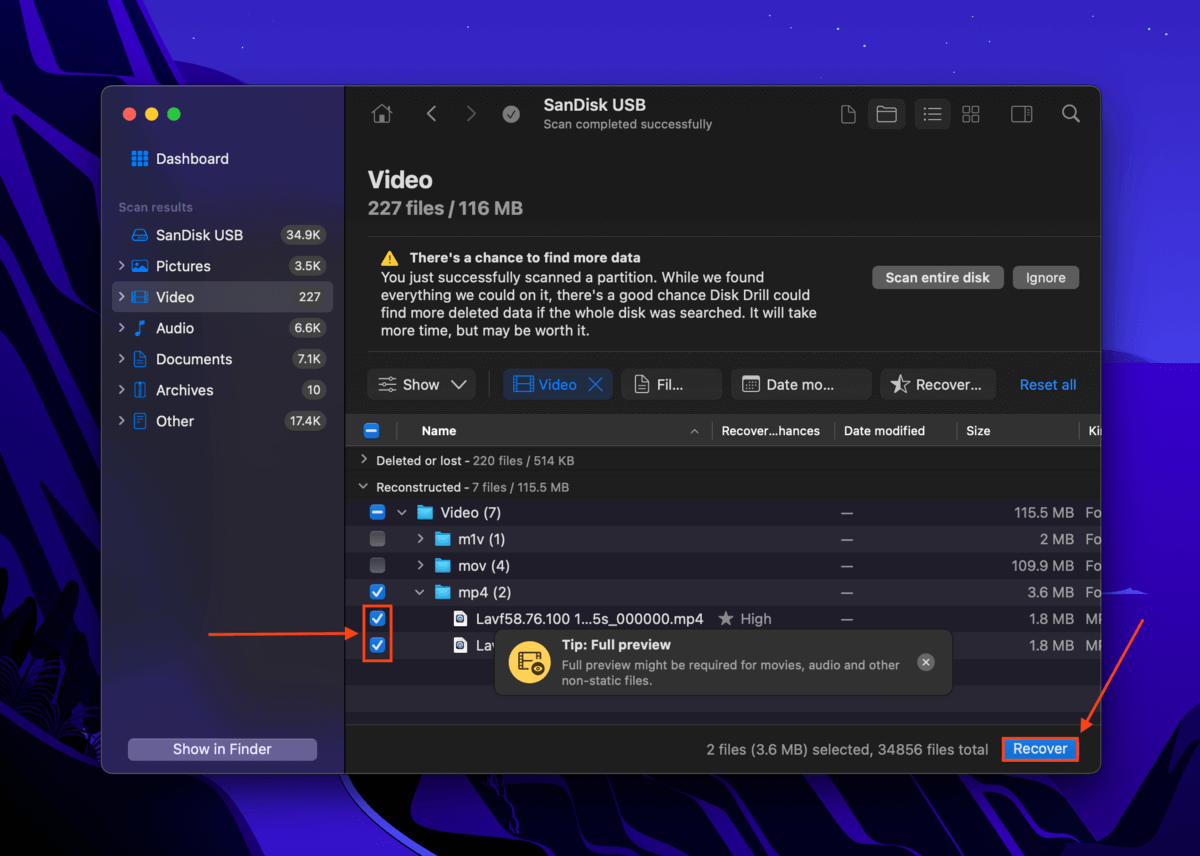
Step 2. Scan your drive. Don’t worry – Disk Drill can recognize and scan partitions that are greyed out in Finder.

Step 3. Select the files you lost while formatting your drive and click Recover. We suggest saving your data to a separate drive to avoid overwriting.
Common Fixes for Greyed Out Elements in Disk Utility
Aside from partitions, many users report other Disk Utility elements appearing as greyed out. While those may not directly prevent you from accessing your data (e.g. partitioning tool), they do indicate that something is wrong.
In the sections below, I’ll demonstrate 6 common and proven fixes for different greyed-out elements in Disk Utility.
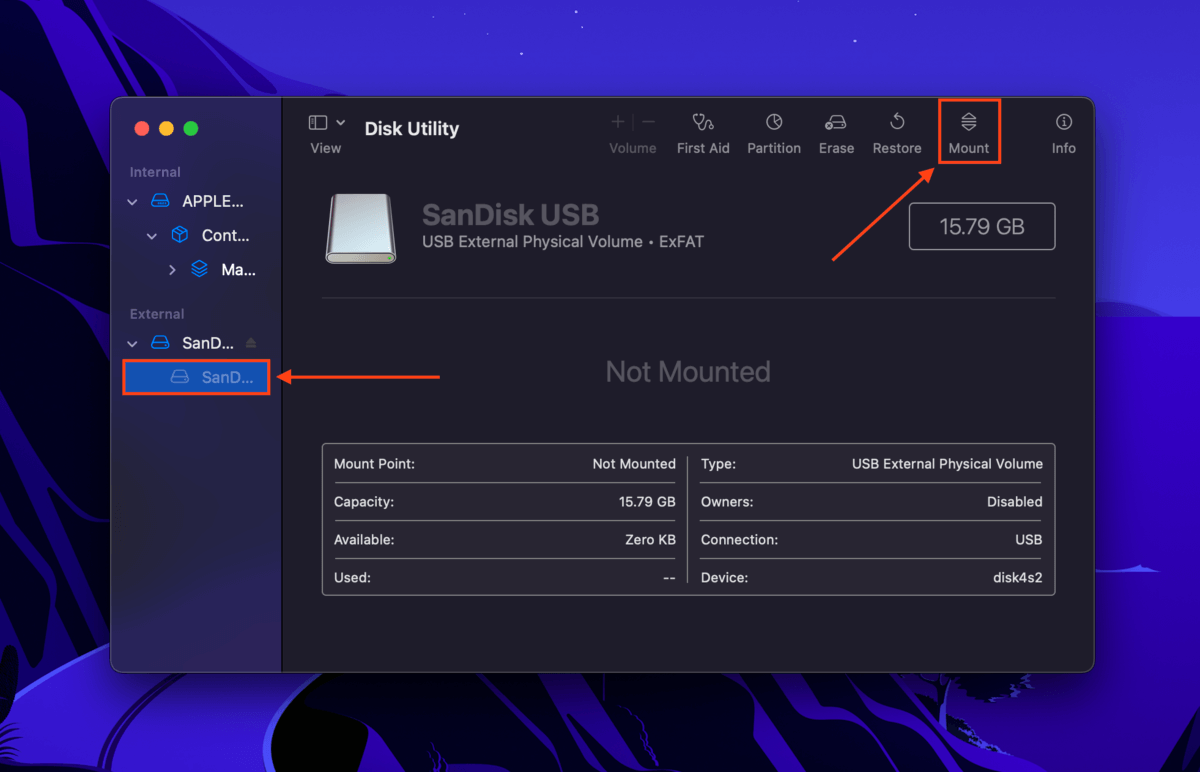
Case #1: Partition is Greyed Out
If your Disk Utility partition is greyed out when viewed on the left sidebar, that means it hasn’t been mounted. Possible causes of a drive not mounting include an interruption of macOS’ mounting system due to the lack of CPU resources. The solution is to mount your partition manually using Disk Utility’s Mount tool.
First, launch Disk Utility (Finder > Applications > Utilities). Then, select your partition from the left sidebar and click Mount.
Case #2: Mount Button is Greyed Out
If the Mount button is greyed on in Disk Utility, there are two possible reasons. First, you may have accidentally selected a non-partition drive. If this isn’t the case, the partition’s file format is likely incompatible with macOS. The solution is to format it to a Mac-compatible file system (like APFS or HFS+) using Disk Utility’s Erase tool.
Case #3: Volume +\- Option is Greyed Out
The Volume +\- button is a tool that allows users to easily create “volumes” (think of them as the resizable version of partitions) on a drive. This tool is only available for APFS partitions. If it’s greyed out, that means you’re using a different file system (such as HFS+, exFAT, FAT32, or NTFS) for which the tool is not available.
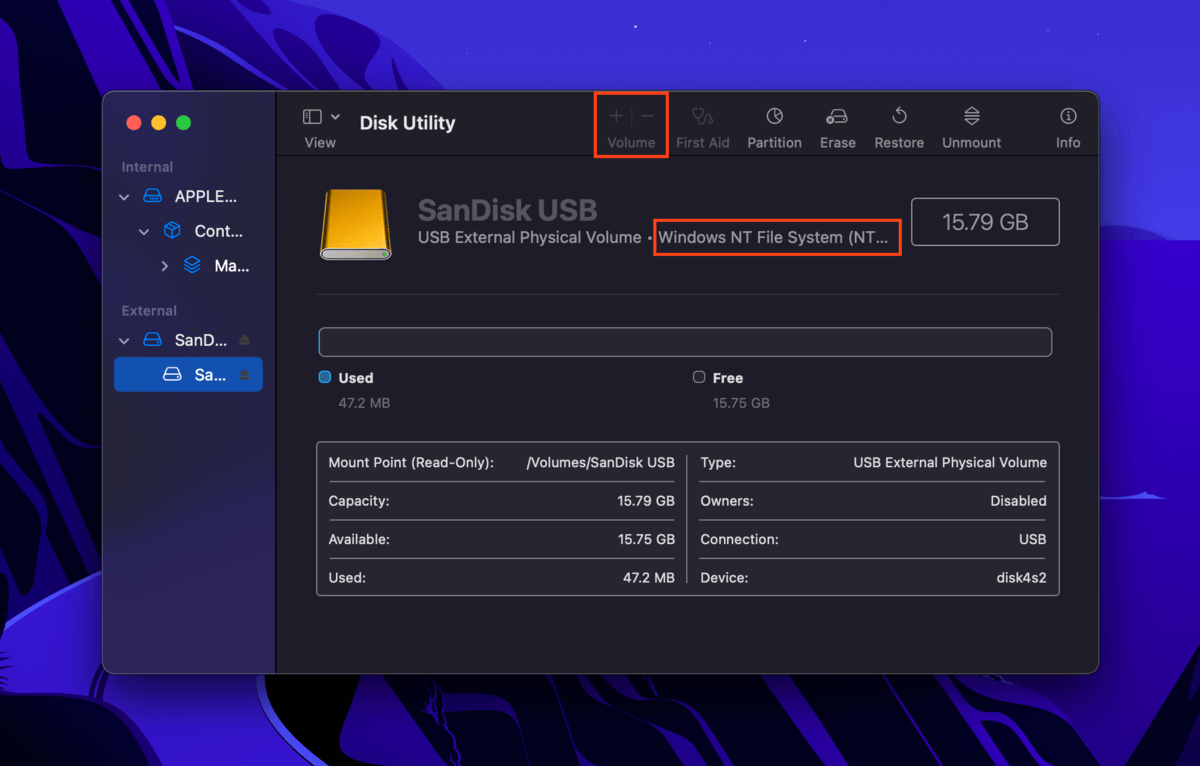
If you want to create a volume on your drive, you’ll need to format it to APFS. See Case #2 for instructions and warnings.
Case #4: Partitioning Function is Greyed Out
If you’re in Disk Utility and you’re unable to partition your hard drive on your Mac, it might be a matter of formatting. If Disk Utility’s Partition button is greyed out, you might be attempting to partition a drive with the MBR (Master Boot Record) Scheme.
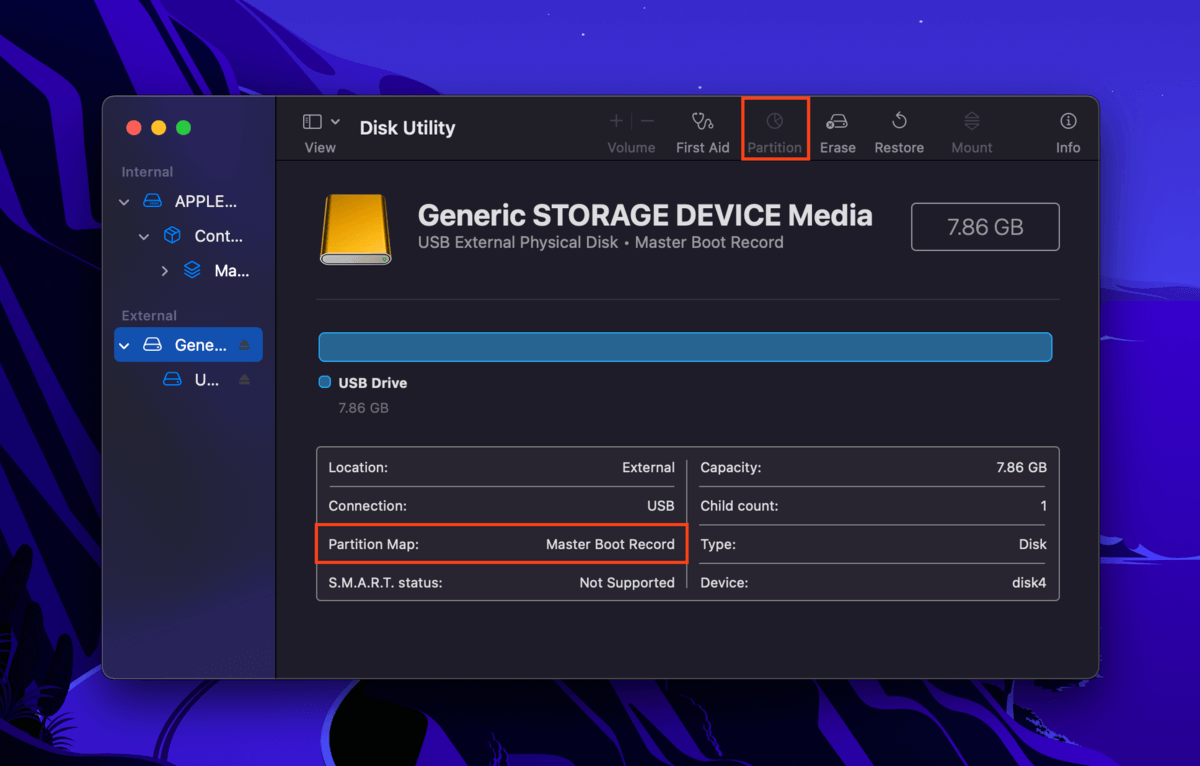
In this case, you’ll need to format your drive and choose GUID Partition Map as its Scheme. See Case #2 for instructions and warnings.
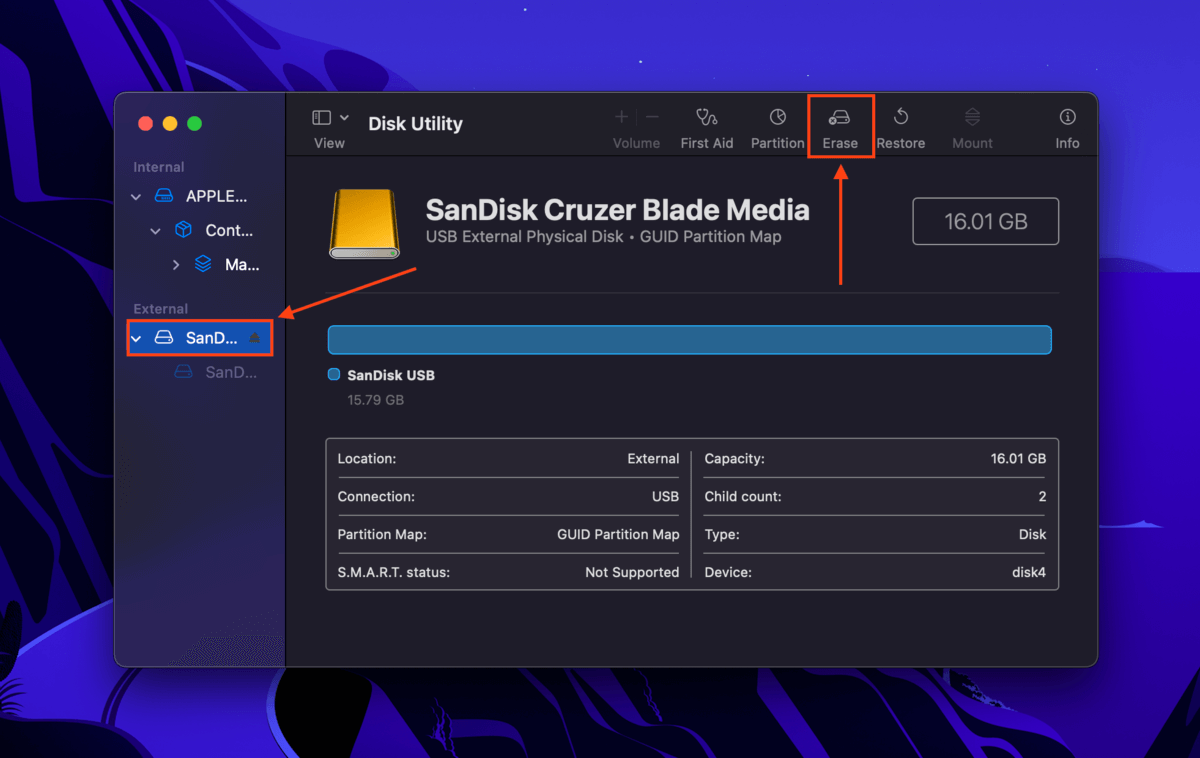
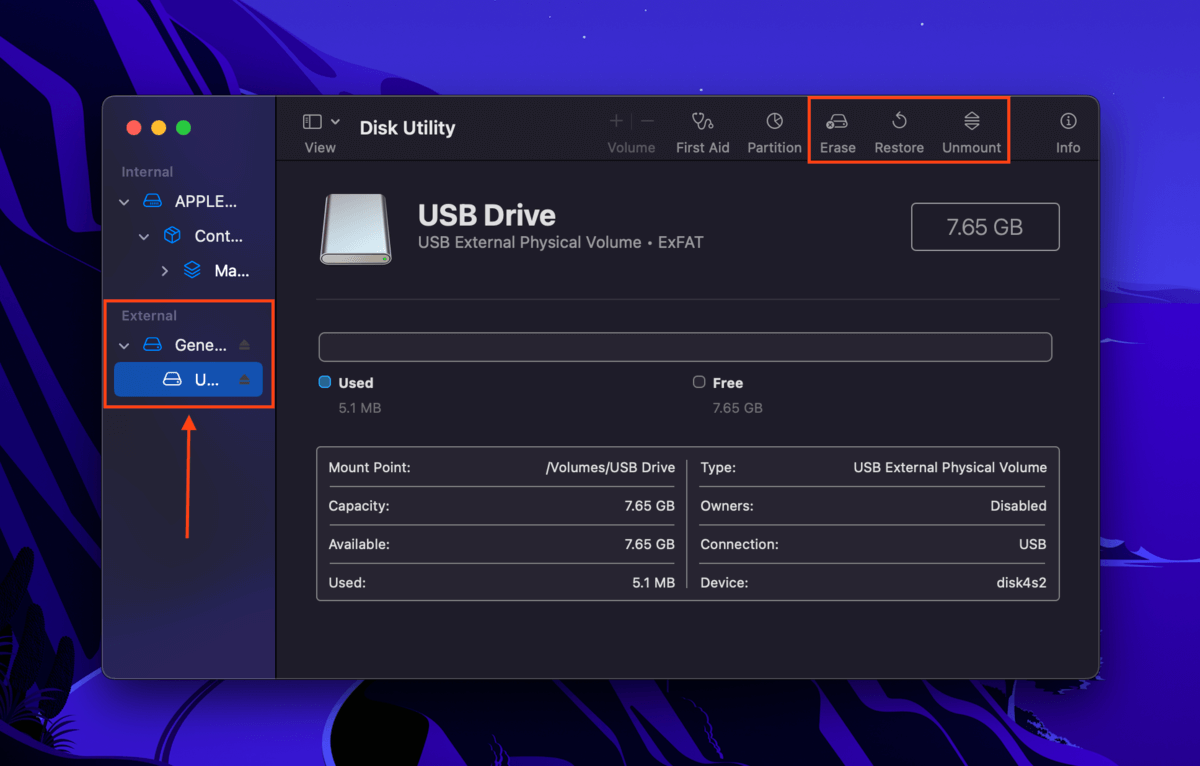
Case #5: Erase, Restore, Unmount Buttons Are Greyed Out
The Erase, Restore, and Unmount Buttons are only available for non-system internal and external drives and partitions to protect users from affecting macOS. If Erase is grayed out in Disk Utility (or Restore or Umount), you likely selected your system drive or partition, which is currently running macOS.
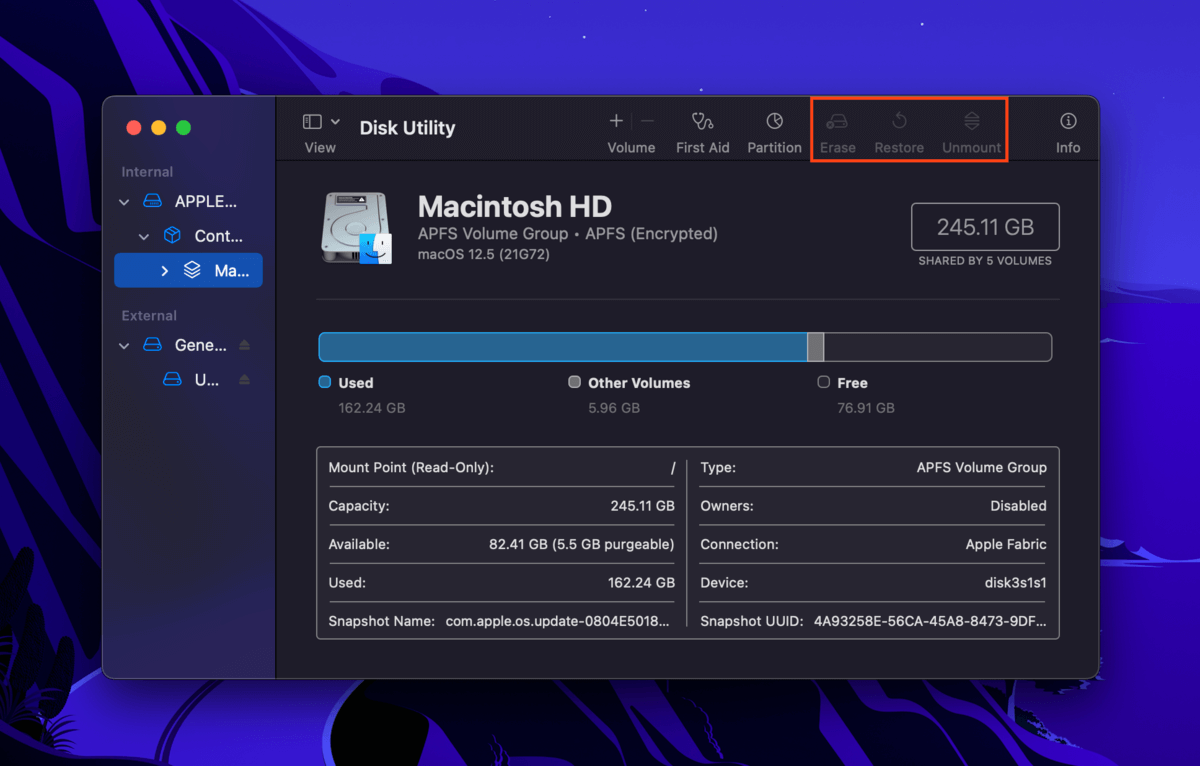
The solution when the Erase option is disabled in Disk Utility or if in Disk Utility all options are greyed out is to select a non-system drive from Disk Utility’s sidebar.
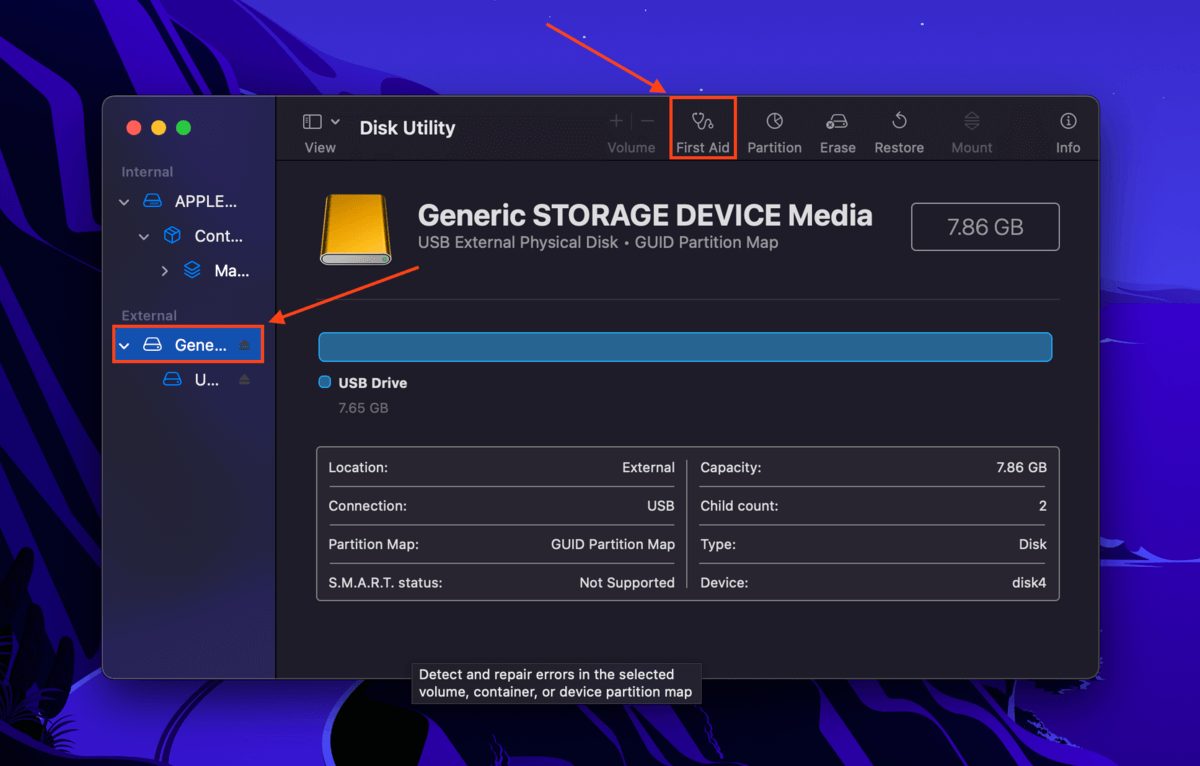
Case #6: First Aid is Greyed Out in Recovery Mode for System Drive
If the First Aid button is greyed out in Disk Utility when selecting your partition, the partition map (which defines how your data is organized) is likely corrupted. To fix it, run the First Aid tool on your entire drive instead.
Conclusion
A greyed-out partition in Disk Utility can be caused by user error, corruption, or even the natural lifespan of a drive. Fortunately, there are usually solutions for the different cases of greyed-out partitions like the ones we went over in this article. However, the best course of action is to create routine backups using Time Machine. Without monitoring your drives closely, Time Machine backups are the best way to secure your data before it’s too late.
FAQ
There are multiple possible reasons why you can’t partition your hard drive:
- The partitioning tool is greyed out on Disk Utility, which indicates a mounting issue
Your hard drive has an incompatible file system (Mac only supports APFS, HFS+, ExFAT, and FAT32) - You’re trying to partition your system disk while macOS is currently running
- Your hard drive is encrypted and you haven’t provided the password
- You selected a volume instead of a disk
- You don’t have the necessary permissions to modify the drive
- The hard drive is currently in use by another process or application
- Your Mac doesn’t have enough RAM to perform the action (try rebooting)
There are actually multiple ways to open Disk Utility on your Mac, depending on your preference:
- Double-click the Disk Utility icon in the Finder > Applications > Utilities folder
- Hit the Command + Space keys to launch Spotlight Search. Then, type “Disk Utility” and hit Return.
- Open Launchpad from the Dock and browse its pages or search for Disk Utility
- Use the Terminal app and use the diskutil command to launch the command-line version of Disk Utility
If your hard drive is greyed out in Disk Utility, the drive is either not mountable or a specific issue is preventing it from being managed. Here are the common reasons why it happens and how to fix it:
- Your drive’s file system is corrupted. See if you can use Disk Utility’s First Aid tool on the drive. If that doesn’t work, you may have to use a third-party disk repair tool.
- Your drive isn’t being recognized. Try using another cable, port, or even another Mac.
- Your drive has an incompatible file system. Connect it to a computer that runs an operating system that can support your hard drive’s file system. Then, save your data and format it to a macOS-compatible format. Alternatively, use data recovery software to secure your data and format the drive using Disk Utility.
- Your drive is encrypted. Unlock it using the password.
- You don’t have the necessary permissions. Use the Get Info menu (right-click your drive) to alter permissions for your user account.
- The drive is set is set to read-only. Check your drive for physical switches or use the drive’s software to remove write protection.


