
Macs use APFS (Apple File System) which is the newest architecture implemented by Apple that offers the best suite of features, reliability, and security. While this is the newest version of Apple’s file system, it doesn’t mean that there aren’t any reasons to not use an older file system such as Mac OS Extended. In this article, we’re going to look at how to format a hard drive to Mac OS Extended.
Table of Contents
APFS vs. Mac OS Extended
APFS is Apple’s newest file system, released in 2017, and is the default option that their new Macs ship with. However, there are some reasons that you might want to use Mac OS Extended. Let’s compare the two of them and see what pros and cons each one has to offer.
| Pros: | Cons: |
| Reliable which means that it will lead to less data corruption and also offers greater security. | External devices formatted with APFS can’t be read by versions of macOS before Sierra. |
| Designed for solid-state drives and flash memory which most Macs use today. | Can’t be used if you have a Fusion hard drive in your Mac. |
| Fast in pretty much every way. | |
| Improved metadata and file structure. |
| Pros: | Cons: |
| Old (was released in 1998 and works with macOS 10.12 or earlier). | Isn’t fast. |
| Optimized for mechanical hard drives. | Not as secure as APFS. |
| Offers reverse compatibility which is useful if you work with older versions of macOS. | It doesn’t offer the same amount of stability and new features. |
Another consideration for the APFS file system is the creation of containers. When you format a drive to APFS, a container is created; it serves as a “virtual partition” for APFS volumes. Within the container, you can have multiple volumes with their own settings, encryption properties, and file system characteristics.
The main reason that you would want to use Mac OS Extended over APFS would be if you’re using a newer Mac and want to also swap data from an external device on an older machine that can’t use APFS.
If you’re in this scenario or one similar, let’s look at what ways we can reformat a hard drive to Mac OS Extended.
Avoid Losing Your Data When Formatting
The formatting process wipes your data to prepare your drive for the new file system. The best way to avoid losing your files is by copying them or creating a backup beforehand.
In this case, we can use a tool like Disk Drill. Disk Drill is a data recovery solution that can retrieve files directly from the file system even in the case of corruption and other logical damage. It can even restore files from formatted drives (but we recommend the backup method to be sure).
There are a ton of data recovery software solutions out there but I’m going to use Disk Drill for a couple of reasons:
- It offers support for Apple silicon Macs, and it runs on the newest version of macOS.
- You can use the powerful Preview feature that lets you view the file first to ensure it’s the correct one before recovering it.
- The app runs better and finds more recoverable data when compared to other data recovery tools that I’ve used.
We can download, scan our hard drive, and view our data all for free. This includes being able to use the powerful data recovery feature. A purchase is only required if you then choose to recover your data.
- Download and install Disk Drill onto your Mac.
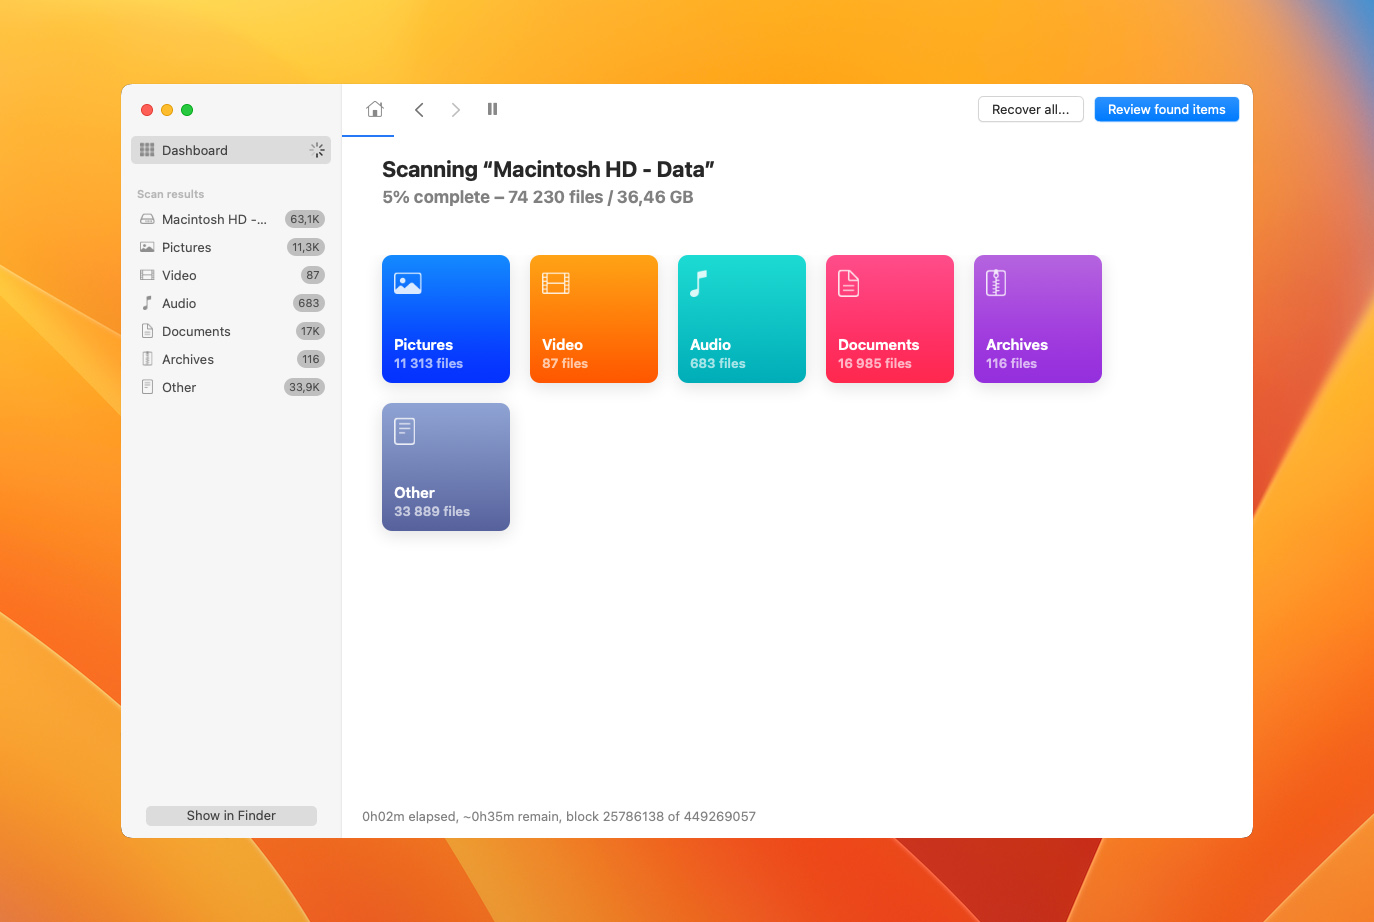
- Launch Disk Drill and then under Data Recovery select Storage devices. You can scan any storage device that is connected to your Mac for lost files. In this example, I’m going to select my internal hard drive. Click on Search for lost data.

- Wait for the scan process to complete.
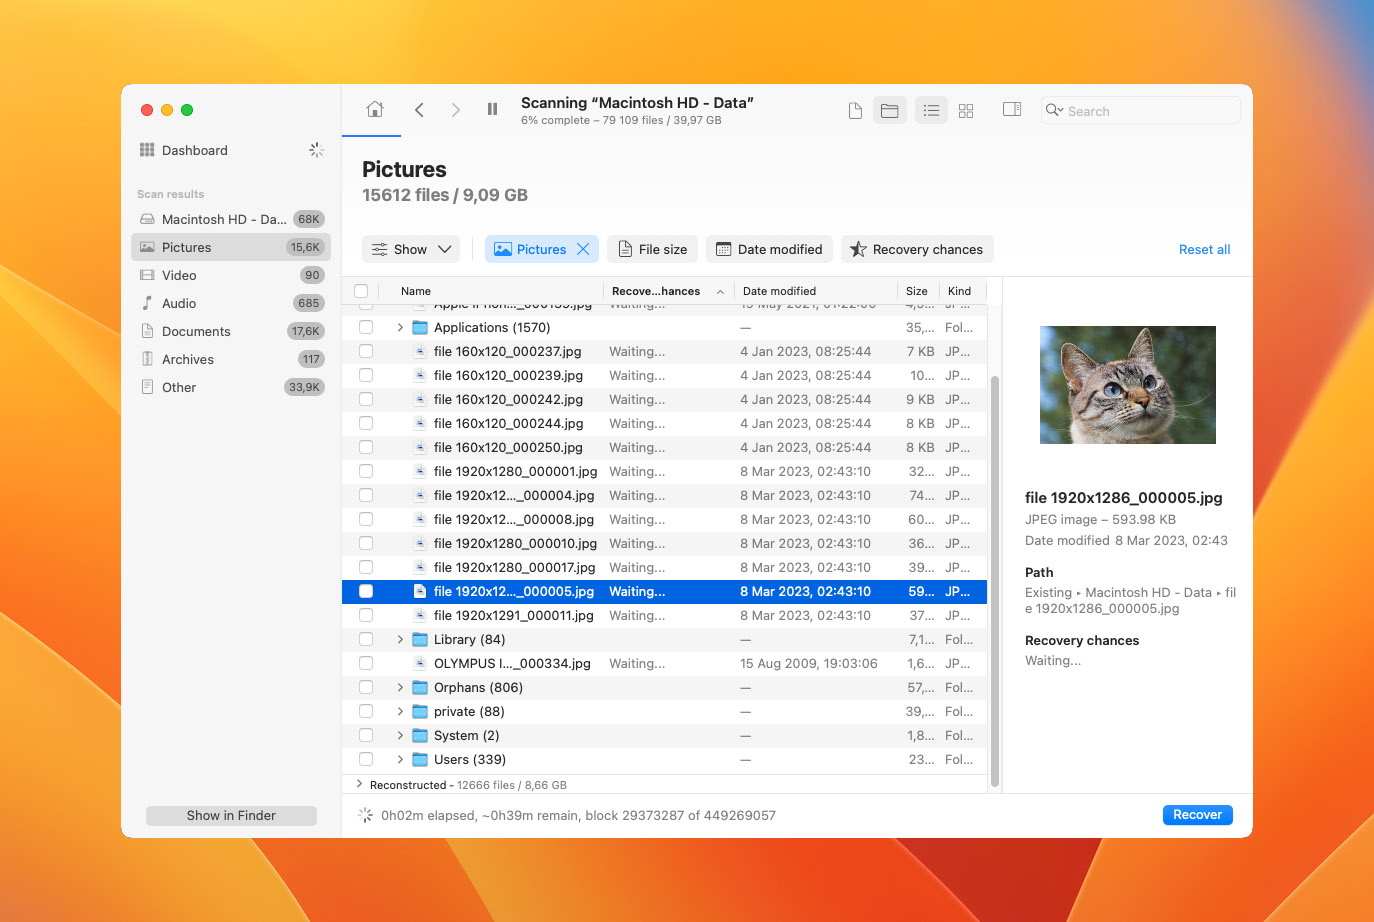
- Review what Disk Drill was able to recover. Don’t forget to use the Preview feature to view files before recovering them.
That’s all that there is to it! Disk Drill is fast and easy to use and offers powerful data recovery features to help you get your files back if you lost them when you were formatting your hard drive.
How to Convert APFS to Mac OS Extended
Below I will walk you through two ways that we can format to Mac OS Extended. One of them will be a textual way using the Terminal and the other will be a graphical solution using Disk Utility.
Both methods are free, it just depends on which way you would like to go about doing it.
Method 1: How to Format a Hard Drive to Mac OS Extended by Using the Terminal
The Terminal comes installed as part of macOS and it’s a free tool that we can use to execute system commands such as converting from AFPS to HFS+.
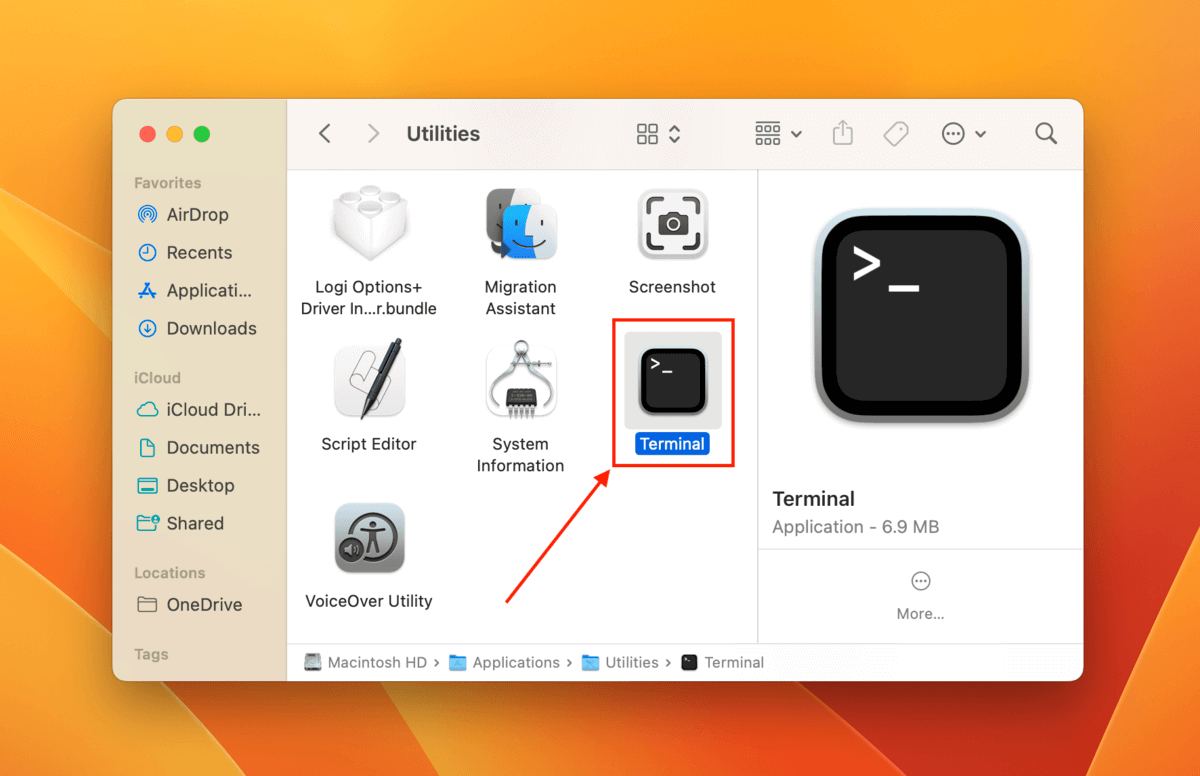
- Open the Terminal app (Finder > Applications > Utilities).
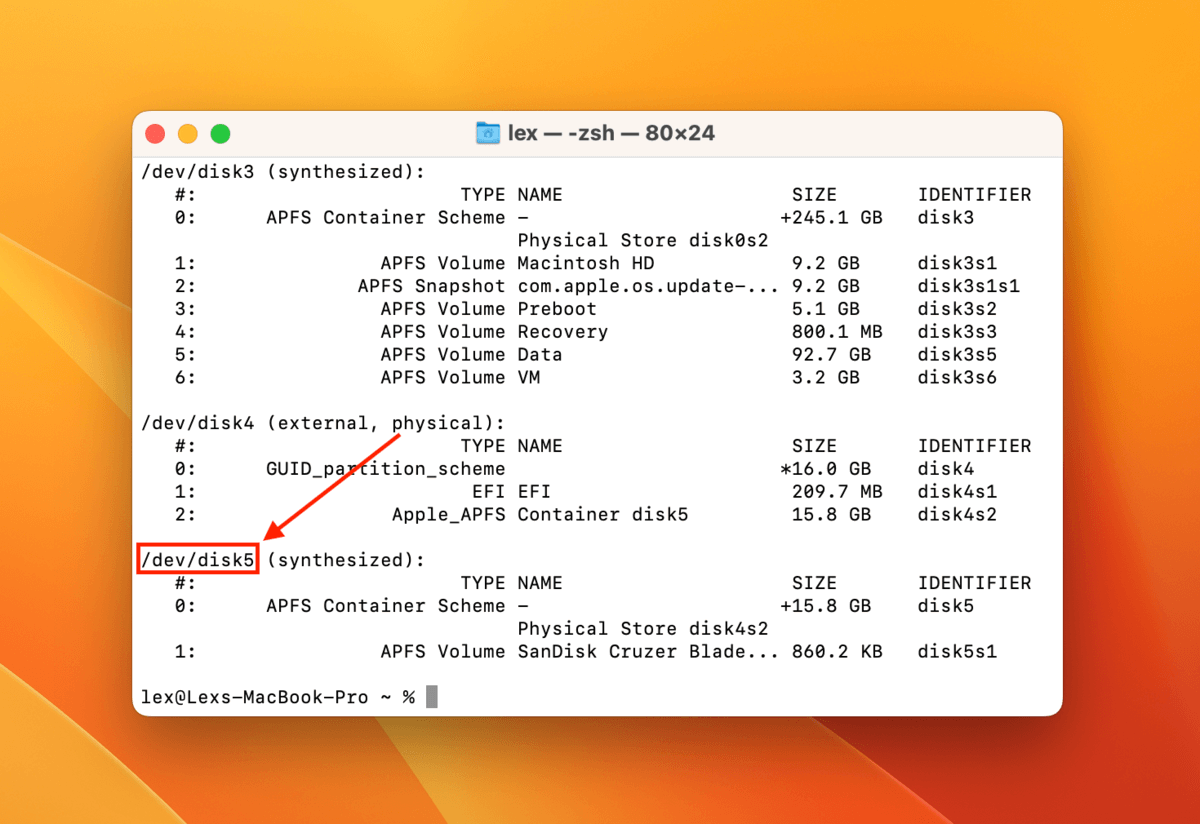
- Type the following command and hit Return, noting your drive’s identifier.
diskutil list
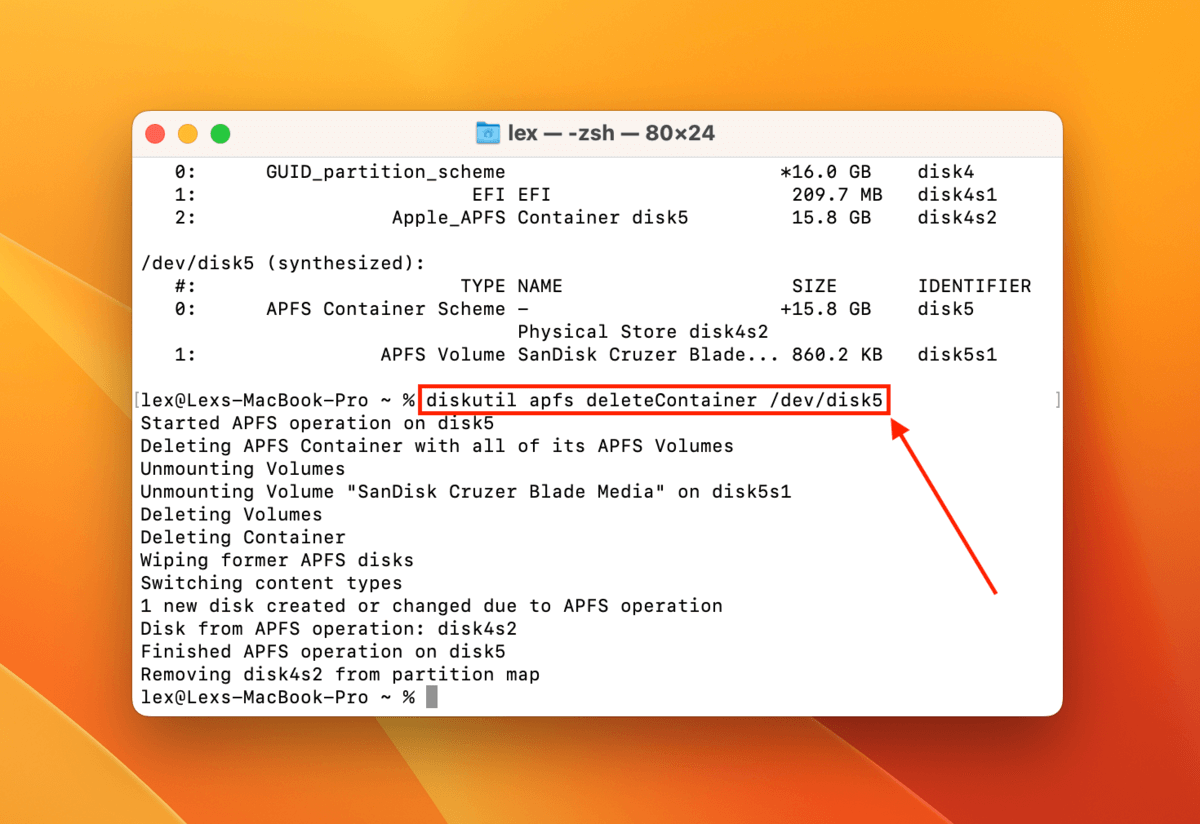
- Type the following command and hit Return:
diskutil apfs deleteContainer /dev/diskX
Replace X with the corresponding digit in your drive’s Identifier.
- Your drive should now be free of APFS volumes and can be formatted to HFS+. Make sure you’ve correctly identified it using the command we used earlier:
diskutil list

- Type the following command and hit Return:
diskutil eraseDisk HFS+ NewVolumeName /dev/diskX
Replace NewVolumeName with whatever you want to label your drive and replace X with the corresponding digit of your drive’s Identifier.
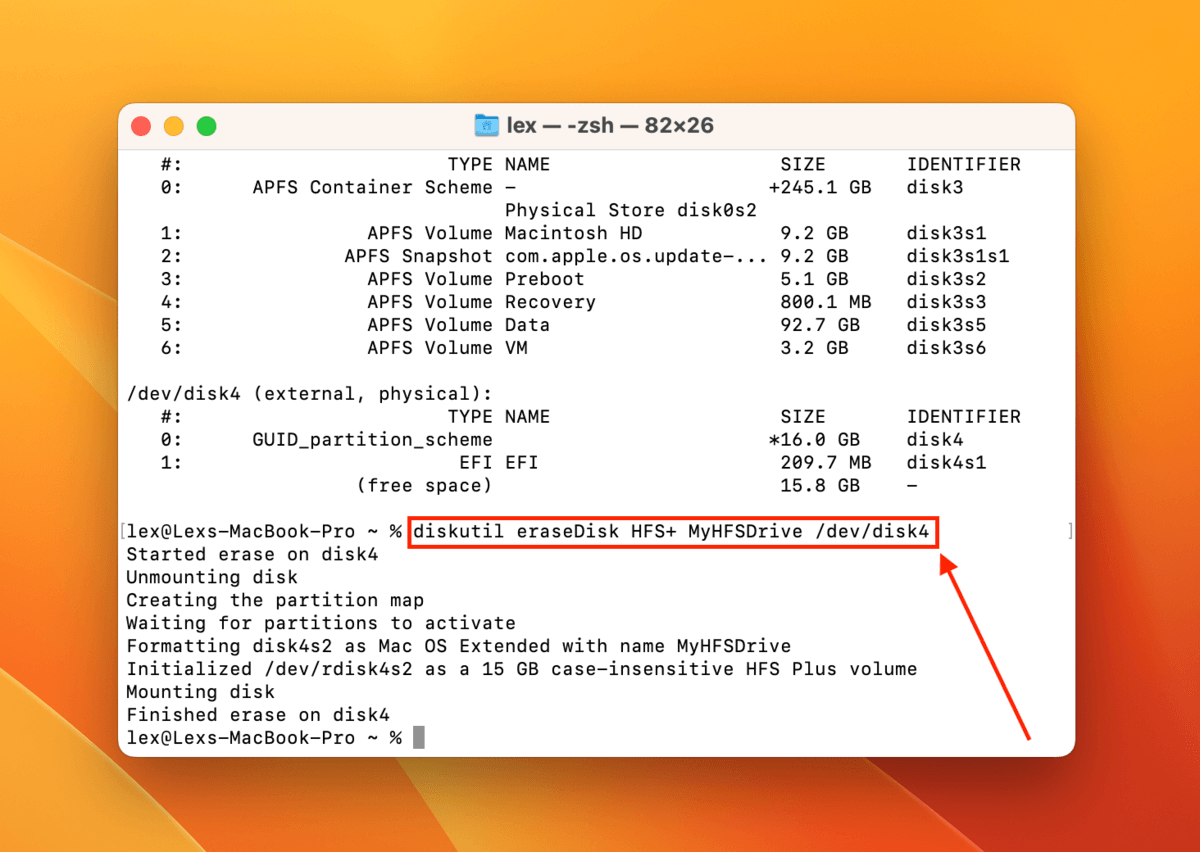
Wait for the formatting process to complete. Then, check in Disk Utility if your drive has been formatted properly and recognized as HFS+.
If you prefer a more graphical solution, let’s look at how we can use Disk Utility to change APFS to Mac OS Extended.
Method 2: How to Format APFS Hard Drive to Mac OS Extended by Using Disk Utility
Disk Utility comes installed on your Mac as part of macOS and it offers a graphical interface for formatting our hard drive to Mac OS Extended.
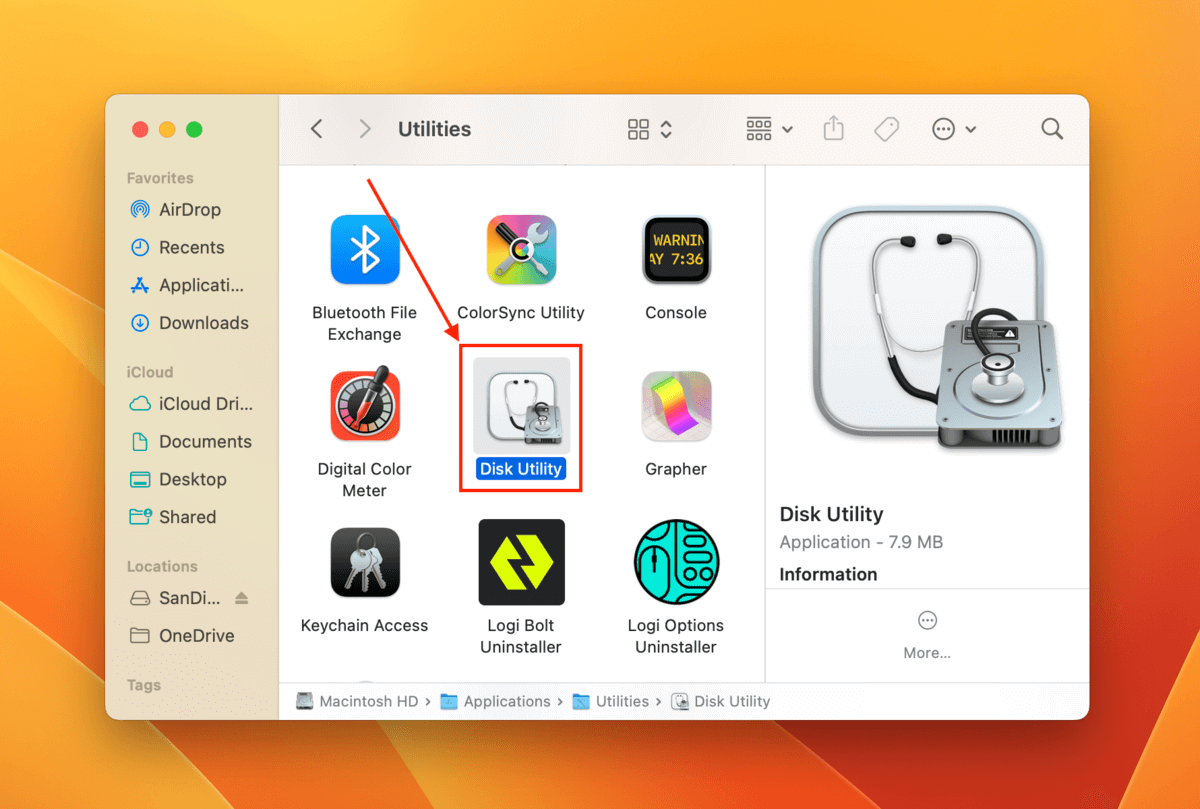
- Launch Disk Utility (Finder > Applications).
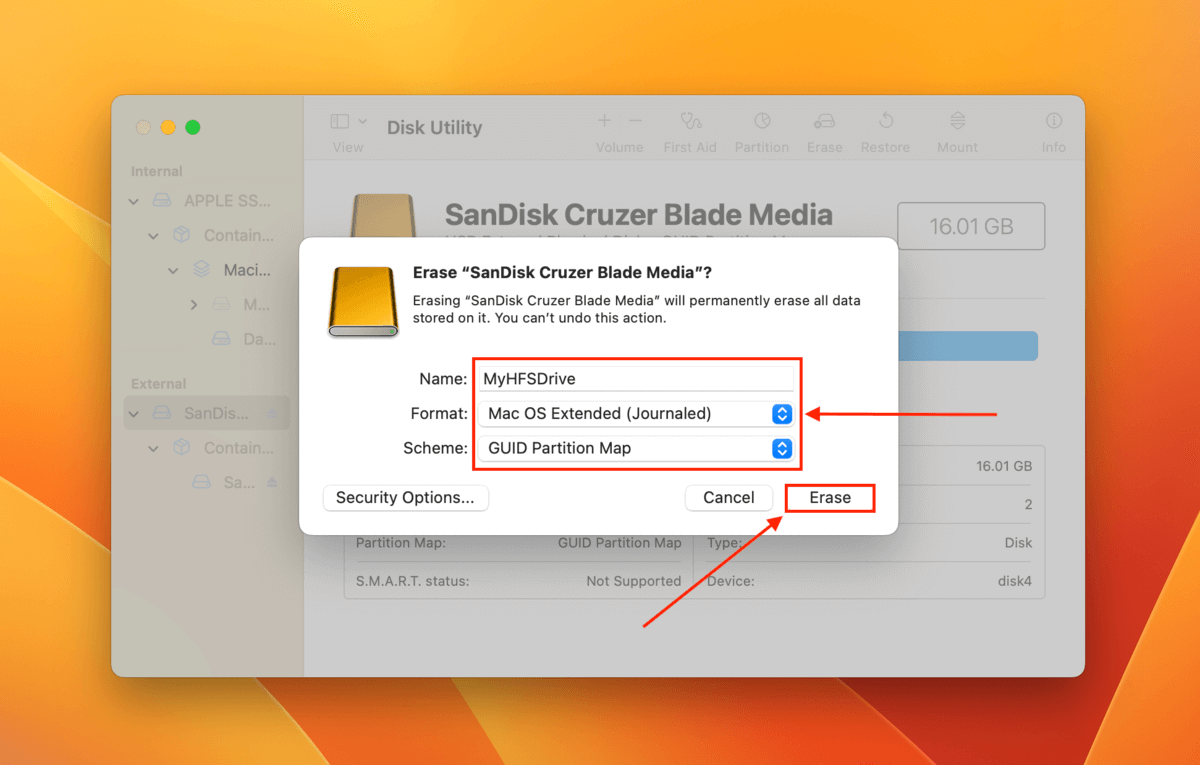
- On the left sidebar, select your hard drive. Then, click Erase at the top of the screen.
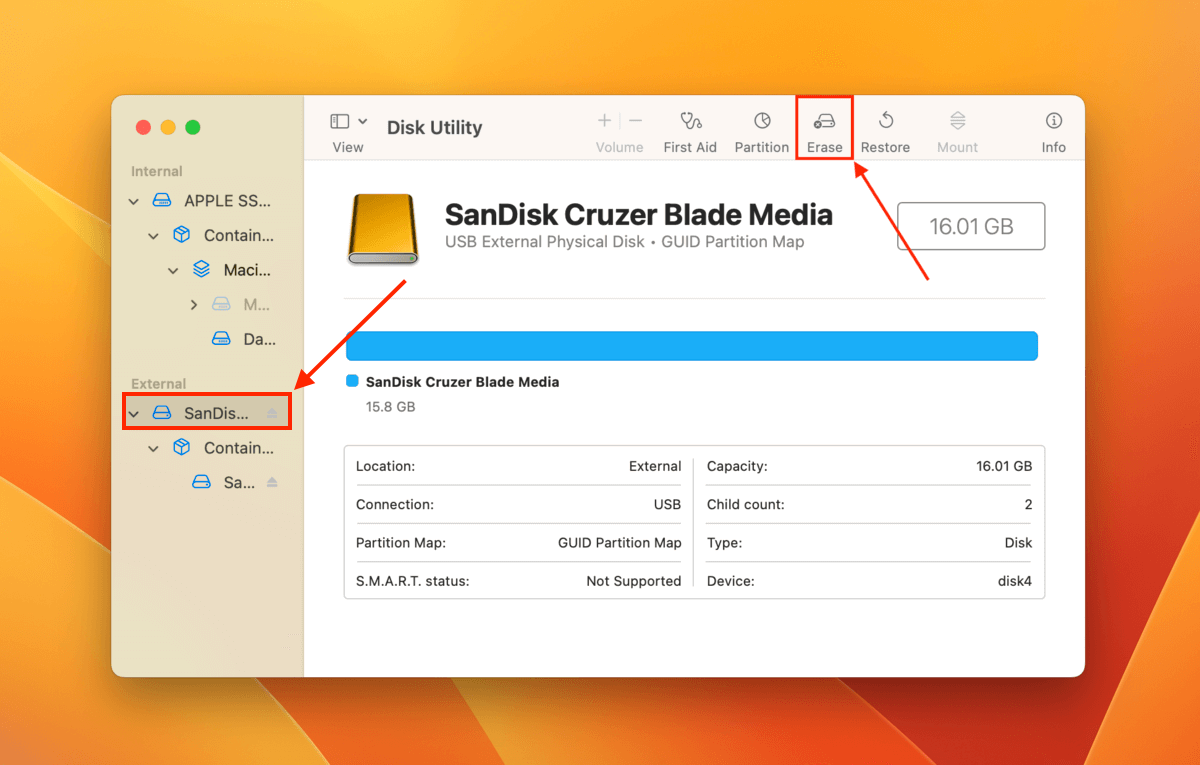
- Name your drive, select Mac OS Extended (Journaled) as its Format, and select GUID Partition Map as its Scheme. Then, click Erase.
Wait for the formatting process to be completed. Then, check Disk Utility if your drive has successfully been reformatted to HFS+.
Conclusion
APFS and Mac OS Journaled are both robust and useful file systems that are great for different types of workflows. If you decide to format your storage device to Mac OS Extended, using either the Terminal or Disk Utility are both great options that will help you get the job done.
If you need to recover some data after the hard drive has been formatted, Disk Drill is a powerful tool with some stand-out features such as the ability to preview your files before recovering them.


