
Macs are super reliable computers; most have no moving parts except for a fan. You can usually just turn them on, and they work with no issue, which is why so many users love using their Macs, including me.
Sometimes though, there can be a software or hardware issue. If your Mac is experiencing a folder with a question mark, this article will talk about how to save your data and troubleshoot the issue.
Table of Contents
What Does a Folder With a Question Mark Mean?
There are two scenarios when you see the folder with a question mark on your Mac:
- The folder appears but disappears as your Mac loads. This can occur if the startup disk is incorrectly specified. Your Mac initially searches for a hard drive, but not the default one it should use. After the first selected startup disk fails to load, your Mac searches for other hard drives. Once it finds the one with your operating system, your computer boots successfully, resolving the error.
- The folder with a question mark appears and remains. The folder with a question mark appears and remains. This indicates a problem with your startup disk, such as data corruption or physical damage. In either case, your Mac won’t boot normally, and Recovery Mode becomes your only option.
It would be best to first try and recover the data from Mac as the disk could fail at any moment. Having your data recovered and safe can give you that peace of mind right away.
Can I Recover Data When My Mac Is Showing the Folder With a Question Mark?
You can try recovering data from your MacBook even when it’s displaying the folder with a question mark. Utilizing third-party data recovery software is a viable option for this purpose.
Disk Drill is a third-party data recovery app that allows you to scan your Mac and recover the data from your hard drive even if your Mac won’t boot. There are many options out there when it comes to data recovery software. I like using Disk Drill as it has proven to be the best, and I will tell you why!
- It works with the new Apple silicon Macs and offers support for macOS version 14 Sonoma.
- The interface is easy to use which is important so that you can navigate and find your data fast. There is also a search feature where you can type in the name of a file to find it that way.
- You can scan for lost data on your Mac for free. Once you confirm that your data is recoverable, you have the option to decide whether or not to purchase the software.
Let’s look at how to recover the data from our Mac before troubleshooting the issue.
- Press and hold the power button to power down your Mac.
- Boot Mac into Recovery Mode. There are two methods for this, depending on whether you’re using a newer Apple silicon Mac or an older Intel Mac.
- Apple silicon (newer Macs, usually less than 2 years old): Press the power button on your Mac and then continue to hold it down until you see the startup options window. Click the gear icon labeled Options, then click Continue and this will bring you into Recovery Mode.
- Intel processor (older Macs, usually greater than 2 years old): Press and release the power button then immediately press and hold these two keys until you see an Apple logo or other image: Command (⌘) and R. I usually have to hold these keys for a little bit of time to get into Recovery Mode.
- Launch the Terminal so that you can use Disk Drill. Once within Recovery Mode, click on Utilities and then select Terminal.
- Enter this command into the Terminal window. This will download and then launch Disk Drill from within Recovery Mode: sh <(curl http://www.cleverfiles.com/bootmode/boot.xml).
- Press Return on your keyboard after you’ve typed in the command.
- Wait for Disk Drill to download and then launch. This might take a few moments.
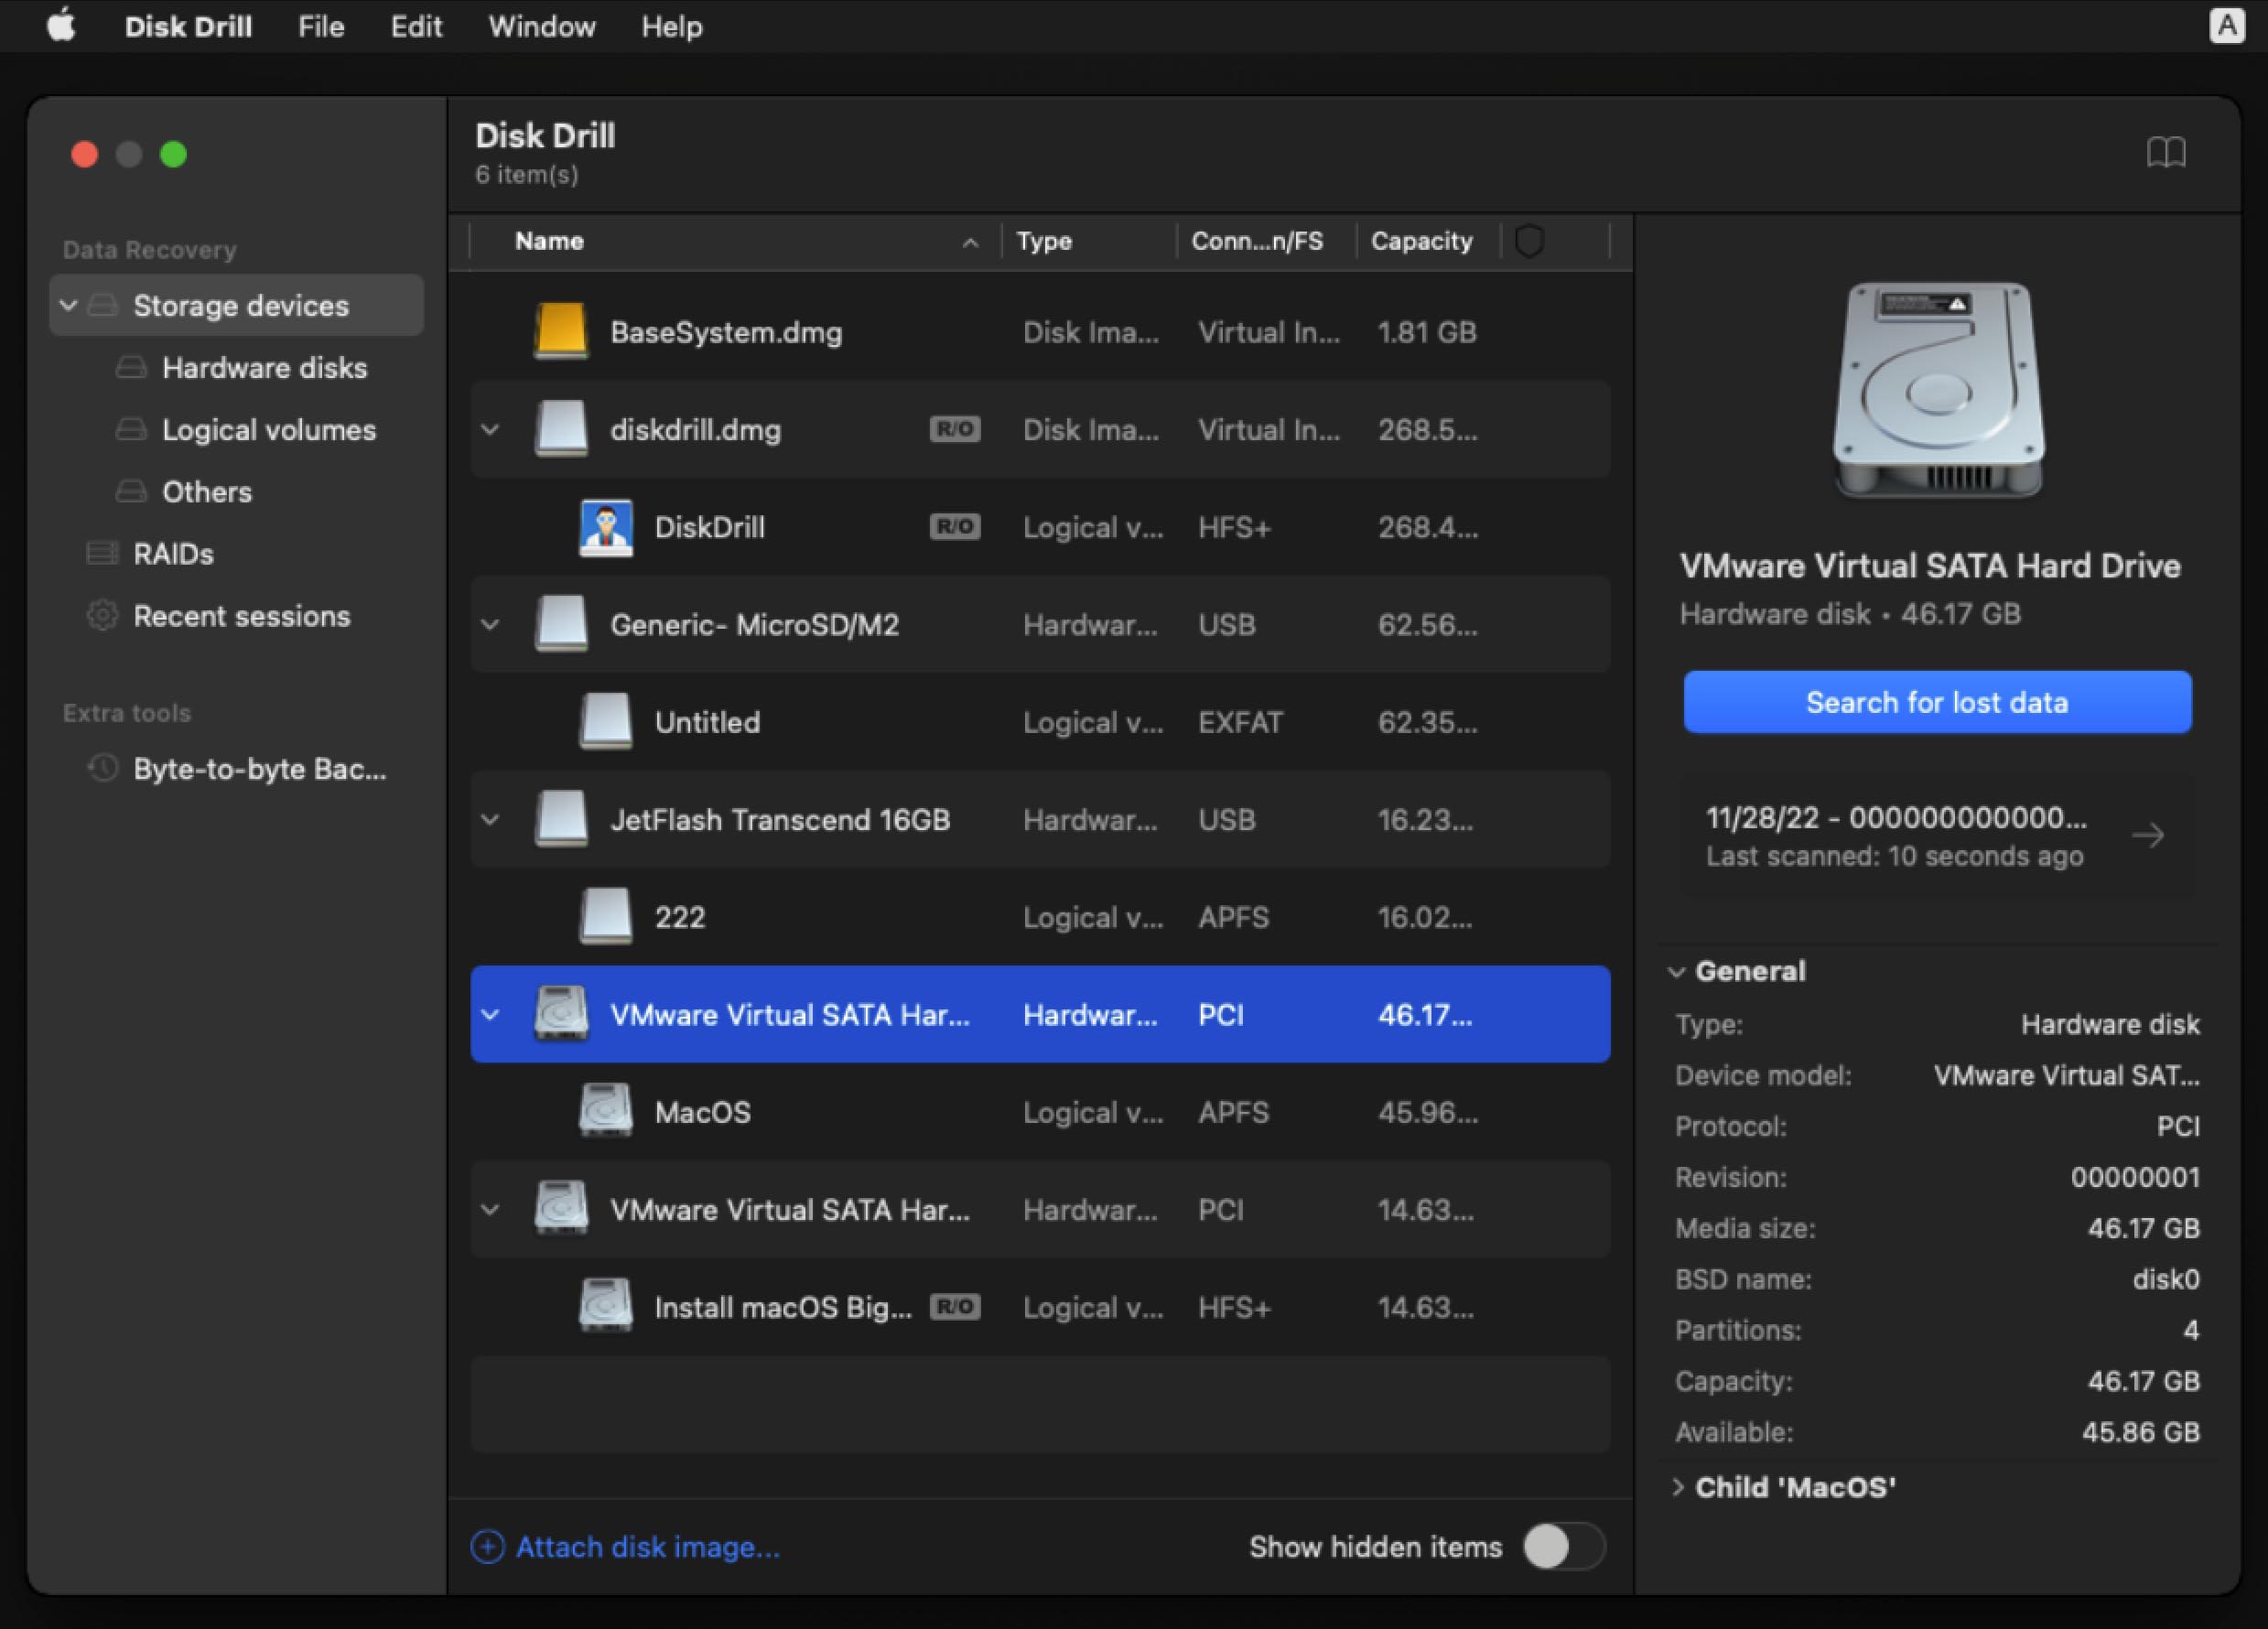
- Below Data Recovery, select Storage devices and choose the disk that you would like to scan for lost data. Once you have found the disk, click Search for lost data.
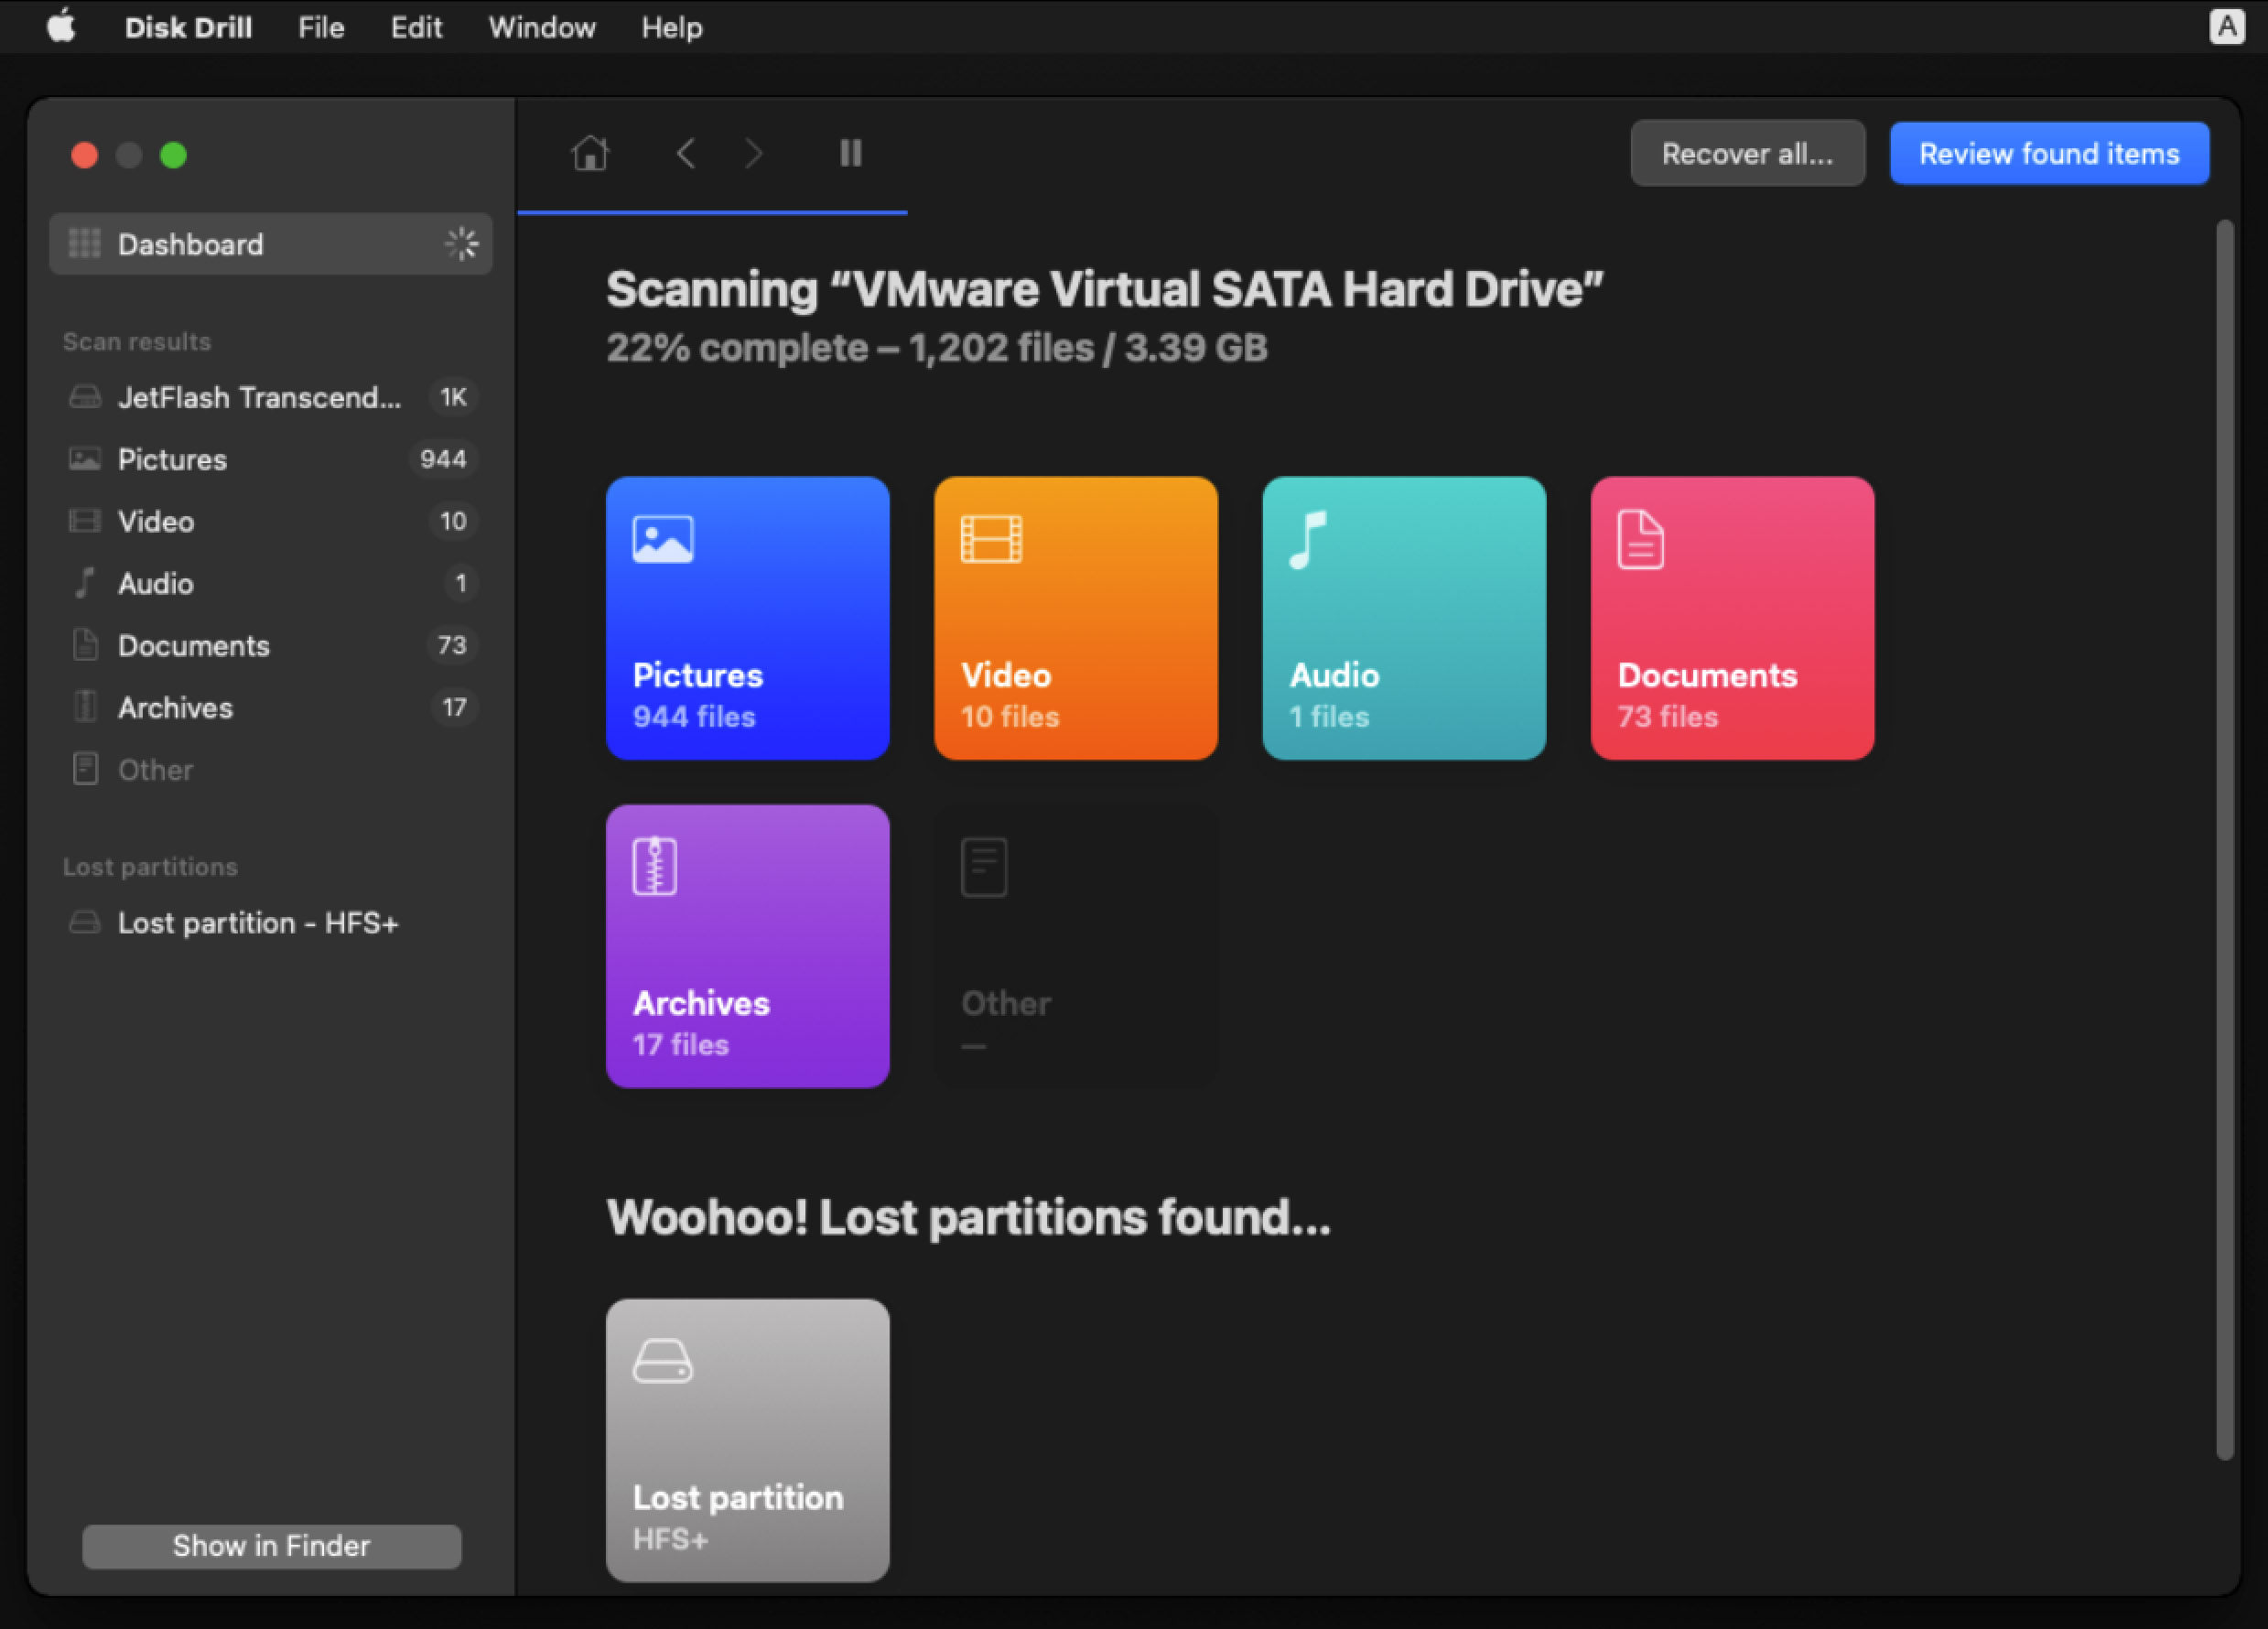
- Wait for the scan to complete.
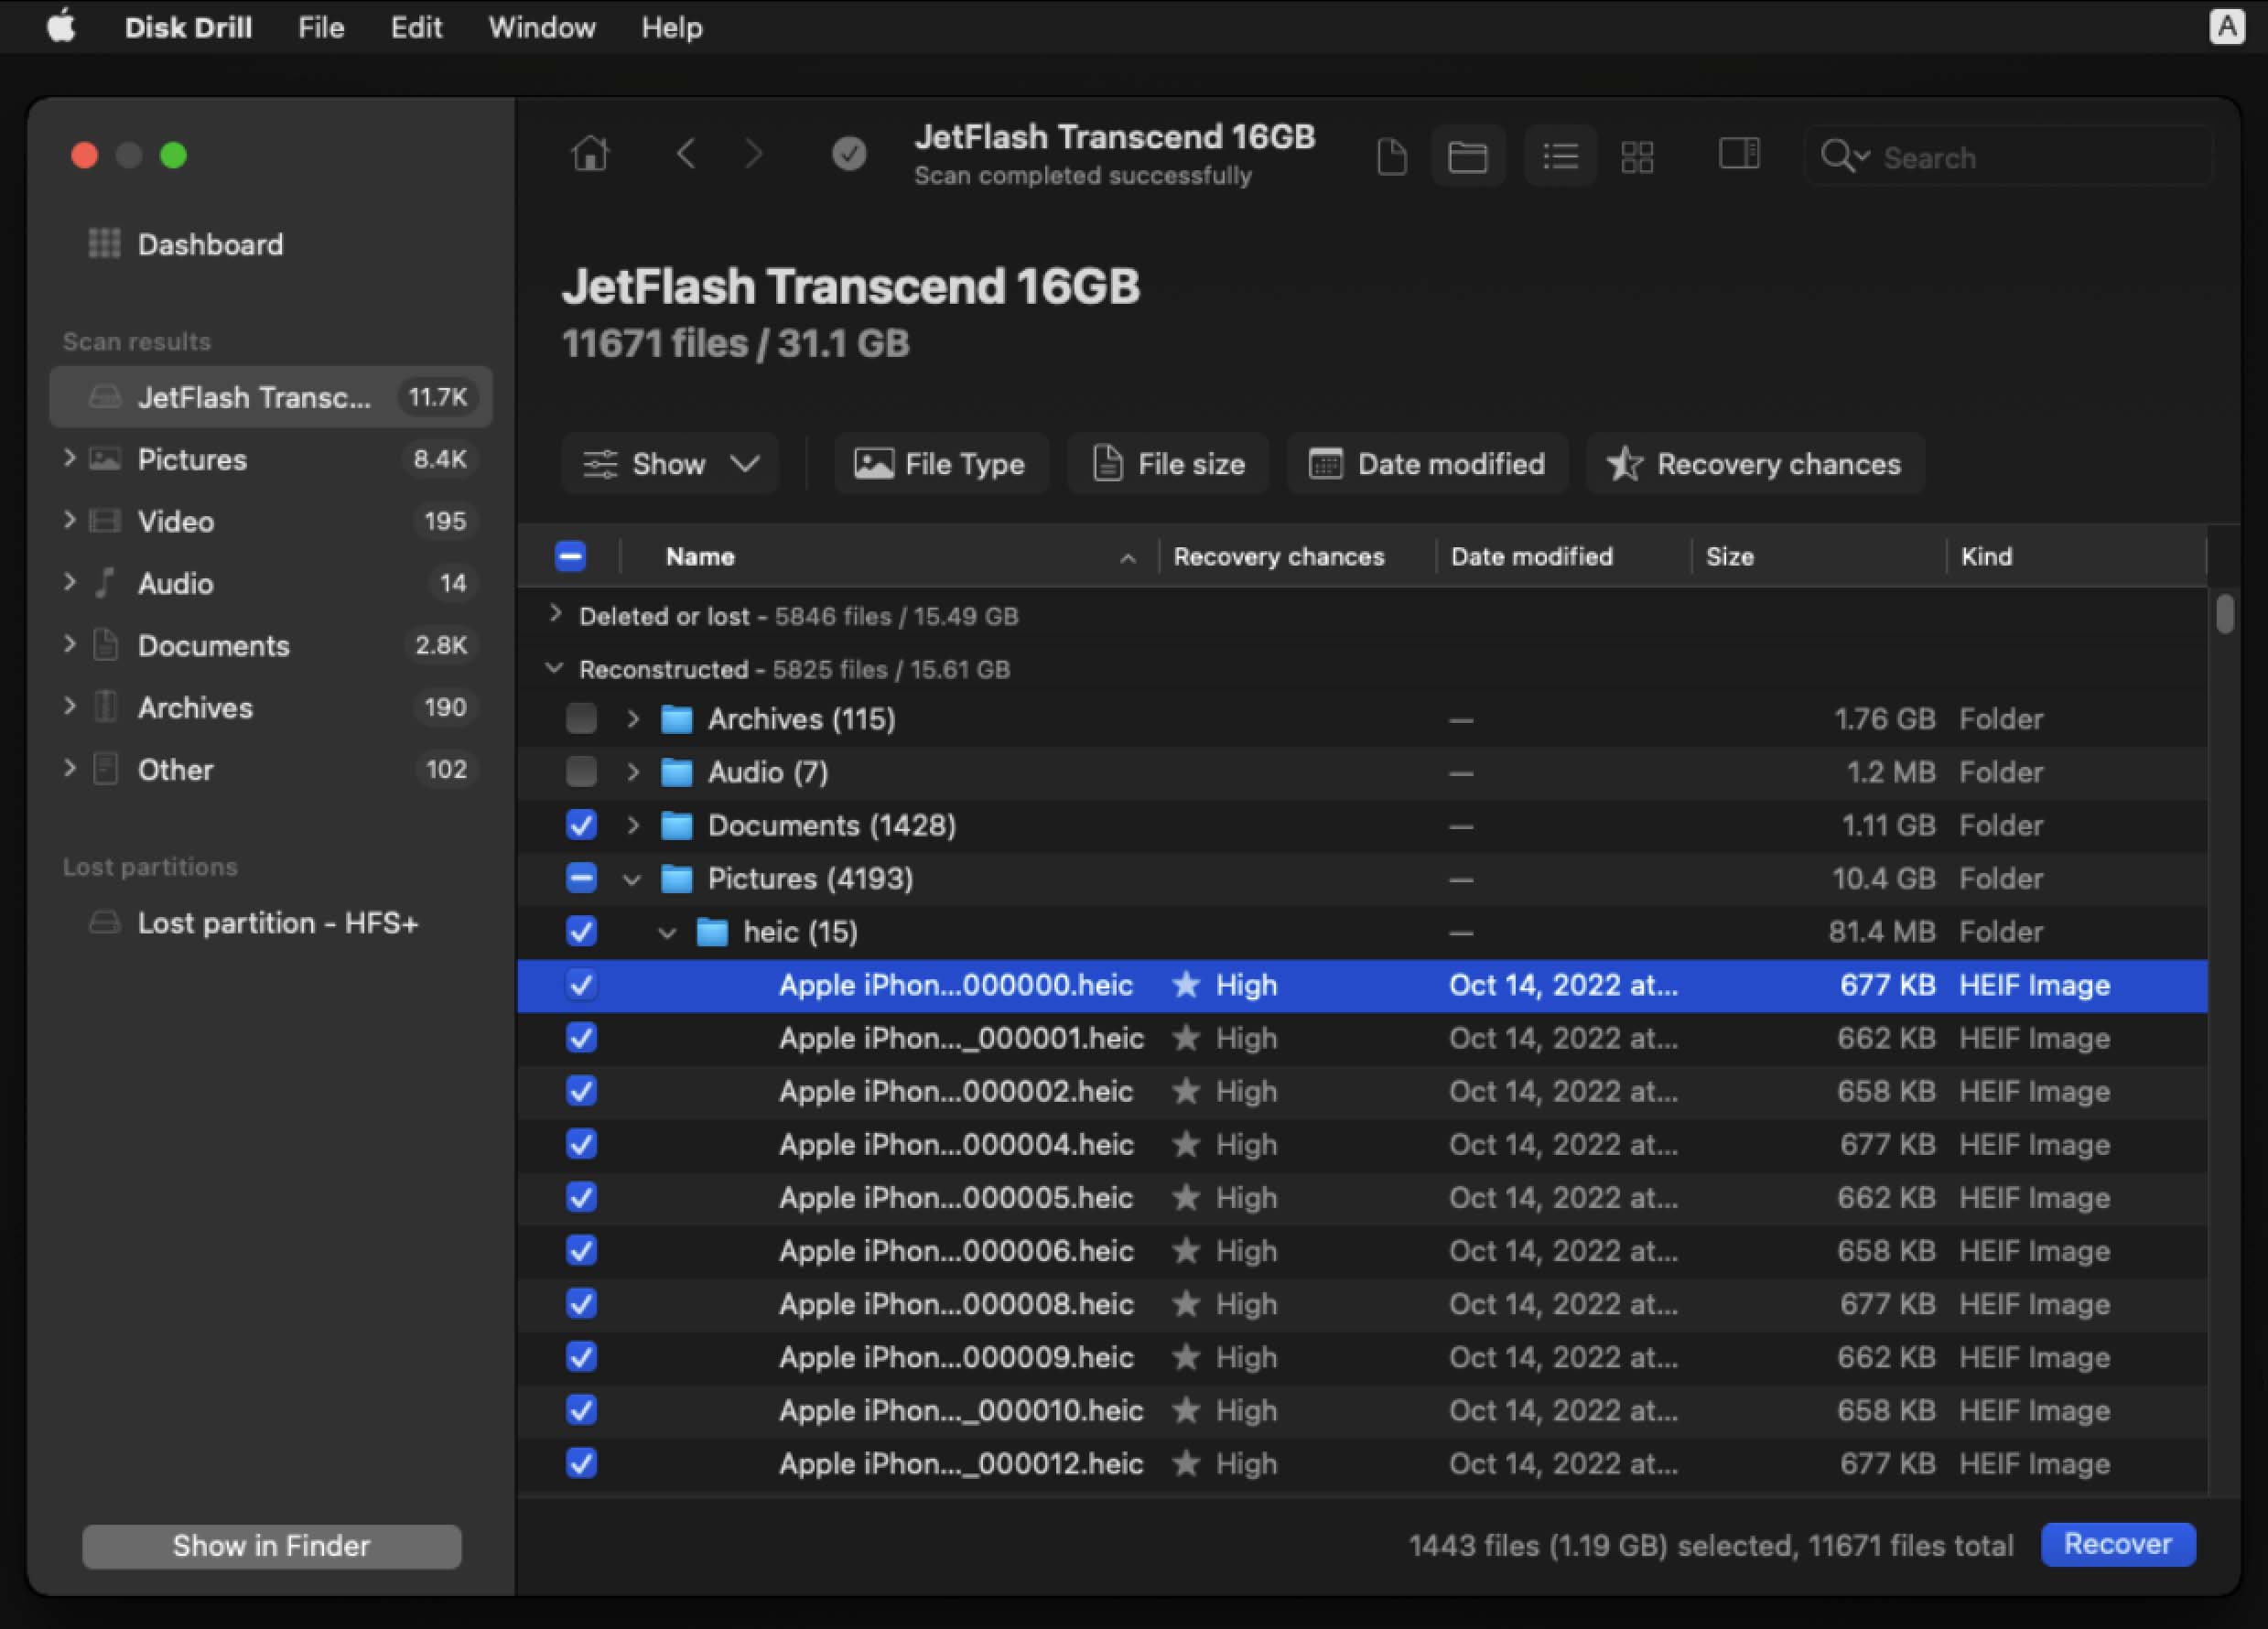
- Review the results and select the data that you would like to recover.
- Choose the destination where you would like to recover the data to.
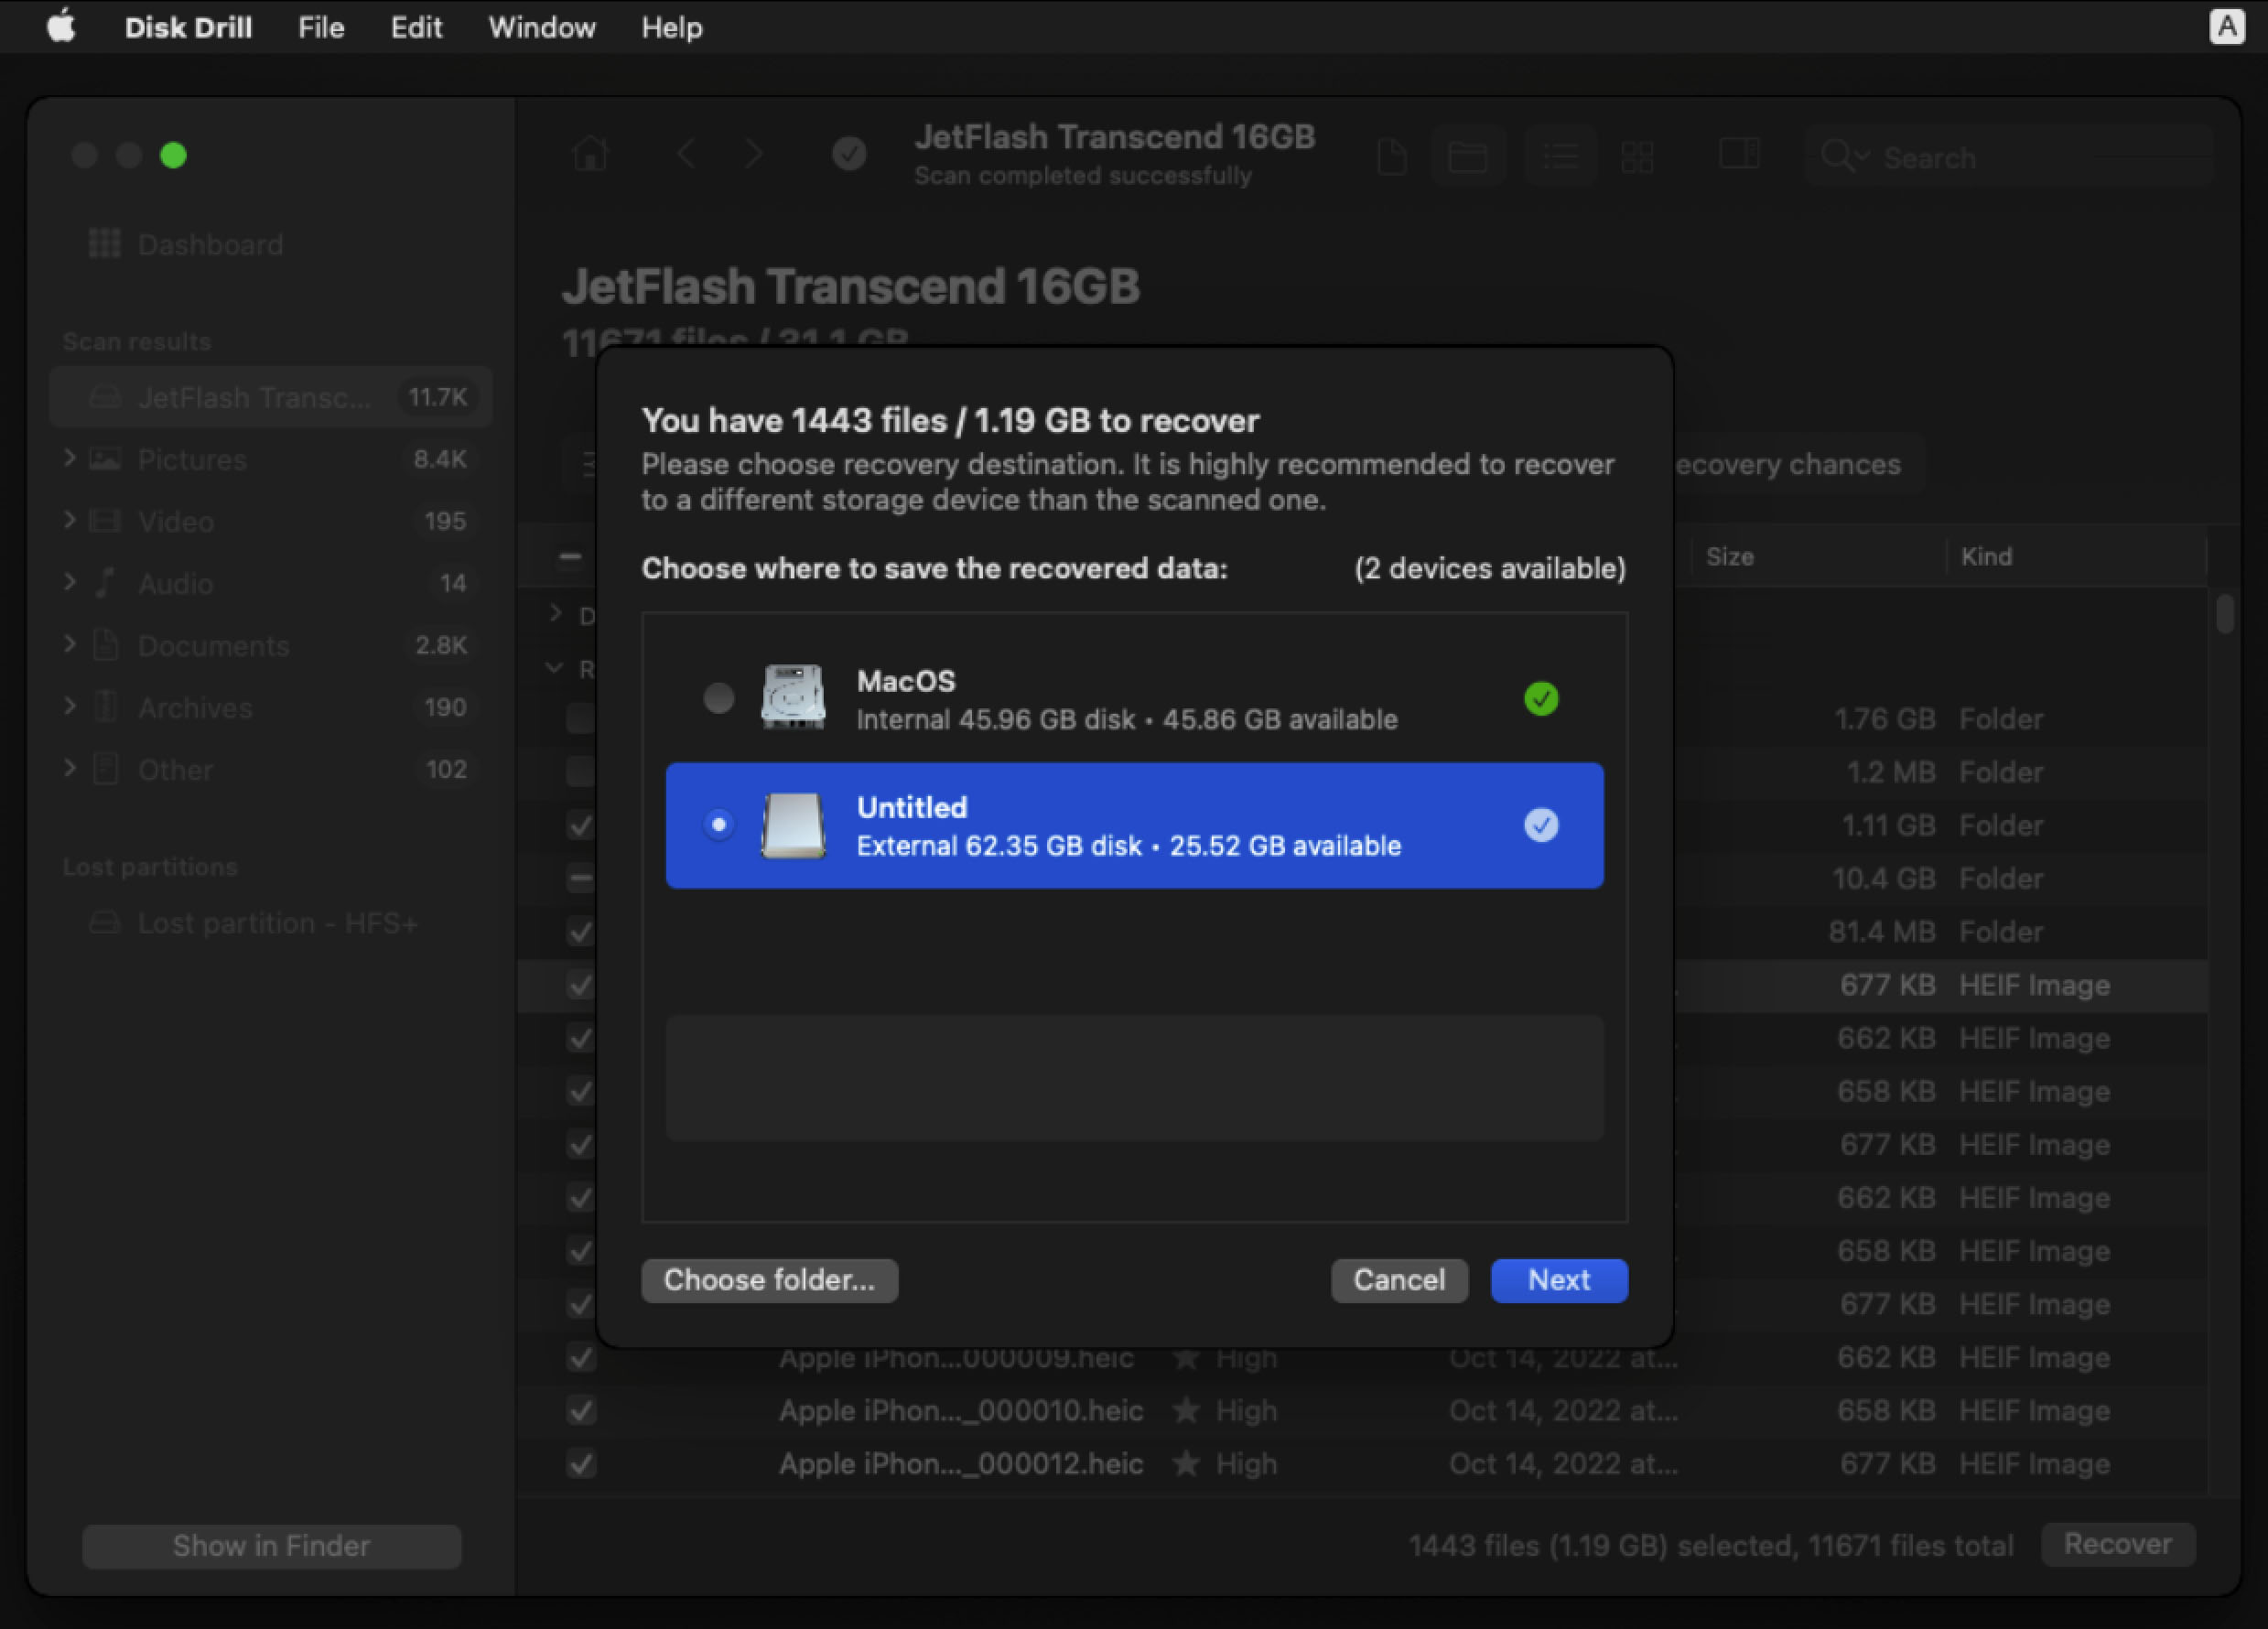
- That’s it! You will now receive a recovery complete message.

Now that you have your data saved and don’t have to worry about that anymore, let’s shift toward trying to get our Mac to boot.
How to Fix Question Mark Folder on Mac
There could be many reasons why your Mac won’t boot up. Below we will walk through various methods that we can do to try and get our Mac up and running again.
Method 1: Edit Mac Startup Disk in System Settings (If the Folder With a Question Mark Goes Away)
We recommend using this method if your Mac briefly displays the folder with a question mark but then proceeds to boot up normally.
This will enable Mac to boot from the correct startup disk each time instead of doing the dance of showing the error message and then booting.
- Launch System Settings.
- Go down to General and then choose Startup Disk.
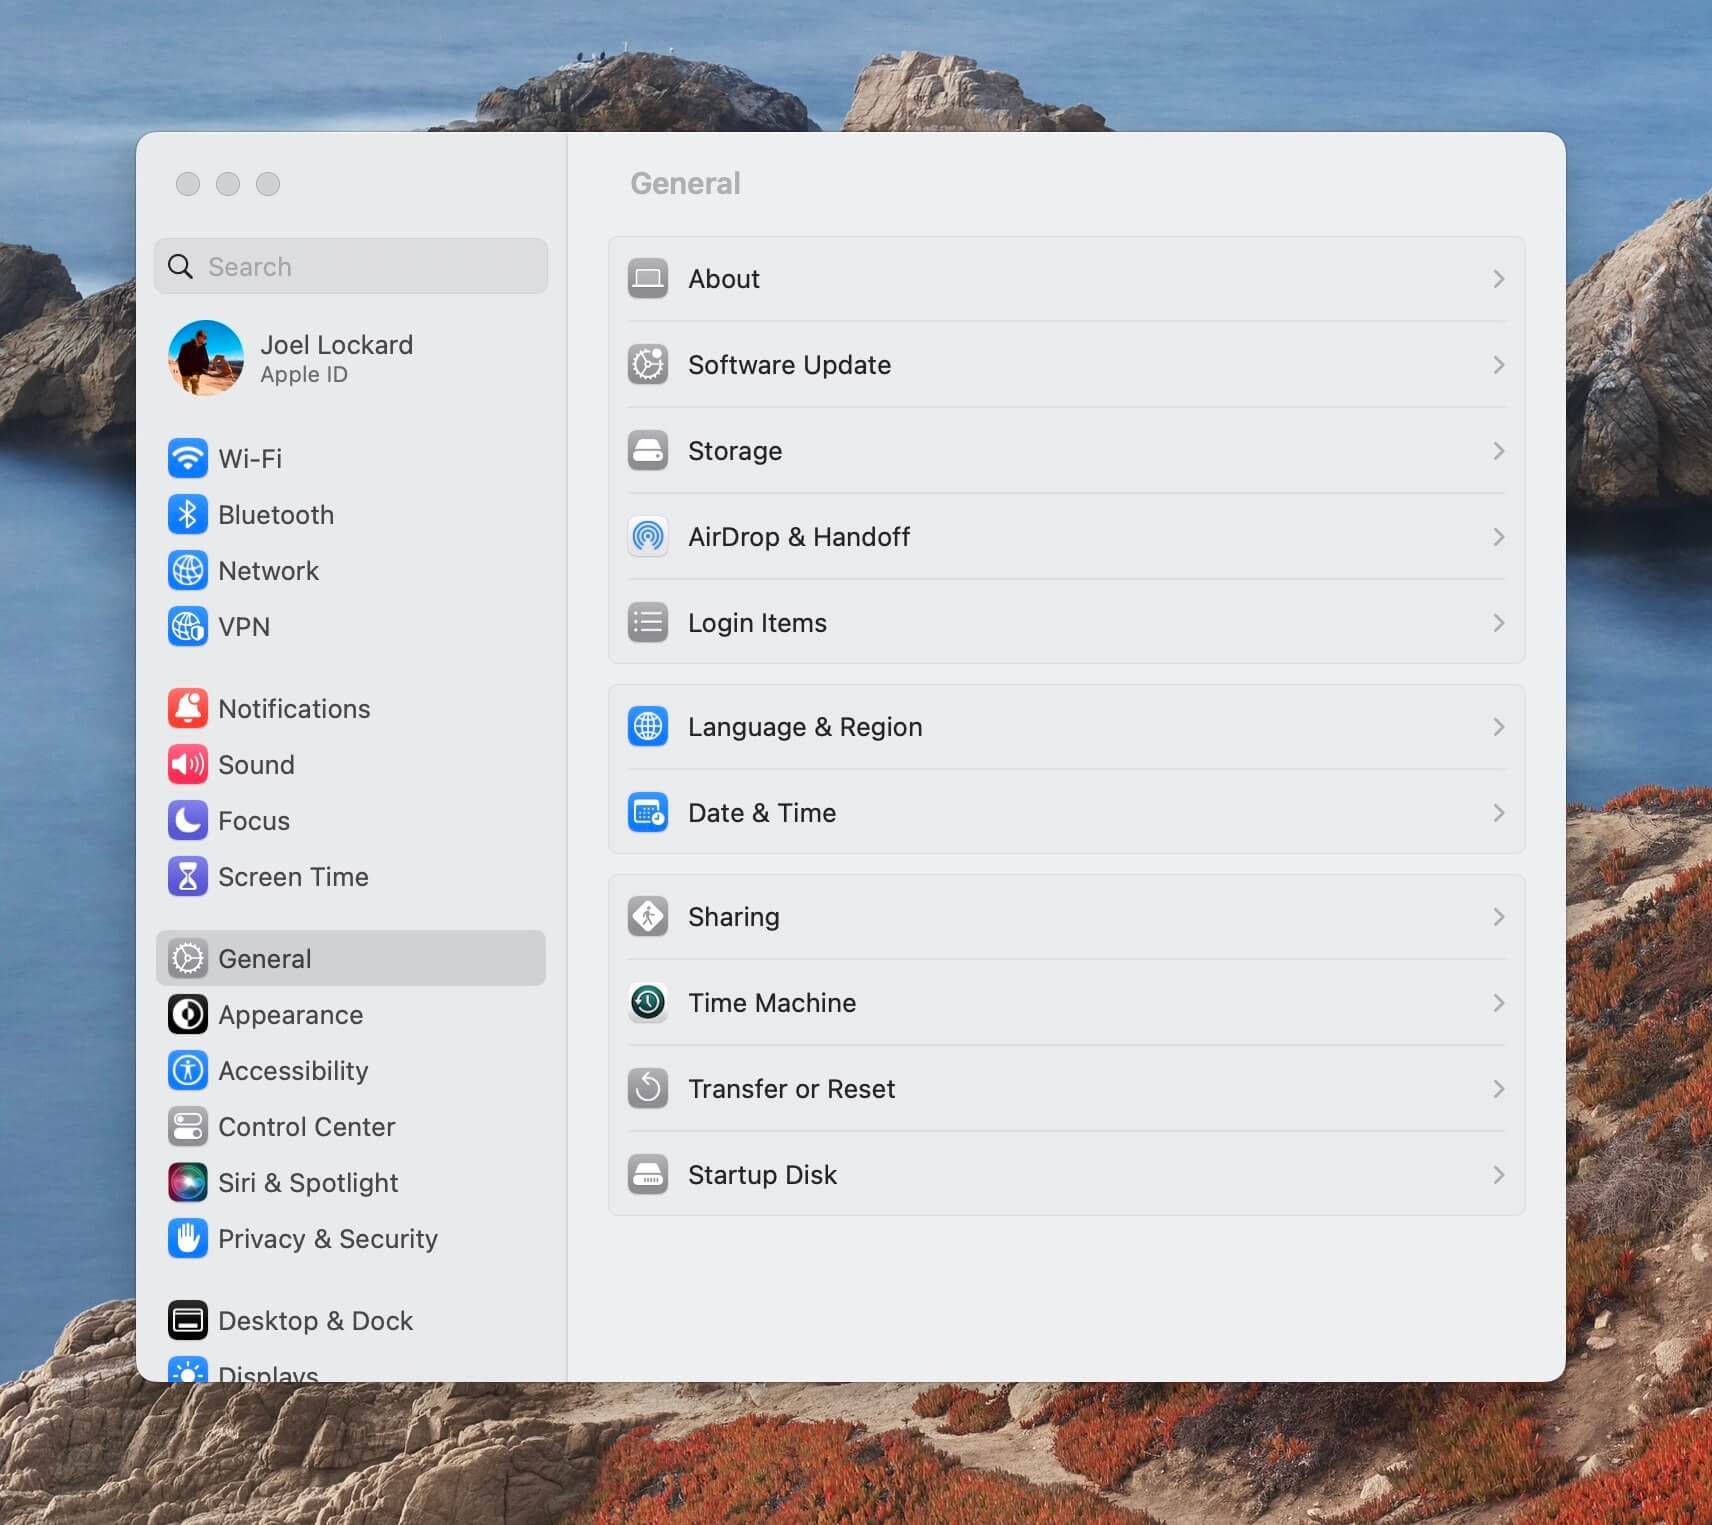
- From within System Settings, select your startup disk that has your operating system on it.
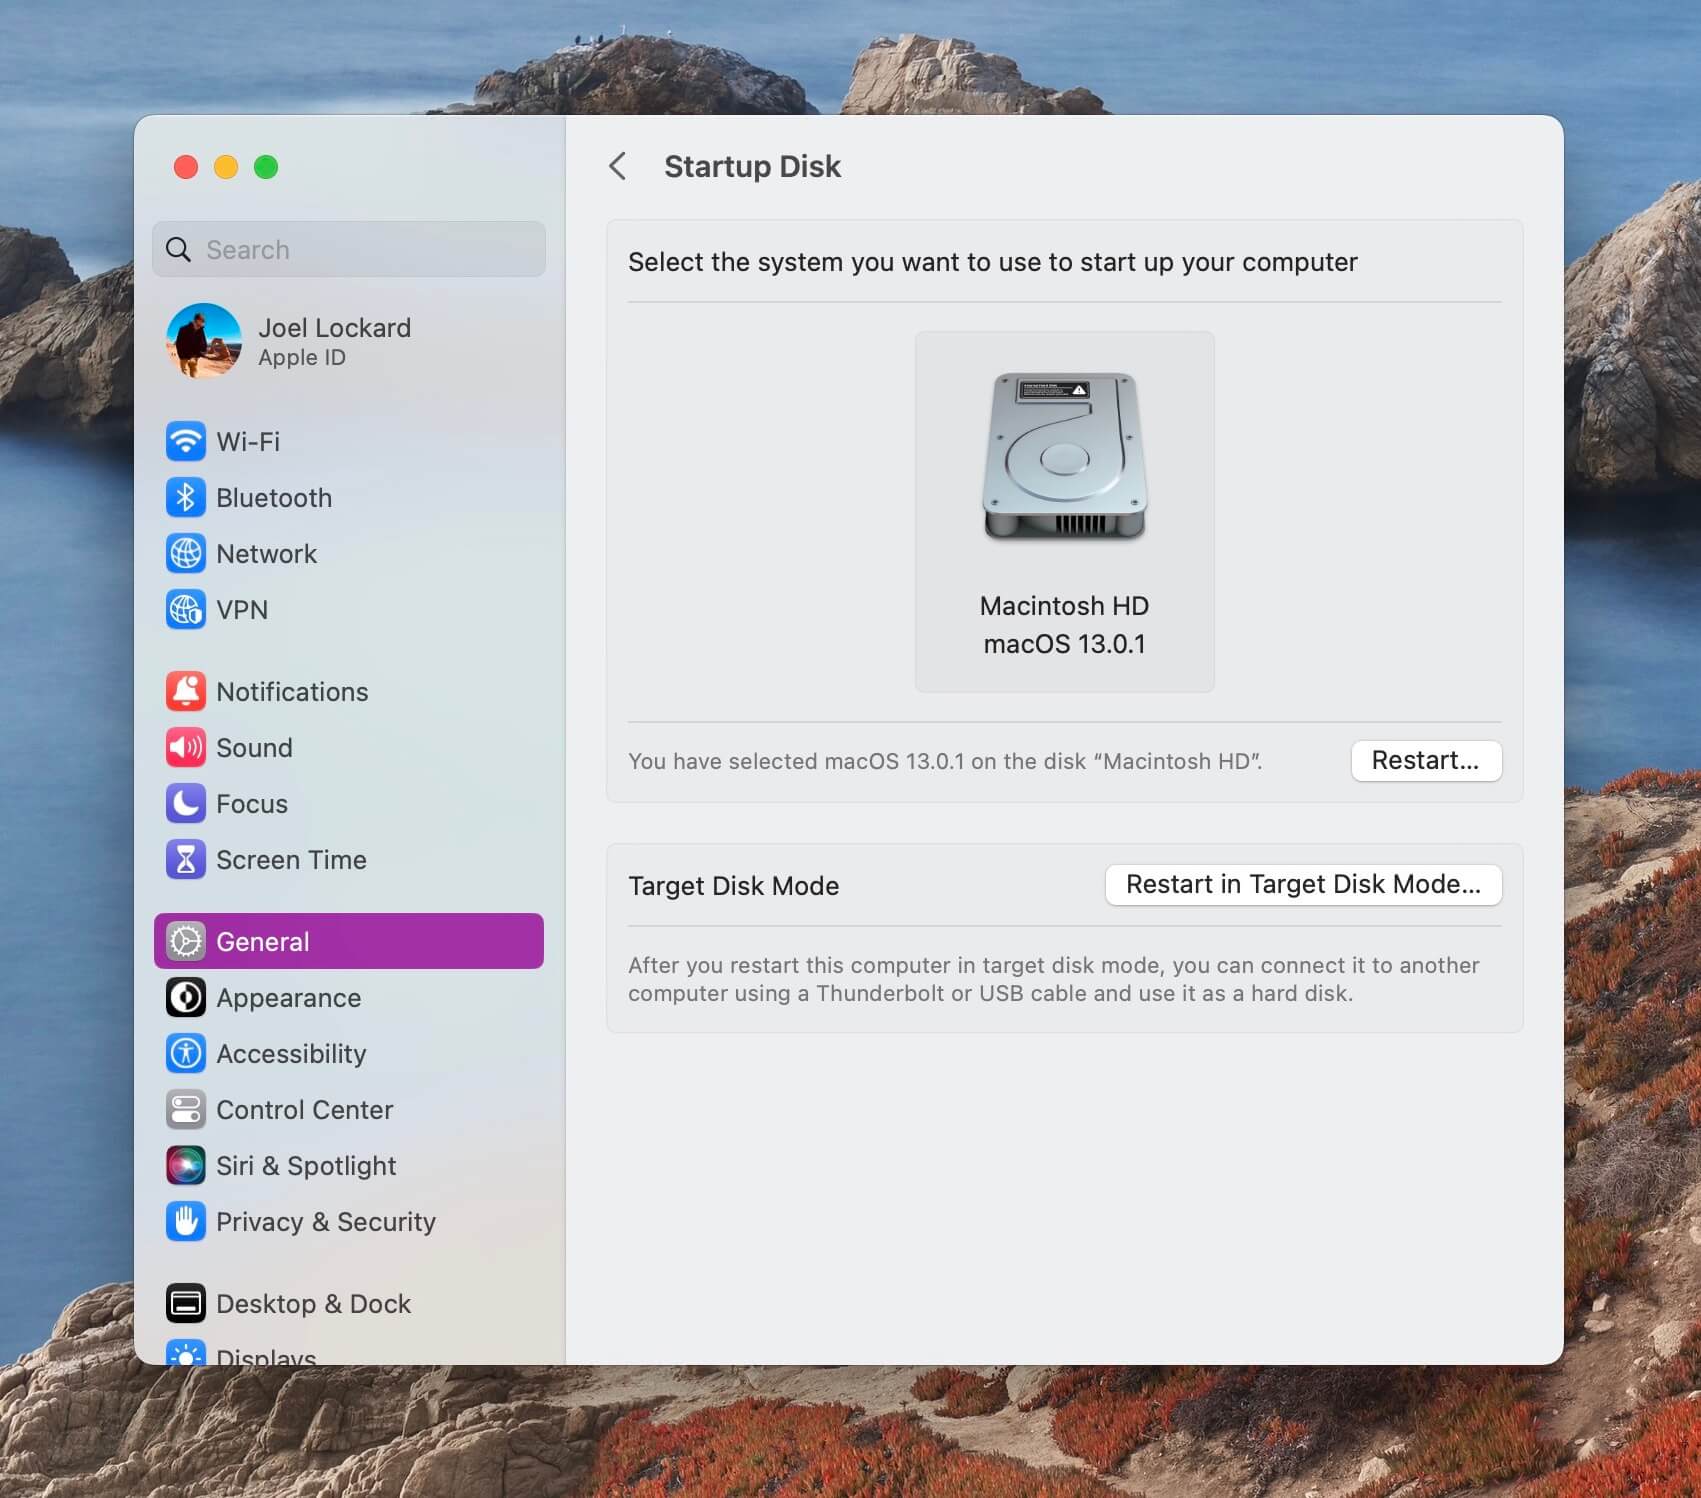
- Restart your Mac and see if the issue has been corrected.
If your Mac has a permanent folder with a question mark, you will want to start with the next method.
Method 2: Turn Your Mac off and Then Try to Boot It Again
If you’ve powered on your Mac and encounter the folder with a question mark, there might have been a glitch in the startup process. Trying a simple restart can often resolve such issues, allowing your Mac to initiate a fresh startup.
- Hold down the power button until your Mac’s screen goes black.
- Press the power button and then release.
- Wait for your Mac to boot up and see if it’s operating correctly this time.
If your Mac isn’t making it past the folder with a question mark, then let’s move on to the next step.
Method 3: Reset the NVRAM/PRAM on your Mac
Your Mac uses both NVRAM/PRAM to store system settings that have to do with your startup disk, audio settings, display resolutions, and other system settings.
Although these settings typically function seamlessly, if you’re facing problems like the appearance of the folder with a question mark, it’s advisable to check if resetting them resolves the issue.
The steps below will reset both NVRAM/PRAM so you will only need to accomplish this once.
- Shut down your Mac by holding the power button until the screen goes black.
- Turn your Mac back on and then immediately press and hold OPTION+COMMAND+P+R. Hold these keys for about 20 seconds.
- Your Mac will then appear to restart.
- See if the folder with a question mark is gone and if your Mac has booted correctly.
If you’re using a newer Mac that has a T2 security chip, you can release the keys right after you see the Apple logo.
If your Mac still has a folder with a question mark, then let’s try running First Aid.
Method 4: Run First Aid on Your Mac in Recovery Mode
First Aid is a free utility that comes installed on your Mac and it’s provided by Apple. By using it, we can scan our Mac and find any disk errors that could be causing Mac to display the folder with a question mark.
Let’s look at how to use First Aid on Mac.
- The first thing that you need to do is boot into Recovery Mode. There are 2 ways to do this, and they depend on if you’re using an Intel or Apple Silicon Mac.
- Apple silicon (newer Macs, usually less than 2 years old): Press the power button on your Mac and then continue to hold it down until you see the startup options window. Click the gear icon labeled Options, then click Continue and this will bring you into Recovery Mode.
- Intel processor (older Macs, usually greater than 2 years old): Press and release the power button then immediately press and hold these two keys until you see an Apple logo or other image: Command (⌘) and R. I usually hold these keys for a little bit of time to get into Recovery Mode.
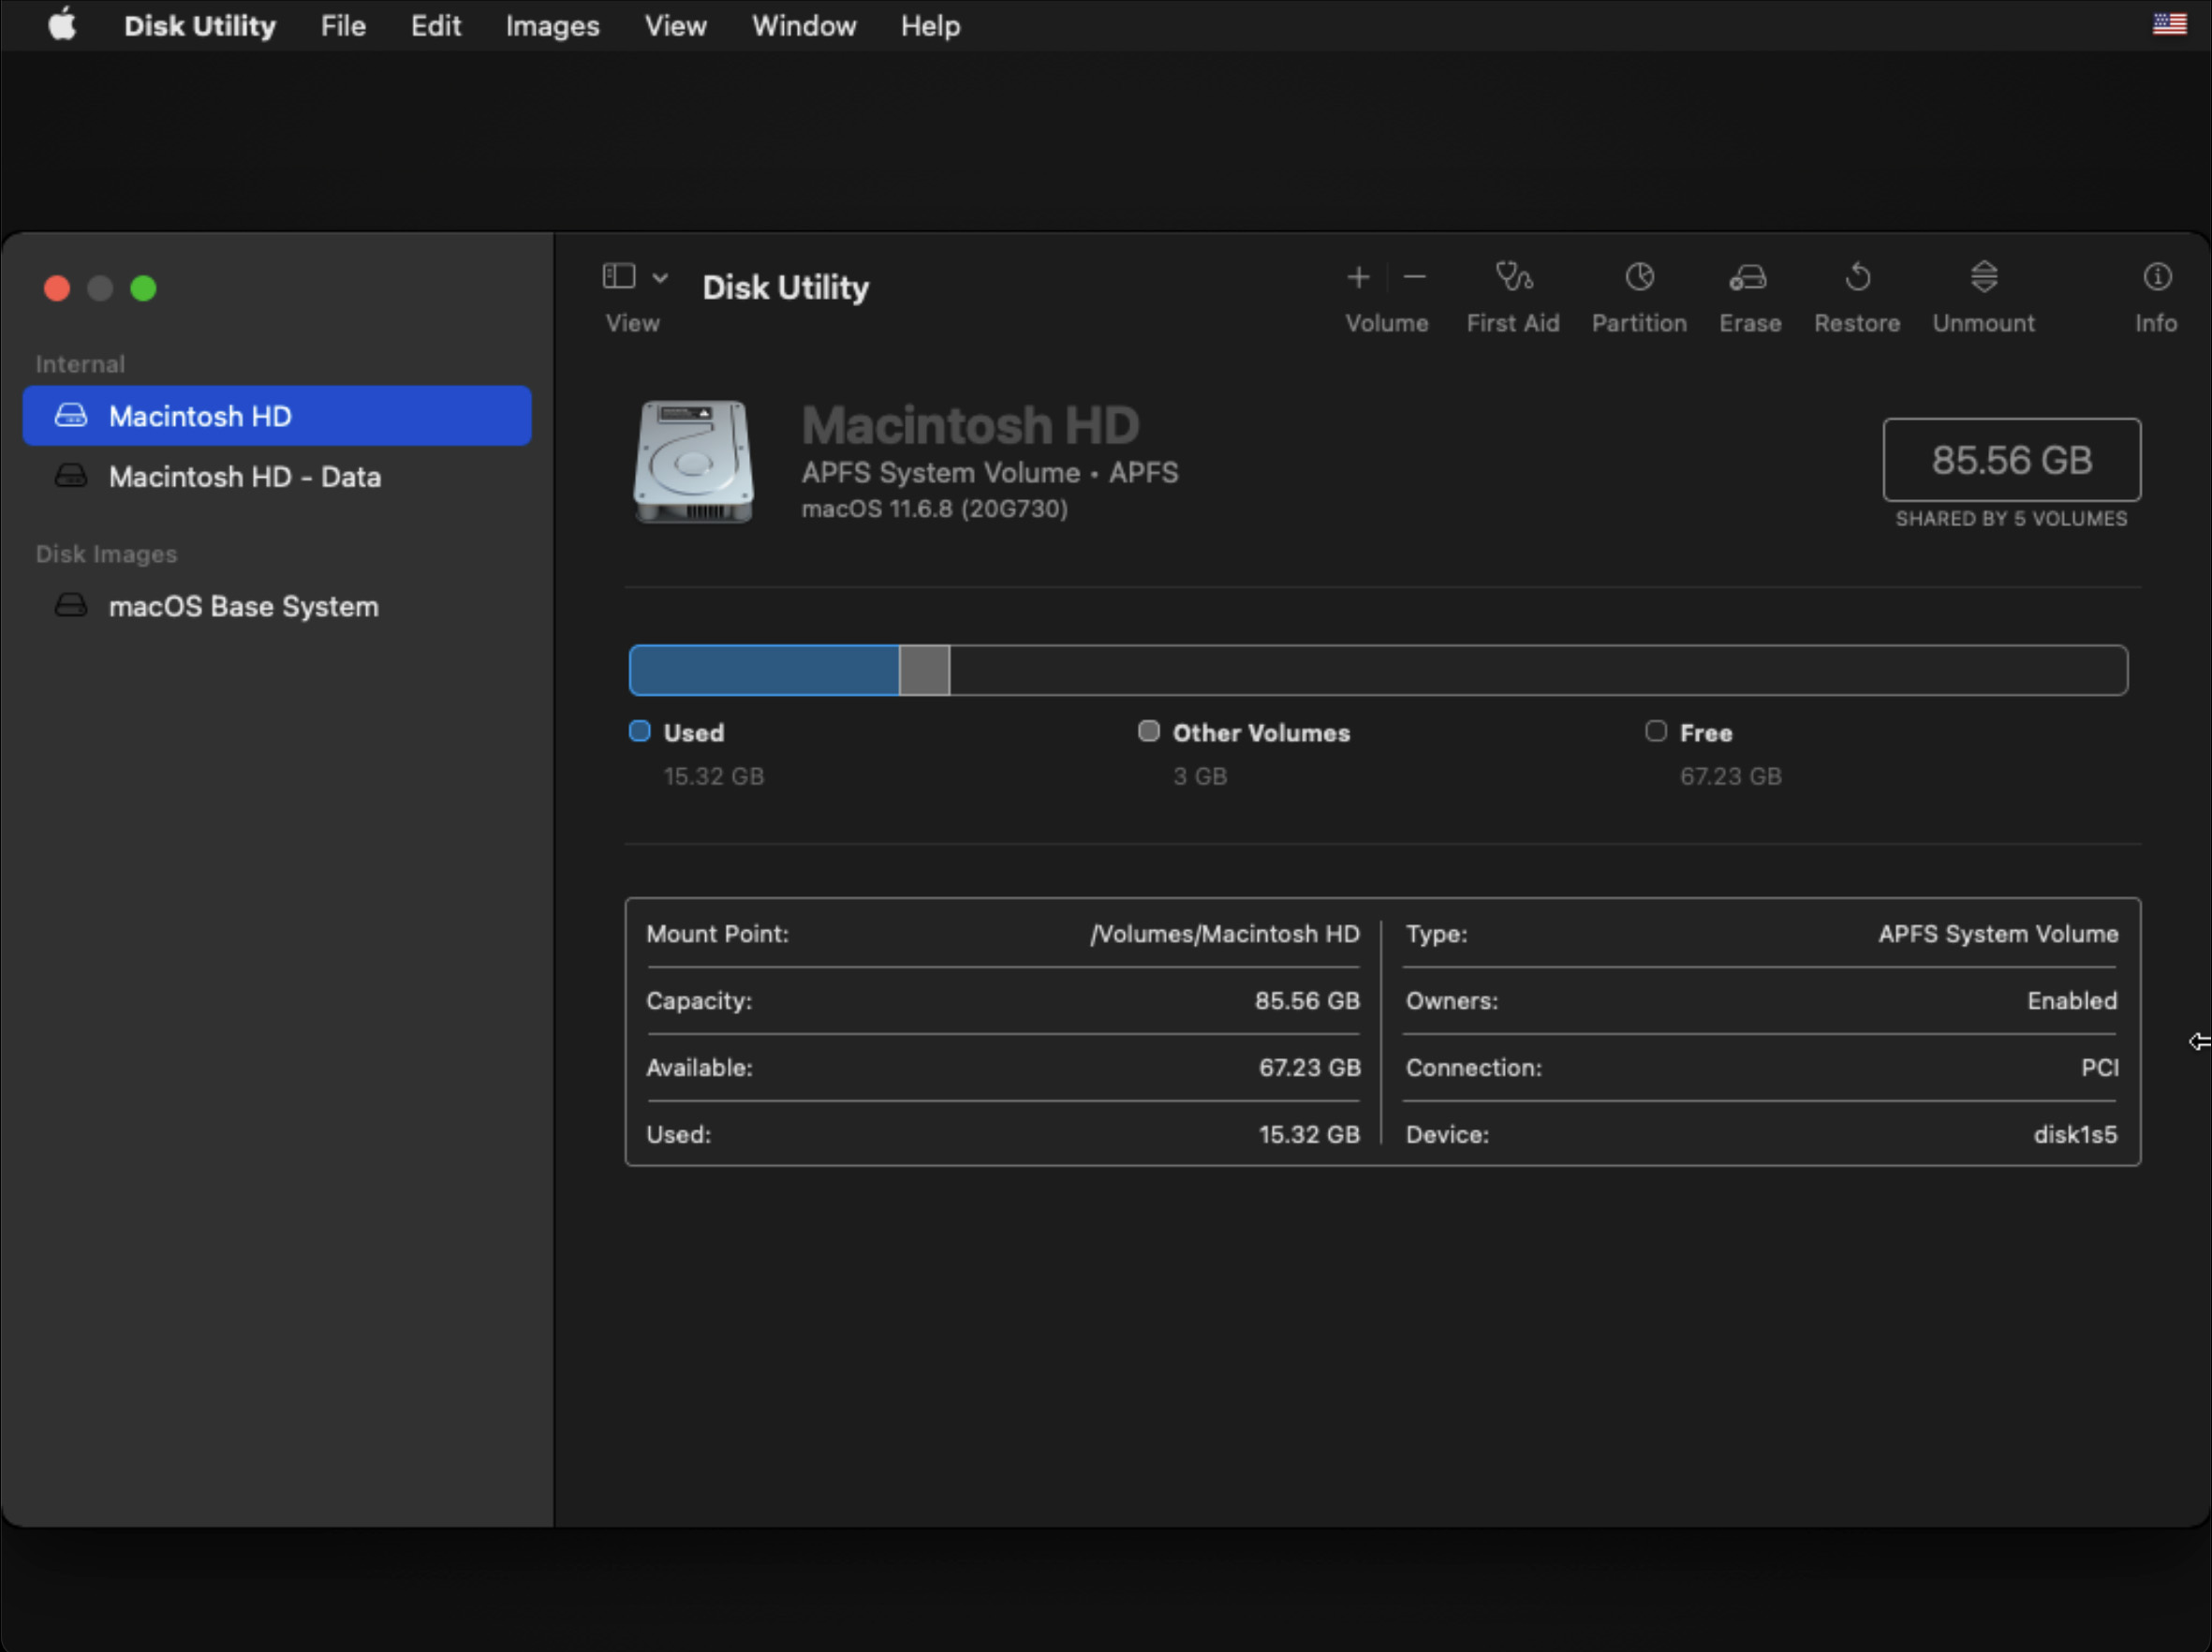
- Now that you’re in Recovery Mode, you will see a list of options. First Aid is part of Disk Utility, so you need to select Disk Utility. Then, click on the Continue tab in the lower right-hand corner.
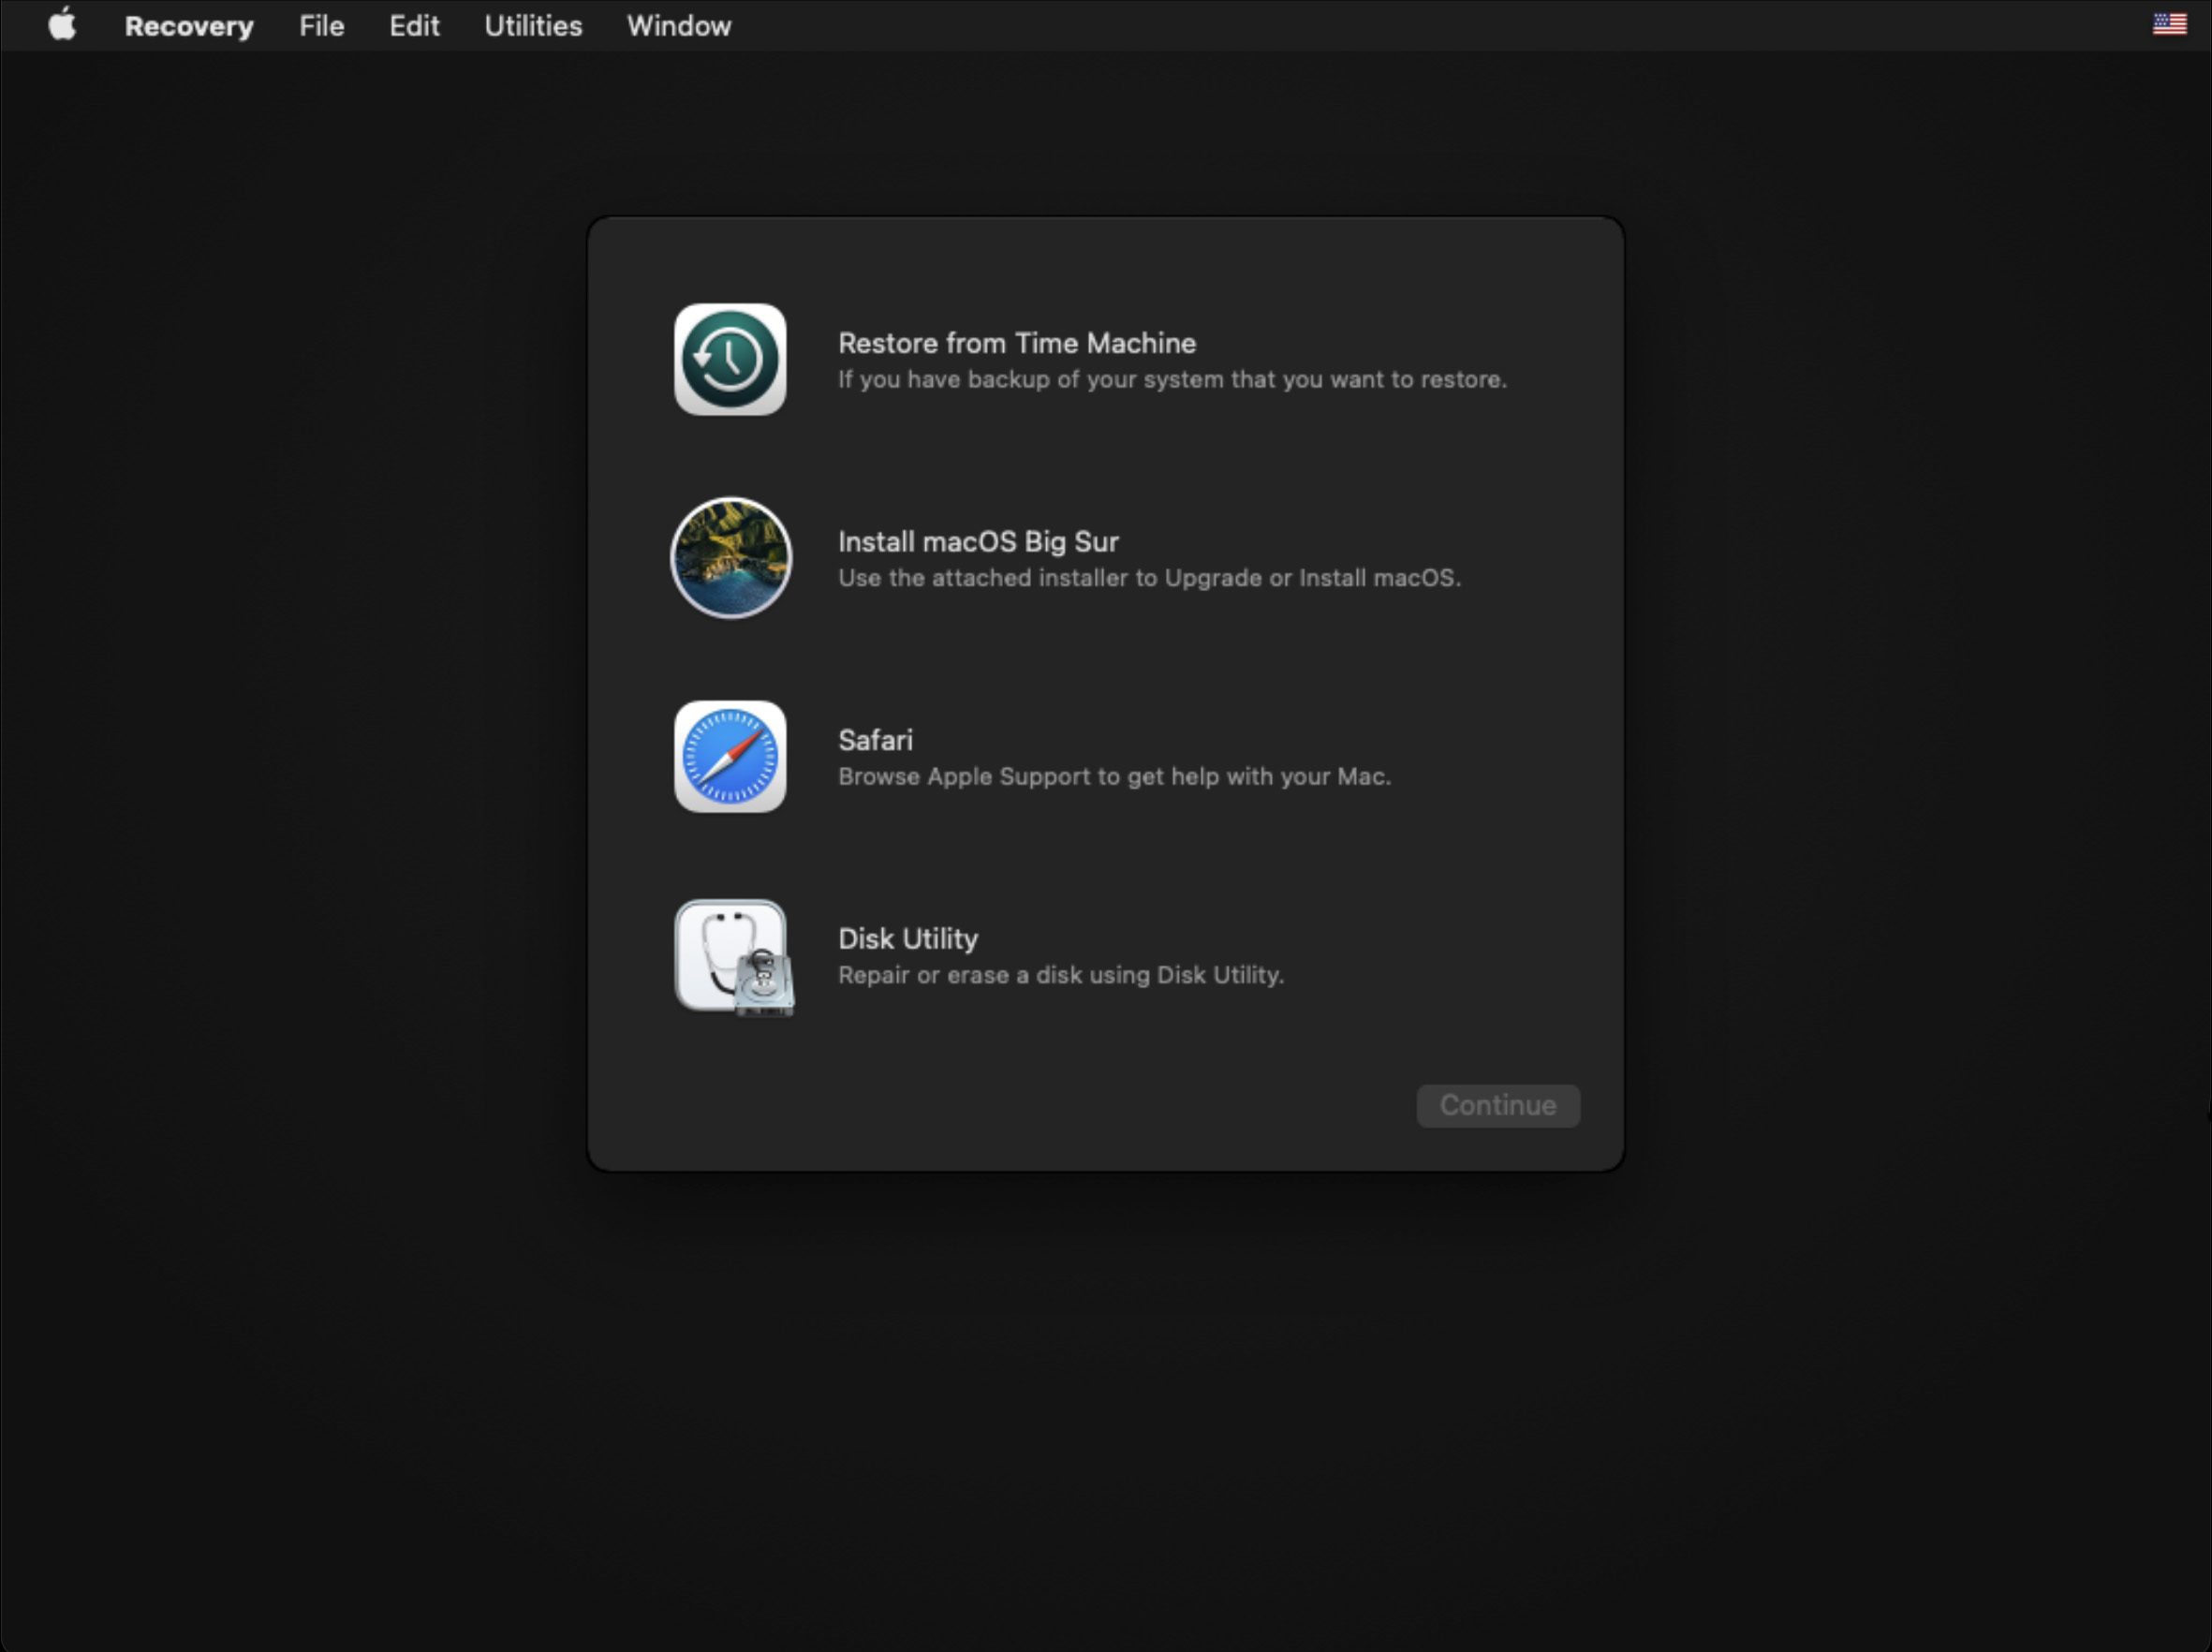
- Select First Aid.
- A pop-up window will appear asking you if you want to run First Aid, click on Run.
- Wait for the process to complete.
- You will then see a green checkmark and a message that says operation successful.
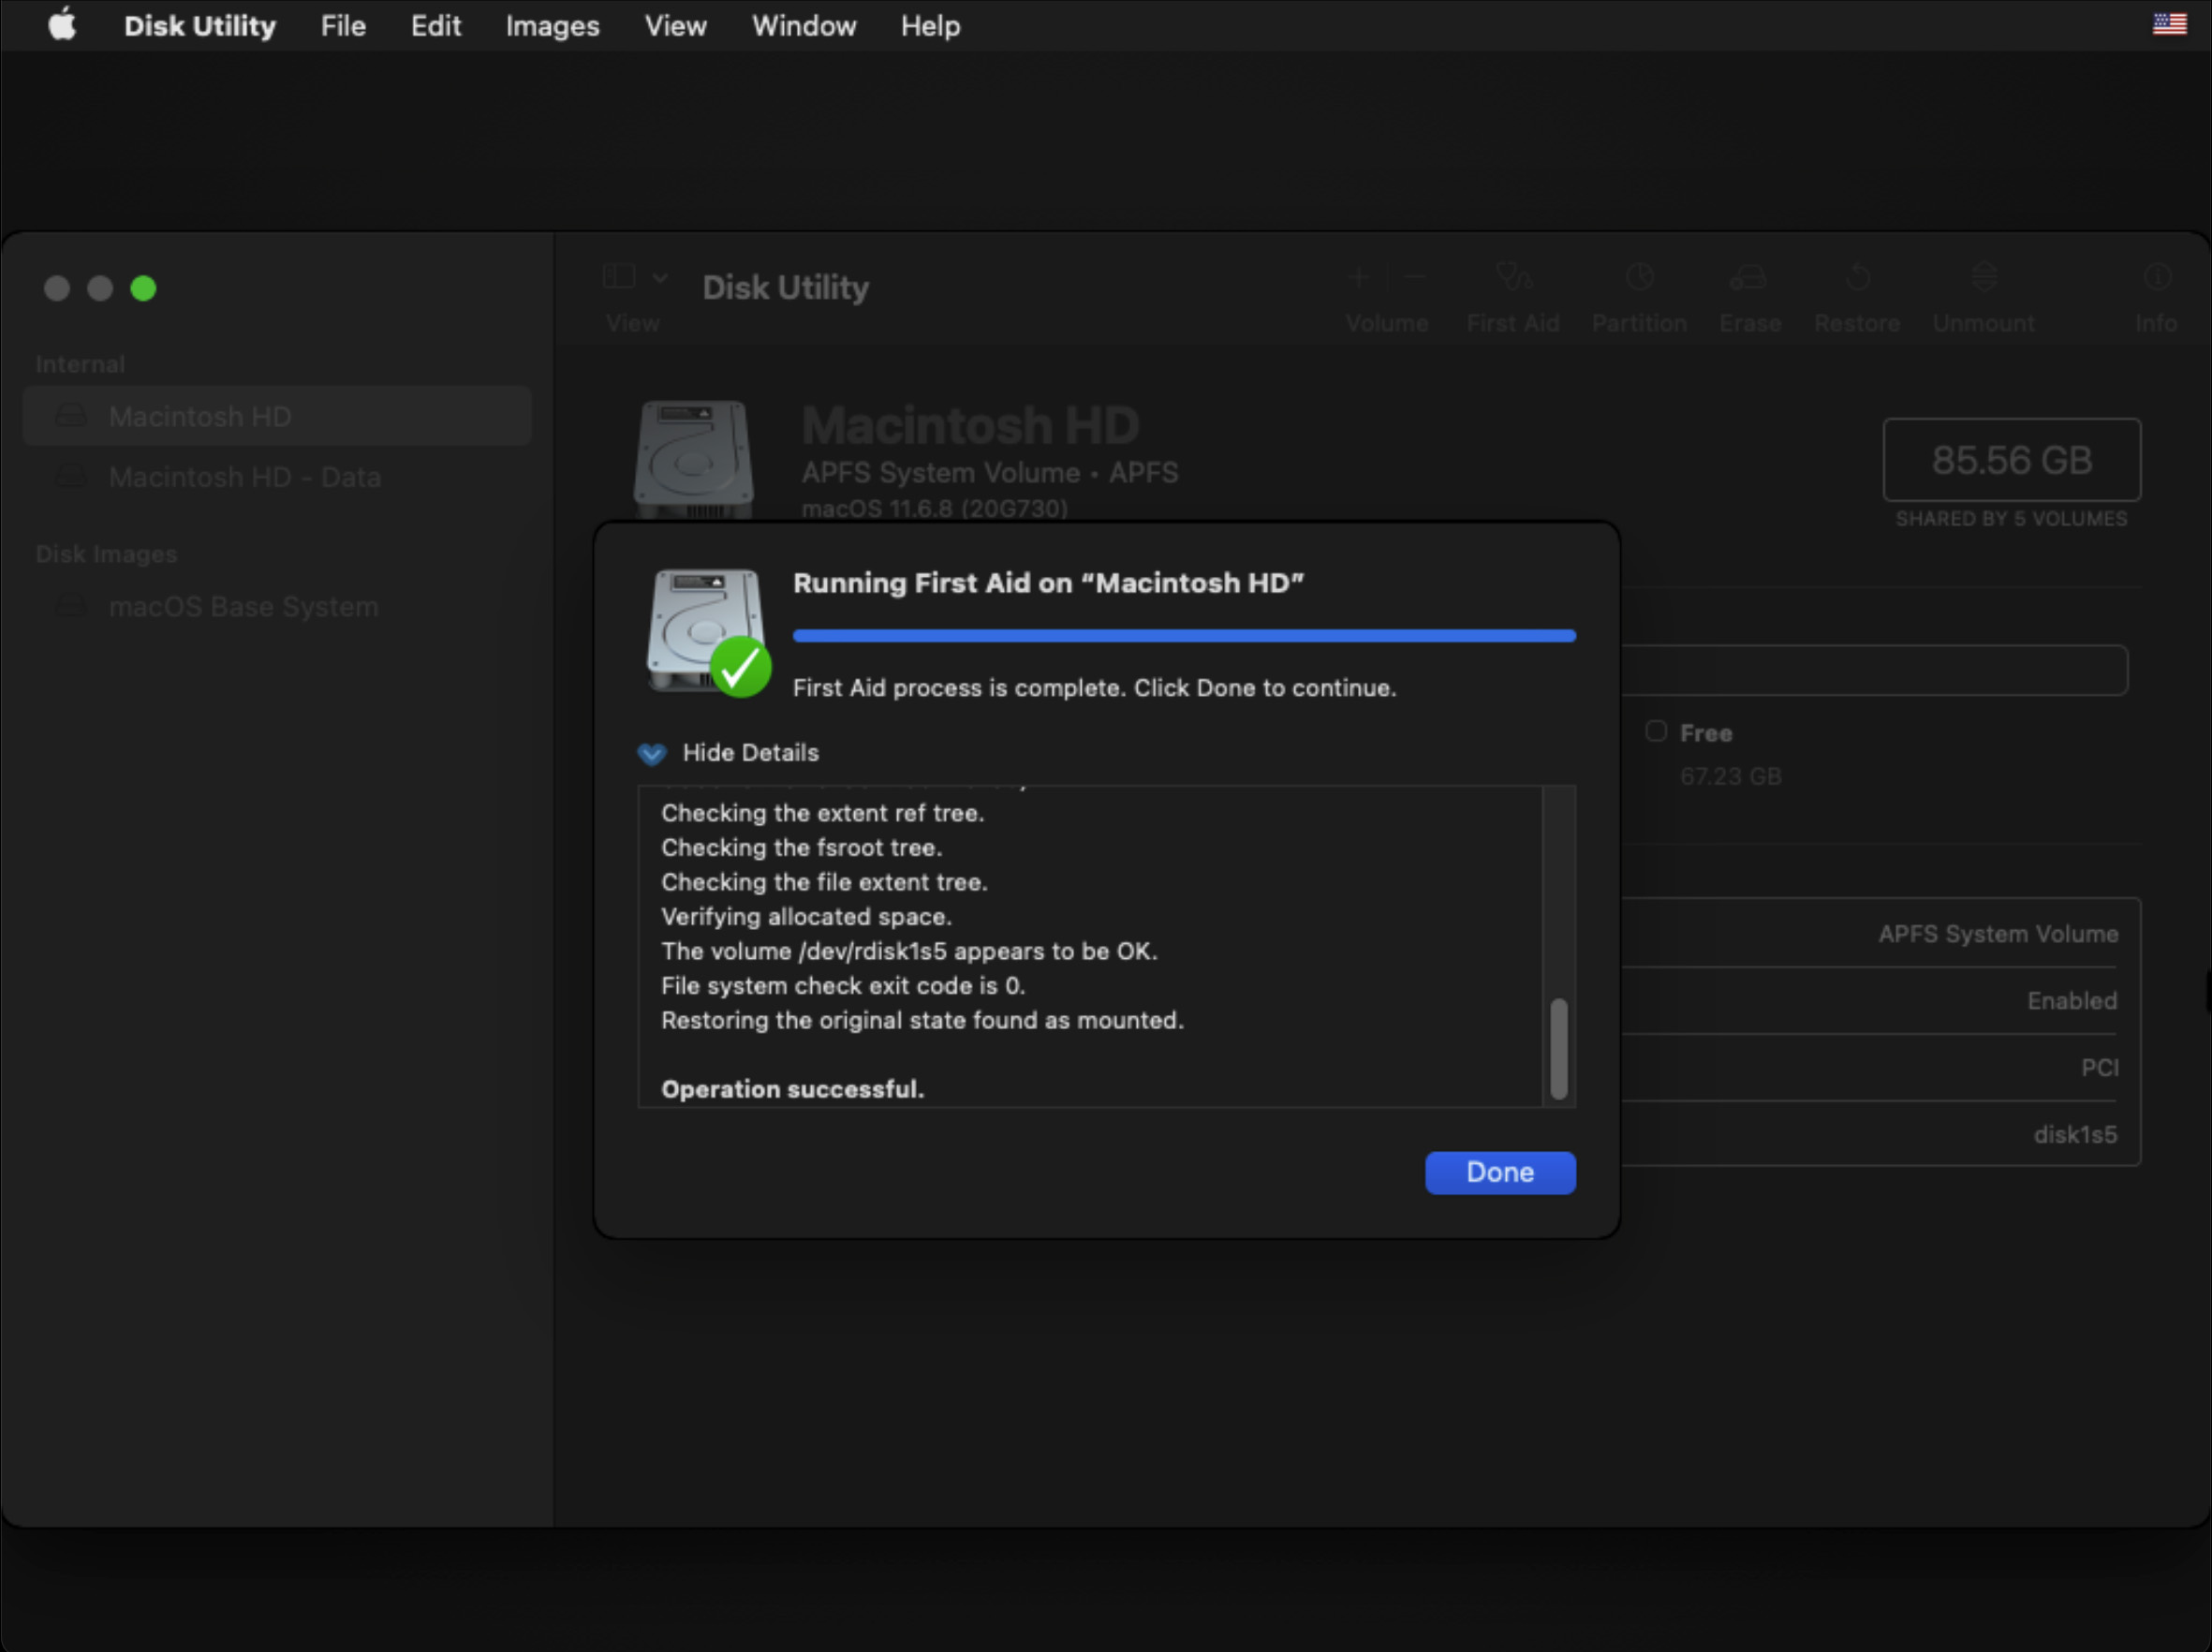
- Click on Done and then go up to the Apple Logo and choose to restart your Mac.
If your Mac is now booting normally, then we’re done here! If not, let’s try reinstalling macOS.
Method 5: Reinstall macOS on Your Mac (No Data Loss)
Reinstalling macOS while in Recovery Mode is more straightforward than it might seem initially. Despite sounding complex, this process is user-friendly, cost-free, and, if executed correctly following the steps below, you won’t experience any data loss.
- First, get your Mac in Recovery Mode. Follow one of the two options below.
- Apple silicon (newer Macs, usually less than 2 years old): Press the power button on your Mac and then continue to hold it down until you see the startup options window. Click the gear icon labeled Options, then click Continue and this will bring you into Recovery Mode.
- Intel processor (older Macs, usually greater than 2 years old): Press and release the power button then immediately press and hold these two keys until you see an Apple logo or other image: Command (⌘) and R. I usually hold these keys for a little bit of time to get into Recovery Mode.
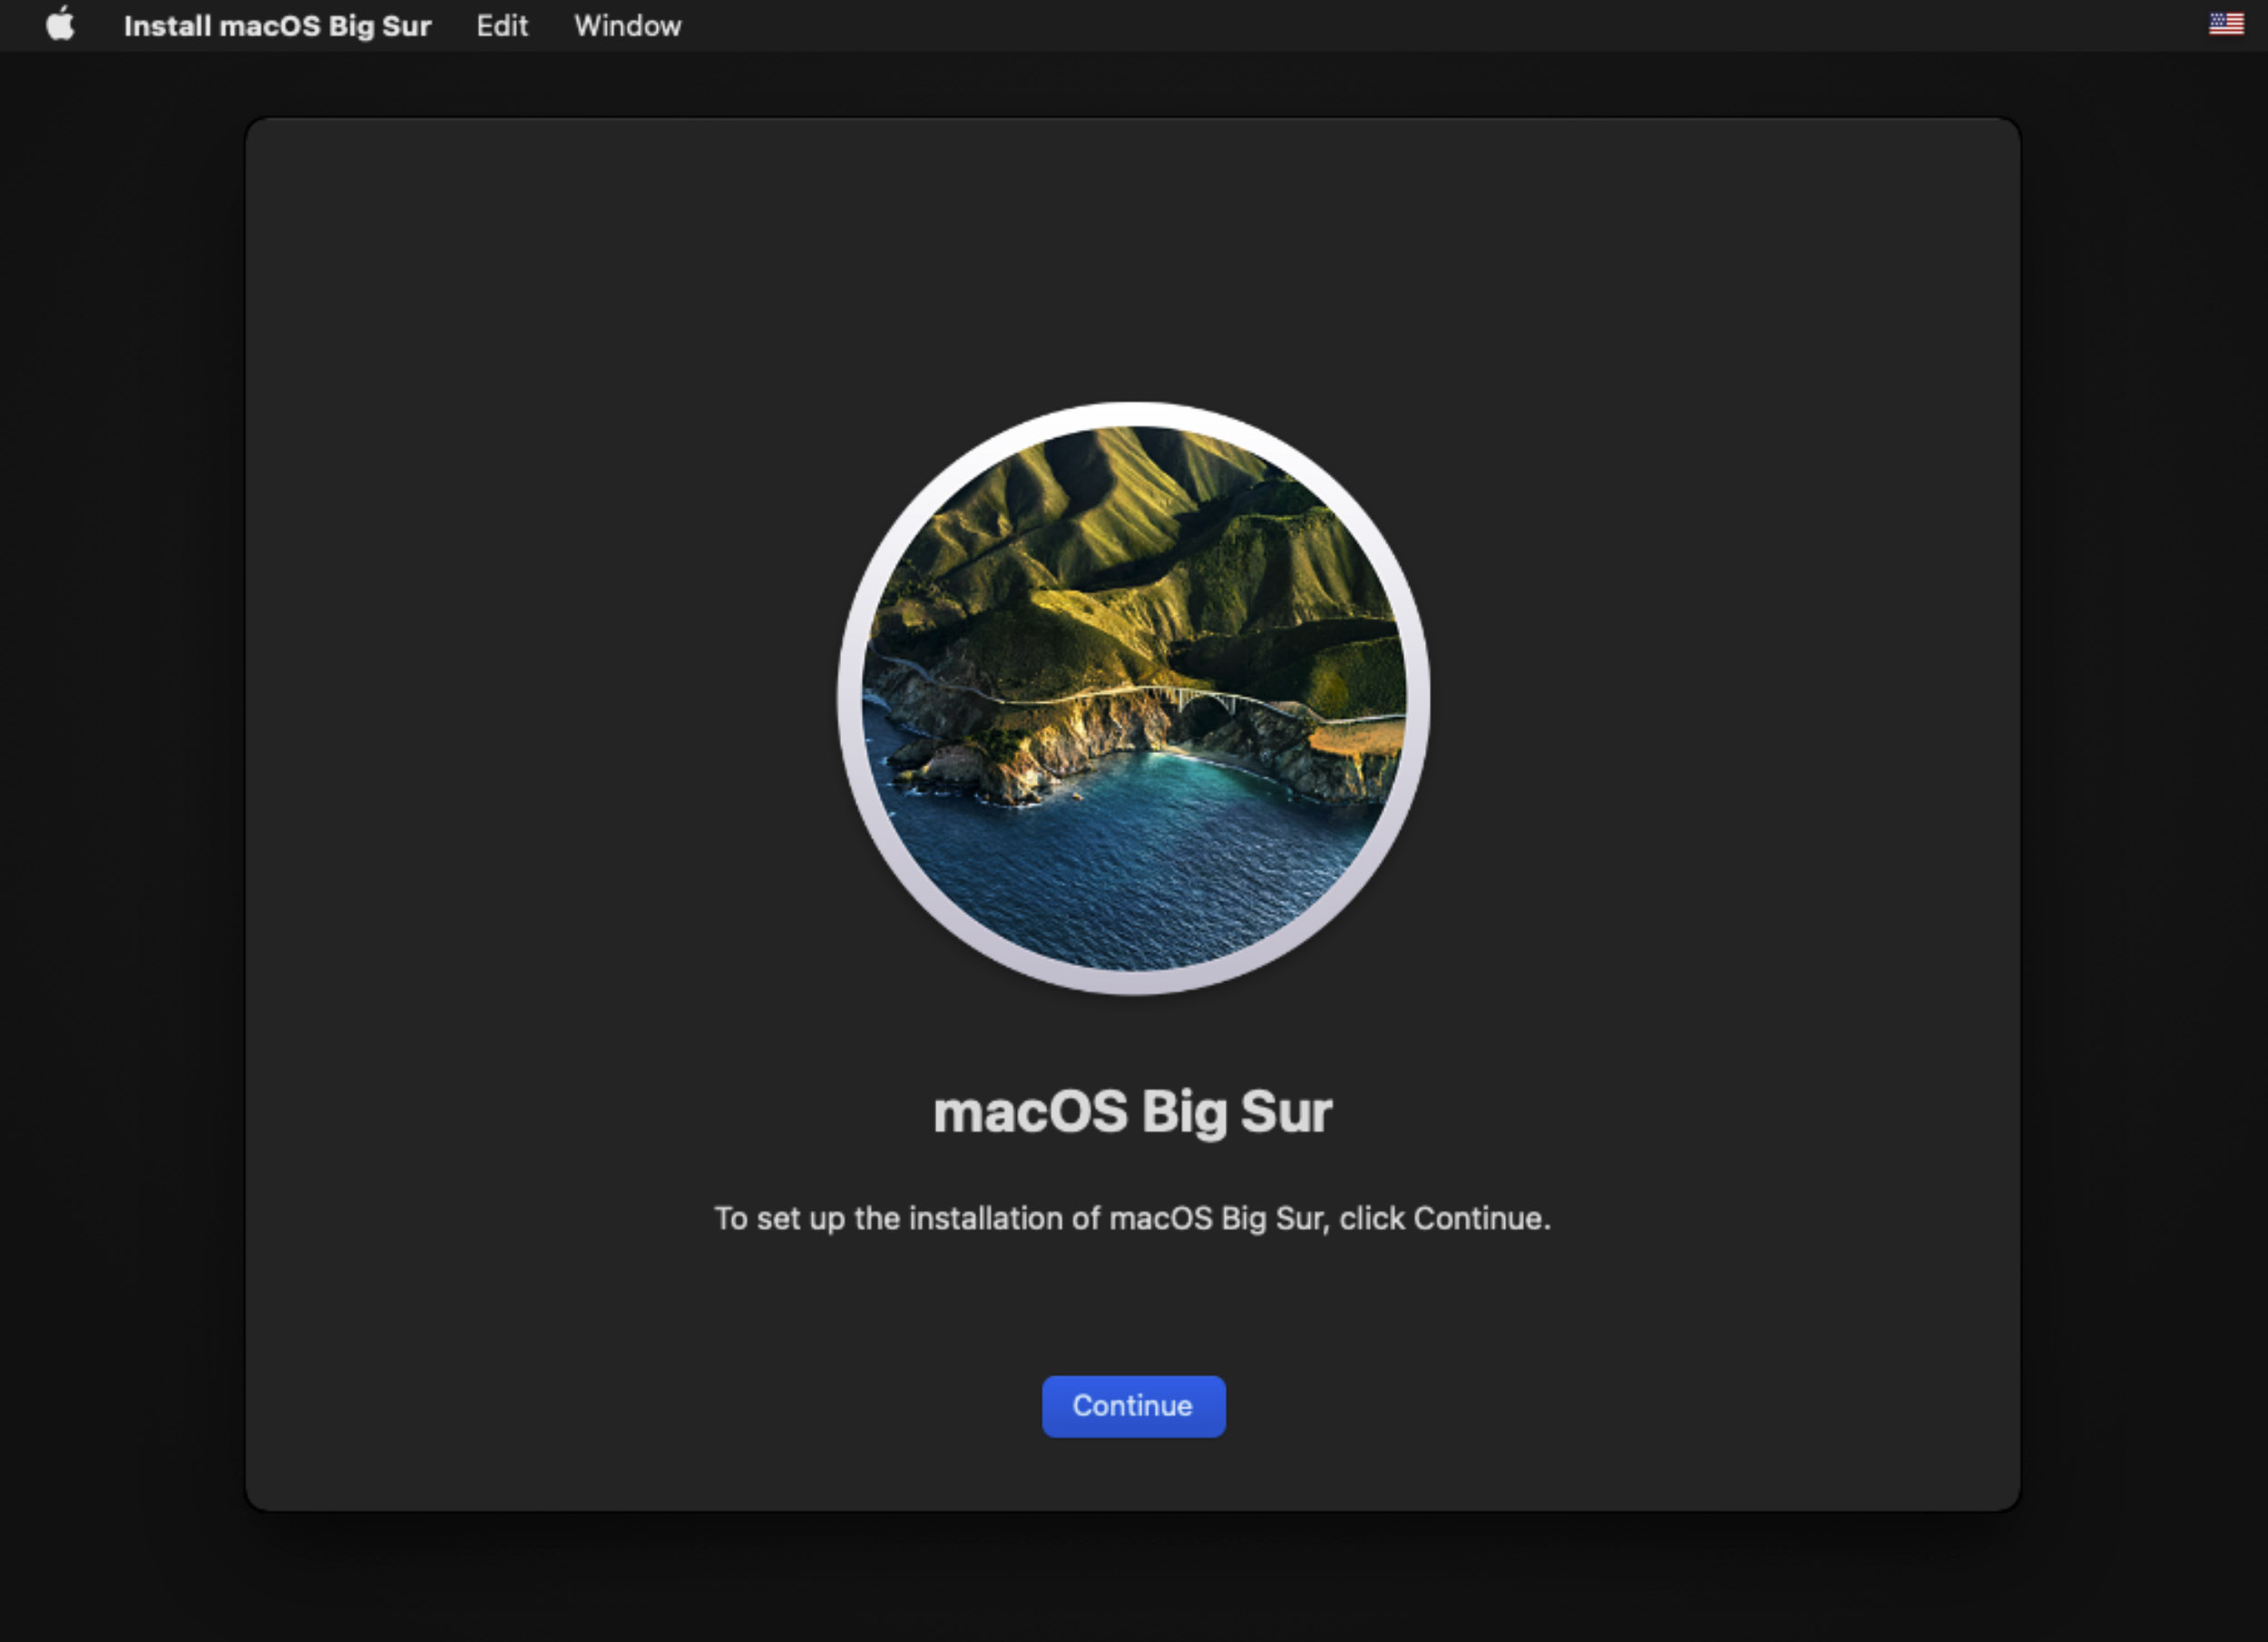
- Select Reinstall macOS.

- Click through and accept the install prompts.
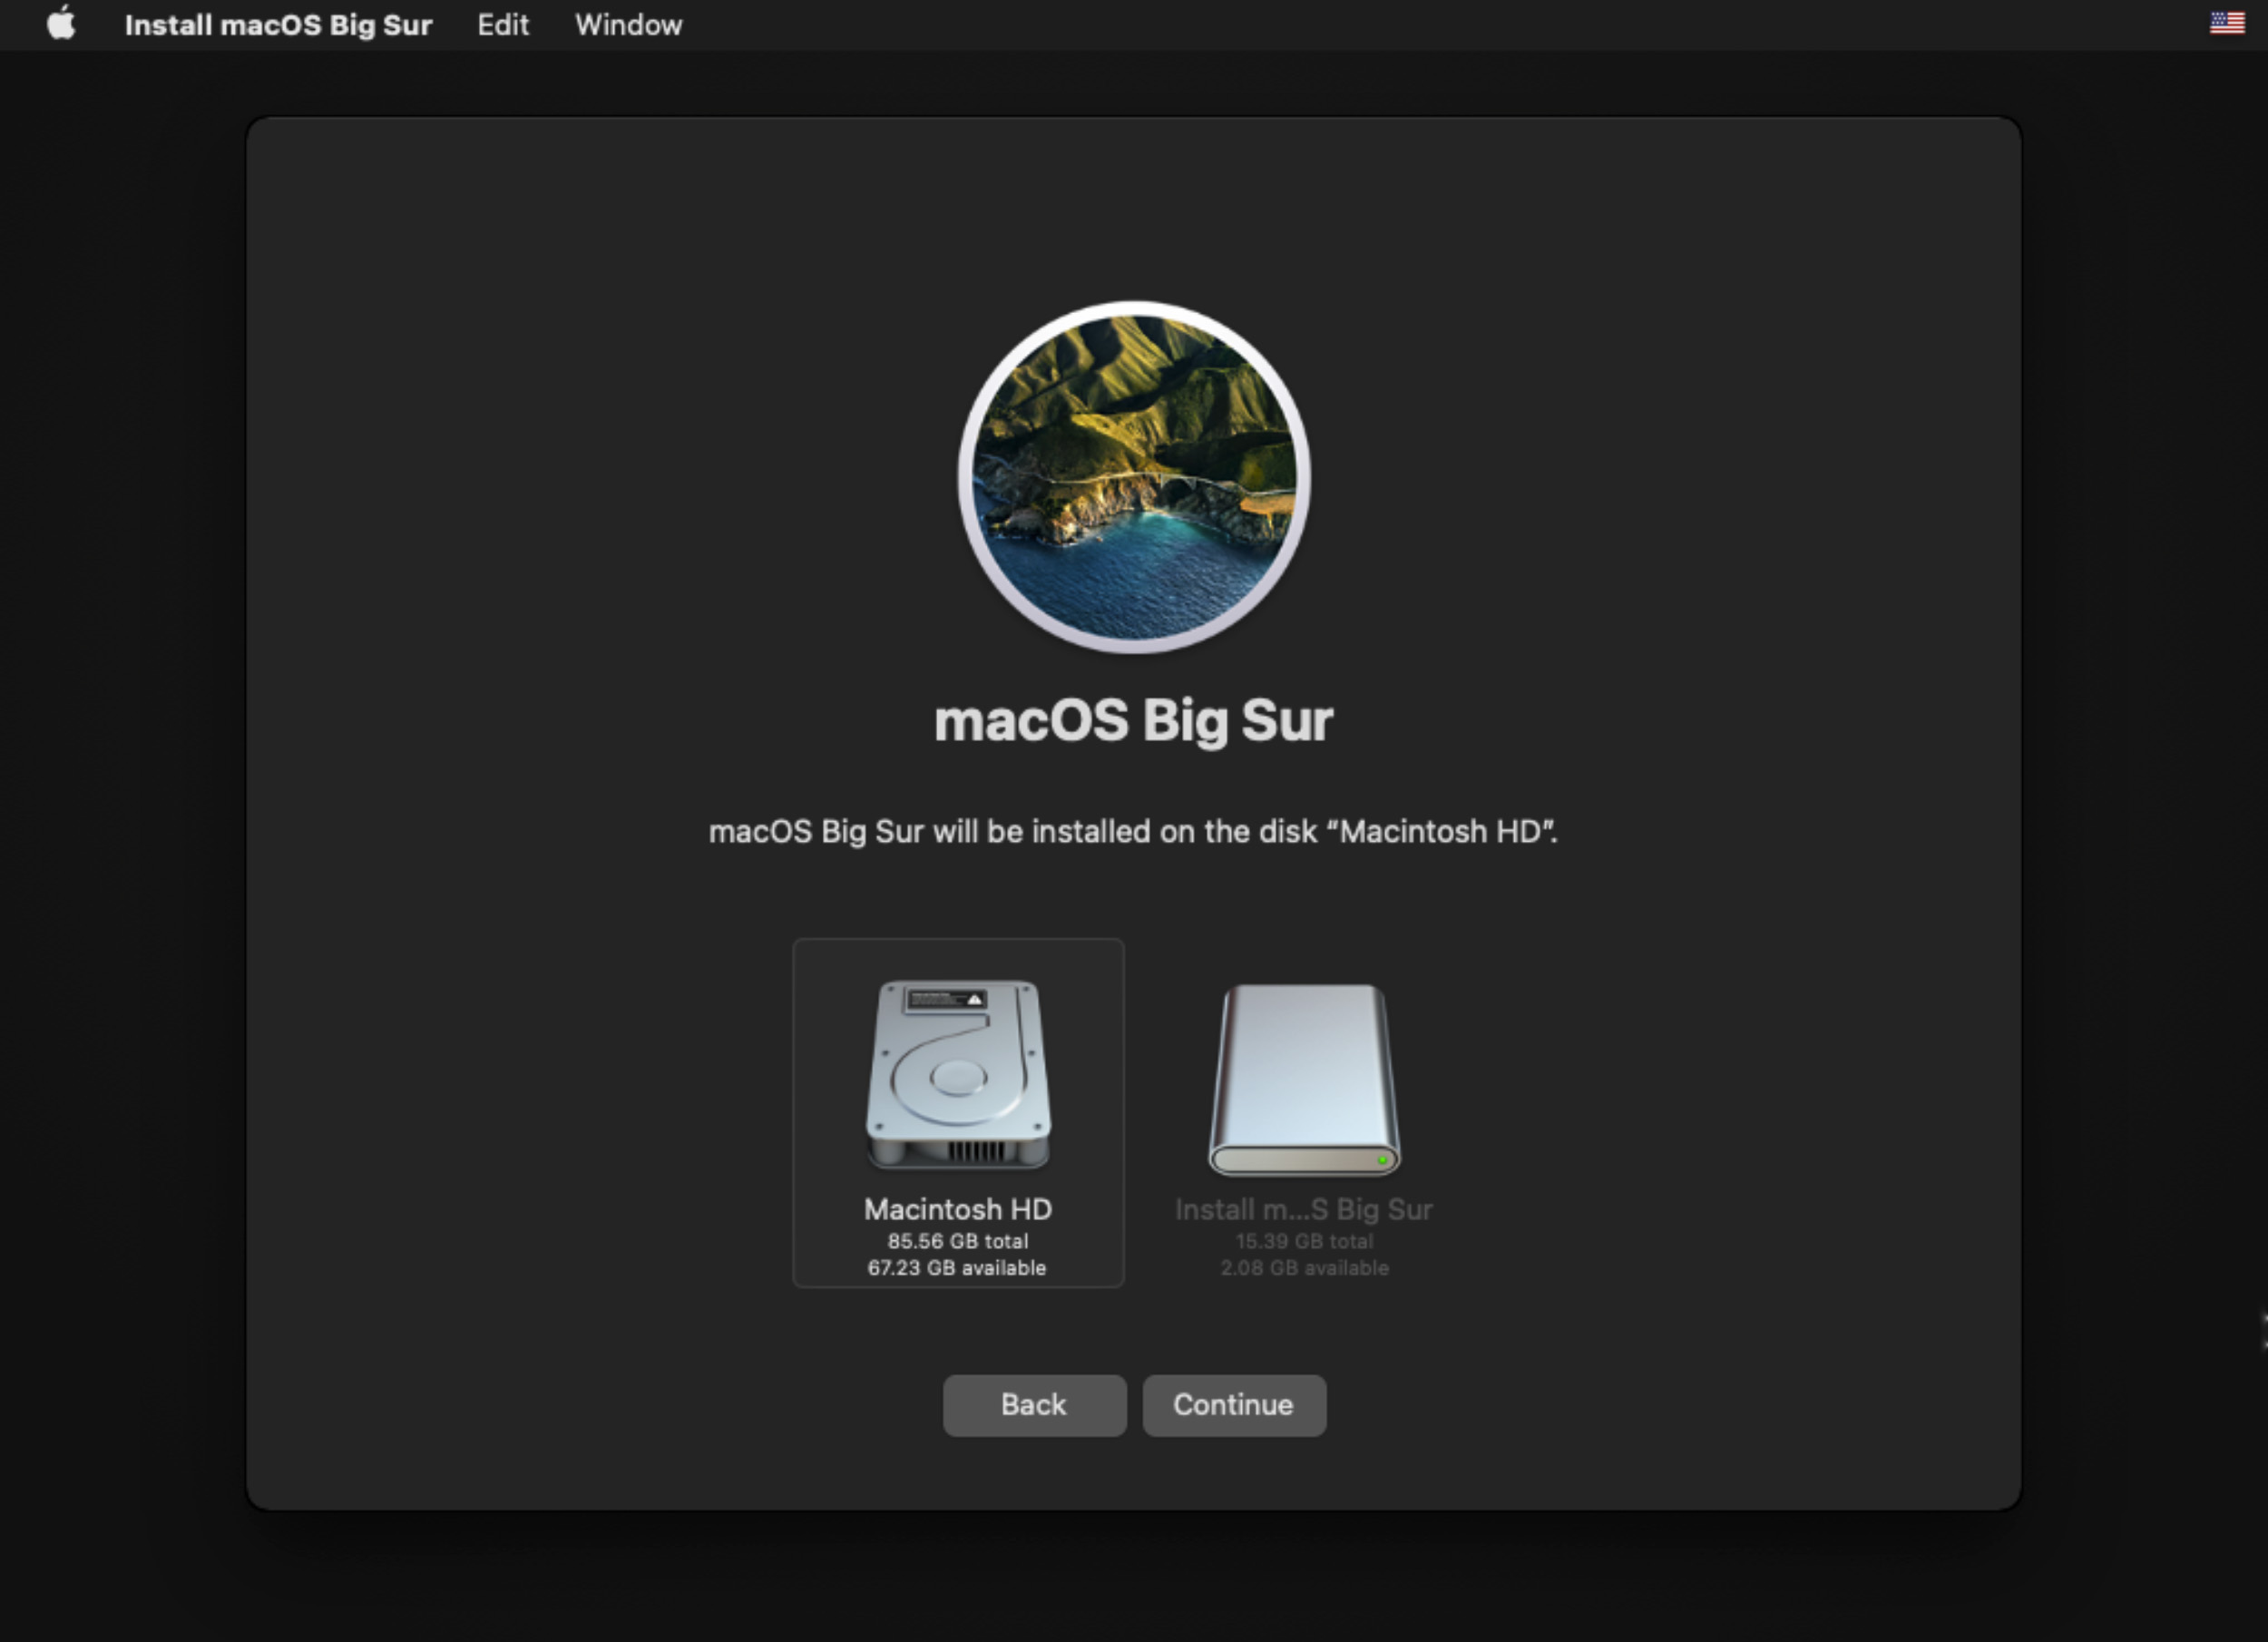
- Select the hard drive that you would like to reinstall macOS to and then click on Continue. Wait for the installation to complete. I would also recommend that you connect your Mac to power during this process.
If after the installation of macOS your Mac still won’t load, then it might be time to contact Apple support.
Method 6: Contact Apple Support
At times, issues beyond our control may require professional assistance, and reaching out to a technician becomes necessary.
Apple will be able to fix a Mac that has a blinking question mark within the startup folder if the above methods didn’t work.
You can schedule an appointment on Apple’s website or visit a local Apple store, if feasible, to seek their guidance on the next steps.
FAQ
If Command + R isn’t working to get you into Recovery Mode, then you most likely have an Apple Silicon Mac. Follow these steps to get it working correctly:
- Press the power button on your Mac and then continue to hold it down until you see the startup options window.
- Click the gear icon labeled Options, then click Continue and this will bring you into Recovery Mode.
If you can’t get that to work, then I would recommend taking it to an Apple store and having a technician look at it.
You do not need a CD to reinstall macOS. If your Mac is showing a folder with a question mark, then we can enter Recovery Mode and reinstall macOS. All that you will need for these steps is a working internet connection.
- Power on your Mac and then enter Recovery Mode.
- Select reinstall macOS and walk through the prompts.
- Select the hard drive that you want to install it on.
- Wait for the process to complete.
First, format the hard drive to APFS as that is the latest and greatest file system that your Mac can use.
- Turn your Mac off.
- Enter Recovery Mode.
- Select Disk Utility.
- Erase and format the hard drive to APFS.
- Now, let’s move on to installing the operating system onto the new hard drive.
You will need to conduct these steps in Recovery Mode with a working internet connection.
- Turn your Mac on and enter Recovery Mode.
- Select reinstall macOS and walk through the prompts.
- Select the hard drive that you want to install it on.
- Wait for the process to complete.


