
If you’d like to learn how to create a bootable installer for macOS Sonoma, the fourteenth version of Apple’s operating system, you’re in the right place. Having a bootable USB drive loaded with this new OS can be incredibly useful for various reasons, and—don’t worry—the steps to make one aren’t too tricky to follow.
To successfully create a bootable USB from Mac, you’ll need the following:
- A Mac computer compatible with macOS Sonoma. This includes Macs with Apple silicon and Intel’s Xeon-W and 8th-generation Coffee Lake/Amber Lake chips or later. In simpler terms, if you have an iMac from 2019 or later, iMac Pro from 2017, MacBook Air or MacBook Pro from 2018 or later, Mac Mini from 2018 or later, Mac Pro from 2019 or later, or any Mac Studio model, you’re good to go.
- USB flash drive with a storage capacity of at least 16 GB.
- A reasonably fast connection to the internet.
Do you have everything you need? If so, then we can dive deep into the process of creating a bootable USB drive on Mac.
Table of Contents
Why It’s Useful to Know How to Make a Bootable USB on Mac?
Mac users enjoy a hassle-free upgrade process that, for the most part, eliminates the need to fumble with installation media. When a new macOS version is released, you simply go to System Settings, click the Software Update Available button, and let the installer do its job.
Still, there are some situations when having a bootable flash drive with macOS at hand comes in handy:
- Installing macOS without re-downloading it: macOS Sonoma is about 12 GB large. If you have multiple Macs, then it makes sense to install it on each machine from a single macOS USB installer, instead of downloading it separately every time.
- Using built-in recovery tools: Bundled with the macOS installer are useful recovery tools that you can use to troubleshoot and fix all kinds of issues. For example, you can regain access to a Mac that’s refusing to boot or recover files that seem to be lost.
- Performing a clean installation: One reason why users like macOS is that it doesn’t degrade over time, becoming slower and less reliable. But that doesn’t mean performing a clean installation doesn’t have its advantages because it does. One important advantage is getting rid of junk apps and files that have accumulated over time so that you can start over with a clean slate.
Of course, there’s value in knowing how to create a bootable USB on Mac even if you don’t have any use for the resulting bootable USB drive yourself. It’s possible that someone you know will in the future, and you’ll be able to help them when the time comes.
How to Download the macOS Sonoma Installer?

Apple distributes major versions of macOS via the Mac App Store. Apple officially released its latest operating system, macOS Sonoma, on Monday, September 26. You can easily download it directly from the App Store:
- Launch the App Store on your Mac.
- Enter “macOS Sonoma” into the search bar.
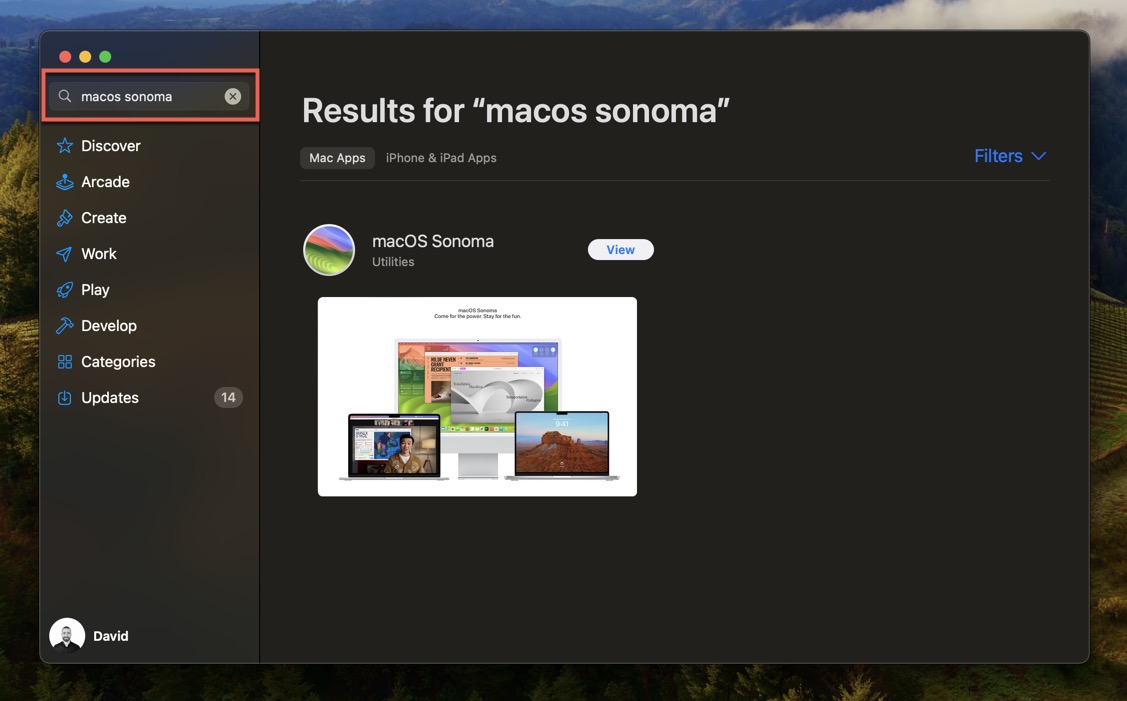
- Click the Get button.

You will be left with the macOS Sonoma installer app in your Applications folder, and that’s all you need to actually download macOS to your USB flash drive.
Warning: Back Up Your Mac to Avoid Losing Important Data
While the likelihood of something going catastrophically wrong when creating a bootable macOS Sonoma USB drive is slim, it’s always better to be safe than sorry, which is why we recommend you back up your Mac before you proceed.
There are many different backup software tools that you can use, but the one that’s already on your computer, Time Machine, gets the job done well enough. If you haven’t configured Time Machine yet, this is what you need to do:
- Connect an external backup drive to your Mac.
- Open System Settings and go to General > Time Machine.
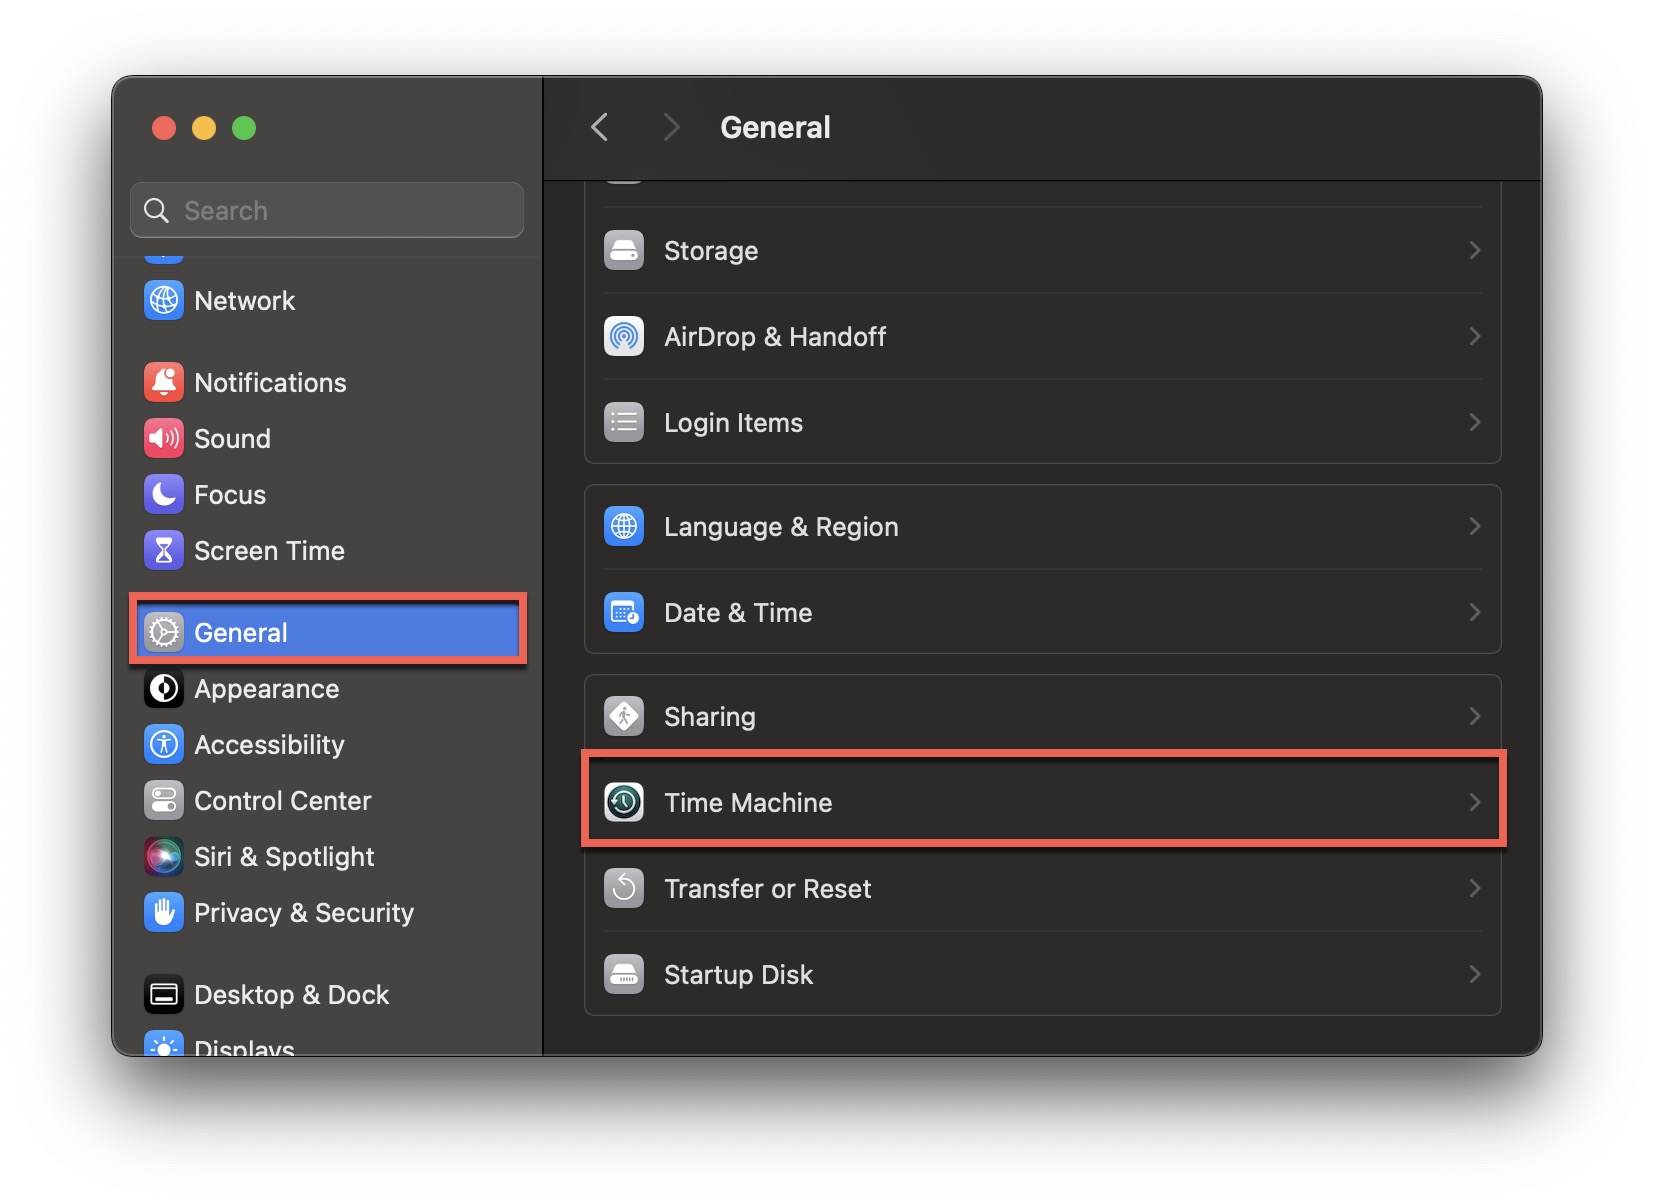
- Click the Select Backup Disk button.
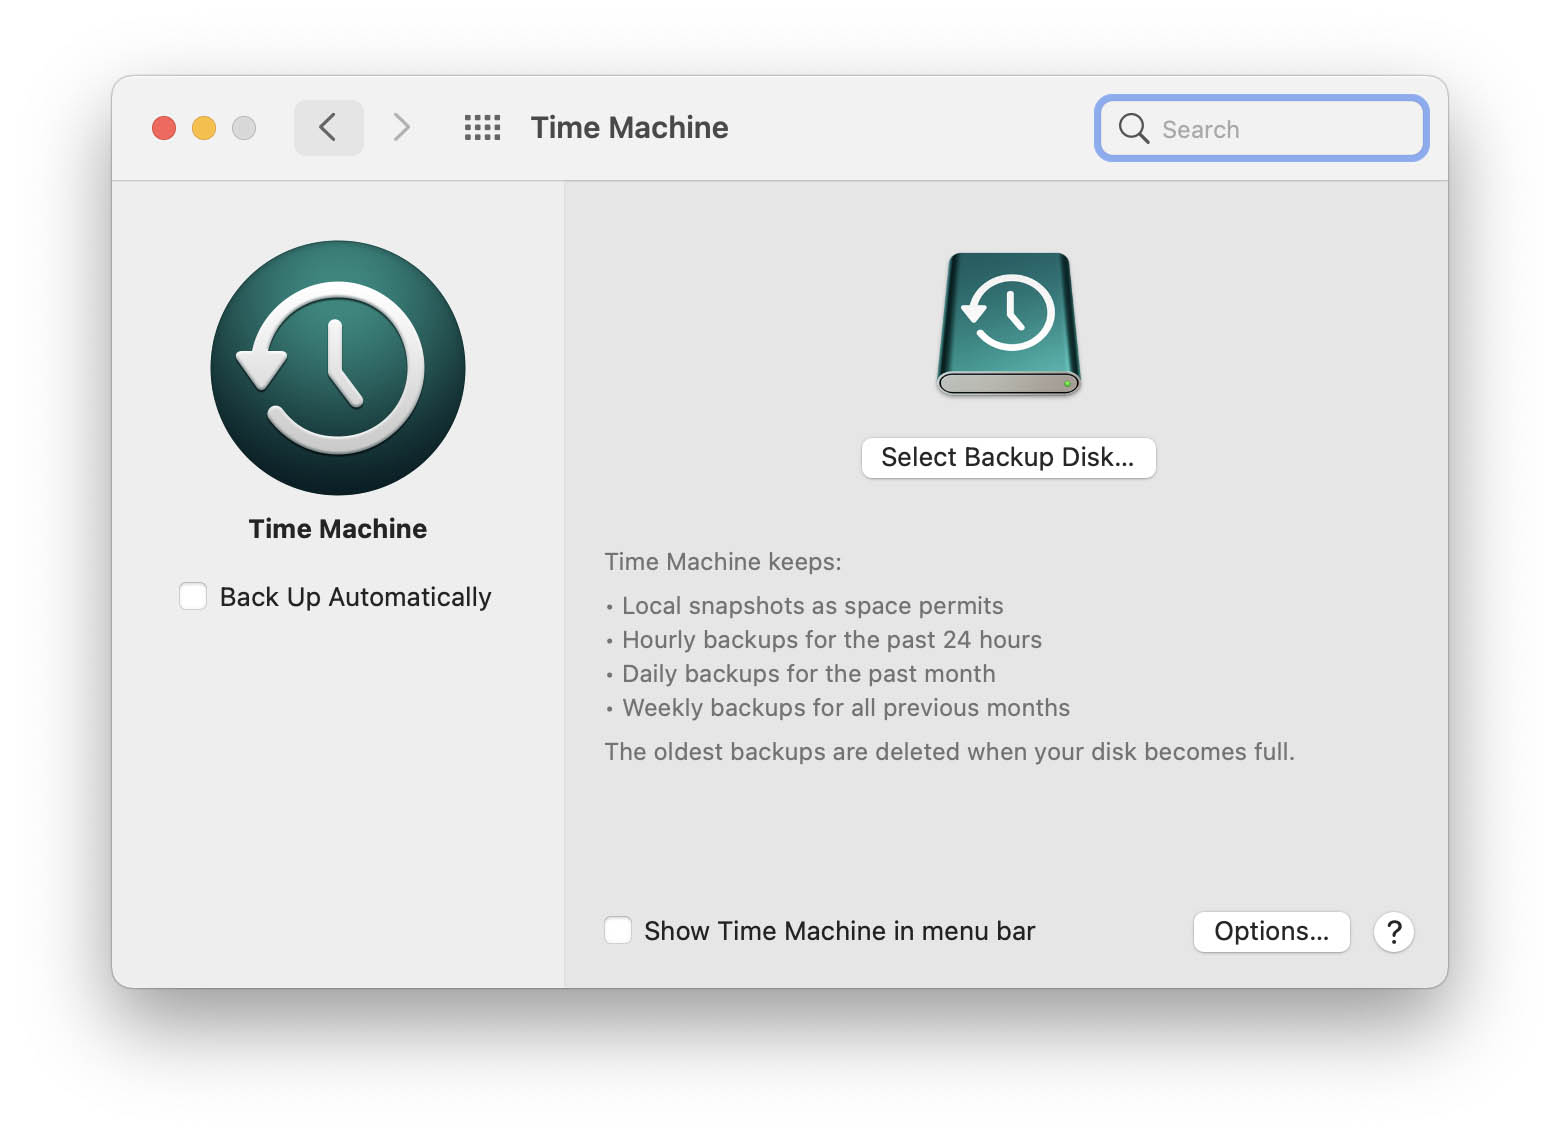
- Choose your Time Machine backup drive.
- Erase the drive if it has an incompatible file system, but make sure to back up all files that are still stored on it first.
- Wait for Time Machine to back up your Mac.
Now that your Mac is backed up, you can go ahead and create a bootable installer for macOS Sonoma.
How to Create a Bootable Installer for macOS Sonoma?
Let’s take a look at two methods for making a bootable USB with macOS Sonoma on Mac. The first method relies on a third-party app called Disk Drill, while the second method takes advantage of Apple’s own USB creation tool.
The main reason to use Disk Drill instead of Apple’s own USB creation tool is that it’s far easier to use thanks to its graphical user interface. Besides the ability to boot Mac from a USB drive, Disk Drill comes with a whole host of other features and capabilities, mainly the ability to recover hundreds of file formats from all kinds of storage devices.
Method 1: Create a Bootable USB Using Disk Drill
With Disk Drill, creating a bootable USB drive with macOS Sonoma is a matter of a few simple clicks:
- Download and install Disk Drill from the official website.
- Connect a sufficiently large USB flash drive to your Mac.
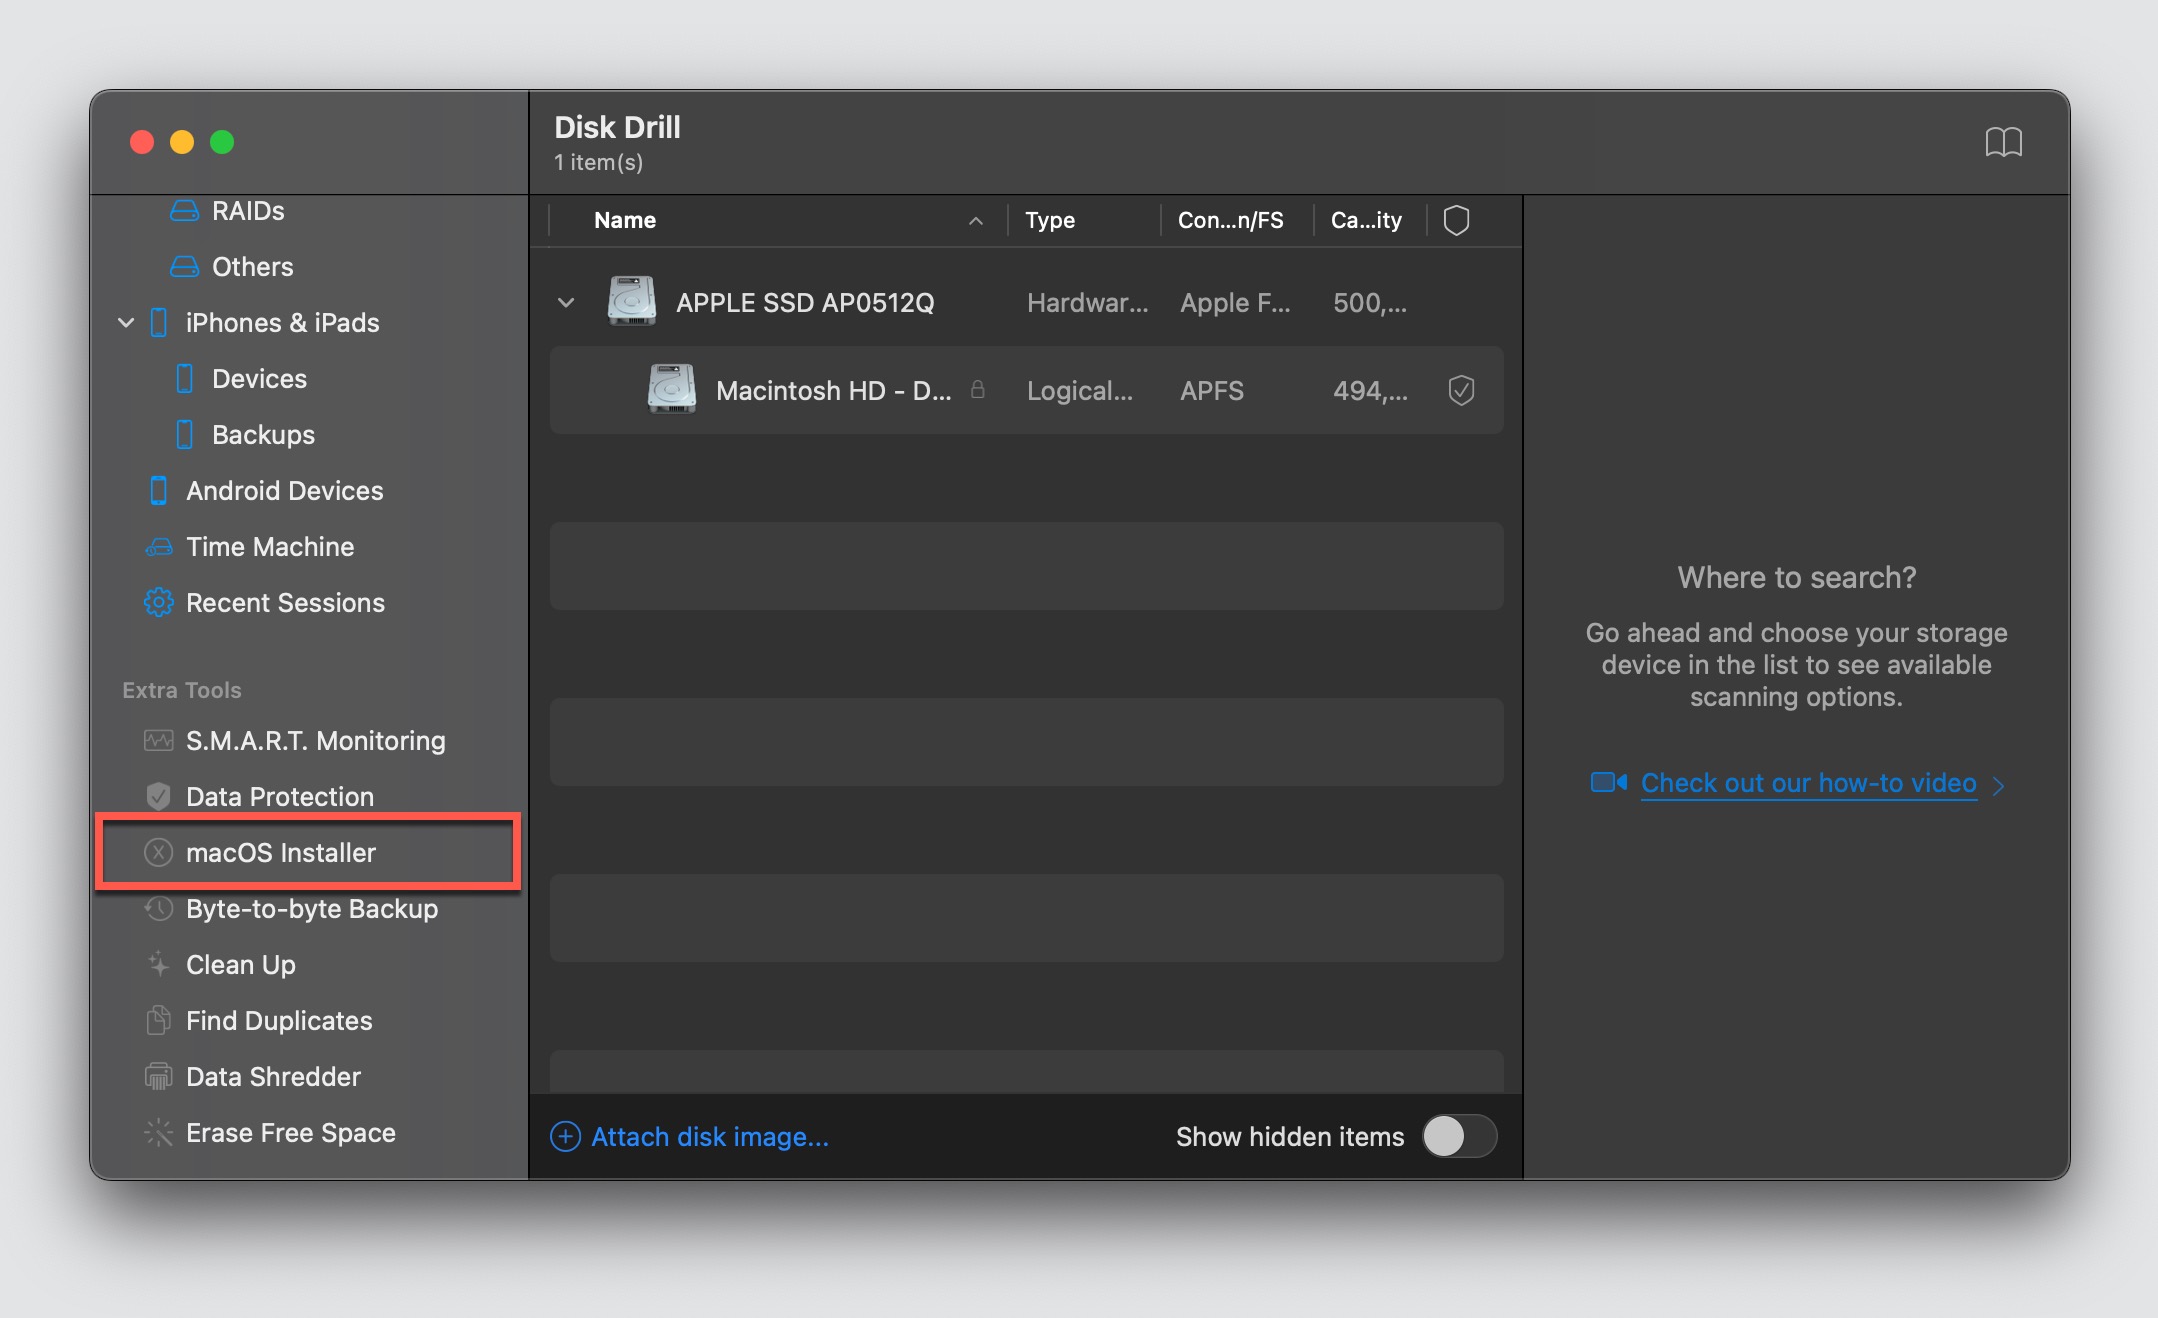
- Launch Disk Drill from Applications and select the macOS Installer option from the left pane.
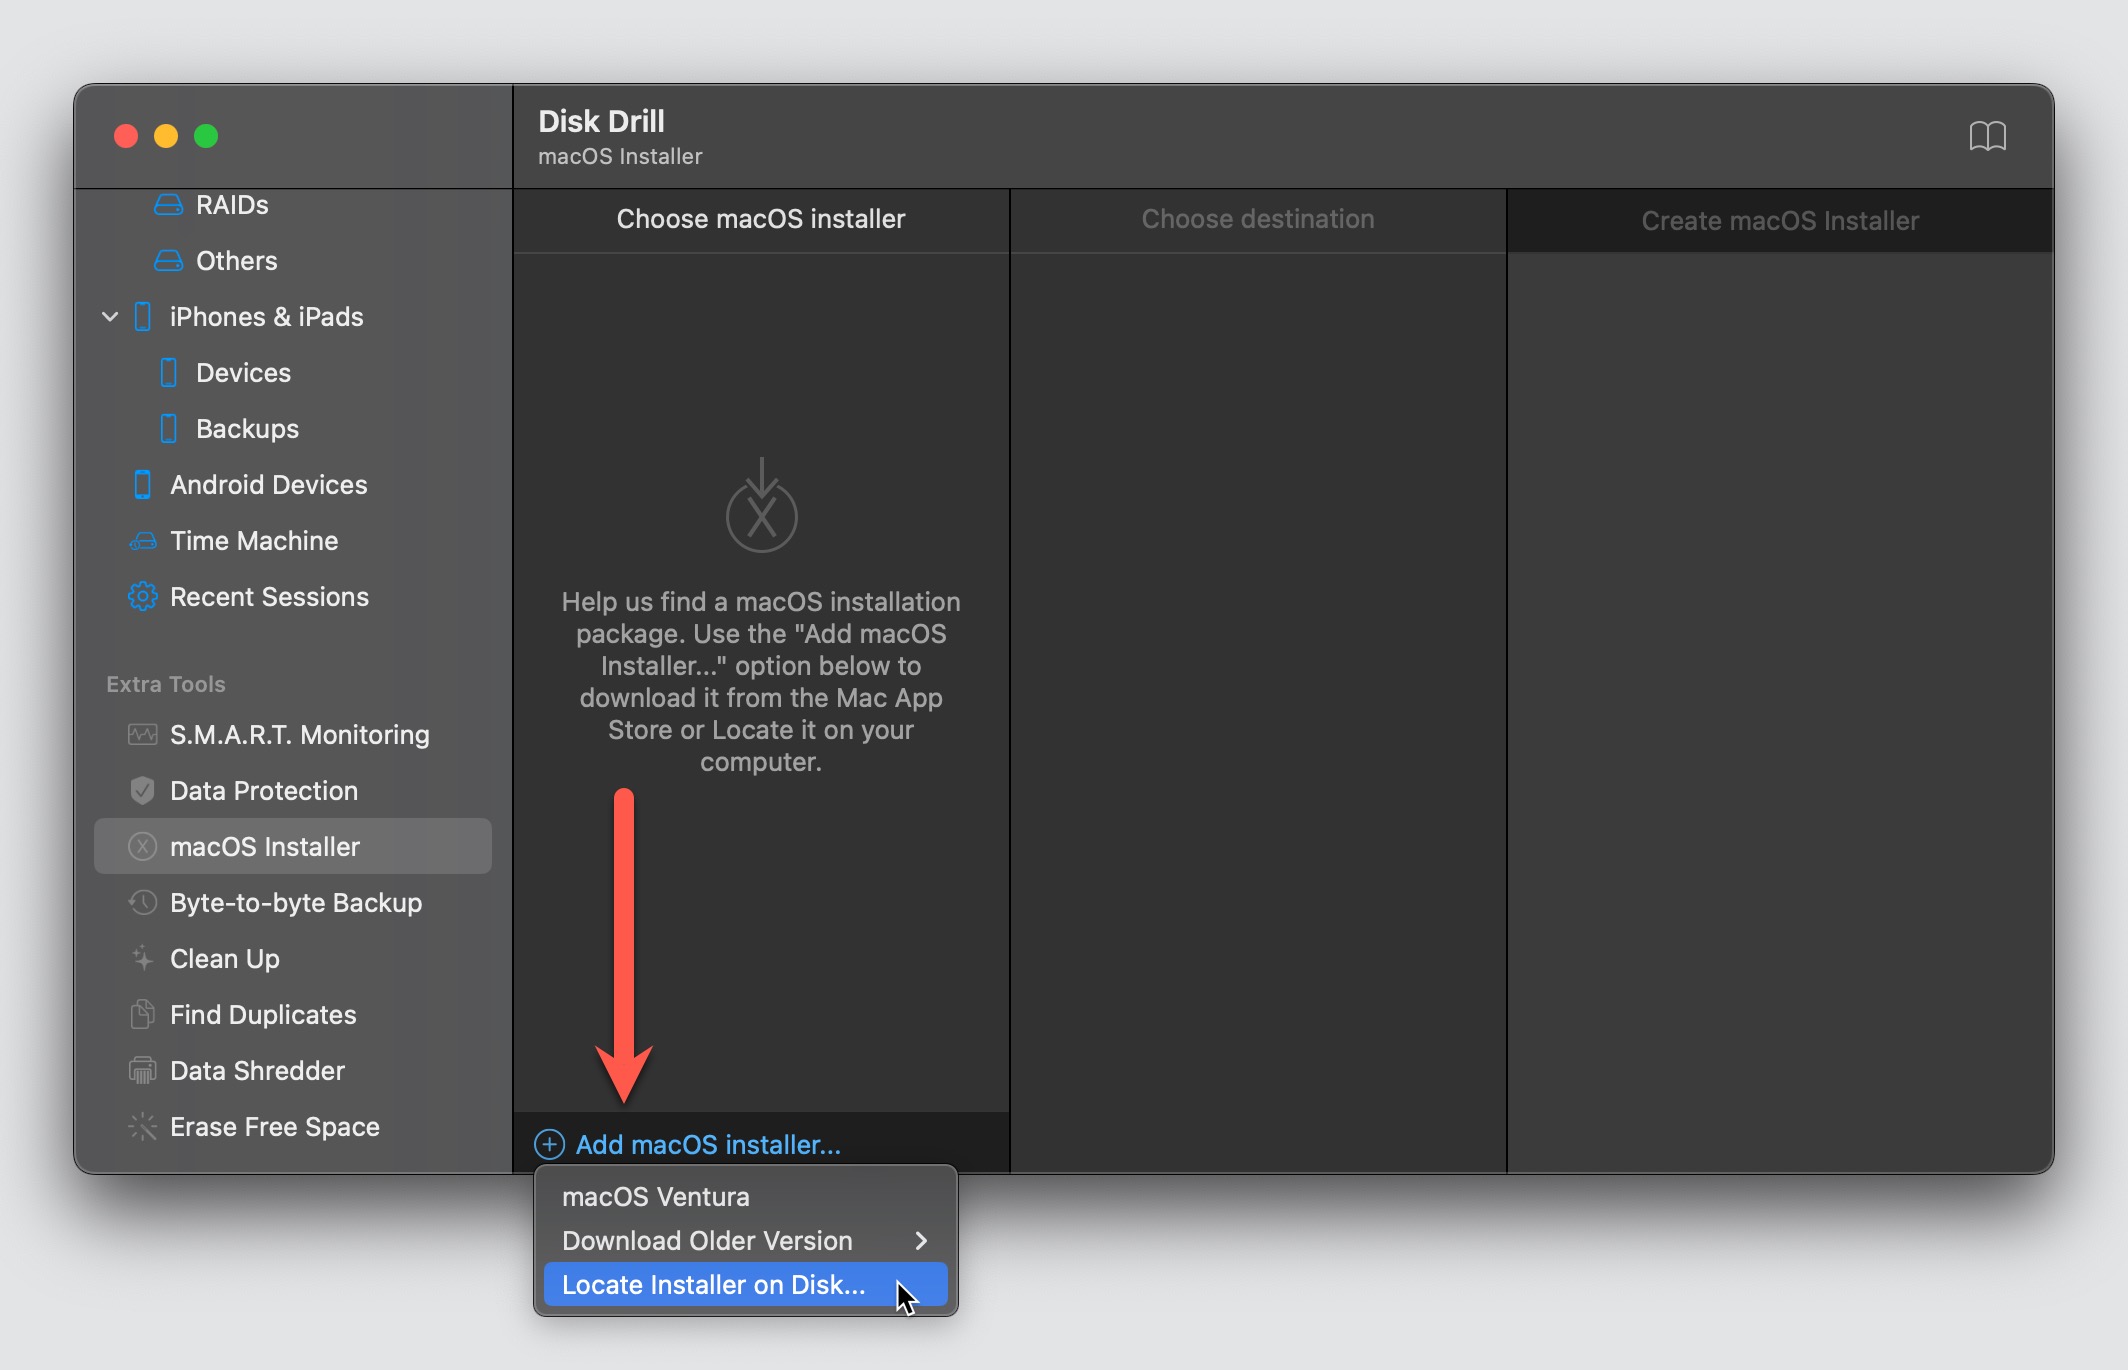
- Choose the macOS Sonoma installer file in the Applications folder by clicking the Add macOS installer button and choosing the Locate installer on disk option. If Disk Drill auto-detected the installer file, then you can simply select it.
- Choose your USB flash drive and let Disk Drill make it bootable for you.
Tip: You can download the macOS Sonoma installation package, as well as the installation packages for older versions of macOS, directly from Disk Drill. Just click the Add macOS installer button and select the version you want to download.
Method 2: Run “createinstallmedia” in Terminal
Assuming you’ve downloaded the macOS Sonoma installer, you can go ahead and run the “createinstallmedia” command in Terminal to create a bootable USB drive:
- Connect a suitable USB drive to your Mac.
- Launch Disk Utility from Applications > Utilities and write down the name of the USB drive. Feel free to rename it to something that can be easily memorized.

- Launch the Terminal app from Applications > Utilities.
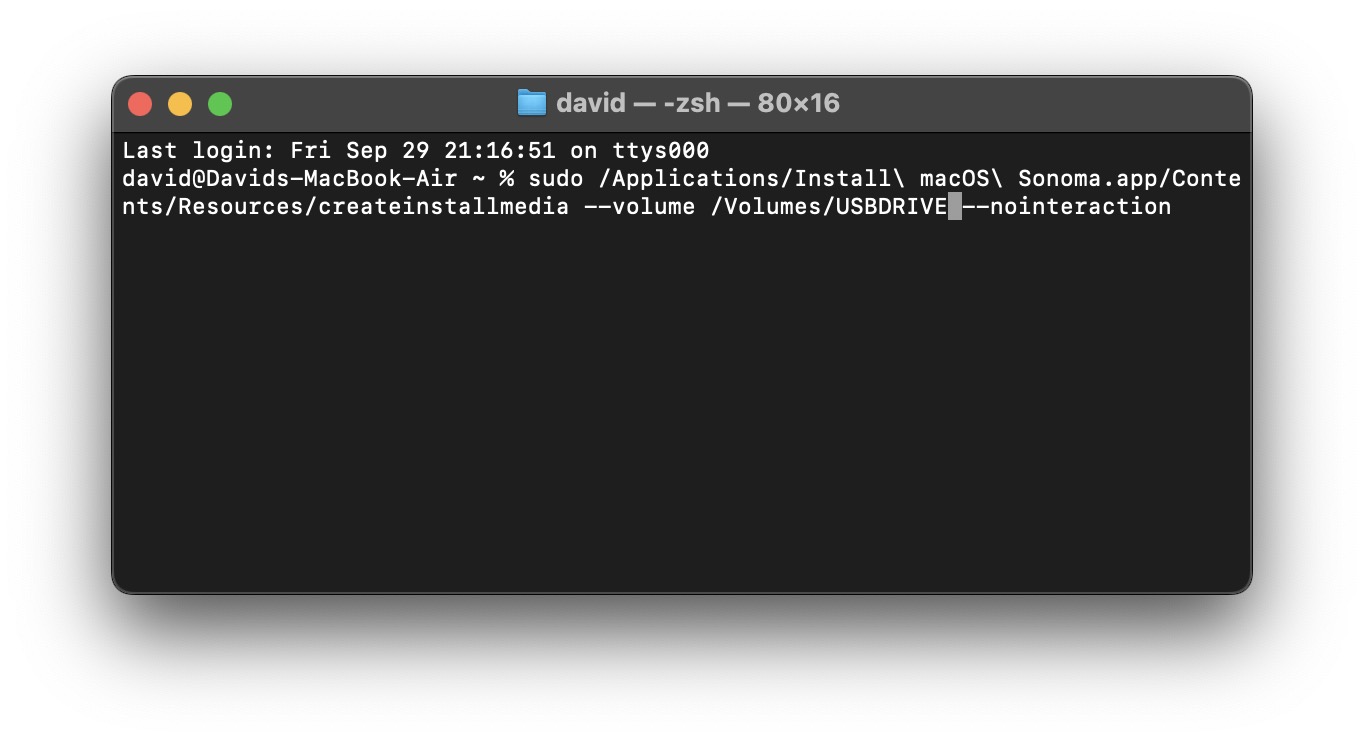
- Paste the following command and hit Return (make sure to change the name of the USB drive):
sudo /Applications/Install\ macOS\ Sonoma.app/Contents/Resources/createinstallmedia --volume /Volumes/NAME_OF_YOUR_USB_DRIVE --nointeraction
When the progress bar reaches 100%, your macOS Sonoma USB flash is ready, and you can disconnect it from your Mac if you want to.
How to Start Mac from a USB Drive with Bootable macOS Sonoma?
Now that you have a bootable version of macOS Sonoma on your USB drive, you may be wondering how to install macOS from it. Well, that depends on whether you have a Mac with an Intel CPU or Apple Silicon:
Apple Silicon:
- Connect the USB drive to your Mac.
- Turn off your Mac.
- Press and hold the power button until you see a boot menu.
- Select the macOS Sonoma startup disk from the boot menu.
Intel CPU:
- Connect the USB drive to your Mac.
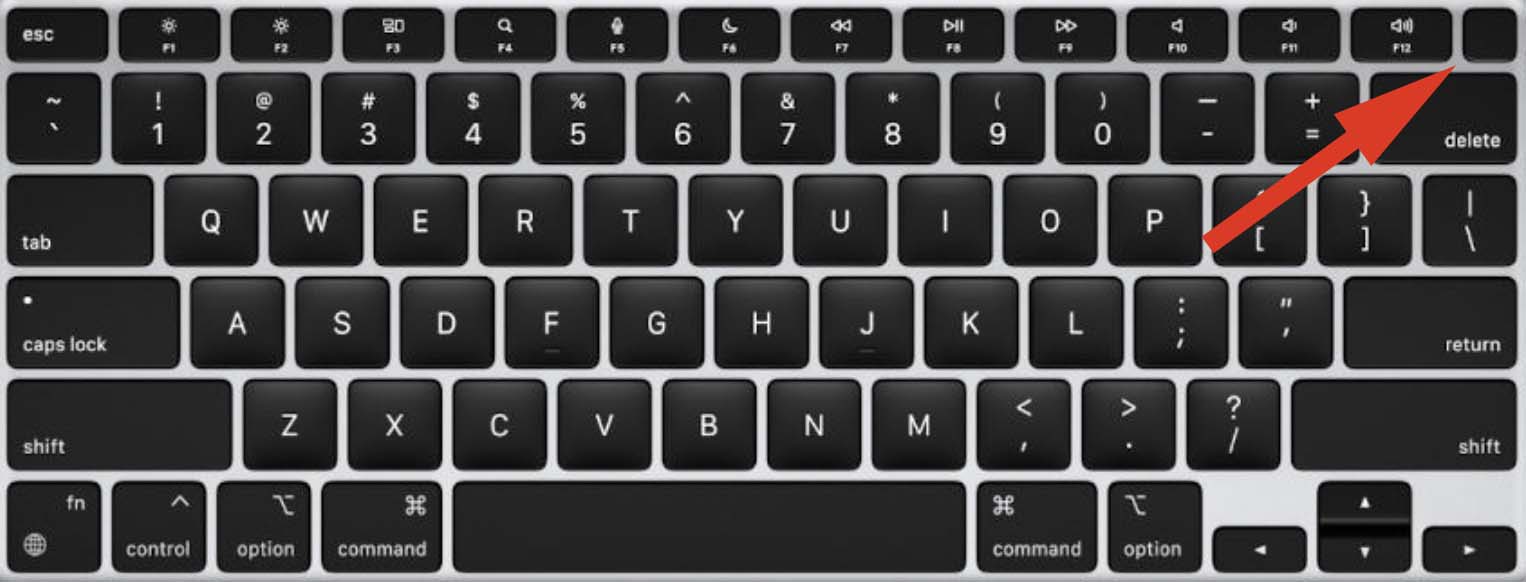
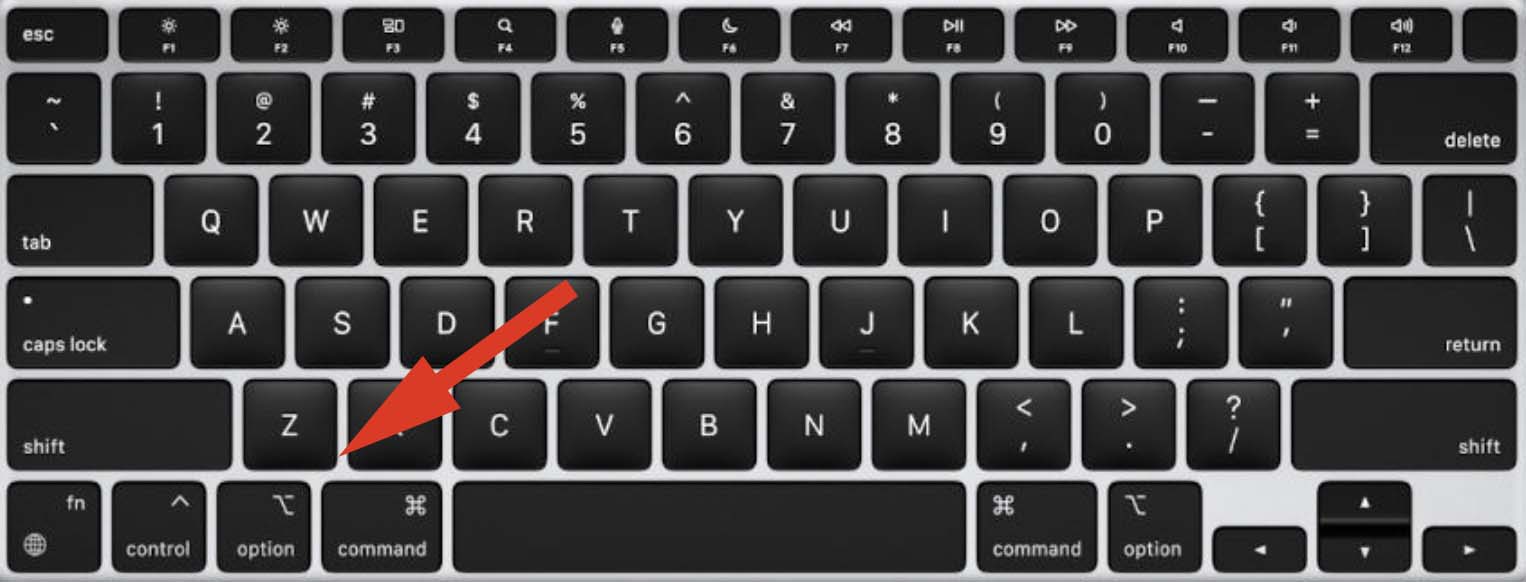
- Restart your Mac with the OPTION key pressed.
- Select the macOS Sonoma installer from the boot menu.
Fortunately, that’s where the differences between Intel and Apple Silicon Macs end. To perform a clean install of the operating system, you’ll need to erase the target drive and follow the installation instructions.
If everything goes right (and there’s no reason why it shouldn’t), you can expect macOS Sonoma to be installed and running in around one hour, depending on the performance of your Mac, of course.
Conclusion
In this article, we explained how to install macOS Sonoma on a USB flash drive using a Terminal utility provided by Apple and a third-party app called Disk Drill. Regardless of which of these two methods you decided to use, we hope that you were able to go through all the steps without any issues. The only thing left now is to put the bootable USB flash drive to good use.


