
Graphic designers, photographers, and other artists rely on Adobe Photoshop on a daily basis, and most have at least some experience with Photoshop crashing unexpectedly. While any sudden crash is annoying, it’s often possible to recover unsaved Photoshop files, and you may not even need to download and install a dedicated data recovery app.
Table of Contents
Why Is Photoshop Crashing?
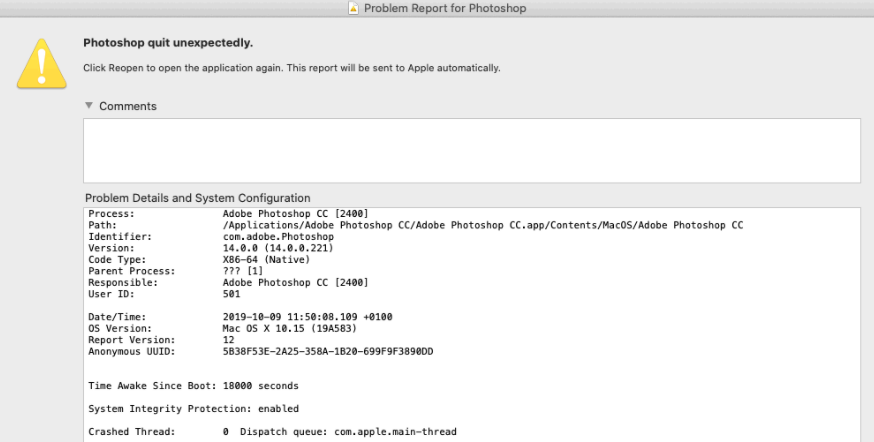
Even though Adobe Photoshop has been available since 1990, there’s no shortage of users reporting catastrophic crashes. Just take a look at these examples gathered from Adobe’s discussion board:
- One hour ago, I downloaded PS CC 2019. I have made no progress on my artwork during this time because of this application keep crashing. (Source)
- Started from last night, Photoshop keeps crashing after launch, the time varies from immediately to about one minute, regardless of the task being done. (Source)
- I downloaded Photoshop with the adobe cloud package along with multiple other things like Illustrator, After Effects, etc. Everything else I’ve downloaded loads and opens fine, but Photoshop just crashes every time I open it. (Source)
As you can see, even the latest versions of Photoshop sometimes crash, but why? Unless the user encounters an unfixed bug, one of the following five causes is typically to blame:
- ⏳ Outdated operating system: If you’re using an old version of macOS, you may encounter bugs that Photoshop developers are not aware of because they focus their attention on supporting the latest version of Apple’s operating system. The solution here is simple: upgrade your operating system.
- 🖥️ Hardware issues: Photoshop is a demanding app that requires a fairly powerful CPU and GPU to run smoothly. If your hardware resources are so limited that every action in the app takes forever, then you shouldn’t be surprised when Photoshop hangs up and refuses to budge.
- 🗄️ Insufficient amount of RAM: Apple has never been very generous when it comes to the amount of RAM with which it equips its computers. If you’re using a basic Mac with just 8 GB or less of RAM, then you should close as many apps as possible to give Photoshop more room to breathe. Without enough RAM, the app is unlikely to perform well.
- 🗂️ Low storage space: Likewise, you must prevent your hard drive from becoming completely full because Photoshop needs to save various temporary files, which is not possible when it doesn’t have anywhere to store them. A fast solid-state drive (SSD) is a good investment that can improve not only Photoshop’s performance but also stability.
- 📼 Buggy plugins: Photoshop plugins are great, but they’re also an ongoing source of stability problems for its users. The developers of third-party plugins are rarely as skilled as the developers working for Adobe, which is why there are so many plugins that cause Photoshop to become unstable or even unusable.
Now that you understand why Photoshop quits unexpectedly from time to time, it’s time that we explain how to recover Photoshop files on Mac.
How to Recover Deleted Photoshop Files
Accidentally deleting the wrong Photoshop file is a fairly common problem that most users will sooner or later run into. Fortunately, there are several proven methods for restoring accidentally deleted Photoshop files that anyone can try without much effort.
Method 1: Trash Folder
![]() Have you checked the Trash folder already? If not, go ahead and do it now. The Trash folder is where Mac keeps deleted files to make it possible for users to easily restore them without any special software.
Have you checked the Trash folder already? If not, go ahead and do it now. The Trash folder is where Mac keeps deleted files to make it possible for users to easily restore them without any special software.
To recover a deleted Photoshop file from Trash:
- Open the Trash folder from the Dock.
- Locate your PSD file.
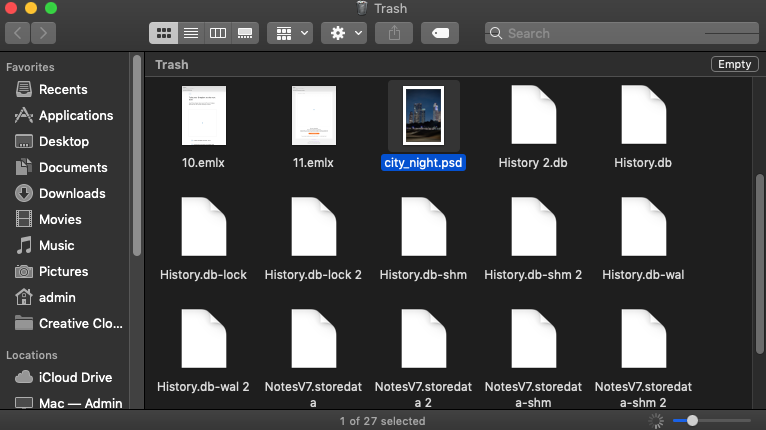
- Move the file to a different folder.
This method won’t help you get back permanently deleted files, but the next two methods can, at least if you hurry up and begin the recovery process before the permanently deleted files get overwritten and become impossible to recover.
Method 2: Time Machine
![]() Apple’s backup application for macOS can reliably recover all deleted PSD files, but it won’t help you unless you’ve activated it in the past. If you have, you’re in luck because you can simply follow the steps below and recover your files without installing any additional software.
Apple’s backup application for macOS can reliably recover all deleted PSD files, but it won’t help you unless you’ve activated it in the past. If you have, you’re in luck because you can simply follow the steps below and recover your files without installing any additional software.
To recover a deleted Photoshop file using Time Machine:
- Connect your Time Machine backup disk to your Mac.
- Navigate to the folder where the Photoshop file was stored.
- Click the Time Machine icon in the Menu bar and choose Enter Time Machine.
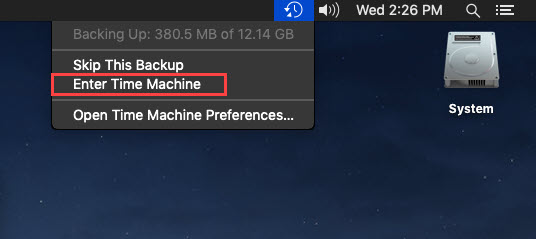
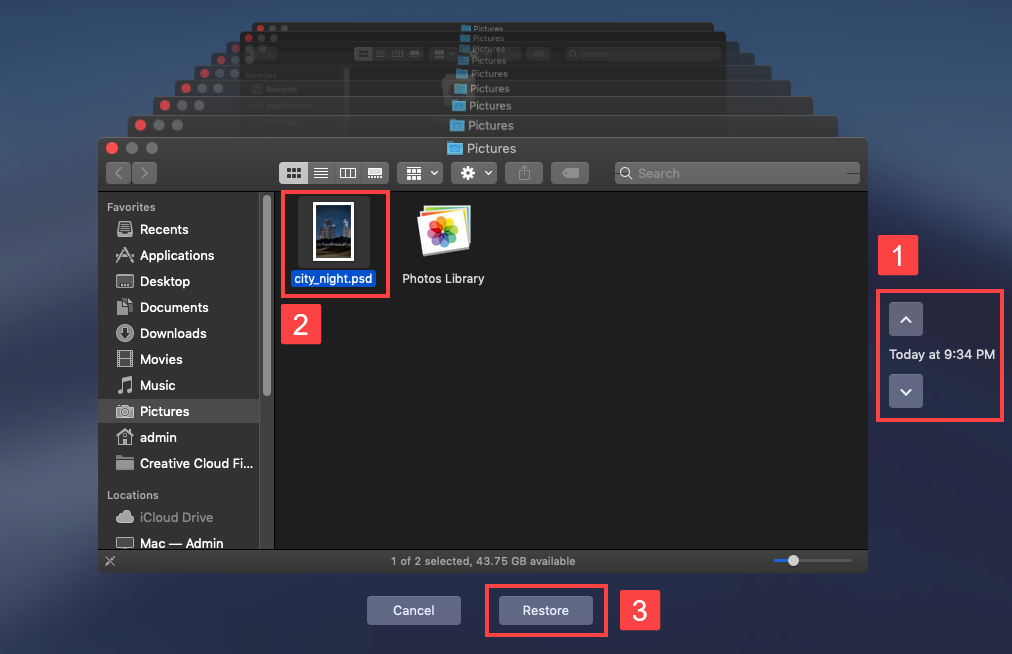
- Use the timeline or up/down arrows to select a backup that contains your file.
- Select the file and click Recover.
Unfortunately, Time Machine can’t recover Photoshop files that were saved in any other file location besides your system drive. If you need to recover a PSD file from an external hard drive, USB flash drive, or memory card, use the next method instead.
Method 3: Data Recovery Software
![]()
For recovering unsaved or deleted Photoshop (PSD) files on Mac, data recovery software can be an effective solution. These programs scan your storage device to locate and restore lost files, even after they’ve been removed from the Trash folder.
One such tool is Disk Drill, known for its user-friendly interface and professional recovery capabilities, this highly-rated software boasts excellent support for not just Photoshop’s PSD files but also a wide variety of image formats, including RAW photo file formats like CR2/3, DNG, or NEF.
You can start with Disk Drill’s free version, available on its official website, to check if your lost files are recoverable:
- Download Disk Drill for Mac from its official website. Locate the downloaded file (usually in the Downloads folder) and double-click to start the installation process. Simply drag the application icon into the Applications folder to install Disk Drill on your Mac.
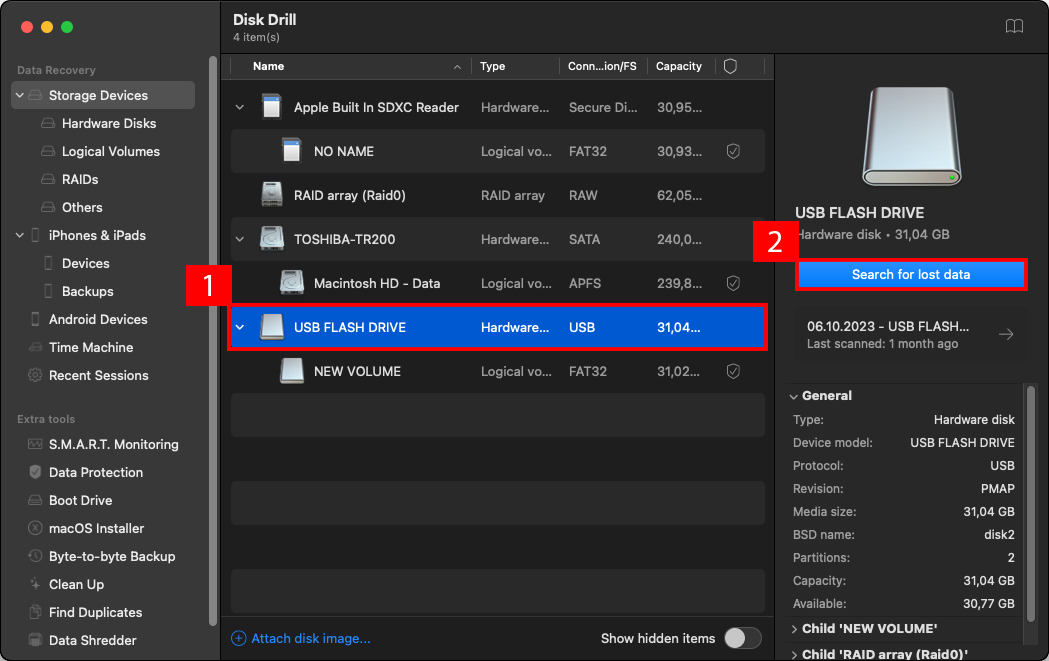
- Open Disk Drill from your Applications folder. Connect the storage device (if external) where the lost PSD files were located. Launch Disk Drill and select the drive to be scanned from the list of available drives. Click the Search for lost data button to begin a scan.
- The scan process will begin, searching for recoverable files. This can take time, ranging from a few minutes to several hours, depending on the drive’s size and the amount of data.
- Navigate through the list to find your lost PSD files. You can use the search function and available filters to quickly locate them by file name or format. For example, you could narrow down the list of recoverable files by date and file format to see only PSD files created in the last week. Select your files by clicking the checkboxes next to them.
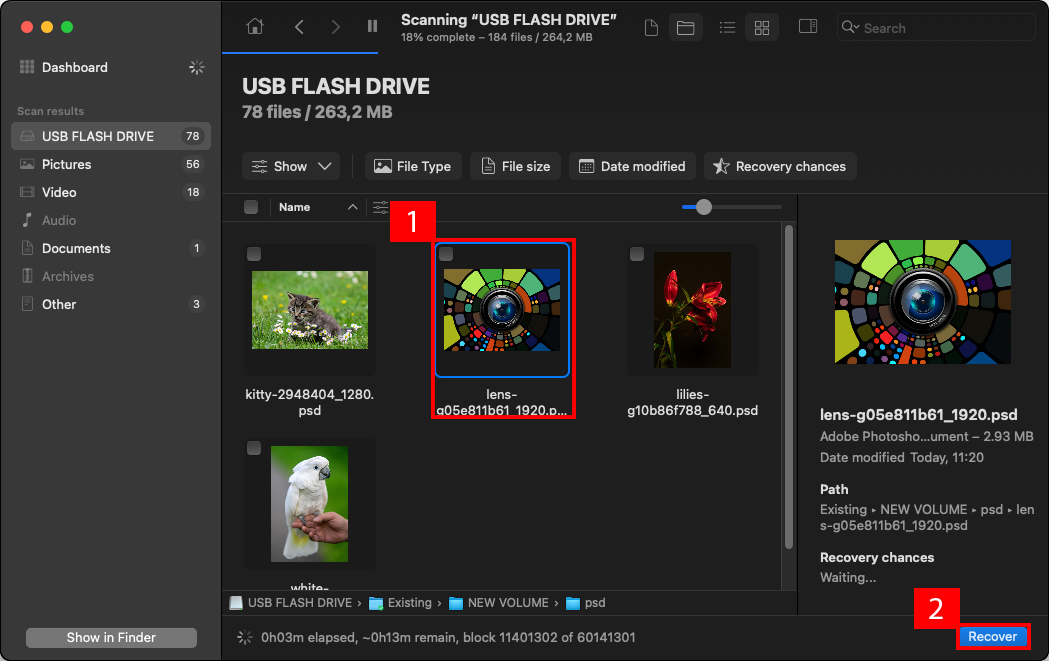
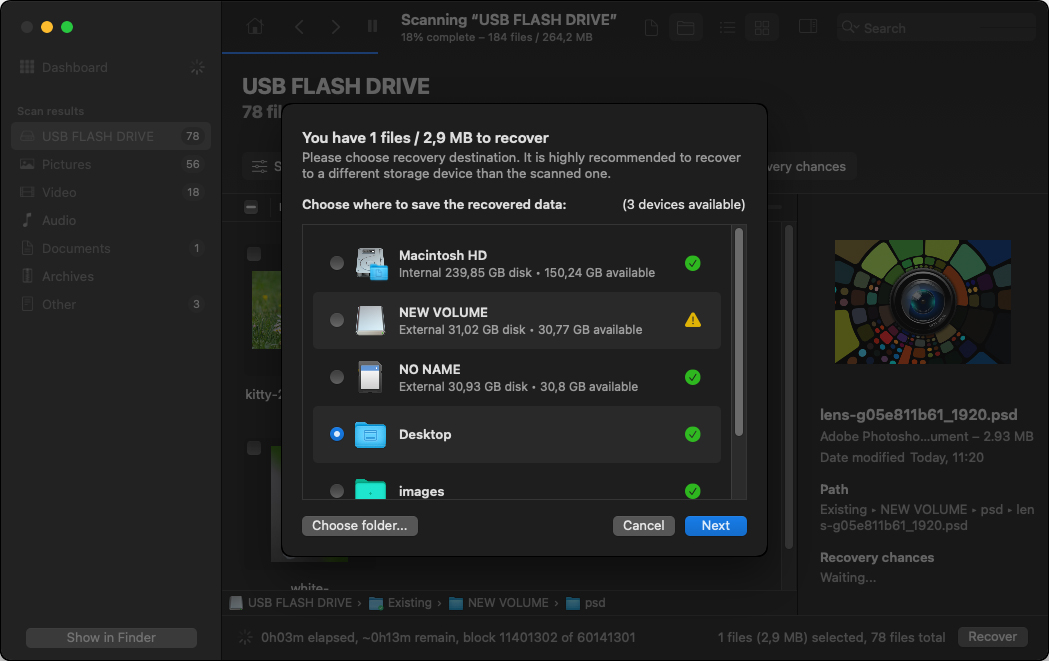
- Click the Recover button to start the recovery process. Choose a safe recovery location on your Mac, preferably a different drive than the one scanned, to prevent overwriting of data. Once the recovery process is complete, navigate to the chosen recovery location and verify the recovered PSD files.
You can now go to the recovery destination and verify that your PSD files have been successfully recovered. That’s how easy recovering deleted files with Disk Drill is.
How to Recover Unsaved Photoshop Files
Even when you haven’t saved your work, all is not lost. In this section, we explain three methods that can bring your unsaved Photoshop files back from their digital grave. Just like when recovering deleted Photoshop files, time and user activity (saving new files or, worst of all, restarting your computer) are crucial factors that can impact the success of the recovery process.
Method 1: Photoshop’s Crash Recovery Feature
![]() Adobe Photoshop includes a feature for crash recovery, which is often misunderstood as an autosave function for user errors. This feature, which can be enabled via Preferences > File Handling, is specifically designed to activate after an unexpected shutdown, such as a system crash, and restore your work from a backup file maintained in a special folder called AutoRecover.
Adobe Photoshop includes a feature for crash recovery, which is often misunderstood as an autosave function for user errors. This feature, which can be enabled via Preferences > File Handling, is specifically designed to activate after an unexpected shutdown, such as a system crash, and restore your work from a backup file maintained in a special folder called AutoRecover.
You can find the AutoRecover folder here:
~/Library/Application Support/Adobe/Adobe Photoshop XXX/AutoRecover
Make sure to replace “Adobe Photoshop XXX” with your specific version of Photoshop, such as “Adobe Photoshop 2020.”
However, it’s crucial to understand that the AutoRecover folder:
- Does not save .psd files in normal circumstances.
- Gets cleared when Photoshop closes normally.
- Only contains recovery information if Photoshop crashes.
If the AutoRecover feature is successful, the next time you launch Photoshop, it will automatically attempt to reopen these files. There’s no need to manually navigate to the AutoRecover folder.
Method 2: Temporary Files
 If you don’t find the PSD file you’re looking for in the AutoRecover folder, you should also look for it in the Temporary Files folder. This is a special hidden folder on every Mac where the operating system and app store files that may or may not be needed in the future.
Unfortunately, this method is fairly unreliable because temporary files are automatically deleted when Photoshop is closed or your Mac is rebooted. Still, it takes just a minute to try it, and you never know when luck is going to be on your side.
To recover a Photoshop file from Temporary Files on Mac:
- Open Finder and go to Applications > Utilities.
- Launch Terminal.
- Enter the following command and press Return: open $TMPDIR
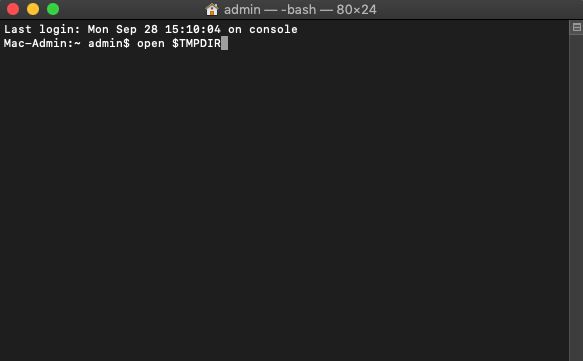
- Look for the unsaved Photoshop file.
- Copy it to a safe location.
Method 3: Open Recent
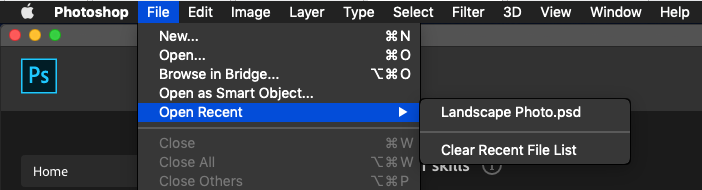
![]() We’re mentioning this recovery method as a bonus. In fact, it’s not really even so much a recovery method as it is an alternative way to access Photoshop files after they’ve been closed unexpectedly.
We’re mentioning this recovery method as a bonus. In fact, it’s not really even so much a recovery method as it is an alternative way to access Photoshop files after they’ve been closed unexpectedly.
Here’s how you can open recently closed Photoshop files:
- Launch Adobe Photoshop.
- Select File from the Menu bar.
- Click Open Recent and select your Photoshop file.
If the file isn’t there, it means that Photoshop isn’t aware of its existence and confirms that you haven’t saved it. If the file is listed among recent files, but you can’t open it, then it’s possible that the file has been accidentally deleted. In the next section of this article, we explain how to recover deleted Photoshop files.
How to Avoid Losing Your Photoshop Work
Losing your Photoshop editing work can be frustrating at best and costly at worst, especially if it involves complex projects or tight deadlines. However, there are several strategies you can employ to minimize the risk of your important project files getting lost:
- Regular manual saving: Make it a habit to save your work manually at regular intervals. Use the shortcut Cmd + S for quick saving whenever you make an important edit.
- Enable AutoSave feature: Although Photoshop doesn’t have a traditional autosave feature, you can adjust the automatic recovery options in Preferences > File Handling. This setting helps Photoshop to save recovery information of unsaved work in case of a crash.
- Versioning your work: Set up Apple’s Time Machine, a backup software application included with macOS. Time Machine automatically saves up-to-date copies of everything on your Mac. It lets you easily restore previous versions of your projects, helping you track changes and revert to earlier versions if needed.
- External backups: Regularly back up your Photoshop files to external storage devices like USB drives or external hard drives. This guarantees that you always have another copy of your work in case your primary storage fails.
- Store work in the cloud: Adobe’s suite offers cloud document capabilities. Creating new cloud documents in these applications makes it so that your files are not only auto-saved but also accessible from any device with internet access, providing both data security and flexibility.
By implementing these best practices, you can greatly reduce the risk of losing your valuable Photoshop work.
Conclusion
Adobe Photoshop stands as a cornerstone tool for graphic designers, photographers, and artists. But despite its advanced capabilities and widespread use, Photoshop is not immune to unexpected crashes and file losses. In this article, we’ve described several methods and tools to effectively recover unsaved or accidentally deleted Photoshop files on a Mac. By combining these recovery methods with preventive measures, you can ensure that your creative flow remains uninterrupted and your valuable work is preserved.
FAQ:
Use the following procedure to delete the Photoshop temp files from your Mac.
- Open Finder and select Go from its Menu.
- Choose Go to Folder, type /tmp in the dialog box, and click Go.
- Search for folders or files that begin with Photoshop Temp.
- Make sure you are deleting items with a .tmp extension to ensure they are temporary files.
Unfortunately, if you’ve closed a Photoshop file without saving, even the built-in AutoRecover feature won’t be able to assist, as it’s designed for crash recovery, not for unsaved user actions. Your best option is to manually retrace all your editing steps and to regularly save your work during editing going forward.
Use the following steps to locate the Photoshop temp files that are stored on your Mac’s system disk.
- Open the Terminal app from the Applications -> Utility folder.
- Type the open /tmp command to open your Mac’s temporal folder.
- Photoshop temp files will begin with the words Photoshop Temp, then numbers, then .tmp.
Photoshop autosave files are saved in different locations depending on the operating system you are using. On a Mac, the files are located here:
~/Library/Application Support/Adobe/Adobe Photoshop /AutoRecover
On Windows where C: is your system drive, this is the Photoshop autosave file location:
C:\Users\\AppData\Roaming\Adobe\Adobe Photoshop \AutoRecover
It’s important to note that the files in the AutoRecover folder are specifically for recovery in case of an unexpected shutdown or crash of Photoshop. Under normal circumstances, there’s no need to manually access this folder.


