
It doesn’t take much research to discover many data recovery software applications promising to help you get back permanently deleted files from your Mac’s internal hard drive as well as all external storage devices attached to it. But do you really need to use them? Maybe not!
In this article, we explain how to recover deleted files on Mac without software, which, as you probably know, can cost quite a lot of money depending on which application you go for. Each of the methods described in this article is completely safe, and you can go through all of them in less than 30 minutes.
If they fail to recover your deleted files, then you can review all the methods available to recover deleted files on Mac.
Table of Contents
Method #1: Trash Bin
The Trash Bin folder, commonly referred to simply as Trash, should always be the first place to look for deleted files on Mac. That’s because deleted files are first moved to Trash, where they stay for 30 days before they are automatically removed. As long as you don’t take too much time to notice that your files are missing, you can get them back without any effort and without any software.
Step 1. Open the Trash Bin Folder, all you need to do is click the Trash icon in the Dock (it should be on the right side).

rm ~/Library/Preferences/com.apple.dock.plist
When you log back in, the Dock will be in its default state, and you should see the Trash icon. Alternatively, you can open Trash directly using the following Terminal command: open .trash
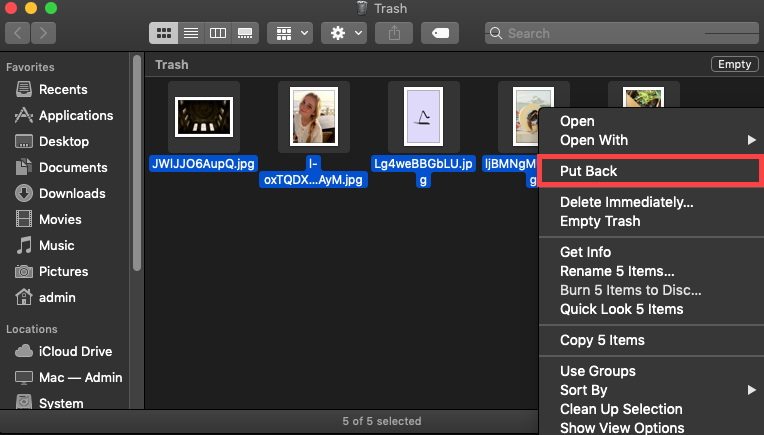
Step 2. Go through the Trash folder and select the files you want to undelete. You can either manually look at the names of the files inside the folder or use the search feature to find a specific file or all files with a certain file extension.
Regardless of which approach you choose, you need to select each file by pressing and holding the command key and then clicking on it.
Step 3. Finally, right-click on any of the selected files and select the Put Back option. The files will be moved back to their original locations. If you want to move them to a specific directory, you can simply drag and drop them to another Finder window.
Method #2: Trash Bin via Terminal
Not many Mac users know that it’s also possible to restore files from the Trash Bin folder via the Terminal app. Why would you want to do that? Because it’s sometimes simple to use a single Terminal command than it is to perform multiple GUI actions, or because you’re experiencing issues with Finder that make it impossible for you to recover deleted files from Trash with the mouse.
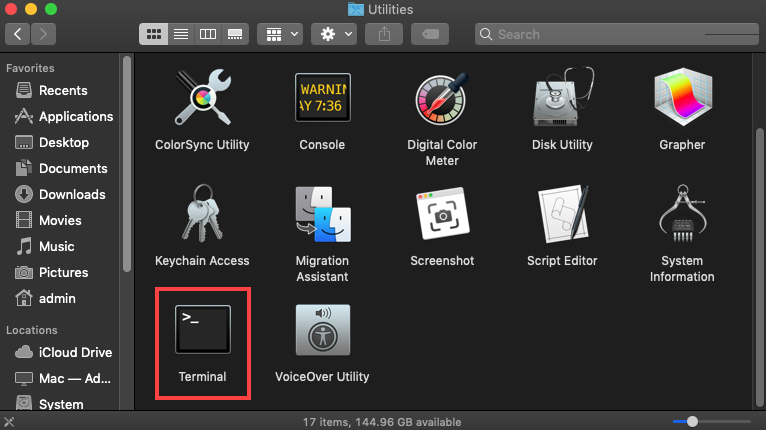
Step 1. Launch Terminal – to do so simply bring up Spotlight by pressing the Command key and Space bar at the same time, type “terminal,” and hit Return. Alternatively, open Finder and navigate to Applications and Utilities, which is where the Terminal app can be found.
Step 2. Then navigate to the Trash folder by entering the following command:
cd .Trash
If you also want to display the content of the Trash folder, enter this command:
ls -al ~/.Trash
Step 3. To restore a file from Trash via Terminal, you need to use the mv command and provide the exact name of the file you want to restore and the recovery location as arguments, like this:
mv image.jpg ../
The command above moves the file titled image.jpg to the Home folder.
You can also move all files that are present in the Trash folder at the same time using the following command:
mv * ../
The asterisk (*) is called a wild character, and it acts as a kind of placeholder for unknown characters in a text value. In the command above, it is used to recover all files regardless of their names, but you can also get a bit more creative with it and use it to recover all files with a certain file extension:
mv *.jpg ../
Here the asterisk is used to recover all files with the .jpg file extension. Pretty useful, right? That’s why it’s sometimes more efficient to perform certain actions in the Terminal app.
Method #3: Recover Files Using Time Machine
Do you use Time Machine, Apple’s backup software application, to automatically back up your Mac to an external storage device? If so, you’re in luck because it’s very likely that you’ll be able to recover your files without any third-party data recovery software.
Step 1. Open the folder where your deleted files were last located in Finder. Then, click the Time Machine icon located in the Menu Bar and choose Enter Time Machine. By opening Time Machine this way, you’ll have instant access to older versions of the folder.
![]()
Step 2. Time Machine will first display the most recent version of the folder, and your job is to use the two buttons and the timeline on the right find an older version of the folder, one that contains the deleted files. When you find it, select the files you want to recover just like you would normally.
![]()
Step 3. Now all you need to do to retrieve your files from the Time Machine backup is to click the Restore button at the bottom. You’ll be able to find the restored files in their original locations.
![]()
Method #4: App-Specific Recovery Features
Many Mac apps have their own recovery features that help users avoid catastrophic data loss and recover deleted files without third-party software. A great example of a native Mac app with built-in data recovery capabilities is the Photos app, the default photo management and editing solution included with Mac OS X Yosemite and newer.
When you delete a photo in the Photos app, the image file is moved to the Recently Deleted album, where it stays for 30 days. Once this grace period is over, the photo is automatically deleted, and you can recover it only with special third-party data recovery software.
Step 1. Open the Photos App and Navigate to the Albums tab. If you don’t mind using keyboard shortcuts and want to save some time, you can also open Spotlight (Command + Space), type “photos,” and hit Return.
![]()
The Photos app is straightforward, and its main window is divided into two panes. The right pane displays the content of the currently selected library, album, or project, while the left pane displays all available libraries, albums, and projects.
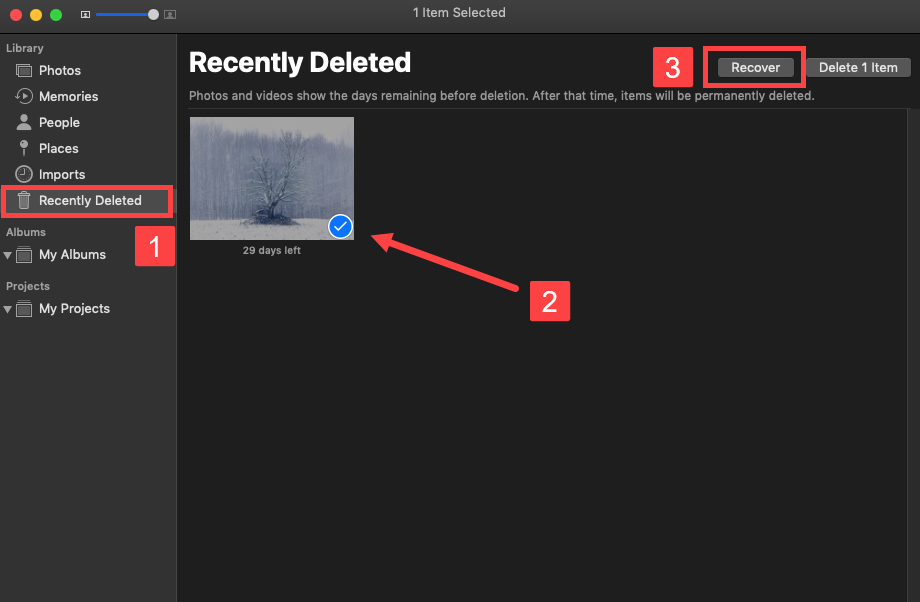
Step 2. Navigate to the Recently Deleted Library. Select the Recently Deleted library from the left pane so that you can view its content in the right pane.
Step 3. You should see all deleted photos, with the days remaining before deletion displayed under them. To select a photo, just click on it. If you want to select multiple photos, keep clicking until they’re all selected. Finally, click the Recover button in the top-right corner. You can find the recovered photos in the Photos library.
Method #5: Undo Command
Do you know that your Mac computer keeps track of everything you do? Macs do this to allow users to undo recent changes made to files. All you need to do is activate the Undo command in the application that was used to delete the missing file.
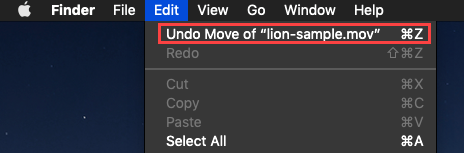
Let’s say that you’ve accidentally deleted an important file in Finder, and you want to get it back. Simply bring Finder to focus and choose Edit > Undo (from the Edit menu at the top of your screen) or press Command-Z on your keyboard.
You can keep activating the Undo command to go further back in time, but keep in mind that the history of your past actions gets deleted when you restart your Mac or close the application that was used to delete the missing file.
Method #6: Recover From iCloud Backup
There are many ways to recover your deleted files on Mac. If you have an iCloud backup, you can easily retrieve these from the iCloud website. Listed below are the steps on how to do it.
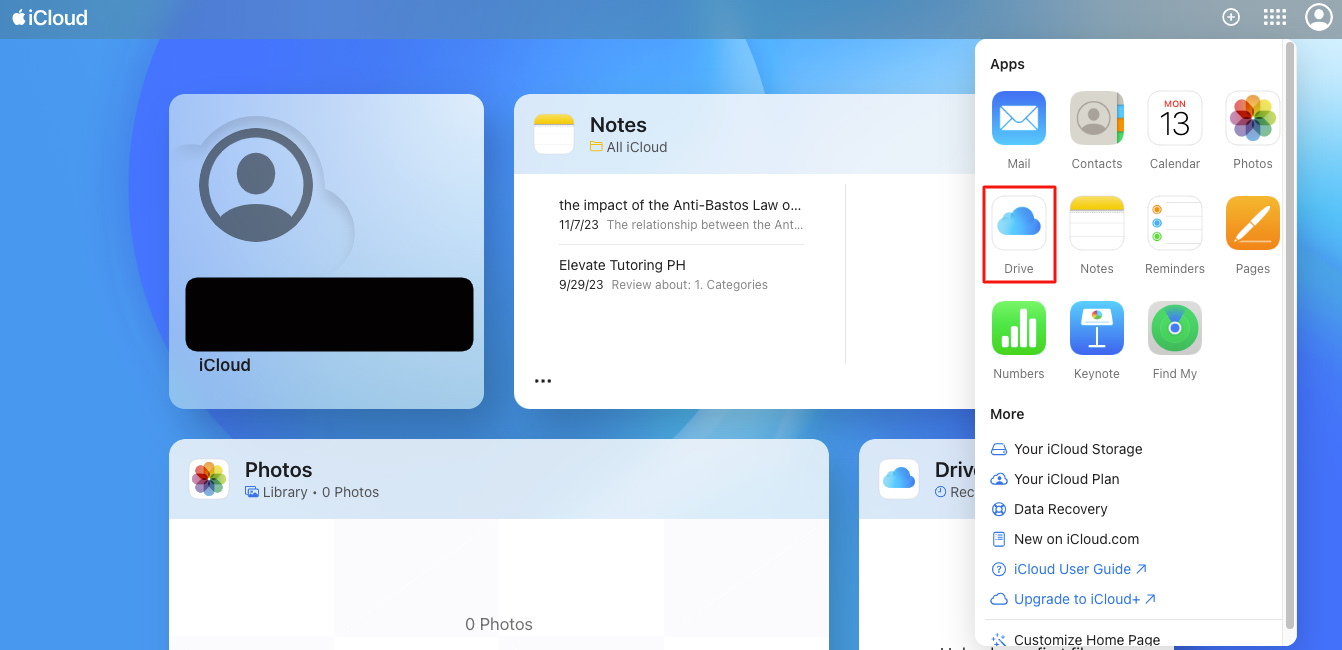
Step 1. Visit iCloud.com and sign in with your Apple ID.

Step 2. After logging in, click on the menu button (it looks like a rectangle with white squares) in the top-right corner. From the options that appear, choose Drive to open iCloud Drive.
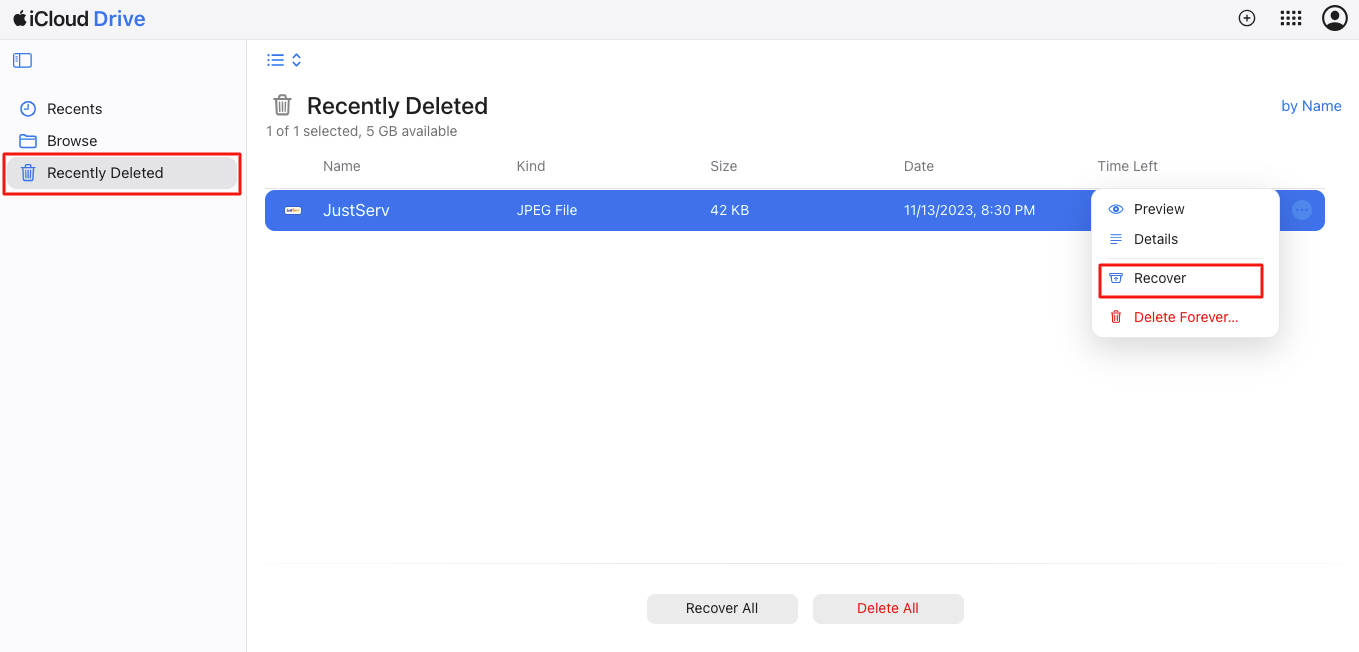
Step 3. To find files you recently deleted, click on Recently Deleted in the left sidebar.
Step 4. On the Recently Deleted folder, you can restore all deleted files by clicking on Recover All at the bottom part of your screen. If you only want specific files, click on the file(s), click the three dot button, and choose Recover. Repeat these steps if needed.
Conclusion
While recovering deleted files from your Mac without using any third-party software tools is possible, most of the time, you need a few stars to align properly to work, and a backup to rely on.
While a lot of data recovery applications claim to restore permanently deleted files, it’s important to consider alternative, cost-effective approaches. You just need to find the right tools that are already available on your Mac for free. The methods outlined in this article are not only safe but can be completed in less than 30 minutes, offering a quick and efficient solution.
FAQ
If you accidentally erased files on an external hard drive, you can still find them in the Trash folder as long as the drive is still connected to your Mac and has a supported file system.
If you can’t find the files in the Trash folder, it’s best to use a data recovery app or rely on your backup.


