
The cut function on Mac is super convenient, but it’s also a super easy way to lose files quickly if you aren’t careful. If you cut a file and forget to paste it before copying or cutting another file, the original file is usually gone.
This guide will help you recover files lost in cut and paste on a Mac. You will also have a better understanding of the cut function and the powerful clipboard feature, and what to do when these components work against you. Read on.
Table of Contents
What Does Cut Mean on a Mac
“Cut” (CMD + X) is a function that removes selected content and stores it in the “Clipboard.” A Clipboard is a virtual storage folder that holds the content you recently cut. You can “Paste” (CMD + V) this content elsewhere, and Mac will pull it from the clipboard.
In contrast, the “Delete” command removes selected content and does not store it in the clipboard. In other words, the clipboard is the only functional difference between cut and delete. Instead, the detele function sends a file to the Trash folder (fortunately, you can still recover files from the Trash folder on a Mac, even after emptying it).
How to Recover Cut Files on a Mac
The Cut function is not only used for on-page content like text and images, but it can also be used for organizing files in Finder. For example, you can cut and paste files on a Mac to different folders. This is more convenient than copying a file to a folder and going back to the original location to delete it.
However, it’s easy to cut a file by mistake – especially when you’ve zoned out. Fortunately, there are ways to recover cut files on a Mac:
Method 1: Use the “Undo” Function (Command + Z)
The “Undo” function (CMD + Z) also works for more than just on-page content. As long as you stay in the folder where you accidentally cut your file, you can undo the cut and even undo copy and paste using (CMD + Z).
Method 2: Search for Your File in the Clipboard
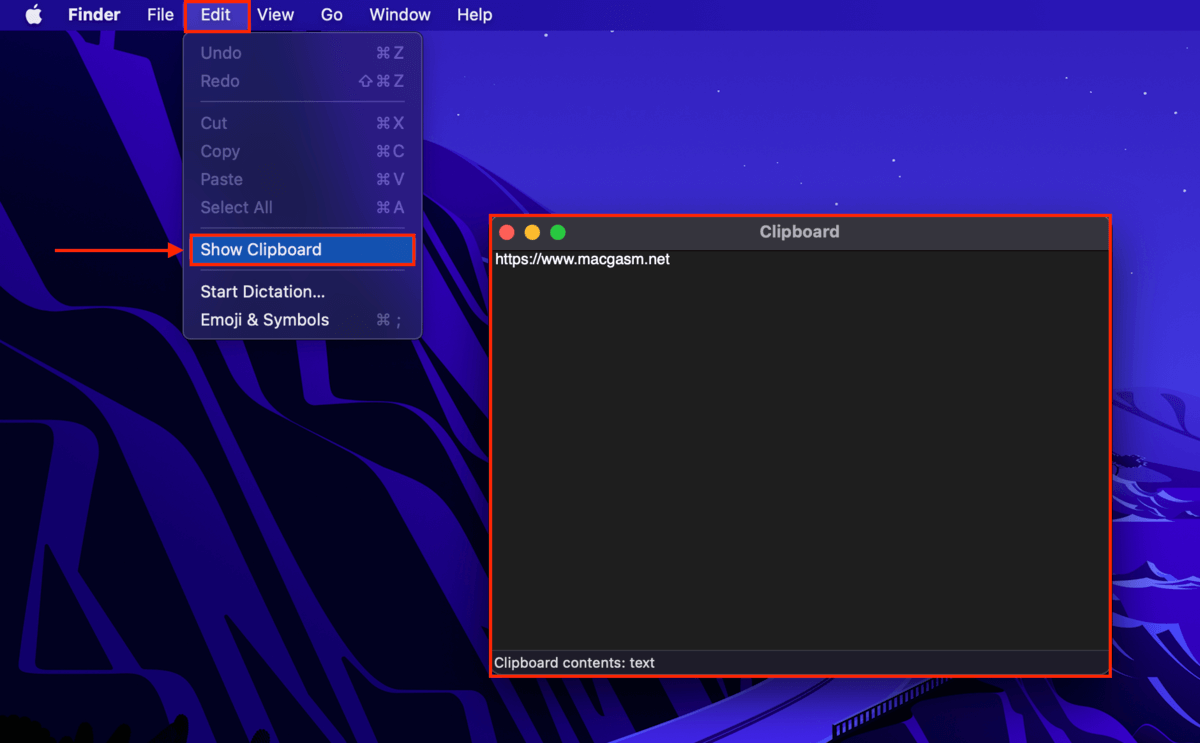
If (CMD + Z) doesn’t work, you can actually open the clipboard on your Mac. Open Finder and click Edit > Show Clipboard. A window will pop up displaying the content you cut/copied.
macOS also provides a “secondary clipboard”, which literally acts as an extra clipboard. You can store another set of cut/copied text-only content without replacing the original content in the first clipboard. Hit (CTRL + K) to cut the content, and (CTRL + Y) to paste it.
Method 3: Restore Your Cut File From a Time Machine Backup
If you cut or copy a file, it replaces whatever is in your clipboard. Once this happens, it’s gone and you can’t recover clipboard history on a Mac. But if you have Time Machine enabled, you can access a past version or “snapshot” of the folder that still contained your file. Then, you can pull the file from that snapshot and save it somewhere else.
Step 1. Open System Preferences > Time Machine.
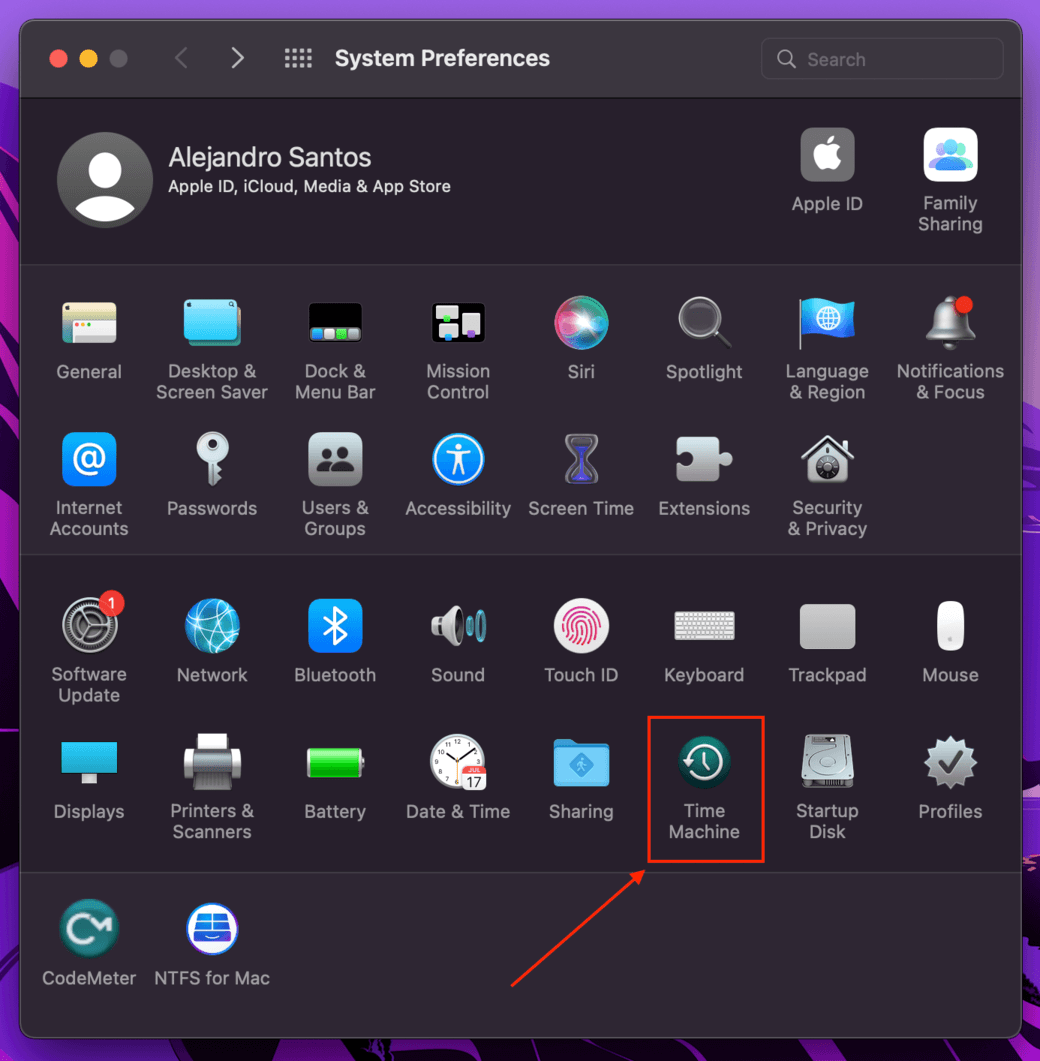
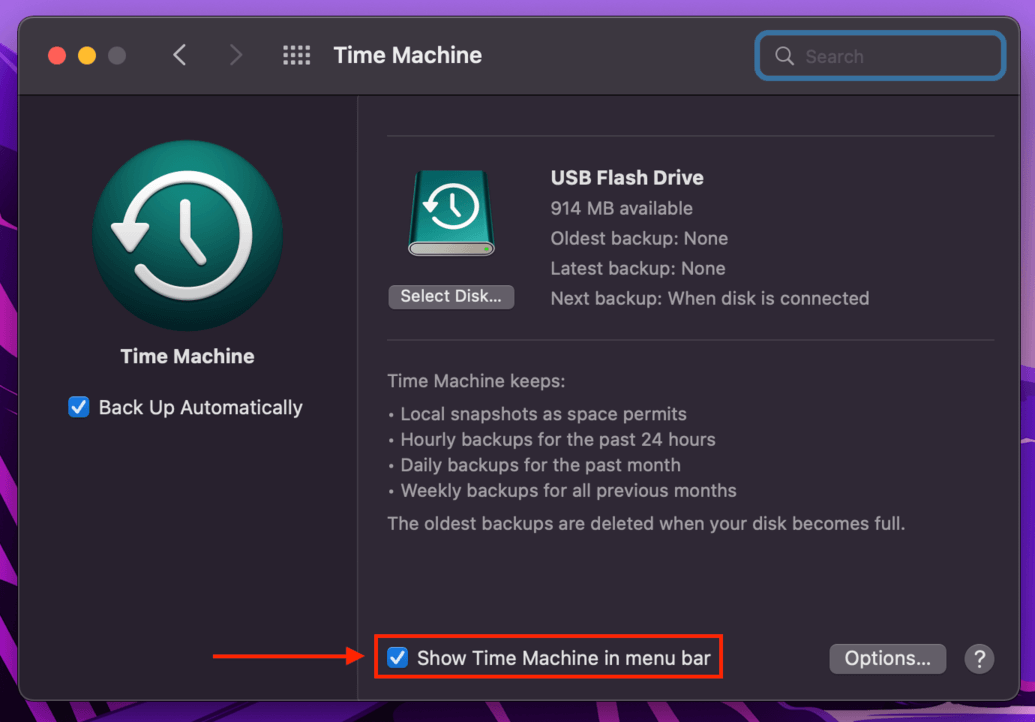
Step 2. Make sure the checkbox beside “Show Time Machine in menu bar” is ticked, then close the window.
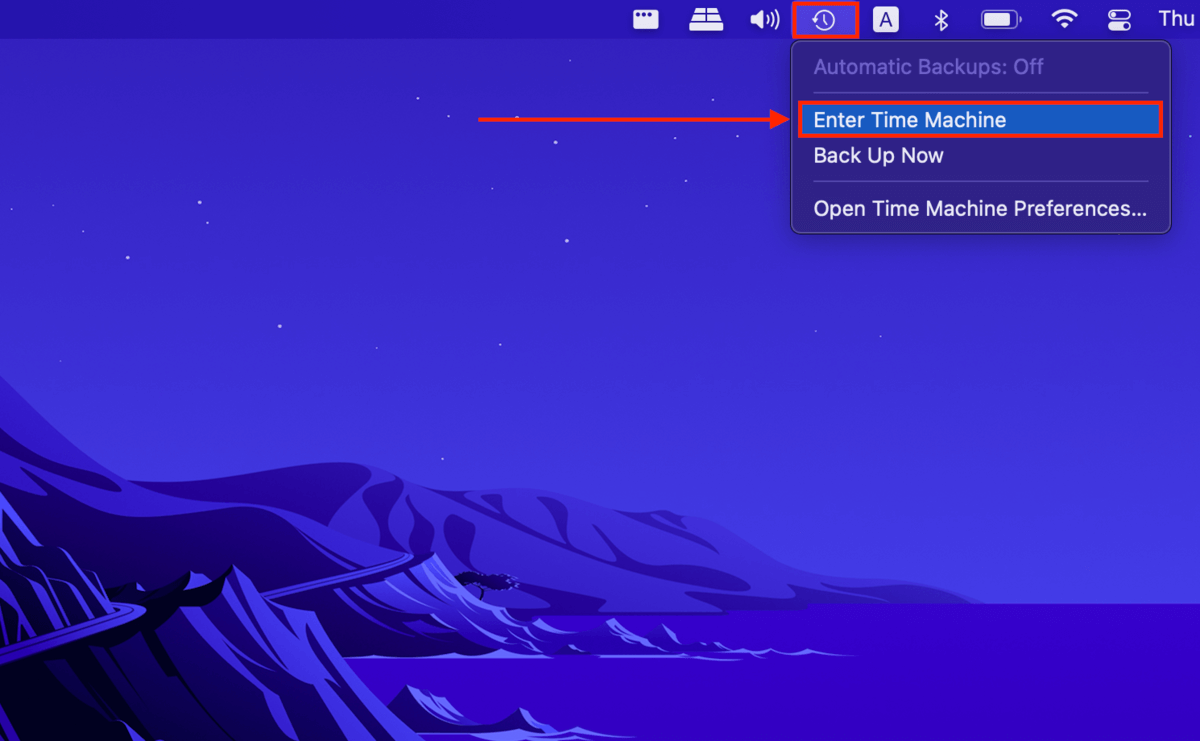
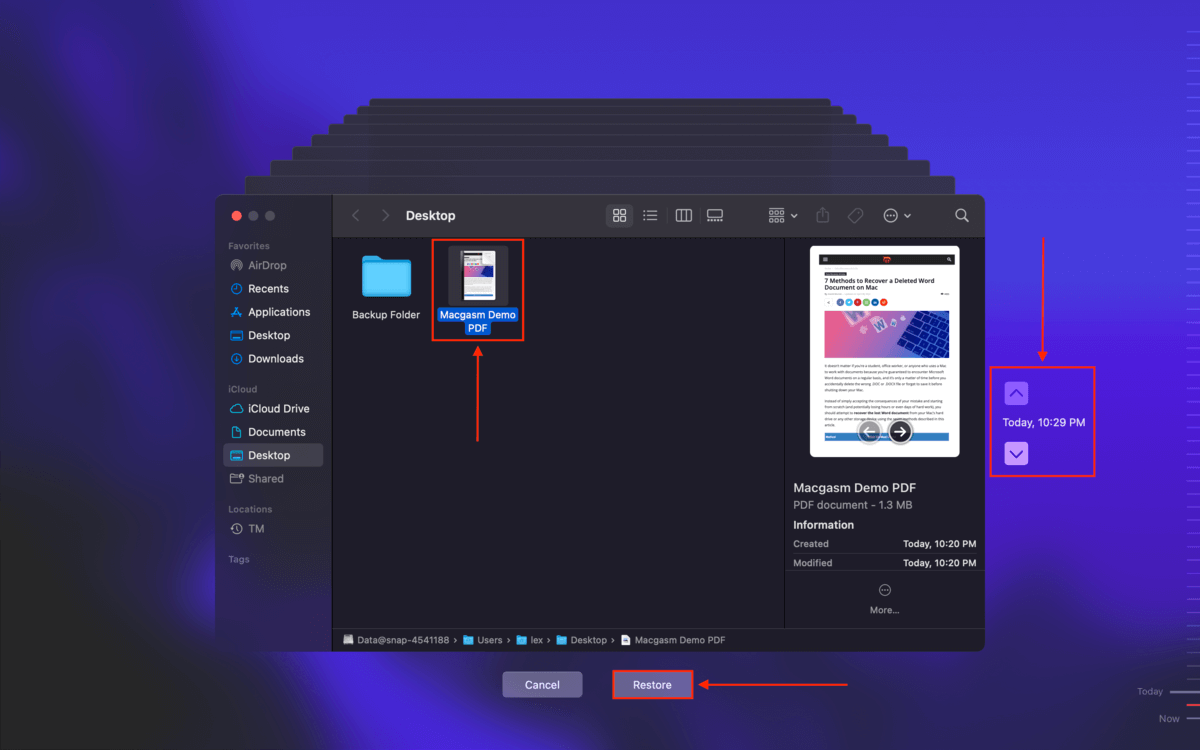
Step 3. Open Finder, then navigate to the folder where you accidentally cut your file. For example, navigate to the Desktop folder if you need to recover cut files from your desktop. Then, on the menu bar, click the Time Machine button > Enter Time Machine.
Step 4. Use the arrows on the right of the screen to find a snapshot that contains your file. Then, click your file and click “Restore.”
Method 4: Restore Your Cut File Using Data Recovery Software
If you didn’t have Time Machine set up beforehand, the only way to restore your cut file is by using data recovery software. Let me explain – your file still exists in the file system, but it’s inaccessible through Finder (and it’s marked for deletion). Data recovery software allows the user to pull data from the file system and make it accessible again.
For this article, we’ll be using Disk Drill. We’ve used it to demonstrate data recovery for tons of different file types and with different devices. We’ve had great success with it so far, and it’s very easy-to-use so our readers usually have no problem following along. Here’s how to use it to restore your cut file:
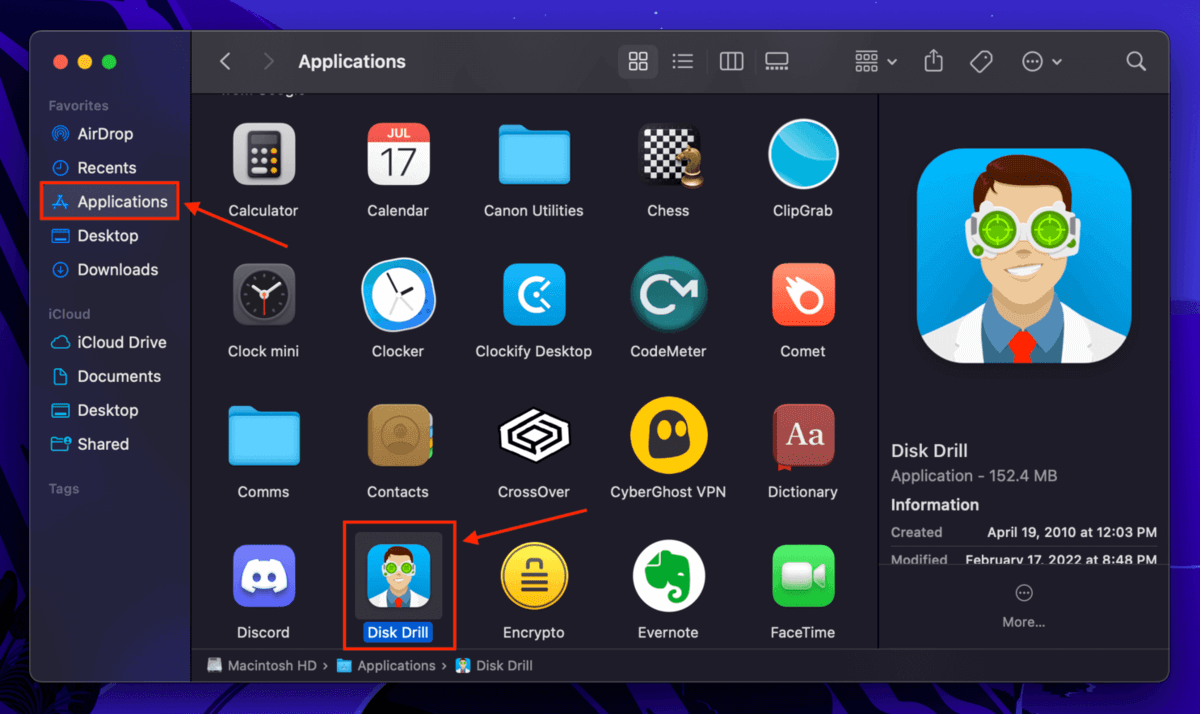
Step 1. Download and install Disk Drill.
Step 2. Launch Disk Drill (Finder > Applications).
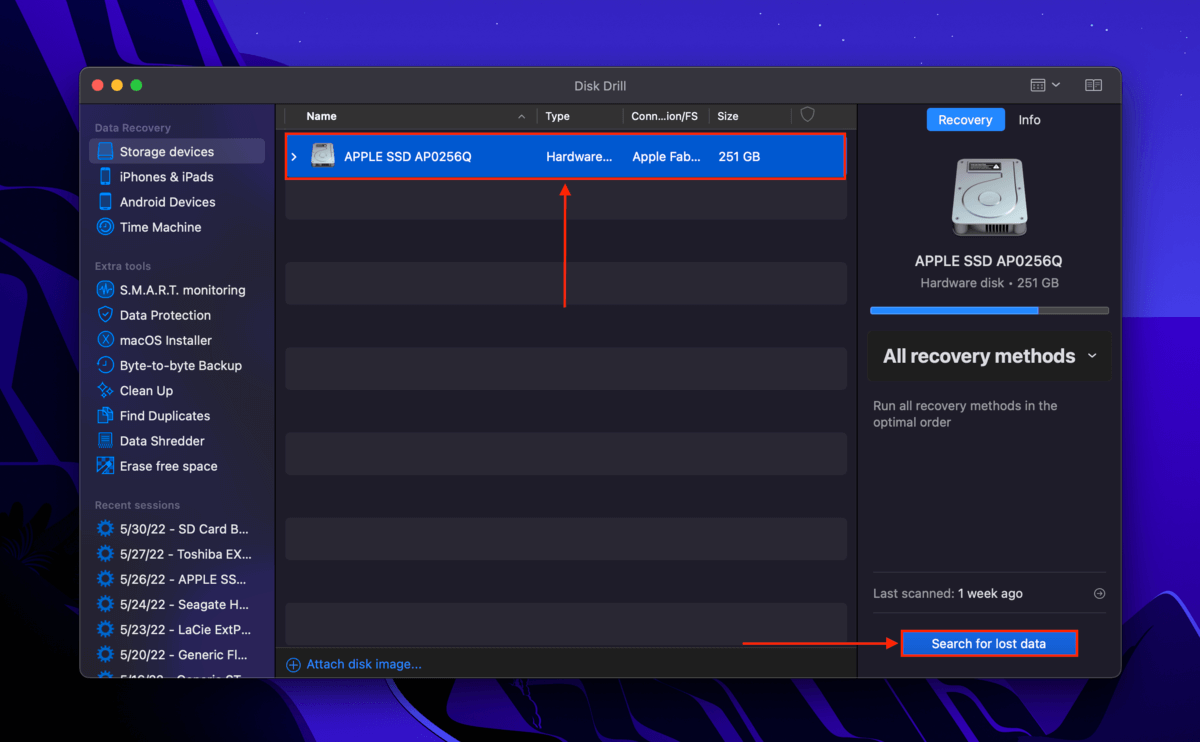
Step 3. Select your system drive (it’s usually labeled as “Apple SSD”) and click “Search for lost data.” If you accidentally cut a file from another storage device, select that.
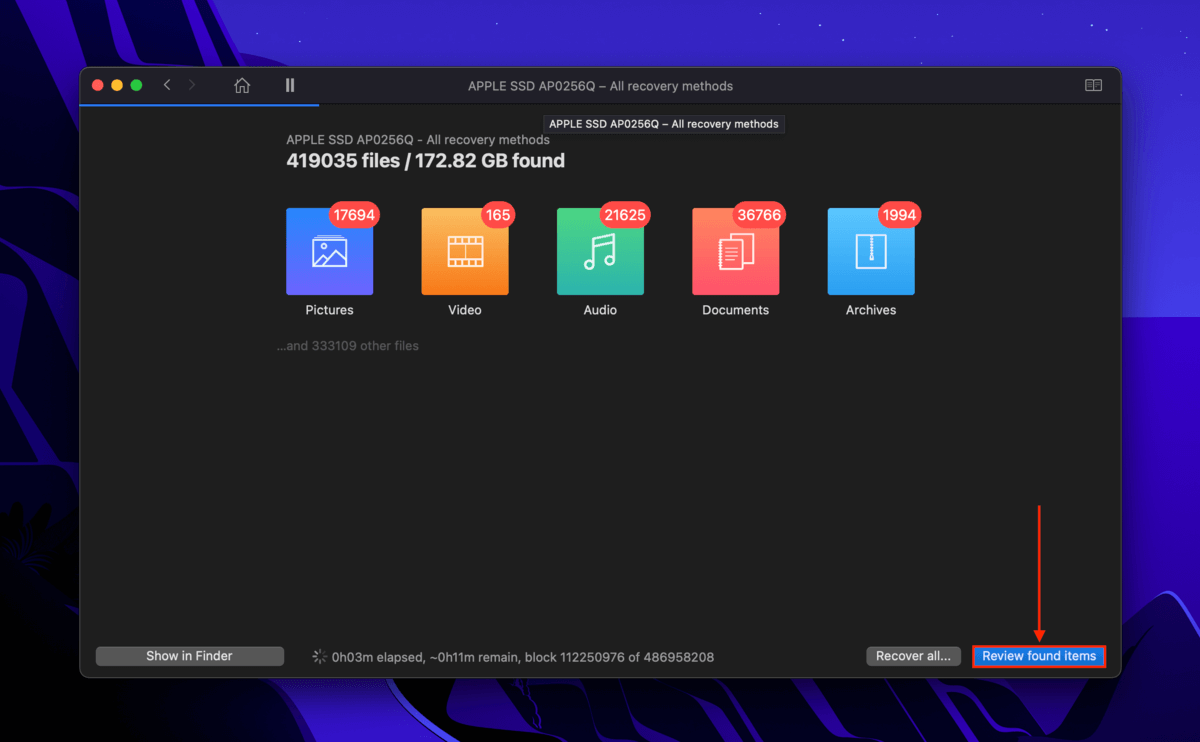
Step 4. You can wait for Disk Drill to complete its scan or immediately click “Review found items” (Disk Drill will continue to populate the results as it finds new data).
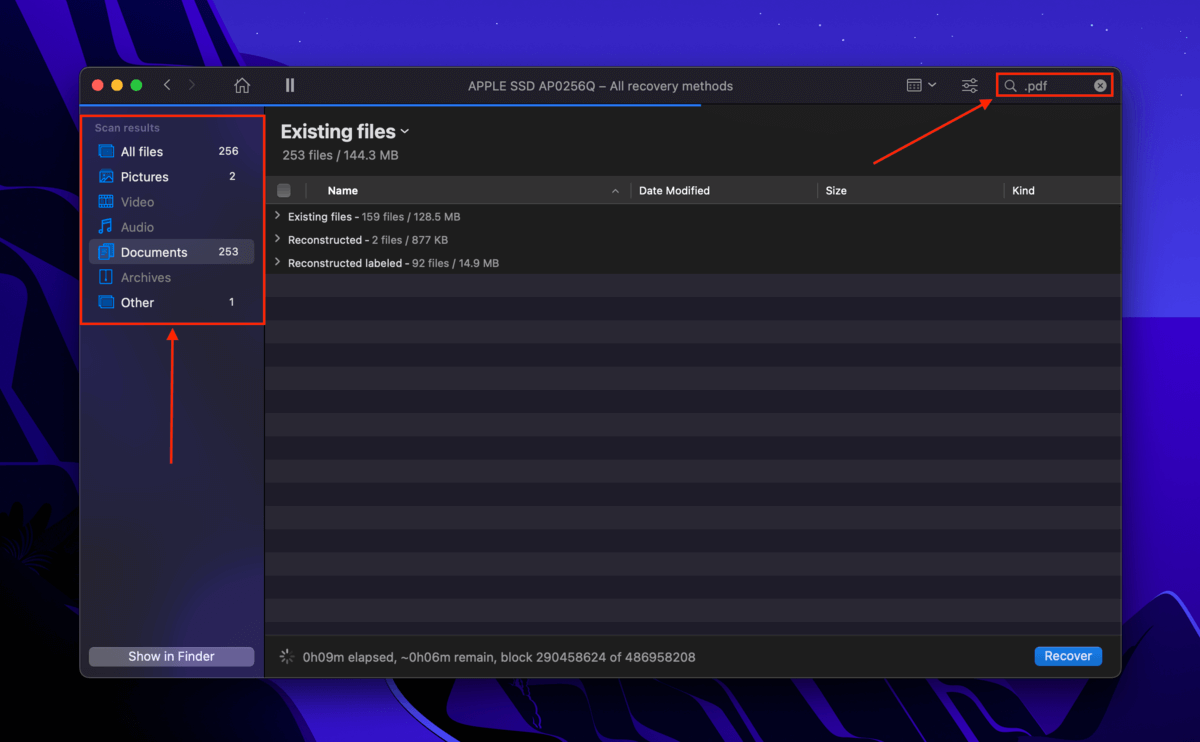
Step 5. You can use the search bar to find your file faster (you can search by name or extension), or you can filter results by file type using the options in the left sidebar.
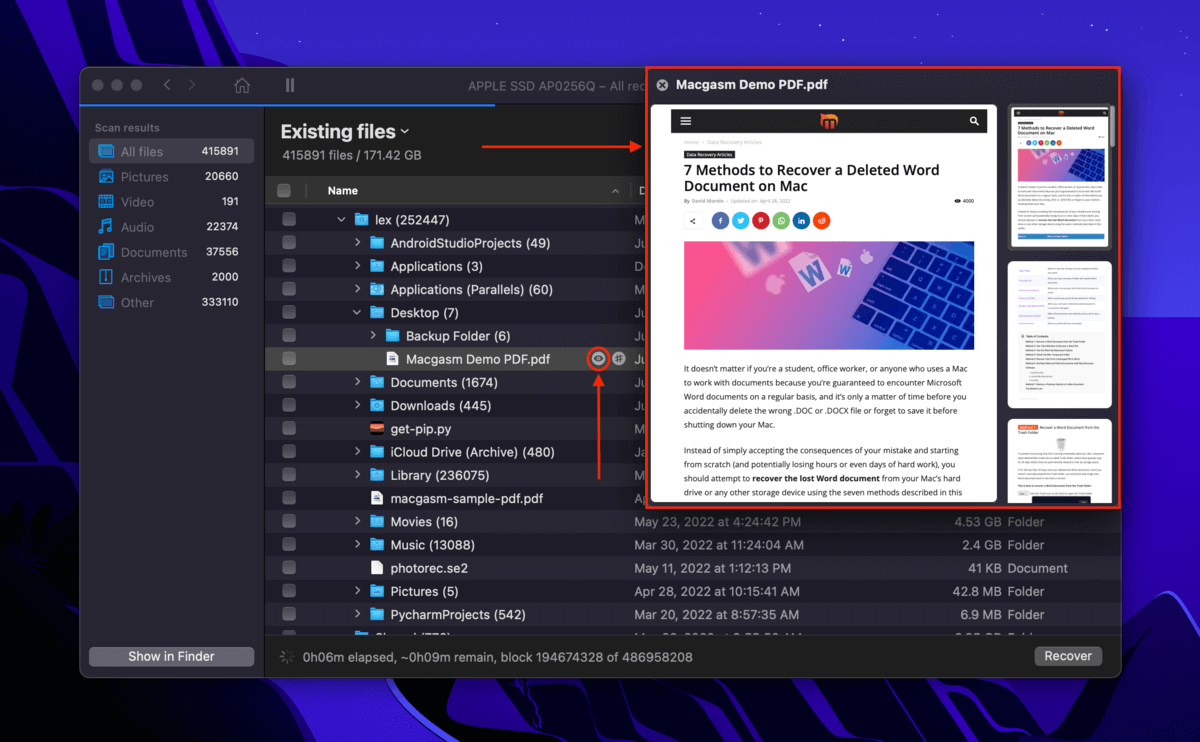
Step 6. To preview your file and make sure you got the right one, hover your mouse pointer to the right of its file name and click the eye button that appears.
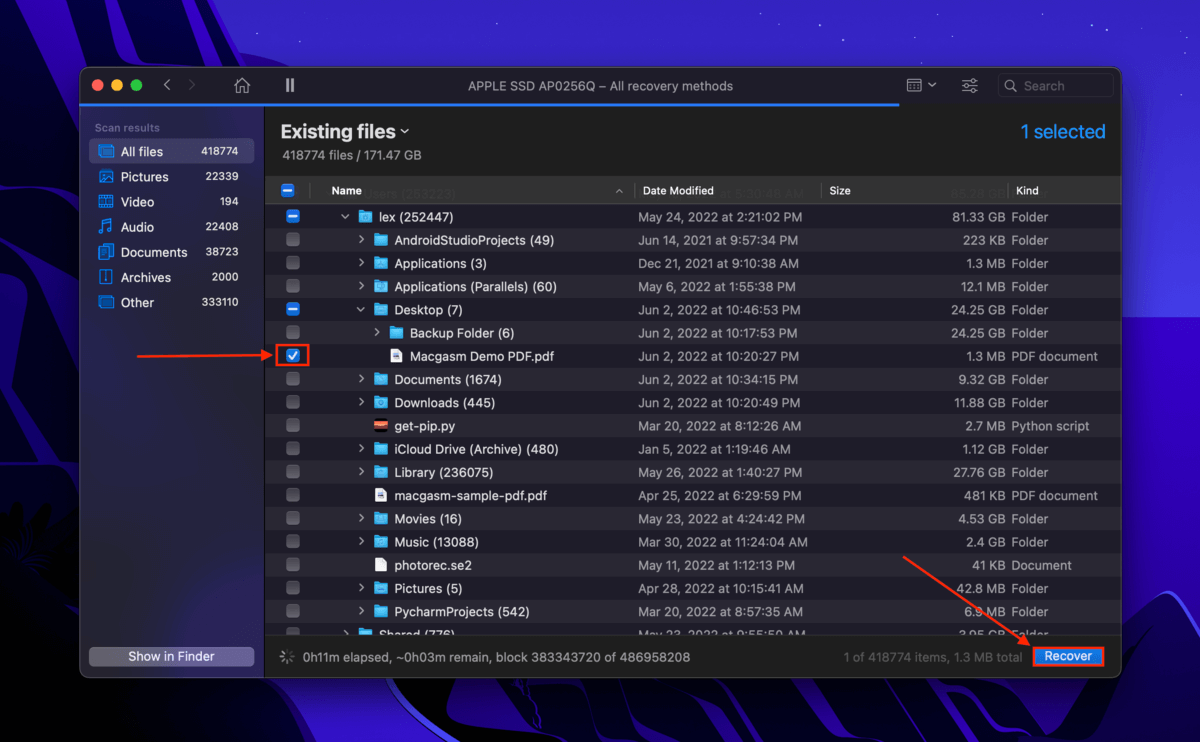
Step 7. Tick the boxes beside the file you want to restore, then click “Recover.”
Step 8. Select a destination folder for the recovered file, then click “OK.” We suggest connecting a storage device (like a USB stick) and saving the file there to avoid overwriting.


