
When was the last time you lost an important file because you accidentally deleted it and then managed to empty Trash on your Mac without noticing?
Don’t be afraid to admit that the experience is still in your recent memory. The good news is that it’s possible to recover items deleted from Trash, but don’t expect the Undo shortcut or some Terminal command to work.
| Method | Description |
| ✅ Data Recovery Software | The most convenient method |
| 🕒 Time Machine Backup | When you have a recent backup |
| 💭 iCloud | If you are used to synchronize your Mac with cloud storage |
| 🛠️ Data Recovery Services | If it’s critical for you to restore the files |
Table of Contents
What Is Trash Bin on Mac?
![]()
The Trash bin on Mac is a special folder for deleted files. Like its name suggests, its functionality mimics the functionality of a real-life trash bin. Moving files to the Trash bin is convenient because you can easily get them back if you change your mind.
Windows has its own Trash bin, called Recycle Bin. Mac’s Trash bin and Recycle Bin on Windows work quite similarly, but there are some minor differences you should keep in mind if you want to undo Recycle Bin or Trash. To help you understand them, let’s take a closer look at the process of deleting files on Mac.
How Trash Works on Mac?
When a file is moved to Trash, the operating system doesn’t erase its data. It simply changes the file’s location, allowing you to clean up your computer while giving you the option to recover deleted files from Trash if you change your mind.
Files are moved to Trash on Mac when you perform any of the following actions:
- Dragging a file to the Trash icon in the Dock.
- Right-clicking on a file and selecting the Move to Trash option.
- Using the keyboard shortcut Command + Delete.
To free up storage space on your hard drive or USB flash drive, you need to empty the Trash folder, which you can do either manually or automatically:
- Manually: To manually empty Trash, click the Trash icon in the Dock and click Empty. Confirm your decision to permanently erase all items in Trash by clicking the Empty Trash button.
- Automatically: In newer versions of macOS, you can set the Trash bin to empty automatically after 30 days by going to Finder Preferences > Advanced. There, activate the “Remove items from the Trash after 30 days” option.
On Mac, it’s also possible to skip Trash and delete files directly. This can be done using the Option + Command + Delete keyboard shortcut or by using the Delete Immediately option in Finder’s File menu, which can be revealed by holding down the Option key.
How to Recover Files from Emptied Trash on Mac?
Accidentally emptying your Mac’s Trash can feel like a disaster if it contained important files you didn’t mean to delete. Fortunately, there are multiple ways to recover your lost data, even if you’ve emptied the Trash. Let’s take a closer look at four reliable methods to retrieve your files with ease.
Method 1: Use Data Recovery Software
To recover emptied Trash on Mac, you need a third-party data recovery application capable of scanning the raw data on your storage device and allowing you to recover individual files.
We recommend Disk Drill because it lets you restore emptied Trash on Mac with a single click. Disk Drill supports over 400 file formats, including all commonly used image, video, audio, and document file extensions.
- The first thing you need to do is download and install Disk Drill. Don’t install Disk Drill on your main hard drive because you could overwrite the same files you’re trying to undelete. Instead, use an external hard drive or a USB flash drive. Alternatively, you can remove your Mac’s hard drive and connect it to another Mac.

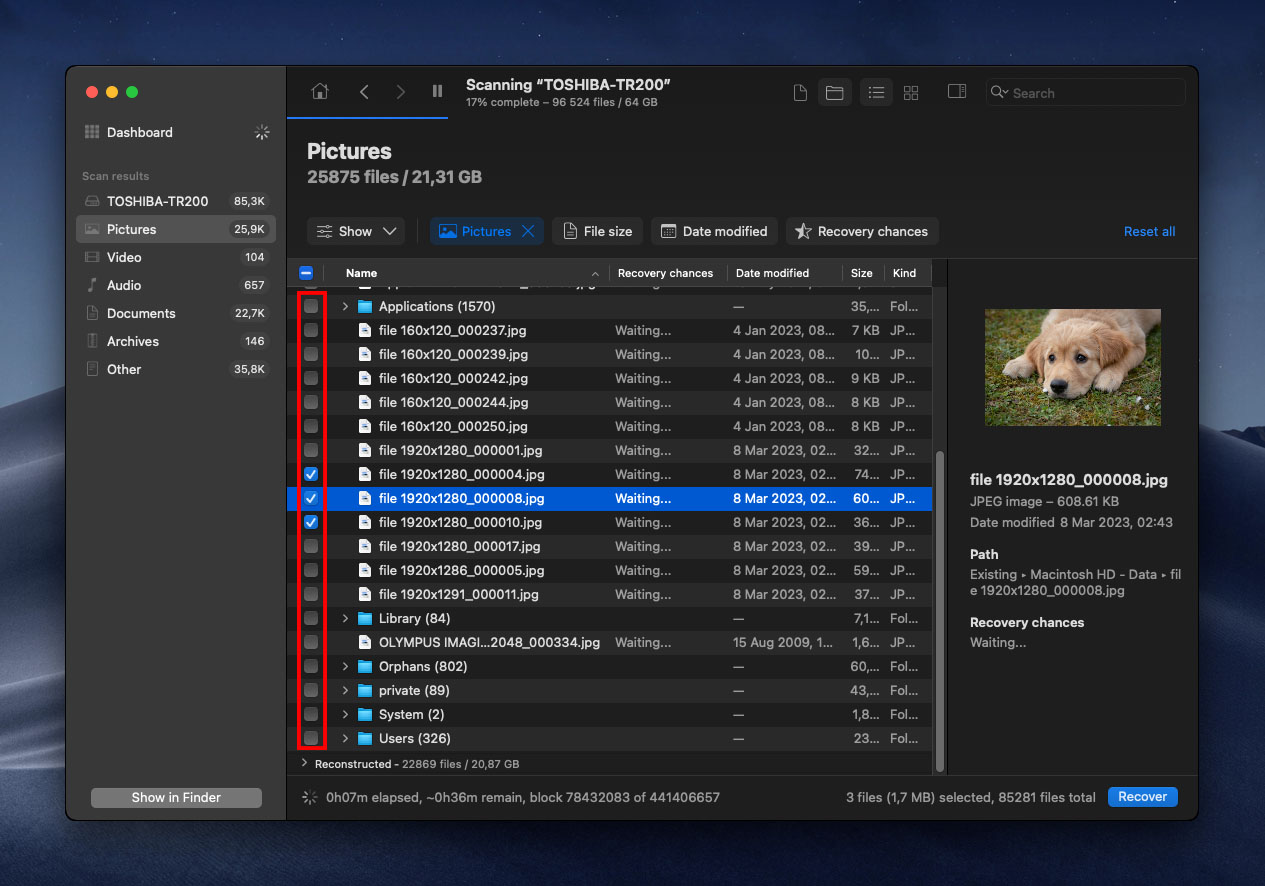
- Launch Disk Drill and click the Search for lost data button next to drive where files were deleted from. You want to scan your system drive because that’s where Trash is located. Disk Drill will automatically go through its recovery algorithms to restore as many deleted files as possible.

- Go through the scan results and select files for recovery. You may use the preview feature when restoring Trash on Mac to decide which files you want to get back. All files that can be previewed can be recovered.
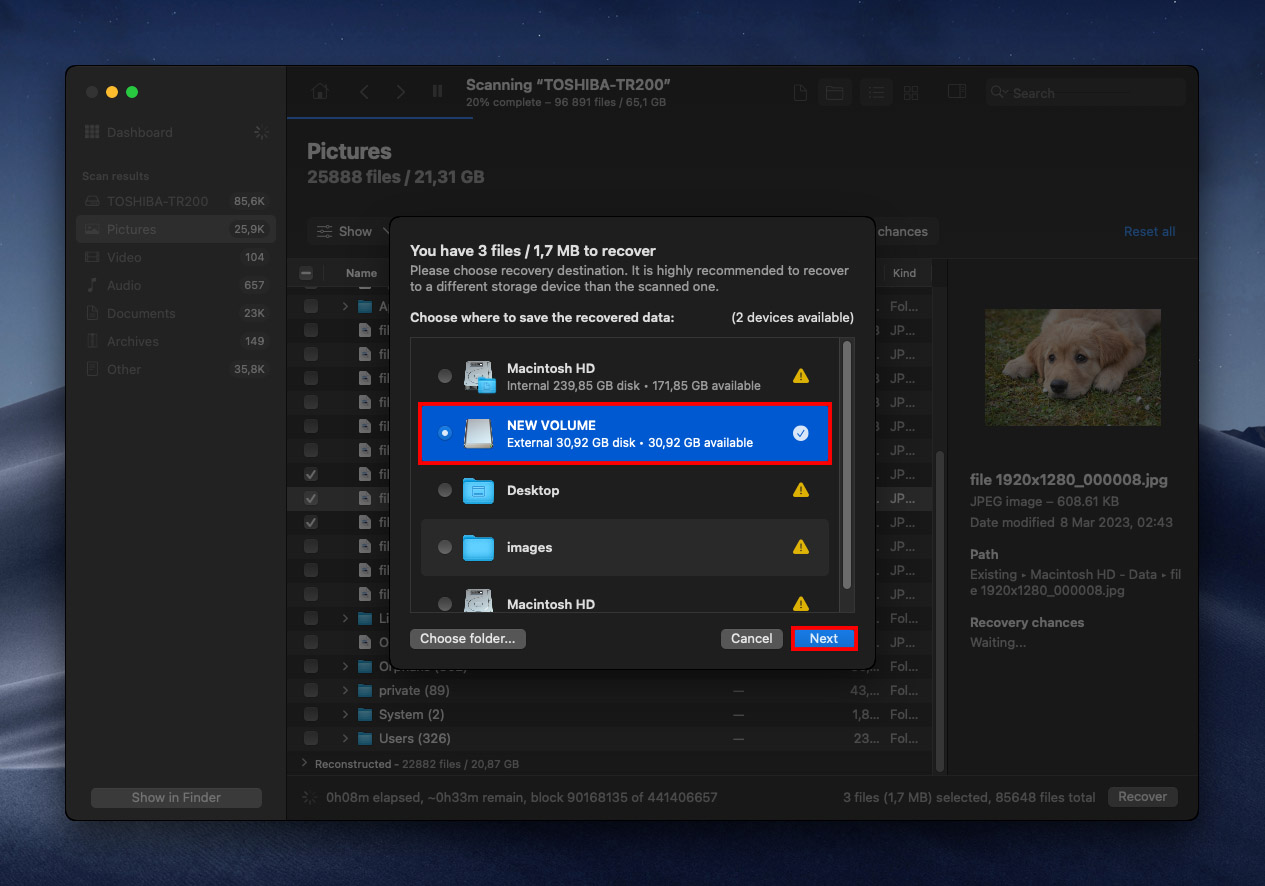
- Now it’s time to perform the actual data recovery from Trash. Disk Drill makes this otherwise complicated step easy, allowing you to undo empty Trash on Mac with a single click on the Recover button. Just make sure to recover your files to a different storage device than the one you’re recovering them from.
- You can now navigate to the folder with your recovered files and verify that the recovery process has been completed successfully.
Method 2: Restore Time Machine Backup
All newer Macs come with a backup software application called Time Machine. The purpose of Time Machine is to create incremental backups of files on an external storage device and allow users to restore the whole system or specific files with just a few clicks.
To recover deleted files using TimeMachine:
- Connect your Time Machine backup disk if you haven’t done so already.
- Open the folder that contained the deleted files.
- Click the Time Machine icon located in the Menu Bar and choose Enter Time Machine.’

- Locate the files you want to recover using the timeline on the right edge of the screen and select them.
- Click Restore to restore the selected file.

Method 3: Recover Files from iCloud
iCloud is Apple’s cloud storage and cloud computing service that all Mac users can use to back up important photos, videos, documents, notes, contacts, and other data. If you’ve been using the service to avoid losing important data, you can now use it to restore all files that are no longer in Trash.
To recover deleted files from iCloud:
- Go to: www.icloud.com
- Sign in with your username and password.

- Click iCloud Drive.

- Select the files you want to undelete.
- Click the Download button in the toolbar.

Method 4: Use Data Recovery Services
We can also use a data recovery service to recover data if the above methods haven’t worked for you. Cleverfiles offers a data recovery center where you can send in your Mac and get a free evaluation to see if the data can be recovered from it.
There are many hard drive recovery centers but I like this one for the following:
- If they can’t recover your data, there is no charge to you so it’s worth giving it a shot.
- Your hard drive warranty will not be voided.
- They have a very high success rate.
- The evaluation is free to see if your data can be recovered.
How to Recover Data From Trash That Hasn’t Been Emptied
If you haven’t yet emptied your Trash folder, restoring files is way easier. In fact, we’ll only be using built-in macOS functions to do so (no additional downloads or setup required). There are three easy methods to restore files from the Trash folder:
Method 1: Use “Put Back”
This is the simplest method to restore a file you sent to the Trash folder, and it works as long as you haven’t emptied your Trash. Just open the Trash folder using the icon on your dock (or type ~/.Trash in Finder > Go > Go to folder), right-click your file, then click “Put Back.”

Method 2: Use a Terminal Command
You can also restore files right from the Terminal command line. This is a great method if you’re comfortable with the command line, but it’s also quite simple that it’s worth learning. Here’s how to do it:
Step 1. First, we need to give Terminal Full Disk Access on macOS. This will also be useful in case you want to use Terminal to interact with your file system in the future. Open System Preferences > Security & Privacy.
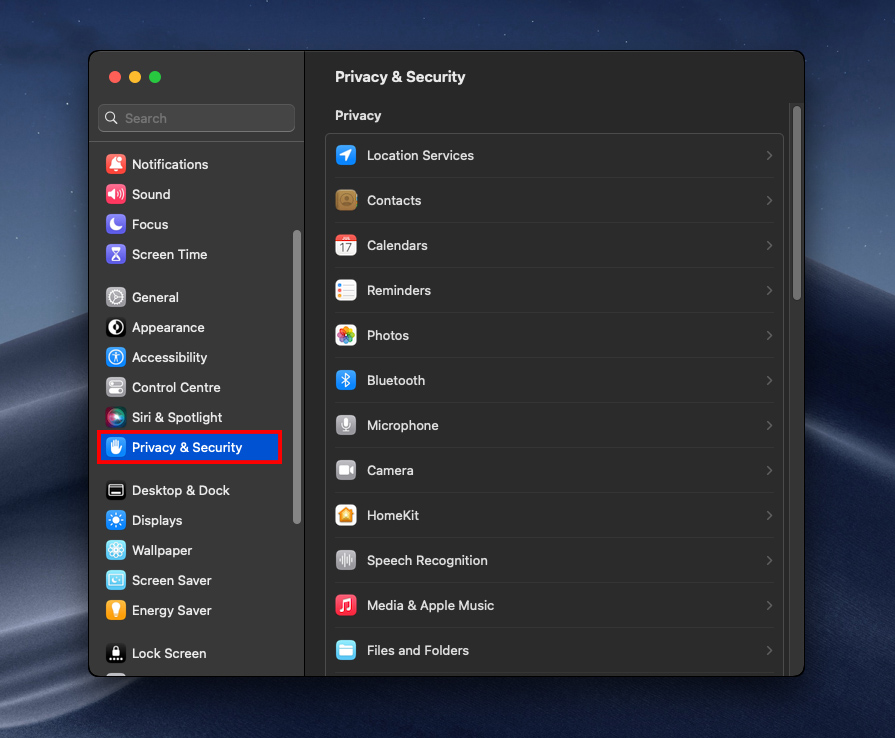
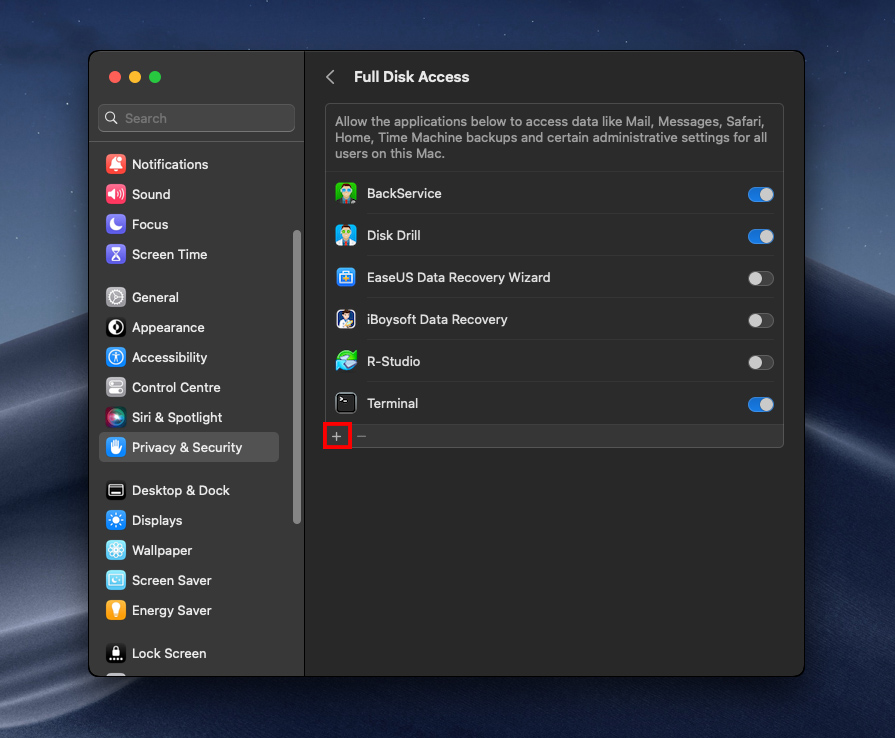
Step 2. Navigate to the Privacy tab, then scroll down the left pane and select “Full Disk Access.”
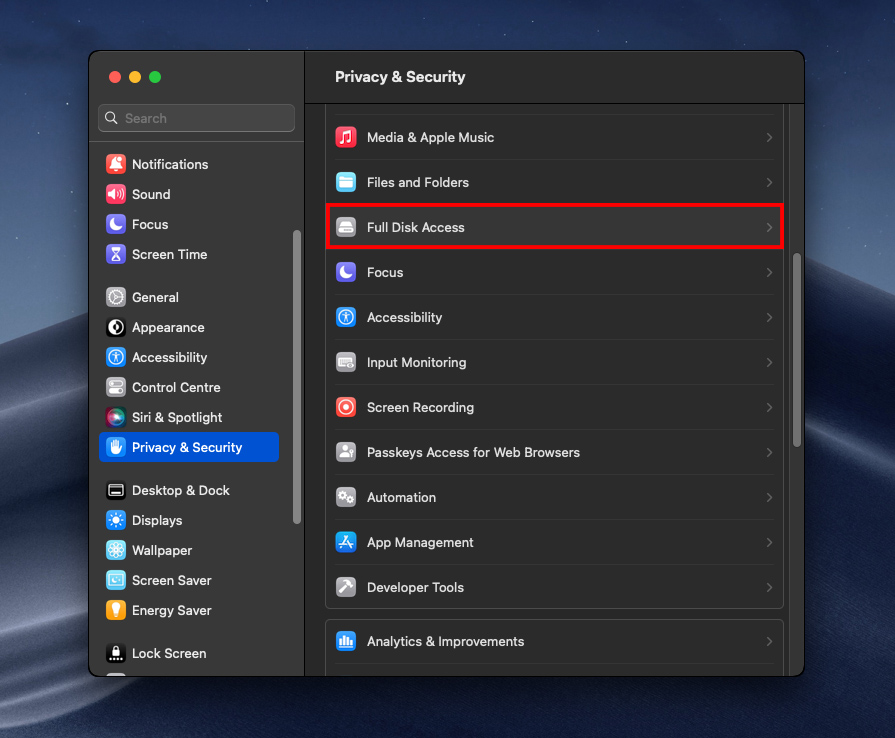
Step 3. Click the + button on the right pane (and input your password or fingerprint if prompted).
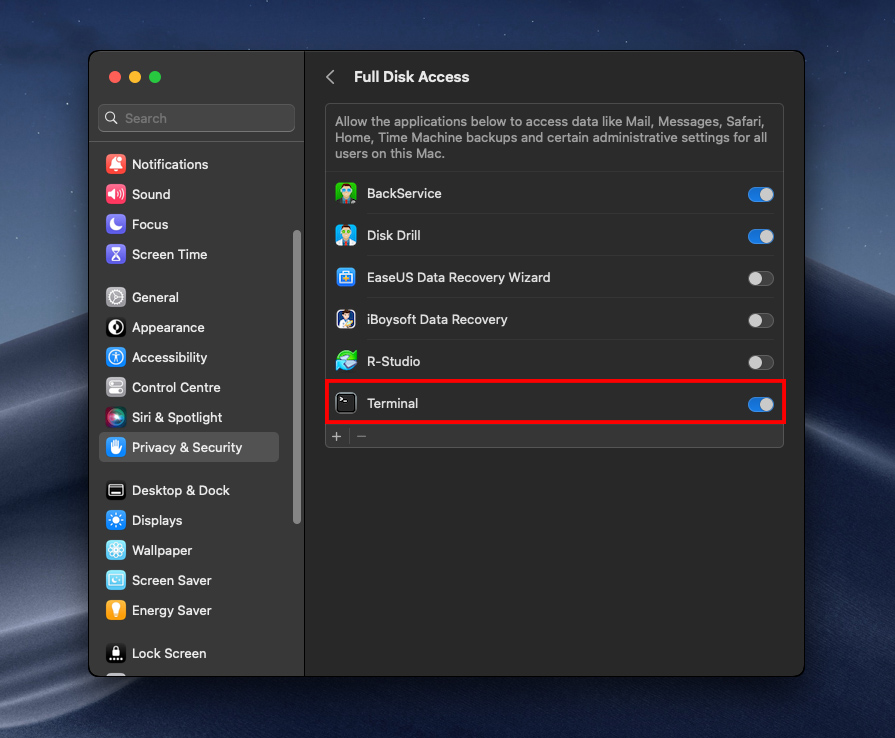
Step 4. Add the Terminal app to the list and make sure its slider is enabled. Then, allow macOS to restart Terminal when prompted.
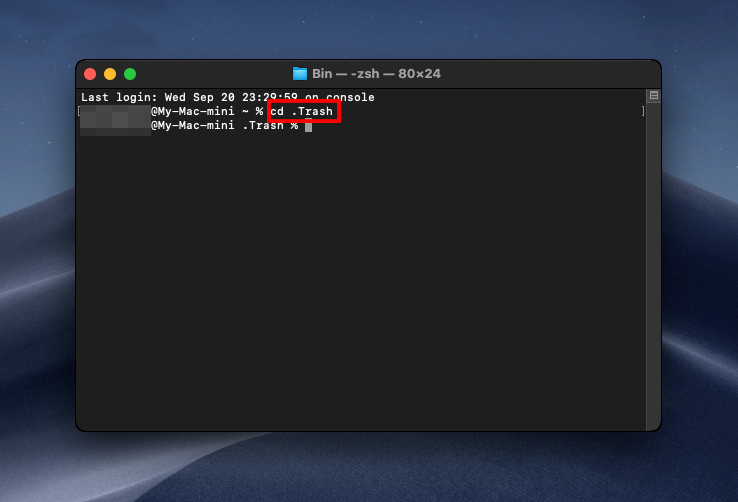
Step 5. Open Finder > Applications > Utilities, and double-click the Terminal icon.

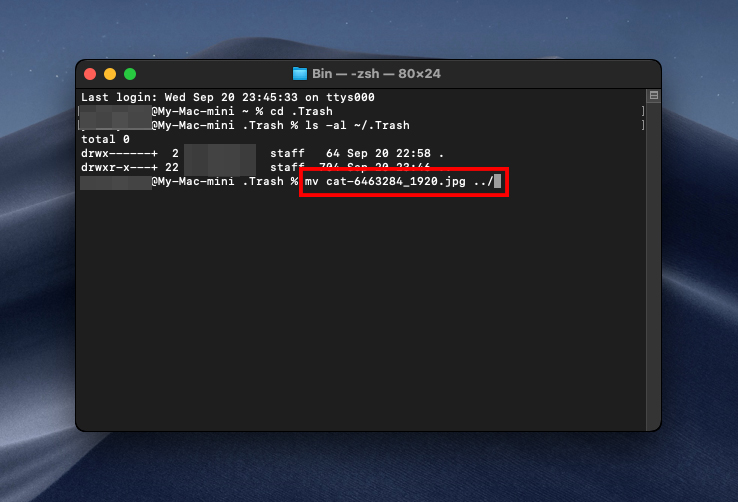
Step 6. Type the following command, then hit return:
cd .Trash
Step 7. Then, type the following command and hit return:
ls -al ~/.Trash
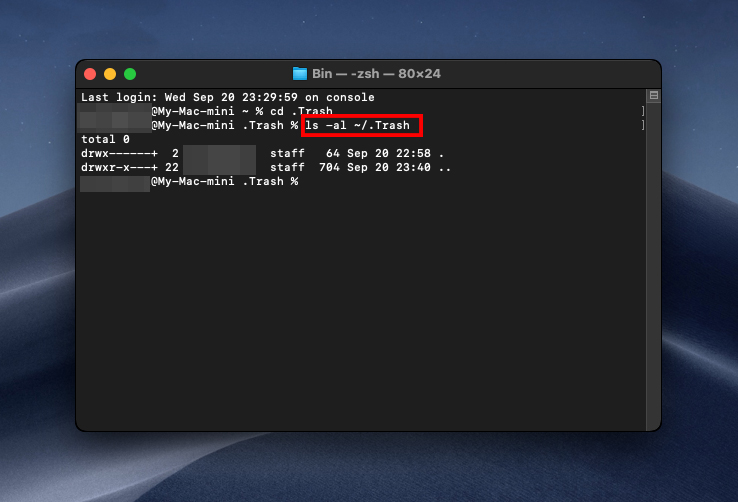
Step 8. This will display the contents of your Trash folder. To restore a specific file from Trash, type the following command and hit return:
mv “filename” ../
Replace “filename” with the exact filename of the item you want to restore (remember to include the extension).
Once the command has been executed, your file will be restored. Use Spotlight Search (CMD + Space) to locate it.
How to Prevent Accidental Data Loss from Trash
Now that we know how to recover data if we’ve emptied the trash, let’s talk about what are the best tips for protecting our data and ensuring that this doesn’t happen again in the future.
The below tips will help you be more aware of when your Trash is emptied and one of them also includes instructions on how to back up your data.
Tip 1: Turn off Automatic Trash Emptying if You Have It Turned On
Within the Finder, you have the option to turn on automatic Trash deletion after 30 days. This setting is off by default, but if you do have it turned on and want to turn it off we can do so.
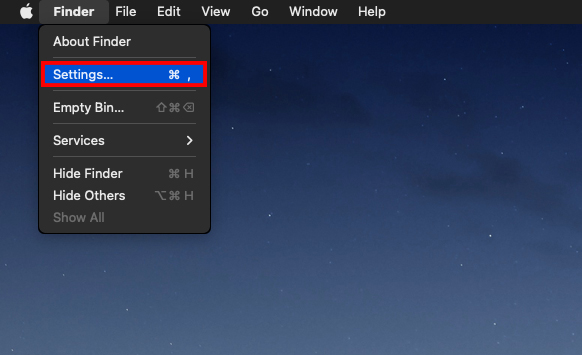
- Launch Finder and then select your Preferences.
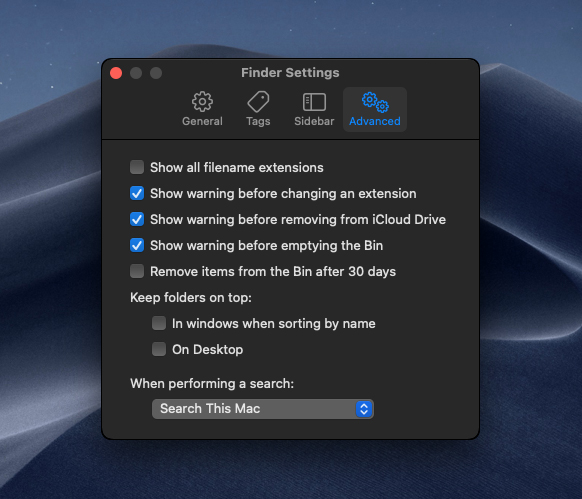
- Within your Finder Preferences, go to the Advanced tab. You will then see the option to “Remove items from the Trash after 30 days”. If it’s on, you can turn it off by clicking on the checkbox.
That’s all that there is to it! Now your Trash won’t empty itself unless you go in and decide to do so.
Tip 2: Show Warning Message Before Emptying the Trash
By default, there is a popup that comes up when either you click Empty within the trash or if you push the key command to do so. If this is turned off, we can turn it back on by following the steps below. I would recommend having this on just to make sure you really want to empty the Trash each time that you do so.
- Launch Finder and then go to your Preferences.
- Click on the Advanced tab and check to see if you have the option “Show warning before emptying the Trash” turned on or not. If you don’t have it on, I would recommend checking the box to turn it on.
Lastly, let’s talk about how to set up a backup and make sure that we always have another copy of our data in another location.
Tip 3: Set up a Backup Tool
Having a backup in place isn’t one of those things that you realize that you want to have until it’s too late. I’ve sent my Mac in for service and have experienced a software issue with it. Both times, I was super happy to have a backup and I know that if anything ever happens to my Mac, my data is saved in another location.
All that you need for a backup is an external hard drive. You don’t have to purchase a super expensive one, a cheaper slow one is fine but it will just take a little bit longer to back up your machine. Mine is a slower mechanical hard drive.
Once you have an external hard drive, you can back up using the steps below.
- Plug your external hard drive into your Mac.
- Launch System Preferences and then select Time Machine.
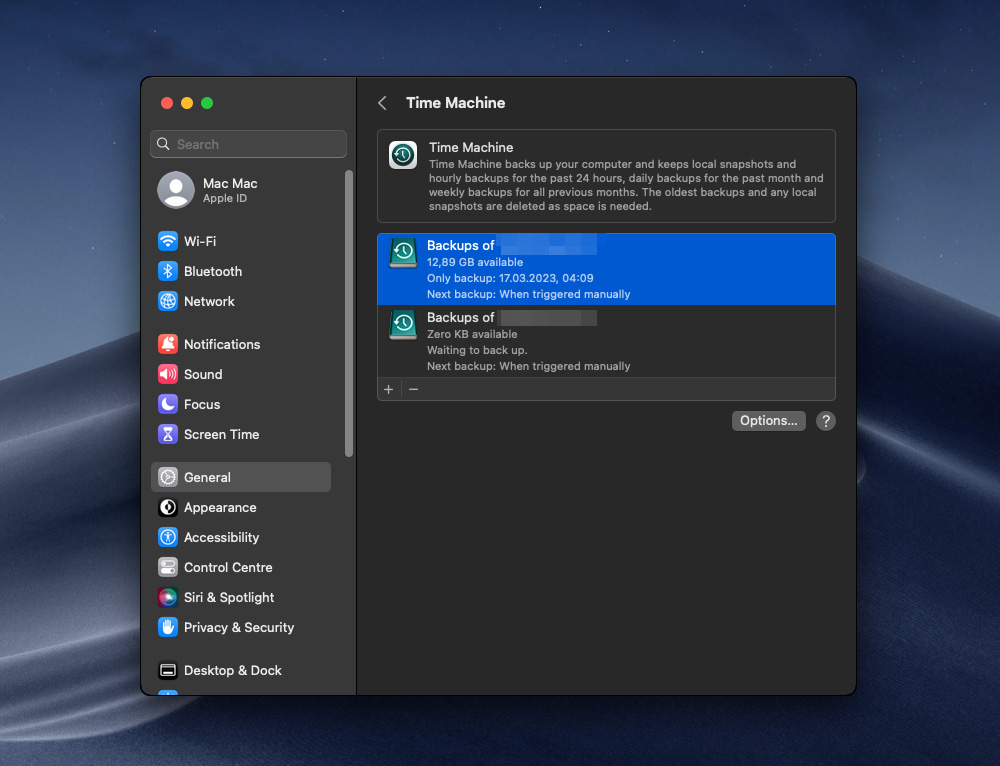
- Select the external hard drive and then back up to it.
Now you have a copy of your data on the external hard drive. It would be a good idea to back up every week or whenever you make a huge change to your data on your Mac.
Conclusion
Accidentally moving important files to Trash on your Mac and then emptying its contents without realizing the error can be a nerve-wracking experience. However, it’s essential to know that all is not lost. By following the methods described in this article, you have a solid chance of recovering your valuable data. The key is to act quickly and not overwrite the space where the deleted files were initially stored.
FAQ
Moving something out of the Trash is very easy to do with the following procedure.
- Open the Trash by clicking on its icon.
- Locate the item you wish to remove from the Trash.
- Right-click on the item and select Put Back to return it to its original location.
You can also drag a file or folder from the Trash to your desktop.


