
Watching a video and the audio is out of sync? Don’t worry — this problem is easy to fix. If you’re wondering how to sync audio and video on your Mac computer or Windows PC, wonder no more. We’ll explain some possible reasons for desynchronization, take you through some handy syncing tips, and show you the easiest ways to sync audio and video, including using the best video player for Mac.
Table of Contents
Why Audio and Video synchronization Matters for Your Content
Nobody wants to watch a streaming movie, show, or other content where the audio and video are out of sync. This is particularly the case for promotional or instructional videos, where the audio describes how to perform each step, as it is displayed on the screen. If the audio does not reflect what’s happening on screen at the correct time, the instructional video may be useless.
This also applies to videos such as adverts or promotional videos. If the audio is out of sync with the video on screen, the message you’re intending to convey will likely not get across to the consumer.
Handy Tips For Syncing Audio and Video
If you’re wondering how to sync audio and video on Mac or Windows, here are just a few tips to help you:
- Use a reputable program, either a free one like Windows Movie Maker, or a paid option such as Elmedia Player.
- Make sure you read the instructions for how to use the software to sync audio and video.
- If you’re not confident syncing files manually, most software usually has an auto-sync setting which will work for some (but not all) files.
- If opting for a paid video player for Mac or Windows, always try to get a free trial first, to make sure the software suits your needs.
Best Ways to Sync Audio and Video on Mac and Windows
With so many different methods for syncing audio and video on Mac and Windows, how do you know which one to choose? Below, we’ll show you some of the best ways to sync audio and video using a variety of different apps, including Elmedia Player.
1. How to Sync Equal Duration Audio and Video Files with Elmedia Player
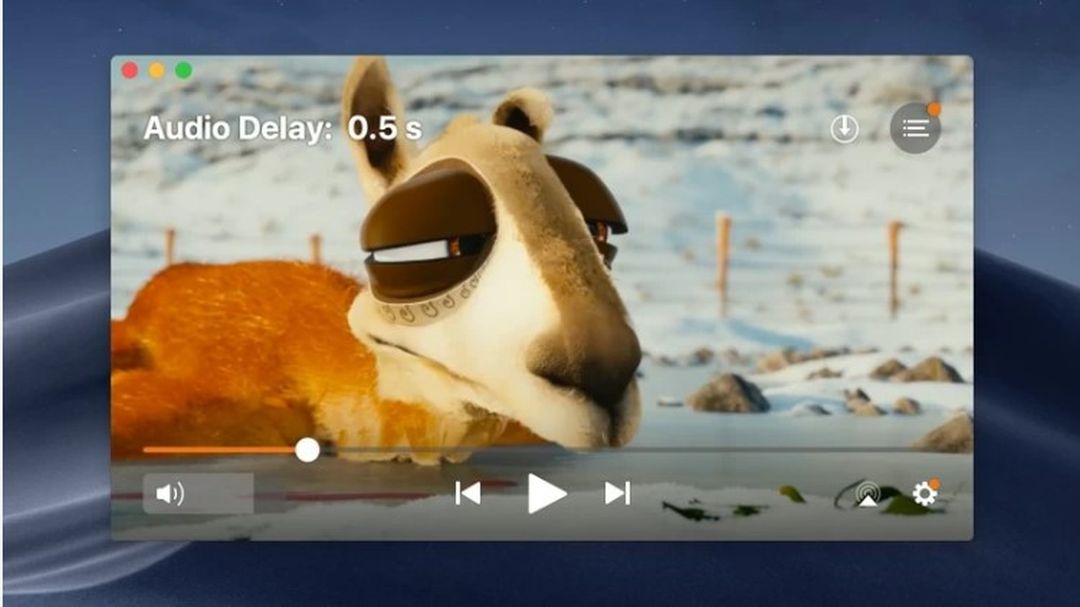
If you’re looking for the best video player for Mac, Elmedia Player is a solid choice. This feature-packed player plays most multimedia files, including MP3, MP4, AVI, WMV, and more, without the need for codecs. Elmedia Player runs natively on M1 and M2-powered Macs and is easy to use. You can stream via DLNA, AirPlay 2, or Chromecast to a Smart TV, Apple TV, Roku, or other suitable devices, in Full HD or 4K.
Elmedia offers features such as advanced playback control, allowing you to adjust playback speed, subtitle position, color balance, and more while your track is playing, drag and drop playlist support, advanced subtitle options, picture-in-picture mode, easy audio and video sync, Touch Bar support, and more. It’s one of the few video players that supports SWF playback, and it offers advanced audio options too.
Supported OS: macOS
How to Sync Video and Audio Using Elmedia Player
Wondering how to fix audio and video out of sync issues? Just follow the below steps to sync up your audio and video tracks using Elmedia Player:
Step 1:Download and install Elmedia Player on your Mac.
Step 2:Launch Elmedia Player.
Step 3:Start playback of your chosen video.
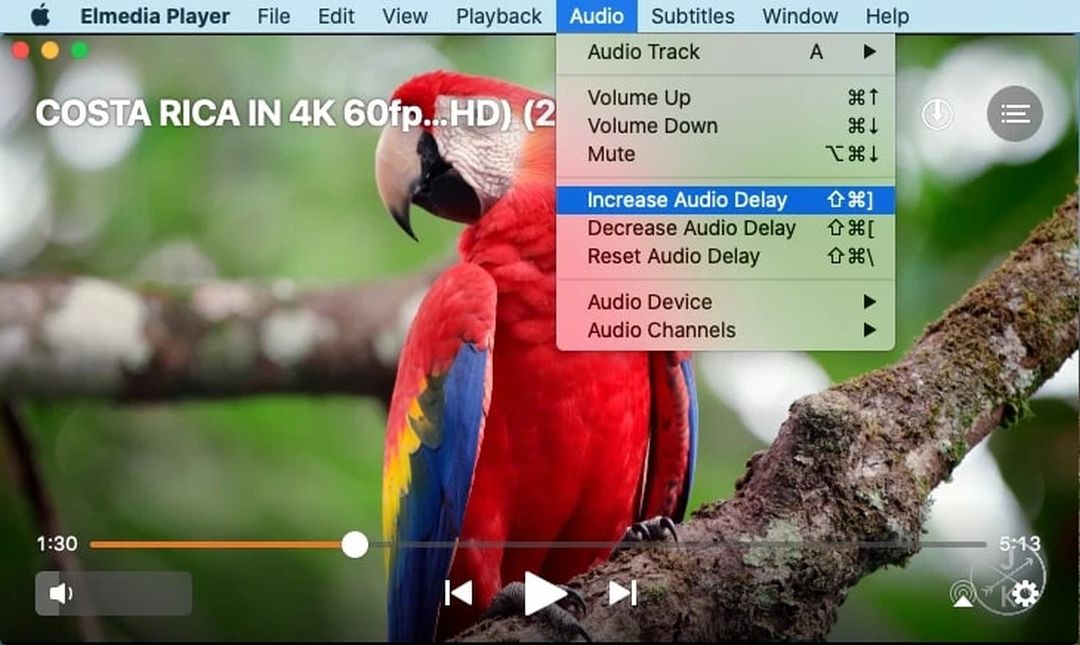
Step 4:If the audio appears to be ahead of the video, select Audio from the top menu, then click Increase Audio Delay. You can also use the ⇧⌘[ hotkey.
Step 5:If the opposite applies and the audio is behind the video, select Audio from the top menu, then click Decrease Audio Delay. You can also use the ⇧⌘] hotkey.
2.VLC Media Player
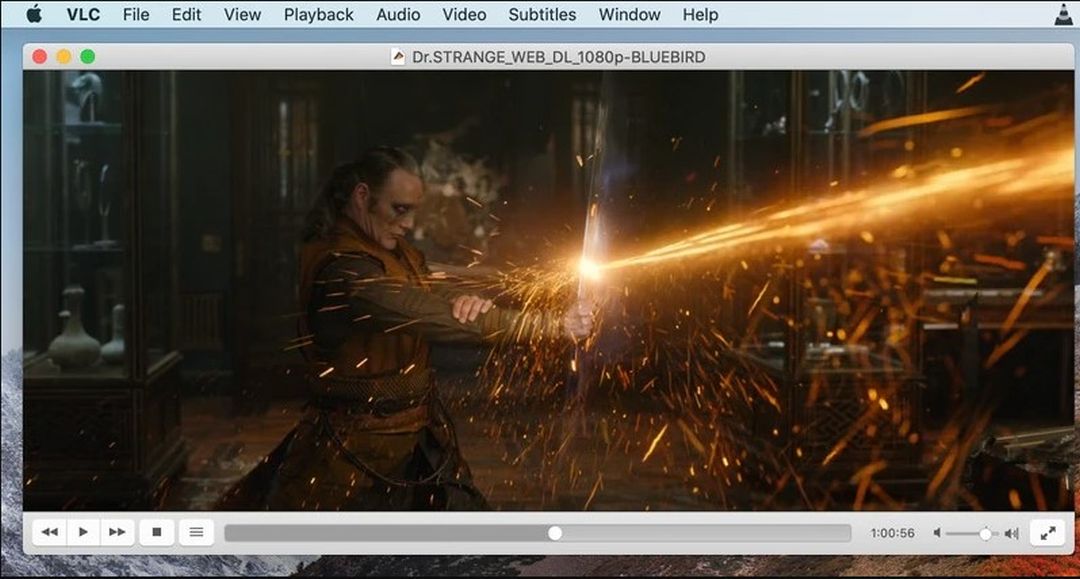
If you’re looking for a free, open-source, easy-to-use option, VLC Media Player is an excellent VLC alternative for Mac. This player is packed with features. It supports almost all audio and video file types, from MP4 to MP3, MKV, FLAC, AVI, and more. It also features advanced controls over video, audio and video filters, and subtitle synchronization, and plays most codecs without the need for codec packs. VLC Media Player also offers a wider range of customization options, including extensions and skins.
Supported OS: macOS, Windows, Linux, Android, iOS
How to Sync Audio and Video using VLC Media Player
Step 1:Download and install VLC Media Player on your Mac.
Step 2:Launch VLC Media Player.
Step 3:Open your file by clicking File > Open File.
Step 4:Start playing your video and determine whether the audio needs to be speeded up or slowed down.
Step 5:Keyboard shortcuts can be used to speed up or slown down the audio. Pressing the shortcut key once will either speed up or slow down the audio by 50 milliseconds.
Step 6: You can press each key multiple times until the tracks are synced.
Step 7: On a Mac, press G to slow audio down and F to speed audio up.
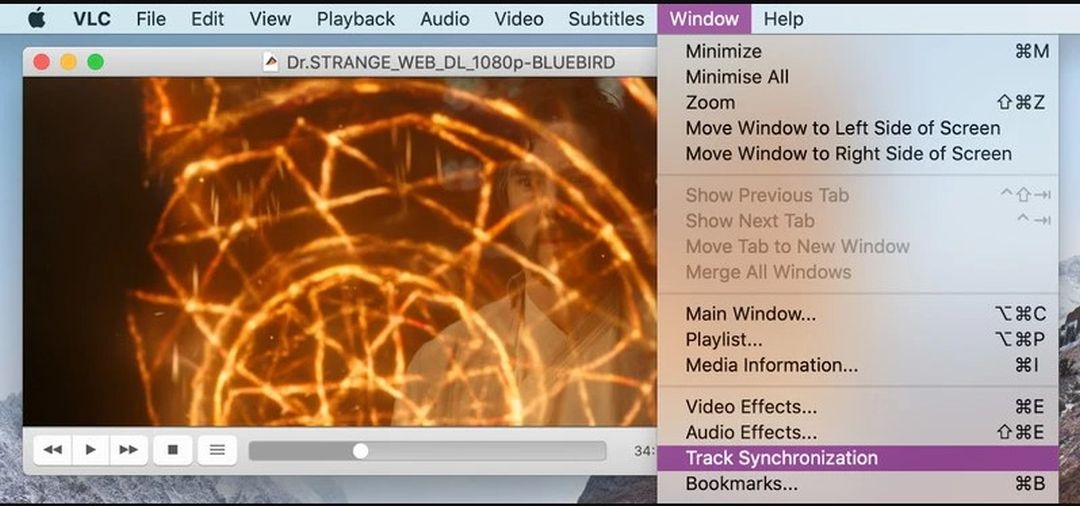
Step 8: If you know by how much you want to speed up or slow down the track, you can also enter the exact amount of milliseconds by going to Tools > Track Synchronization and typing the figure into the box next to Audio track synchronization. Place a minus (-) sign before the number to slow down the track.
3.Premiere Pro

Premiere Pro is a powerful video editing program that’s designed for industry professionals. There’s a free trial before you decide to subscribe, and the program is fast and stable to use. Premiere Pro integrates with Creative Cloud apps, and new features include Speech to Text, Sequence Settings, new titling options, and much more.
Though there’s a bit of a learning curve to using Premiere Pro, syncing audio and video using the software is actually pretty simple. There are three ways to do this: using the Merge Clips feature, using the Synchronize feature, or manual sync.
Supported OS: macOS, Windows
How to Sync Audio and Video Using Premiere Pro
Here’s how to sync audio and video in Premiere Pro using the Synchronize feature:
Step 1:Download and install Premiere Pro on your computer.
Step 2:Launch Premiere Pro.
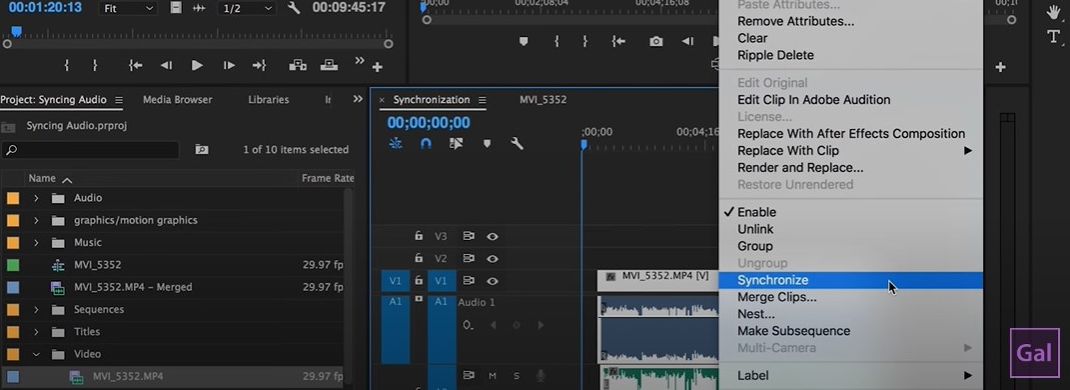
Step 3:Add your audio and video files to the timeline, stacked on top of one another.
Step 4:Highlight the tracks you want to sync.
Step 5:Right-click, then select Synchronize.
Step 6:Select Audio as your sync point, then choose the track you want to sync with.
Step 7:Hit OK and your tracks will now be synced.
4.Final Cut Pro
![]()
Final Cut Pro is Mac-exclusive software that’s suitable for professionals and consumers alike. This video editing software offers a free trial and is surprisingly easy to use thanks to its intuitive interface. Final Cut Pro works on Apple silicon-based Mac and is packed with powerful features for video editing, including a magnetic, trackless timeline, multicam support, and support for 360-degree footage and HDR.
The software is fast too, and offers excellent organizational tools as well as the ability to easily sync audio and video on Mac either automatically, using custom settings, or manually.
Supported OS: macOS
How to Sync Audio and Video Using Final Cut Pro

Here’s how to sync audio and video in Final Cut Pro:
Step 1:Download and install Final Cut Pro on your computer.
Step 2:Launch Final Cut Pro.
Step 3:Select the audio and video clips you want to sync.
Step 4:Either select Clip > Synchronize Clips or control-click the selected tracks, then choose Synchronize Clips.
Step 5:A window will appear in which you can type a name for the synced clips.
Step 6:Click the In Event pop-up menu and choose the event you want to create the new synced clip in.
Step 7:Should you wish the synced clip’s timecode to start at a value other than the earliest timecode value, in the selected clips, you can type the timecode value into the Starting Timecode field.
Step 8:Select Use audio for sync if you want to sync clips using audio waveform data. Note that not all audio recordings are suited for use with this feature, and it may lead to long processing times.
Step 9:If you want to disable the audio in clips containing both audio and video, select Disable audio components on AV clips.
Step 10:If automatic settings are not shown, click Use Automatic Settings.
Step 11:Click OK and Final Cut Pro will create a new synced clip in the selected event.
5.Windows Movie Maker
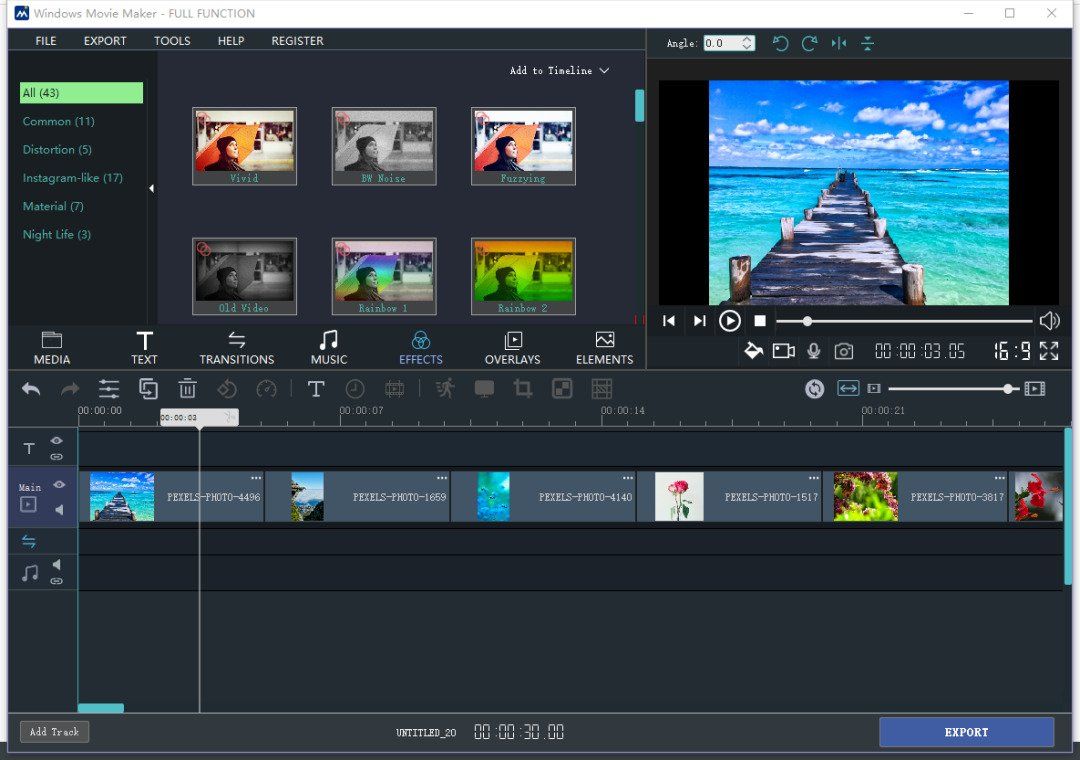
Windows Movie Maker is a free app for Windows that makes it easy to create and edit videos on your PC. There’s also a Pro version available which is packed with more advanced features. As well as a basic editing suite, the app includes features such as transition effects, zoom effects, image filters, and the ability to add titles and end credits, plus add pre-recorded voice clips to a soundtrack. It supports Full HD quality and even has a free HEIC photo converter. Windows Movie Maker supports a wide range of output formats.
Supported OS: Windows
How to Sync Audio and Video Using Windows Movie Maker
Wondering how to sync audio and video in Windows Movie Maker? It’s actually quite simple, and here’s how:
Step 1:Download and install Windows Movie Maker on your computer.
Step 2:Launch the software.
Step 3:Click + to import your video clip and drag it to the video track.
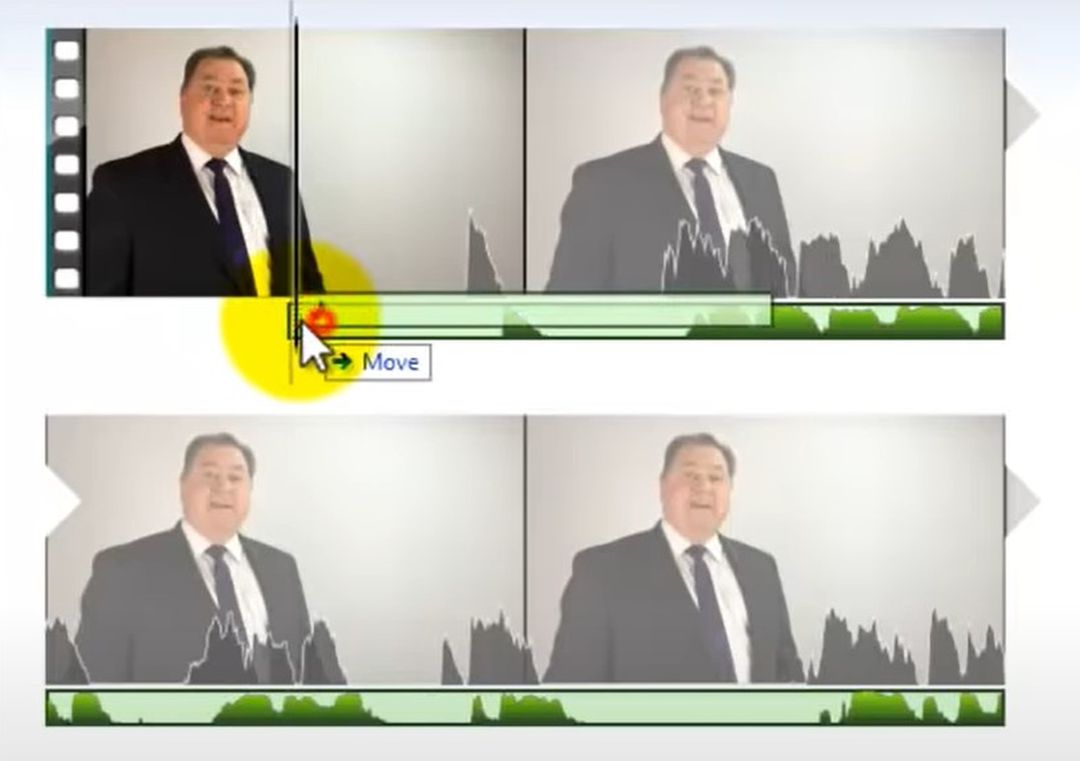
Step 4:Click the video clip in the timeline to select it, then right-click and select Detach Audio. This will auto-place the original video’s audio on the audio track.
Step 5:Drag the audio clip forward or backward to fit the video.
Step 6:You can click the Play icon to preview.
Step 7:In the timeline, select the clip you want to split, hover your mouse pointer over it until the scissors icon appears, then click to split it. Right-click the unused clip and select Remove.
Step 8:Finally, you can select the Play icon to preview again.
Possible Reasons for Audio and Video Desynchronization
There are several reasons why your audio and video are not in sync. If you recorded your audio on a separate device from your video, you’ll find it’s nearly impossible to get both files perfectly in sync without adjustment. Or it may be that your audio track may have “slipped” due to a delay during filming that has left the audio out of step with the video track. It could be that your tracks are of different durations due to improper encoding or a broken container.
Finally, parts of the video could be corrupted, meaning a player may skip over them while the audio track continues playing as usual. In all these cases, if you’re wondering how to fix audio delay on Mac, you may need to use an editing app to make adjustments.
Conclusion
As you can see, it’s important to ensure your audio and video is in sync, but it isn’t a daunting task doing so. There are plenty of programs and apps out there that can help you sync audio and video tracks, from premium offerings like Elmedia Player and Premiere Pro, to free options like Windows Movie Maker. We hope this article has helped you decide which of these apps best suits your needs and shown you how to sync audio and video streaming using various apps.
FAQ
The easiest way to sync audio and video for free is to use a free app like Windows Movie Maker. There are also some other apps out there that offer a free trial, helpful if you just want to sync a couple of tracks.
If the audio in your video is delayed, you can use an app such as Elmedia Player to increase or decrease the audio delay so that the audio track syncs with the video track.
If the audio and video on your TV are out of sync, the method to fix this will vary depending on the manufacturer of your TV. This could be caused by a bad connection or broadcast delay, a faulty Blu-ray disc or DVD, or issues with connectivity caused by a home theater system. Here are a few things you could try to fix the issue:
- Ensure the TV has the latest software (firmware) installed — and bear in mind not all TVs have software that can be updated.
- Check all cables to ensure they’re connected firmly to the TV.
- Try playing video from a different source to determine if the source is the issue.
- If using a home theater system and a digital optical cable, try manually changing the Audio/Video Sync or Audio Delay settings (if possible).
- If using the TV speakers, try performing a power reset on the TV.
It’s easy to sync videos to a sound on TikTok, and here’s how to do it:
- Launch TikTok.
- Find a video with the sound you’d like in the background of your video.
- At the bottom of the screen, click the sound, then click Use this sound.
- Then tap the Upload button and choose the videos you’d like to appear in the montage (the number of videos you’ll need will depend on the sound you chose).
- Once you’ve chosen the correct amount of videos, tap Next.
- Ensure Sound sync is selected (underneath the video) to line up your videos with the sound.
- Tap Next, then make any additional edits you want to.
- Tap Next again and you can upload your video as normal.
There are a number of free online tools you can use to easily sync audio and video online, such as Online Converter. Note that these tools are not usually as fast or reliable as professional apps, and if you get stuck, there’s unlikely to be support available.
You can use Elmedia Player to sync audio. If the audio is ahead of the video, you just need to play the selected video and then choose “Audio” > “Increase Audio Delay”. If the audio lags behind the video, click “Audio” > “Decrease Audio Delay”.


