If you are unable to write on an external hard drive on Mac, its permissions are probably set to “Read Only.” It’s definitely possible that you set your Mac external hard drive to “Read Only” and forgot, but there are other issues that can cause this symptom.
Below are all the ways to fix an external hard drive that is “Read Only” on a Mac, according to what exactly caused it. At the end of this article, you’ll know what to do next. Read on.
Table of Contents
Why is External Hard Drive Read Only on Mac?
There are 3 common reasons why an external hard drive is “Read Only” on Mac. Knowing which one of these applies to you is key to successfully fixing this issue.
Permission Settings. You can change an external hard drive’s read and write permissions using a computer. It’s possible that the “Read Only” permissions were carried over to your Mac when you connected your drive. This can easily be changed through Finder. Click here to jump to that section.
Formatting Errors. Formatting errors are a symptom of a corrupted drive. Corruption can occur due a virus attack, interruption during read and write, software issues, and/or physical damage. You can attempt to fix it using Disk Utility. Click here to jump to that section.
NTFS Formatting.Your drive may be formatted to NTFS. Due to compatibility issues, NTFS is “Read Only” on Mac (but “Read & Write” with Windows). In other words, using an NTFS drive means that you don’t have permission to write to your external drive on Mac. The solution is to format your drive. Click here to jump to that section.
How to Check Permissions for External Hard Drive on Mac
Users can modify and check permissions for an external hard drive on Mac from anywhere in Finder. Here’s how:
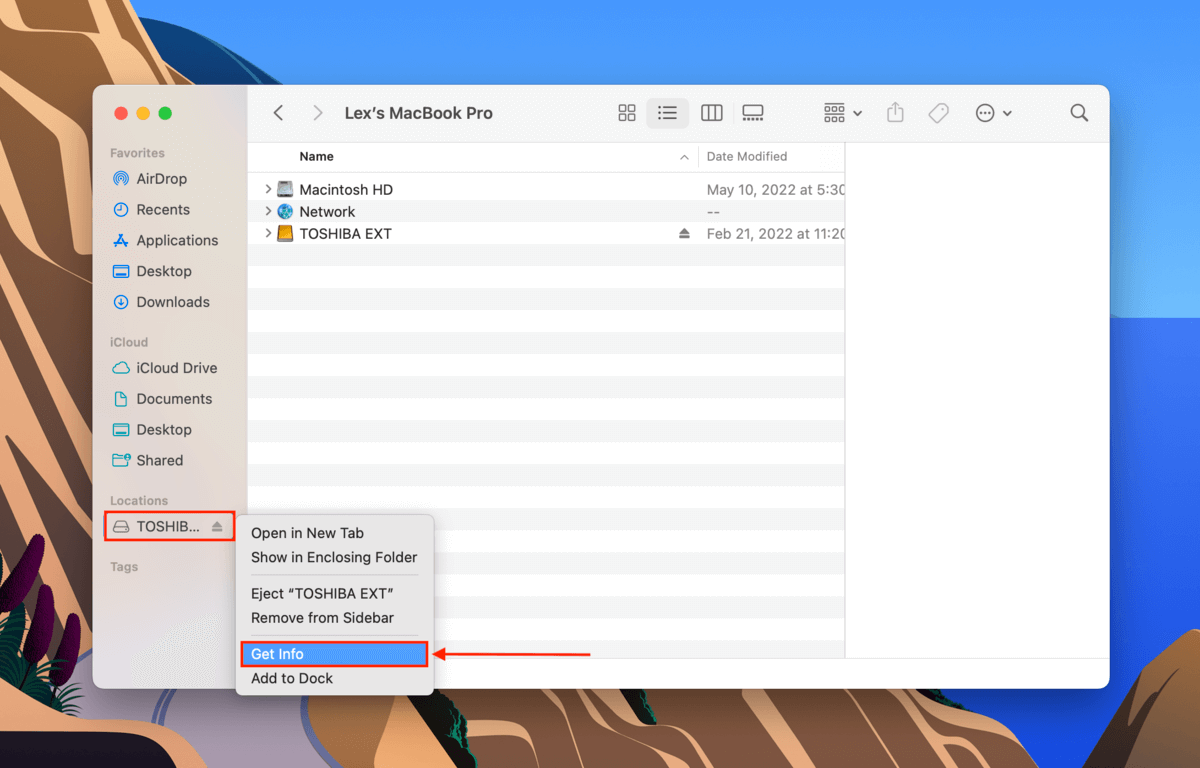
Step 1. Right-click your external hard drive in Finder and click “Get Info.”
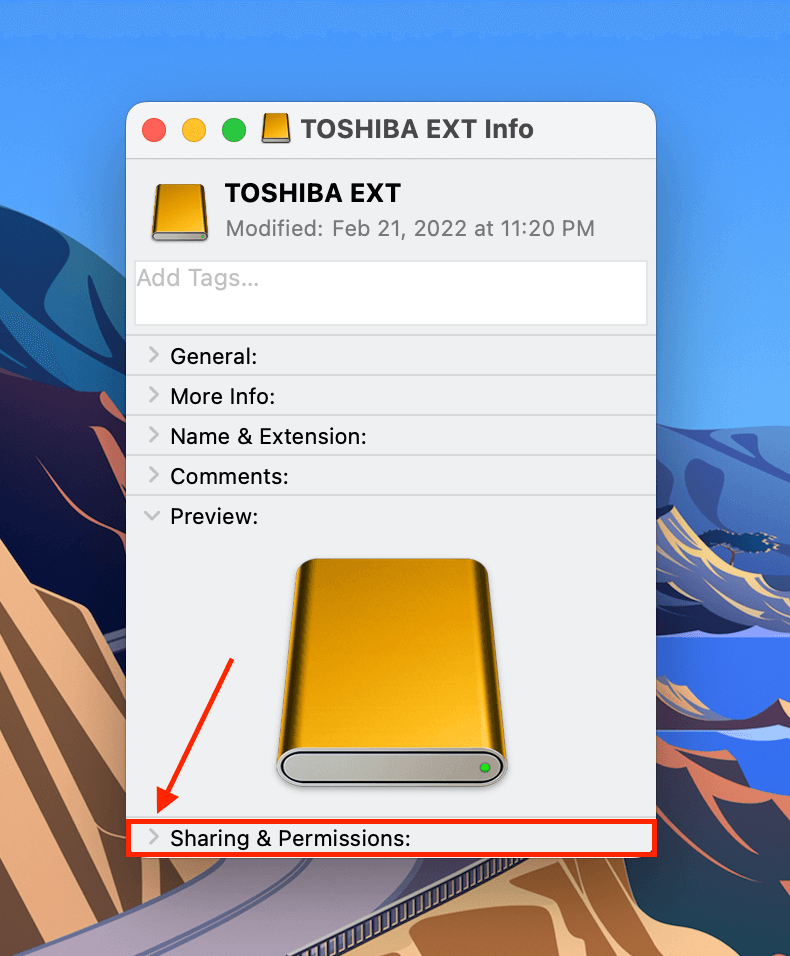
Step 2. Scroll down to the bottom of this new window and click the toggle beside “Sharing & Permissions” to expand these settings.
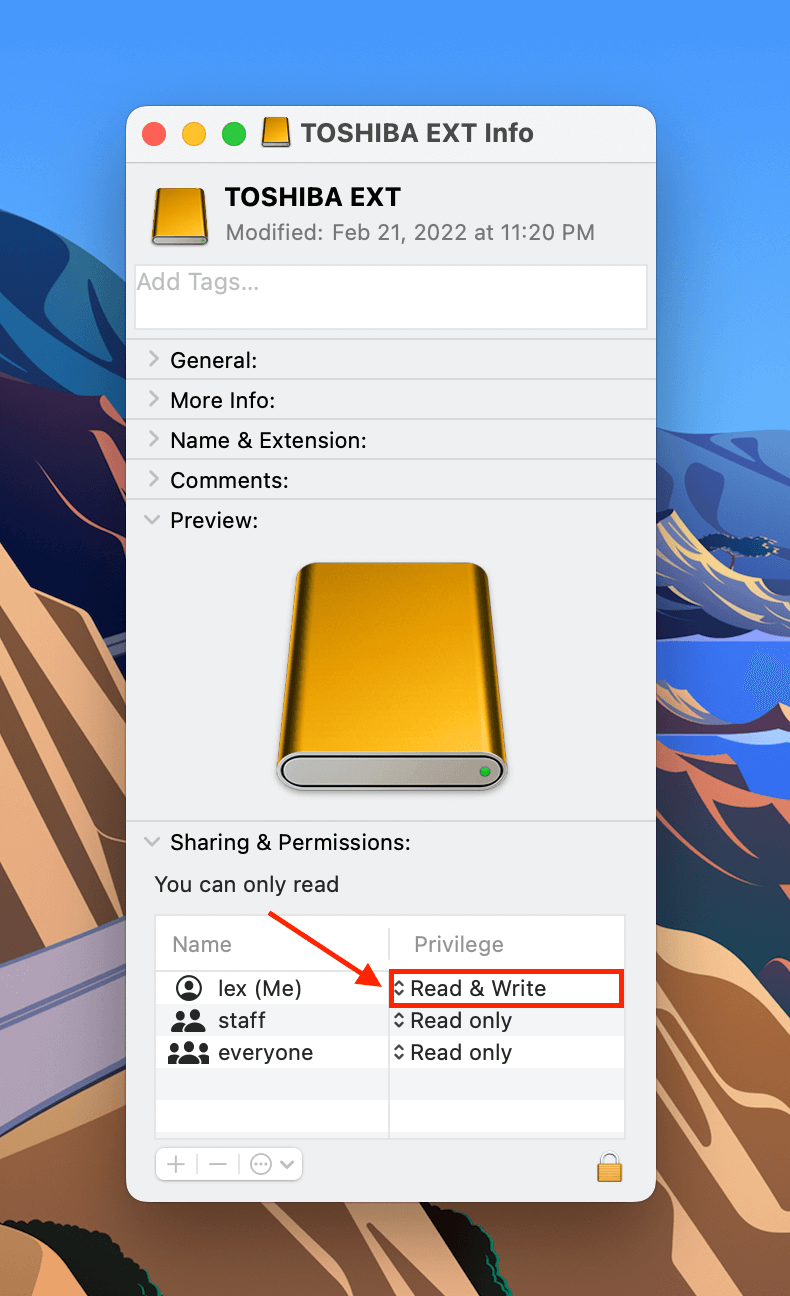
Step 3. Check if the entry under the “Privilege” column beside your name (or “everyone”) says “Read Only.” If so, that means you can’t write data to that drive.

How to Fix External Hard Drive Read-Only Issue on Mac
Choosing the right solution is a matter of figuring out what the problem is, so read the first section of this article if you haven’t already. Below are 3 different ways to fix an external hard drive read-only issue on Mac.
Method 1: Change Drive Permissions on macOS
If your drive is not formatted to NTFS and you still can’t access it, try manually changing the permissions using Finder. To change permissions on an external hard drive on Mac:
Step 1. Right-click your external hard drive in Finder and click “Get Info.”
Step 2. Scroll down to the bottom of this new window and click the toggle beside “Sharing & Permissions” to expand these settings.
Step 3. Under the “Privilege” column, click the entry beside your username (or “everyone”) and select “Read & Write.”
Method 2: Use Disk Utility’s First Aid Function
If changing the permissions manually doesn’t work, your drive may have disk errors. The native macOS tool Disk Utility, which has a tool called “First Aid” that automatically scans for and repairs errors. To use FIrst Aid to fix an external drive or USB drive read only on Mac:
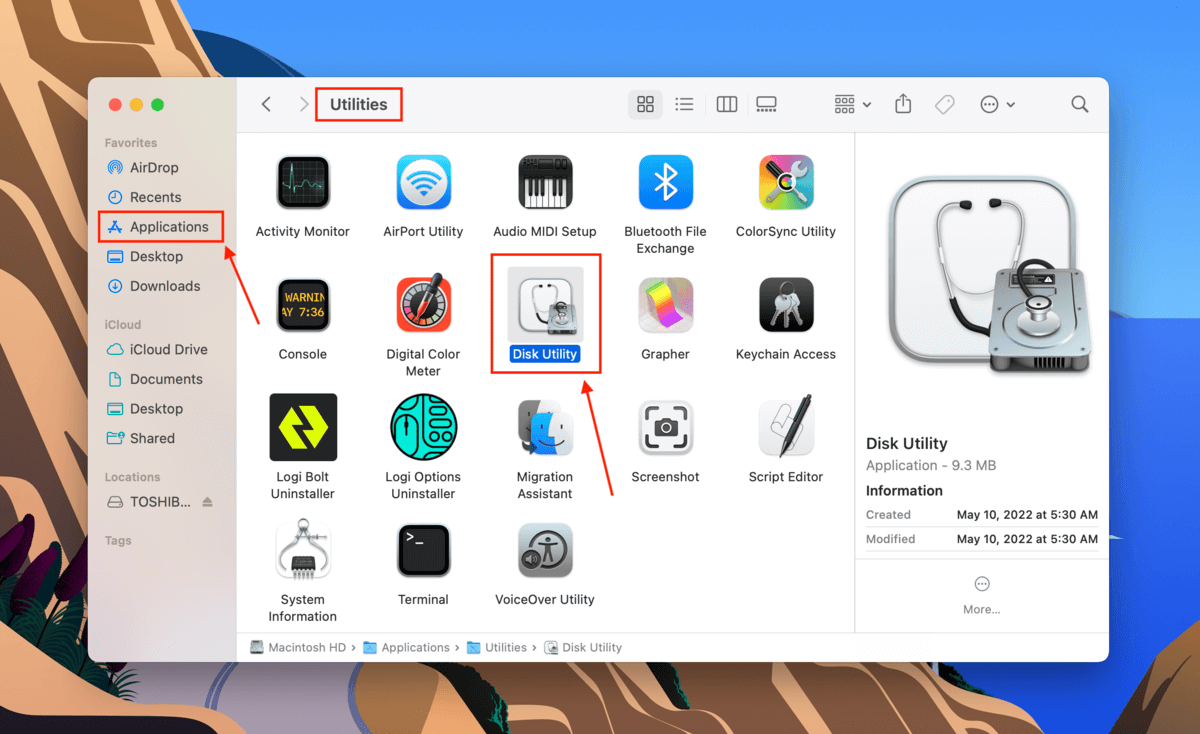
Step 1. Open Finder > Applications > Utilities > Disk Utility.
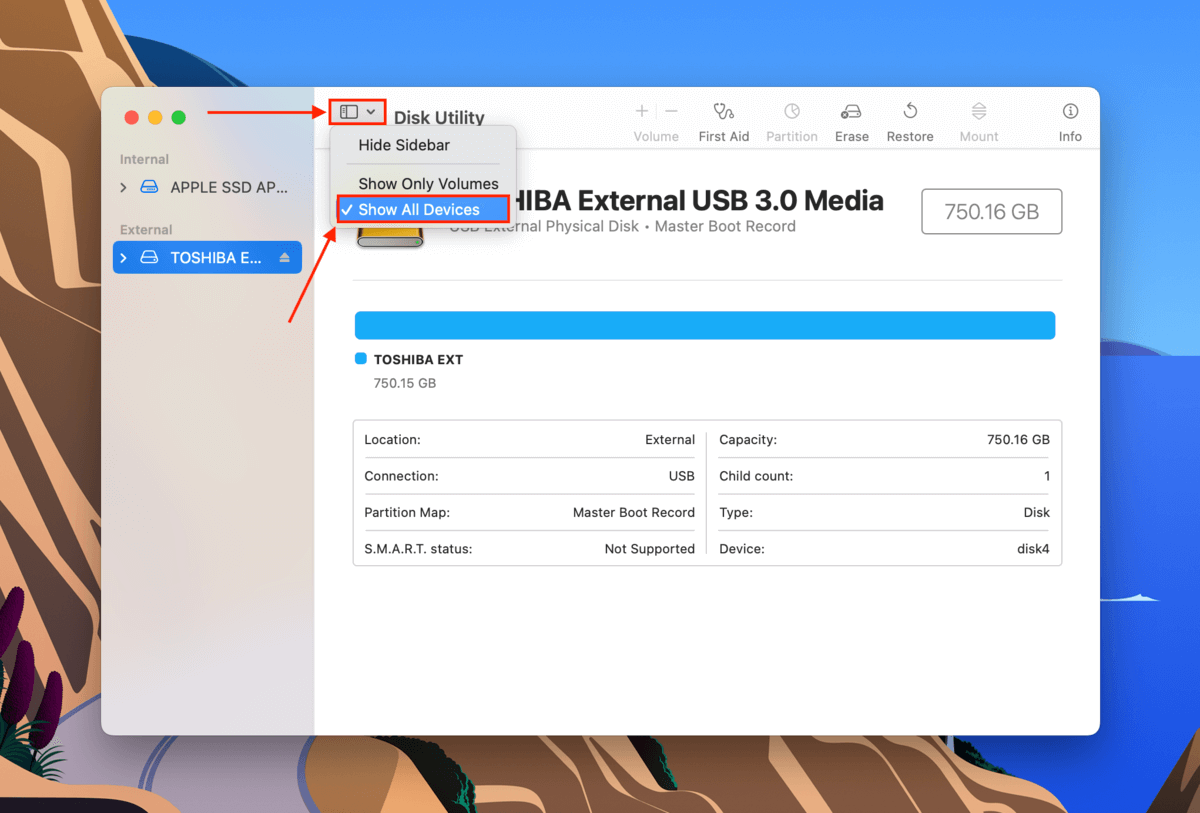
Step 2. Click the “View” button on the top-left corner of the middle pane and select “Show All Devices.”
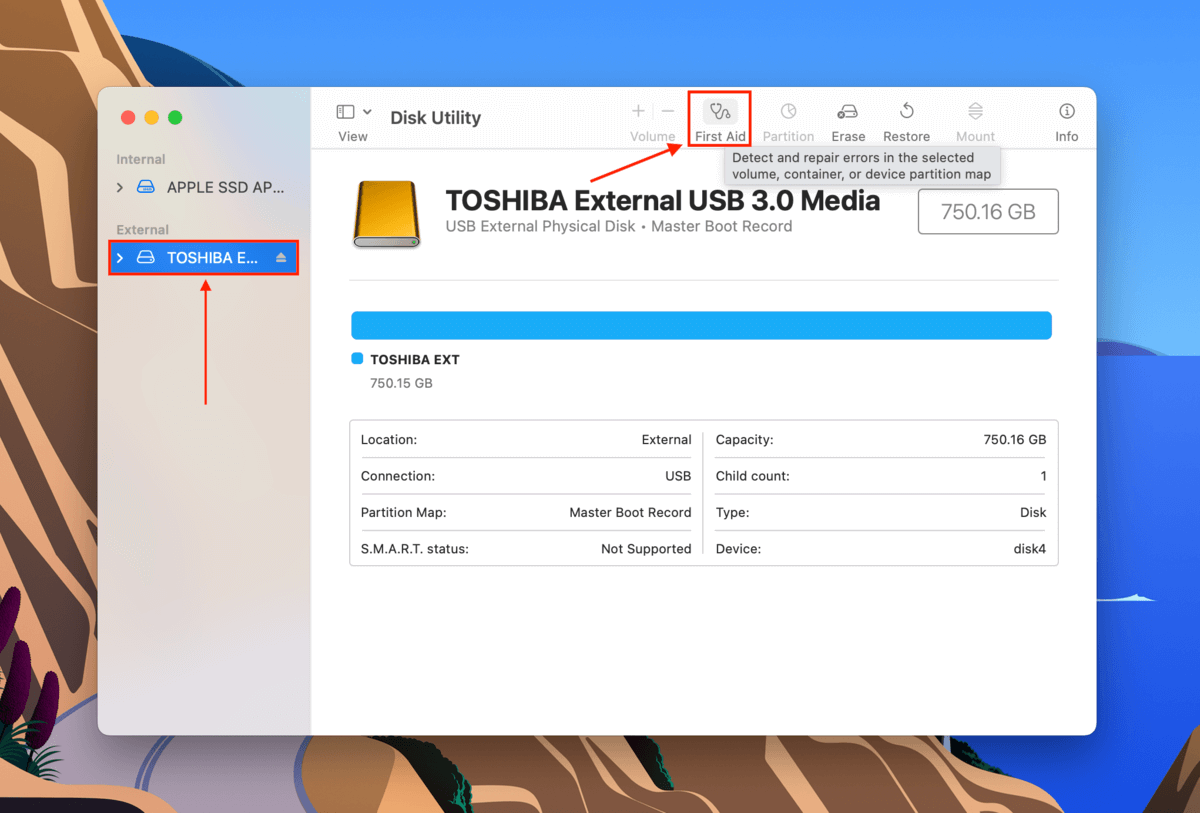
Step 3. Select your external hard drive from the list and click the “First Aid” button at the top of the Disk Utility window.
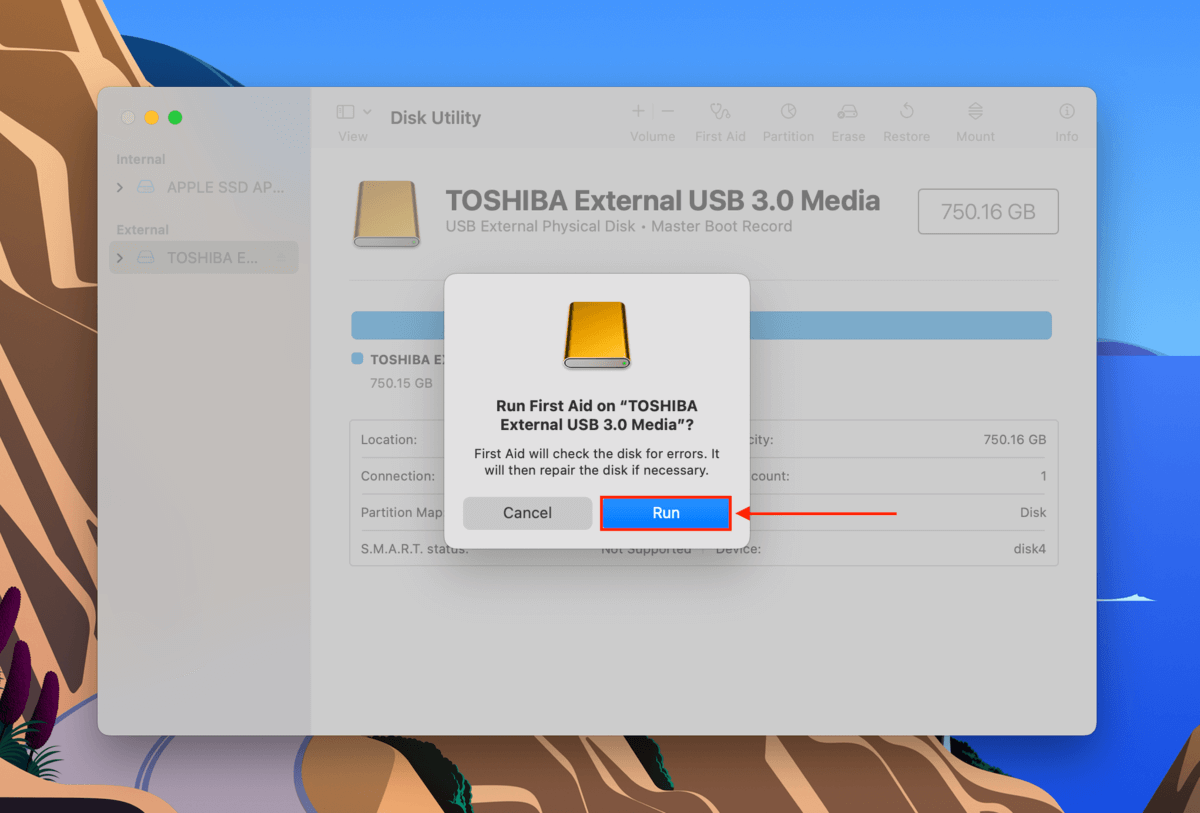
Step 4. In the dialogue box that appears, click “Run.”
Method 3: Format Your Drive
macOS can natively read & write on FAT32 and exFAT disks, so you’ll need to format your drive to one of these file systems. You can easily do this using Disk Utility:
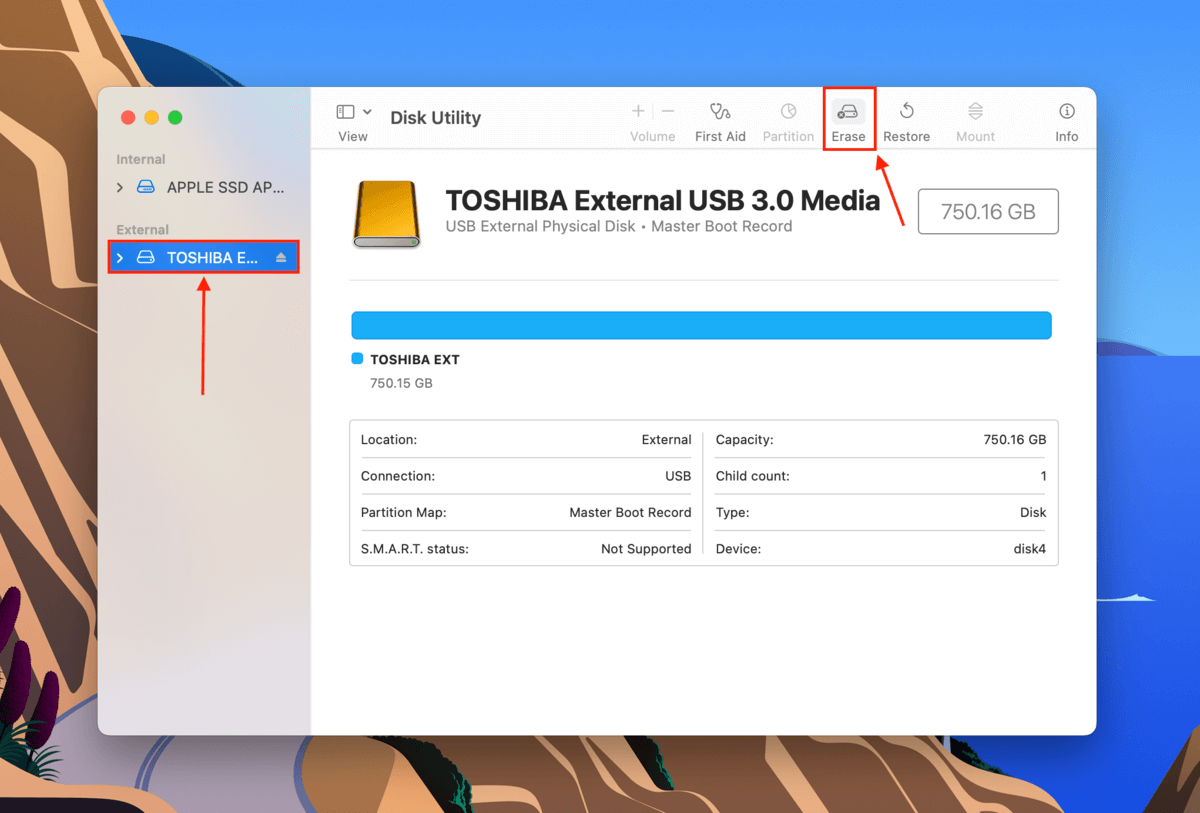
Step 1. Launch Disk Utility (Finder > Applications > Utilities > Disk Utility).
Step 2. Click the “View” button on the top-left corner of the middle pane and select “Show All Devices.”
Step 3. Select your external hard drive from the list and click the “Erase” button at the top of the Disk Utility window.
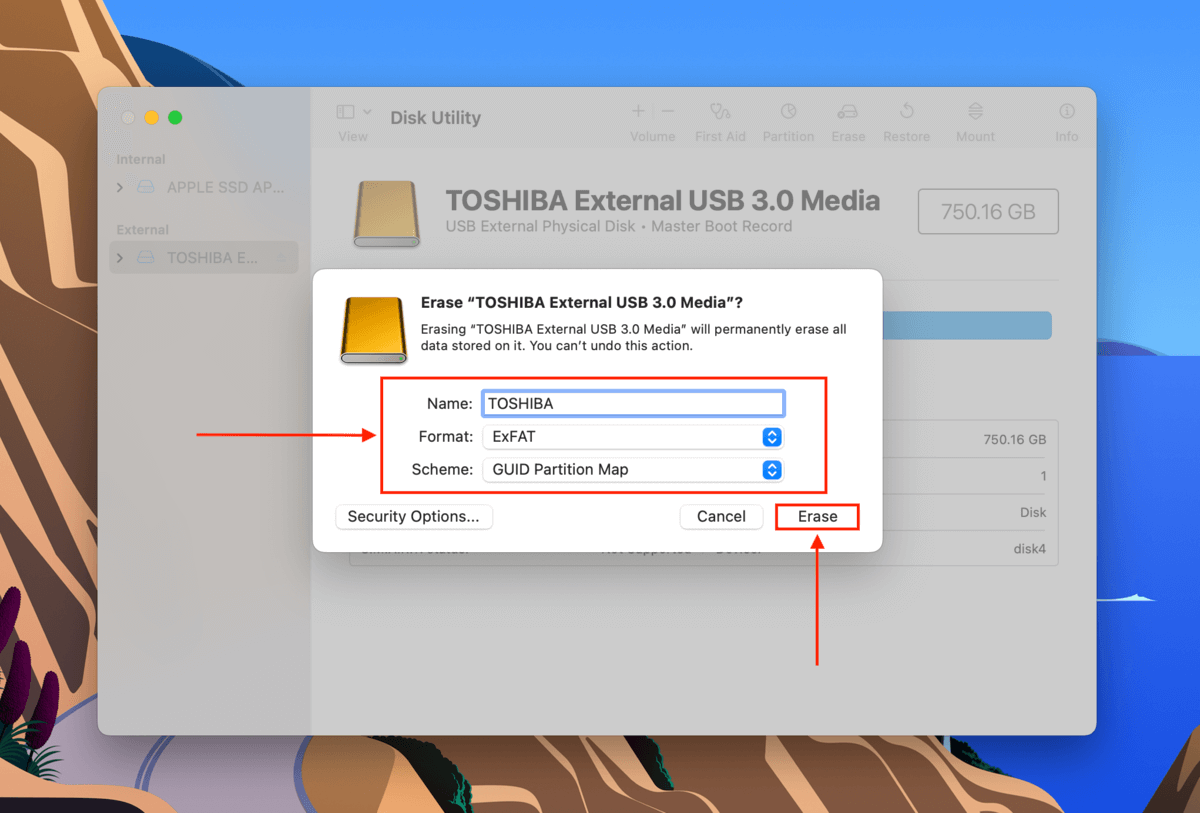
Step 4. Name your external drive, choose “ExFAT” for the format, and “GUID Partition Map” for the Scheme. Then, click “Erase.”
How to Recover Data From an External Hard Drive after Formatting
After formatting your drive from NTFS to FAT32 or ExFAT (or other macOS-compatible file systems), the data on your drive gets totally wiped. There’s no way to access them in Finder – you’ll need to use data recovery software.
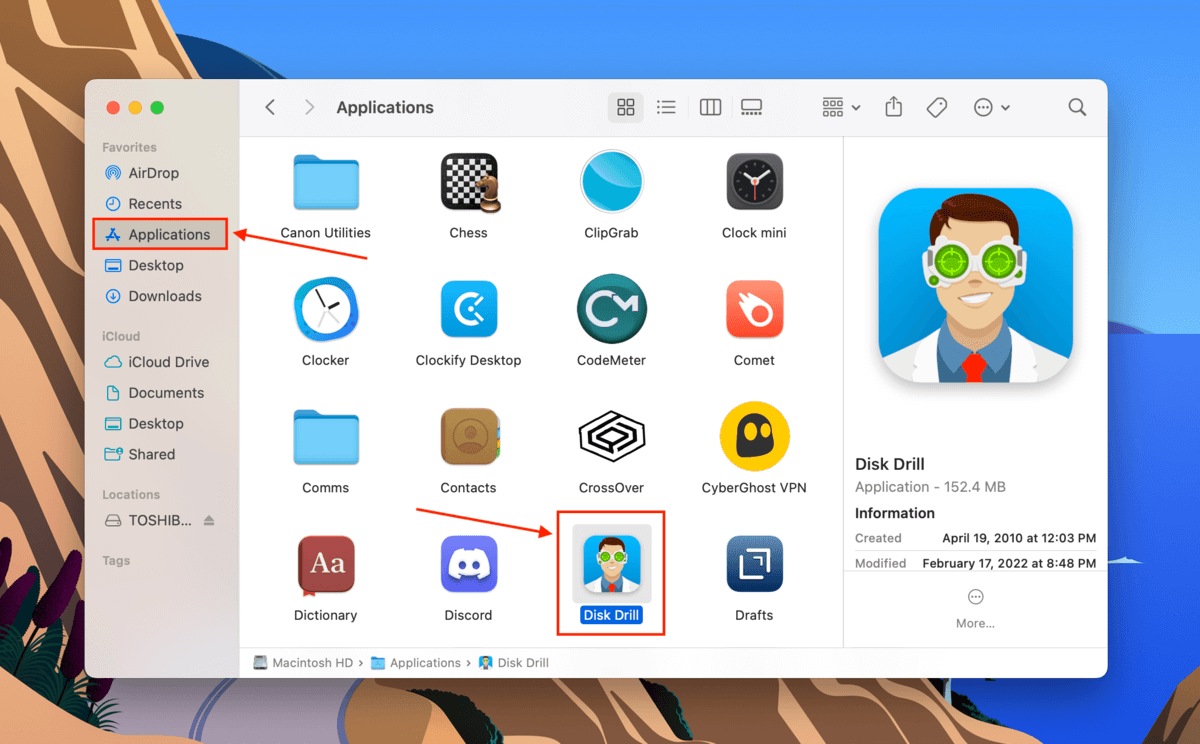
We’ll demonstrate this process using a tool called Disk Drill. It’s a highly effective and easy-to-use data recovery software that we often feature on Macgasm. Here’s how to use it:
Step 1. Securely connect your external drive to your Mac, then download and install Disk Drill.
Step 2. Launch Disk Drill by opening Finder > Applications and double-clicking its icon.
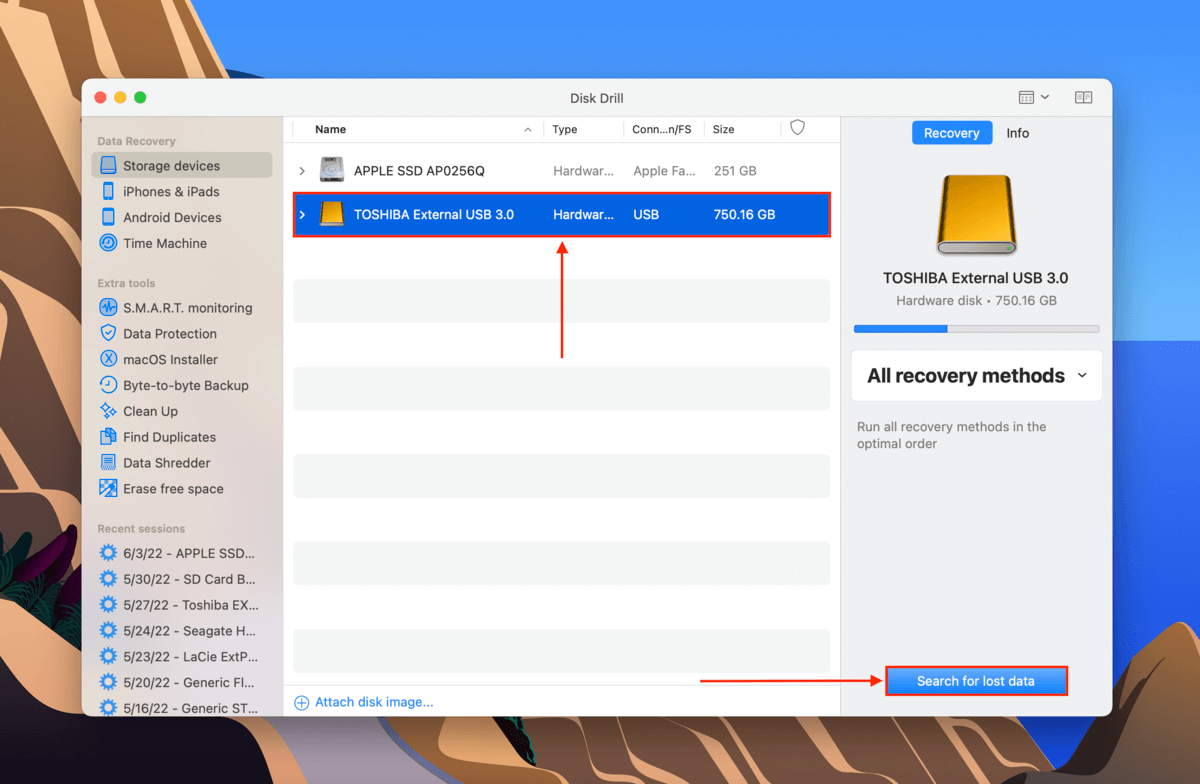
Step 3. Select your external drive and click “Search for lost data.”
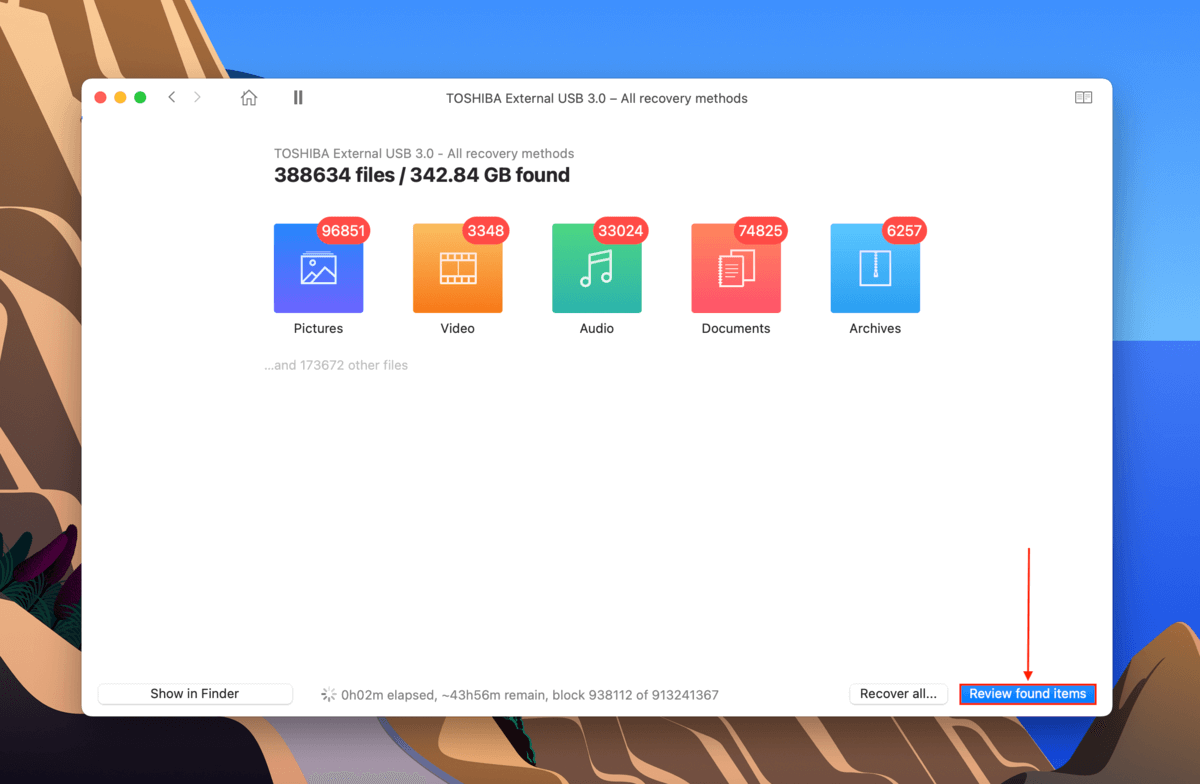
Step 4. Once Disk Drill completes the scan, click “Review found items.”
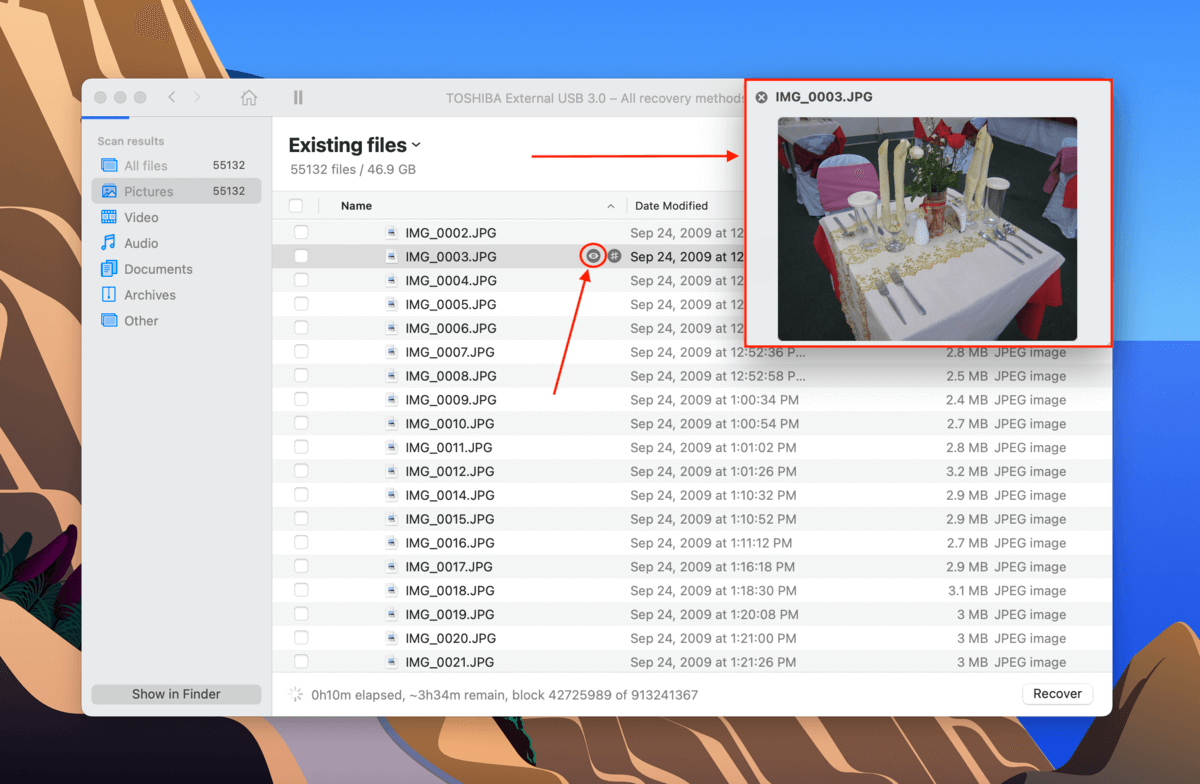
Step 5. Quickly filter results by using the left sidebar and the search bar in the top-right corner of the window.

Step 6. You can find out if you’re able to recover the file you want by previewing it. Hover your mouse pointer to the right of any file and click the eye button that pops up.
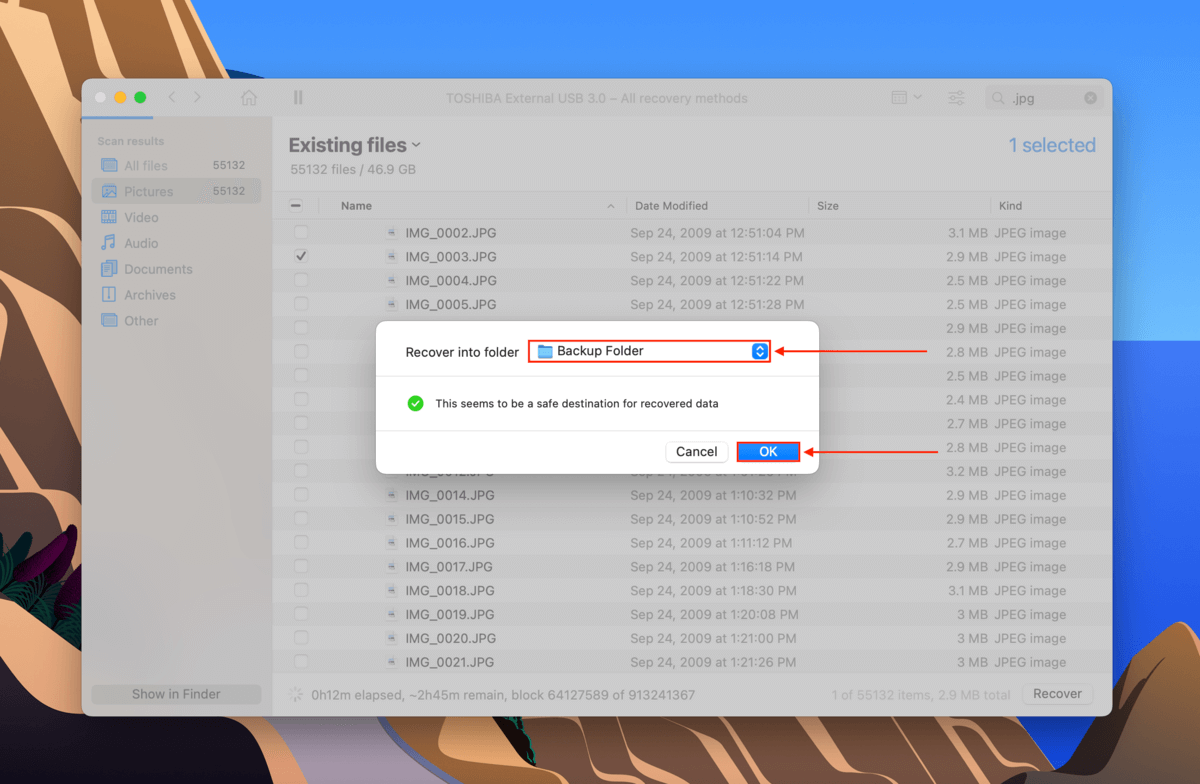
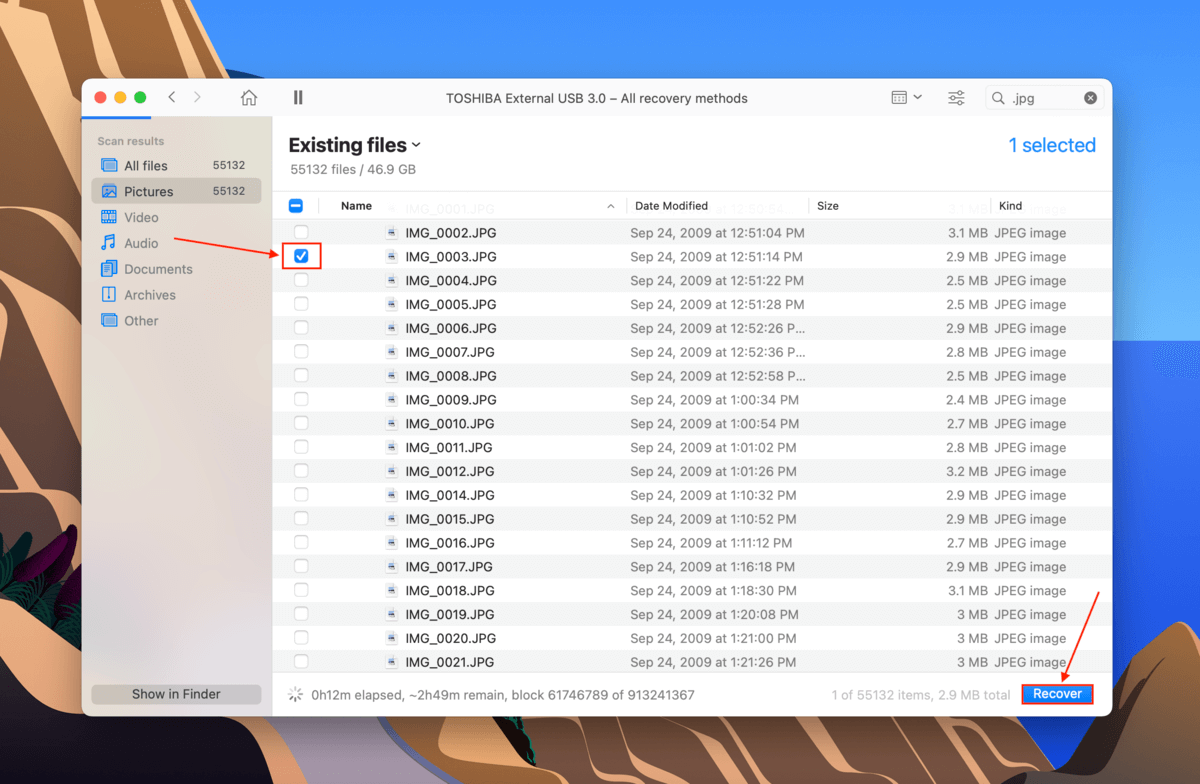
Step 7. To select the files you want to restore, use the checkboxes in the left-most column. Then, click “Recover.”
Step 8. Select a location on your computer where you want Disk Drill to save your files. Then, click “OK.”