
If you’re working with a drive and you keep getting the “Couldn’t Modify Partition Map” error, that typically means the storage device got corrupted or something went wrong with the file system. This makes the entire device unreadable to all but very specific software.
In this article, we explore three ways to deal with this error. We included step-by-step instructions as well as accompanying screenshots so you can safely work on your drive without worrying about your files (more on this later). Read on!
Table of Contents
What is a Partition Map?
A “partition” is a segment (called a “region”) in a disk that is treated as an individual storage unit. A disk can have multiple partitions that show up as individual storage units when connected to a computer – even if, physically, it’s just a single disk.
A “partition map” defines how partitions are organized on a disk. It contains crucial information about the volume. So when it gets corrupted by a virus attack or a power surge, for example, it becomes unreadable.
How to Recover Deleted Data from a Problematic Device
Because of the nature of volume and partition corruption, the solution to this problem usually includes erasing data. There’s just no way around it. If you have important files on your drive or partition, recover your data first. A super simple way to do this is by using a data recovery tool like Disk Drill. Even if your operating system can’t read your volume – Disk Drill can.
- Download the free Mac version of Disk Drill from the Cleverfiles website and install it.
- Connect your device to your Mac.
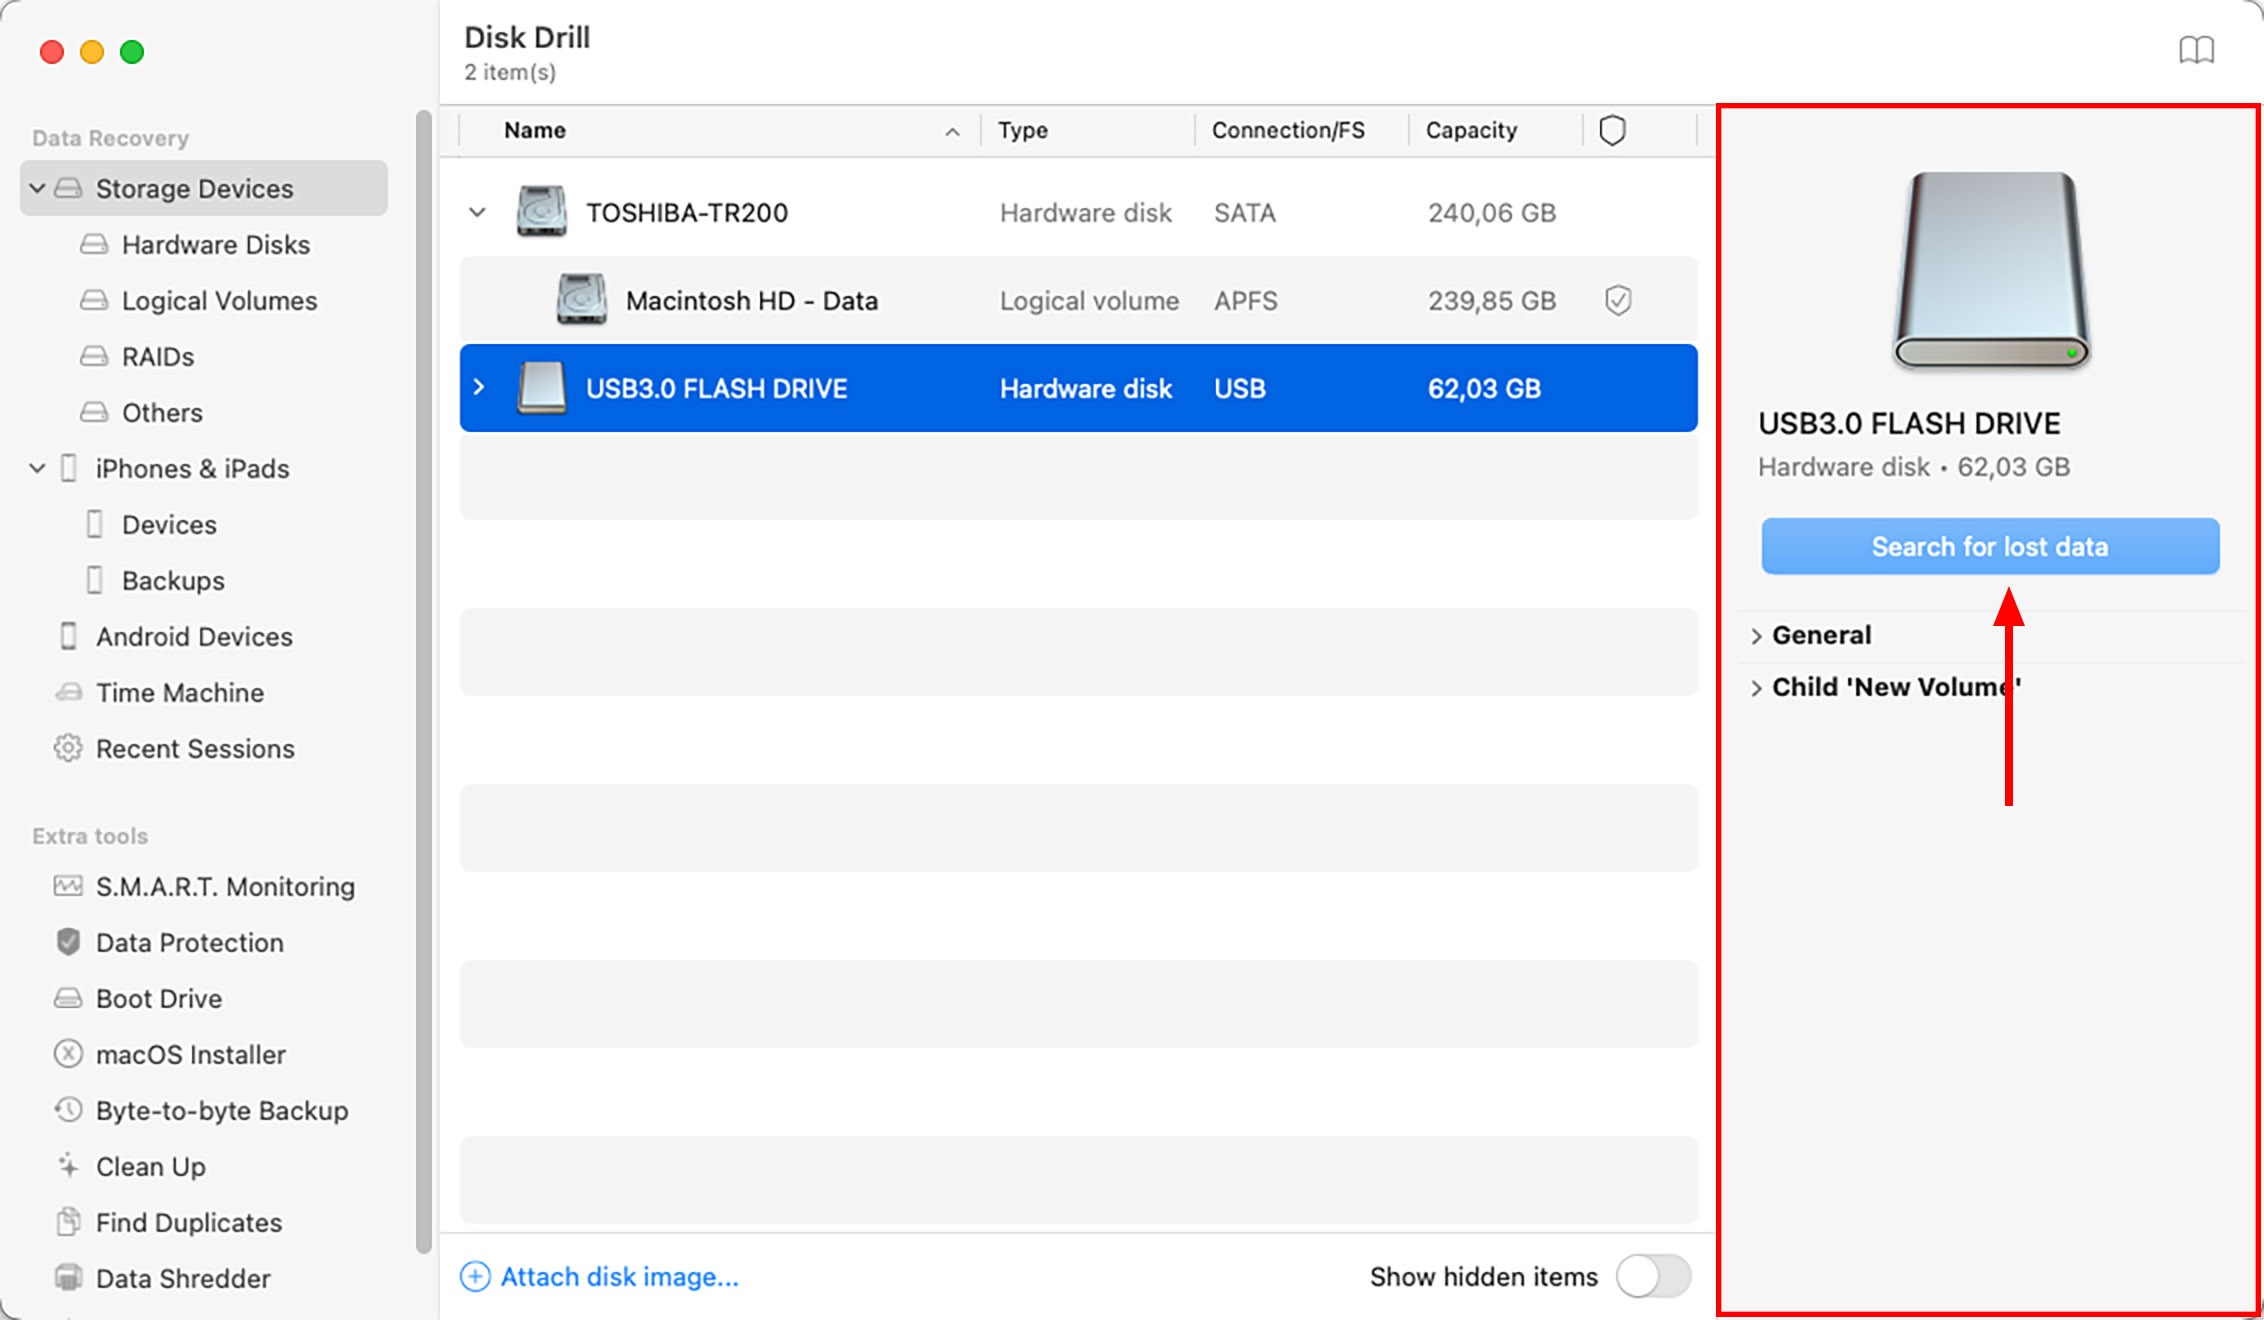
- Open Disk Drill and select the problematic USB, SD card, or drive.
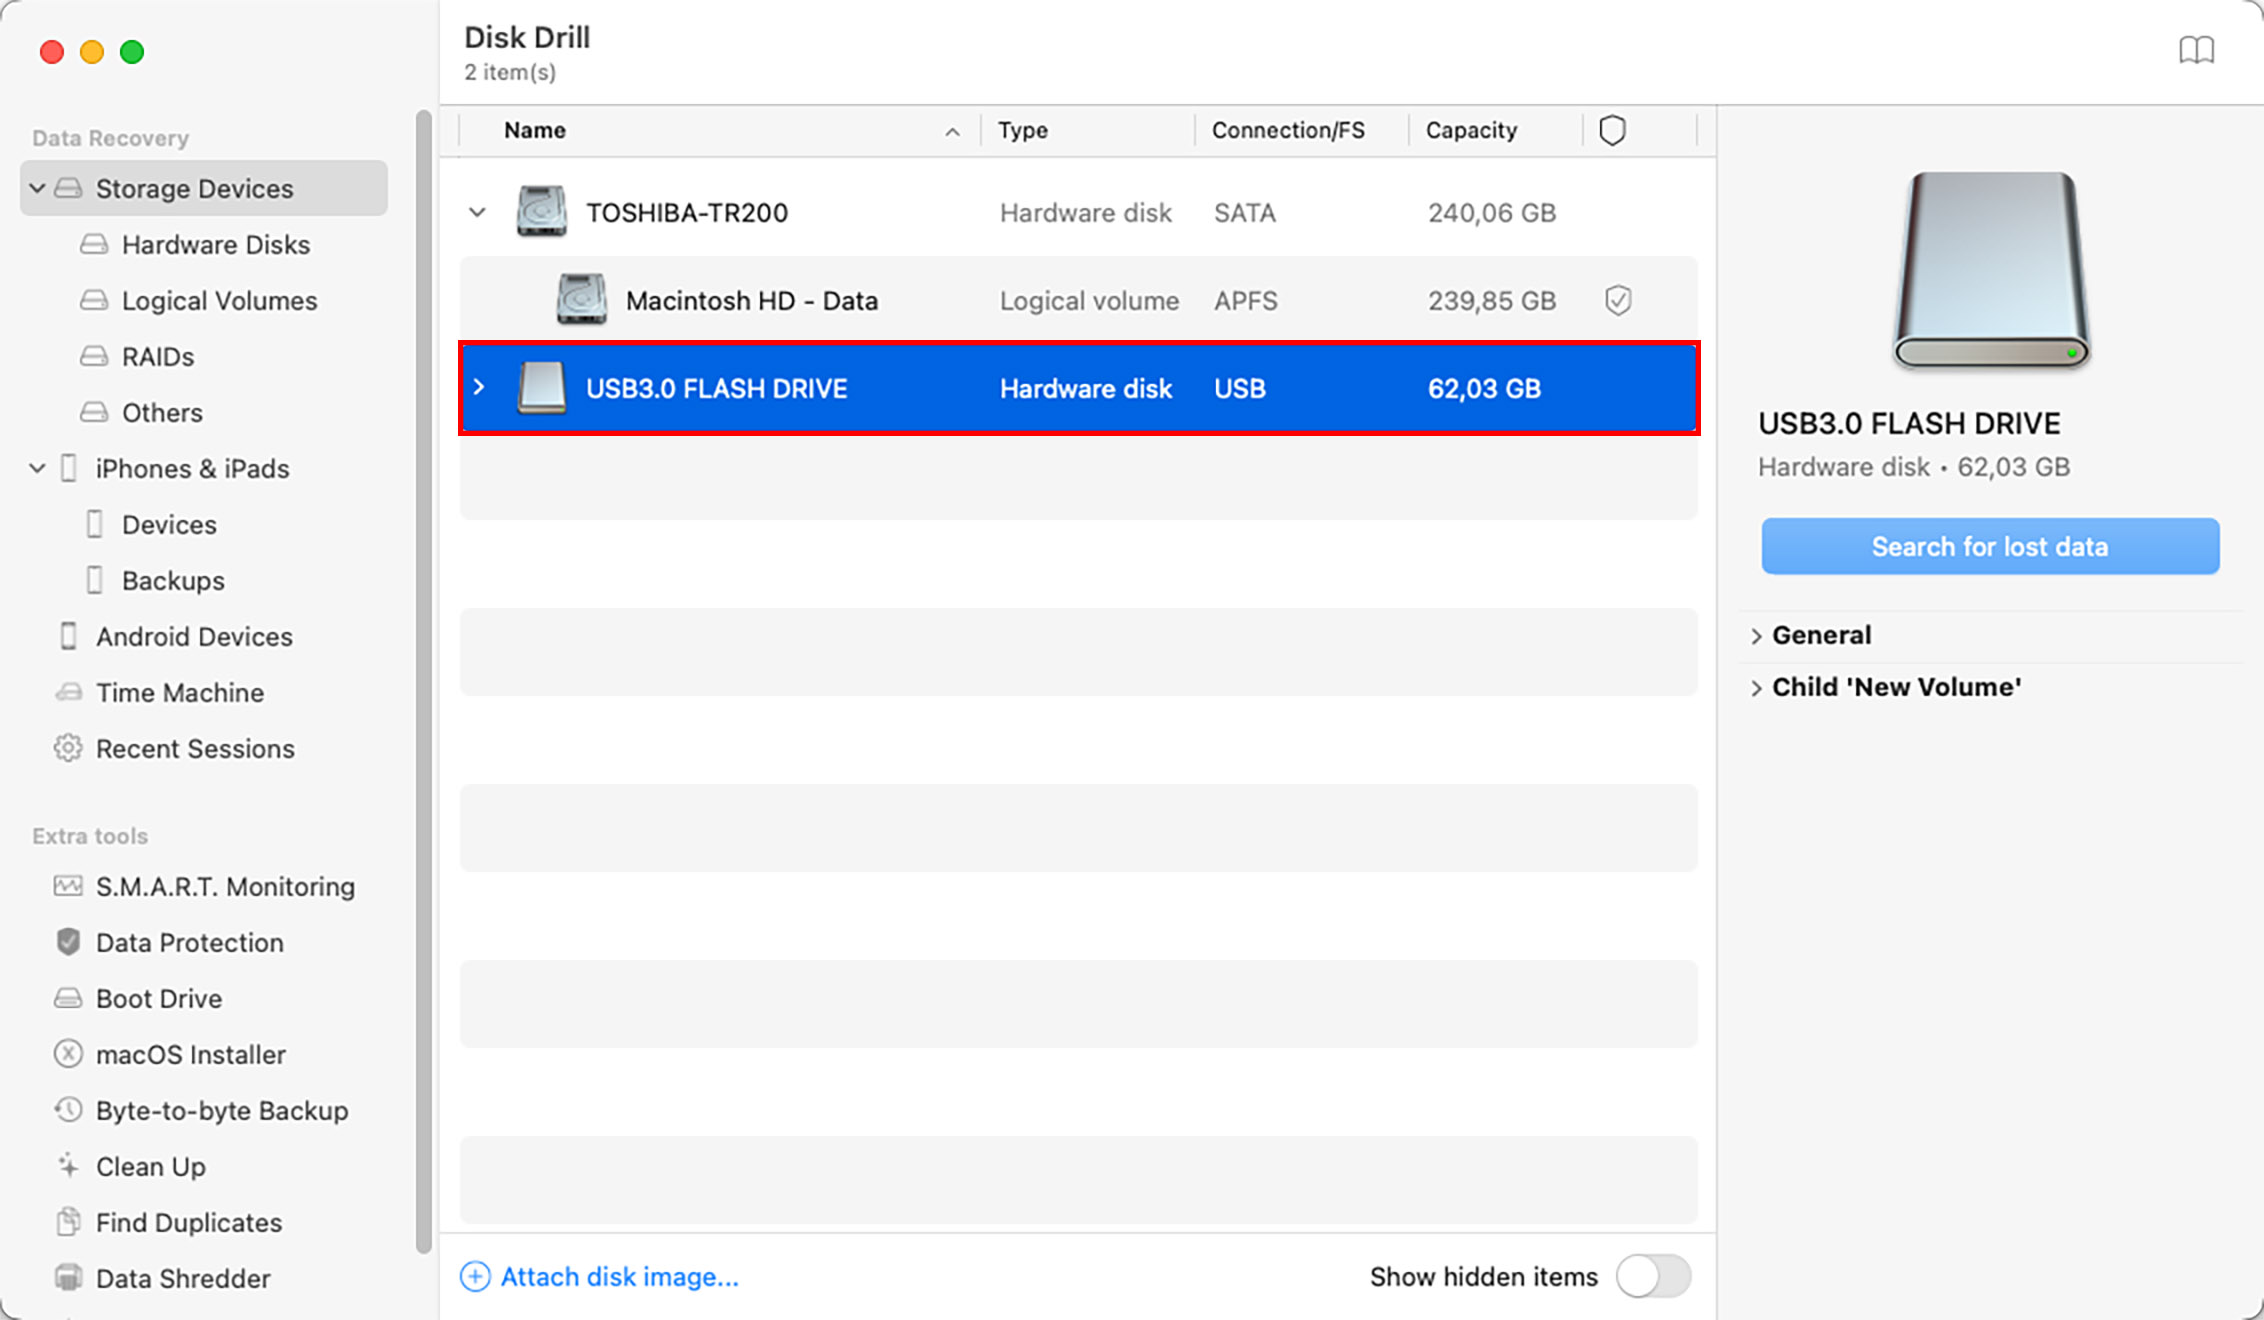
- Click the “Search for lost data” button.
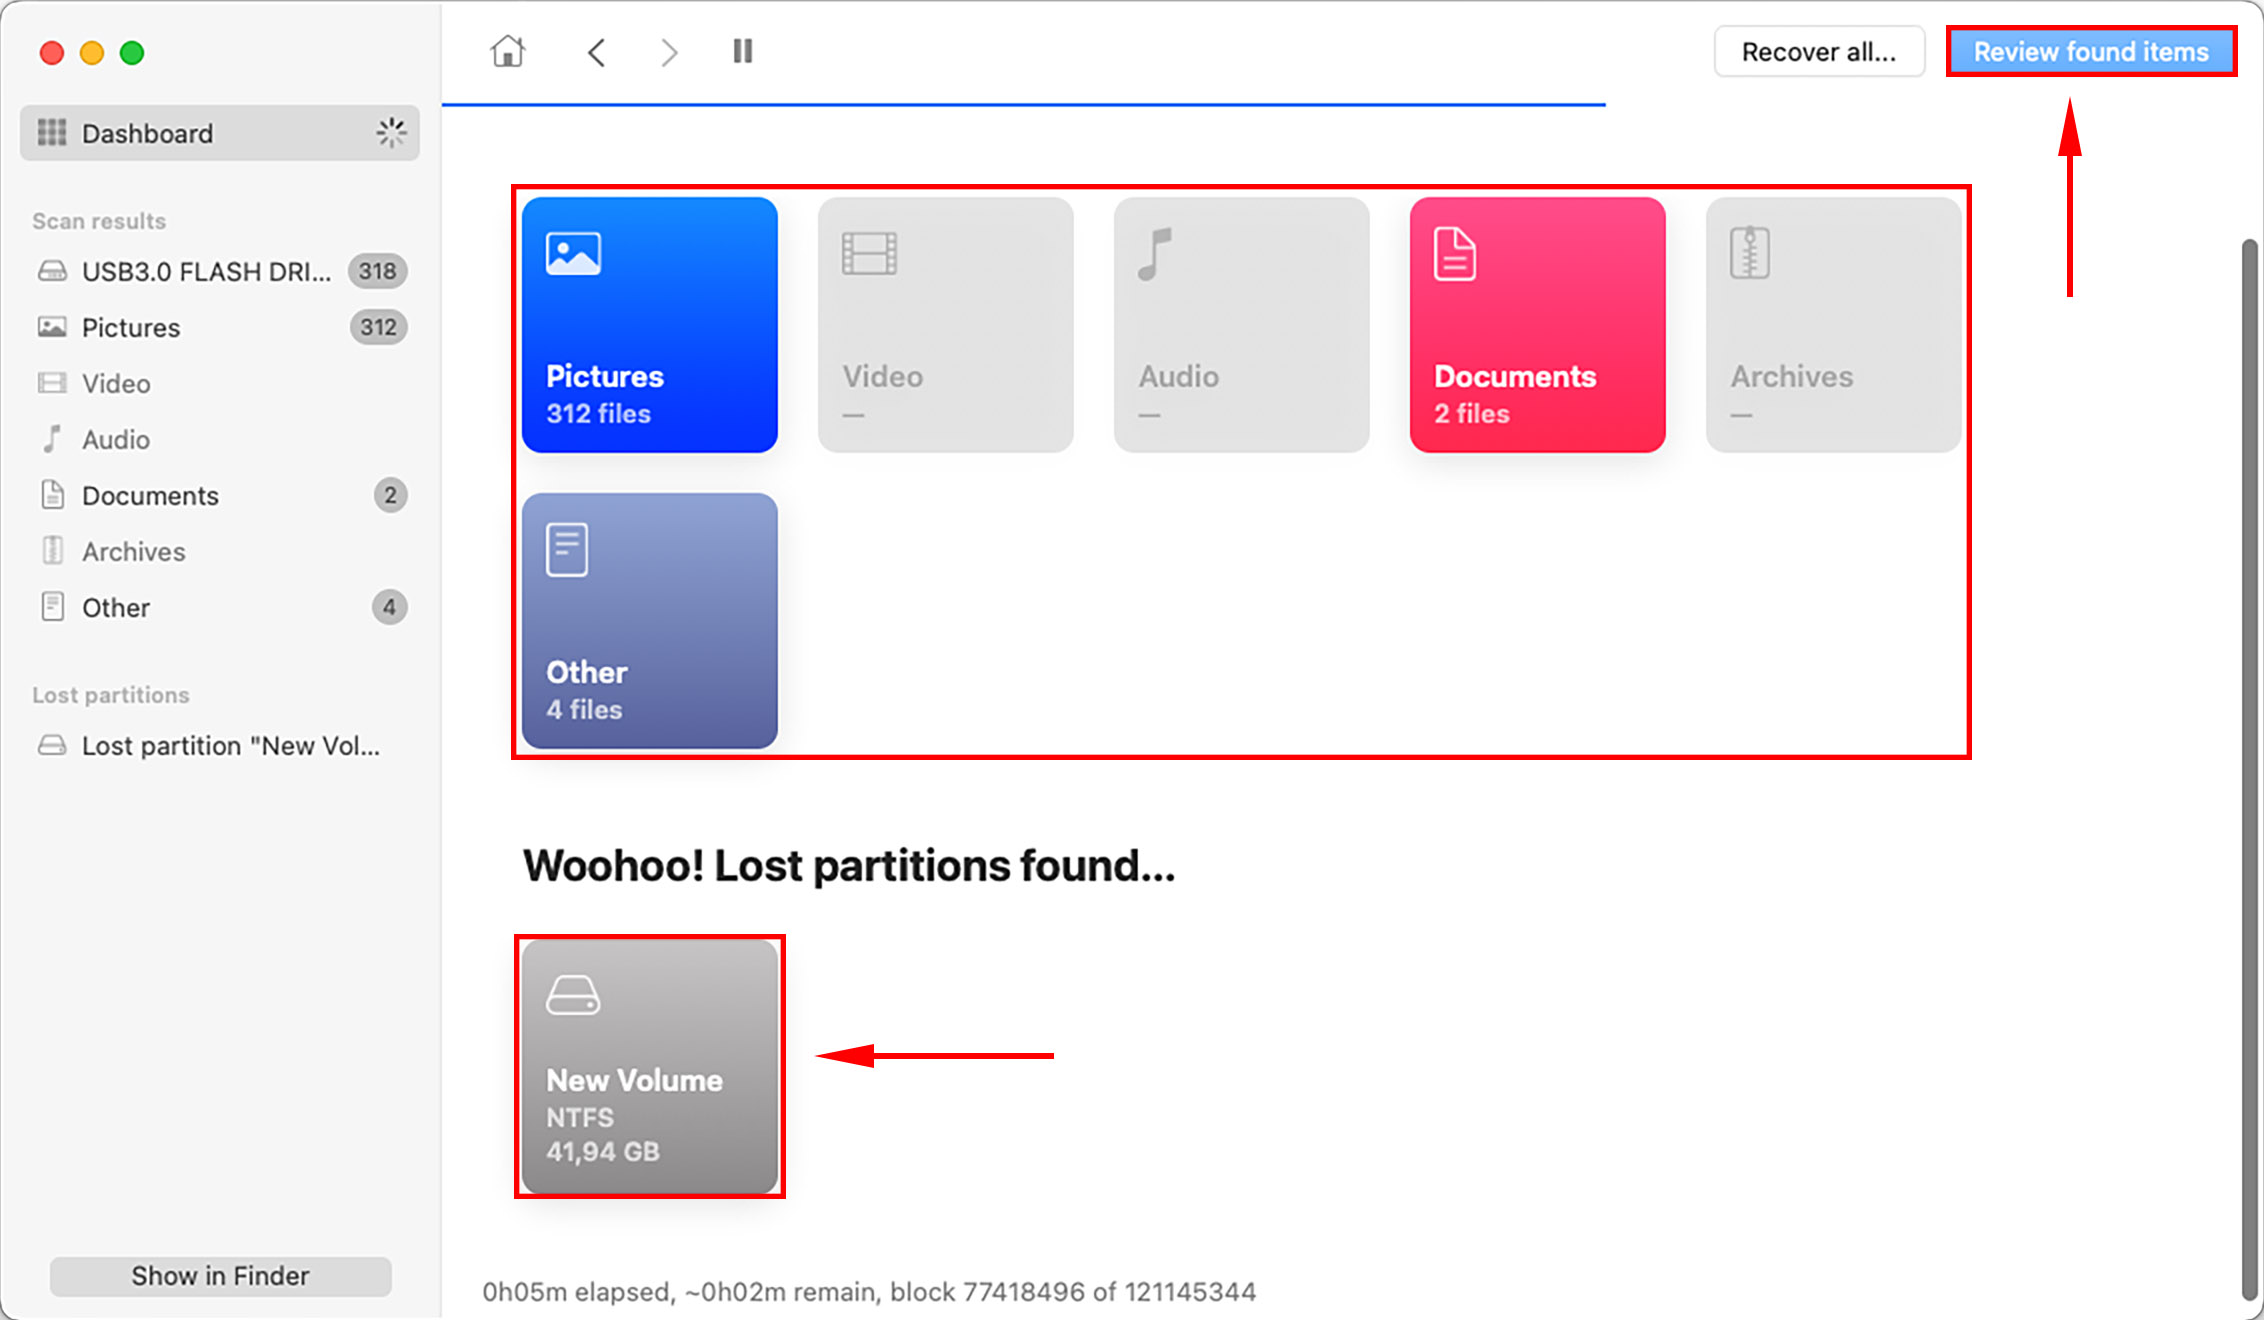
- Let Disk Drill complete its scanning process. You can also use this menu to start going through recovered files by type, and you can even review a lost partition specifically. For this article, we’ll click the “Review found items” button at the top right corner of the window so we can look through all recovered files.
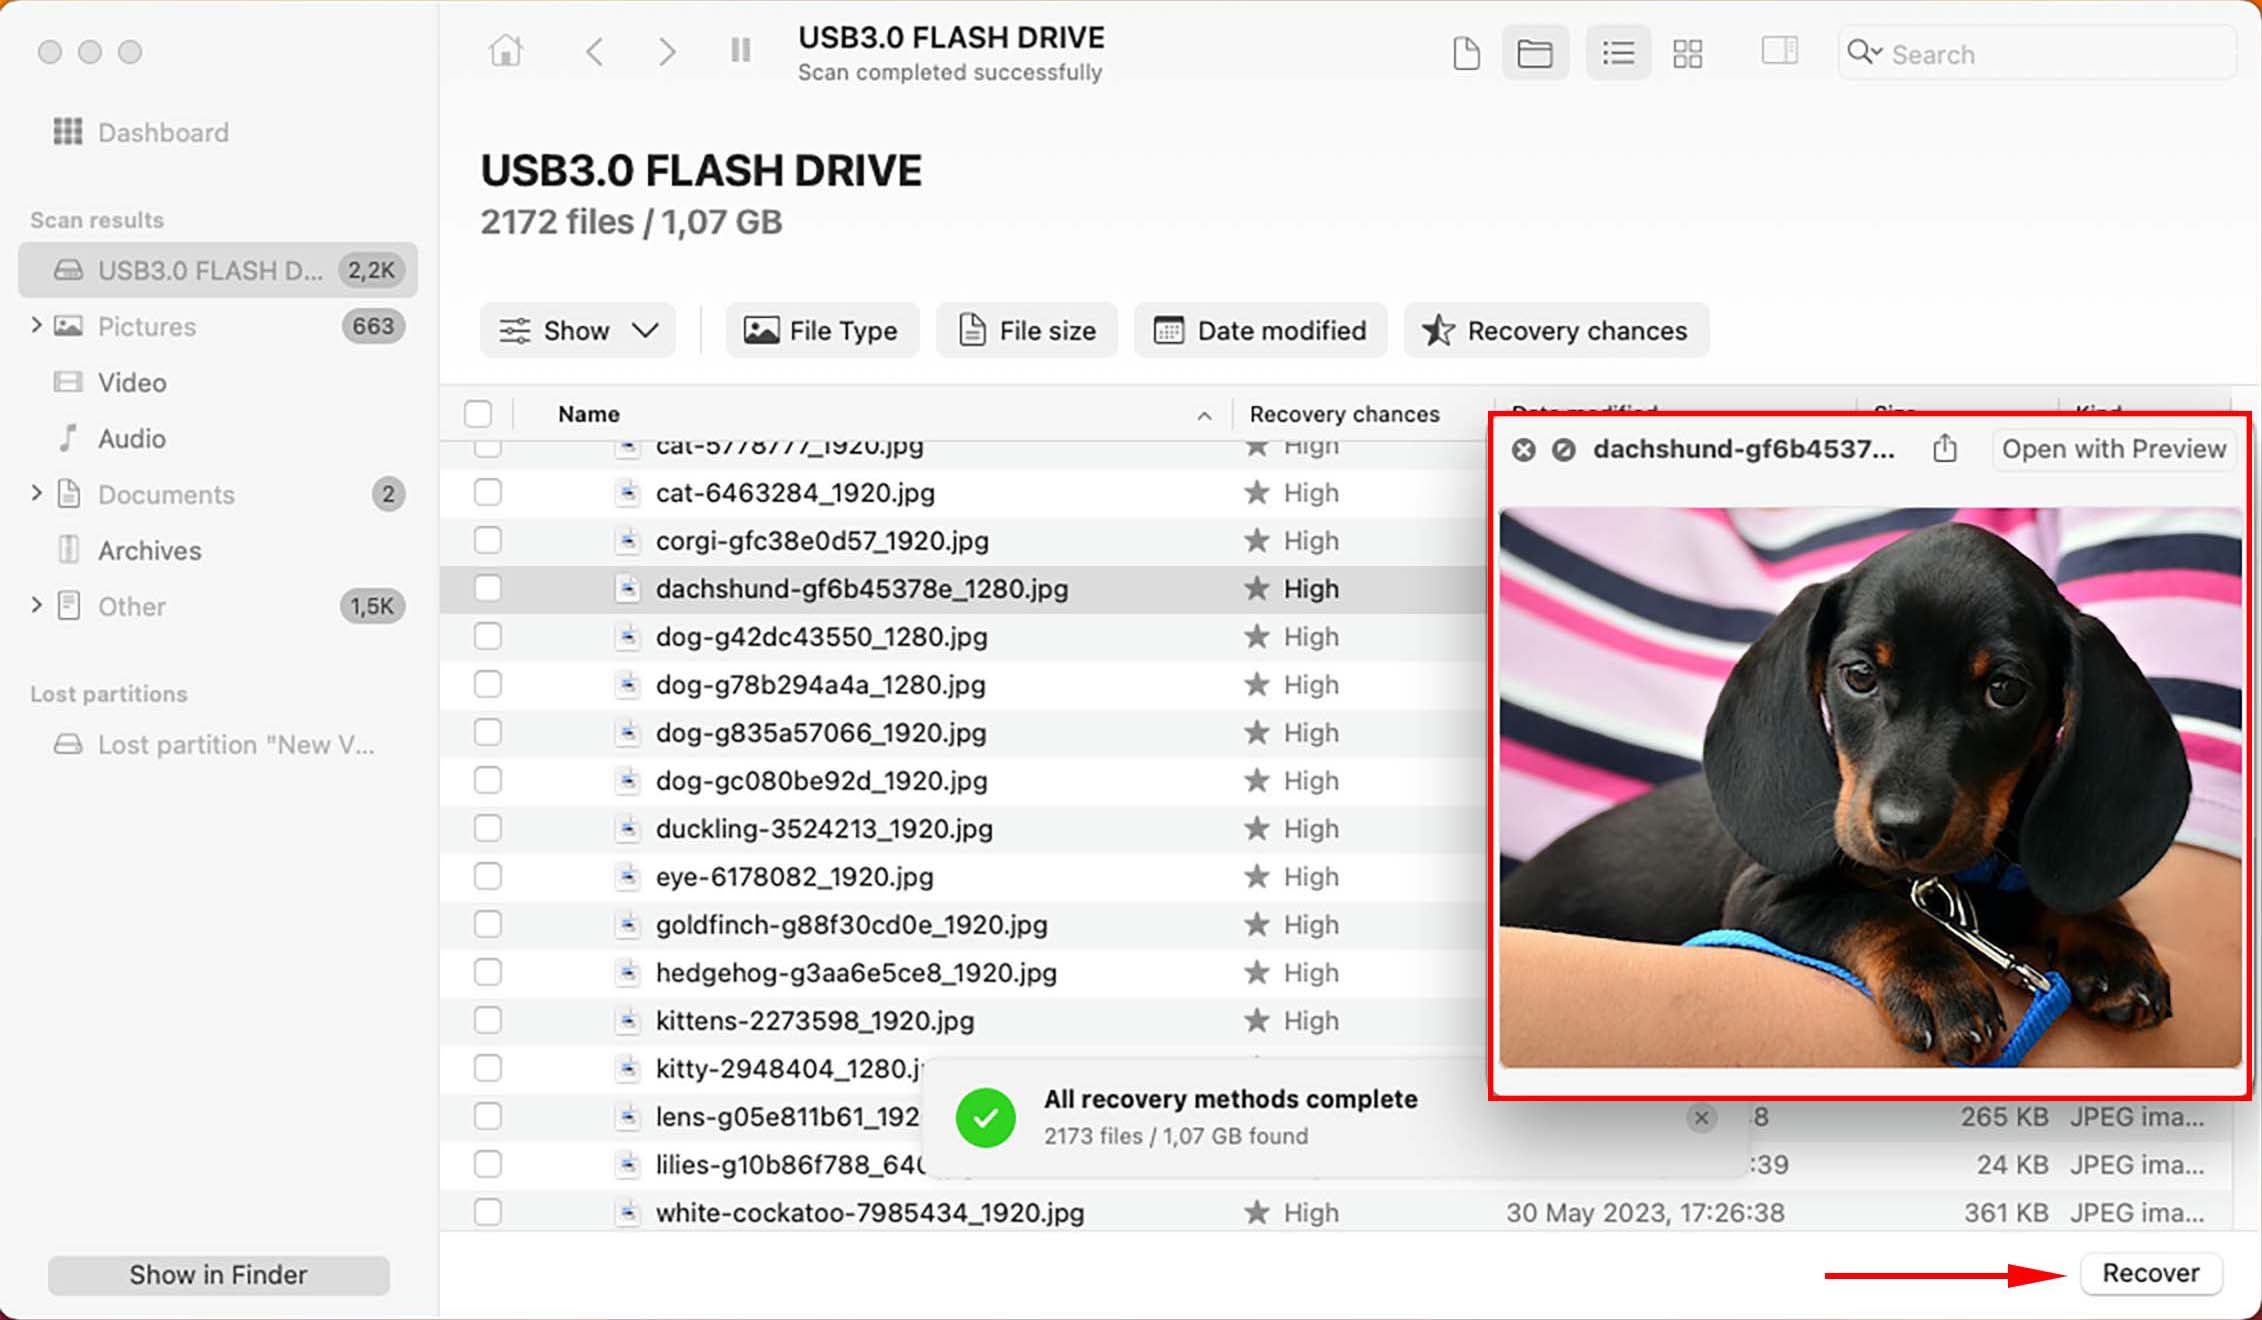
- You can preview as many files as you want. Just click on the file for its preview to appear in the separate window. Once you’ve selected the files you want to recover, click the “Recover” button.
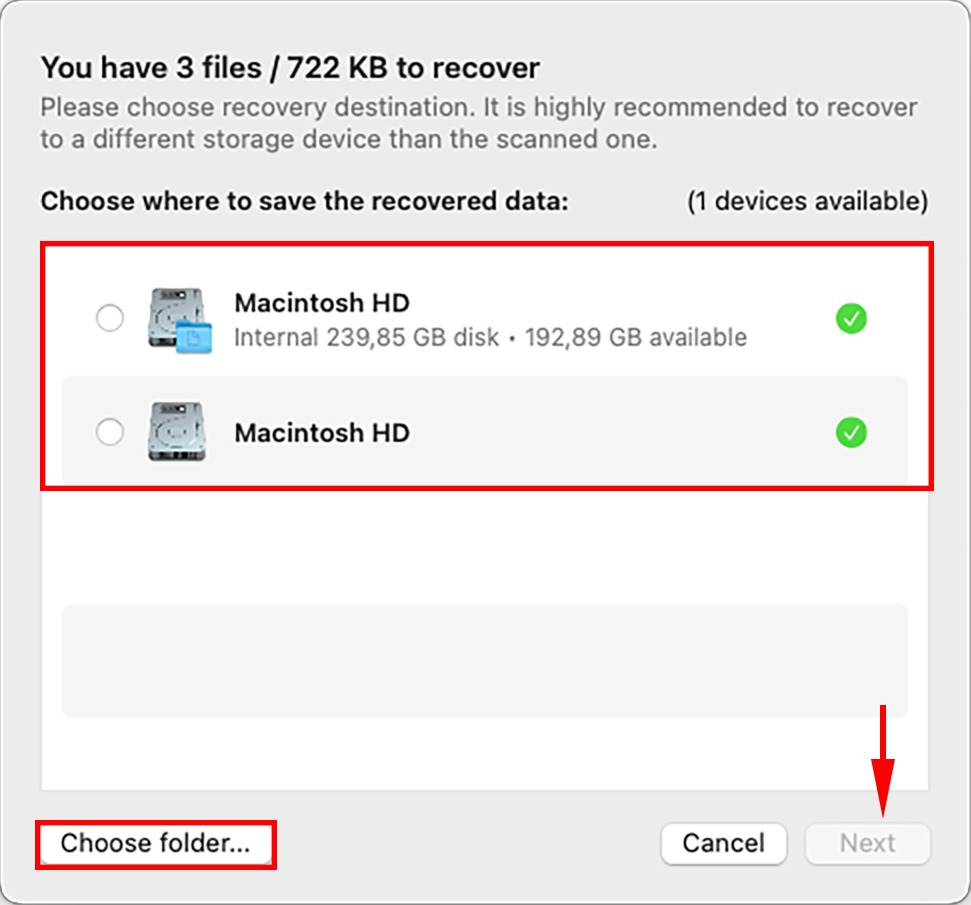
- You’ll be greeted by a pop-up. You can choose a safe drive or choose specific folder using the appropriate button. Make sure you choose a place other than the affected drive. Click the “Next” button. Congratulations, you have successfully recovered your data from your SD card, USB, or hard drive!
How to Fix “Couldn’t modify partition map” Error
Method 1: Use Disk Utility’s First Aid Feature
If you encounter the error “Couldn’t modify partition map” on your SD card or flash drive, the first thing you can try is Mac’s built-in First Aid feature within the Disk Utility app. First Aid can check and repair file system errors, which can solve minor issues before they become bigger problems.
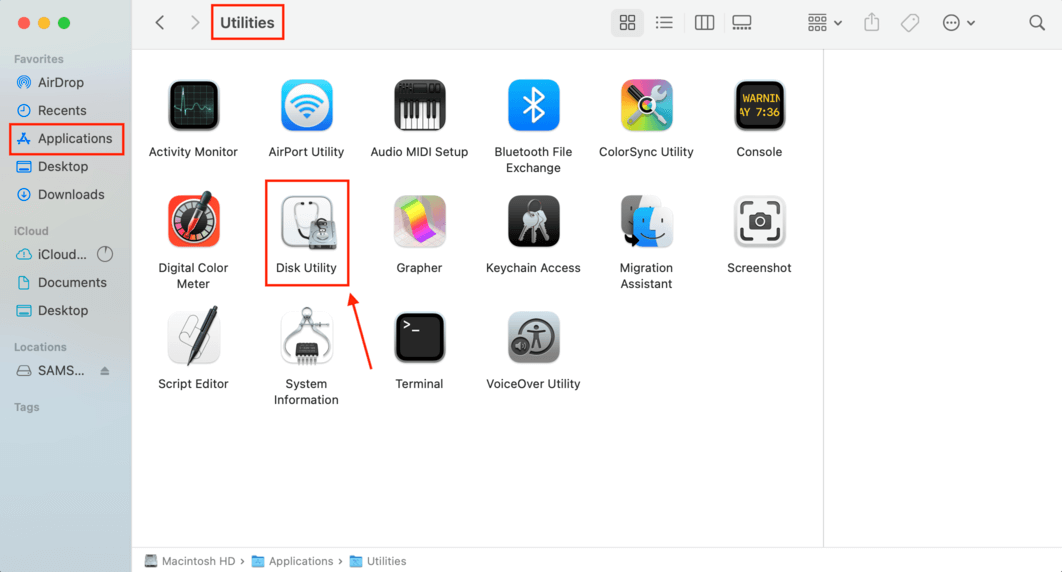
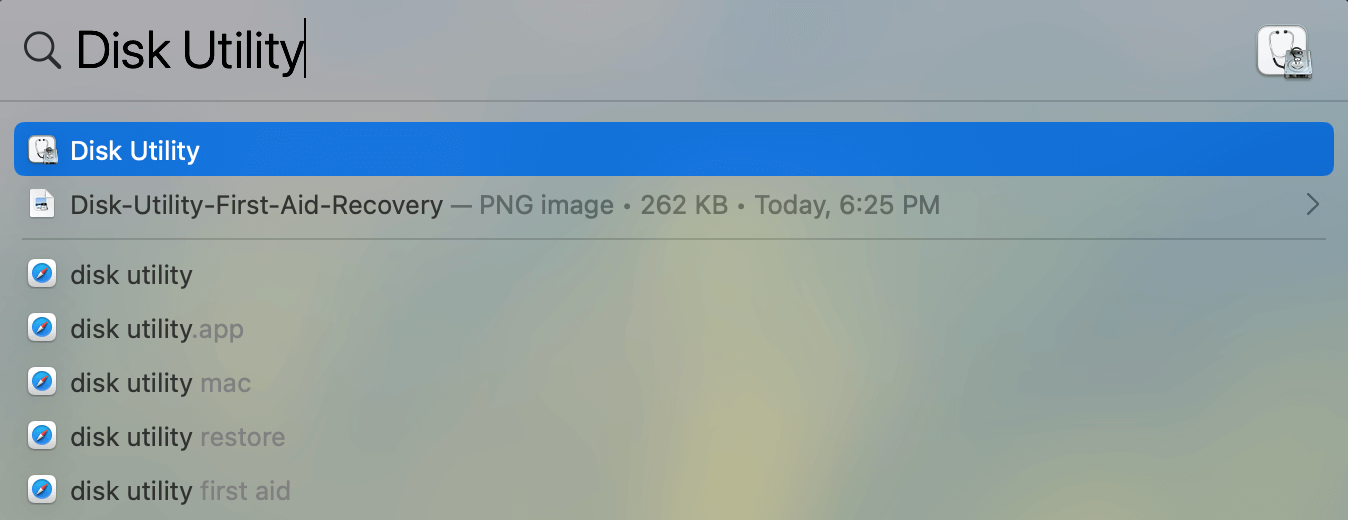
- Open Disk Utility by using Spotlight Search (CMD + Space) or by opening Finder > Applications > Utilities > Disk Utility app.
- Select the problematic drive.

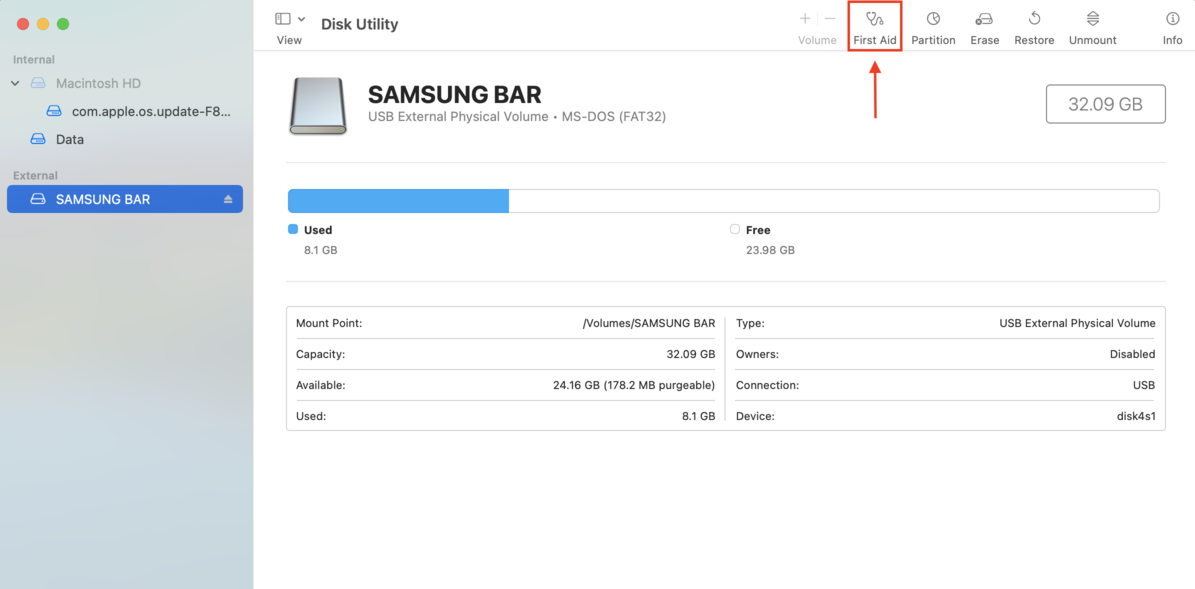
- On the top right corner of the Disk Utility window, click the “First Aid” button.
Method 2: Use Disk Utility to Format the Drive and Create a New Partition Map
For this method, we’ll again be using Disk Utility. If First Aid didn’t work, we can use the app to reformat the device – this will inevitably delete your data. Make sure to conduct a recovery beforehand! Formatting a device will allow you to create a new partition map for a completely new partition.
- Open Disk Utility by using Spotlight Search (CMD + Space) or by opening Finder > Applications > Utilities > Disk Utility app.
- Click the “View” button on the top left corner of the Disk Utility window and click “Show All Devices.”

- Select the storage device (not the partition) and click the “Erase” button at the top of the window.
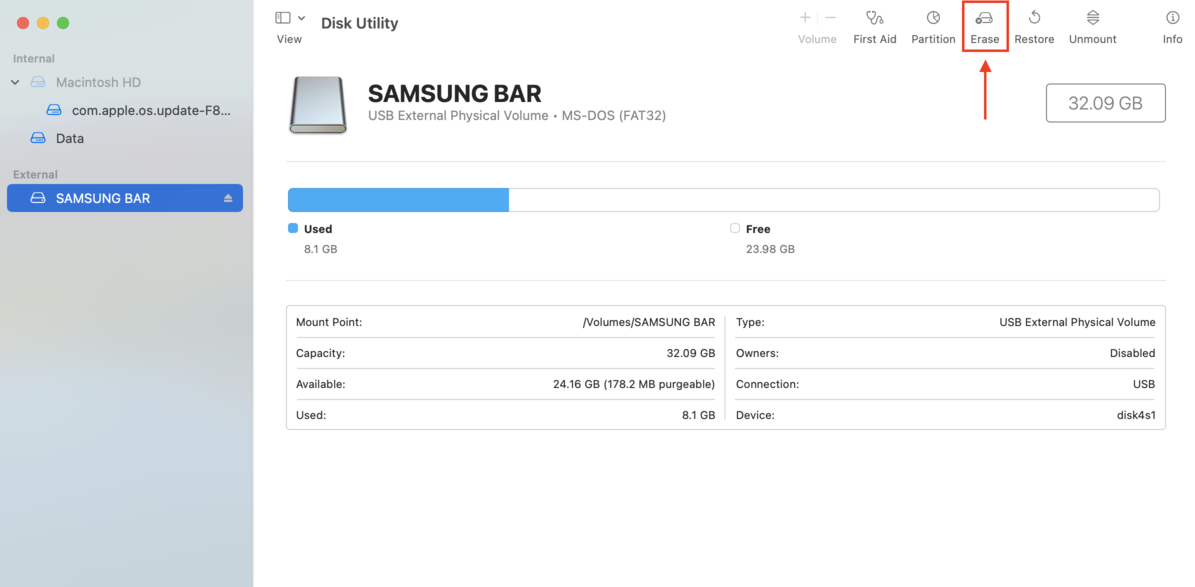
- Change the name of the device to whatever you want, and choose MS-DOS (FAT) for the format, and “Master Boot Record” for the scheme. Click the “Erase” button. This overwrites the old partitions and creates a new one, along with a new partition map.
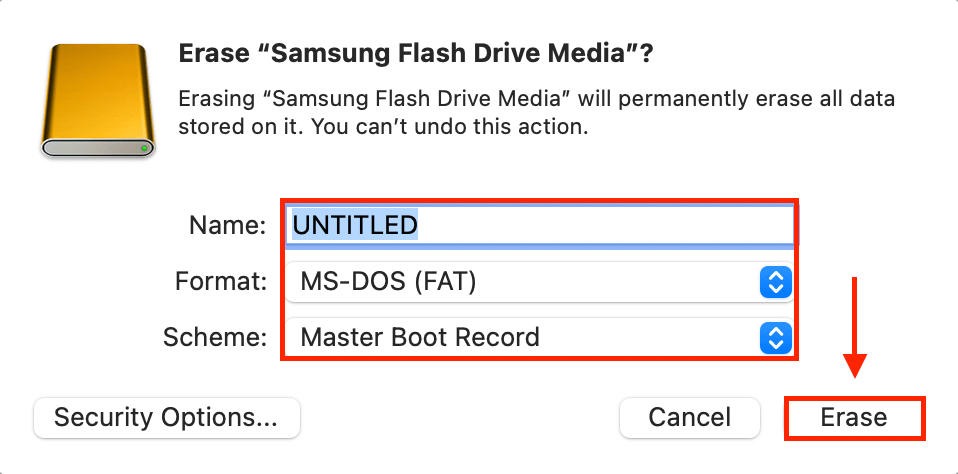
- Wait for the erase process to complete, and click “Done.” You now should be able to use your device.
Method 3: Use the Terminal App to Format the Drive Create a New Partition Map
If the Disk Utility app didn’t work, you can try erasing the device and creating a new partition map using the Terminal app.
- Connect your USB flash drive, SD card, or external hard drive to your Mac.
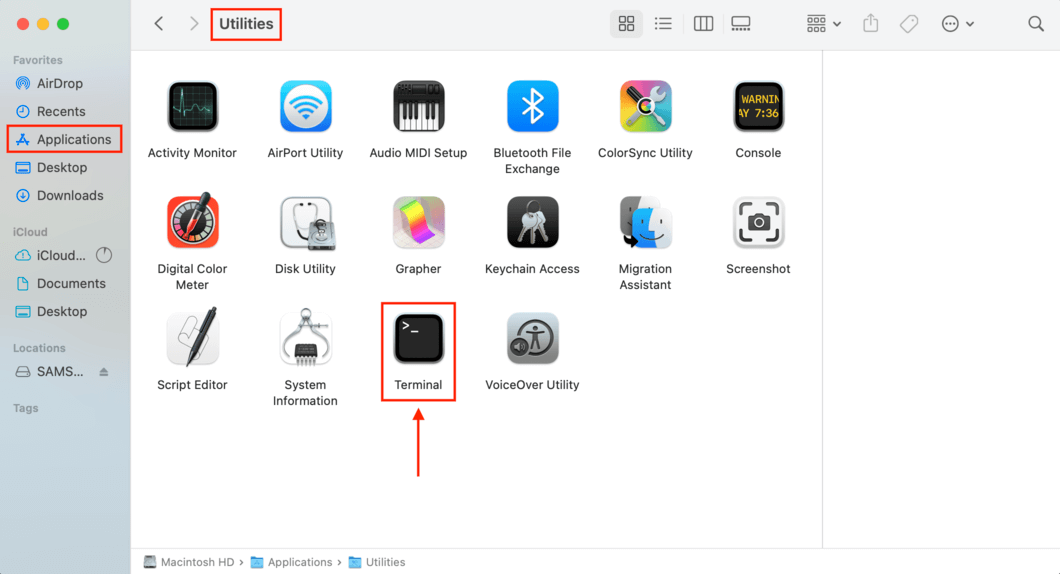
- Open the Terminal app by using using Spotlight Search (CMD + Space) or by opening Finder > Applications > Utilities > Terminal app
- To find your Disk’s identifier, type the following command and press return:
diskutil list
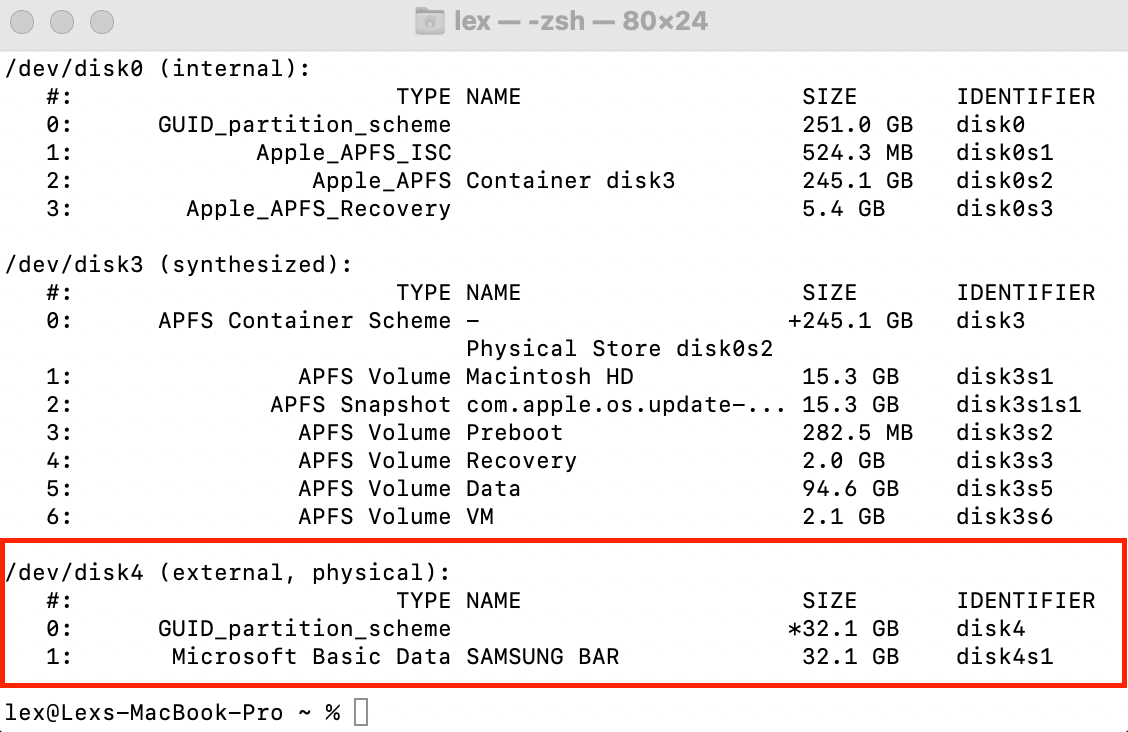
- Once you’ve identified your disk, type the following command and press return:
diskutil eraseDisk MS-DOS “disk name” /dev/”disk identifier”
Change “drive name” to whatever you named your storage device, and “disk identifier” according to the identifier you found in Step #3. For example, here’s what I would type on the Terminal app:diskutil eraseDisk MS-DOS SAMSUNG BAR /dev/disk4s1
If successful, you’ll lose all your data but you will be able to use your device normally again.
Conclusion
With the error “Couldn’t Modify Partition Map”, the drive is usually fixable. Unfortunately, that often means erasing the data stored in it. Make sure you use data recovery software like Disk Drill beforehand if you have important files you want to salvage. Even better, use Disk Drill or even the free Time Machine to routinely back up your files.
FAQ
- Recover and back up your data with data recovery software like Disk Drill.
- Try Disk Utility’s First Aid feature to repair the partition map on your Mac.
- Reformat the disk. Again, recover and back up your data first.


