
Apple Photos has been shipped as the default photo app since OS X Yosemite, but many users are still unfamiliar with how it actually works. The Photos app is efficient at organizing and syncing photos, but it uses its own databases – these are prone to damage and corruption if handled incorrectly.
In other cases, Photos Library files can go missing due to accidental deletion, formatting, misplacement, or even damage due to software errors or drive issues. This article is an in-depth guide to restoring iPhoto Library files (for older macOS) and Photos Library files. Read on.
Table of Contents
What is Photos (iPhoto) Library?
To easily wrap our around what Photos is and why your iPhoto library is gone, here are some key points we should know:
- Fact 1: Photos is the latest image organization app (from iPhoto and Aperture)
- Fact 2: The Photos app manages Libraries, which are a collection of images that are imported manually by the user or automatically by iCloud sync (if enabled).
- Fact 3: You can have multiple libraries, but you must designate one as the “System Photo Library.” This will be the “active” library that uses the Photos app and iCloud Sync. You can transfer this designation to another library anytime.
- Fact 4: If iCloud Sync is enabled for Photos, iCloud will automatically upload the System Photo Library to the Cloud so you can view your images on any Apple device (and open them with native apps, such as Keynote).
Finally, Libraries store their own metadata to organize Photos, so you shouldn’t modify a Library’s contents outside of the Photos app – otherwise, you risk corrupting it or accidentally deleting files. If you want to modify its contents, export them first.
How to Restore Photos Library on Mac
There are 4 different ways to restore Photo Library on Mac, and they tackle different causes so it’s worth trying each one if you aren’t sure why your library is missing. Below are step-by-step instructions (with screenshots) for each method. Read on.
If only certain photos are missing, you might have accidentally deleted them or set them as hidden. Check the recently deleted folder on the Photos app if you accidentally erased your photos. If you think they’re hidden, click View > Show Hidden Photo Album.
Method 1: Use Data Recovery Software
If you don’t have a Time Machine backup, the best way to restore a lost iPhoto on Mac is to use data recovery software. It’s also the best option if the data loss is caused by drive corruption. To demonstrate this process, we’ll use a data recovery software called Disk Drill.
We often use Disk Drill to show data recovery steps on our blog because it has a really high success rate, it’s beginner-friendly, and it supports a massive variety of extensions – including .photoslibrary. It can even retrieve the individual photos within your libraries. We’ll show you an example in the guide below.
Step 1. Download and install Disk Drill.
Step 2. Launch Disk Drill by opening Finder > Applications > Disk Drill.
![]()
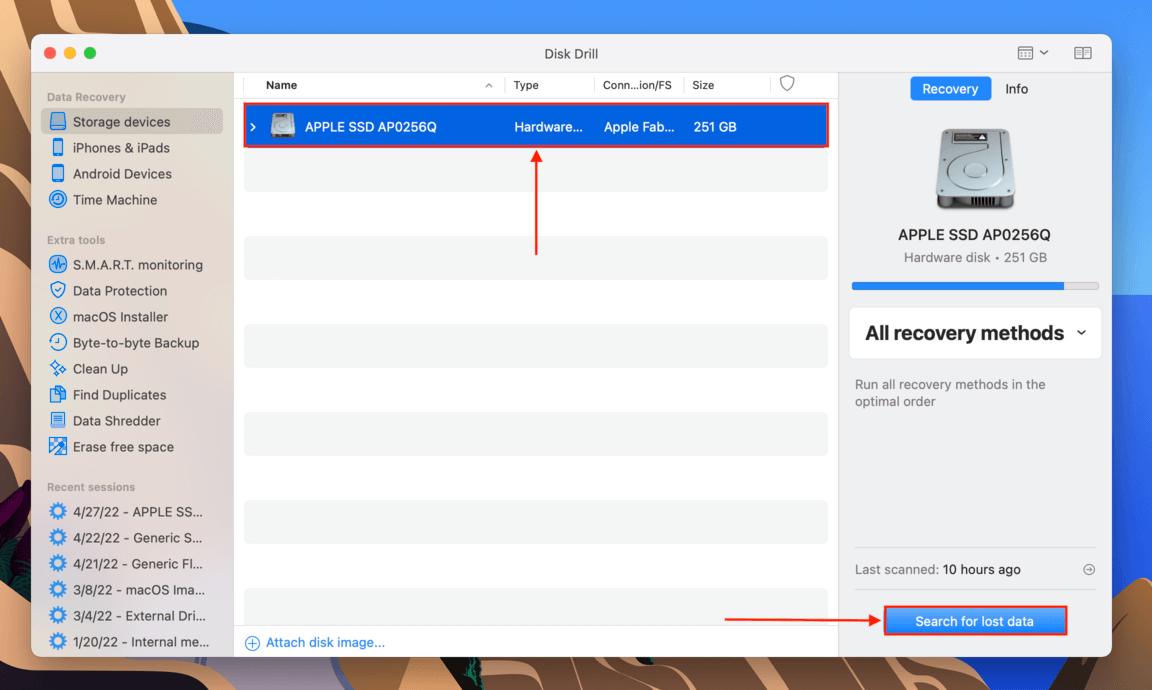
Step 3. In the window that appears, select your system drive (typicalled labeled “Apple SSD”), then click “Search for lost data” in the bottom-right corner of the window.
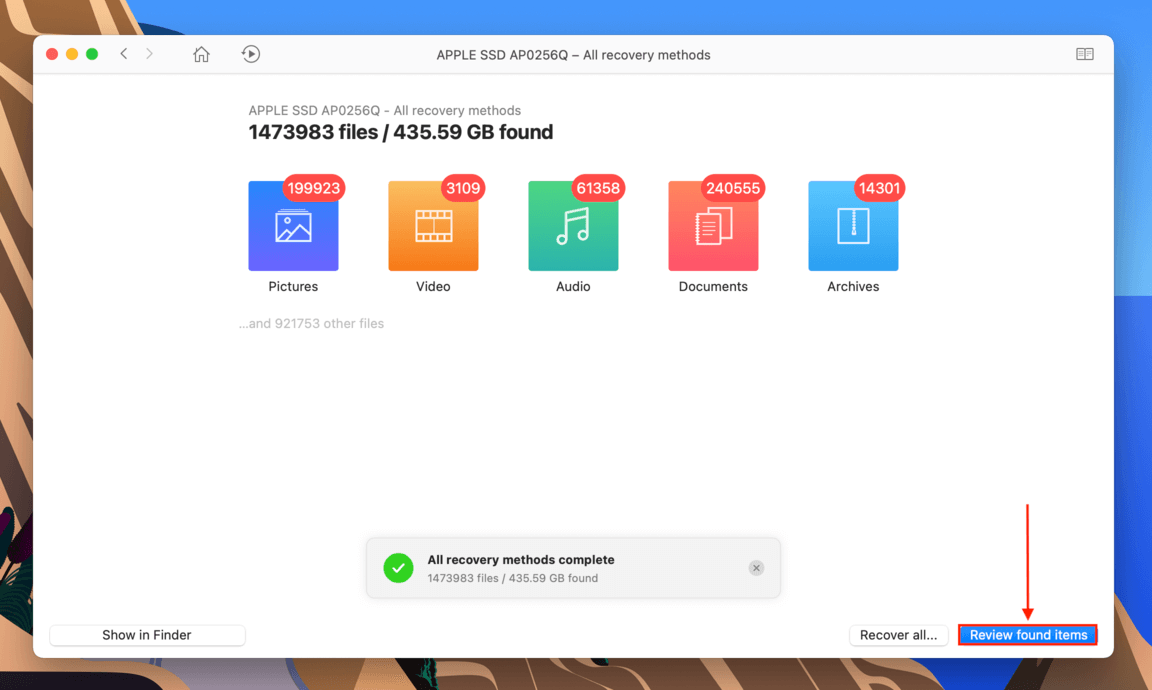
Step 4. Wait for Disk Drill to complete its scan. Then, click “Review found items.”
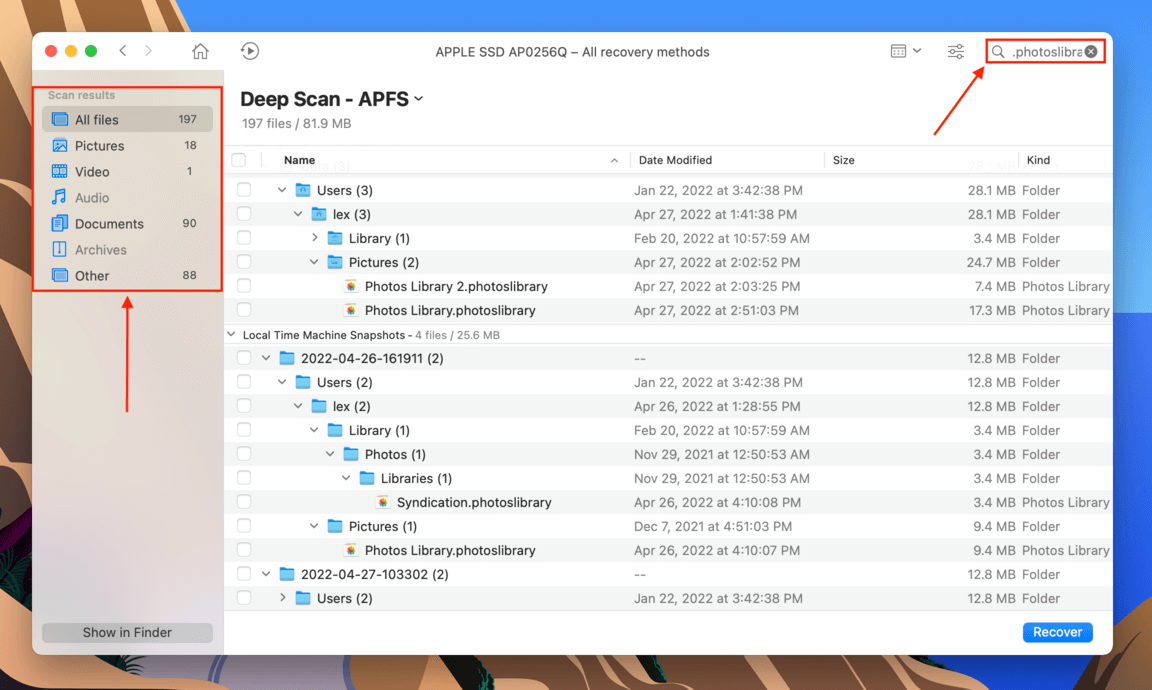
Step 5. The search bar and file type sidebar can help you filter the results and find your files faster. Let’s try displaying files with the .photoslibrary extension.
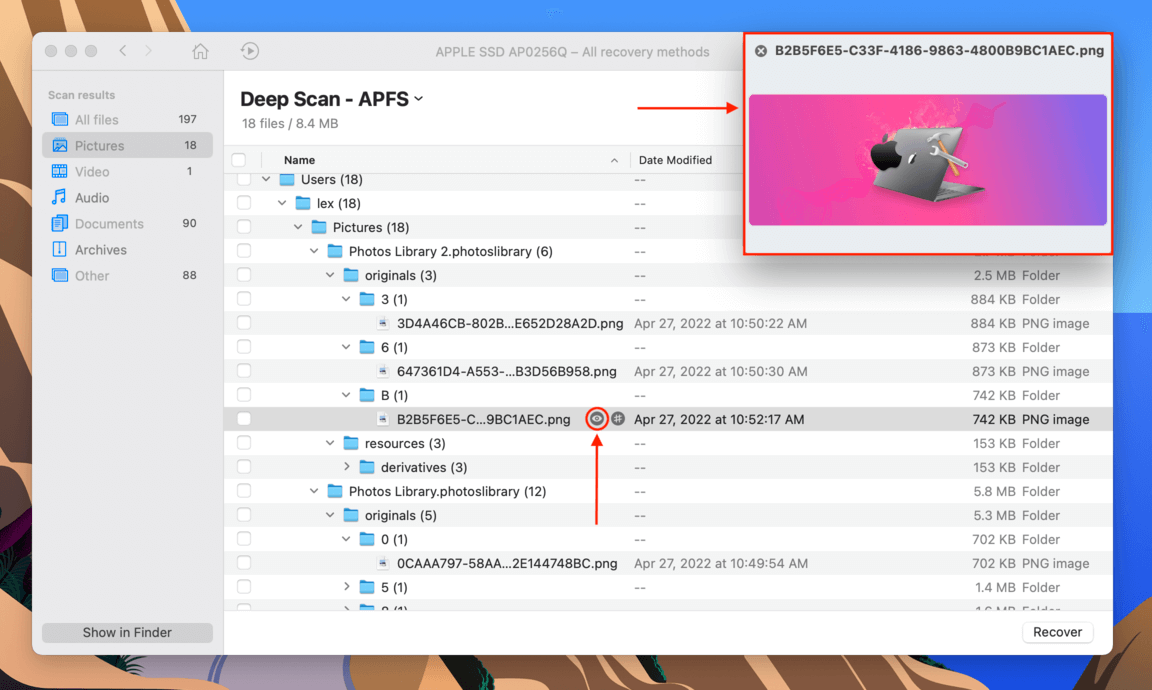
Step 6. You can preview files by hovering your mouse pointer to the right of their file names – this is a good way to check your photos. It’s also super useful since there are cases where data recovery software can’t retrieve exact file names.
Step 7. Tick the checkboxes to the left of the files you want to restore. Then, click the “Recover” button in the bottom-right corner of the window.
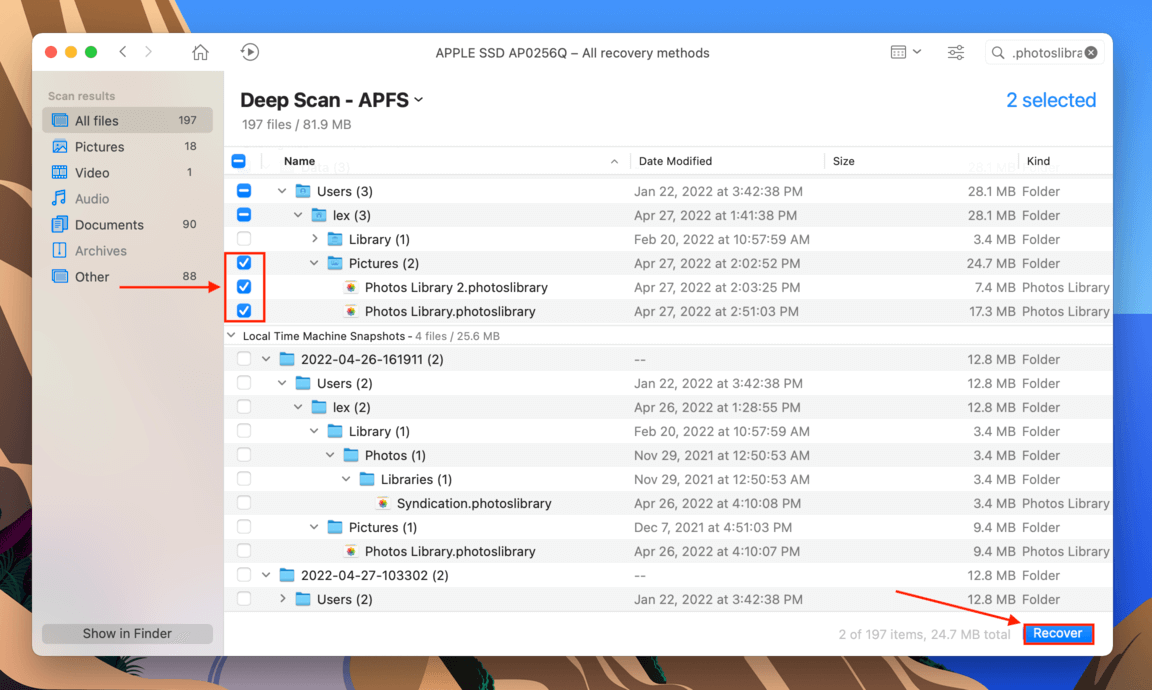
Step 8. On the dialogue box that appears, select a destination for your restored files. If you’re recovering multiple files, it’s better to choose a location on an external drive to avoid overwriting files in the queue.

Method 2: Restore Photos Library From Time Machine
If you enabled Time Machine backups, you can easily restore photos from Time Machine. This powerful Mac app stores incremental backups of files and folders in “snapshots.” Among these snapshots, you should find a version of your Pictures folder (or whichever folder stores your Library files) where your files haven’t been deleted.
To restore iPhoto library from Time Machine:
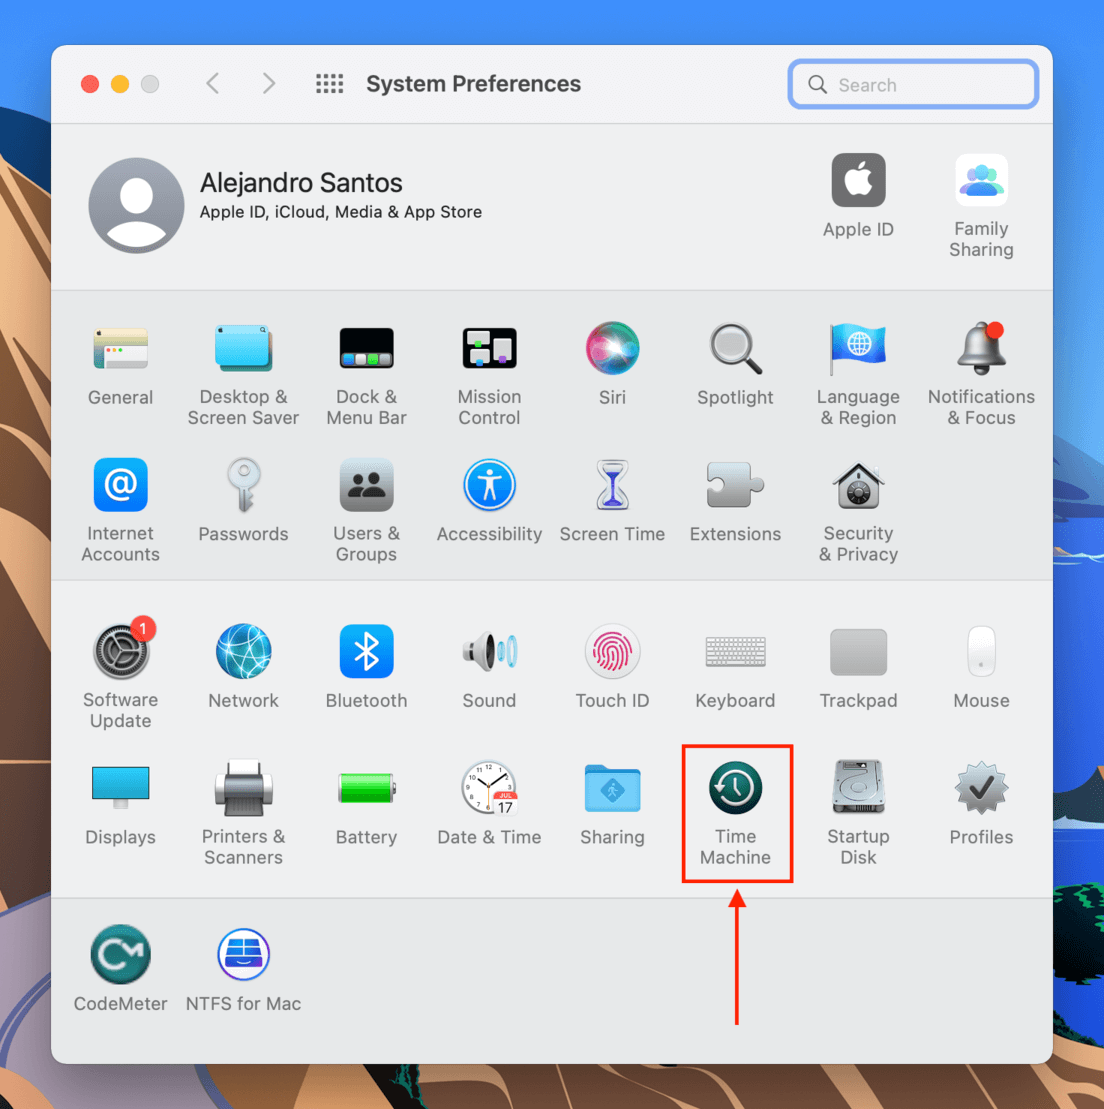
Step 1. First, we need to enable the Time Machine button on the menu bar. Open System Preferences > Time Machine.
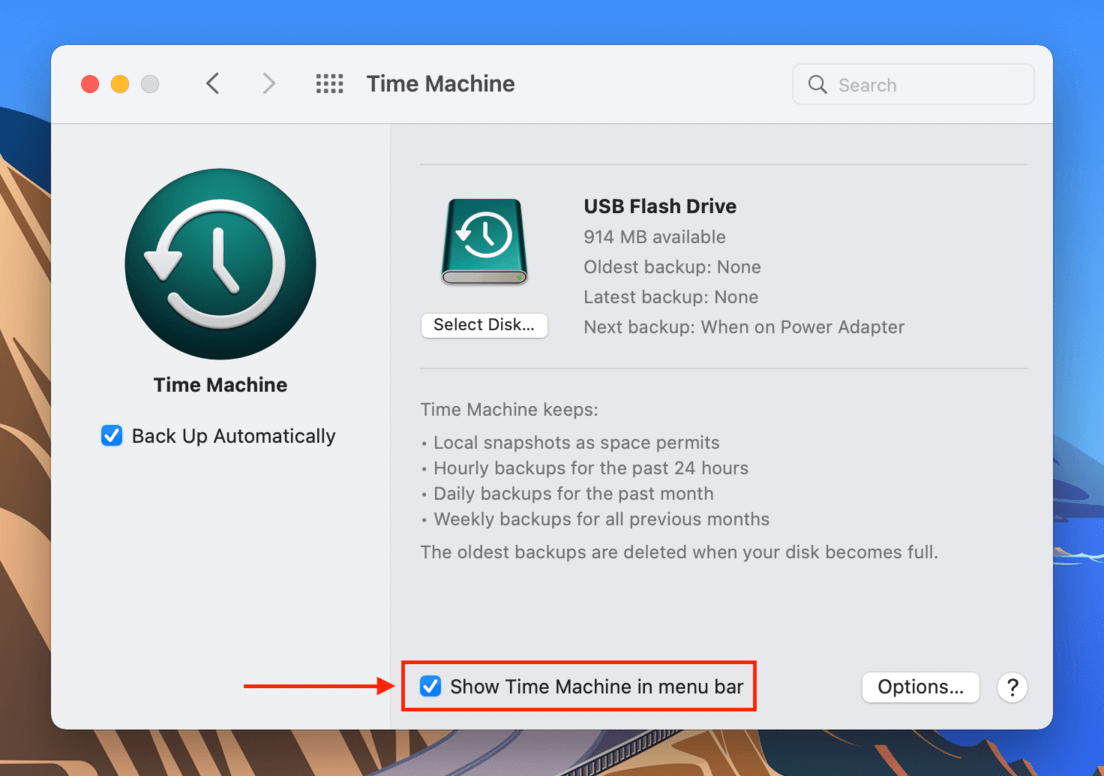
Step 2. You’ll find the setting to enable the Time Machine button near the bottom of the window. Tick the box beside it, then close the window.
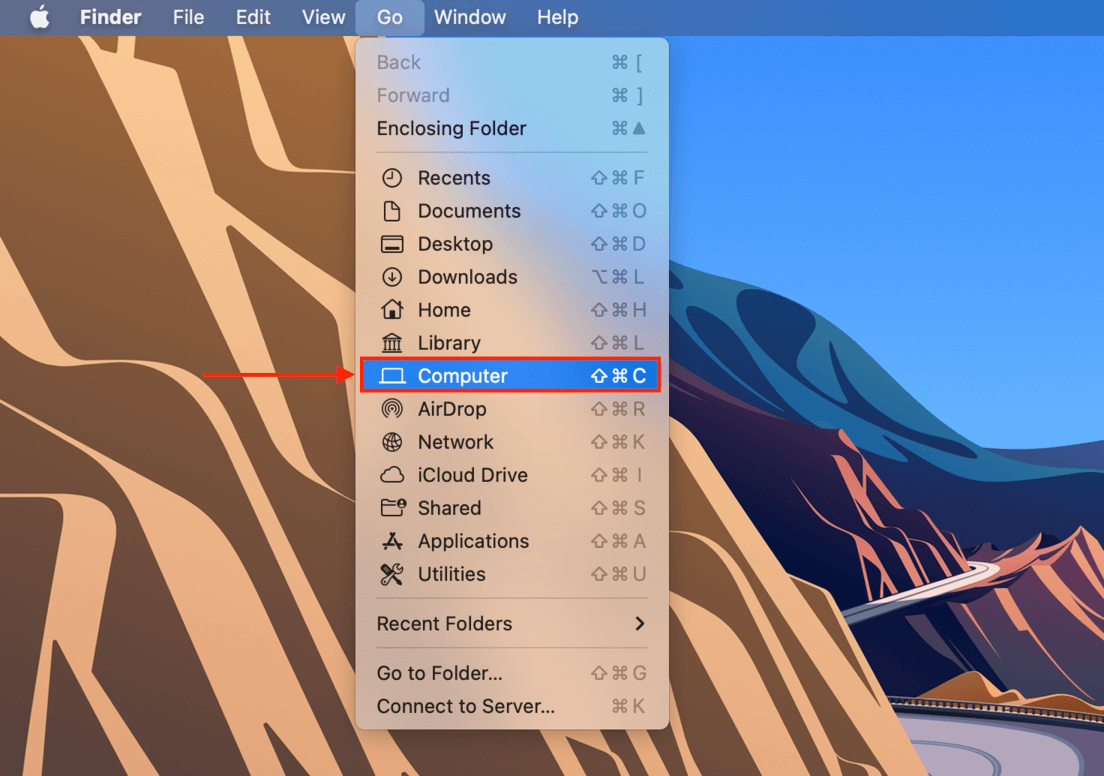
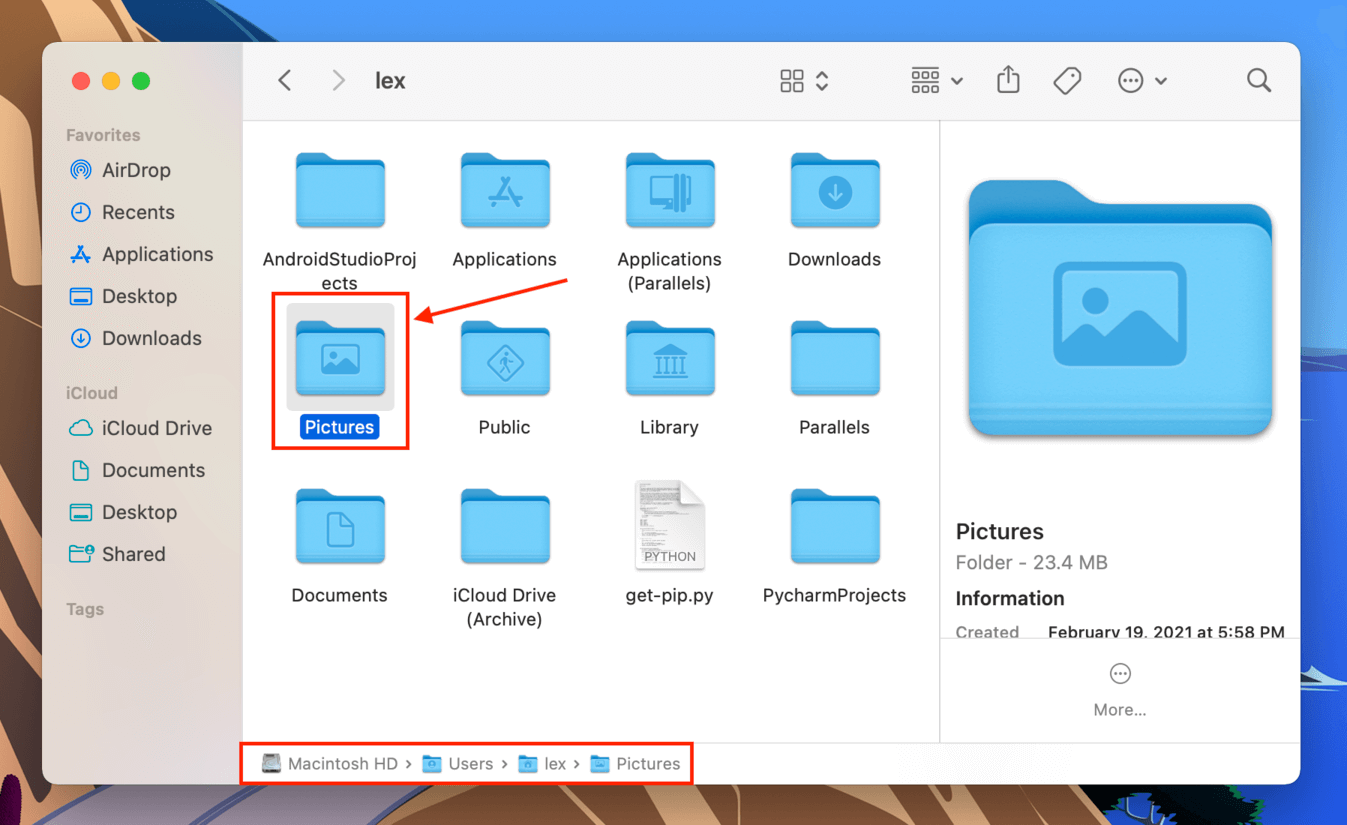
Step 3. Open Finder. On the menu bar, click Go > Computer.
Step 4. Navigate to Macintosh HD > Users > “your username” > Pictures. This is the default folder for library files and the likely folder to restore for restoring an iPhoto Library from Time Machine. If you specified a different folder, navigate to that instead.
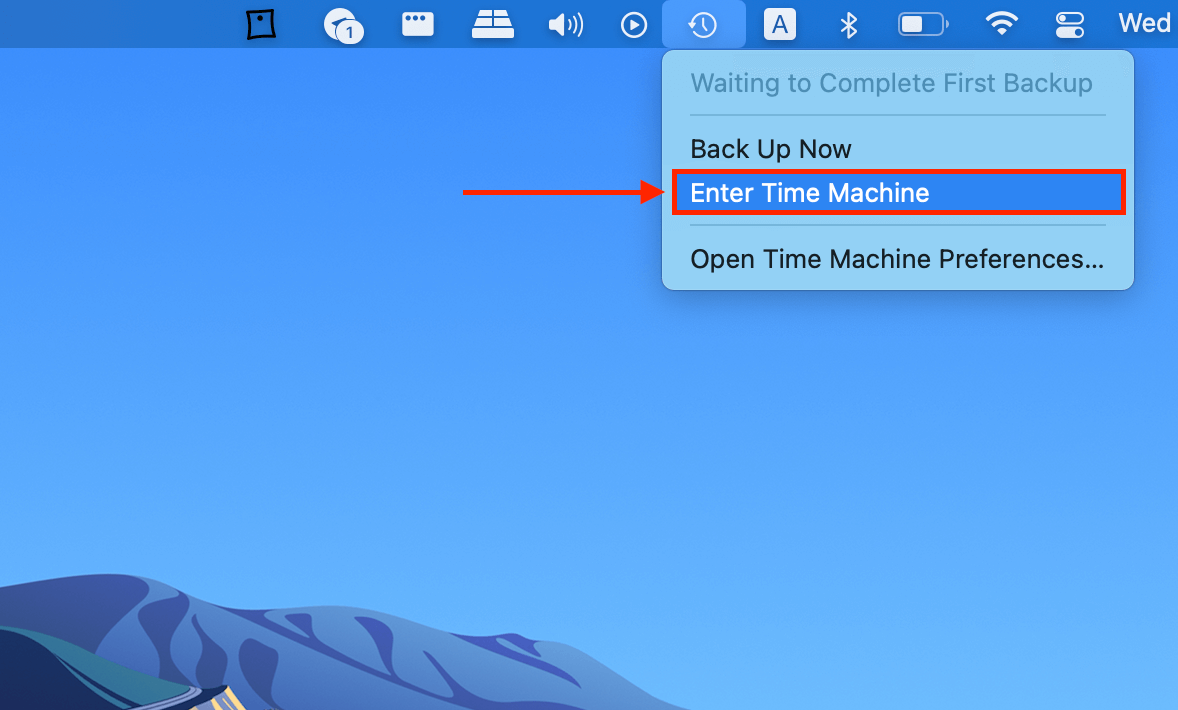
Step 5. On the menu bar, click the Time Machine button > Enter Time Machine. Make sure to keep your folder open as you do this.
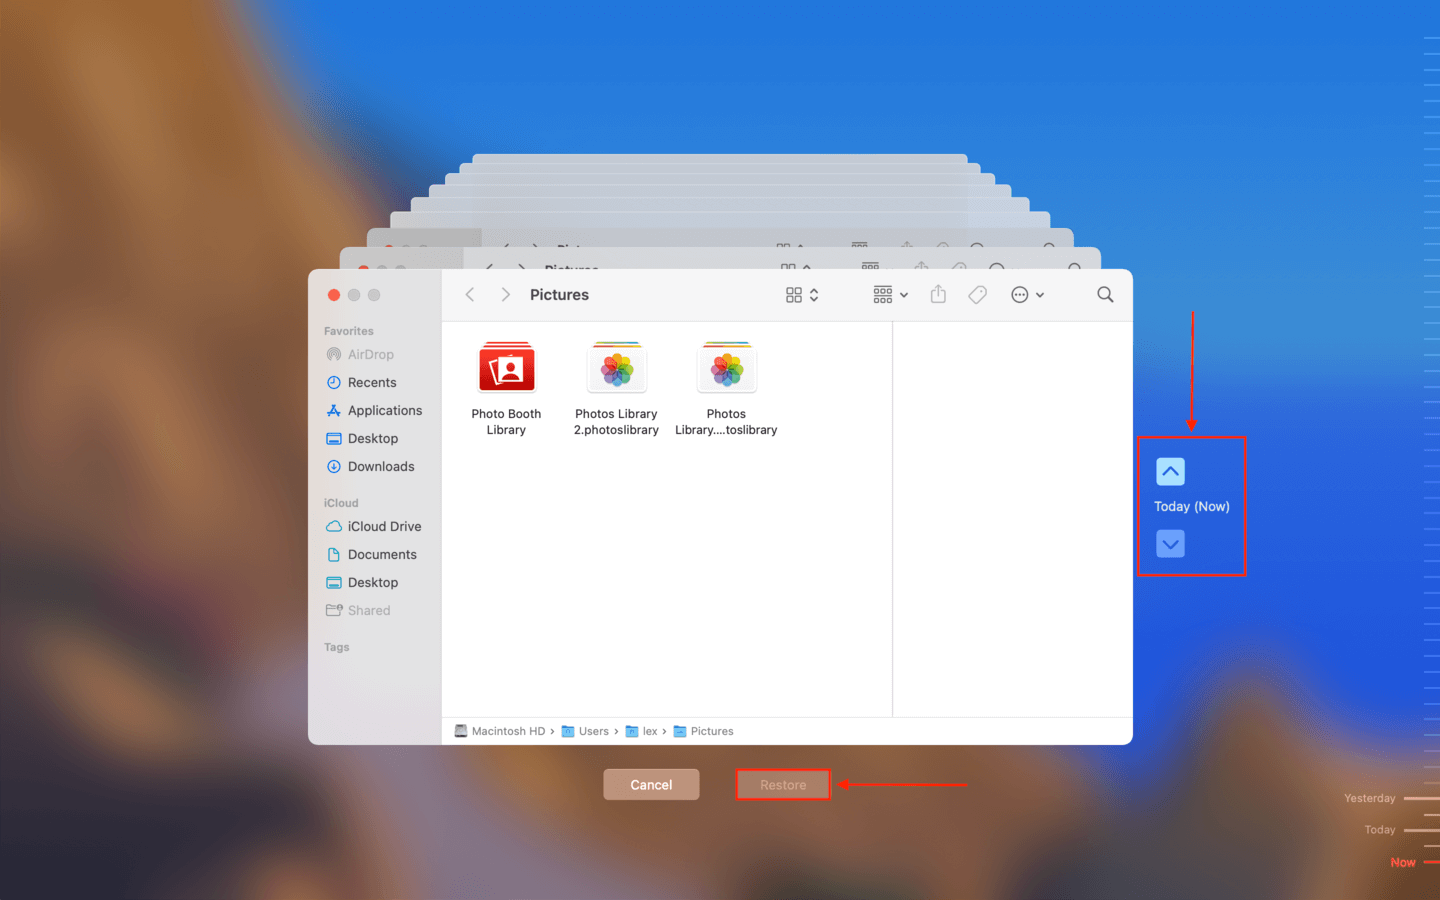
Step 6. Use the arrows on the right side of the screen to find a snapshot of your folder where the .photoslibrary files haven’t been deleted. Select your files, then click “Restore.”
Method 3: Retrieve Photos Library Backup From External Drive
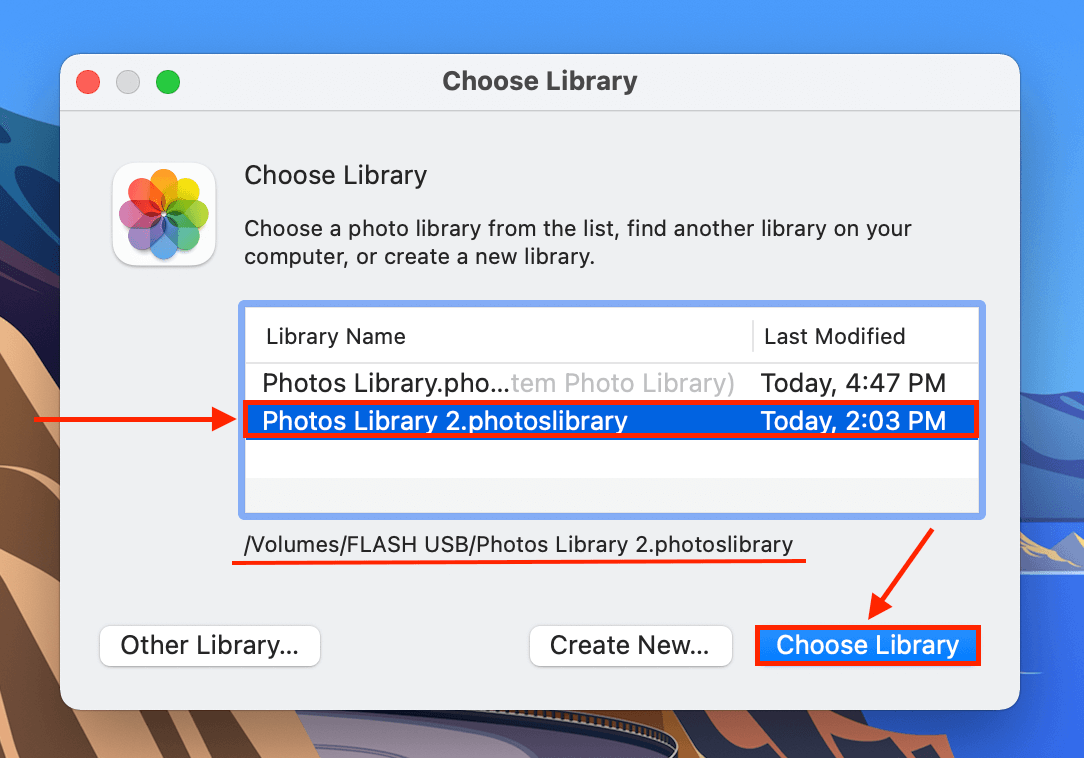
If you backed up your missing iPhoto library to an external drive and deleted the local version of your file, your library won’t show up in the Photos app unless your external drive is connceted. Using the Photos Library selection window, you can directly restore your Photo Library from your external hard drive.
Simply connect your external drive, make sure the Photos app is closed, then hold (OPTION) while reopening it. Your file should appear in the Choose Library window.
Method 4: Check iCloud For Missing Photos Library
Depending on your settings, iCloud efficiently organizes your files either for accessibility or saving storage. iCloud means well – but if you don’t know your way around your Mac yet, you might change certain settings that can cause your Photos library to go missing. Try the following fixes:
Double-Check Your Apple Account
Photo libraries are bound to Apple accounts. Open System Preferences > Apple ID, and make sure you’re logged in to the right Apple account.
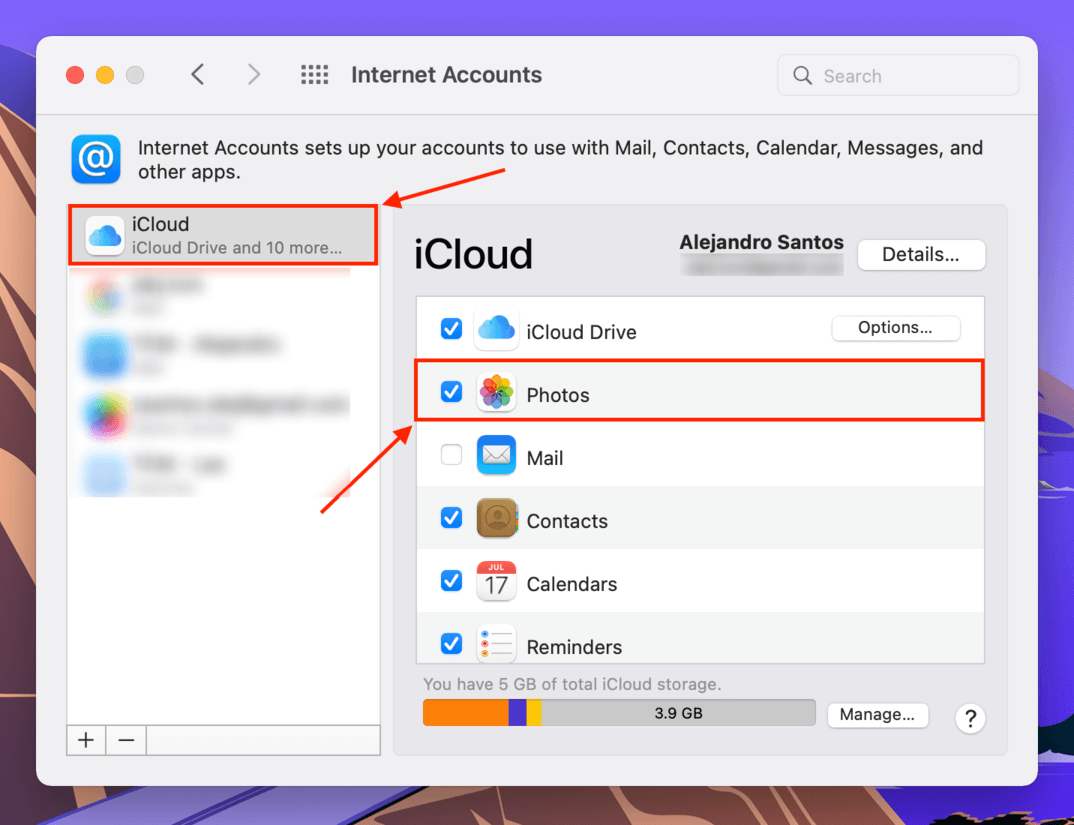
Enable iCloud Photos
Make sure iCloud Photos is enabled. Open System Preferences > Internet Accounts. Select “iCloud” on the left pane. On the right pane, make sure the checkbox beside “Photos” is ticked.
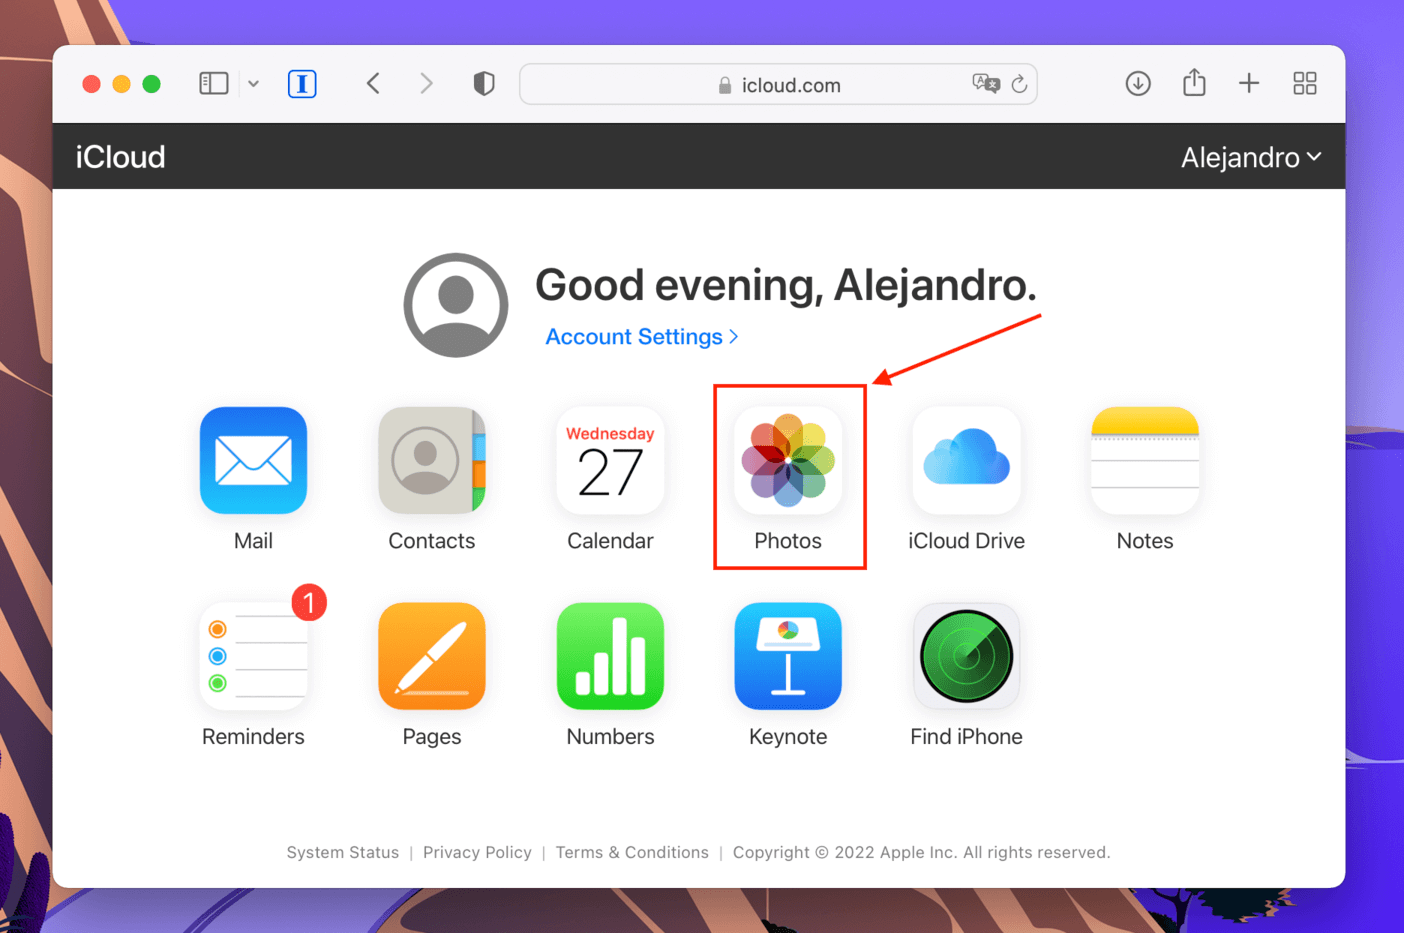
Alternatively, you leave this option off and simply download your photos from iCloud.com.
How to Repair Problematic Photos Library
As we briefly touched on earlier in the article, Photos Libraries have their own metadata to organize imported images. While you can “open” a Library in Finder, deleting, editing, and transferring files manually (outside of the Photos app) is a recipe for data loss and/or corruption. Besides that, there are other ways a Photos Library can get damaged.
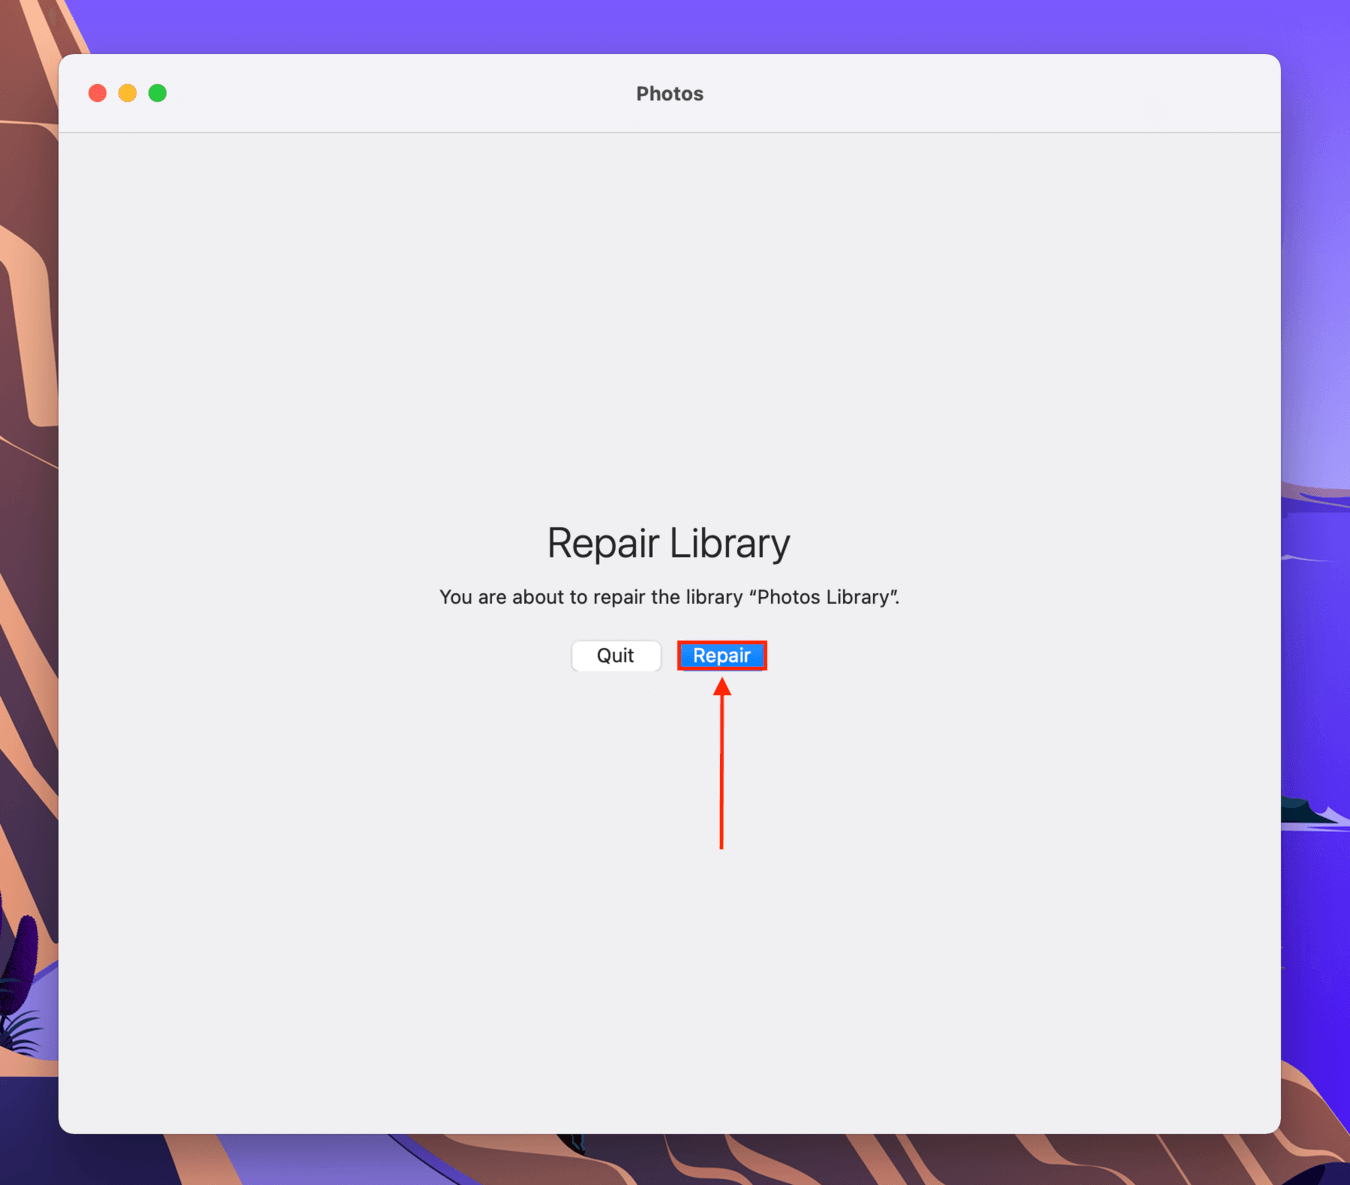
Fortunately, the Photos app has a built-in utility that spots and fixes inconsistenceis in the Library’s database. It’s called the “Photos Repair Library Tool”, and here’s how to use it:
Step 1. Make sure that the Photos app is closed. Then, hold down (CMD + OPTION) while opening the app.
Step 2. You’ll be greeted by a dialogue box prompting you to begin the repair process. Click “Repair” and enter your password if prompted. All that’s left to do now is wait.
If you enabled iCloud for your System Photos Library, it will automatically sync once the repair is complete.


