Like the Photos app, Photo Booth for Mac has a special method of storing media files. And because it acts differently from other files and folders in Finder, it’s easy for new users to mess with its organization system… Which usually leads to data loss. Your Mac can also be infected by a virus, get interrupted during read/write – or maybe you just accidentally deleted your files.
In this article, we walk you step-by-step through 3 different methods to recover deleted Photo Booth photos and videos (which we demonstrate with our own Photo Booth files). Read on.
Table of Contents
Where are Photo Booth Videos and Photos stored?
Photo Booth videos and photos are stored in Photo Booth library files. You won’t be able to view individual photos and videos through Finder, unless you export them. These library files are saved to your Pictures folder (Finder > Go > Home) by default.
If you’re an iCloud user, note that Photo Booth was not designed to interact directly with iCloud, unlike Photo Booth System Libraries. In fact, Photo Booth files are completely independent of other apps. In order to save Photo Booth files to iCloud, you first have to export them out of Photo Booth and upload them manually (or save them in an iCloud folder).
How to Recover Deleted Photo Booth Files
Depending on what you did to the file and how your Mac is set up, you’ll have different methods at your disposal to recover deleted Photo Booth files. We wrote step-by-step guides for 3 of these methods below – at least one of them should resolve your problem, unless your drive is heavily damaged. Read on.
Method 1: Restore Photo Booth Files From the Trash Folder
When you delete a Photo Booth file, it gets sent straight to the Trash folder. By default, it stays there until you delete it once more from inside the folder or you empty your Trash. Restoring a file from the Trash folder is very simple:
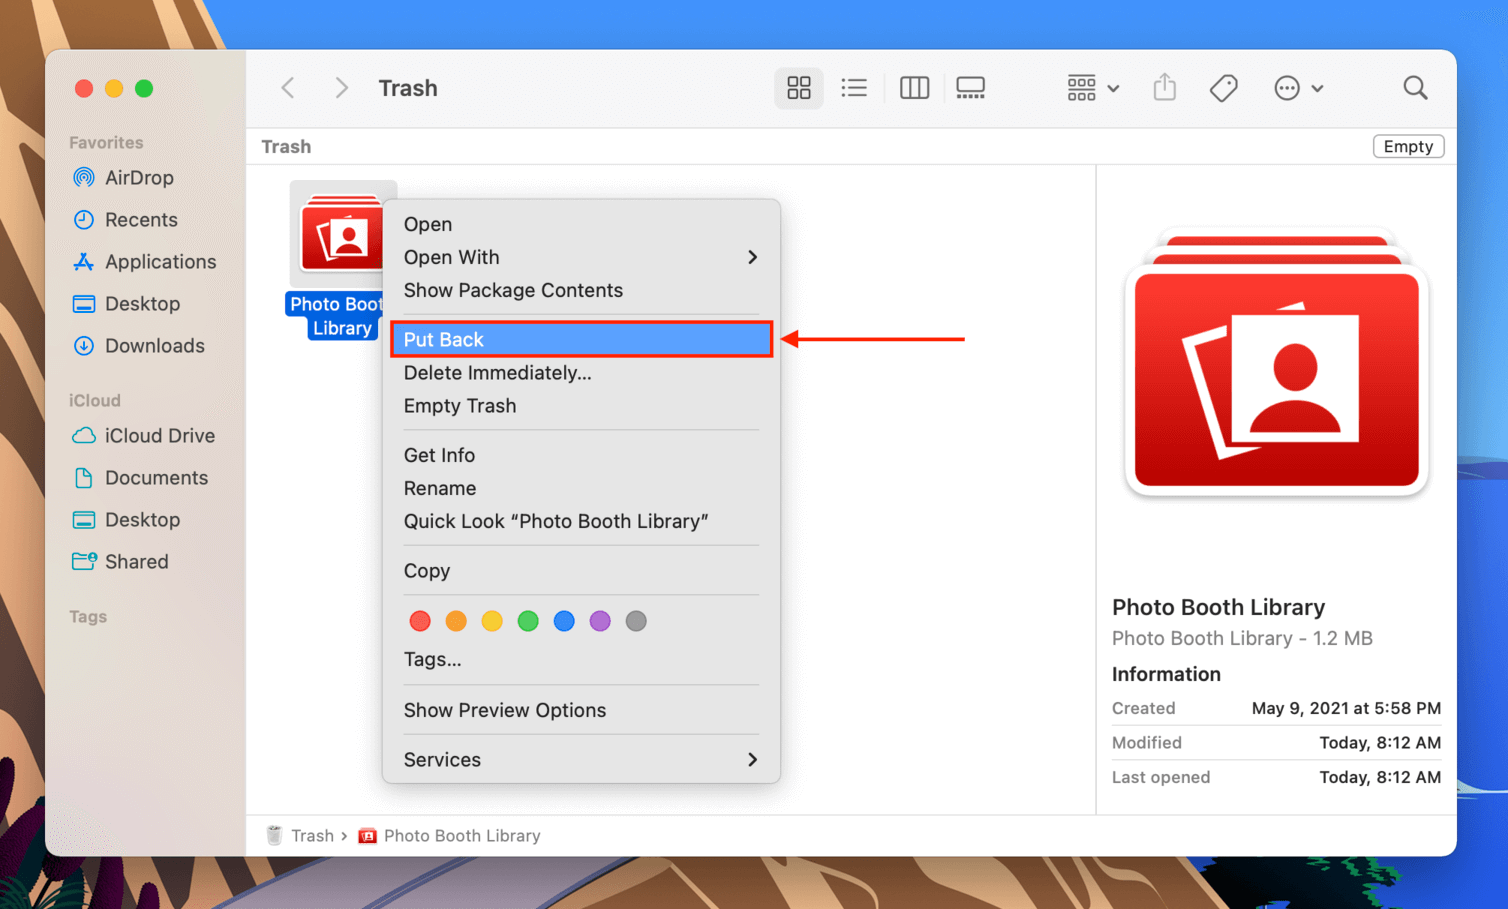
Step 1. Click the Trash icon on your dock to open it.
![]()
Step 2. Right-click your Photo Booth file, then click “Put Back.”
Method 2: Restore Photo Booth Files Using Data Recovery Software
If you emptied your Trash folder, your deleted Photo Booth files will be inaccessible from macOS Finder. However, the file still exists on your drive – it has just been marked to be overwritten by new data. In this case, the only way to recover deleted Photo Booth files is by using data recovery software. These tools can access the file system and extract the data and metadata needed to restore files.
Our tool of choice for this article is Disk Drill. We’ve used it to recover deleted files from GoPro cameras, mobile devices, storage devices, and more on this blog. It has a consistently high success rate and it’s beginner-friendly, making it perfect for step-by-step guides.
To recover deleted Photo Booth videos and photos using Disk Drill, do the following:
Step 1. Download and install Disk Drill.
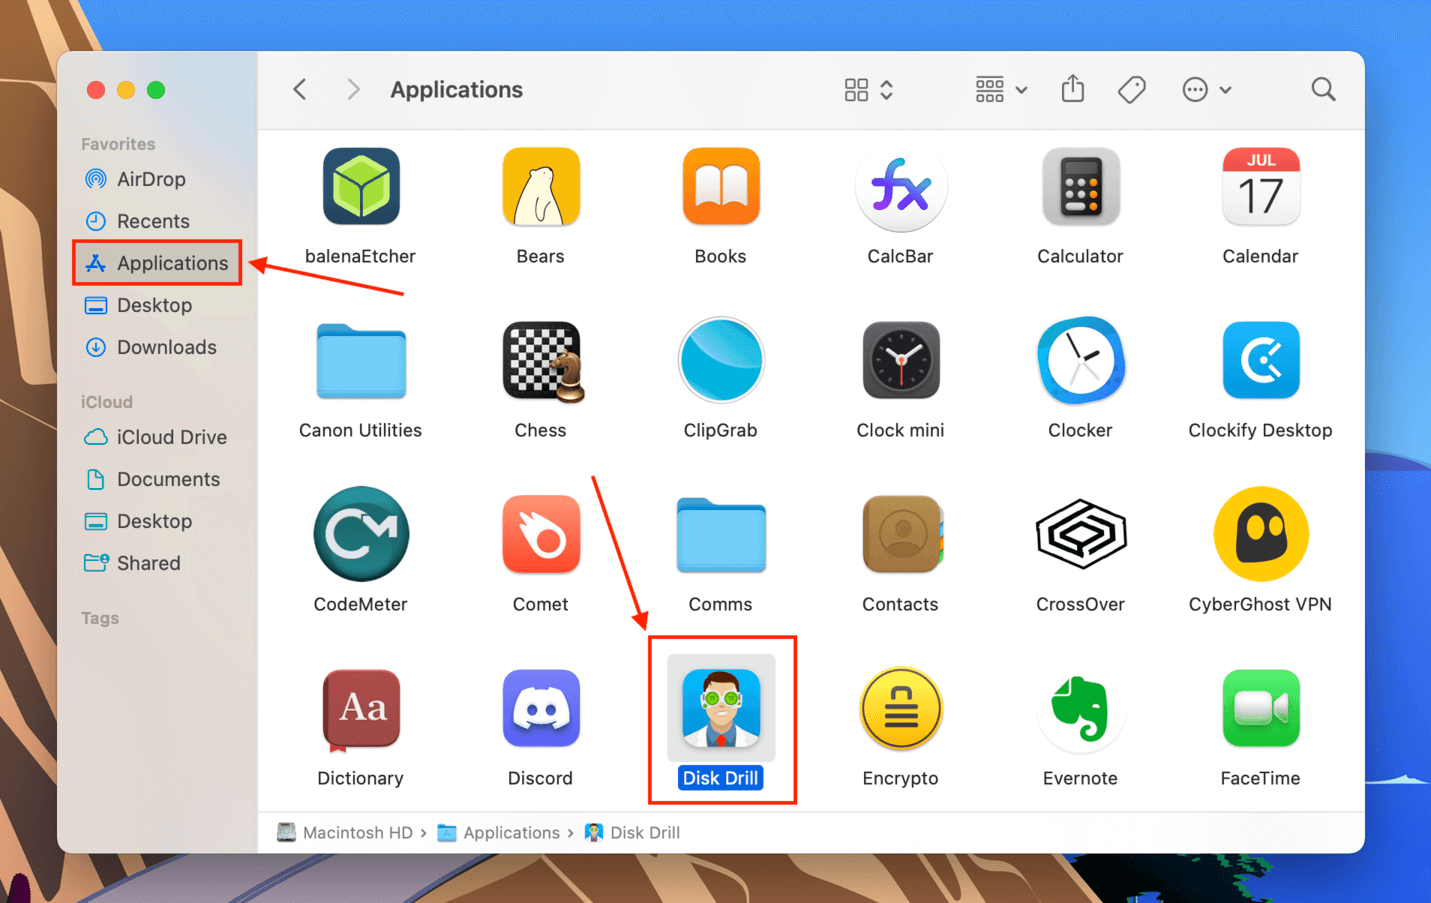
Step 2. Launch Disk Drill (Finder > Applications > Disk Drill).
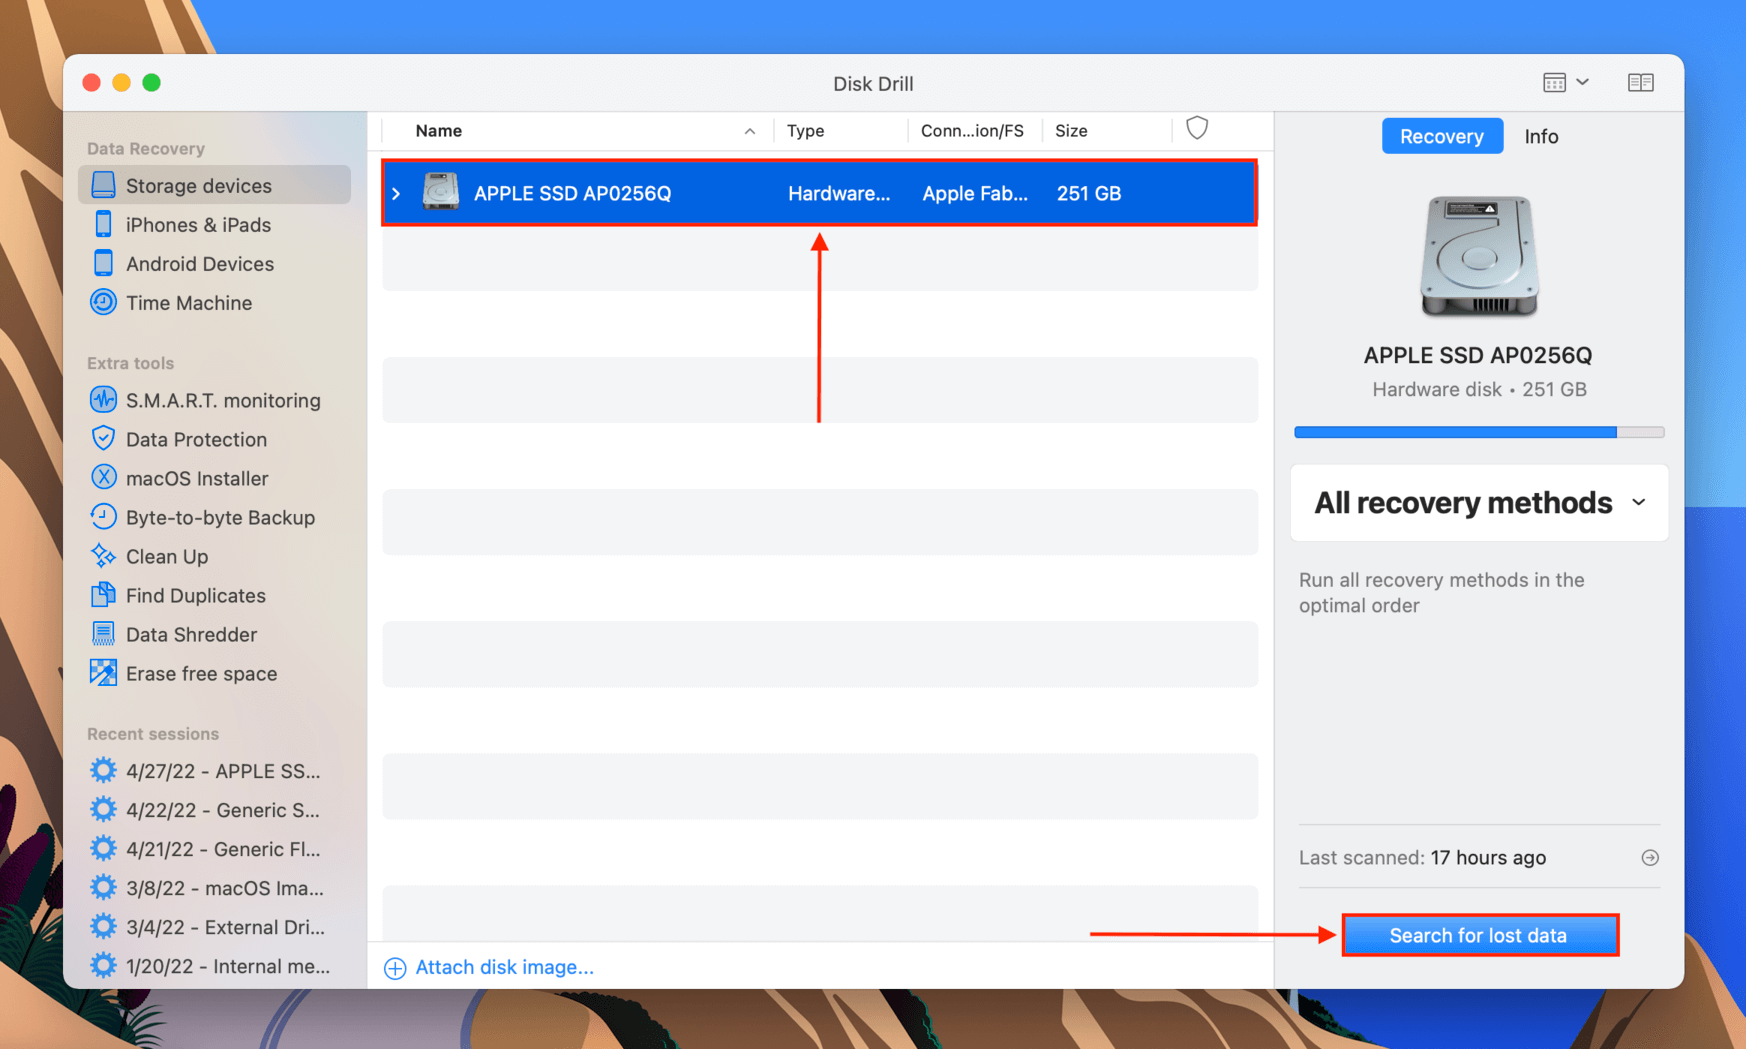
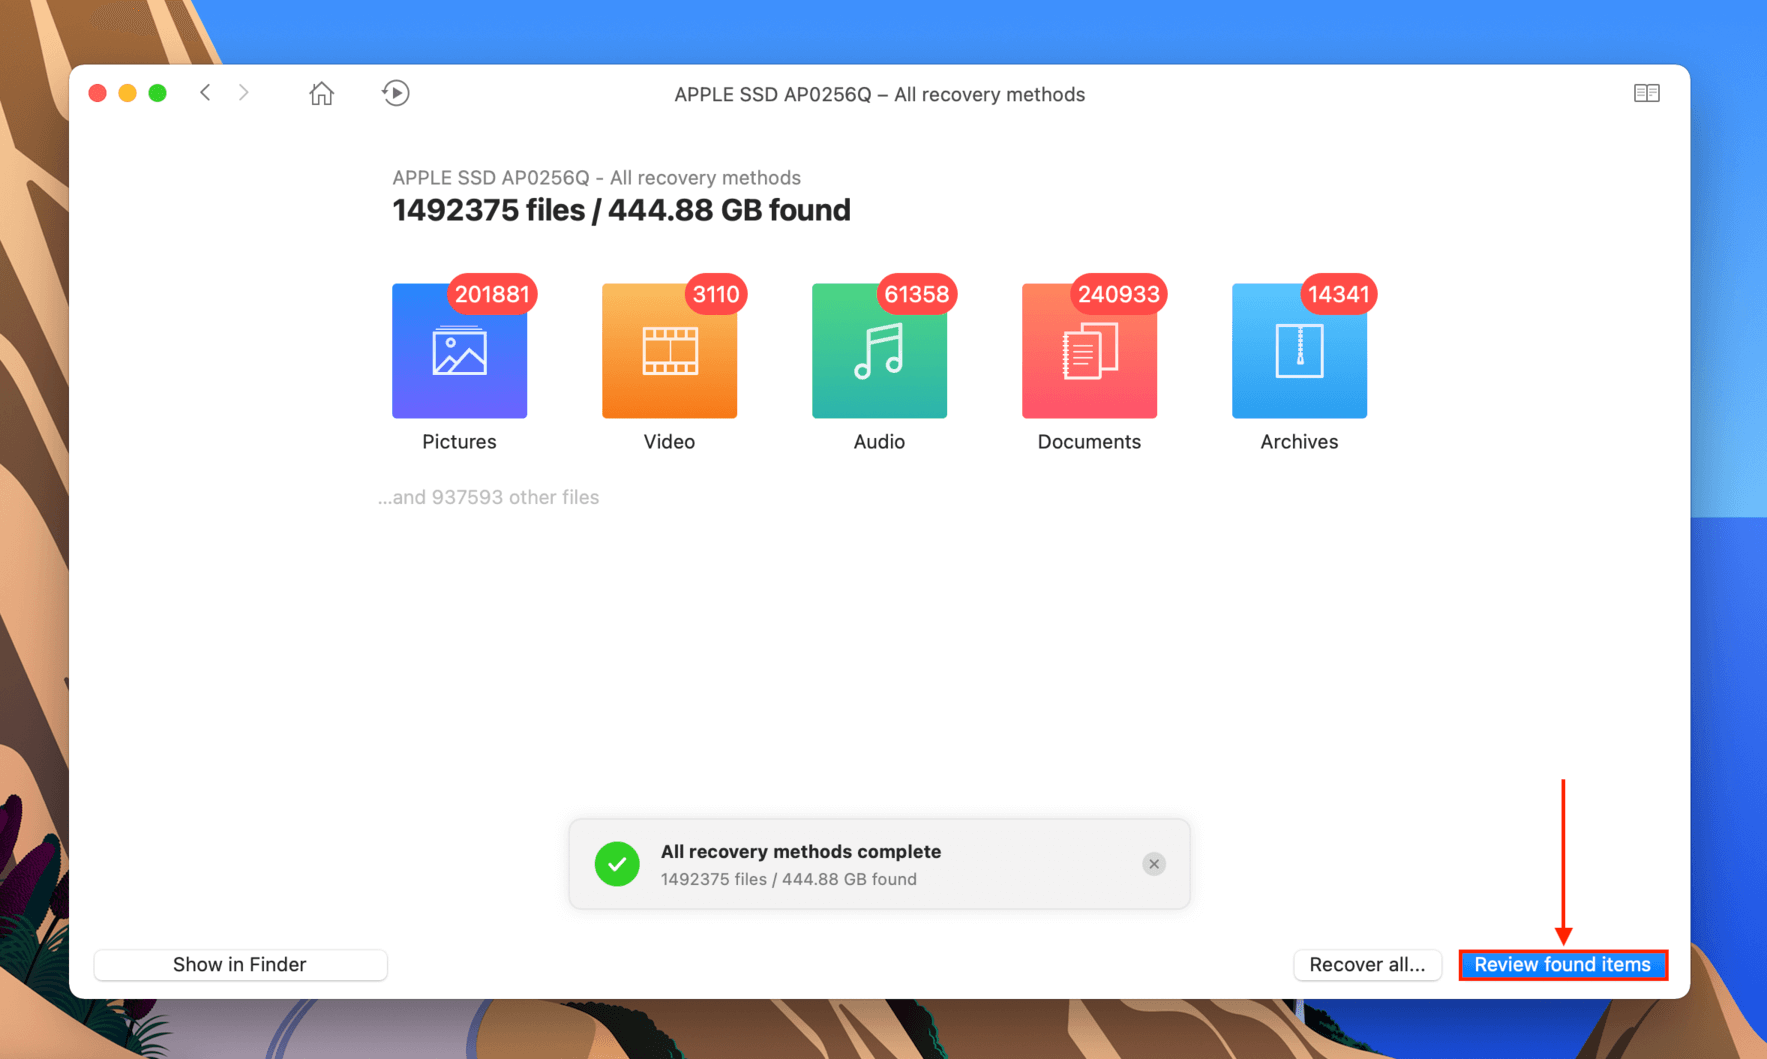
Step 3. From the list, click on your system drive (usually labeled as “Apple SSD”), then click “Search for lost data.”
Step 4. Disk Drill will now scan your system drive. Wait for the process to finish, then click “Review found items.”
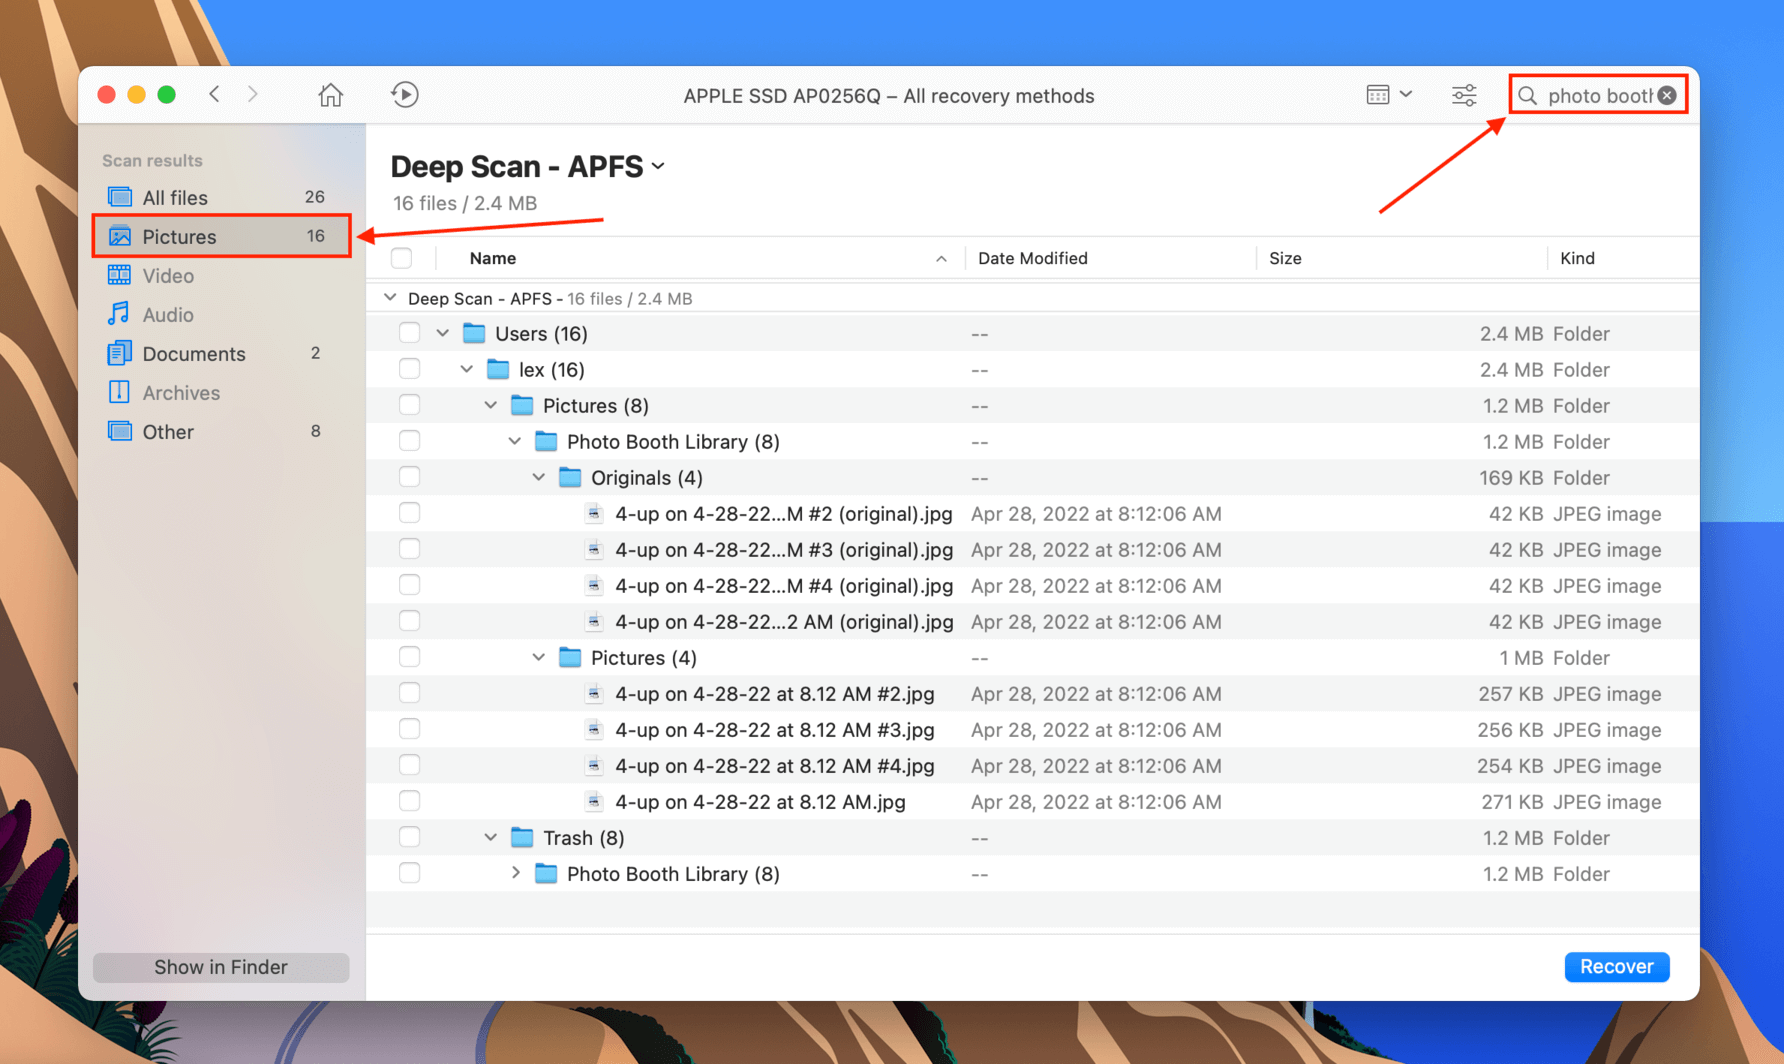
Step 5. You’ll be greeted by a list of the files Disk Drill found. You can use the search bar to look for Photo Library files or use the left sidebar to show only certain file types, such as pictures.
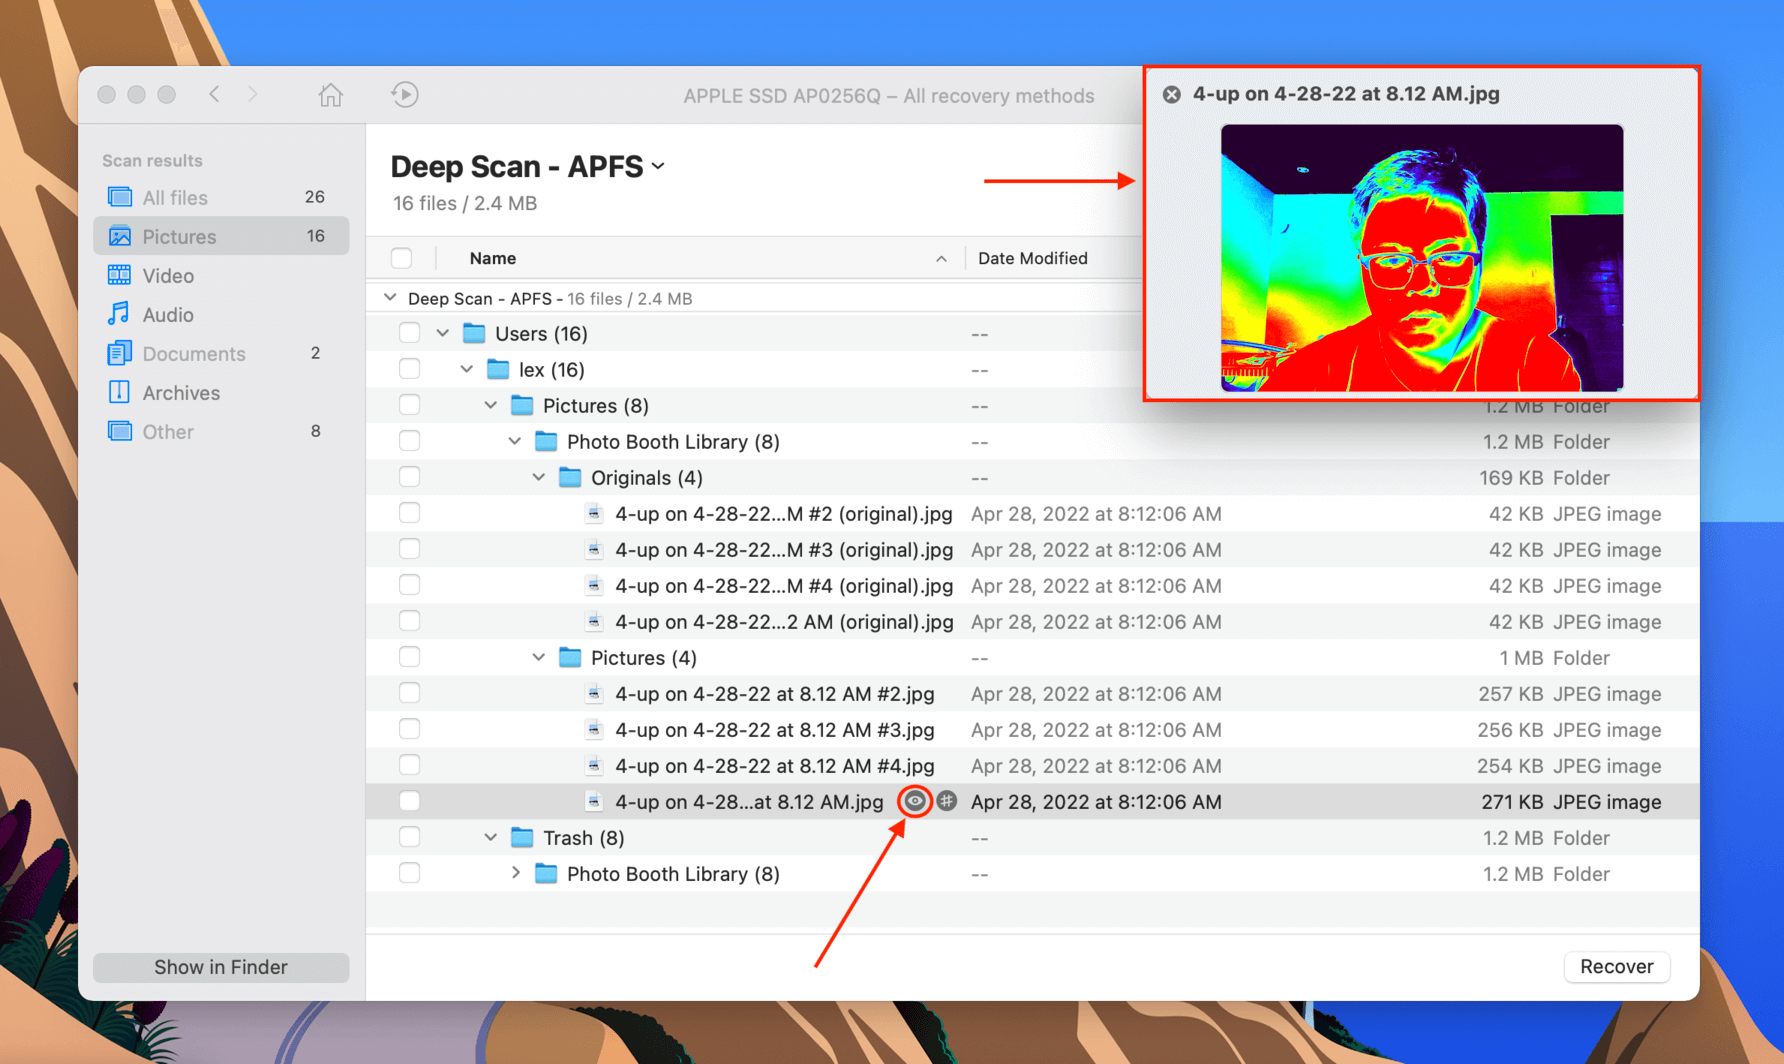
Step 6. It’s a good idea to preview your files, as data recovery software will sometimes not be able to retrieve exact file names. Fortunately, Disk Drill can display a library’s original media. For example, you can restore MOV files directly from the original Photo Booth video location.
To preview a file, hover your mouse pointer to the right of a file name and click the eye button that appears.
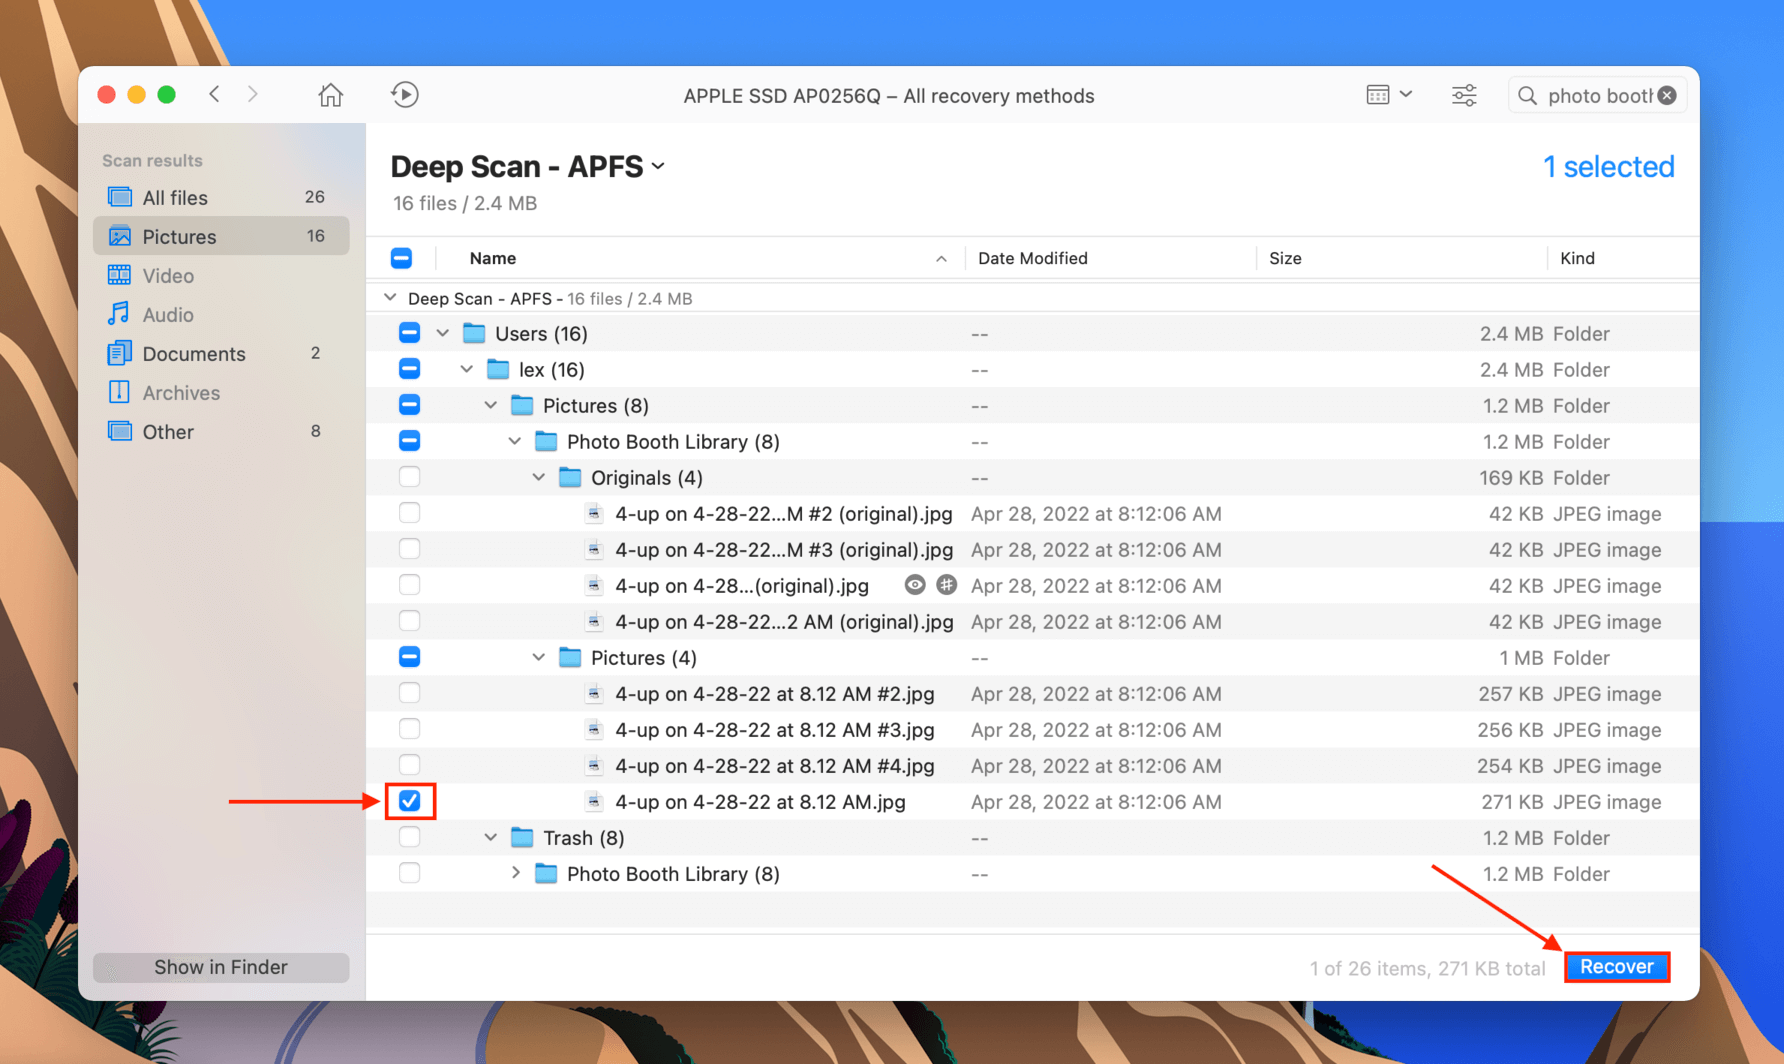
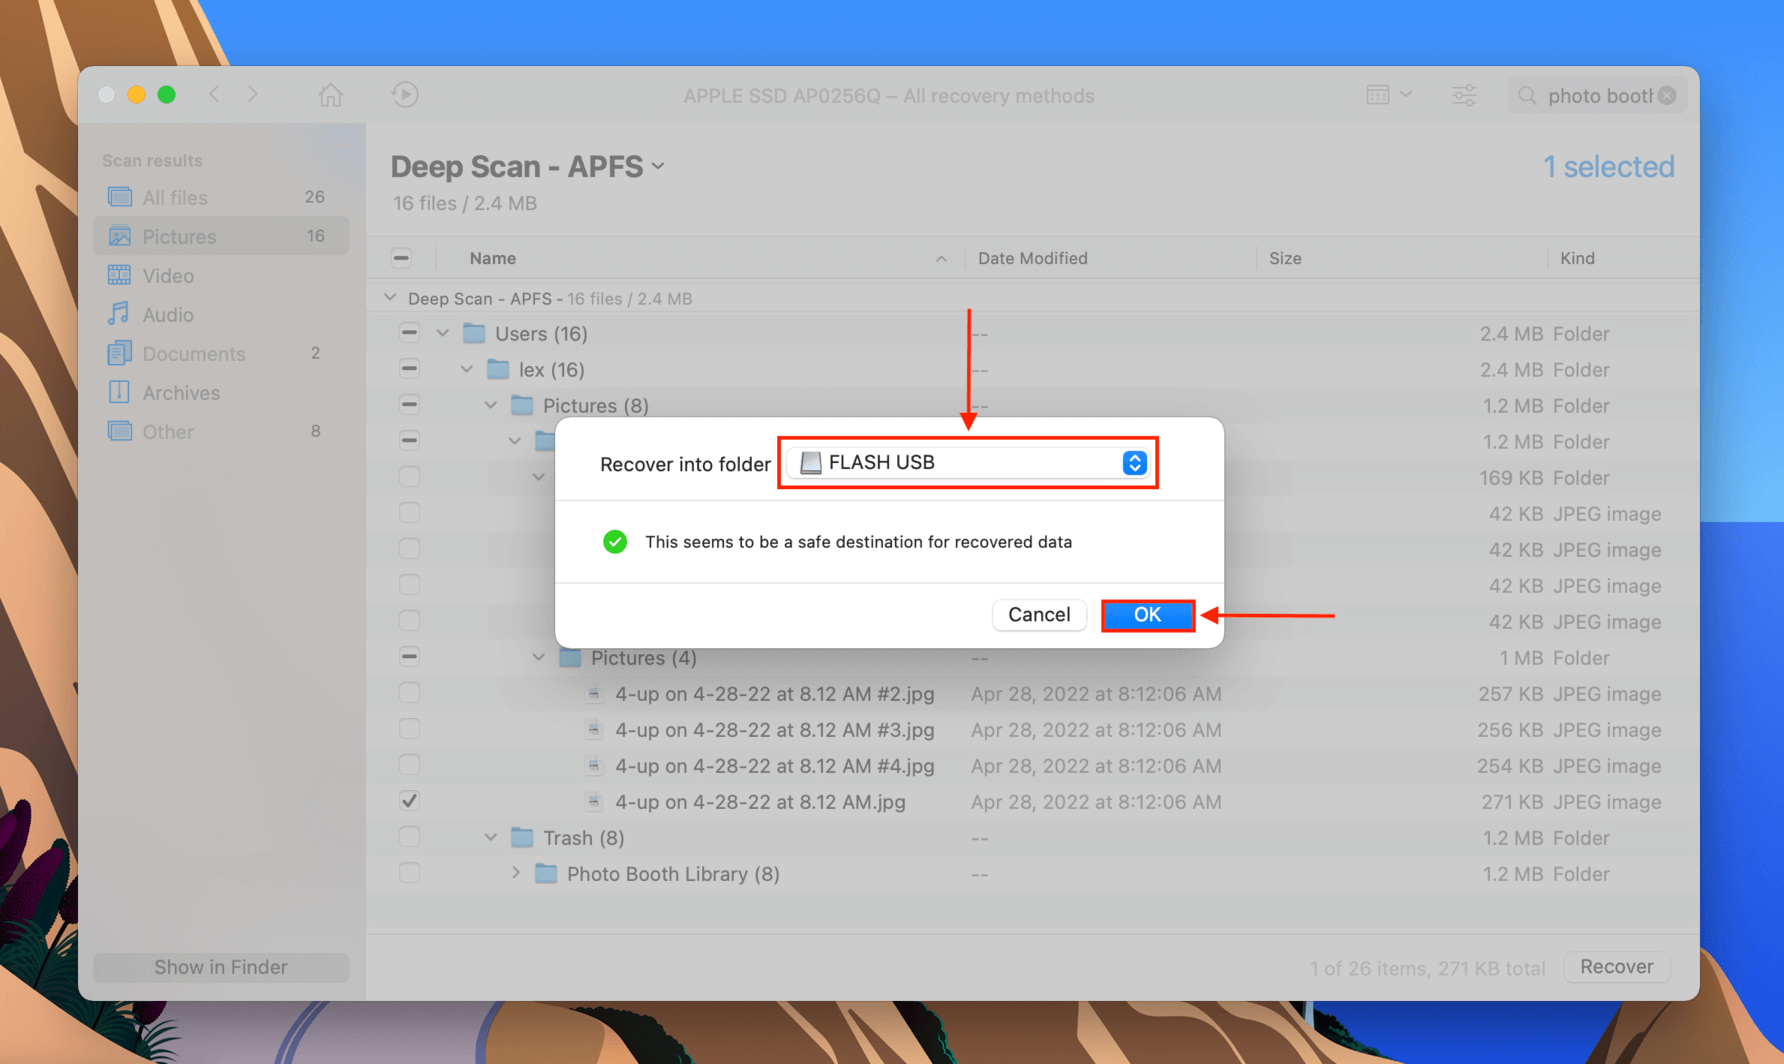
Step 7. Use the checkboxes in the left-most column to select the files you want to recover. Then, click “Recover.”
Step 8. On the window that appears, use the dropdown menu to choose a destination for the files Disk Drill recovers. If you’re restoring multiple files, save them to a USB to avoid overwriting data. Then, click “OK.”
Method 3: Recover Photo Booth Files From a Time Machine Backup
Time Machine is a powerful macOS backup utility that automatically captures versions of folders and files at different points in their timeline. In this case, we can access a snapshot of your Pictures folder and restore a version of it where your Photo Booth files haven’t been deleted. Here’s how:
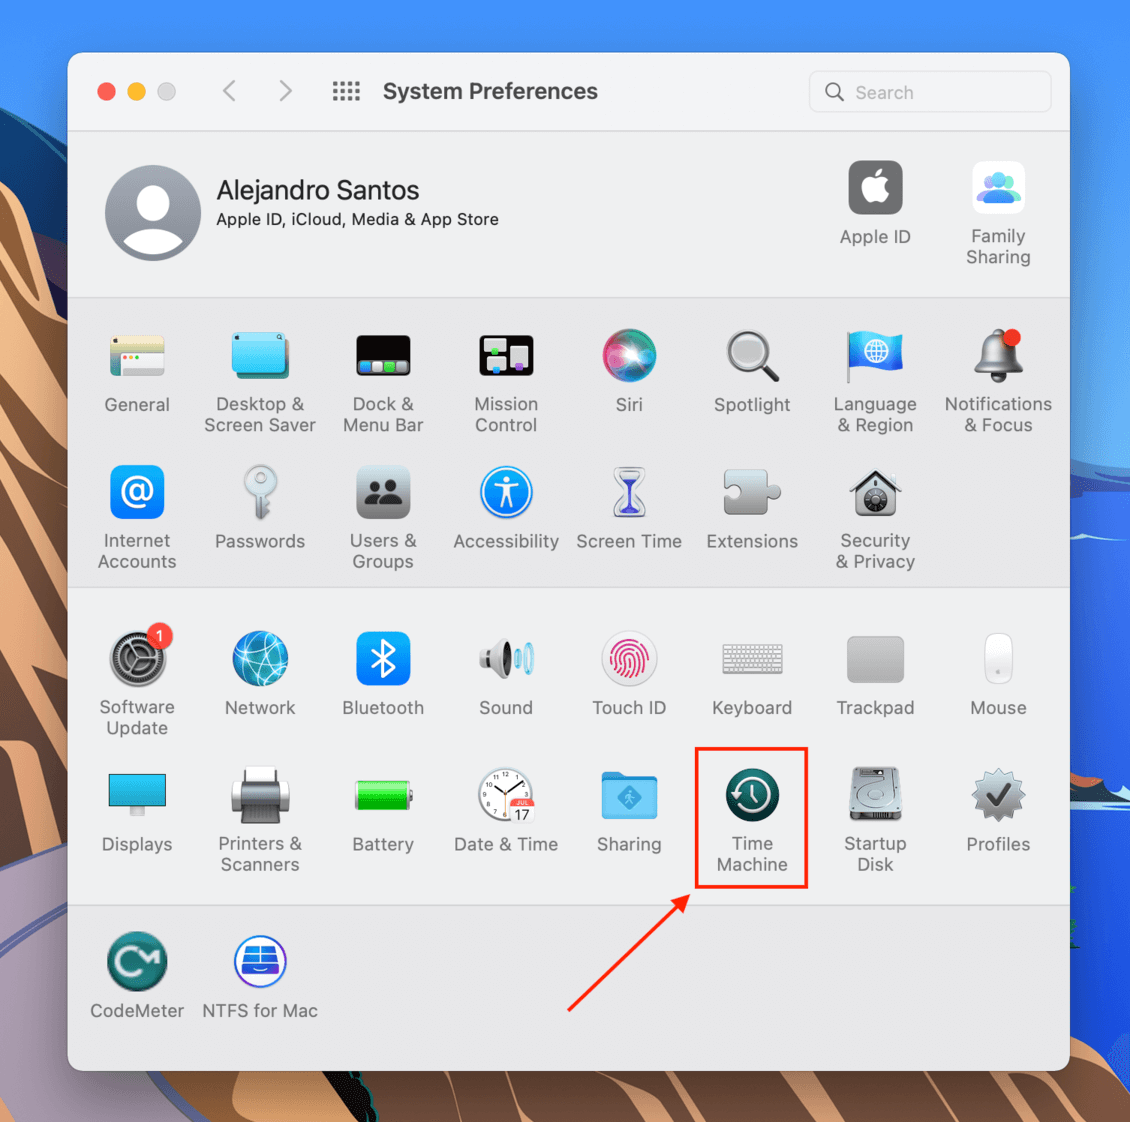
Step 1. First, enable the Time Machine button on the menu bar. Open System Preferences > Time Machine.
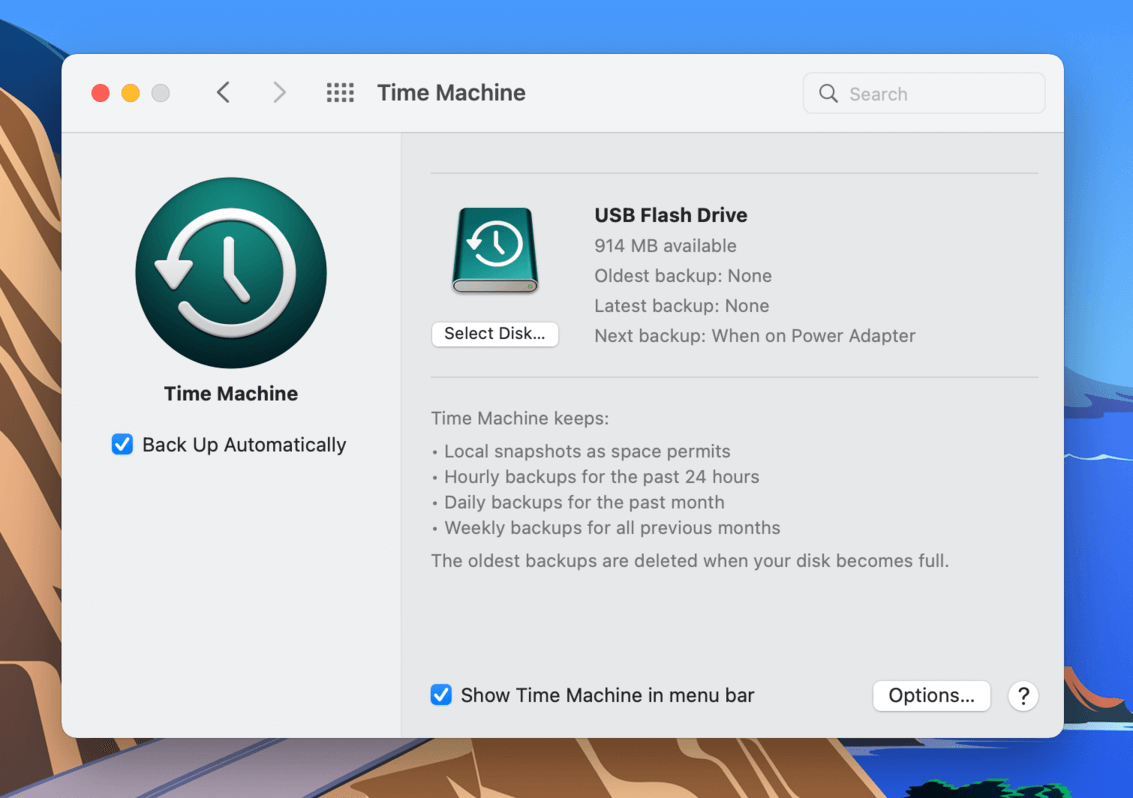
Step 2. Tick the box beside “Enable Time Machine in menu bar” to enable this setting. Then, close the window.
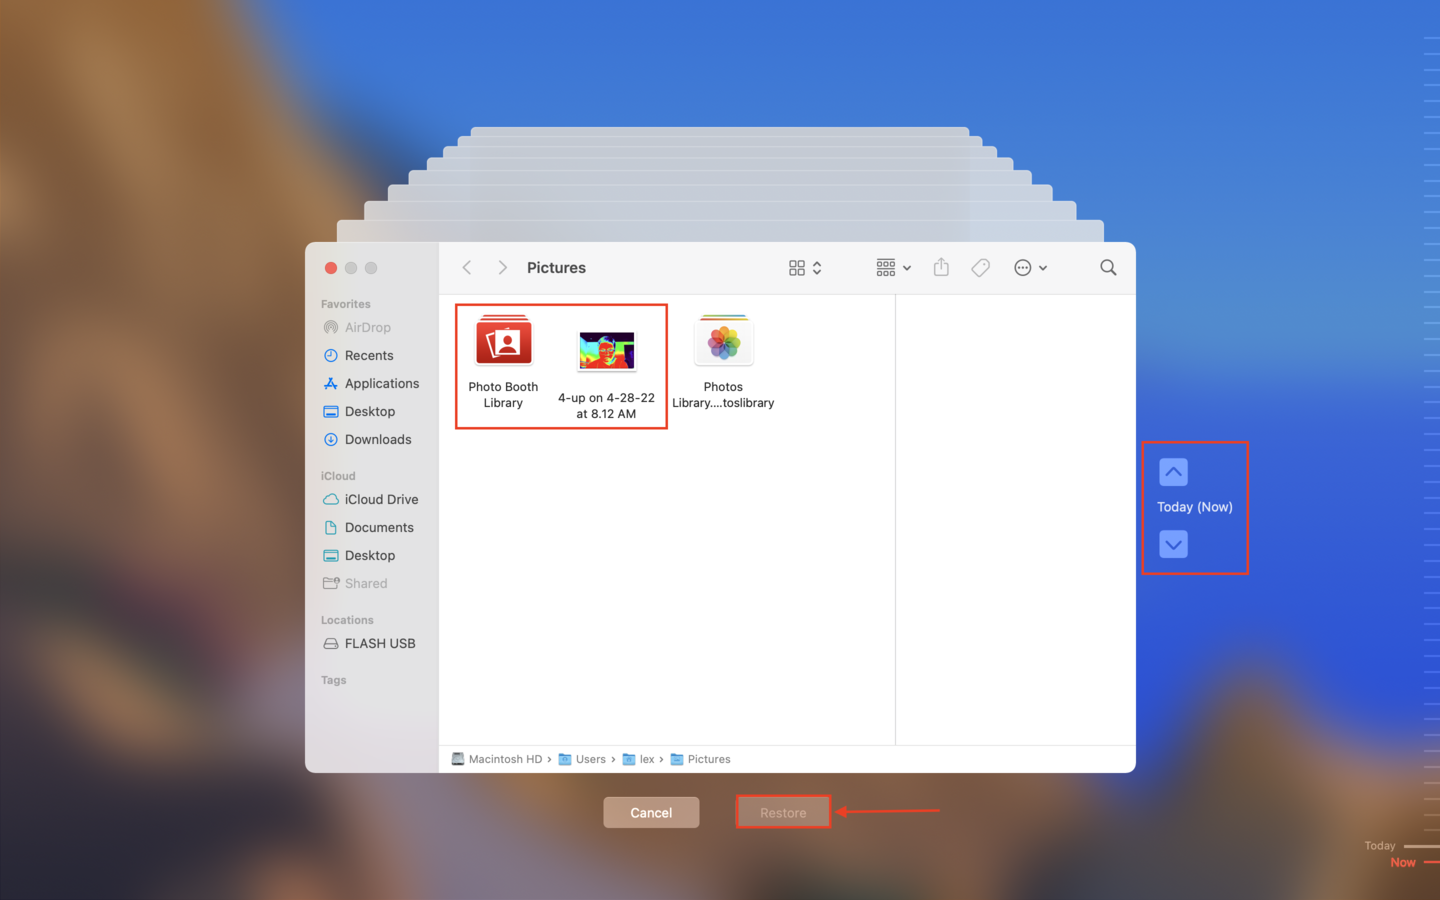
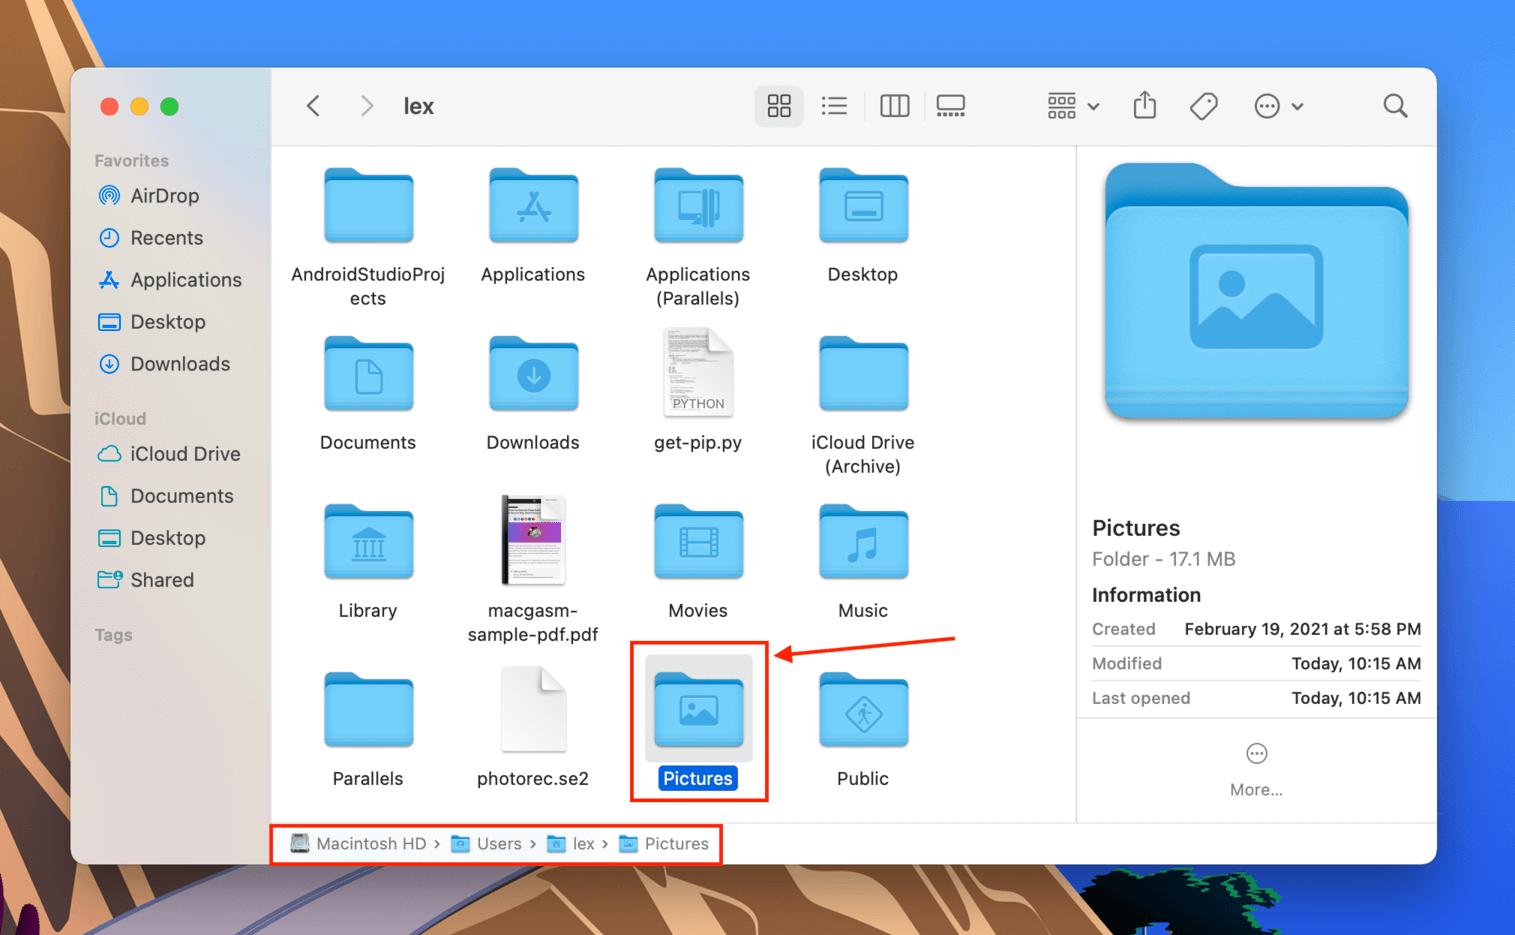
Step 3. Open Finder, then navigate to your Pictures folder (Finder > Go > Home).
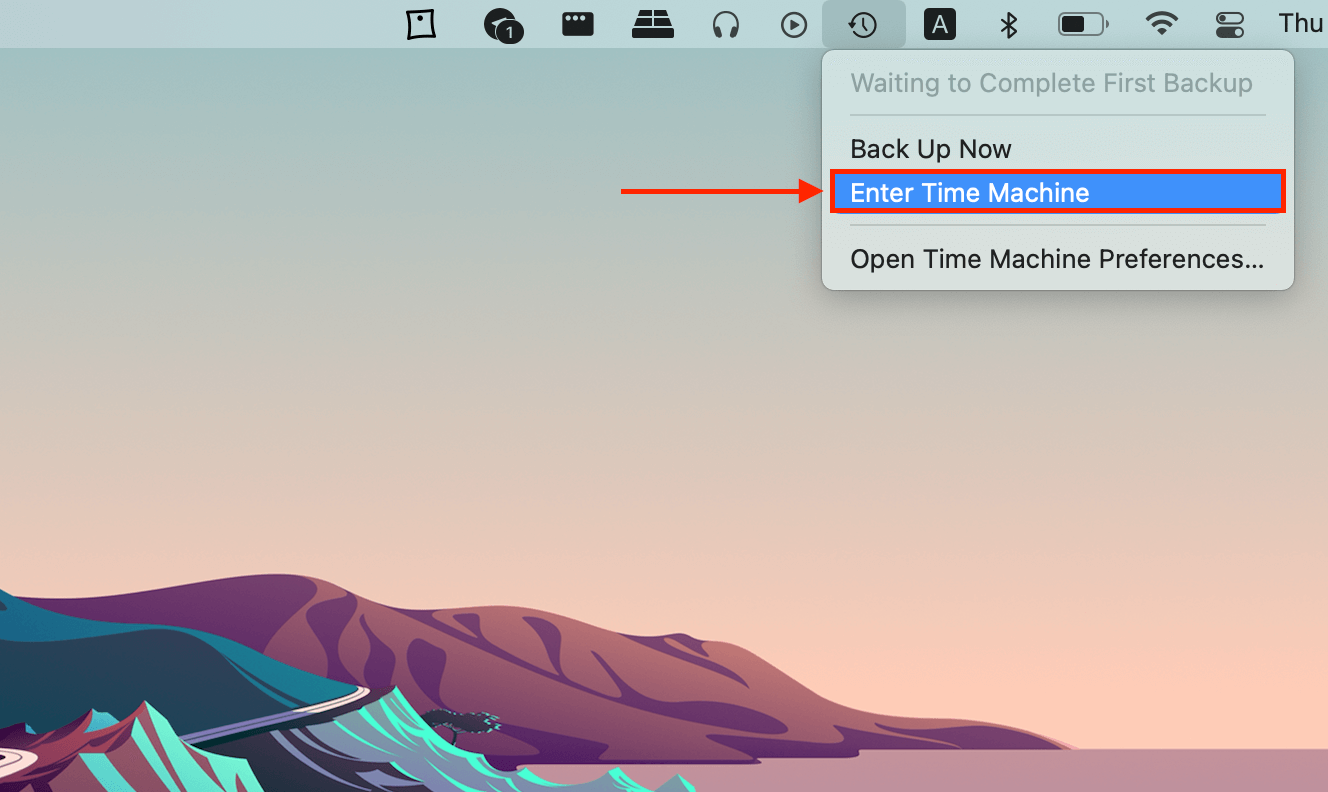
Step 4. Click the Time Machine button in the menu bar, then click “Enter Time Machine.”
Step 5. Use the arrows to browse through snapshots of your Pictures folder. Once you find your files, highlight them and click “Restore.”