Can’t find your songs in your library? iTunes deleted songs? It happens often and there are a couple of reasons why. More importantly, depending on how you set up your Mac, iCloud, and even iPhone – there are different ways you can restore them.
This article covers 5 methods to recover deleted songs from iTunes on a Mac. As a bonus, we added 2 additional methods to restore them using your iPhone if you don’t have access to a computer. Read on.
Table of Contents
Why iTunes May Delete Music on Mac and iPhone
The Music app or iTunes deletes music on either device for different reasons: syncing the wrong library, to save storage, or as a behavior enabled by certain settings. Figure out which one applies to you:
- Sync Library. If you enabled Sync Library, that means that any changes made to your music library are reflected in all the devices using the same account. So if you delete a song on your iPhone, it will disappear from your Mac as well.
- Optimize Storage. The Optimize Storage setting will remove songs you haven’t played in a while to make room for new ones. You can choose a minimum number of songs where your iPhone will start “optimizing.”
- Wrong Computer. If you connect your iPhone to another computer with its own iTunes library, it syncs that library to your device. Reconnect your iPhone to the computer that contains your iTunes Library.
- Accidental Deletion. Maybe you accidentally deleted your songs from the iTunes library and forgot. It happens.
- Updated iTunes and Lost Music. If you upgraded to macOS Catalina or higher, your library has been moved to the Music app. Otherwise, it could be a faulty update that deleted your songs, but they should still appear in your purchase history.
How to Recover Deleted Songs from iTunes on Mac
The methods you can try depend on how you have your music library and your Mac set up. At least one method below will let you get back your music deleted from iTunes even if you don’t have any backups.
Method #1: Redownload Purchased Music
Apple keeps a purchase history of your music which you can access from any device if they are logged into the same account. Here’s how to do it:
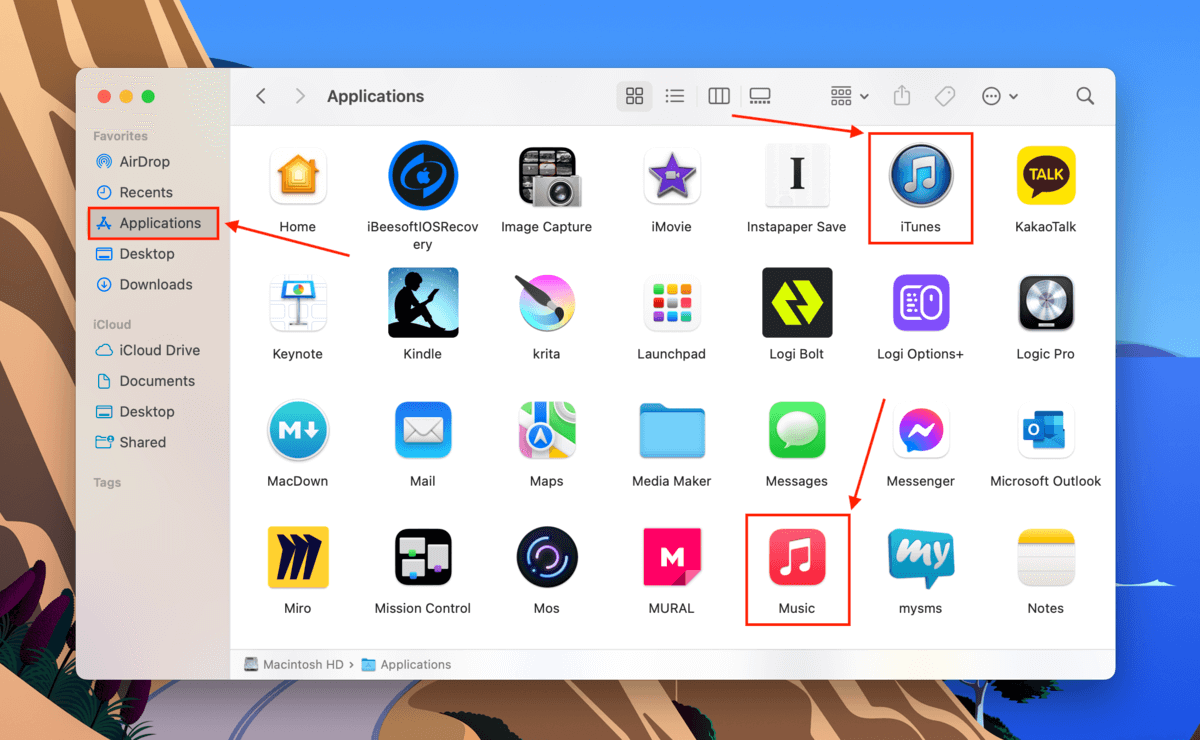
Step 1. Launch iTunes or the Music app. You can find both in the Finder > Applications folder.
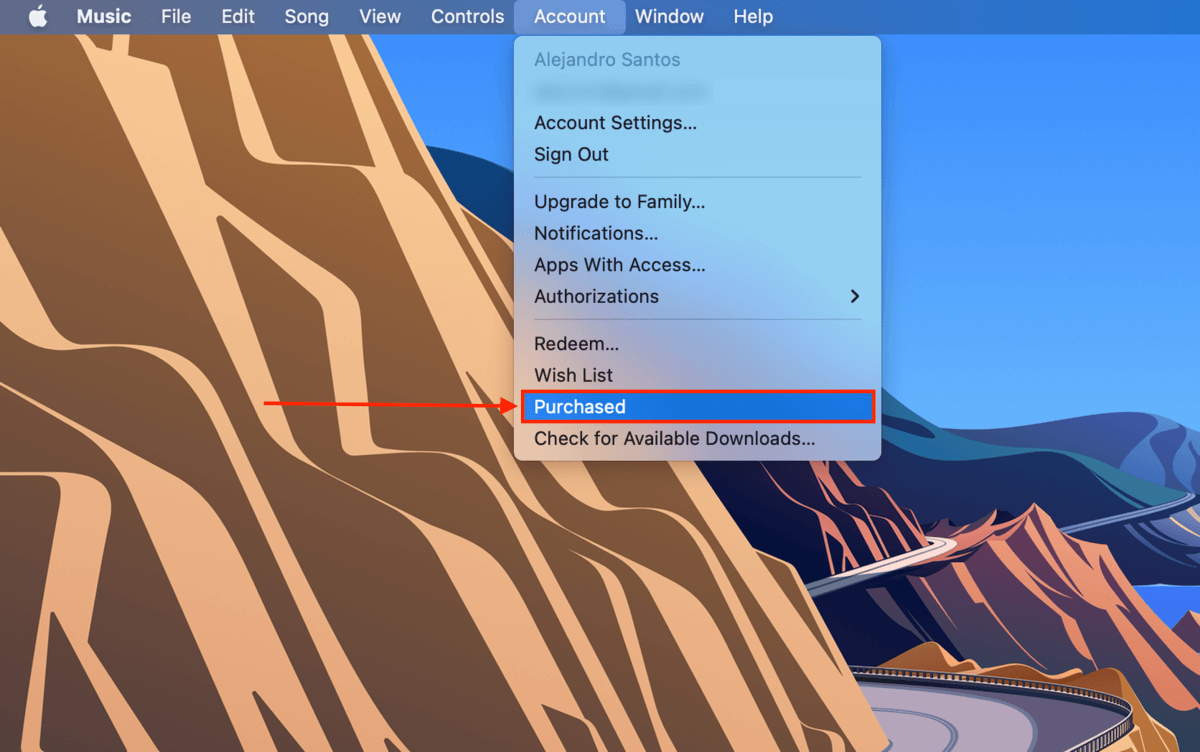
Step 2. On the Apple menu bar, click “Account” > “Purchased.”
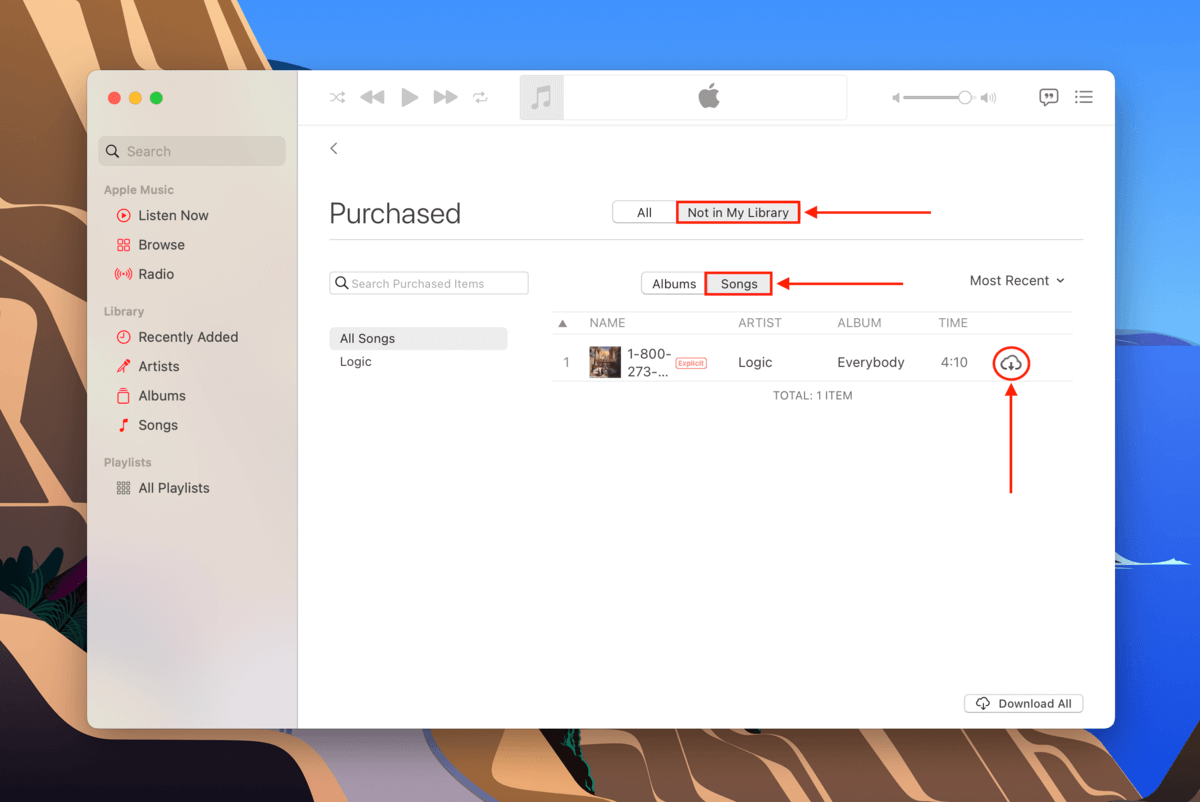
Step 3. Click the “Not in My Library” and “Songs” tabs. Then click the download button on the songs you want to restore to your library.
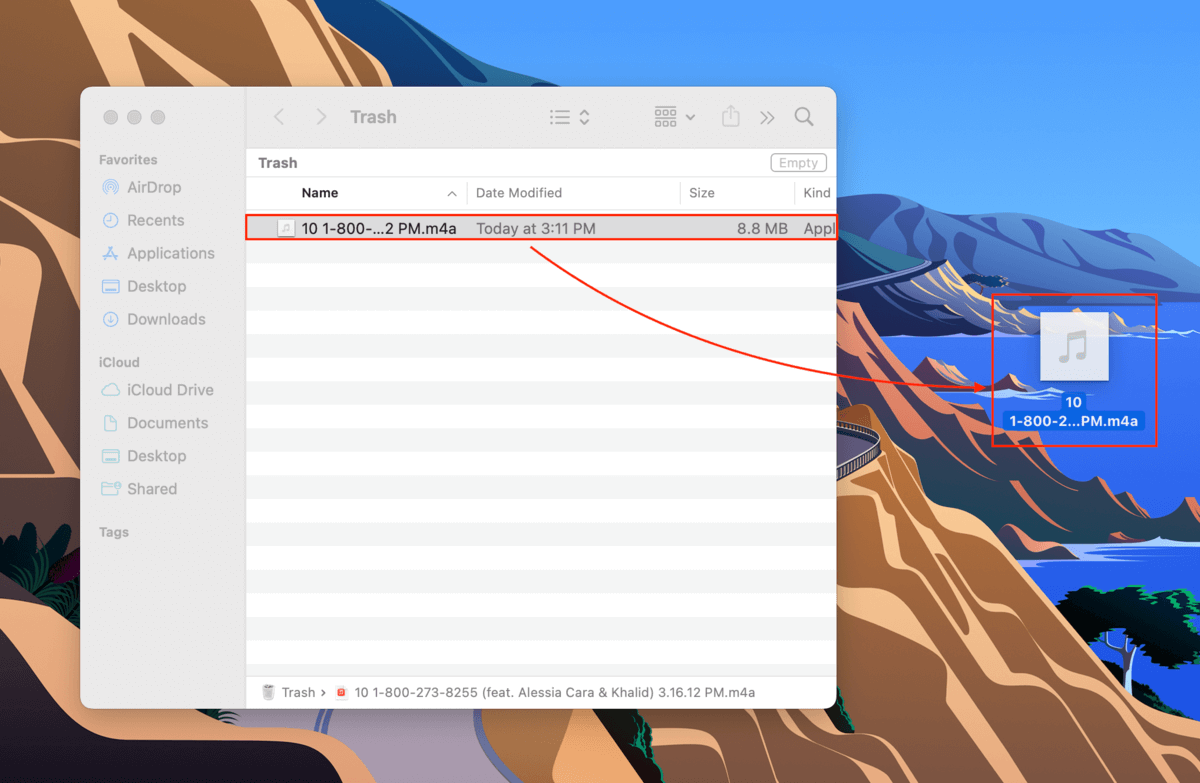
Method #2: Restore Your Songs From the Trash Folder
When you delete a song from your library within iTunes or the Music app, you’re prompted to either keep the file in the app’s “Media” folder or move it to the Trash folder. It’s easy to miss this prompt if you aren’t paying attention.
To restore deleted songs from iTunes from the Trash folder:
Step 1. From the Trash folder, drag your song file to your desktop.
Step 2. Open the iTunes or Music app and click File > Import…
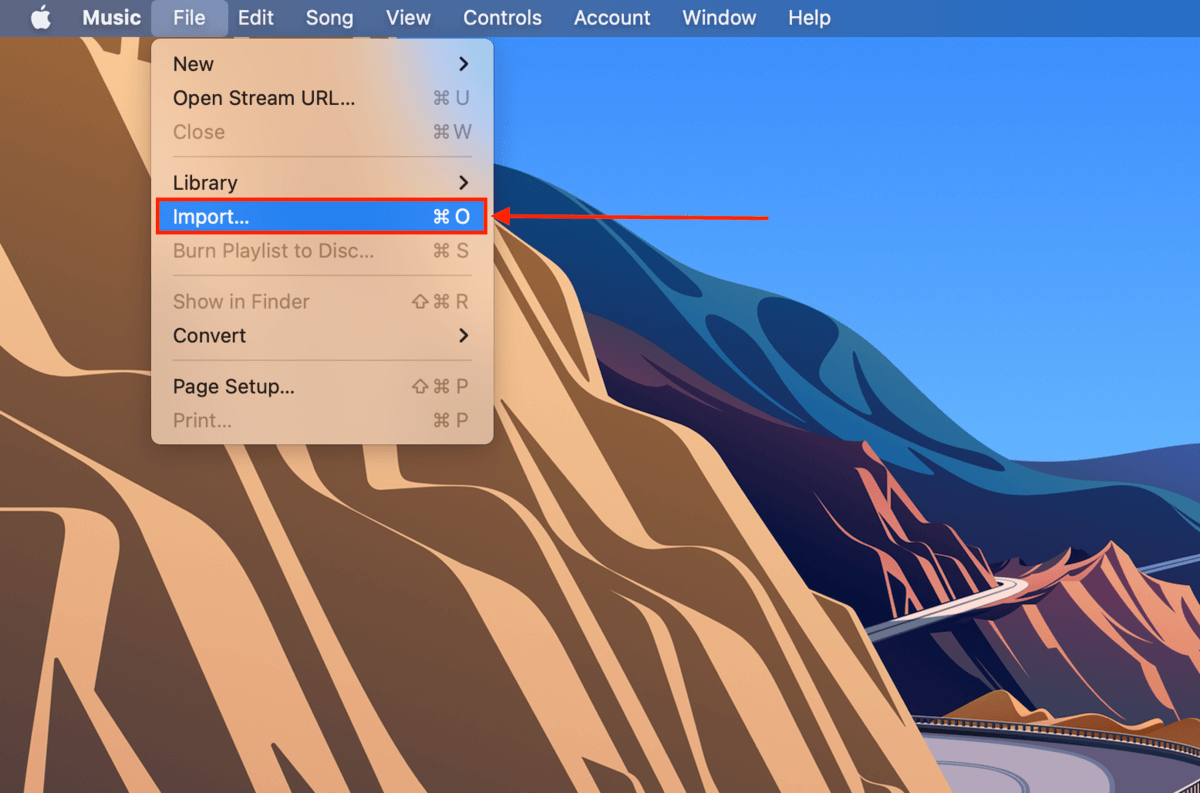
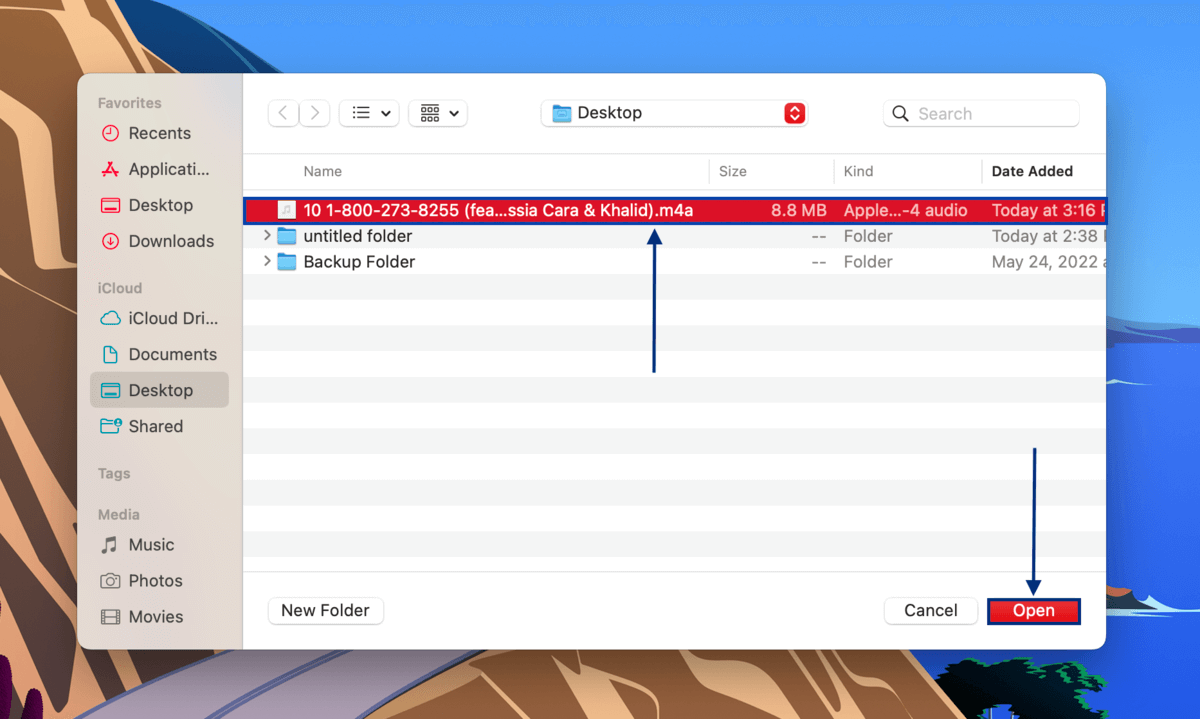
Step 3. Select your music file and click “Open” to add it back to your library.
Method #3: Restore Your Deleted Songs Using Data Recovery Software
If you emptied your Trash folder, the song is removed from Finder and marked for deletion by the operating system. However, it won’t actually be erased until it gets overwritten by new data. Before then, we can still recover it using data recovery software. This is the best method to use if you don’t back backups from Time Machine, iTunes, or iCloud.
Disk Drill is a data recovery software that can retrieve deleted songs from iTunes directly from the file system. It has a high success rate and a user-friendly GUI, which makes it easier for our readers to follow along. Here’s how to use it to recover deleted music on iTunes:
Step 1. Download and install Disk Drill.
Step 2. Launch Disk Drill (Finder > Applications).

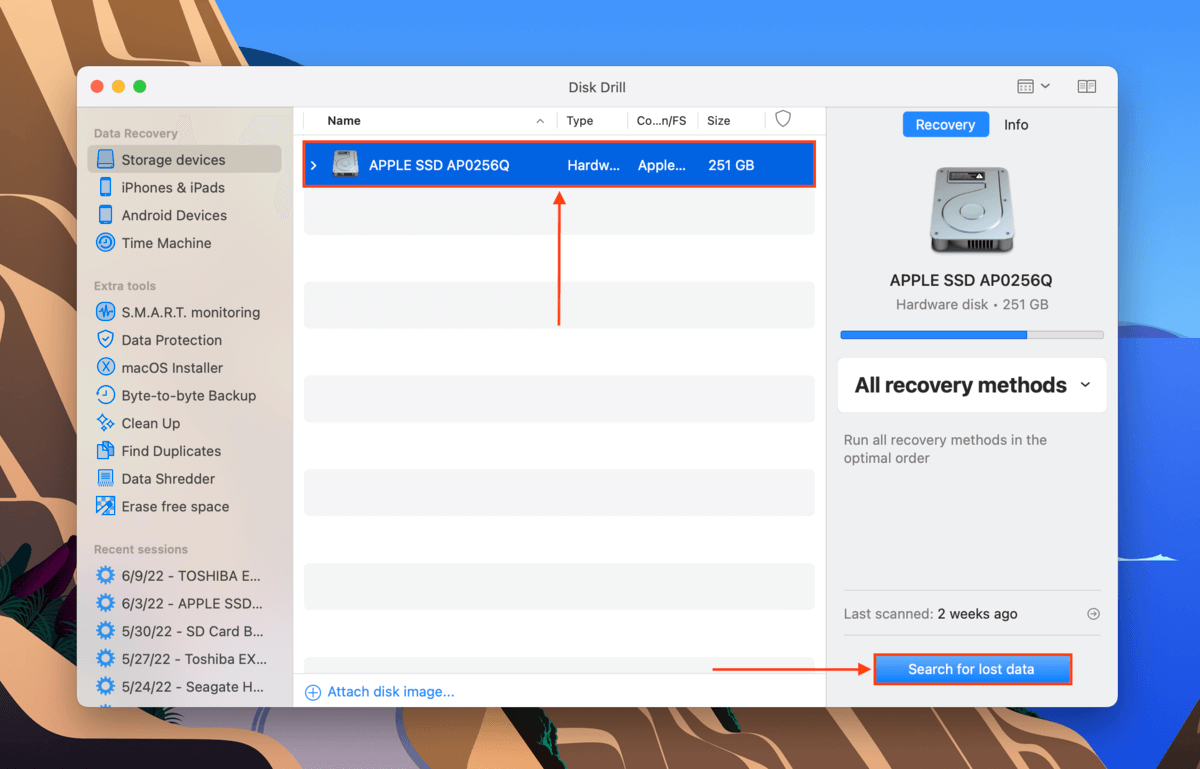
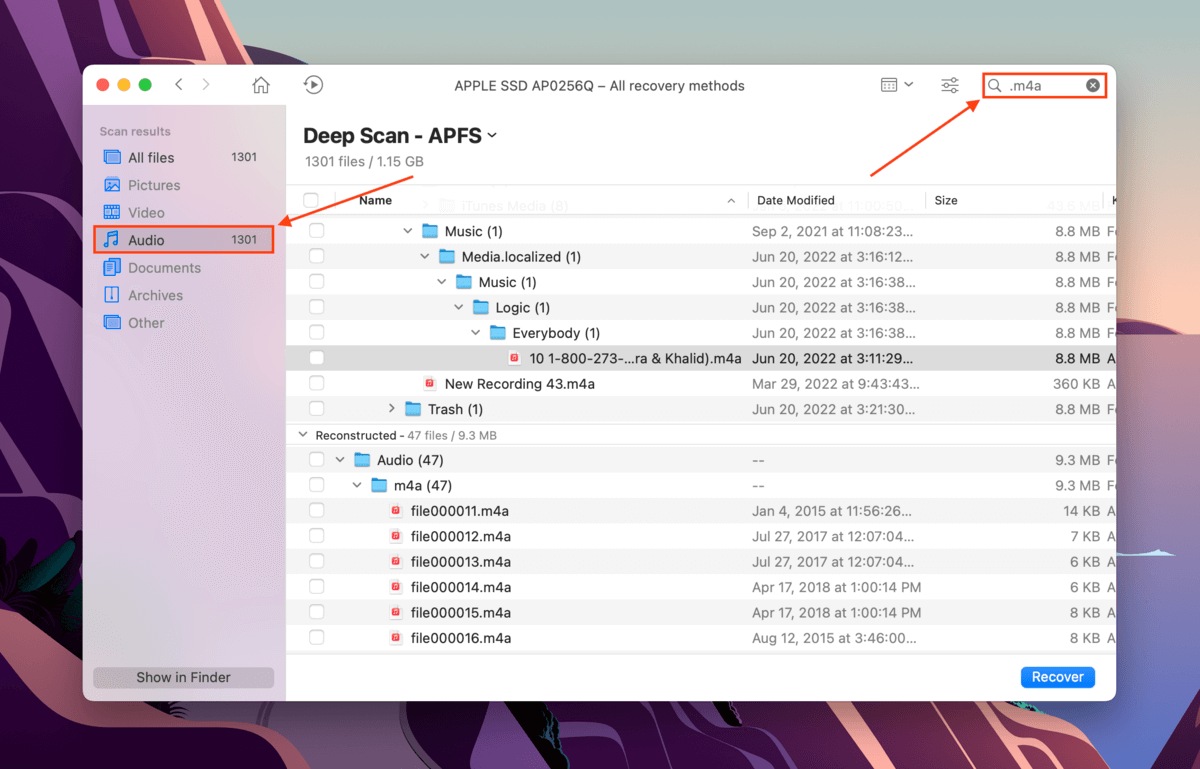
Step 3. Select your system drive (usually labeled as “APPLE SSD”) from the middle pane and click “Search for lost data.”
Step 4. Wait for Disk Drill to complete its scan, then click “Review found items.”

Step 5. Type “.m4a” in the search bar in the top-right corner of the window to locate your song file faster. You can also click “Audio” in the left sidebar to only show audio files. If you need to recover a deleted iTunes playlist, type “.itl” instead of “.m4a” in the search bar.
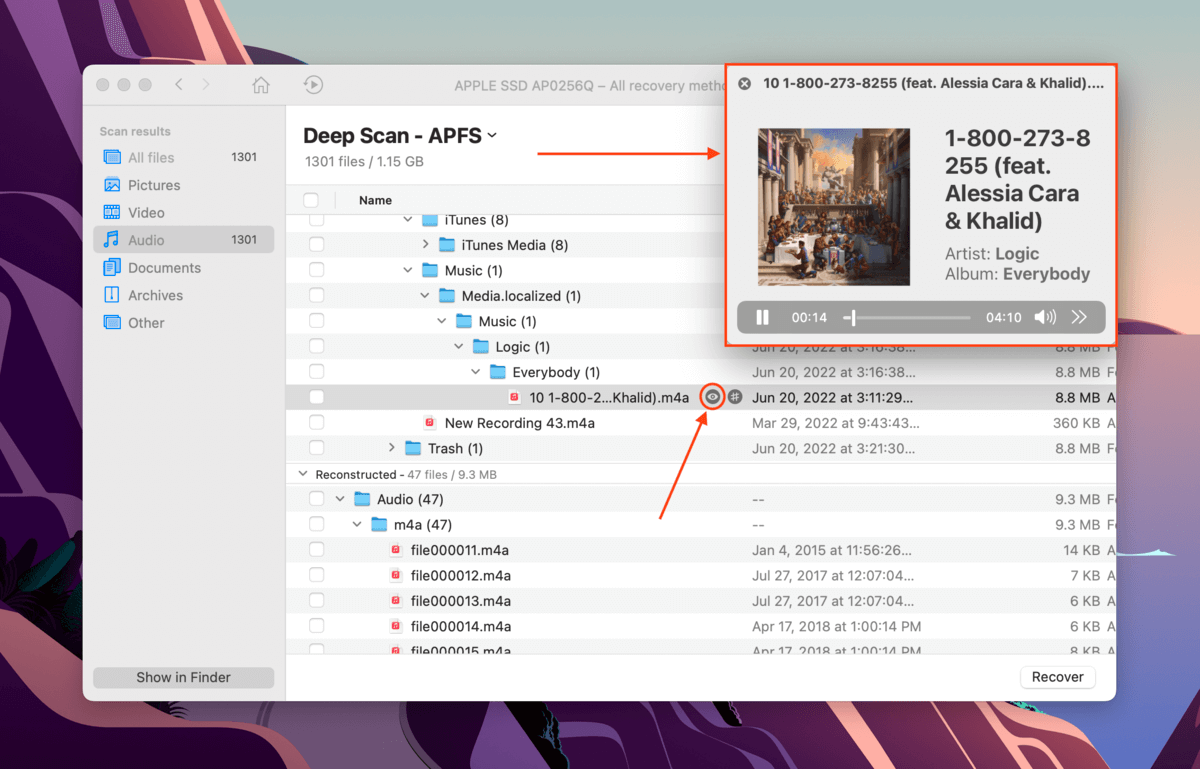
Step 6. You can preview your song by hovering your mouse pointer to the right of its file name and clicking the eye button that appears. Yes, it will play the original audio. The preview function even has a video player, which makes it easier to recover deleted videos on your Mac (since file names don’t always get preserved).
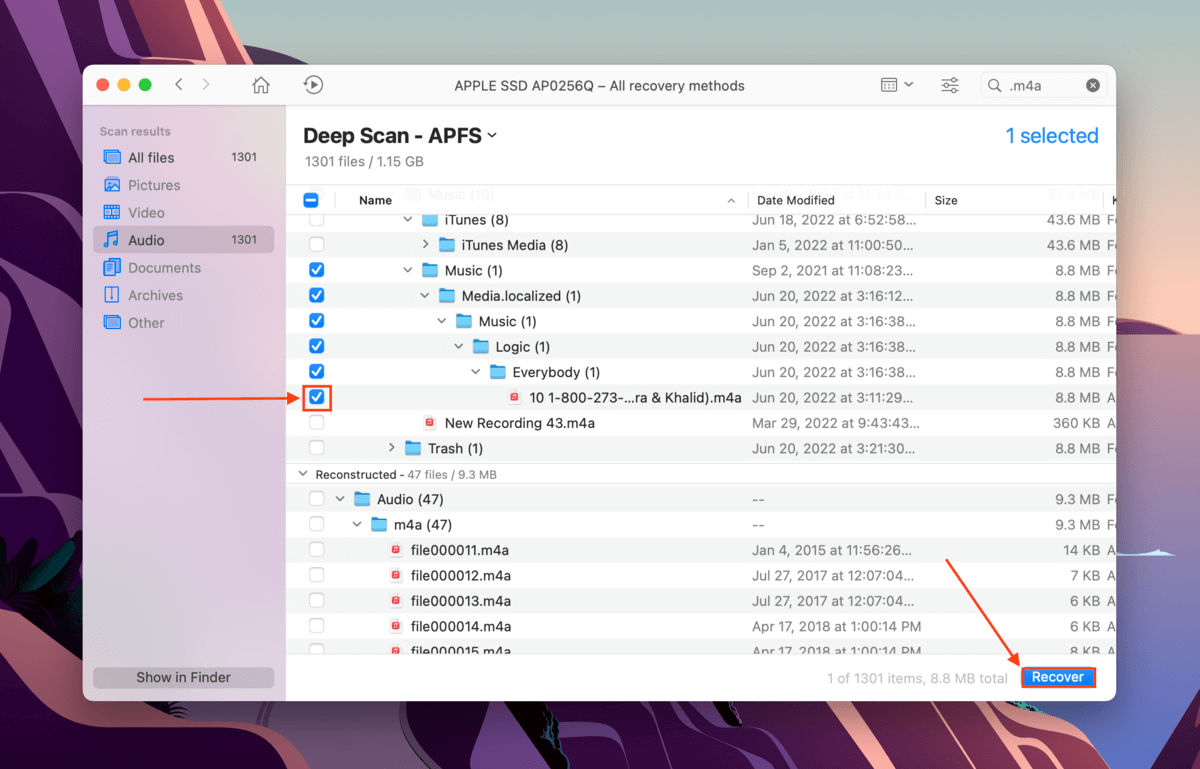
Step 7. Tick the boxes to the left of the files you want to restore, then click “Recover.”
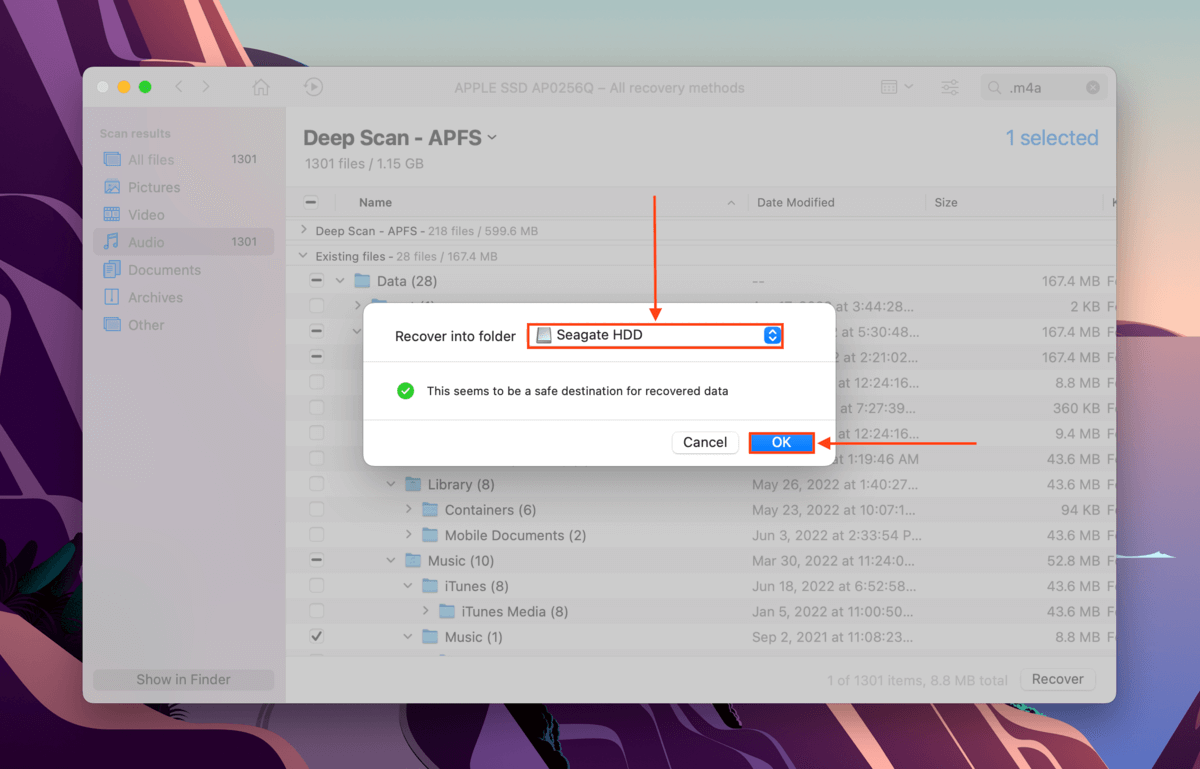
Step 8. Connect a USB drive or other external storage device and use it as the destination for the recovered file. We want to avoid saving recovered files to the same location – otherwise, we risk overwriting data. Then, click “OK.”
Method #4: Restore Your Song From a Time Machine Backup
The songs you download on iTunes or the Music app are stored in the app’s own “Media” folder and gets moved to the Trash folder once deleted. Then, it’s erased from Finder once the Trash folder is emptied.
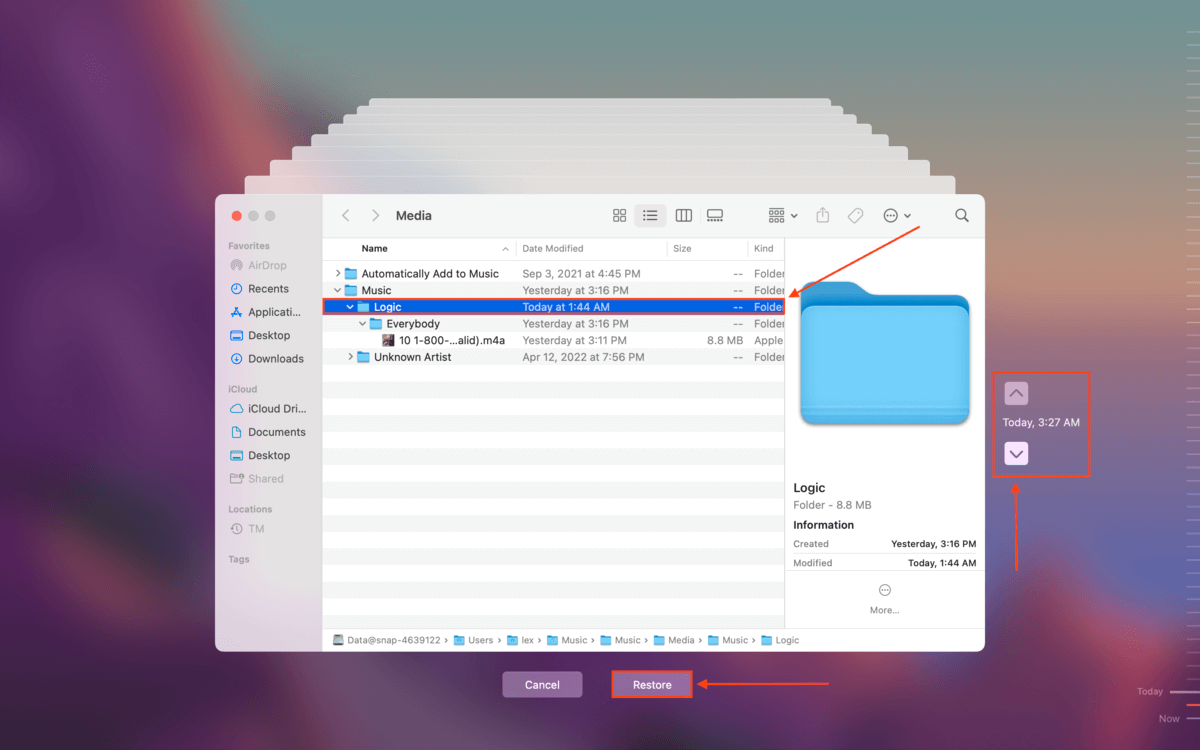
If you have Time Machine enabled, you can recover deleted iTunes songs by restoring an earlier version of the “Media” folder… Specifically, a version where your songs haven’t been deleted.
Step 1. Launch System Preferences > Time Machine.
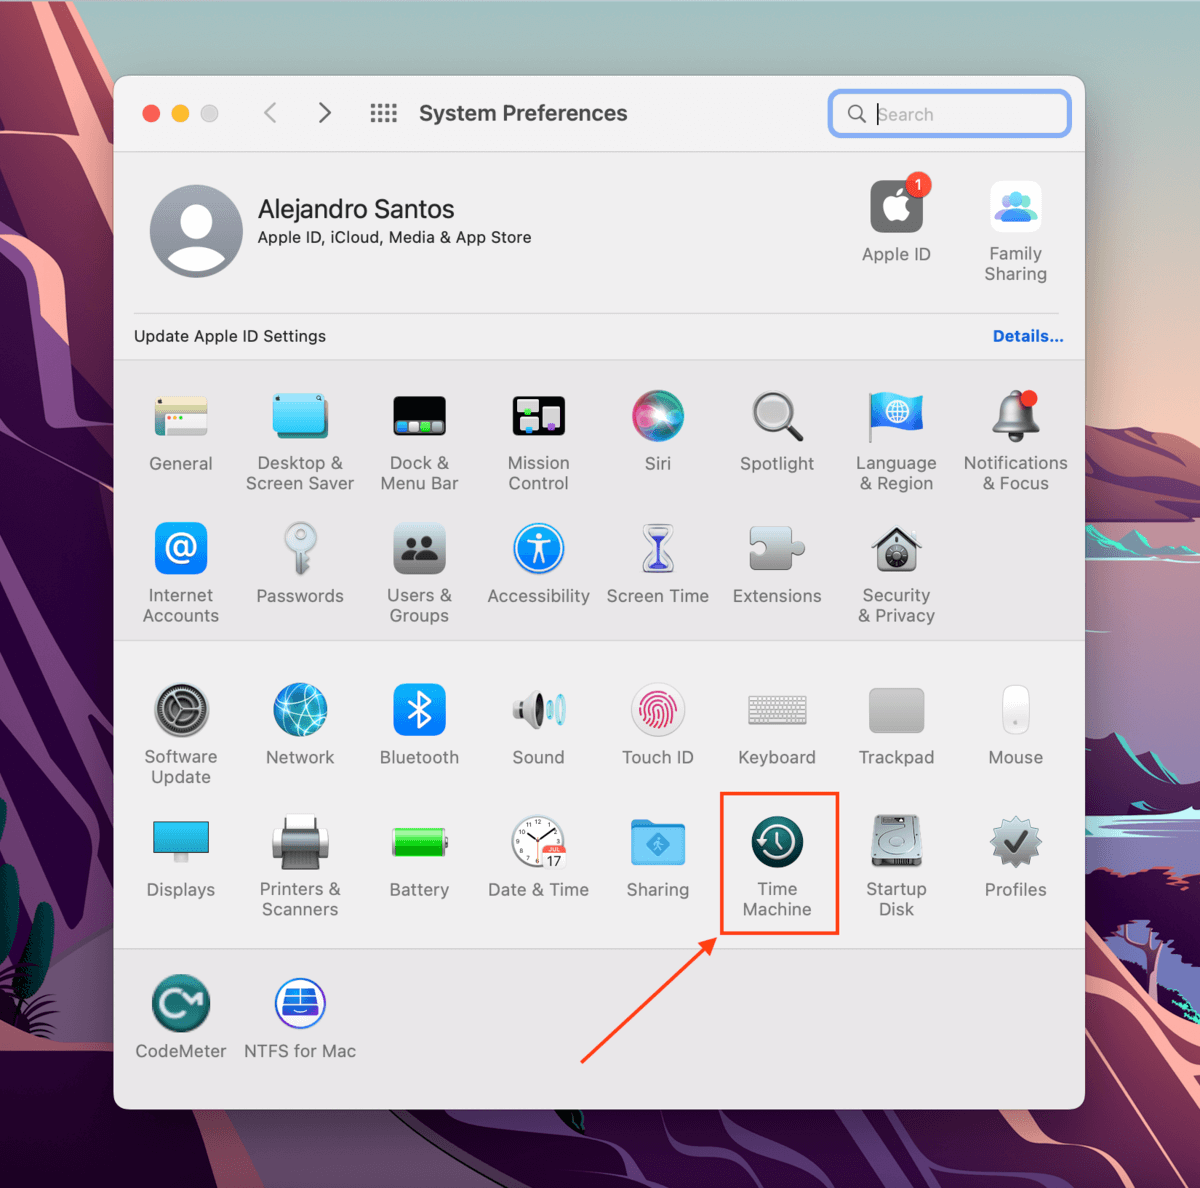
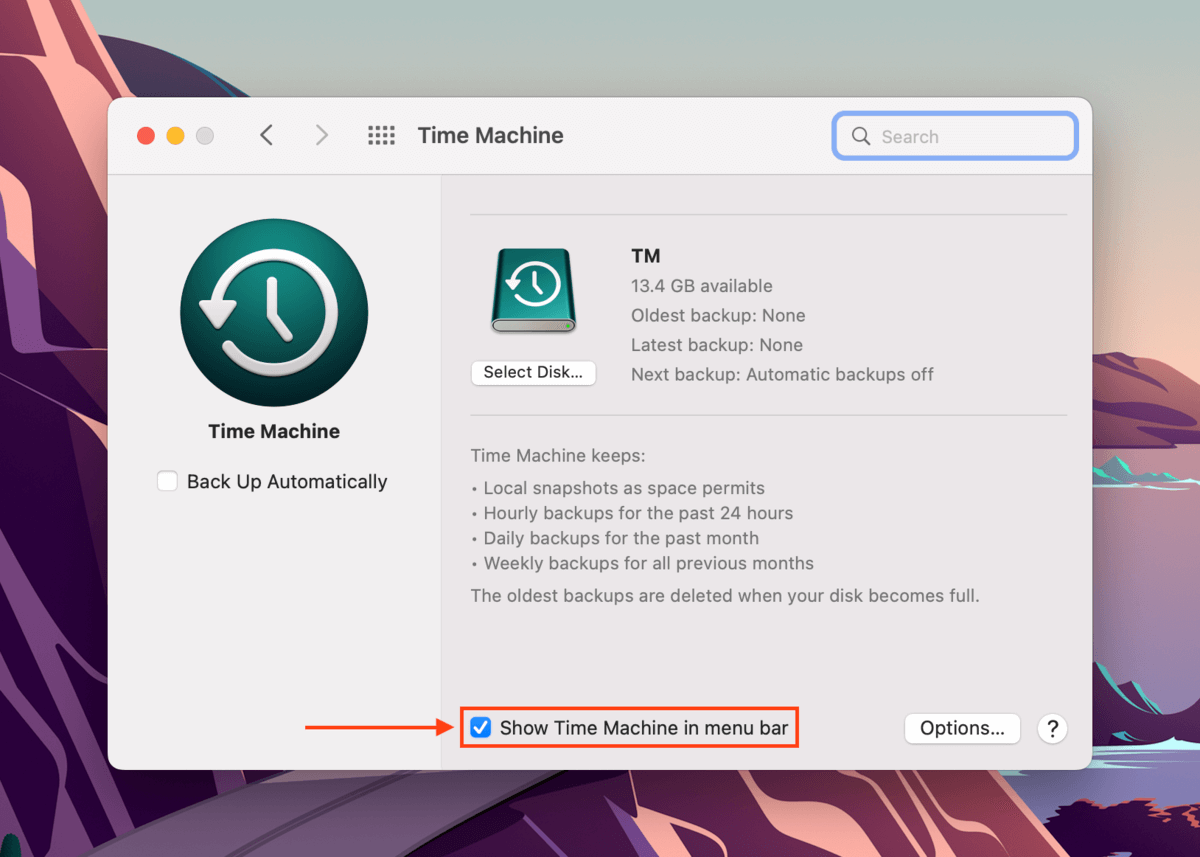
Step 2. Make sure the box beside “Show Time Machine in menu bar” is ticked, then close the window.
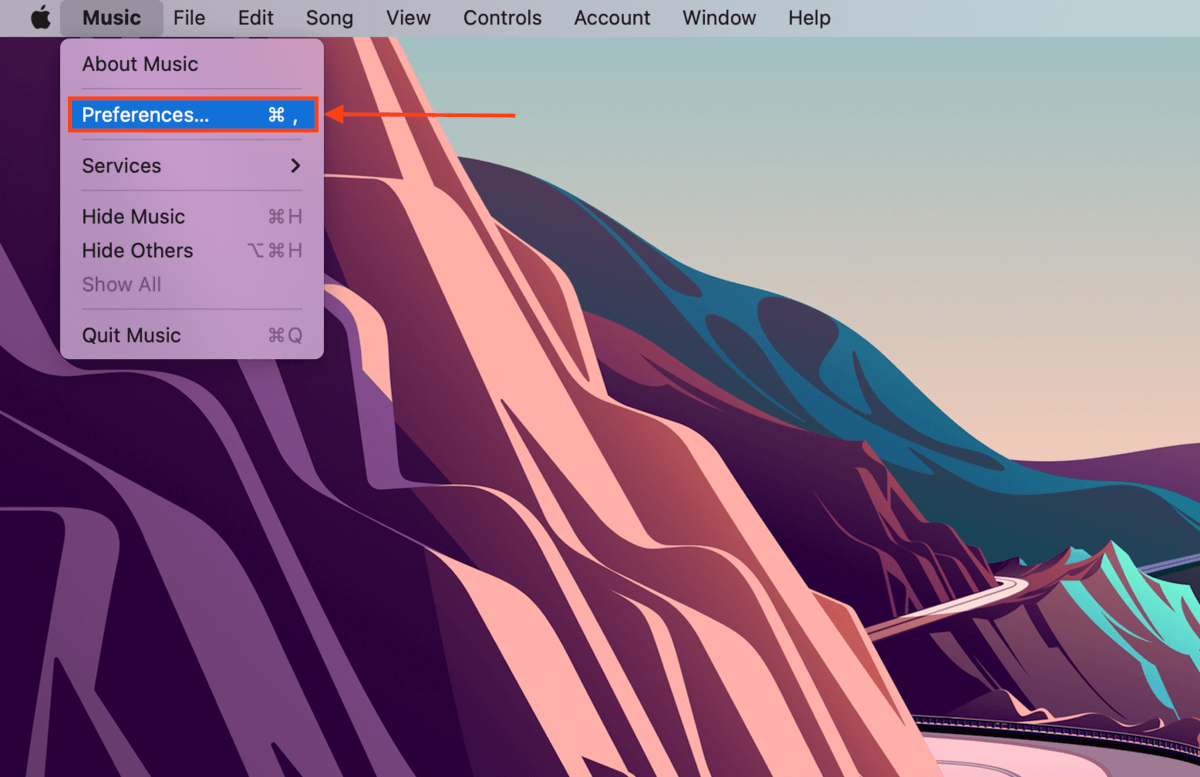
Step 3. On iTunes or the Music app, click the app name in the Apple menu bar and click “Preferences.”
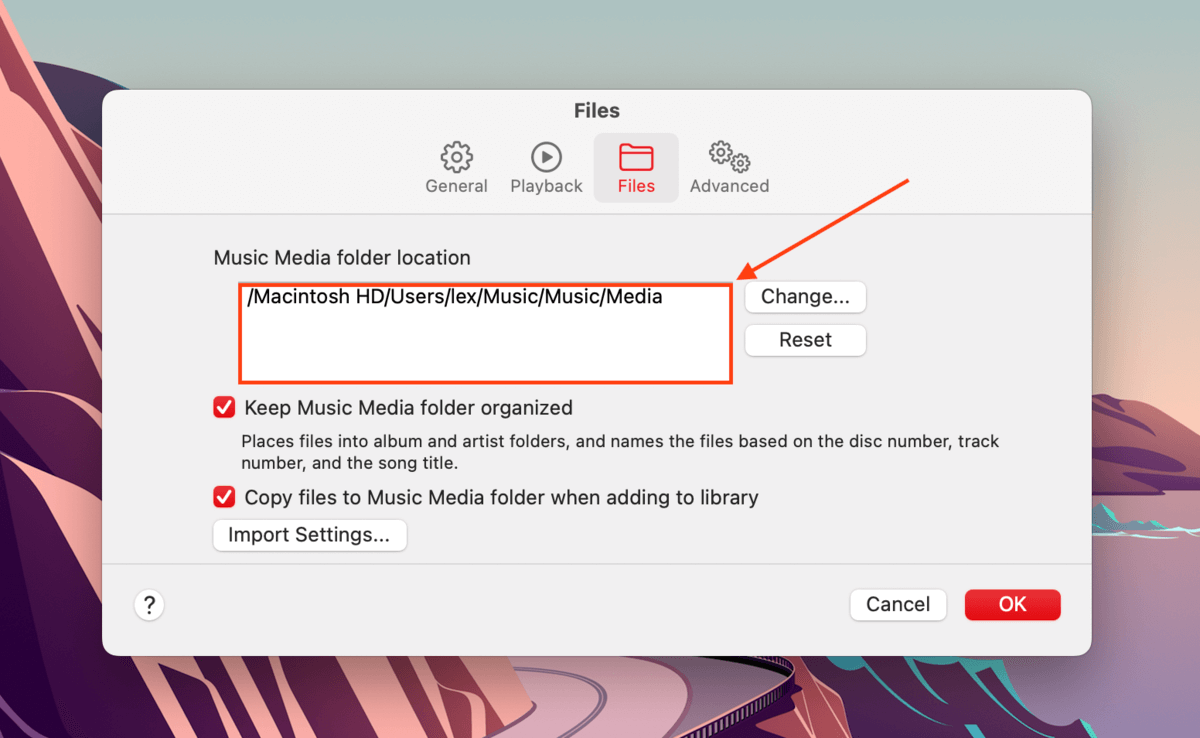
Step 4.Navigate to the “Files” tab and take note of the path displayed. Navigate to this path in Finder.
Step 5. Once you’ve navigated to the above path in Finder, click the Time Machine button > Enter Time Machine.

Step 6. Use the arrow buttons on the right to find a “snapshot” of the Media/Music folder that contains the song. It’s usually displayed like this: Artist > Album > Song file. Make sure the .m4a file is in the song folder, then select the Artist folder and click “Restore.”
Method #5: iTunes Backup (Finder Backup for macOS Catalina and Up)
If you have an iTunes or Finder backup, use it to restore your iPhone to a previous state where the song had not yet been deleted.
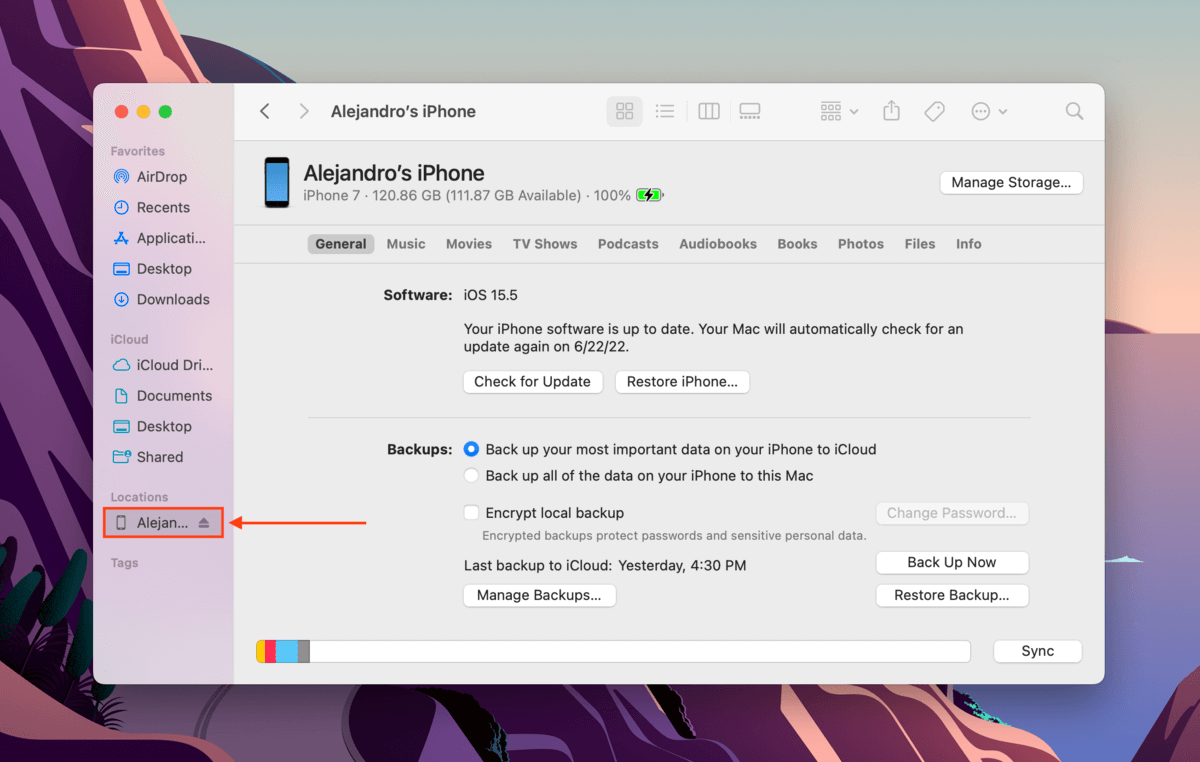
Step 1. Make sure your iPhone is securely connected to your Mac.
Step 2. For ≥ macOS Catalina, open Finder. For < macOS Catalina, open iTunes (Finder > Applications).
Step 3. In Finder, select your iPhone from the left menu bar. In iTunes, click the phone icon in the top-left corner of the window.
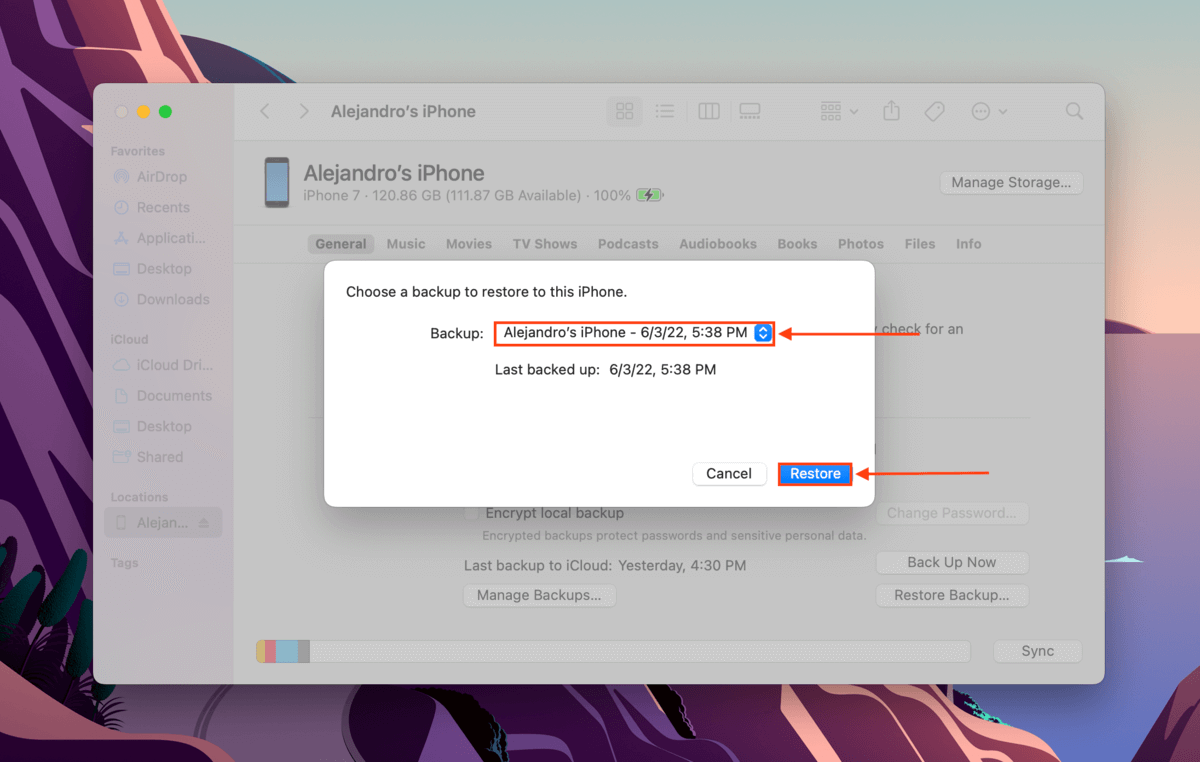
Step 4. Under “Backups”, click “Restore Backup.”
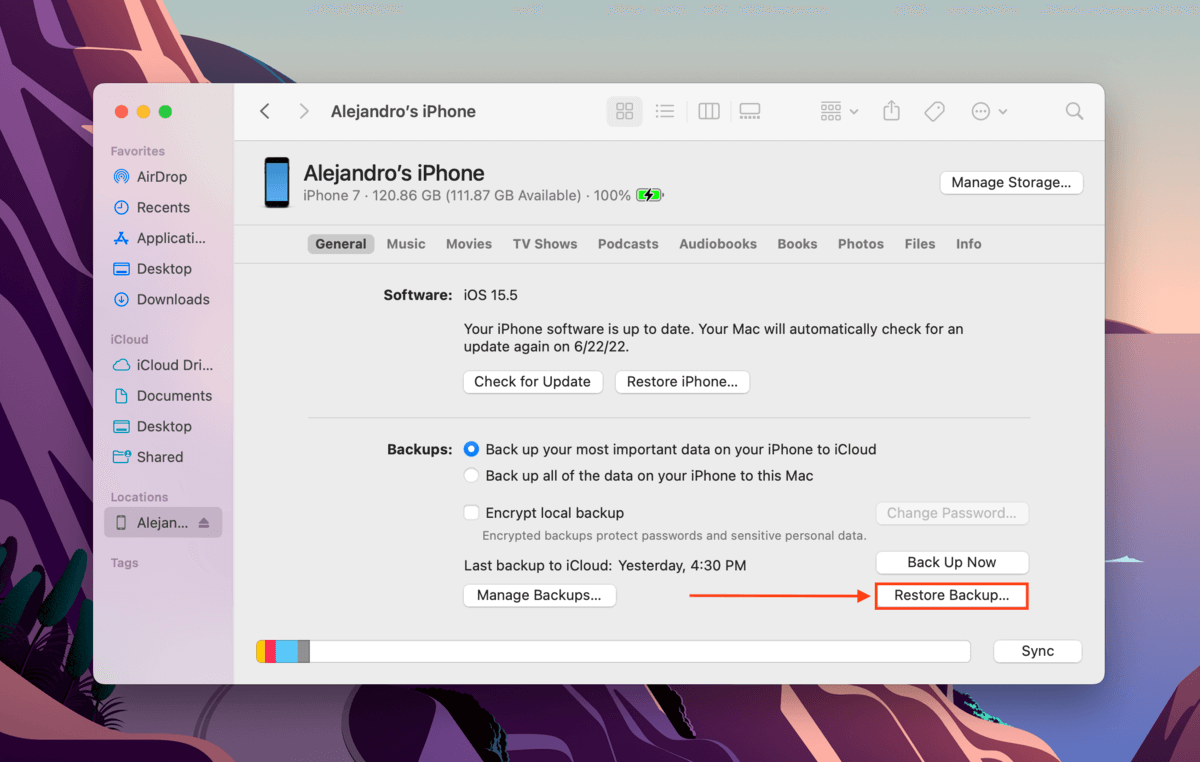
Step 5. Select that backup that stores your music file and click “OK.”
How to Recover Deleted Songs from iTunes on iPhone
If you don’t have a computer to use, there are 2 ways you can recover deleted songs from iTunes on an iPhone:
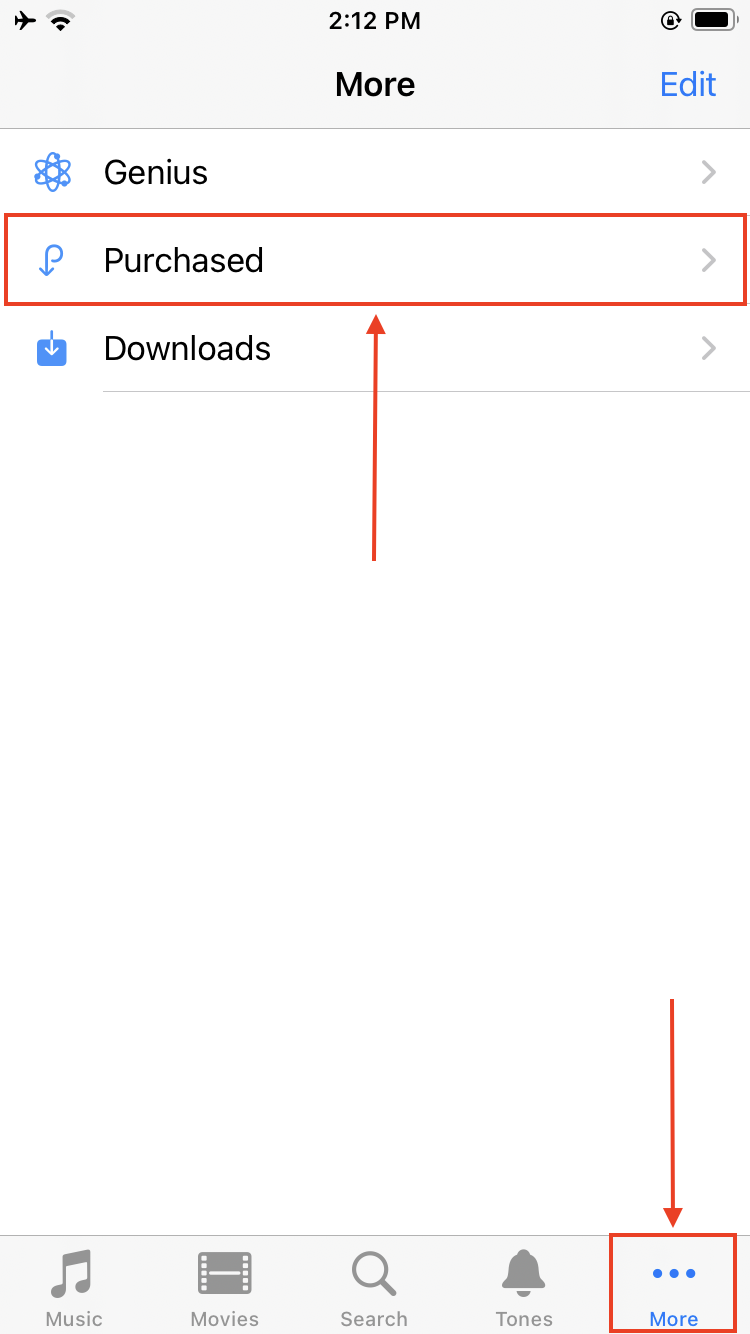
Method #1:Redownload purchased music.
On your iPhone, you can redownload purchased music on the iTunes Store. Launch the iTunes Store, tap the 3 dots > Purchased and download your lost iTunes music back to your library.
Method #2:Restore From iCloud Backup
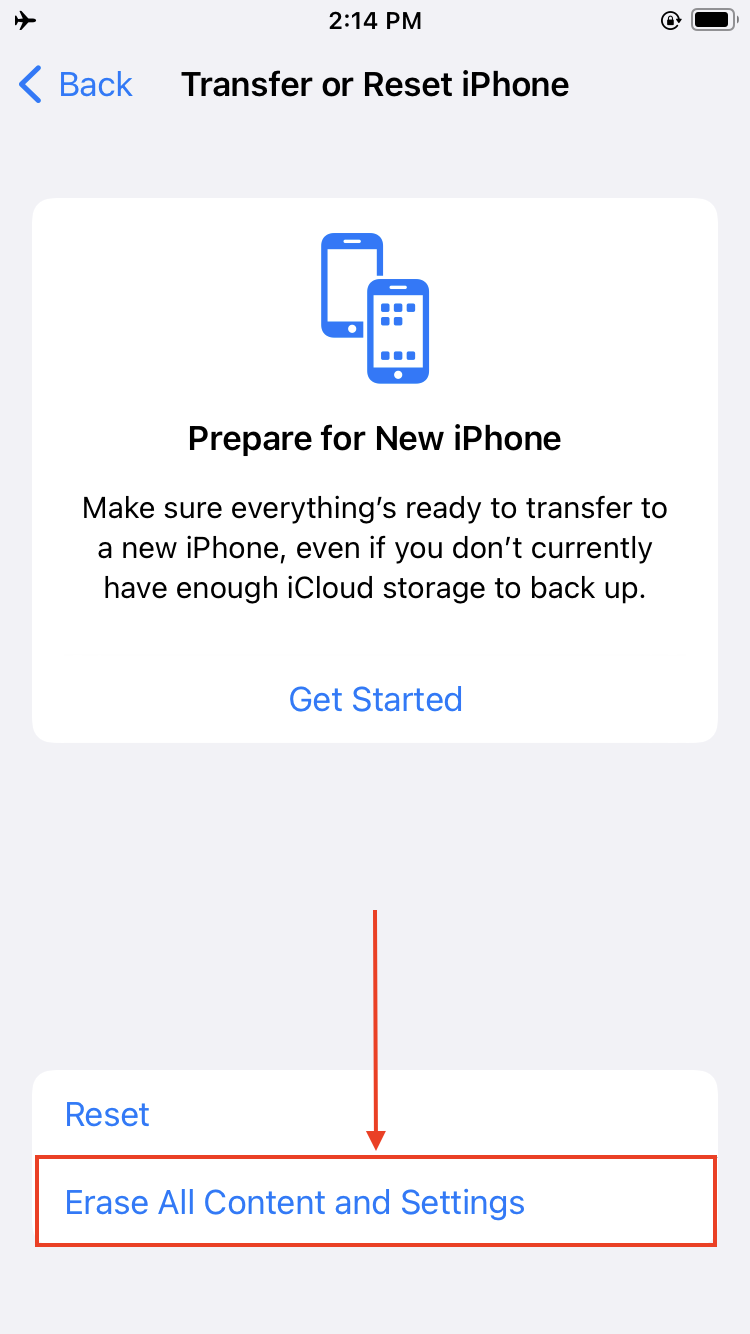
If you backed up your iPhone via iCloud, you can restore your device to the state of that backup. That means that you’ll have all the libraries and data you had during the moment you backed up your device. This method is useful if your song is no longer available for redownload on iTunes.
In the Settings app, tap General > Transfer or Reset iPhone and tap “Erase All Content and Settings.”