
Data loss on Mac hard drives can happen due to multiple reasons: corruption, accidental deletion, formatting, virus attacks, and more. Even disconnecting your drive without properly ejecting it first can result in data loss. For most users, it’s bound to happen at least once.
Fortunately, modern operating systems and commercial software arm users with multiple ways to address this issue – and in many cases, fully restore their lost data. This article covers 4 of the best methods to restore your deleted files from a Mac hard drive. Read on.
Table of Contents
4 Ways to Recover Deleted Files from a Mac Hard Drive
The sections below are step-by-step guides for different methods to recover deleted files from your hard drive. The method best suitable to you will depend on what caused the data loss, the extent of data loss, and whether or not you have a backup. We made sure to cover every scenario – but read the section introductions carefully before proceeding with any method.
Method 1: Restore Deleted Files on Mac from Trash
Whenever you delete a file, it gets moved to the Trash folder. Depending on your settings, it will then be automatically deleted after 30 days or remain until you delete it again from the Trash folder.
To Recover Deleted Files from Trash:
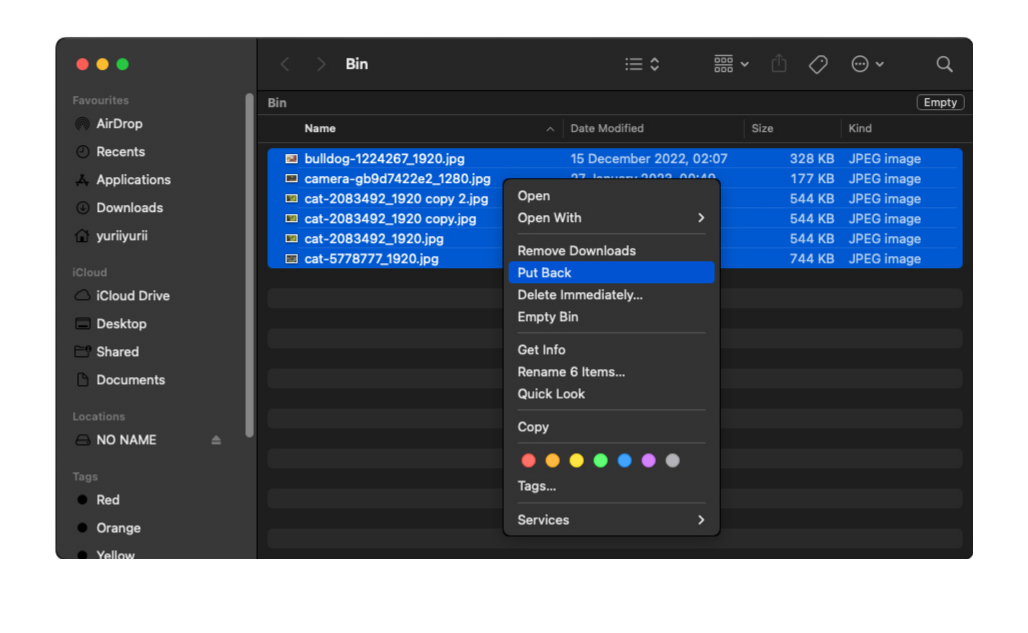
- Click on the Trash icon in the Dock.

- Select the files you want to recover.
- Right-click on them and select “Put Back” to recover them from Trash.
While you’re at it, you can empty the Trash folder to free up storage space on your hard drive. Just make sure that you’ve restored all important files because emptying the Trash folder makes data recovery more difficult.
Method 2: Use Data Recovery Software
When files get deleted (even from the Trash folder), that data is not completely erased from the drive. It still lives inside the file system, marked to be overwritten by new data. Data recovery software is able to extract and rebuild that data, allowing users to recover the files intact.
For this article, we’ll be using Disk Drill – not only does it have excellent ratings as a data recovery utility, it’s also super easy to use so we often recommend it to our readers (who are usually a mish-mash of computer geeks and non-tech-savvy users). Here’s how to use it:
Step 1: Increase Your Chances of Recovery
If you need to restore data from an internal hard drive, you need to do a bit of preparation before proceeding with your recovery attempt. Simply downloading and installing Disk Drill may overwrite your missing data.
Installing Disk Drill on an external storage device is a better option if you have access to another Mac. You can avoid overwriting any data since you’re not downloading and installing Disk Drill on that drive. You’ll also be able to carry around your “portable” data recovery software with you.
- Plug in your external storage device to a working Mac.
- Download and begin installing Disk Drill.
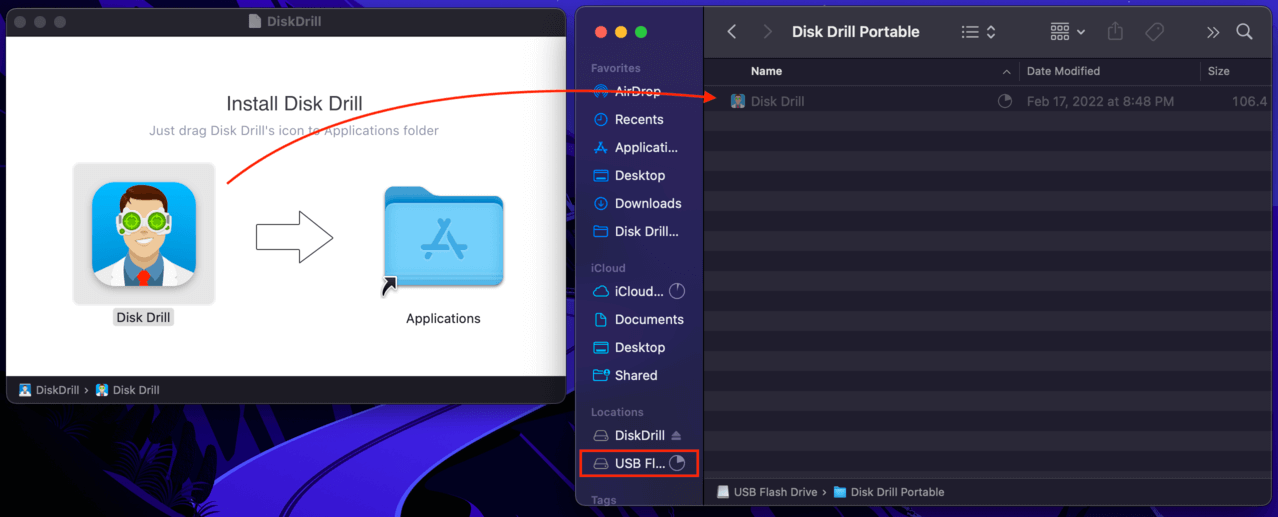
- Once you are prompted to drag Disk Drill into the Applications folder, open Finder and drag the Disk Drill icon onto a folder in your external storage device instead. This will install a fully-functioning Disk Drill program on that device.
- Plug in your new Disk Drill USB drive to the Mac you want to recover data from.
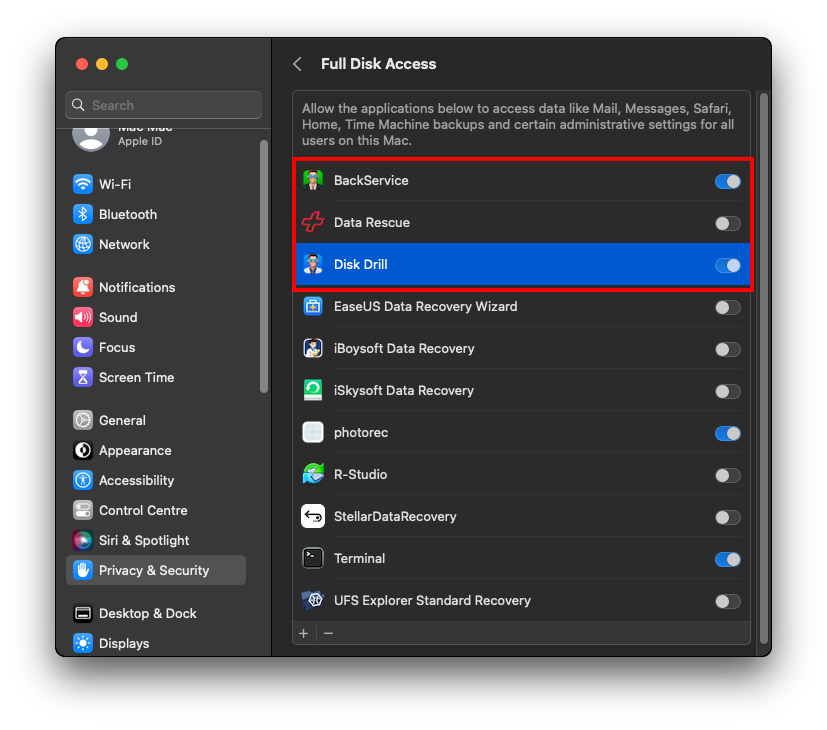
- Open System Preferences > Security & Privacy and select “Full Disk Access” in the right window. Make sure Disk Drill is included (or add it).
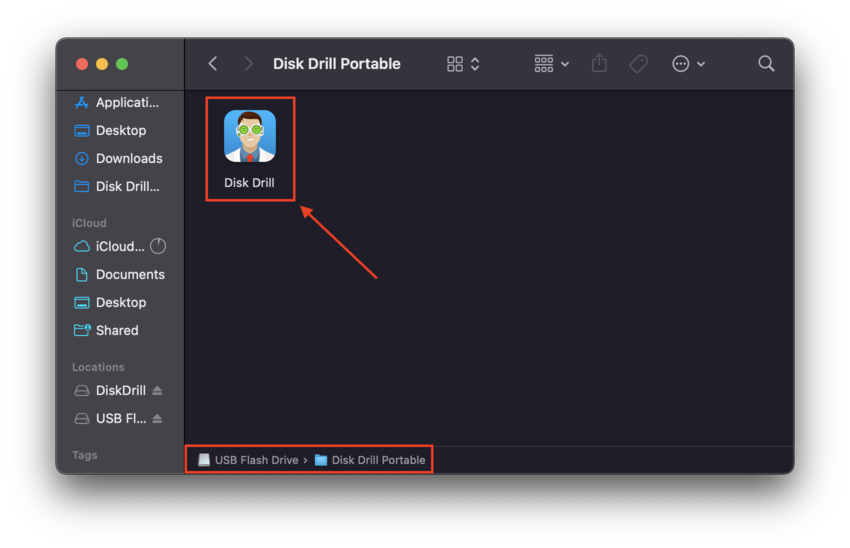
- Launch Disk Drill by opening double-clicking its icon in the folder where you installed it on your external drive.
Step 2: Recover Your Data
- Click the Recover button next to the hard drive from which you want to recover deleted files. Wait for Disk Drill to finish scanning the selected hard drive and present you with a list of files available for recovery.

- Select which files you want to recover and select the location where you want them to be stored. Again, the location shouldn’t be on the same hard drive where the deleted files are located.

- Click the Recover button again to begin the data recovery process.
Method 3: Recover Deleted Files on a Mac with Time Machine
Time Machine is a powerful built-in backup and restore utility for Mac. Unfortunately, Time Machine only makes backups for internal drives by default – to have created a Time Machine backup for an external drive, you would have had to physically connect it and change configurations in the app. This is unlikely to be the case during sudden data loss, so we’ll just walk you through the steps of recovering data on an internal hard drive.
To recover files from Mac hard drive via snapshots:
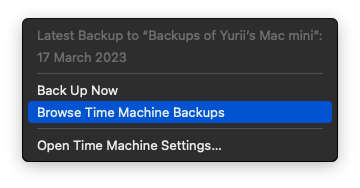
- Open Time Machine Backups from the Time Machine menu in the menu bar.
- Navigate to a time before you deleted the file using the arrow icons on the right.
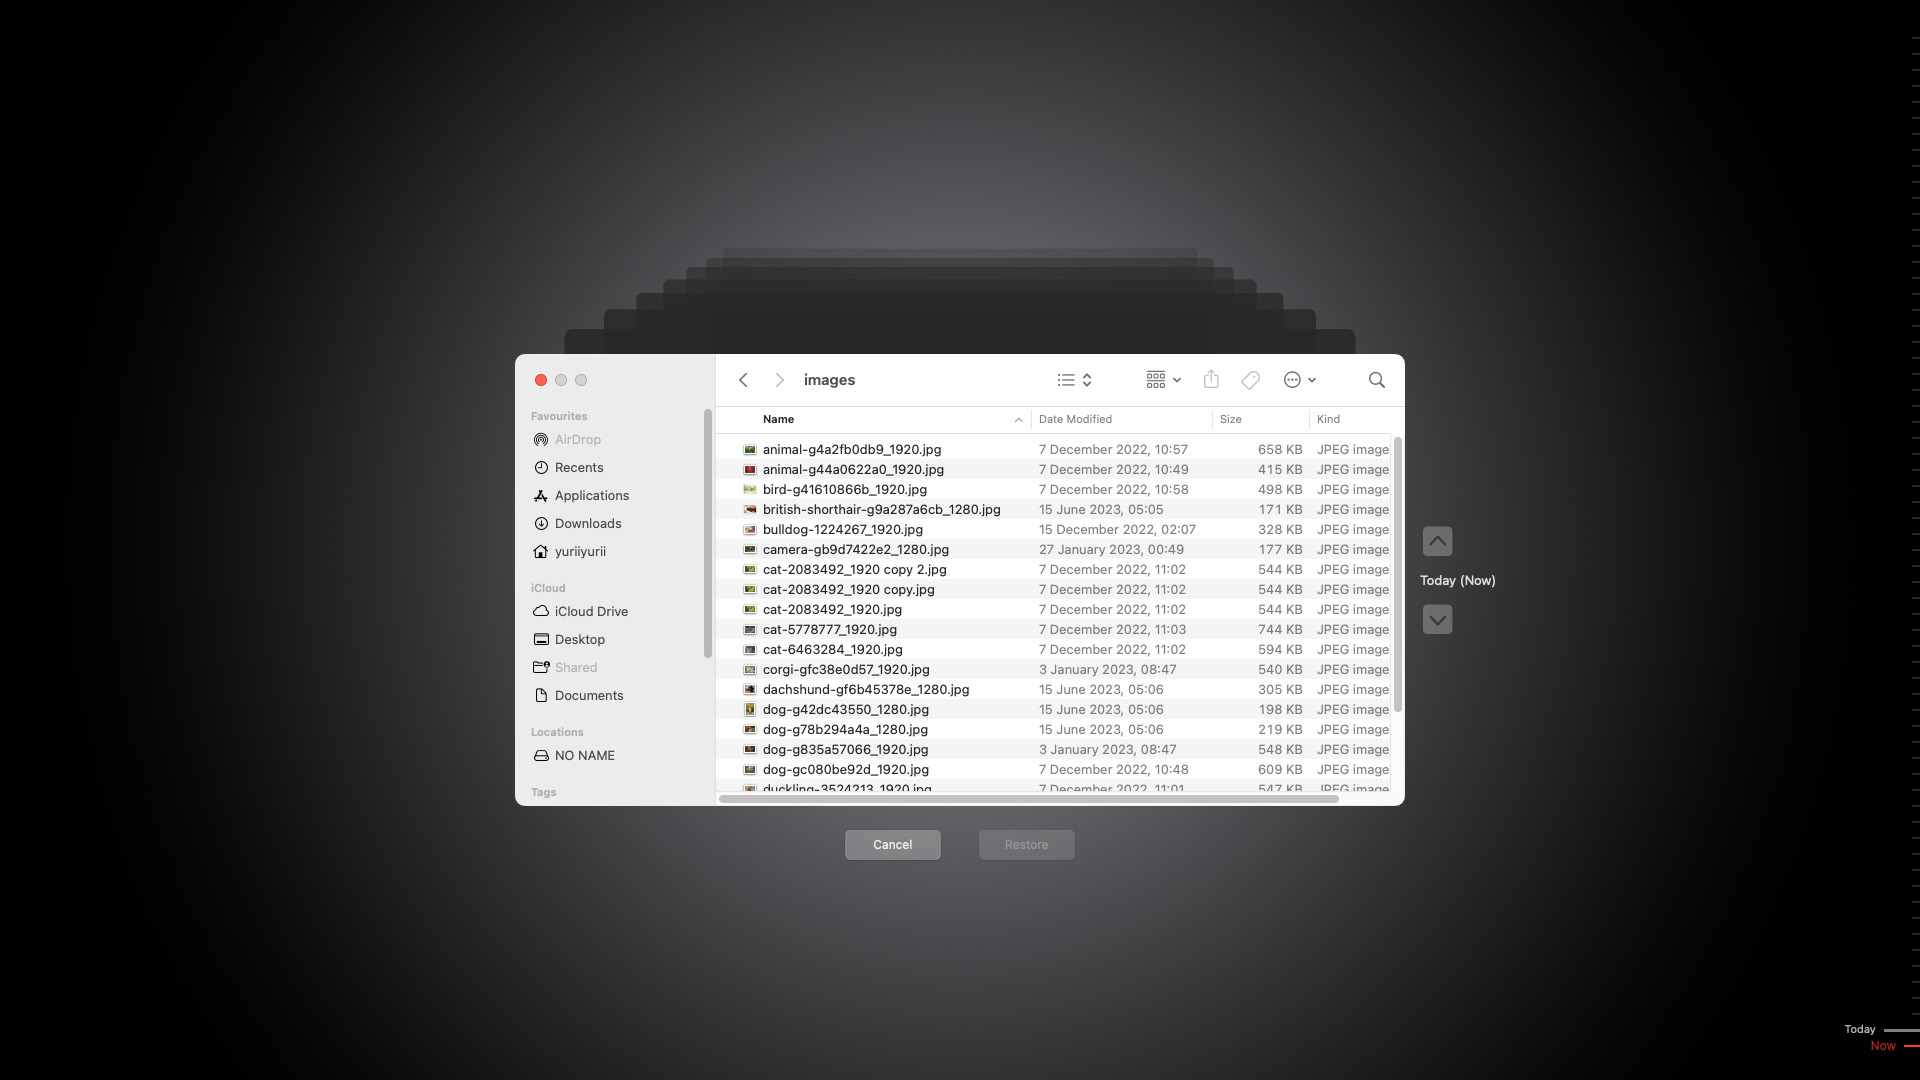
- Click on the Finder window and select the files you want to recover.
- If you want to, you can press the spacebar on your keyboard to preview a selected file.
- Click the Restore button to recover the selected files.
Method 4: Use Professional Data Recovery Services
If everything we’ve tried so far has failed, it’s possible that your drive has been physically damaged. In such cases, software is not going to help you. Professional Data Recovery services stemmed from the demand for high grade data recovery for individuals, businesses, and organizations. They have the right equipment, the right experts, and a sterilized lab to safely take apart drives.
If this is the first time you’ll be using a professional data recovery service, here’s what to do:
- Research about data recovery services near you. Here’s what you need to keep in mind:
- A reliable recovery company will not give you a “per GB” price for their services. Data recovery is too complicated for that type of pricing.
- The service should have a certified cleanroom in which it performs its recoveries. Lack of a cleanroom is probably enough reason to look elsewhere.
- You should not be charged if the recovery is unsuccessful. For example, the CleverFiles Data Recovery Center (the same company who created Disk Drill) has a “No Data No Charge” guarantee.
- Look for a service with a high recovery rate. This is a case where user reviews may be very helpful in finding a reputable recovery service.
- Have an initial consultation. Contact the recovery service of your choice and describe the problem, as well as the data you hope to recover. Depending on the service, they might give you a free estimate right then and there.
- If they don’t offer free estimates, then you’ll get it after shipping it to the center for a technical evaluation. Once it arrives, the recovery team will identify the problem, determine the success rate of recovery, and provide an estimate.
- Some data recovery centers require you to sign a waiver before they proceed (covering matters such as the guarantee to pay, whether or not the customer is authorized to proceed with a company-owned drive, etc.). Then, the wait begins.
- After the procedure, the data recovery center will send your drive back to you with a receipt.
Can You Recover Data From a Corrupted or Damaged Hard Drive?
Yes, you can still recover data from a corrupted or damaged hard drive – but you have to act immediately. The more you use that drive, you may corrupt it further or cause more data loss. The process is also quite different between external and internal drives, as internal drives usually store the operating system.
Due to this, we’ll be covering corrupted drive recovery for internal and external drives separately.
Recover from a Corrupted External Drive
The first step is to create a disk image of your data, so that we can recover hard drive data on your Mac without interacting with the actual drive.
- Download and install Disk Drill.
- Connect your external drive to your MacBook.
- Launch Disk Drill by opening Finder > Applications > Disk Drill.
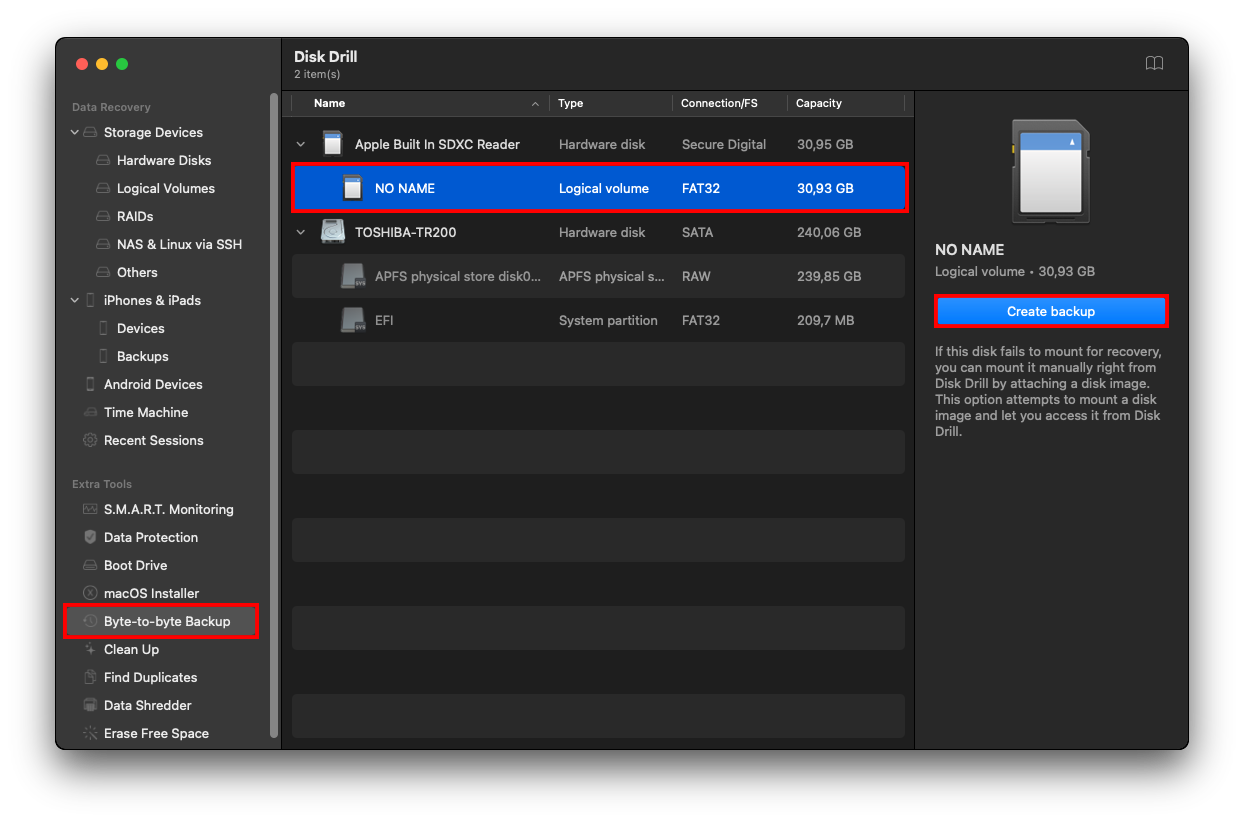
- On the left sidebar, select Byte-to-byte backup. Then, select your external drive from the list, then click “Create a backup.”
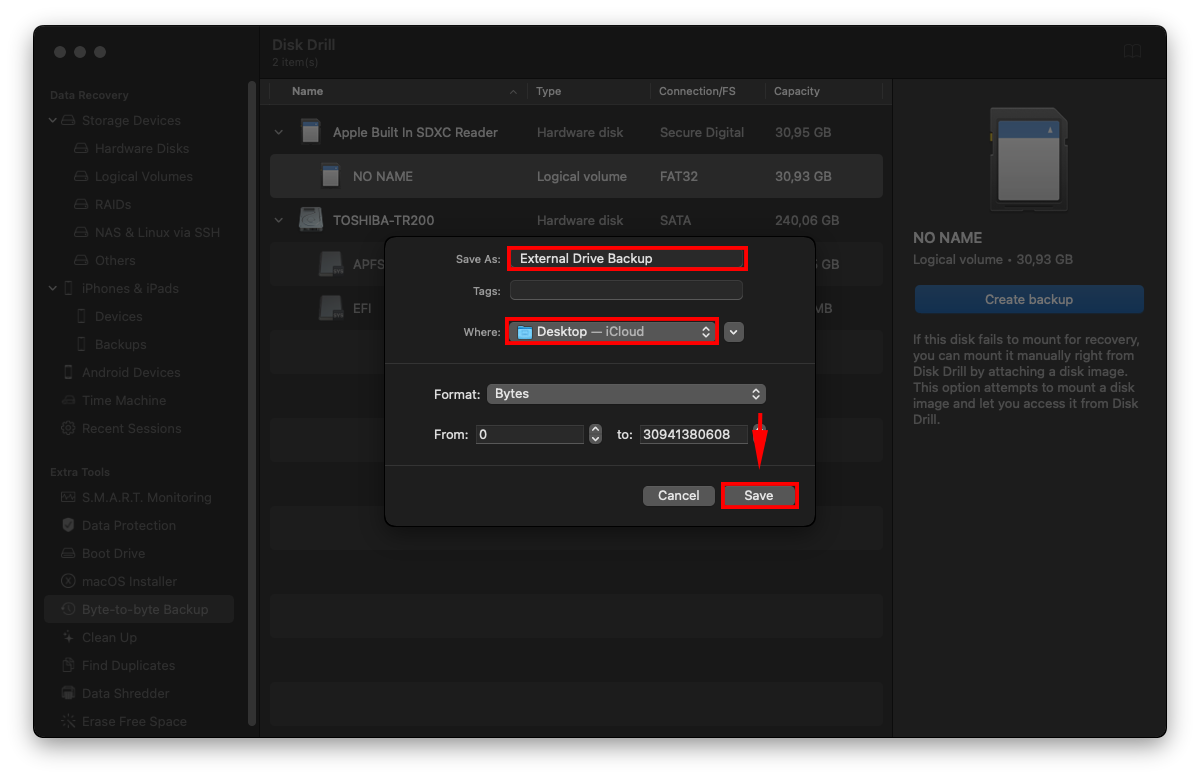
- On the dialogue box that appears, come up with a file name and select a save location for your backup. Make sure to choose a folder on your MacBook, NOT your external drive – otherwise, you risk overwriting data and/or corrupting the drive further. Then, click Save and wait for the backup to complete.
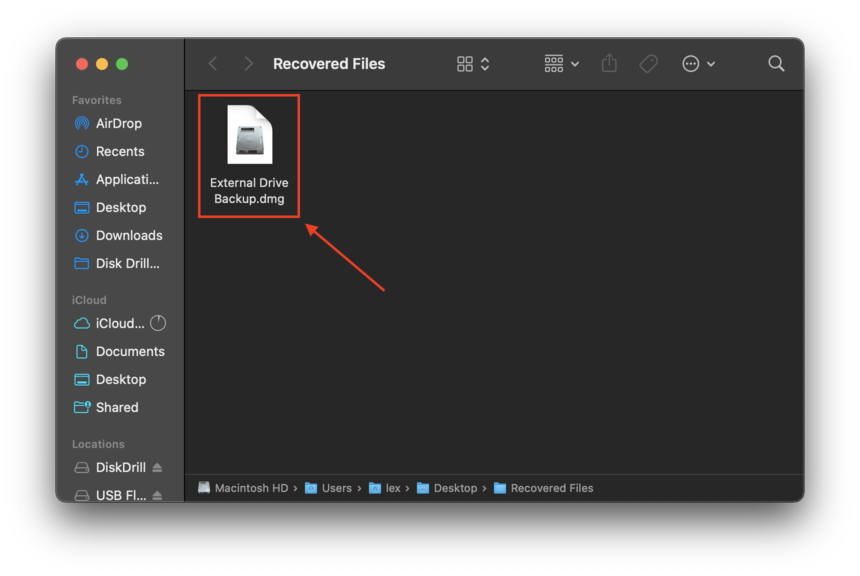
- Now that your data is saved to a disk image, you can use Disk Drill to scan and restore it. First, locate your backup file and double-click it in order to mount it as a disk.
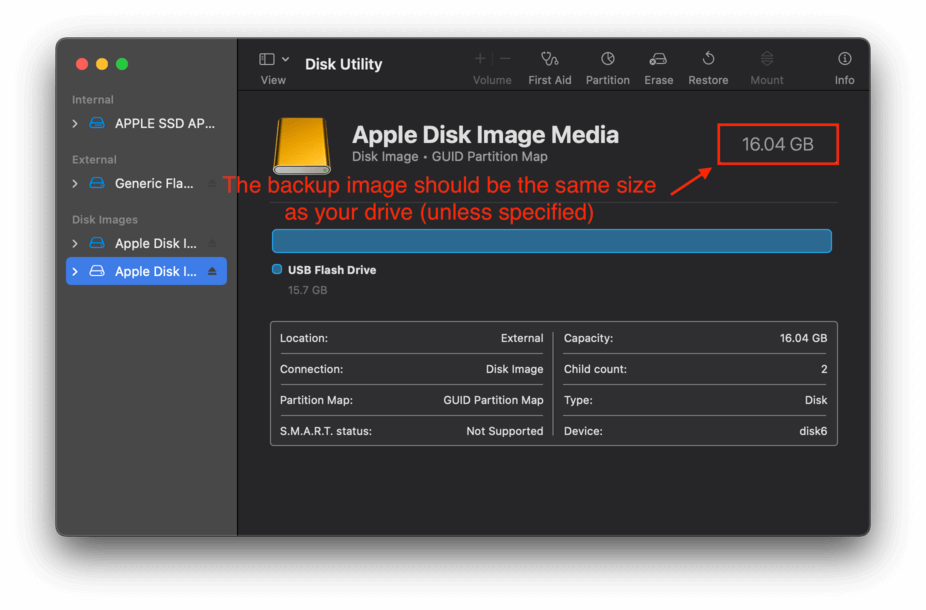
- Open Disk Utility by opening Finder > Applications > Utilities > Disk Utility and check if the size of the backup file is correct.
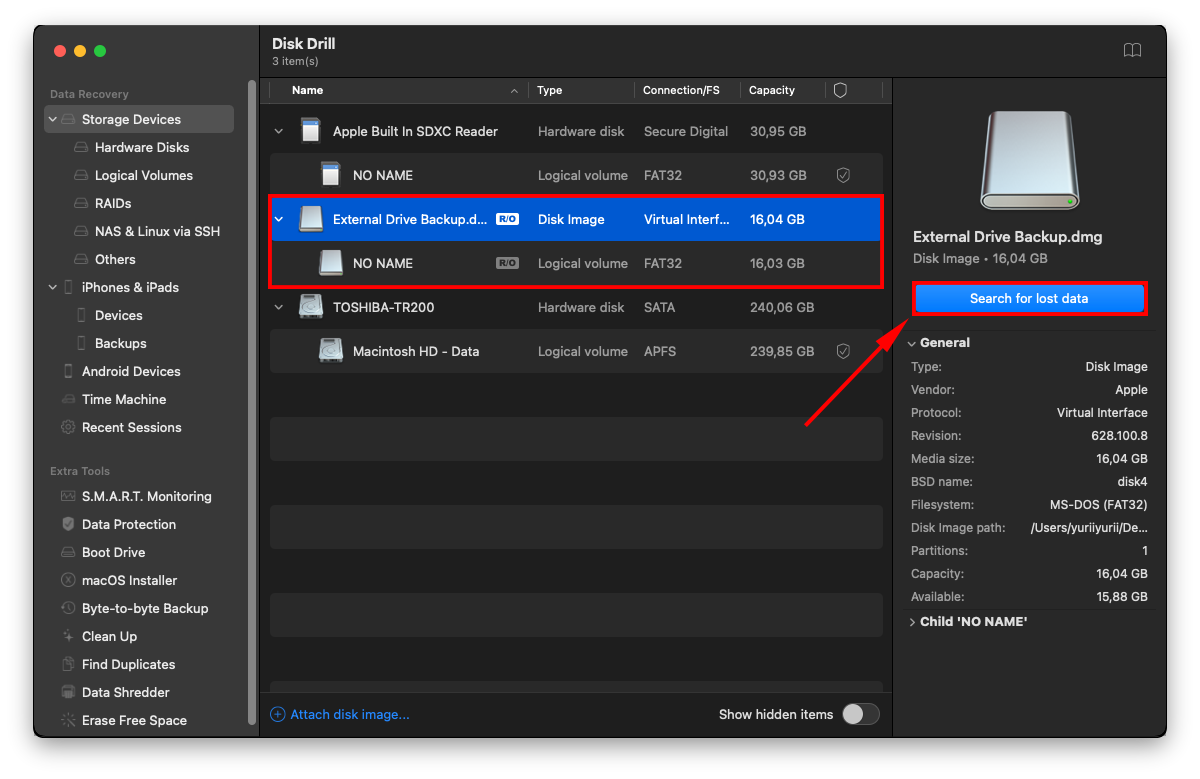
- Now you can launch Disk Drill (Finder > Applications > Disk Drill) and scan your backup disk as if it were a regular drive.
Recover from a Corrupted Internal Drive
Recovering a corrupt internal hard drive is a bit tougher. In some cases, you won’t be able to boot into macOS, which means you won’t have access to the user interface. We found three proven ways to work around it:
Option A: Scan the Drive Using Disk Drill in Recovery Mode
If your system drive won’t boot, you can still recover your data as long as you can access Recovery Mode. Here’s how to do it:
- Launch Recovery Mode. If you’re using an Intel-based Mac, press (CMD + R) as your MacBook powers up. If you’re using an Apple Silicon Mac, hold the power button until you see “Loading startup options”, then click “Options”, then “Continue.”
- Once you’re in the recovery tools window, click Utilities > Terminal.
- Then, type the following command press return:
sh <(curl http://www.cleverfiles.com/bootmode/boot.xml)
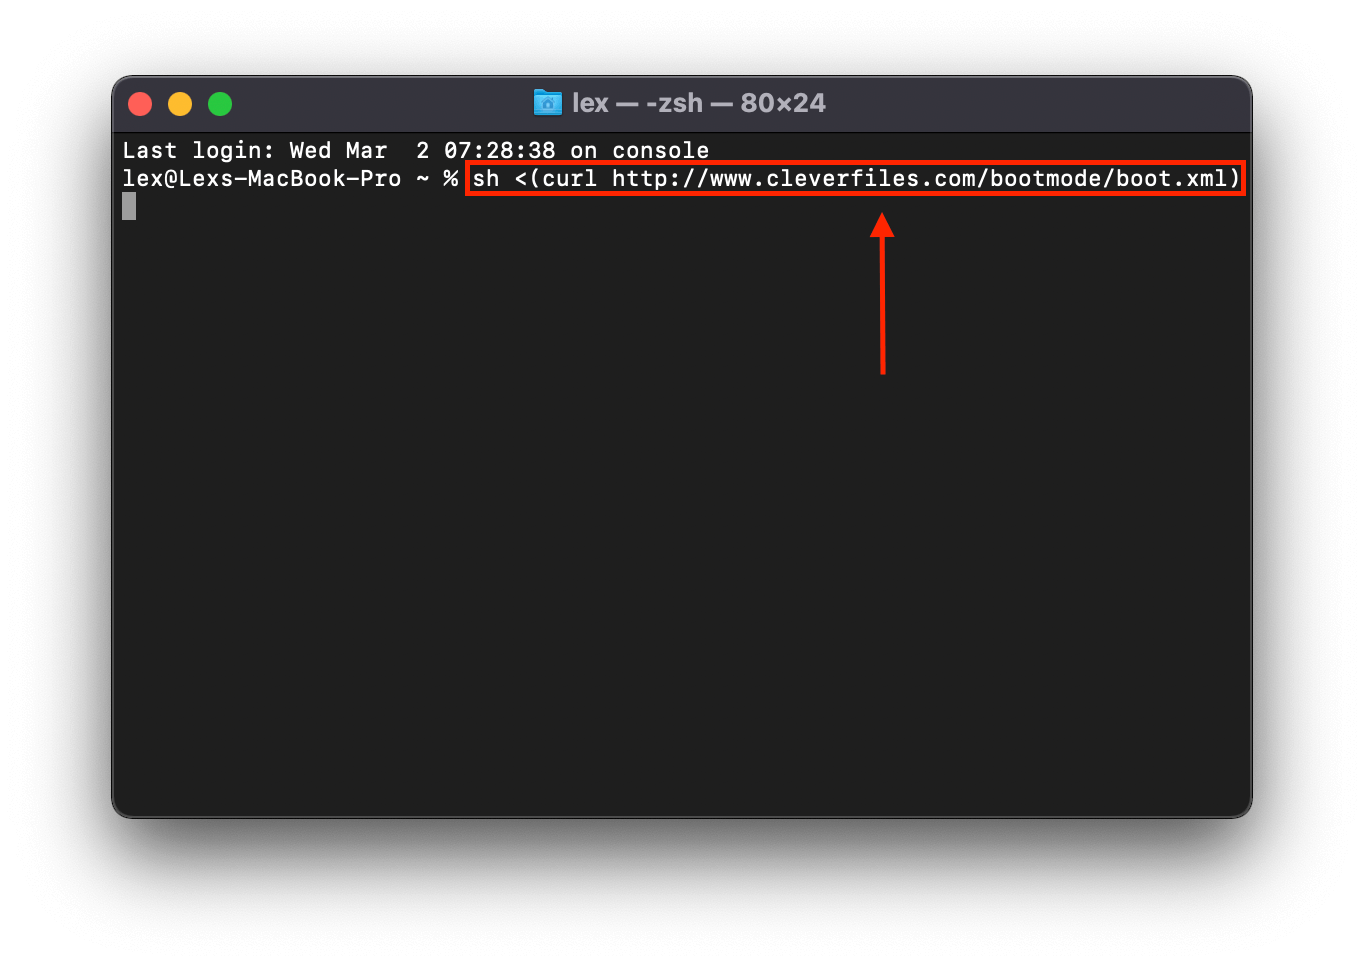
- This command will launch Disk Drill as if you were running it as a program on your computer like normal.
Option B: Connect Your Mac to Another Mac Using Target Disk Mode (Sharing Mode)
If you have access to a working Mac, you can connect your Mac and recover your data using Sharing Mode (for Apple Silicon Macs) or Target DIsk Mode (for Intel-based Macs). Here’s how to do it:
- Connect your corrupt Mac to a working Mac using USB, USB-C, or Thunderbolt cables. You may need a FireWire adaptor.
- For Intel-based Macs, power off your computer then start it up while holding T. For Apple Silicon Macs, press and hold the power button until you see “Loading startup options” on-screen. Click “Options”, then click “Continue.” Click Utilities > Share Disk, select your system drive, then click “Start Sharing.”
- On an Intel-based Mac, you can start dragging files to and from the disk folder using Finder. If you’re using an Apple Silicon-based Mac, open Finder and continue with the next steps.
- On the Finder sidebar, click “Network.”
- In the window that appears, double-click your corrupted Mac.
- Click “Connect As”, click “Guest”, then click “Connect.”
- You can proceed with transferring the files via Finder.
Option C:Turn Your Internal Drive into an External Drive
If the first two methods fail, the last option is to purchase an enclosure – this will allow you to turn your internal drive into an external drive. You can then connect it to another Mac, which might be able to read it on Finder. Otherwise, you can use a data recovery tool like Disk Drill to scan it as an external hard drive.
Conclusion
Whether they are set up to be internal or external components, hard drives can be prone to both logical and physical damage due to their mechanical build. (on top of logical issues that commonly plague all storage devices).
In many cases, data loss is reversible as long as everything goes right. The Trash Folder, data recovery software, and Time Machine are reliable utilities for recovery, and professional services can help in severe cases.
If you’re using Time Machine, continue doing so and consider adding another type of backup, such as a byte-to-byte backup. If you don’t use Time Machine, start!


