
If you’re like most people, then you rely on one or more external hard drives to avoid filling up your internal Mac hard drive to its maximum capacity. However, as with any storage device, data loss can occur for many different reasons and prevent you from accessing your most valued files in the blink of an eye.
But there’s hope. In this article, we discuss several methods that you can use to recover data from an external Mac hard drive. The methods don’t require any prior knowledge, but they can deliver surprisingly excellent results.
Table of Contents
Can Data Be Recovered from an External Hard Drive?
Yes, data can be recovered from an external hard drive in most cases. There are many potential causes of data loss on a storage device and your chances of recovery depend on your specific scenario. To help you evaluate, here are the most common reasons why you lose data on an external hard drive and what the recovery process will look like:
- Accidental deletion or formatting. If you accidentally deleted a file, it should be in the Trash folder. If you deleted it again, emptied Trash, or formatted your drive by accident, recovery is possible using data recovery software.
- Physical damage. External hard drives can be damaged by breakage, extreme temperatures, water, and severe power fluctuations. These can lead to data loss and other unwanted behavior. In this scenario, DIY methods won’t work – send your drive to a professional data recovery service to avoid making things worse.
- Malware infection. Malware can cause unpredictable behavior on storage devices, including making it inaccessible or deleting or corrupting your data. If your external hard drive is infected, anti-malware tools may make your data accessible again. But if the infection deleted or corrupted your data, you’ll need to use data recovery software.
- Corruption. In the case of corruption (that isn’t caused by physical damage), your storage device is likely struggling to properly communicate with your Mac due to issues with the file system, partition table, etc. While repairing your drive can restore your data in some cases, it’s often best to recover your files with data recovery software BEFORE attempting to repair as the repair process itself can often cause data loss.
All causes listed above except for physical damage are considered “logical damage” to your external hard drive.
Generally, data can be recovered from an external hard drive if logical data loss isn’t permanent (the lost data is still physically present on the hard drive) or if the physical cause of data loss can be repaired.
Best Methods to Recover Data from External Hard Drive on Mac
The first thing that we need to do is make sure that our Mac can recognize our external hard drive as we can’t start data recovery without our Mac being able to see it. If your external hard drive is showing up already, then you can move on recovering data from an external hard drive.
Method 1: Recover Files from the Trash
When you delete a file on your Mac or your external hard drive, it will go into the Trash. The trash is in place to make sure that you have an extra layer of security when deleting files from various storage devices.
Recovering files from your Trash is super easy and the files will stay there forever unless you have your Trash set to empty on its own. If you want to set your Trash to empty on its own, you can do so by going to your Finder preferences.
In the steps below, we’re going to look at how to recover files from the trash which only takes a couple of steps and is super easy to do.
Step 1. Connect the external hard drive to your Mac.
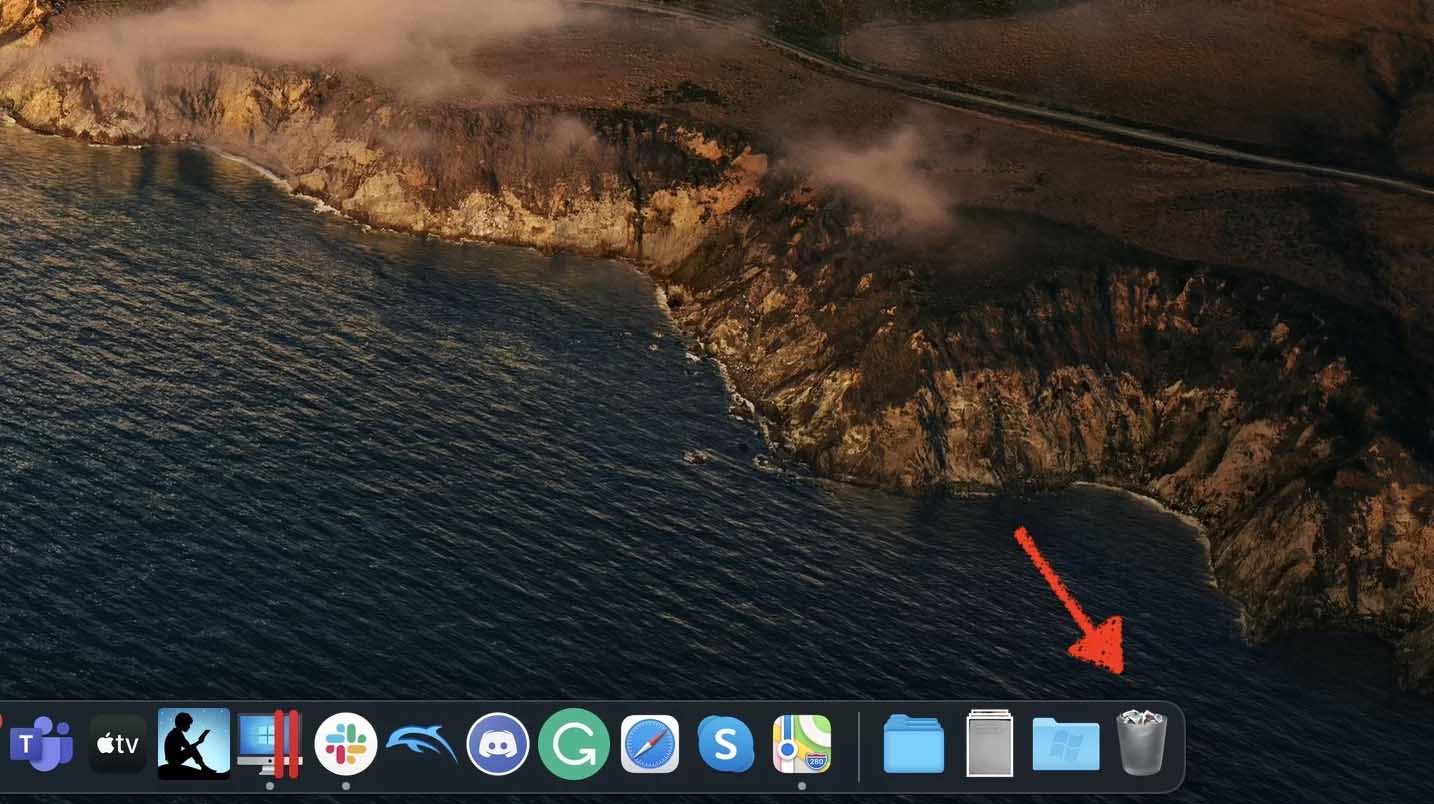
Step 2. Click the Trash icon on your dock.
Step 3. Once you have opened your Trash, select the files that you would like to recover. After you have selected them, right-click on them and choose Put Back.
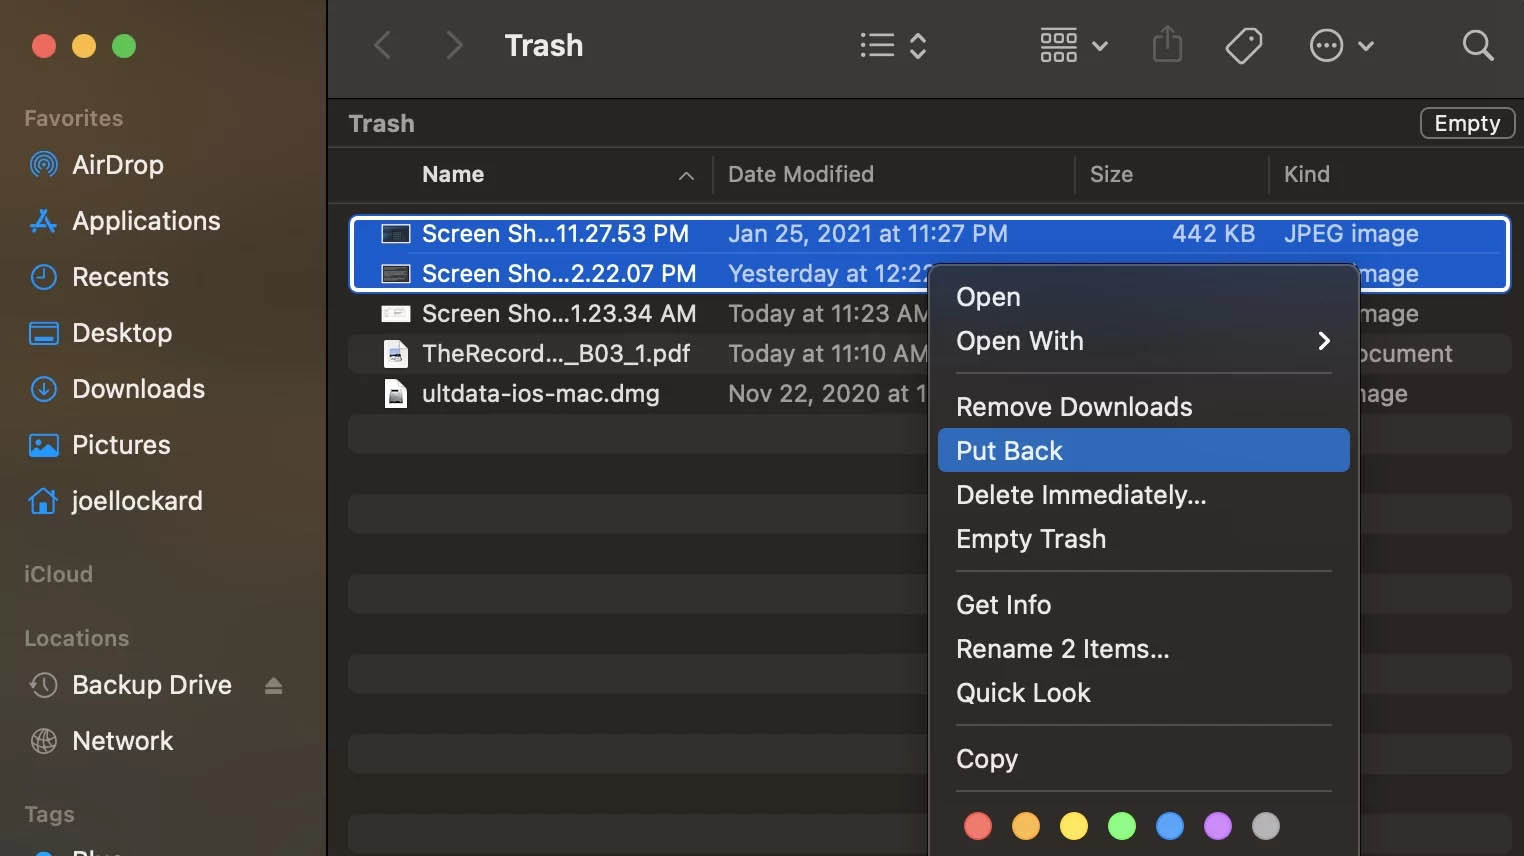
The files will then be put back to the original place that they were before they were deleted. Most of the time, this is the method that you will be able to use to recover files, and trying to access your external hard drive won’t be necessary.
If you have already emptied your Trash or have it set to empty after 30 days, then we can move onto Time Machine as the next method for recovering data from your external hard drive.
Method 2: Recover Files Using Time Machine
Every Mac comes with Apple’s built-in Time Machine tool which allows us to take a look into our external hard drive and recover files and put them right back onto our Mac.
Step 1. Plug in your Time Machine backup drive.
Step 2. Launch Finder and then open Time Machine.
Step 3. Once within Time Machine, we can recover files from an external hard drive on Mac by either using the up and down arrows or use the date slider at the lower right-hand side to scroll through different dates and times.
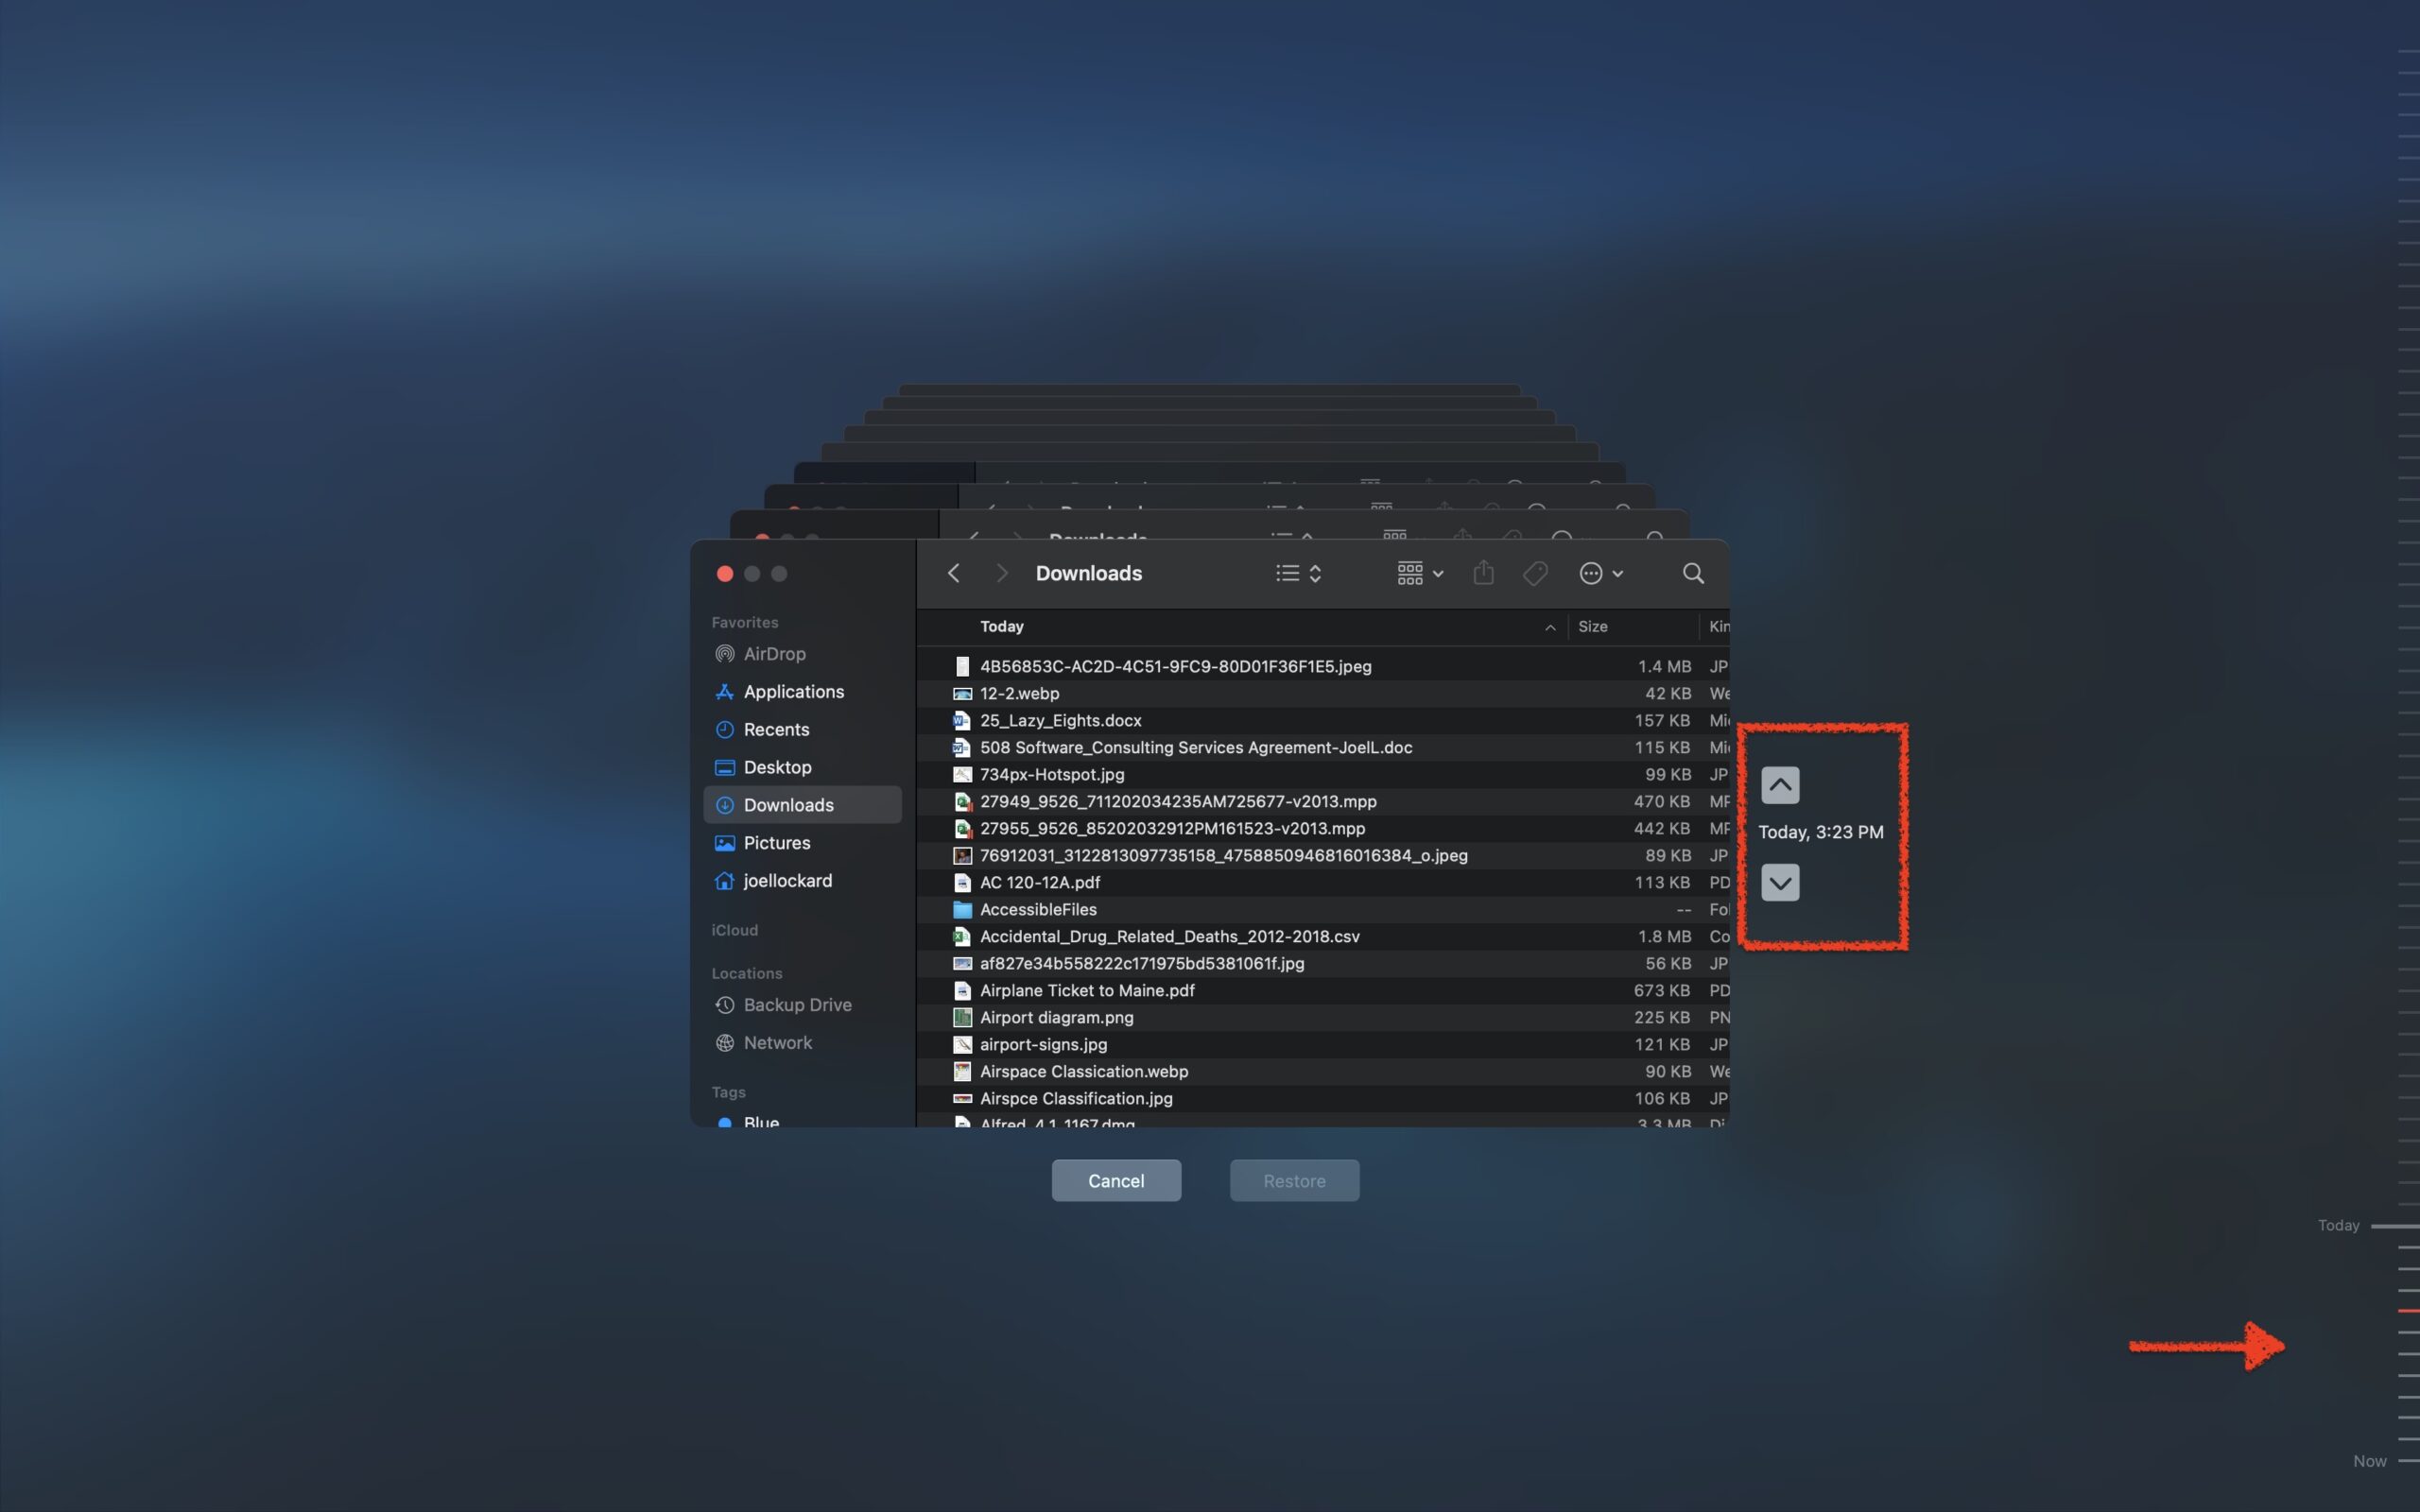
Step 4. Simply find the date that you think that you last had the data that you’re wanting to recover, and then navigate through the Finder and locate the file. You can then click on Restore and put that file back onto your Mac.
Time Machine is great because it’s easy to understand, takes only a few steps, and has a graphical interface that isn’t cluttered with things that don’t need to be there.
The downside of a Time Machine lays in the need to have second drive with capacity of backed up drive or higher which in turn is itslef also can be a subject of data loss.
Method 3: Use Data Recovery Software
Disk Drill allows us to recover data from an external hard drive. If the external hard drive isn’t working or if you accidentally deleted a file off of it, we can scan the drive and try to find the data that was lost.
Step 1. Connect your external storage device to your Mac. Then, download and install Disk Drill.
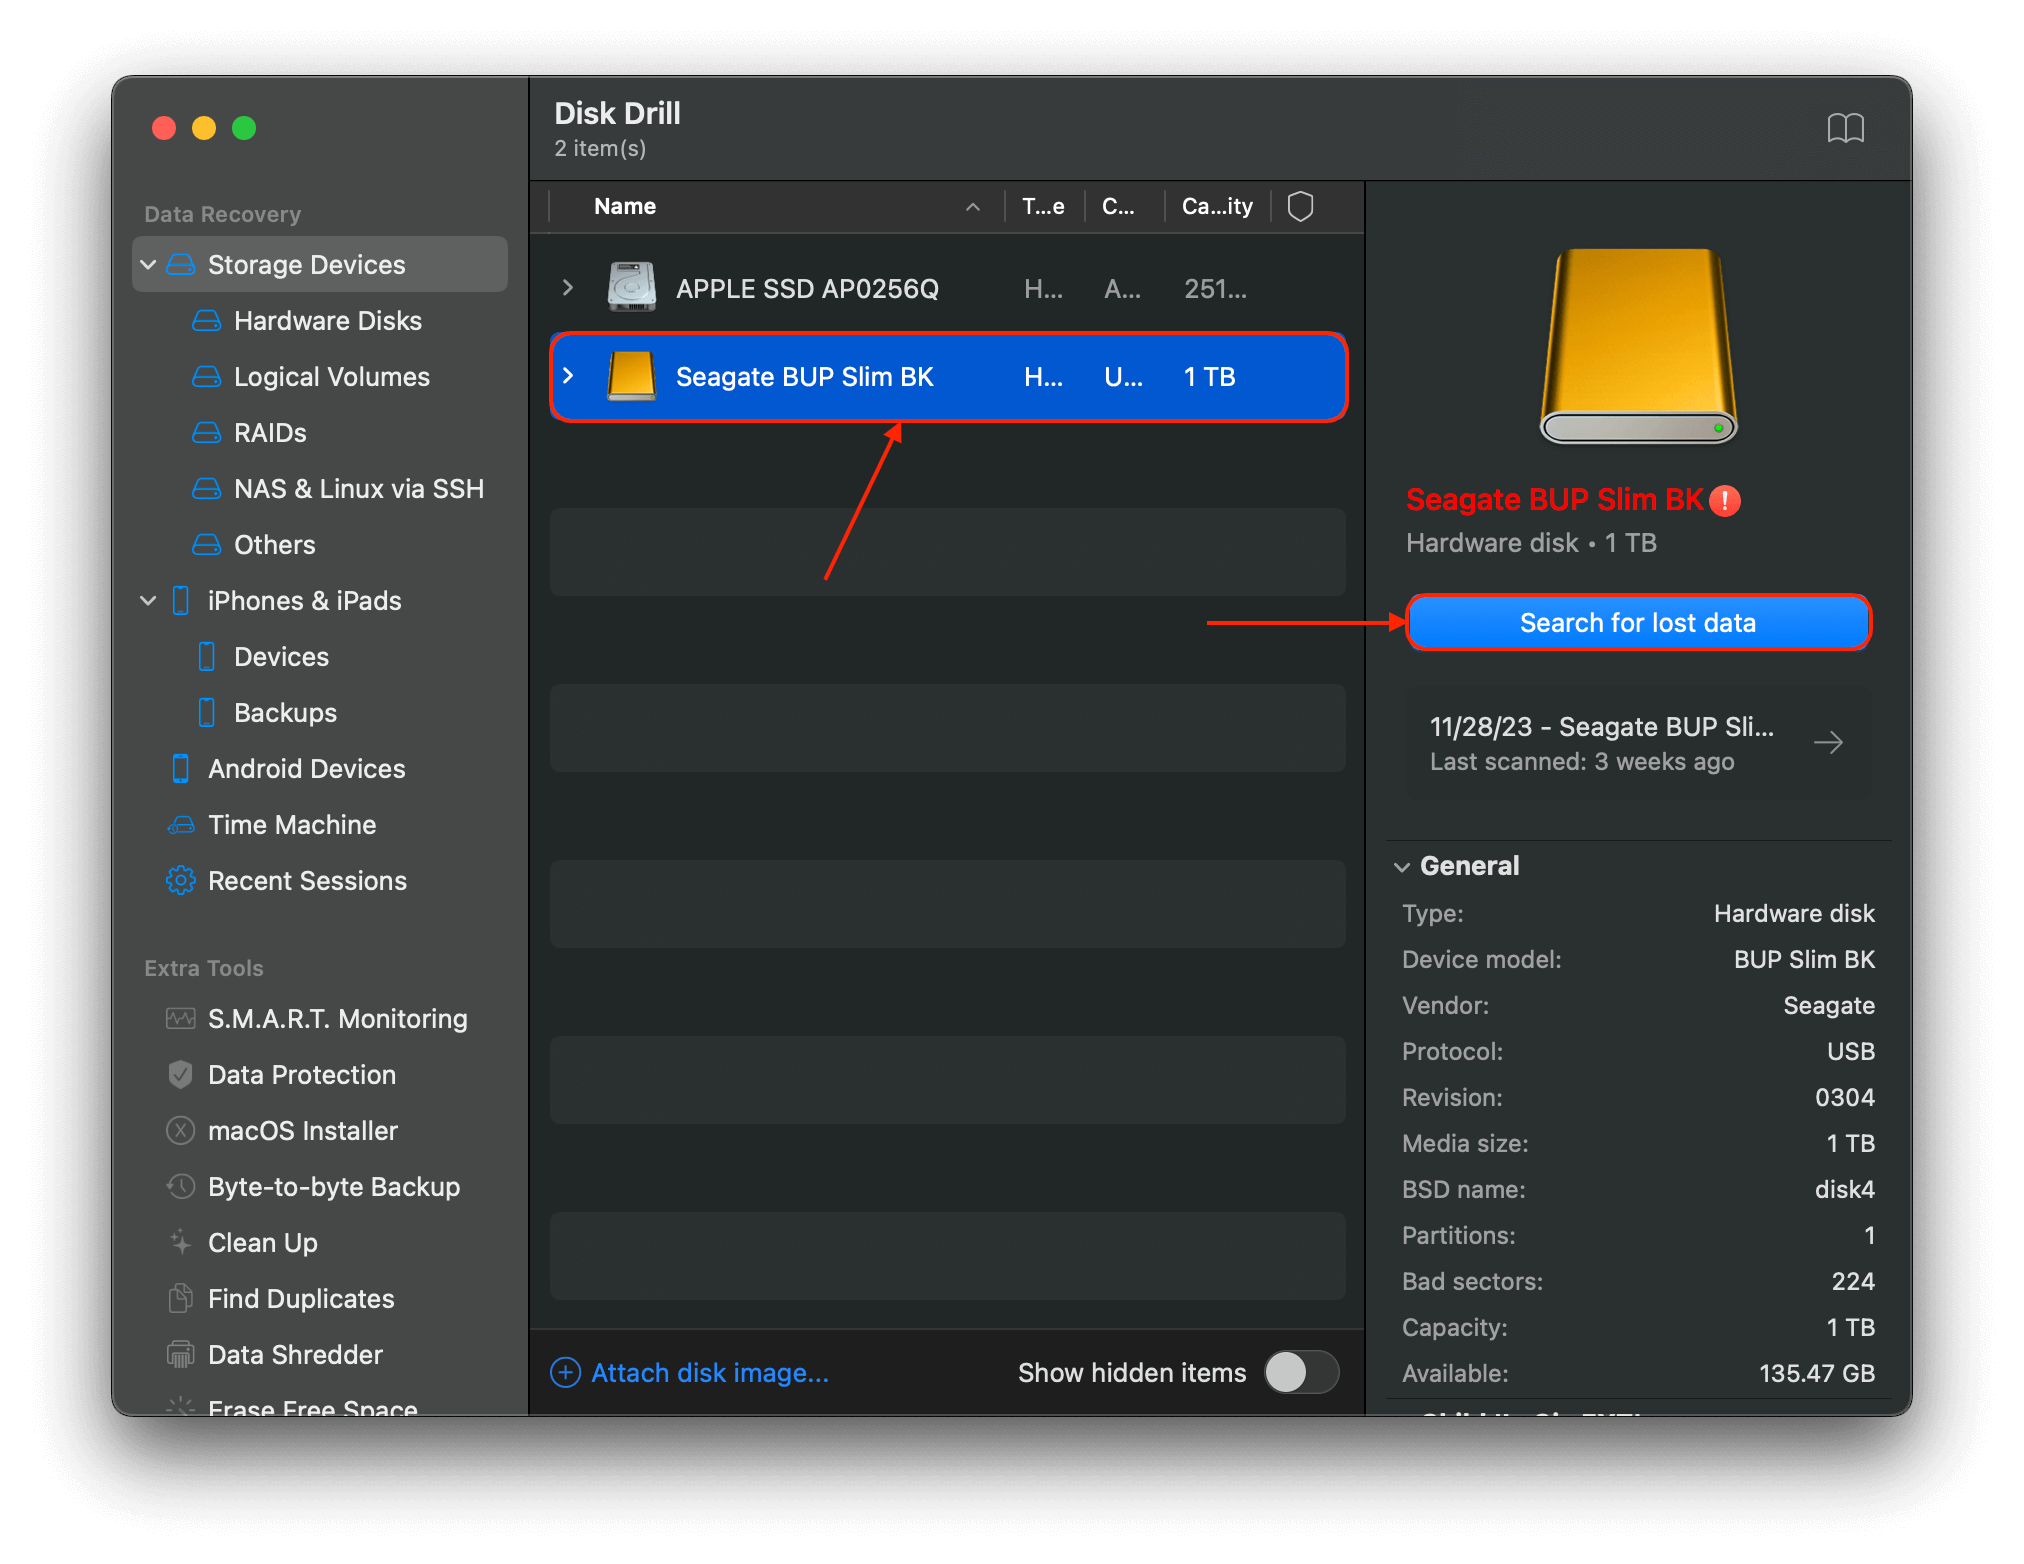
Step 2. Launch Disk Drill (Finder > Applications). Then, select your drive from the list and click Search for lost data.
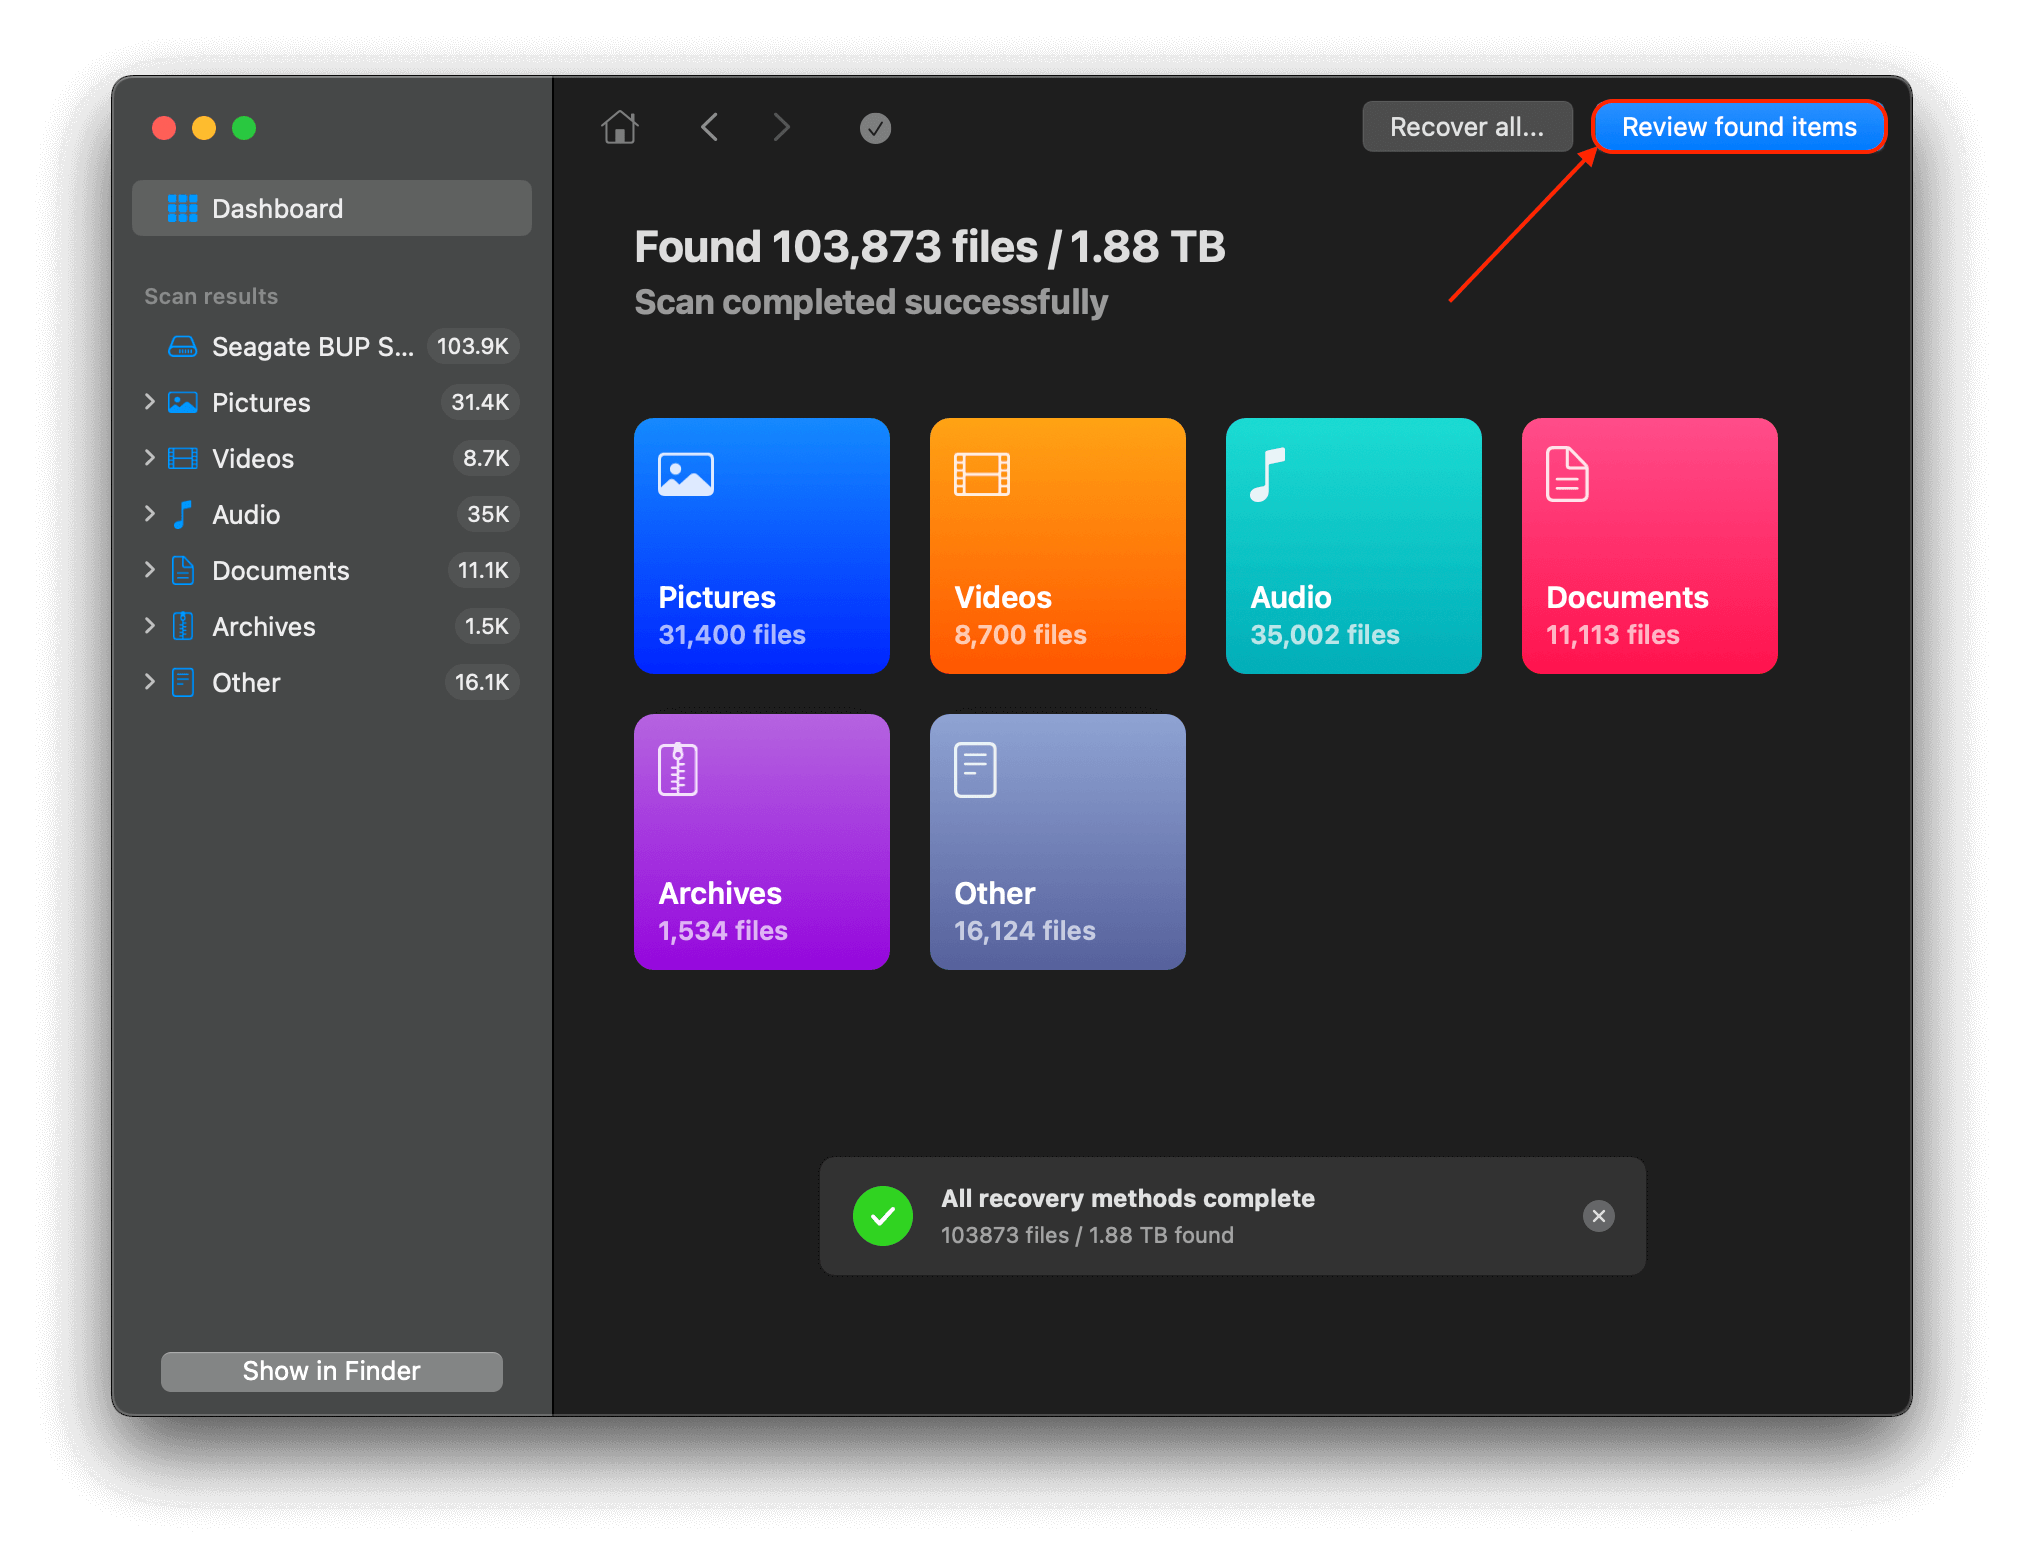
Step 3. Wait for Disk Drill to finish the scan. Once it’s done, click Review found items.
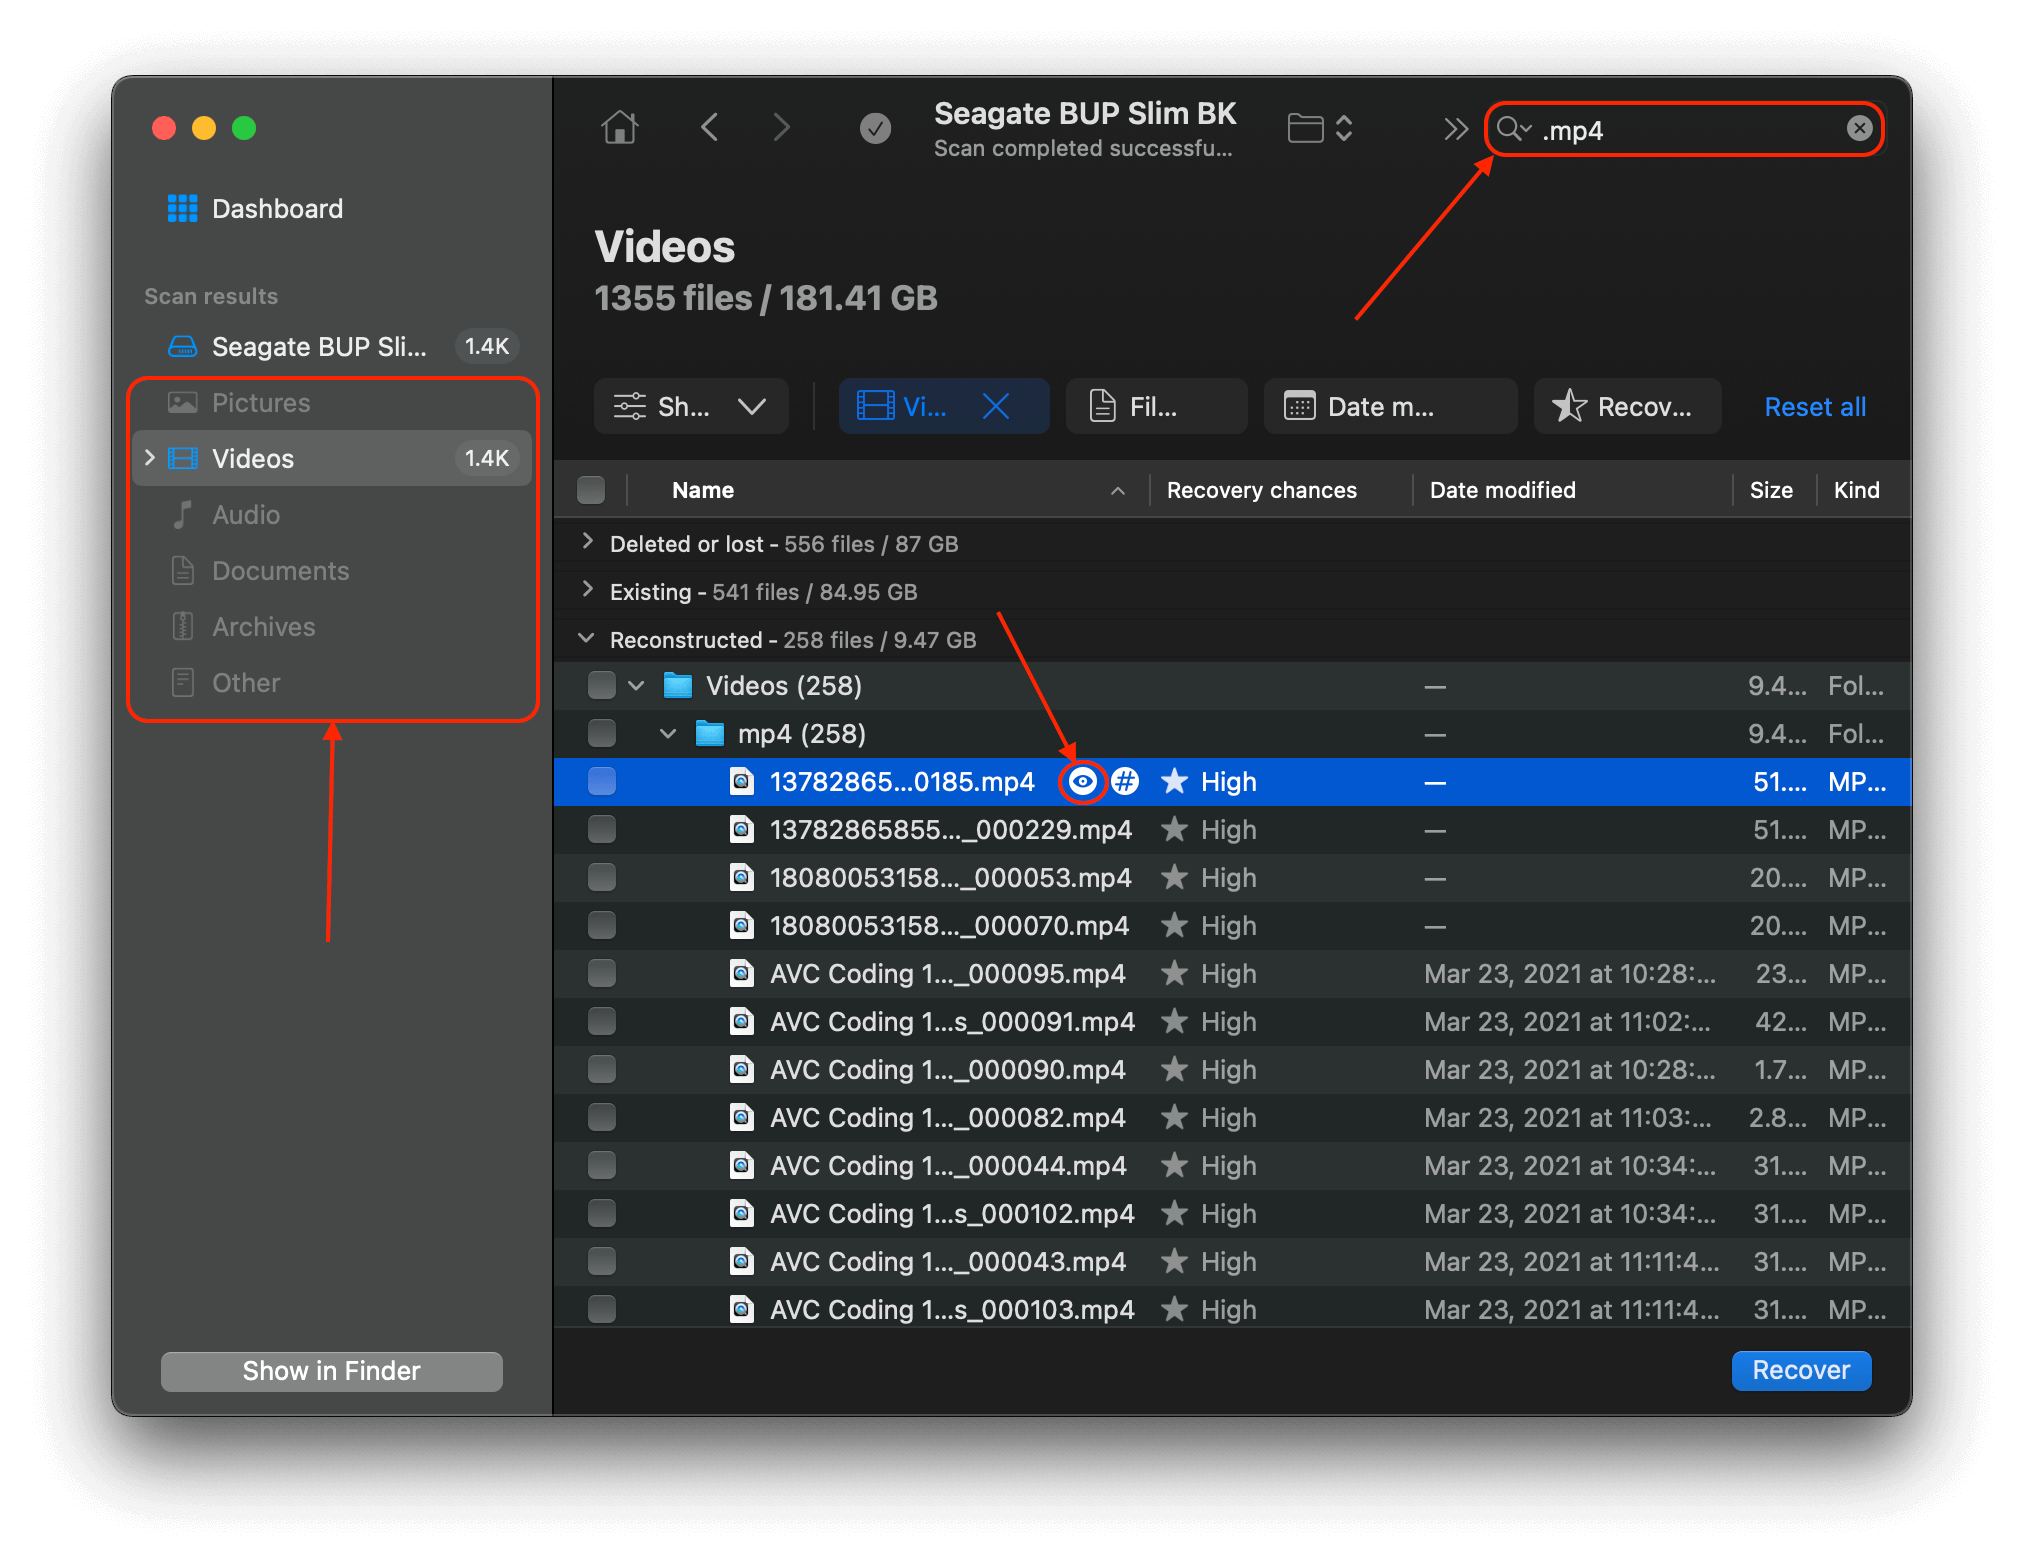
Step 4. In case of deleted or corrupted data, expand the Deleted or lost and Reconstructed sections. If your drive is just inaccessible, expand the Existing section.

Step 5. You can filter scan results using the categories in the left sidebar or by using the search tool. Make sure to preview your data by hovering your mouse beside a file and clicking the eye button that appears.
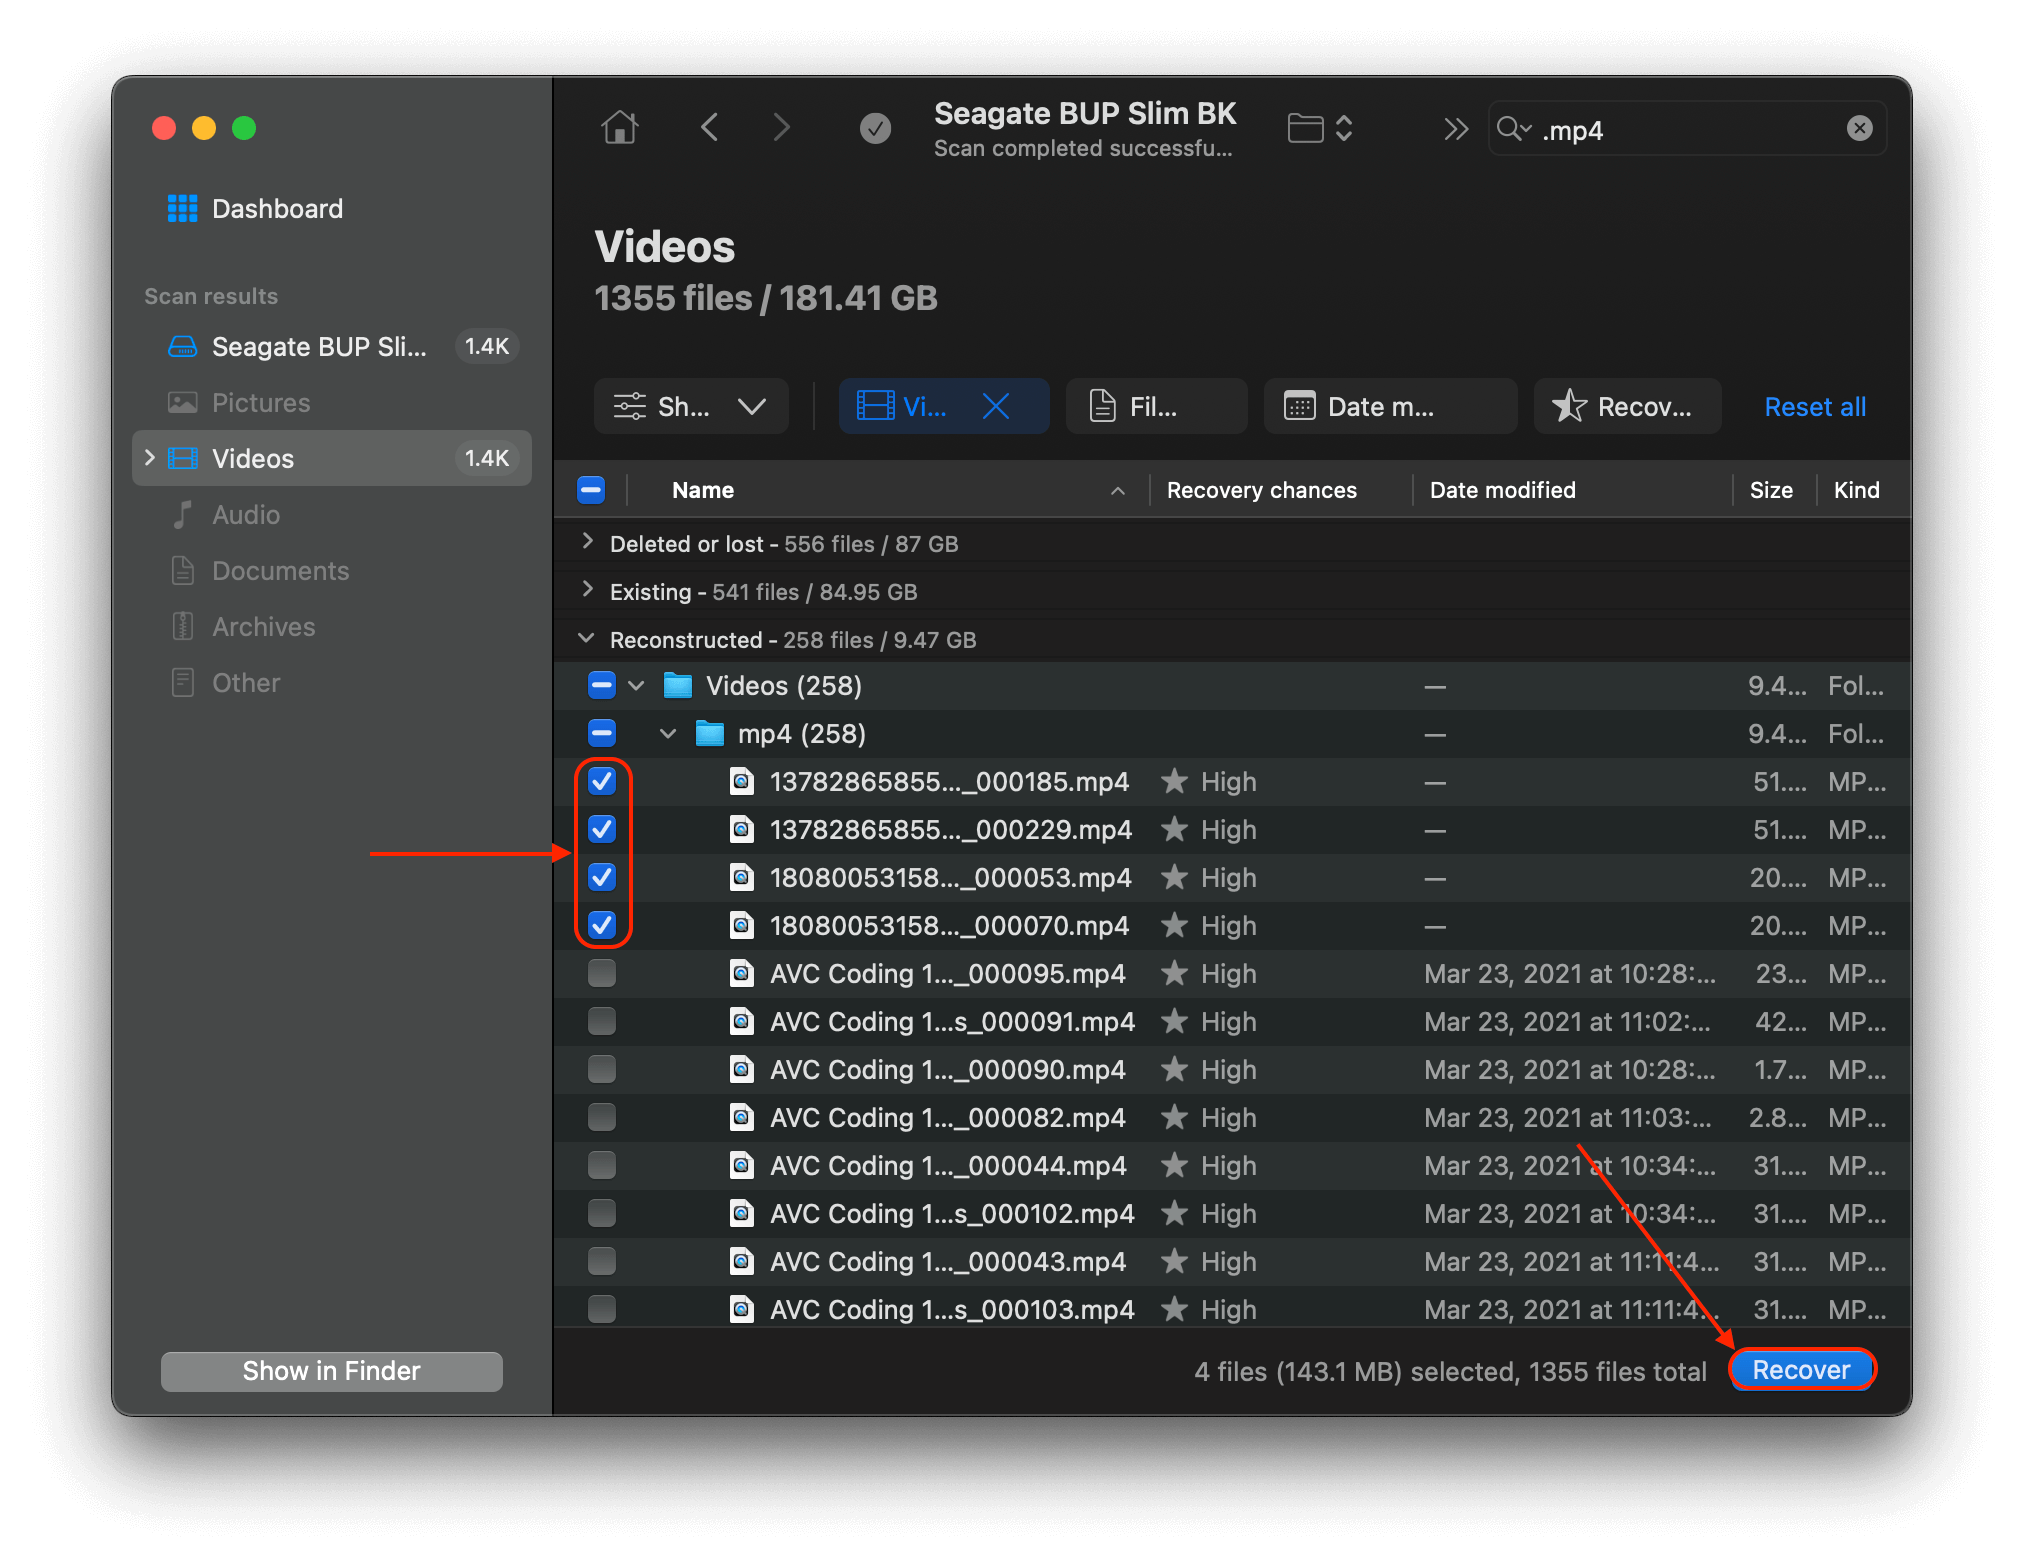
Step 6. Once you’ve found the files and folders you want to restore, mark the box beside them. You can also mark the box in the top of the leftmost column to select all files. Once you’re satisfied with the selection, click Recover.
Step 7. Choose a location on your Mac (NOT on the drive you’re recovering) where Disk Drill will save your recovered files. Click Next to start the recovery process.
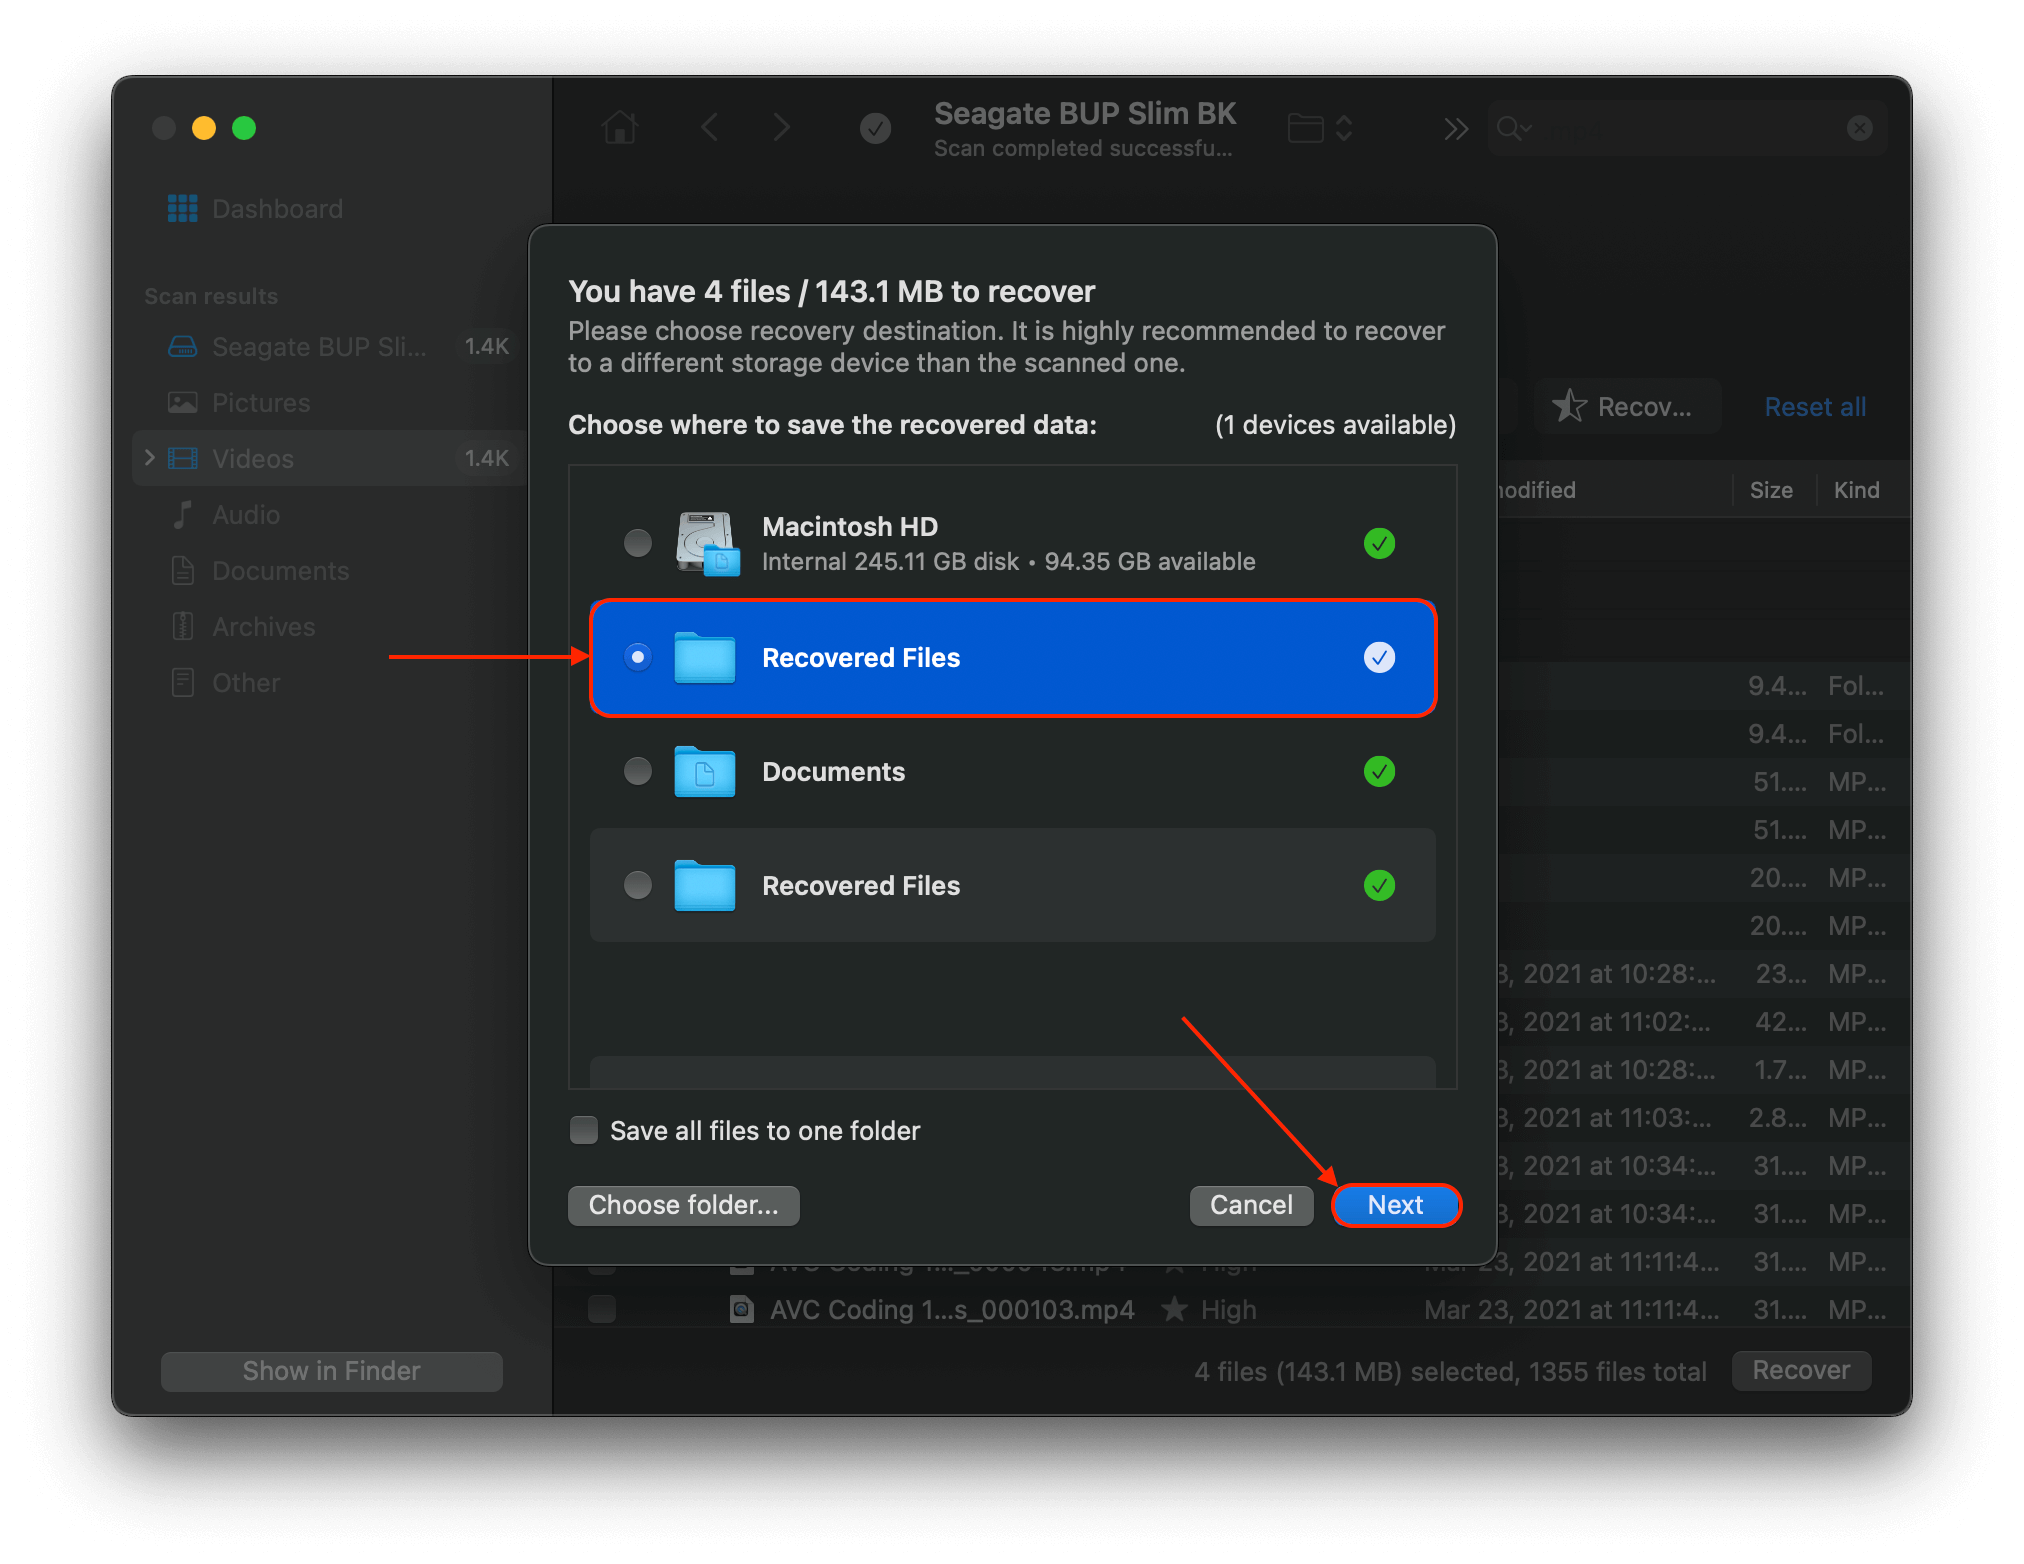
That’s it! Disk Drill is great at helping you recover files from an external hard drive if you can’t find them on the drive or if the drive is failing.
Method 4: Send Your External Hard Drive to a Data Recovery Service
Data recovery services can address both logical and physical data loss, providing a great option for those who are willing to spend some money to get their data back.
In fact, they’re often the only option for recovering data from external hard drives that have been mechanically damaged because only data recovery services are equipped with the kind of cutting-edge equipment that’s necessary to work on modern external hard drives.
To get started, you need to find a suitable data recovery service, and ask for a price quote. If you decide that you’re happy with it, you can go ahead and ship your external hard drive to the data recovery service center of your choice. The best services offer a free evaluation, so you won’t spend any money unless your data is recoverable.
What if My Mac Can’t Recognize My Hard Drive?
If you plug your external hard drive into your Mac and nothing happens, don’t worry the drive most likely isn’t broken. There are some steps that we can take to try and get the external hard drive to be recognized.
Do keep in mind though, that external hard drives can fail even though it is not likely. They’re mechanical devices with moving parts which over time, can stop working if they have been subjected to damage or have failing components.
Before we come to that conclusion though, here are some ways to try and get your external hard drive to mount to your Mac.
Fix 1: Restart Your Mac
As cliche as it may sound, restarting your Mac can fix a lot of issues on its own. The simple “turn it off and back on again” is a good way to troubleshoot issues and should allow for the hard drive to mount to your Mac.
Step 1. Unplug your external hard drive from your Mac.
Step 2. Restart your Mac.

Step 3. Once your Mac has booted back up, plug in the external hard drive and see if it is functioning correctly.
Fix 2: Check Your External Hard Drive’s Connection
The issue could also be something as simple as the cable that you’re trying to use to connect the hard drive to your Mac. Cables do fail, if you have a spare around, try using that instead and see if that fixes the issue.
It could also be the port on your Mac. Try plugging the external hard drive into another port and see if the hard drive mounts to your computer.
Lastly, if you’re using an adapter or dongle try plugging the external hard drive right into your computer and see if that fixes the issue. If you need the dongle due to a connector compatibility issue, try using a different dongle or plug it into another computer.
Fix 3: Reset NVRAM
NVRAM in short, stores settings that you have made on your Mac. It won’t change the configuration of your System Preferences, but it stores things such as sound settings, time zone information, and settings related to hard drives.
Resetting your NVRAM could solve the problem of your hard drive not being recognized by your Mac and it only takes a few steps to reset it.
Step 1. Shut down or restart your Mac.
Step 2. Once your Mac starts back up, immediately press and hold Option, Command, P, and R all together at the same time.
Your Mac will then start back up again and you can let go of the keys at this point. Check and see if the external hard drive is now being recognized by your computer.
When I worked at an Apple Store, this would fix common issues for customers and it is a simple way to troubleshoot why your external hard drive may not be mounted to your Mac.
Fix 4: Repair the External Hard Drive Using Disk Utility
If external drive is present in Disk Utility you can repair it using the First Aid. First Aid can find and repair errors related to the formatting and directory structure of the external hard drive which could increase the chance of external hard drive data recovery on Mac.
Step 1. Plug-in your external hard drive.
Step 2. Launch Disk Utility and find the external hard drive.
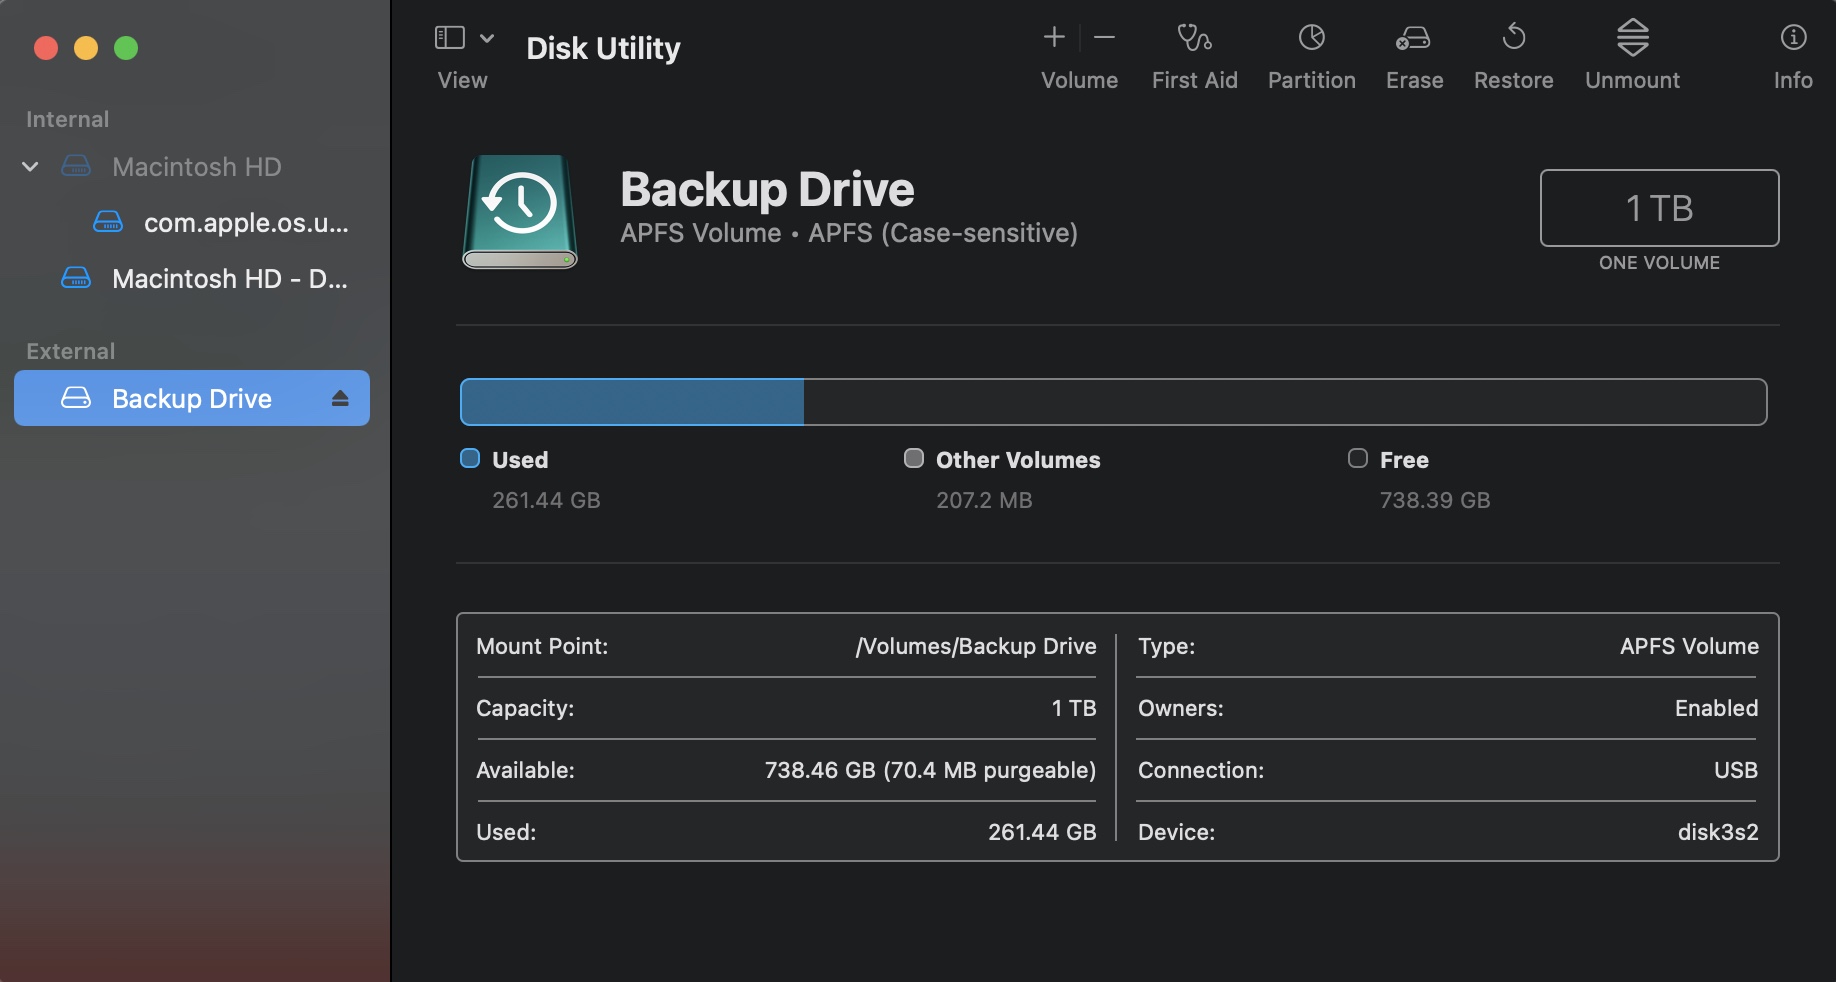
Step 3. Run First Aid on the External Hard Drive.
Fix 5: Format Hard Drive on Other PC
macOS can only recognize the following formats: HFS+, APFS (Apple) and ExFAT, FAT32, NTFS (Windows). If you’re using other formats, like ext3/4, you’ll need to use a Windows PC to format your drive. Just make sure that you choose one of the formats that we mentioned at the beginning. We personally recommend ExFAT for maximum compatibility.
Conclusion
If you don’t have much prior experience with data recovery, getting back lost files from an external hard drive may seem like a daunting task. But with the right tools and knowledge, it can be a relatively straightforward process. By following the methods outlined in this article, you should be able to get your files back in no time—just remember to always back up your data to prevent data loss in the future.
FAQ:
You can try the First Aid feature in Disk Utility, which is included for free in macOS. The First Aid feature will analyze the corrupted external hard drive and attempt to fix any issues it encounters.


