This article is the ultimate guide to help you import photos (and videos) from your SD to Mac. And when things don’t go according to plan, we also talk about common problems that can prevent you from importing photos and how to fix them.
Finally, there are cases where your SD card gets corrupted or damaged, which puts you in danger of data loss sooner or later. We’ll help you secure your data before this happens, or recover it in the worst case scenario. Read on.
How to Import Photos From an SD Card to Mac
Below are 3 simple steps to transfer photos from your SD card to a Macbook Pro (or any Mac) using the Photos app:
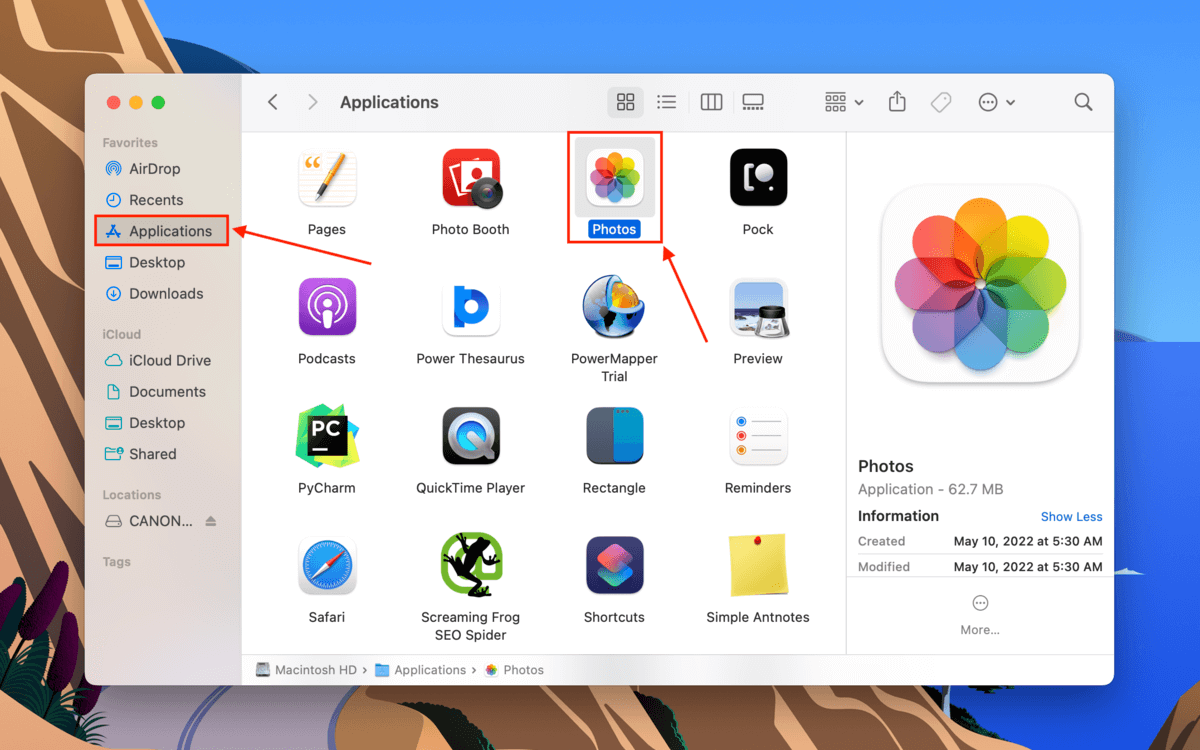
Step 1. Make sure your SD card is securely connected to your Mac, then open the Photos app (Finder > Applications > Photos).
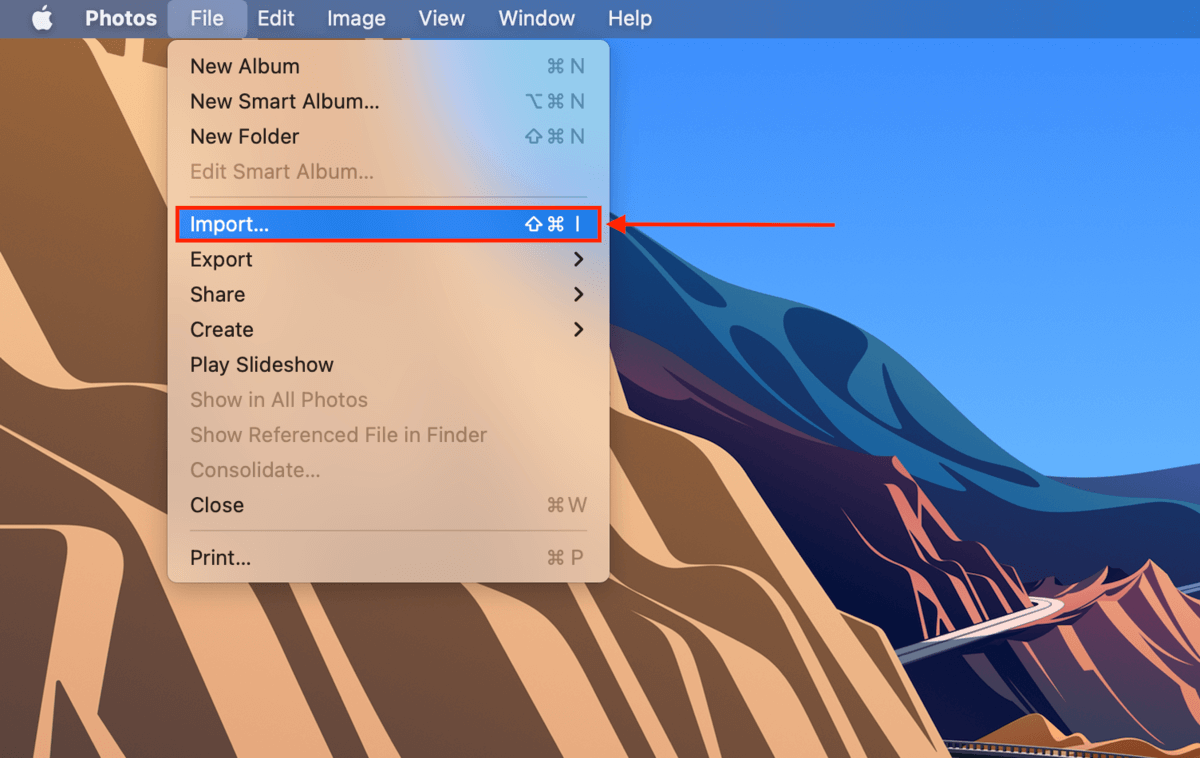
Step 2. On the menu bar, click File > Import.
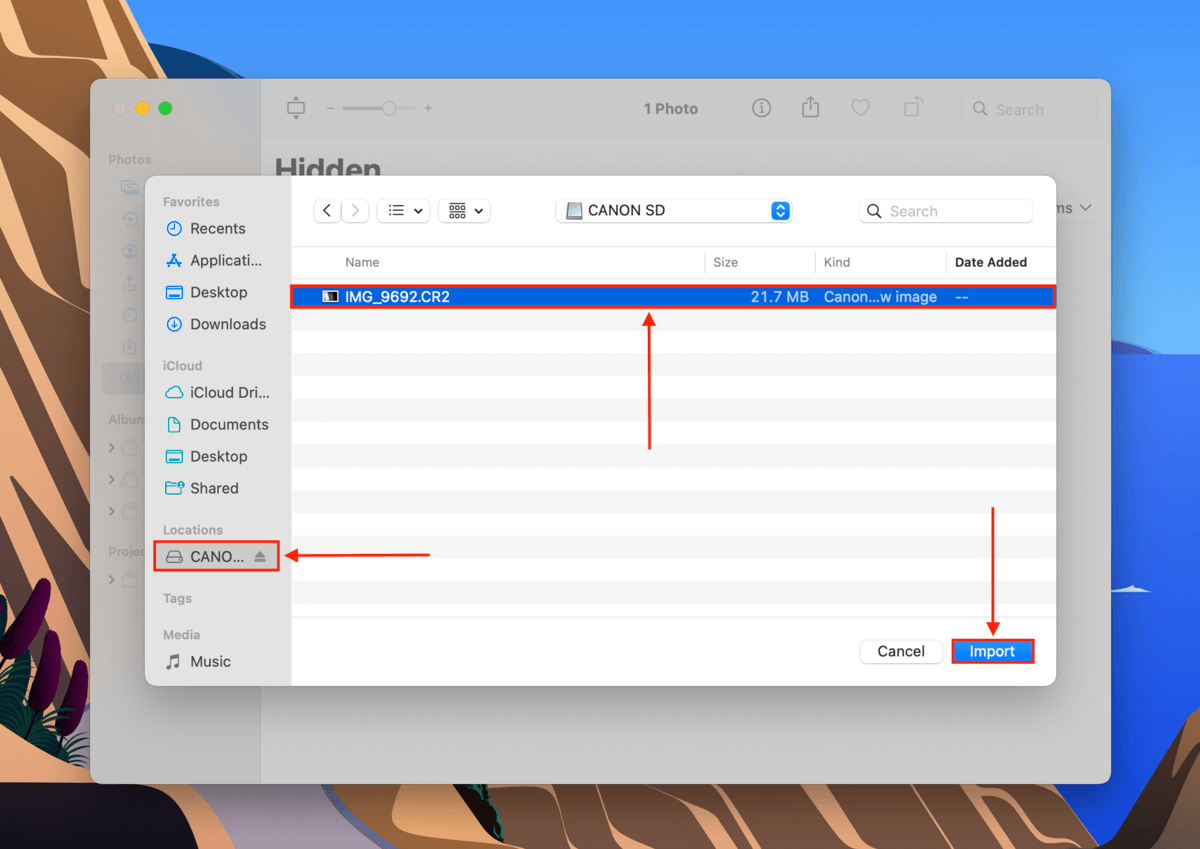
Step 3. In the window that appears, select your SD card from the left sidebar. Then, select the files you want to import and click “Import” to upload your pictures from your SD card to the Photos app.
What to Do If Photos Won’t Import from SD Card
If your photos won’t import from your SD card after following the steps above, let’s start troubleshooting your SD card. Below is a table with the most common scenarios where photos won’t import from your SD card, as well as the corresponding solutions for each unique issue.
| Issue | Summary | Solution |
| 🔌 Faulty ports or connectors | Ports and connectors may become faulty due to dust and debris. | You can try using a dry microfiber cloth to clean it out. If it still doesn’t work, try other ports, connectors, or even another Mac. |
| ⚙️ SD card settings | If your SD card is locked, you might see a message saying “This card cannot be modified” or something similar. | Eject your SD card and check the left side of the physical card for a sliding lock. Slide it up to unlock it and try again. |
| 🎞️ Wrong image format | The Photos app supports HEIF, JPEG, PNG, GIF, and TIFF. You can also import videos from your SD card to Mac (HEVC and MP4). Most popular RAW formats are also supported – you can check the full list here. You may encounter an “Unsupported Format/File Type” error for older Mac models or proprietary formats. | Try updating macOS. Otherwise, you may need to convert your file. |
| 🗃️ Image format changes | If you shoot photos in RAW and JPEG and import your SD card, the Photos app imports photos from your camera to Mac with JPEG as the default. | If you want the RAW file to be the default instead, open a photo in the Photos app and click Edit > Choose Image > Use RAW as Original. |
| 🗳️ Corruption | Your SD card can get corrupted when infected by a virus, affected by erratic software, or interrupted while reading and writing data. This is usually the culprit if you lost data while transferring photos to your computer. | You can fix this by formatting your SD card, but you first have to recover and backup your photos and videos. More in the next section. |
| 💥 Physical Damage | SD cards can be damaged by water, extreme temperatures, and scratches caused by dust and debris getting inside. | In this case, it’s better to send it to a professional data recovery center to avoid further damage. |
How to Recover Lost Photos from an SD Card on Mac
In case your SD card has been corrupted, it’s only a matter of time before you lose data (if you haven’t already). And the longer you use a corrupted SD card, the worse the problem gets. The solution is to “clone” your SD card. We can then safely use data recovery software to carefully extract and rebuild (if needed) the photos and other data from the clone.
For this article, we’ll use a data recovery software called Disk Drill. It has both of the tools we need – an “image-based backup” (or cloning feature) and data recovery. This makes it much easier for beginners to follow along.
Step 1. Make sure your SD card is connected to your computer, then download and install Disk Drill.
Step 2. Open Finder > Applications, then double-click Disk Drill.
![]()
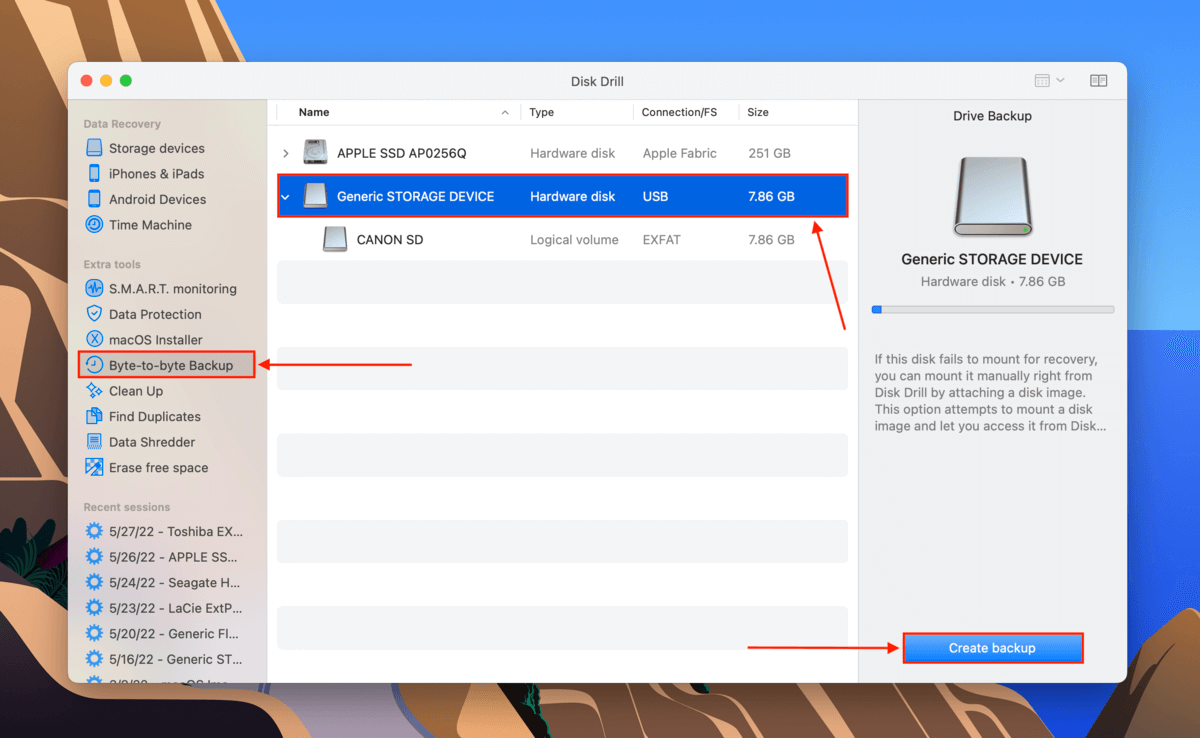
Step 3. On the left sidebar, click “Byte-to-byte backup.” Then, select your SD card from the list and click “Create Backup.” If you’re using a USB-type card reader, your SD card may appear as “General Storage Device.”
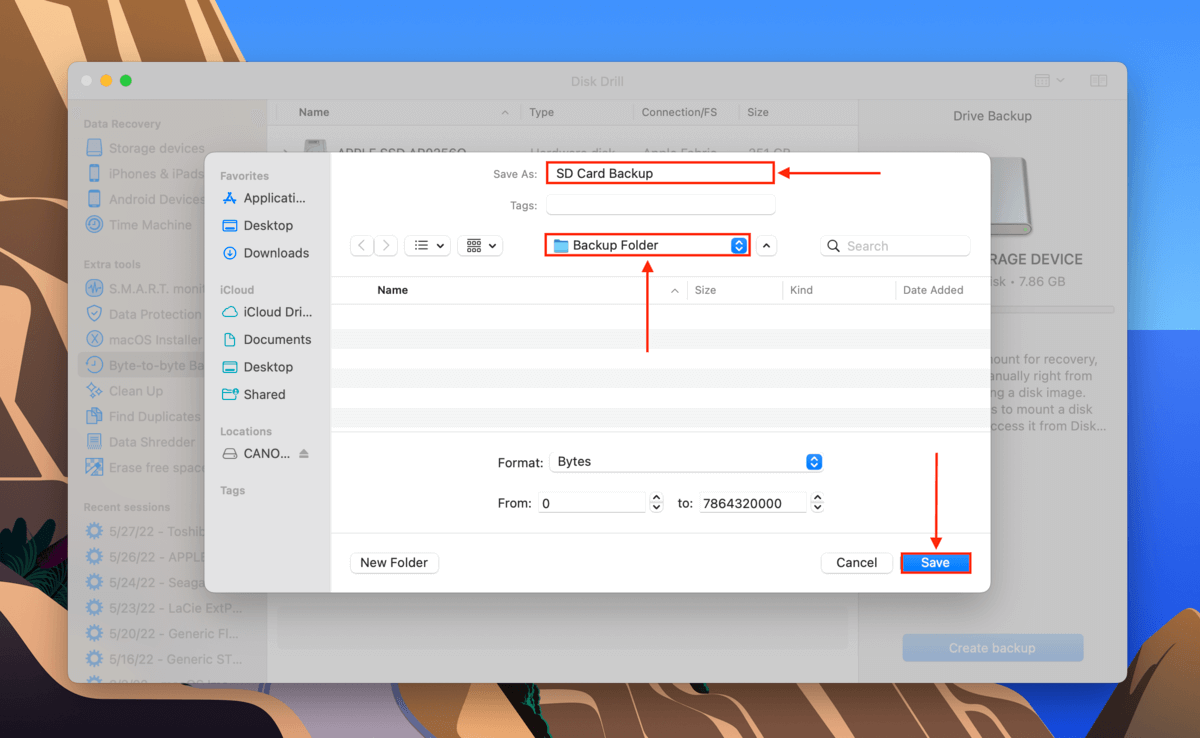
Step 4. In the dialogue box that appears, use the dropdown button to select a location on your computer (not on your SD card) where Disk Drill will save the backup file. Then, click “OK.”
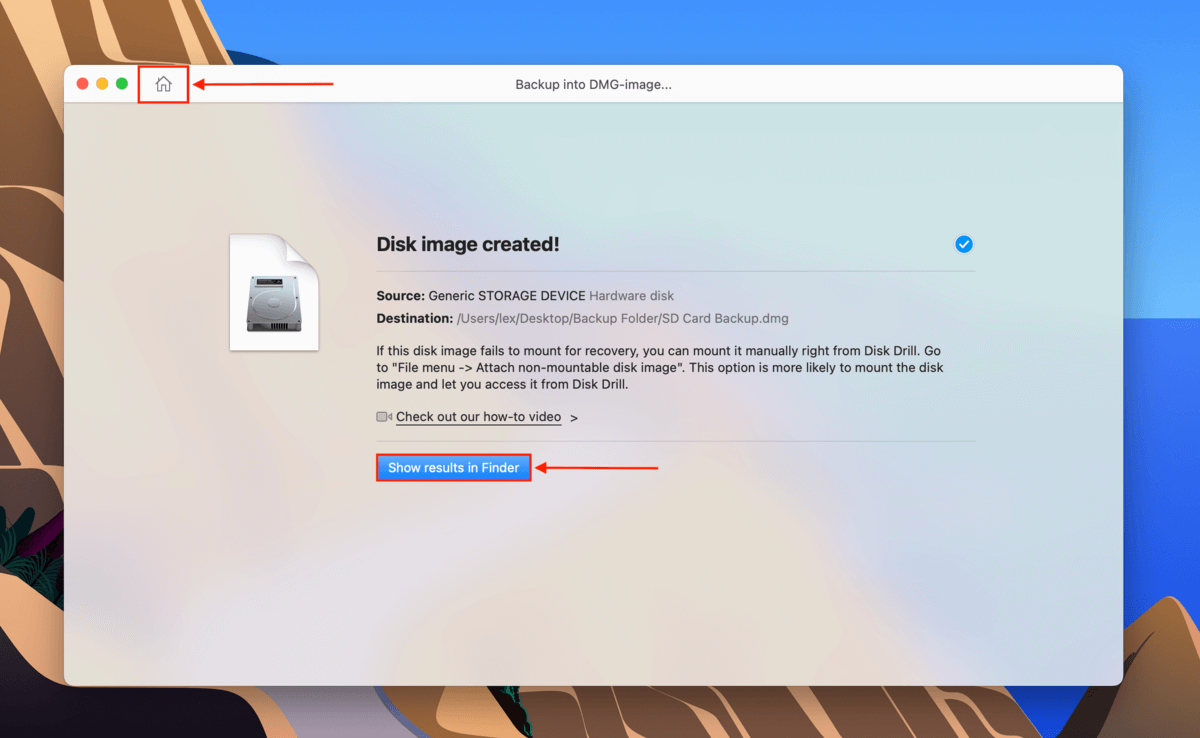
Step 5. Double-click the file we just saved to mount it (you can click “Show results in Finder to find it faster), then click the home button in the Disk Drill window. You can also eject and disconnect your SD card from your Mac at this point.
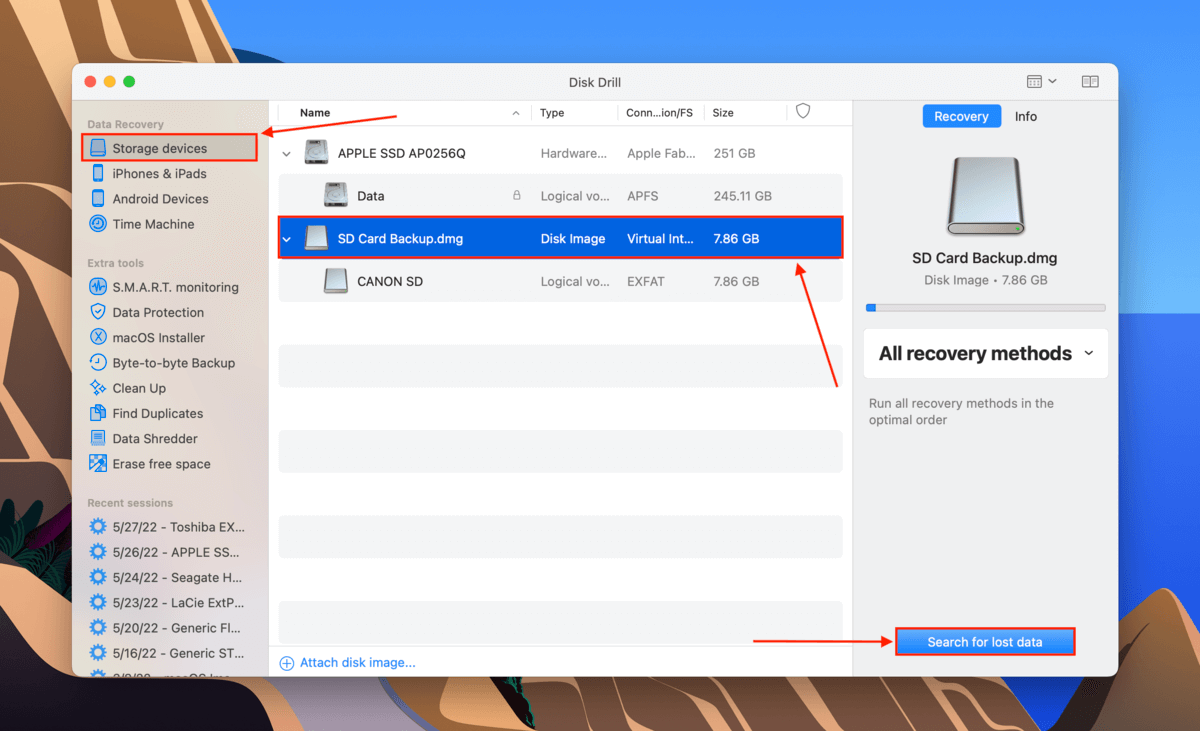
Step 6. On the left sidebar, click “Storage Devices.” In the middle pane, select your backup file (it should have “Disk Image” as its type). Then, click “Search for lost data.”
Step 7. Wait for Disk Drill to complete its scan, then click “Review found items” to view the results.
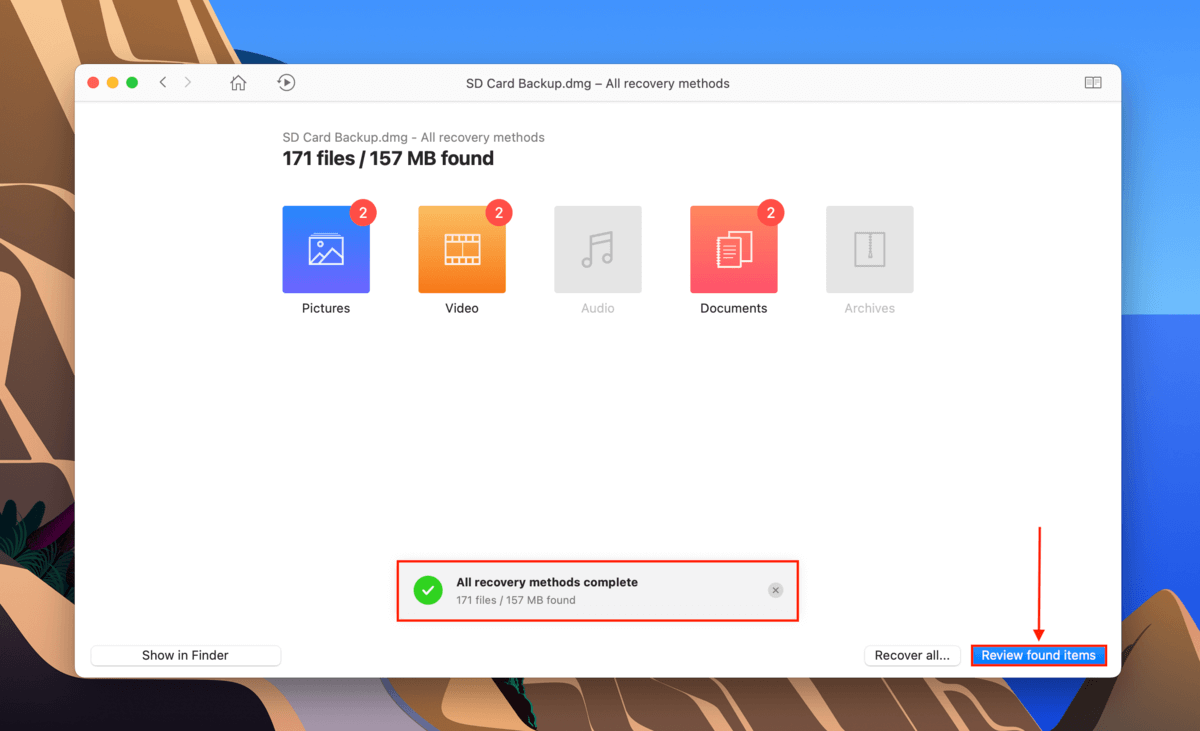
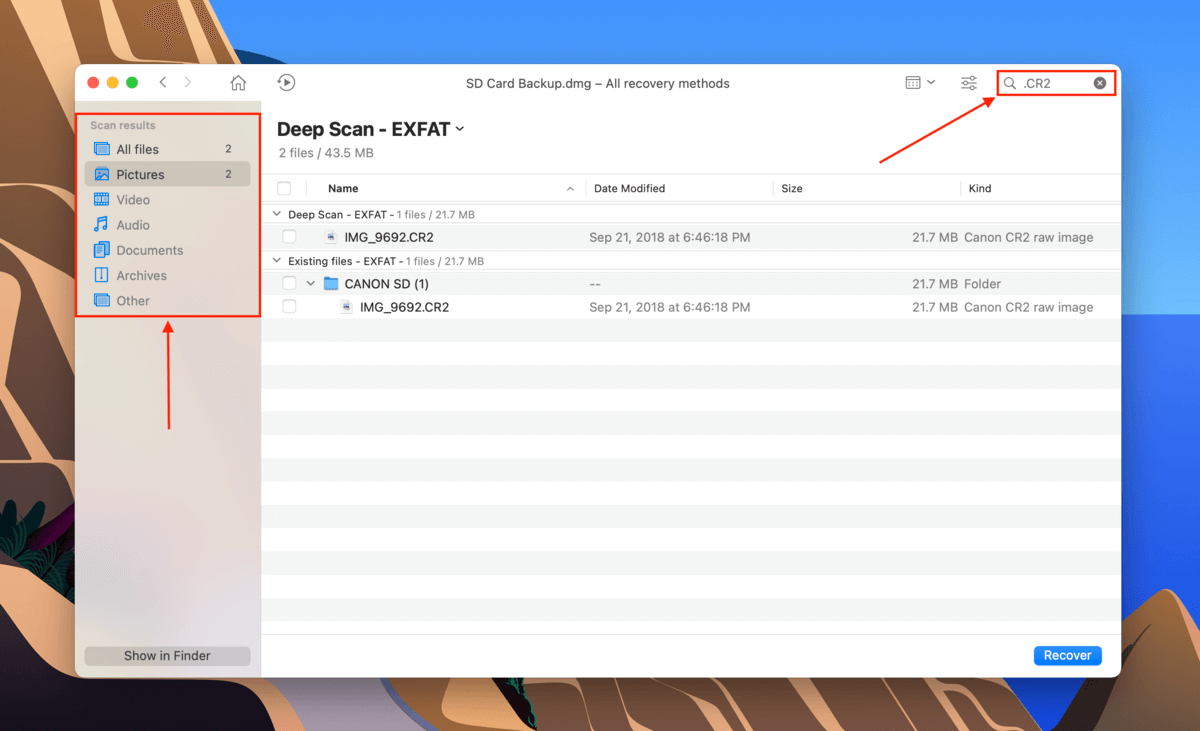
Step 8. Use the left sidebar to view files by type or the search bar in the top-right corner of the screen to filter files by name or extension.
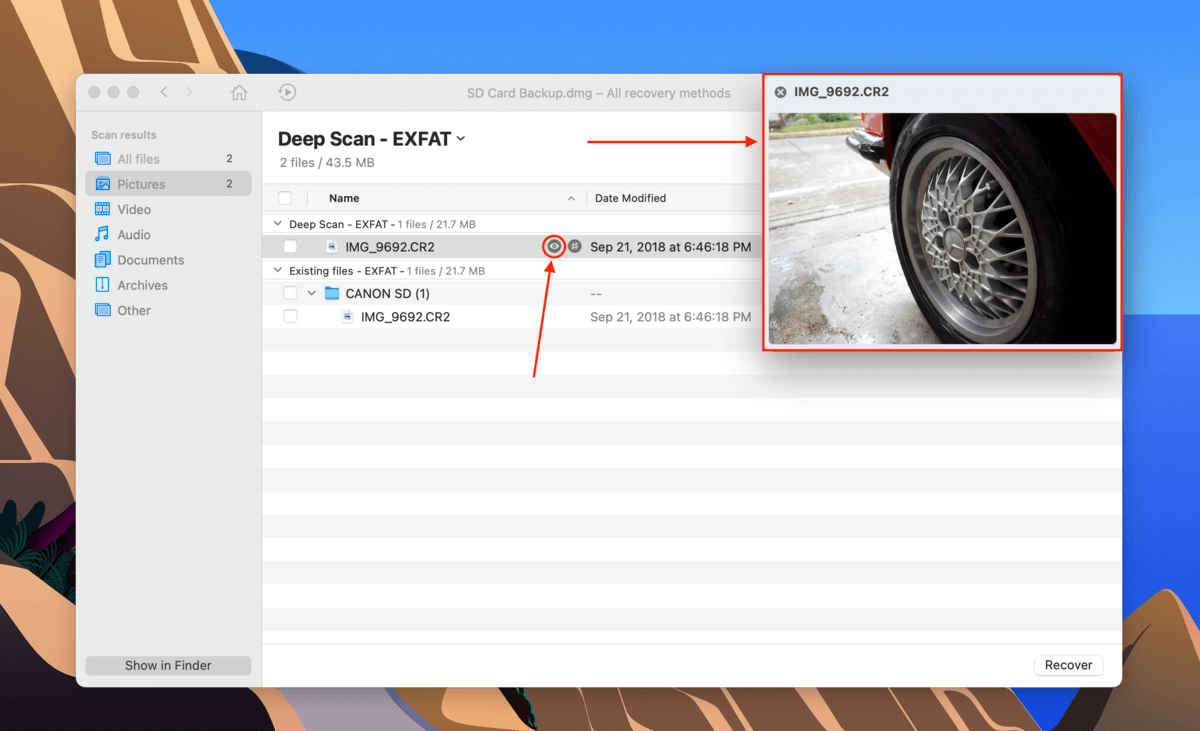
Step 9. Since data recovery tools sometimes can’t recover exact file names, it’s a good idea to preview your files. Hover your mouse pointer to the right of any file and click the eye button that appears.
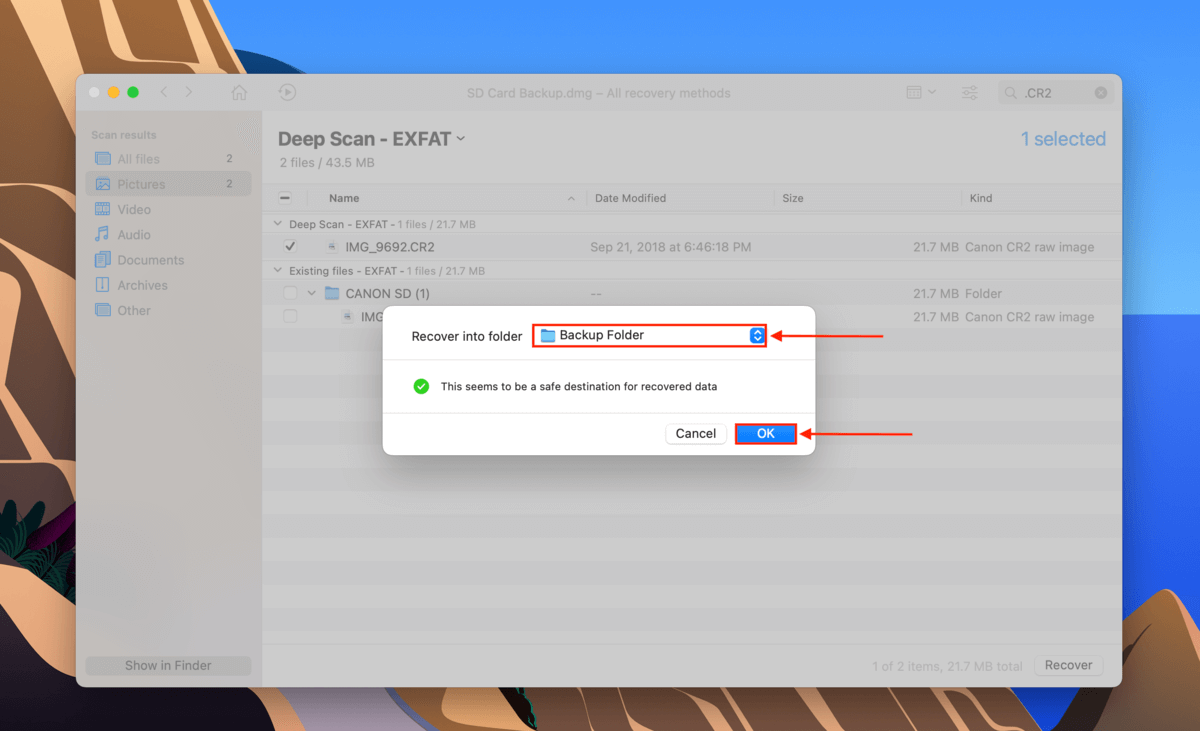
Step 10. Tick the boxes to the left of the files you want to recover, then click “Recover.”
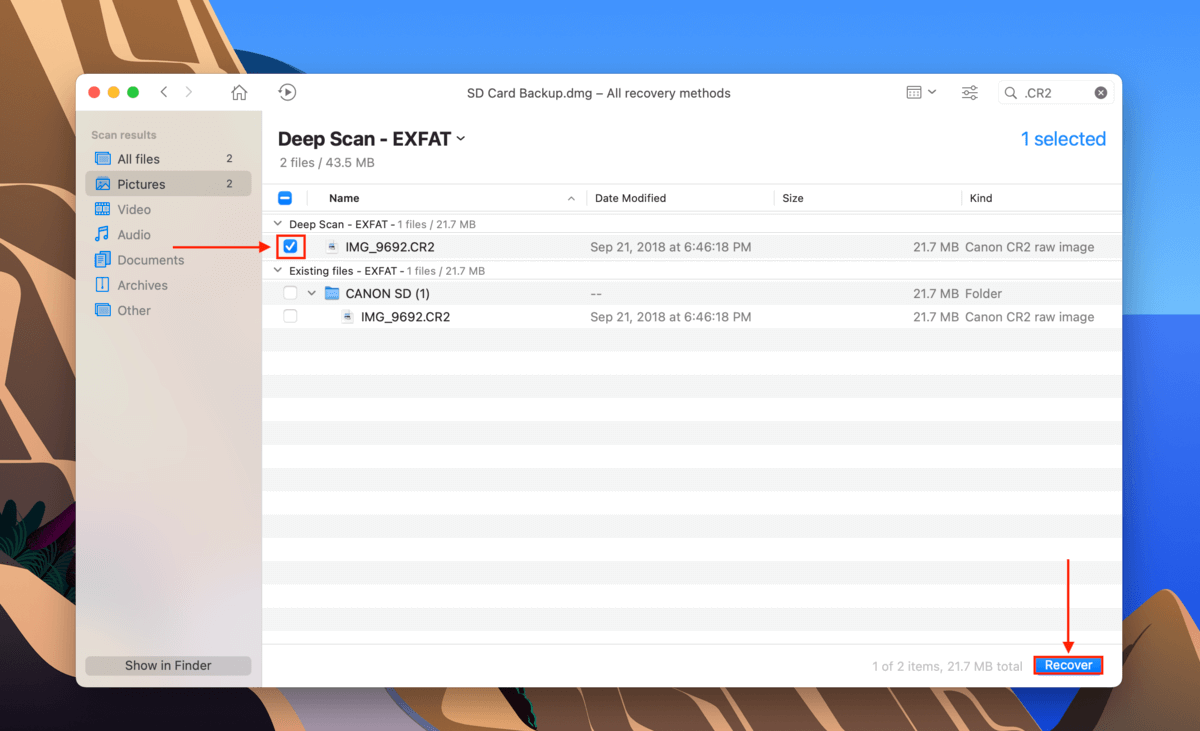
Step 11. Use the dropdown menu to select a location on your computer (not on your SD card to avoid overwriting files), then click “OK.”