
Accidentally erasing important files on your Mac is not necessarily a fatal mistake – although it can easily seem like one when it happens to you. As long as you didn’t do a full format, and the disk is not physically damaged, there’s a good chance you’ll be able to recover an erased Mac hard drive – if not fully, then at least partially.
There are various solutions on the market that can help you recover your data. Time Machine is built directly into your OS, and there are also tools like Disk Drill.
Table of Contents
How Does Disk Utility Erase Data?
Disk Utility is the main disk management application on macOS, and it can assist you with various tasks related to your disks, including erasing them completely. The application has four levels of security when it comes to erasing data:
- Fastest,
- Fast,
- Secure,
- Most Secure.
If you’ve used anything above “Fastest” to erase your data, you’re not going to get it back. Luckily, “Fastest” is the default setting, so if you didn’t change it, you still have a good chance of recovering what you’ve lost.
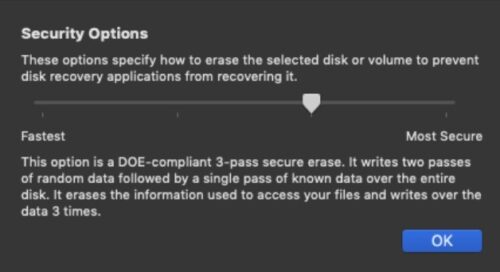
Data erased with the “Fastest” setting isn’t actually physically gone from the disk. Instead, the program simply marks all sectors occupied by your data as unused, allowing applications to write over them freely. As long as no other applications have replaced your data though, it’s still there – just not immediately accessible through your operating system’s interface.
And while this means that you can eventually recover an accidentally erased hard drive, this does come with a few caveats. Most notably, you must stop using the disk immediately after it’s been erased. The longer you continue to use it, the more of the original data will get overwritten. This won’t happen in a controlled, sequential manner either. Applications will write to various parts of the disk for optimization reasons.
How to Recover Data from an Erased External Hard Drive on a Mac
If your drive was erased with the Fastest method you can try to scan it with data recovery software, such as Disk Drill. First of all, keep your drive disconnected while you’re downloading and setting up Disk Drill. Make sure to install Disk Drill on a drive separate from the one that’s affected. Only connect it to the computer once you’re ready to begin the recovery process. Remember, some applications might write to the drive-in unseen ways, even without explicit action on your part.
- Connect the drive to your Mac using the cable that came with it.
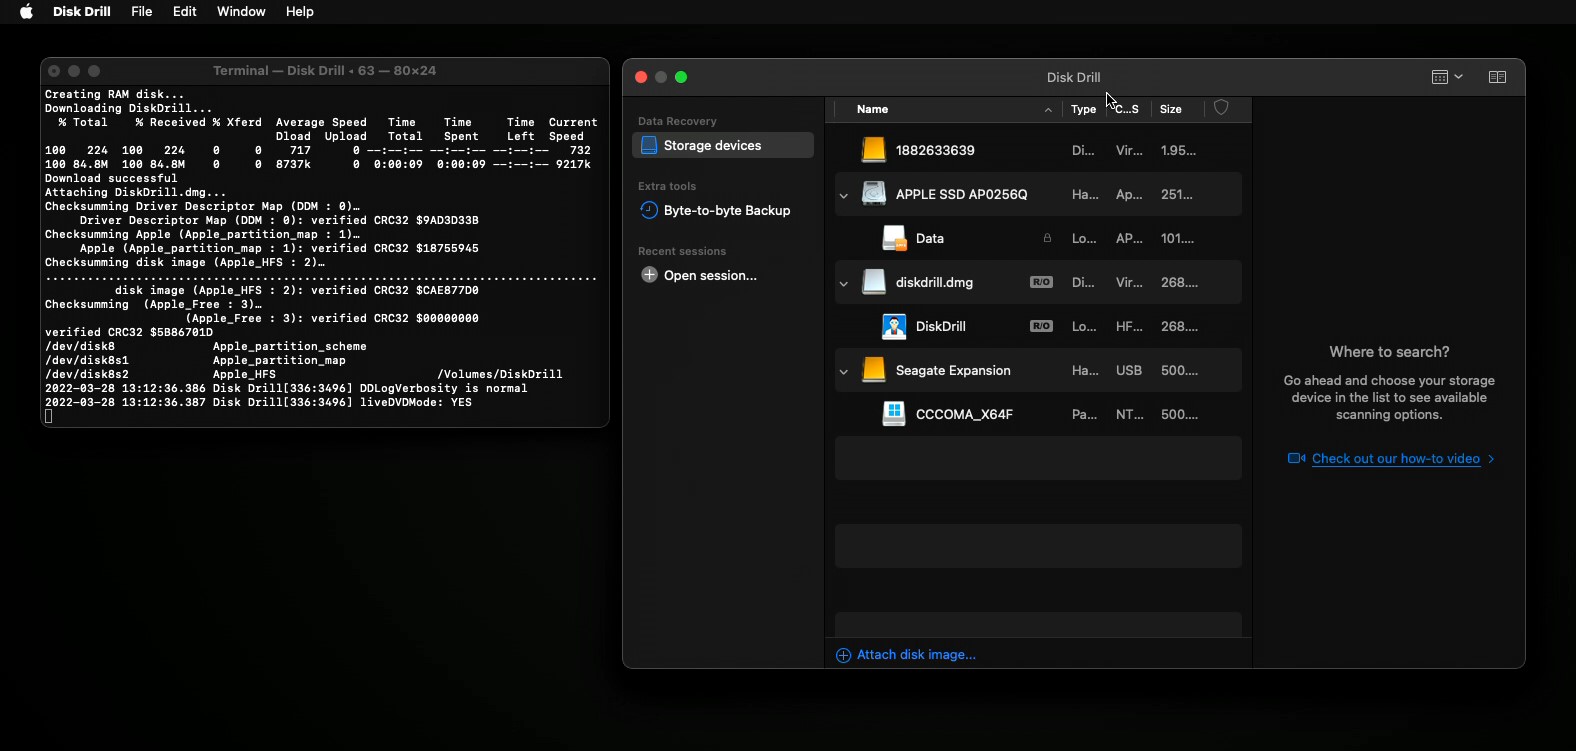
- Launch Disk Drill. You will be presented with a list of drives currently connected to your Mac.
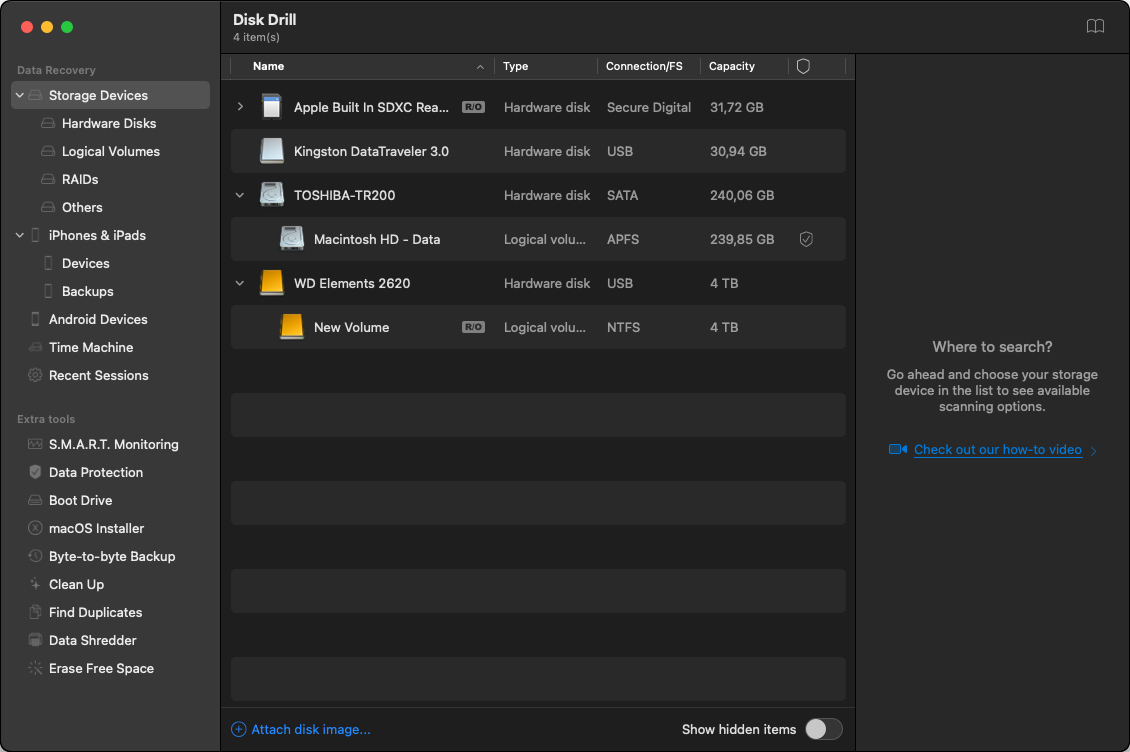
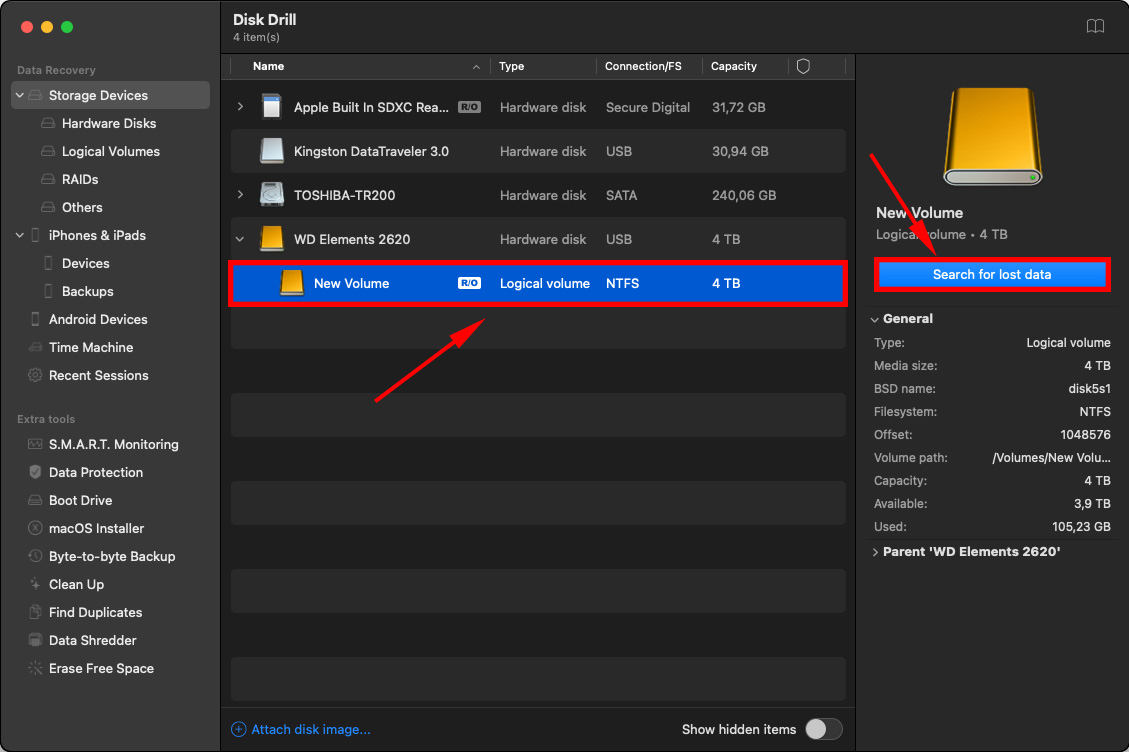
- Choose the one you want to recover and click on Search for lost data.
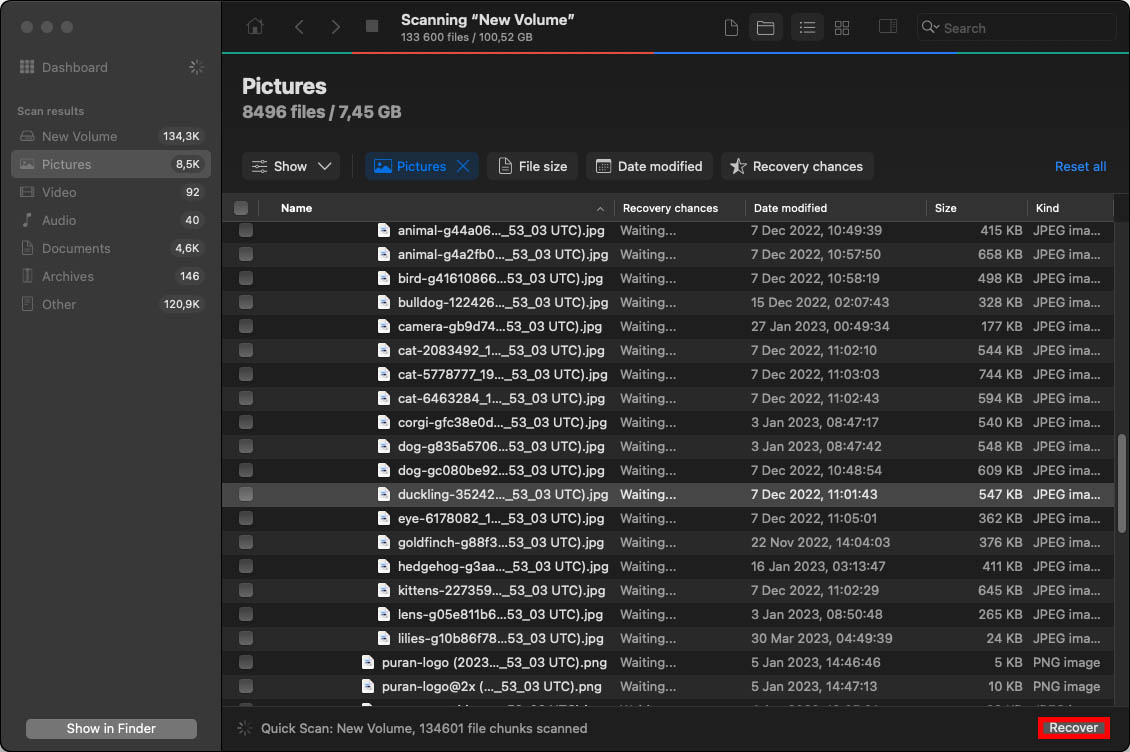
- Check the box for each file or folder you want to recover, then just click Recover, and select the location where you want to save your recovered data. The only important consideration here is to use a separate drive for saving your recovered data.
What to Do if You’ve Accidentally Erased Your Startup Disk on Your Mac
Deleting your startup disk can make your Mac unable to boot. It’s a mistake that inexperienced users are particularly prone to, as they often don’t realize the implications of this action.
If you’ve accidentally erased your startup disk on your Mac through recovery mode startup, don’t panic. Even though it’s a bigger mess to untangle, it’s still possible that you can get your data back.
Method 1: Use Disk Drill in Recovery Mode
Disk Drill can be easily used in Recovery Mode. This approach is a suitable option when you want to quickly recover your disk in an emergency without fiddling with additional tools like creating a bootable USB drive.
- Hold down Command + R while your Mac is turning on to start it in Recovery Mode. Hold down the power button if you’re on an M1 Mac.
- Once you’re in, start Terminal from the Utilities menu.
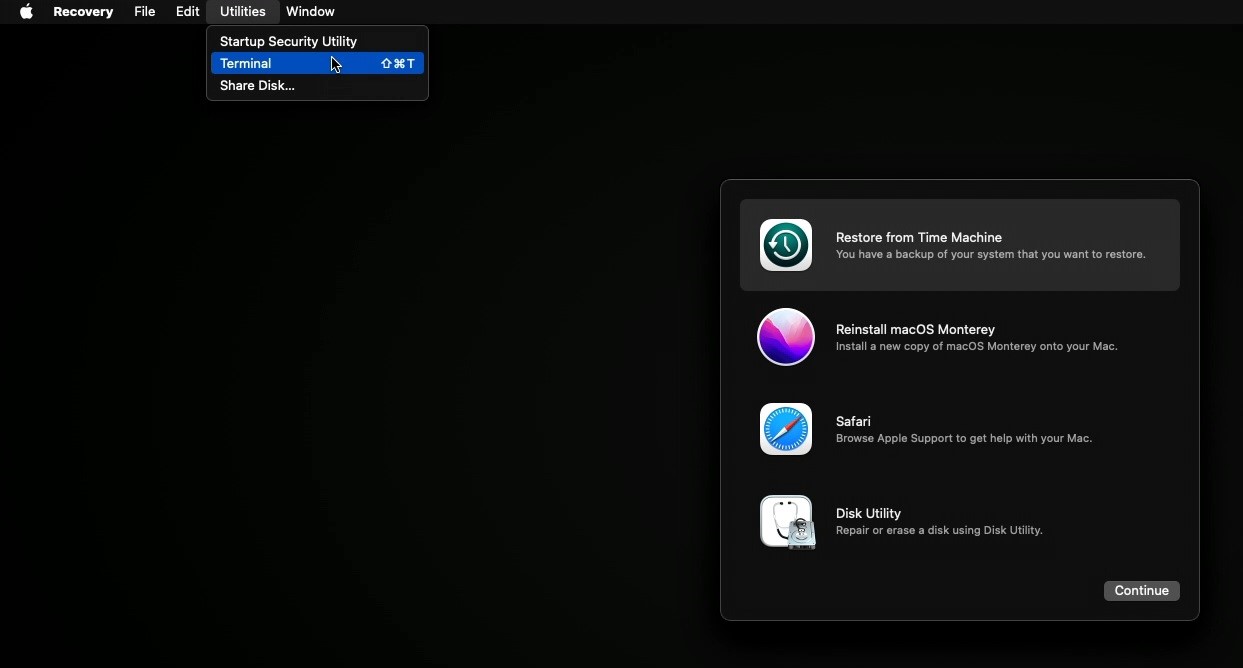
- Enter the following command in the Terminal window and press Enter:
sh <(curl http://www.cleverfiles.com/bootmode/boot.xml)
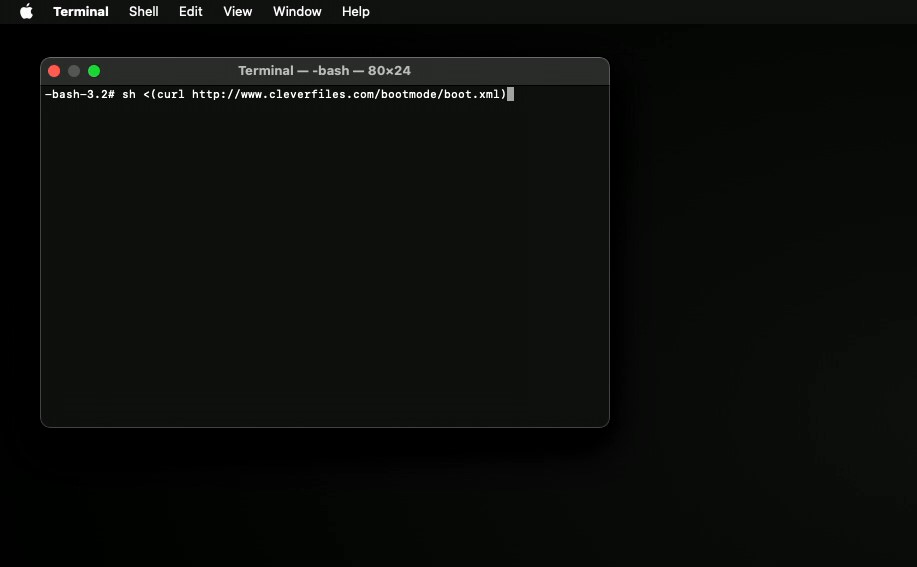
- Disk Drill should now be downloading. Once that’s done, simply start it, and follow the steps we outlined in the previous section to recover your files. Keep in mind that previews will be disabled when you’re in Recovery Mode.
Method 2: Use a bootable macOS drive
Alternatively, you can use a bootable macOS drive. Keeping a bootable drive around is good for situations like this, as it allows you to start the recovery process without any additional setup (other than installing Disk Drill).
- Download macOS Ventura.
- Connect a USB drive to your computer. Keep in mind that the contents of the drive will be erased completely.
- Go to Applications, then right-click on “Install macOS Ventura” and select Show Package Contents.
- Go to Resources.
- Open a new Terminal window.
- Type:
sudo <path to macOS Ventura installation package> --volume <path to USB drive> --nointeraction
For example:
sudo /Applications/Install\ macOS\ Ventura.app/Contents/Resources/createinstallmedia --volum /Volumes/Untitled --nointeraction
- Press Enter – you’ll be asked to provide your Administrator password.
- Confirm the prompt.
- After the installation is complete, you’ll have a bootable macOS Ventura USB installation drive. Connect it to your computer and restart it. Once you’re in, install Disk Drill. Then, refer to the “How to Recover Data from an Erased External Hard Drive on a Mac” section above for instructions on recovering your files with Disk Drill.
Method 3: Use a Time Machine Backup
Restoring a backup from Time Machine a good option for those who want to recover their data with minimal hassle, but is a bit limited in terms of control over the recovery process compared to the other options we outlined above. If you want to restore an entire disk from a Time Machine backup you need to follow these steps:
- Connect the external hard drive with a Time Machine Backup to your Mac.
- Restart your Mac, and hold down Command + R. If you’re using an M1 Mac hold down the power button.
- Once you’re at the macOS Utilities screen, select Restore from Time Machine Backup.
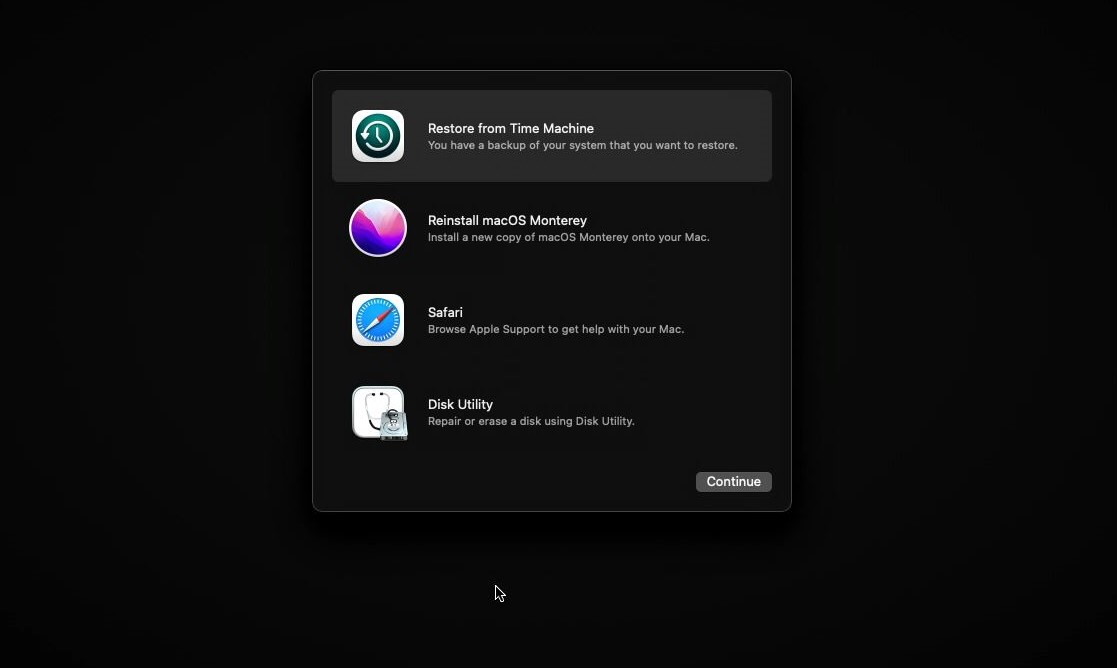
- Select the backup you want to restore, and click Continue. Your Mac will start recovering the selected backup and will then restart.
Conclusion
As long as you know what you’re doing and have taken the time to prepare yourself with the right resources in advance, accidentally erasing a drive on your Mac is something that can potentially be undone with minimal long-term damage. The most important thing is to stop using the drive immediately, and have at least one recovery tool available and ready to use.
FAQ
There are different steps to restart your Mac after erasing your hard drive, and it depends on the Mac that you have. Before restarting, make sure that you are connected to the internet and plug in the power adapter. Reinstalling macOS needs an internet connection.
For Macs with Apple T2 Security Chip:
- Click the Apple menu, select Shut Down, then press and hold the power button until Loading startup options appear.
- Select Options and click Continue, then follow the instructions that appear on the screen.
- On the Recovery app window, select the Reinstall option for your macOS release, click Continue, and then follow the onscreen instructions to complete the reinstallation process.
For Intel-based Mac that doesn’t have the Apple T2 Security Chip:
- Click on the Apple menu and select Restart.
- Immediately press and hold the Command-R keys. This will bring up the Recovery app window. From there, select Disk Utility and click Continue.
- In Disk Utility, locate the volume you wish to erase from the sidebar and click on it. Then, click on Erase in the toolbar.
- On the Name field, give a name to the volume and select APFS from the format pop-up menu.
- Click on Erase Volume Group to proceed with the erasing process.
- Once the process is complete, click Done and then choose Disk Utility > Quit Disk Utility.
- On the Recovery app window, select Reinstall for your macOS release, click Continue, and then follow the instructions on the screen.
It is possible to retrieve the data previously stored on a hard drive by using data recovery tools. However, the success of data recovery is not guaranteed, and it depends on various factors. If a hard drive has been wiped using a secure erase method, the data is unlikely to be recovered.
In addition, the physical condition of the hard drive can also impact the recovery process. If your hard drive is already damaged or has already experienced a failure, this may reduce the success of your data recovery.


