
It’s a common misconception that data recovery is always expensive. In reality, there are many free data recovery software tools for Mac available in 2024 that you can download right now and use them to recover your lost data without having to give your Mac to data recovery professionals, who are guaranteed to charge you a small fortune for their services.
In this article, we compare the top 5 best free data recovery software for Mac and highlight the pros and cons of each tool mentioned.
Table of Contents
1. Disk Drill for Mac
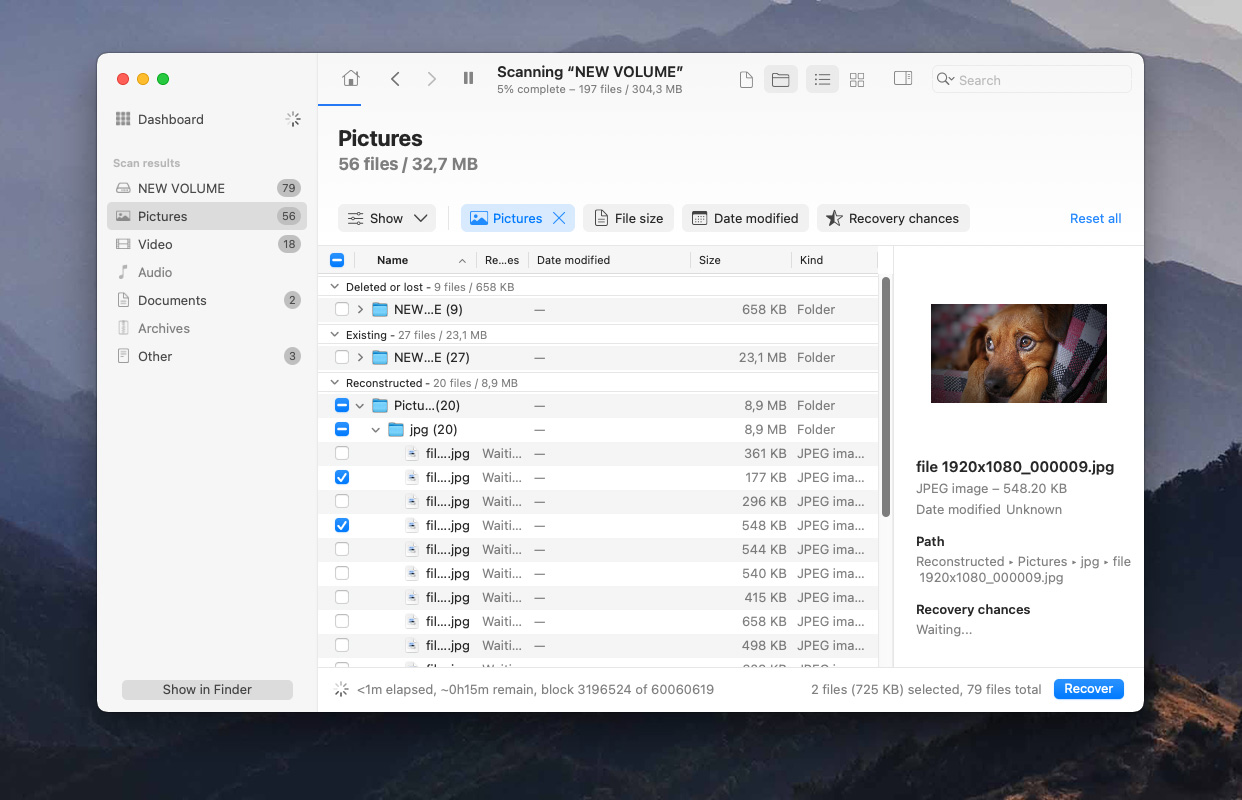
Disk Drill for Mac is widely known as a versatile professional-grade file recovery software that delivers excellent results without making data recovery overly complicated. The 5th version of the app been around since 2022, with the recent 5.4 version making it one of the most refined apps on this list. And it comes with a sleek user interface that is modern, easy-to-use, and extremely intuitive.
Free Version
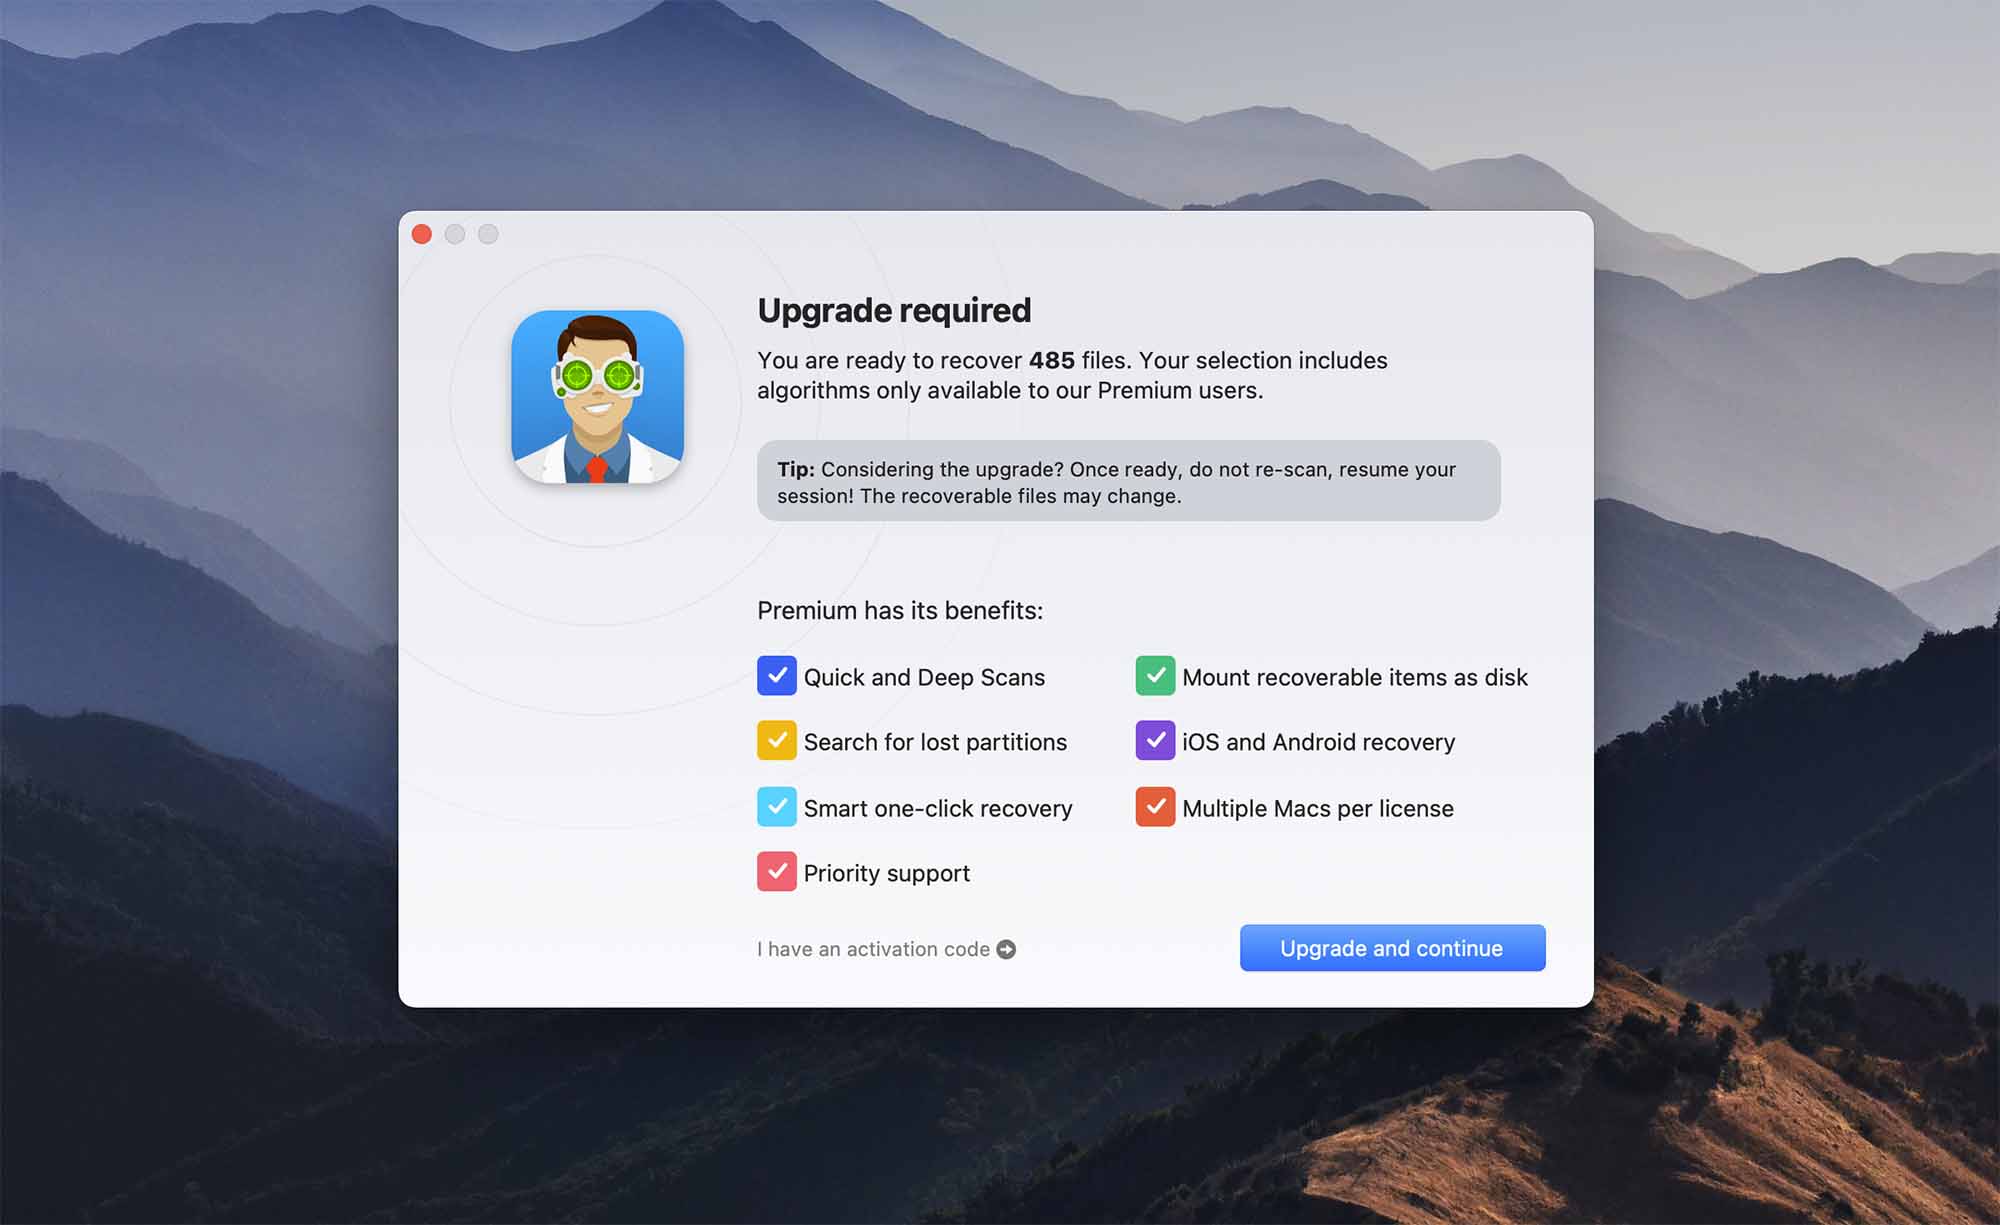
A free version of Disk Drill lets you totally evaluate the recovery results by previewing the files after scanning. If you need to recover your files, you can always upgrade to the Pro version for $89, with optional lifetime upgrades for $29. There’s also an Enterprise version for unlimited commercial recovery, and it costs $399.
- Recovers over 400 file formats
- Extremely easy to use
- Extra free disk tools
- Free recovery evaluation
- File previews
- Restores the original structure of files and folders
- No option to scan individual folders
- Doesn’t support Linux filesystems
Features
Disk Drill for Mac supports all major devices and commonly used file systems, so you can use it to recover data not just from your Mac but also from USB flash drives, external hard drives, iOS and Android devices, memory cards, or cameras.
- Wide range of supported file formats. In total, over 400 file formats are supported, which is really as good as it gets as far as data recovery software is concerned.
- Recovery Vault. One particularly noteworthy free feature of Disk Drill for Mac is called Recovery Vault, and its purpose is to actively monitor your files for changes and save their metadata to aid future data recovery. With the Recovery Vault feature active, Disk Drill for Mac promises a 100% success rate during the recovery process.
- Additional Disk Tools. Besides Recovery Vault, Disk Drill for Mac comes with a whole bunch of other disk tools, including Disk Health, which monitors the health of your hard drive for any potential issues, Mac Cleanup, which looks for space hogs to help you free up available storage space, and Duplicate Finder, which makes it easy to find and get rid of duplicate files.
Supported OS: Disk Drill 5 requires Mac OS X 10.15.7+.
2. PhotoRec for Mac
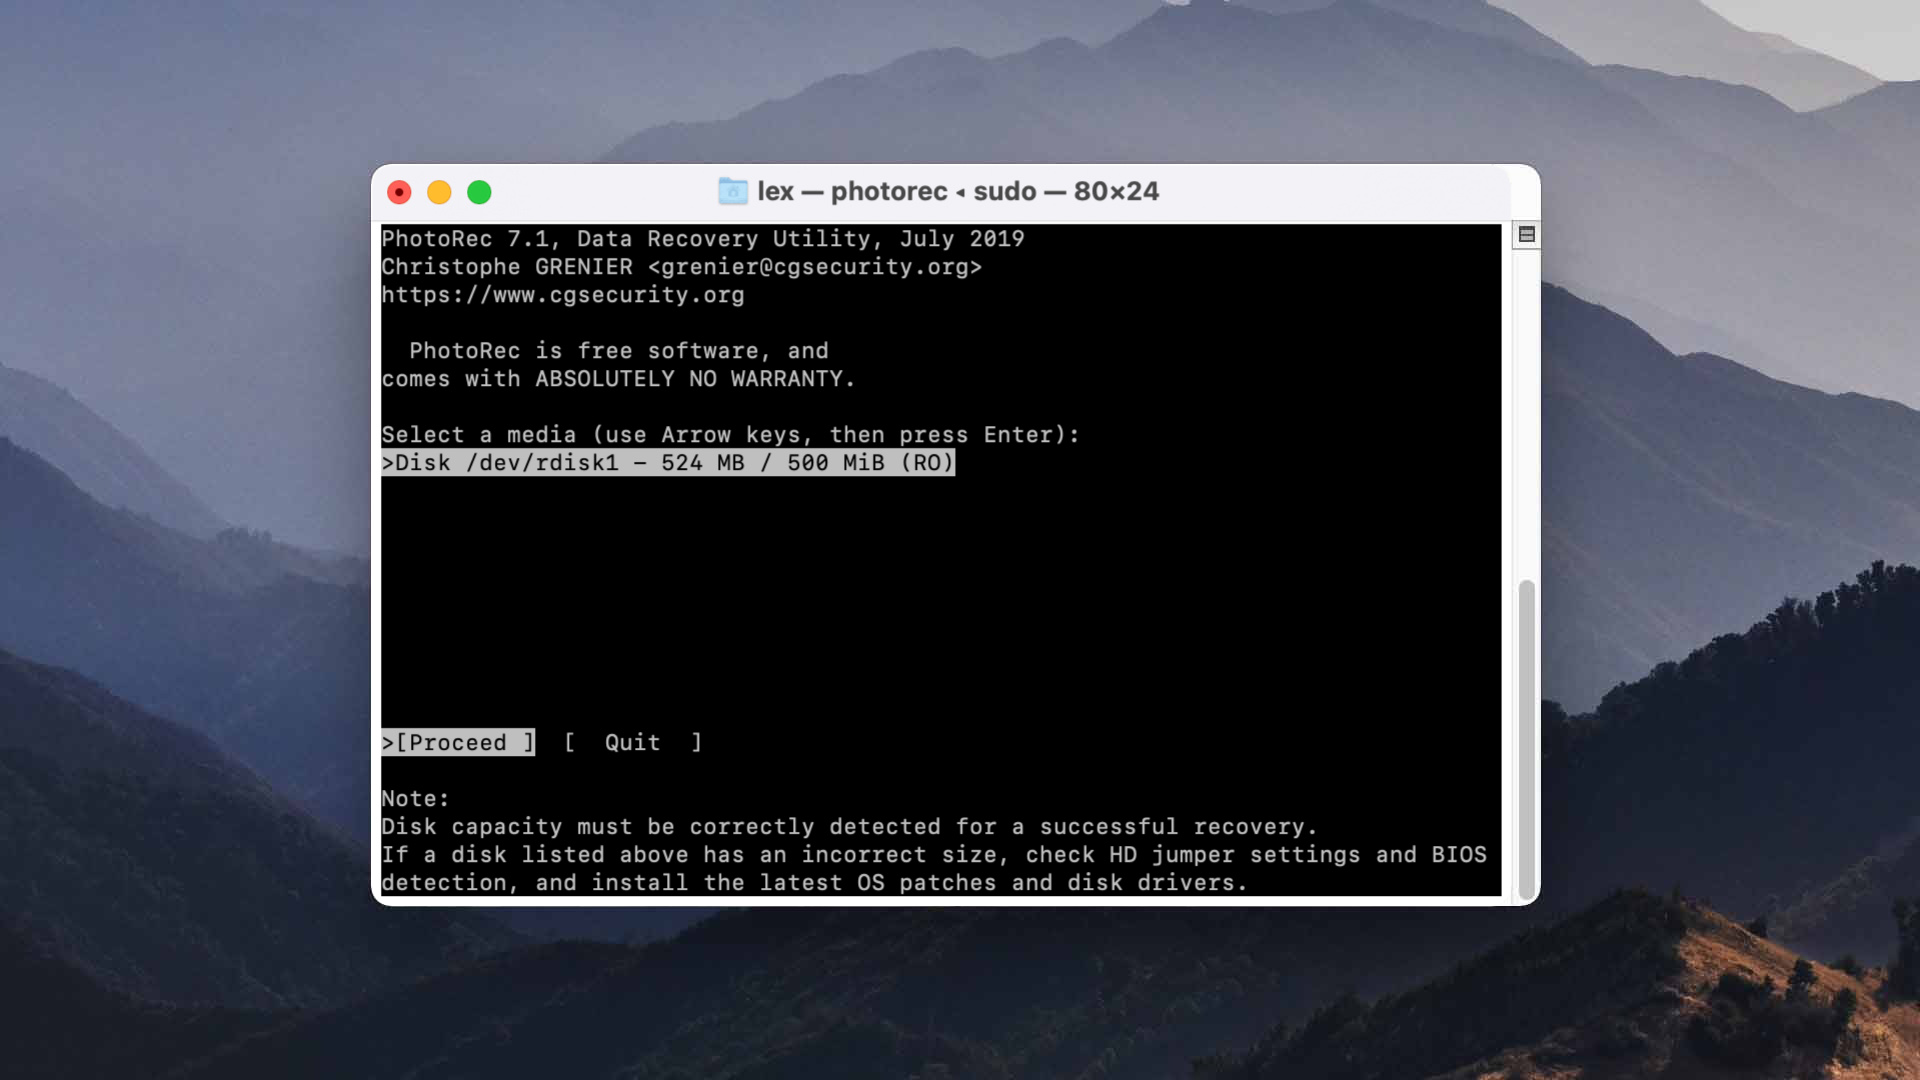
PhotoRec is a well-loved data recovery software that is free, open-source, and highly effective even if it hasn’t been regularly updated. It was developed by CGSecurity, the same software group that’s behind TestDisk.
Free Version
PhotoRec (along with its sister software TestDisk), is 100% free and open-source!
- Free
- Recognizes a lot of different file types
- The app hasn’t had major updates since 2019
- Only provides a signature scanner
- No GUI (and QPhotoRec is super basic)
- Lack of customer support.
Features
PhotoRec only provides a signature scanner, but it recognizes a massive number of file types – including RAW photos and propriety documents, like DWG (AutoCAD) files. It can restore data from most common storage devices, except for mobile. It’s also super lightweight and easy to install.
PhotoRec’s biggest problem is that its original interface looks like the terminal app and you can only navigate it using your keyboard. However, you can now download QPhotoRec, which is PhotoRec packaged with a super simple graphical user interface.
Another issue is the lack of updates. The latest stable version and major updates were released in 2019. However, it still performs well for many modern file types.
Supported OS: macOS ≥ 10.6 (Intel 64-bit), macOs ≤ 10.14 (Intel 32-bit)
3. UFS Explorer

USF Explorer is a commercial data recovery tool that offers users a limited free trial version. The tool employs a Windows Explorer-style user interface for easy navigation through its features to facilitate data recovery on your Mac.
Free Version
The free version of UFS Explorer allows you to test the tool’s functionality and will work with files below 256 KB in size. You can easily upgrade to the paid version if you like the tool and want to recover more data.
- Supports multiple file systems and device types
- Preview files before recovering them
- Quick performance
- File size limitations with the trial version
- Doesn’t have preview of files
Features
UFS Explorer can recover lost and deleted data from a wide variety of physical devices, disk images, and virtual machines. The tool supports recovery of all major file systems used on Mac, Windows, and Linux systems and can reconstruct spanned volumes to access and recover their files.
Customizable scanning options enable a quick or longer search to uncover deleted data. Scans can be paused and the results saved for future reference. UFS Explorer can help recover files locked in undetected partitions and retrieve files from disks with bad sectors. The tool can produce a map of bad blocks while reading and imaging a disk.
Supported OS: macOS version 10.15 and above.
4. Wondershare Recoverit for Mac
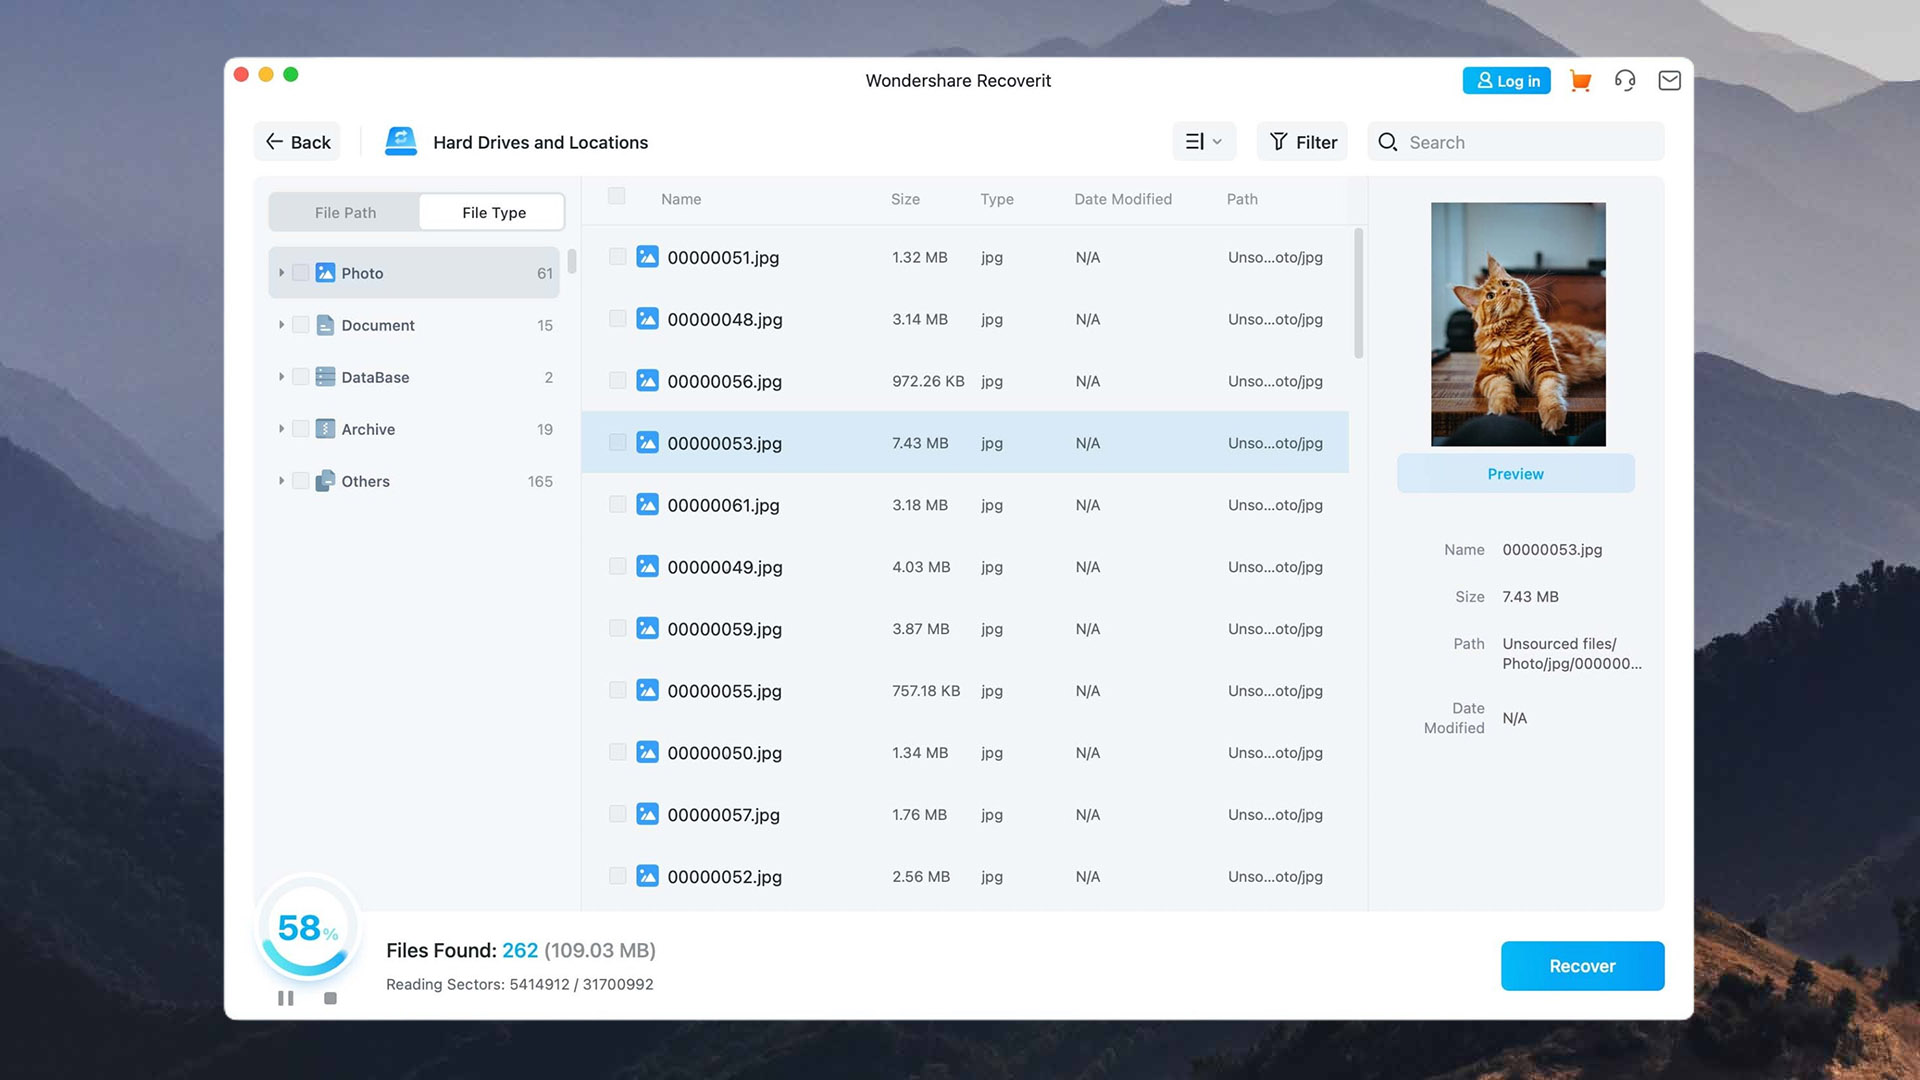
Wonderhare Recoverit for Mac is a modern data recovery software app with average performance but unique features that earn it a spot on this list.
Free Version
The free version of Wondershare Recoverit allows you to preview an unlimited number of files and recover up to 100 MB of data.
- Free 100 MB data recovery
- Reliable video repair tool
- Nice user interface
- Average recovery performance
- Crashes during scanning
- Lack of common recovery utilities like session management and file sorting
- Expensive for what it offers (unless you need the video repair tool)
Features
The app has a nice interface that makes it easy for users of any level to pick up and start recovering data. Although Wondershare claims Recoverit supports 1000+ file types, we noticed that it recognized fewer signatures than other apps on this list. However, we were still able to restore a good number of lost JPG, PNG, MP4, and MOV files, among others.
It provides common but appreciated utilities like bootable recovery and a preview tool. Recoverit’s most notable feature is its advanced support for video files. It allows users to search only for deleted videos and it provides a video repair tool that fixes clips that don’t play or even (which we verify to work).
Unfortunately, this positive feedback may be overshadowed by its average performance. That said, we can see Wondershare Recoverit being a useful tool for users who work with a lot of videos.
Supported OS: macOS 10.12 and later.
5. iBoysoft Data Recovery Software
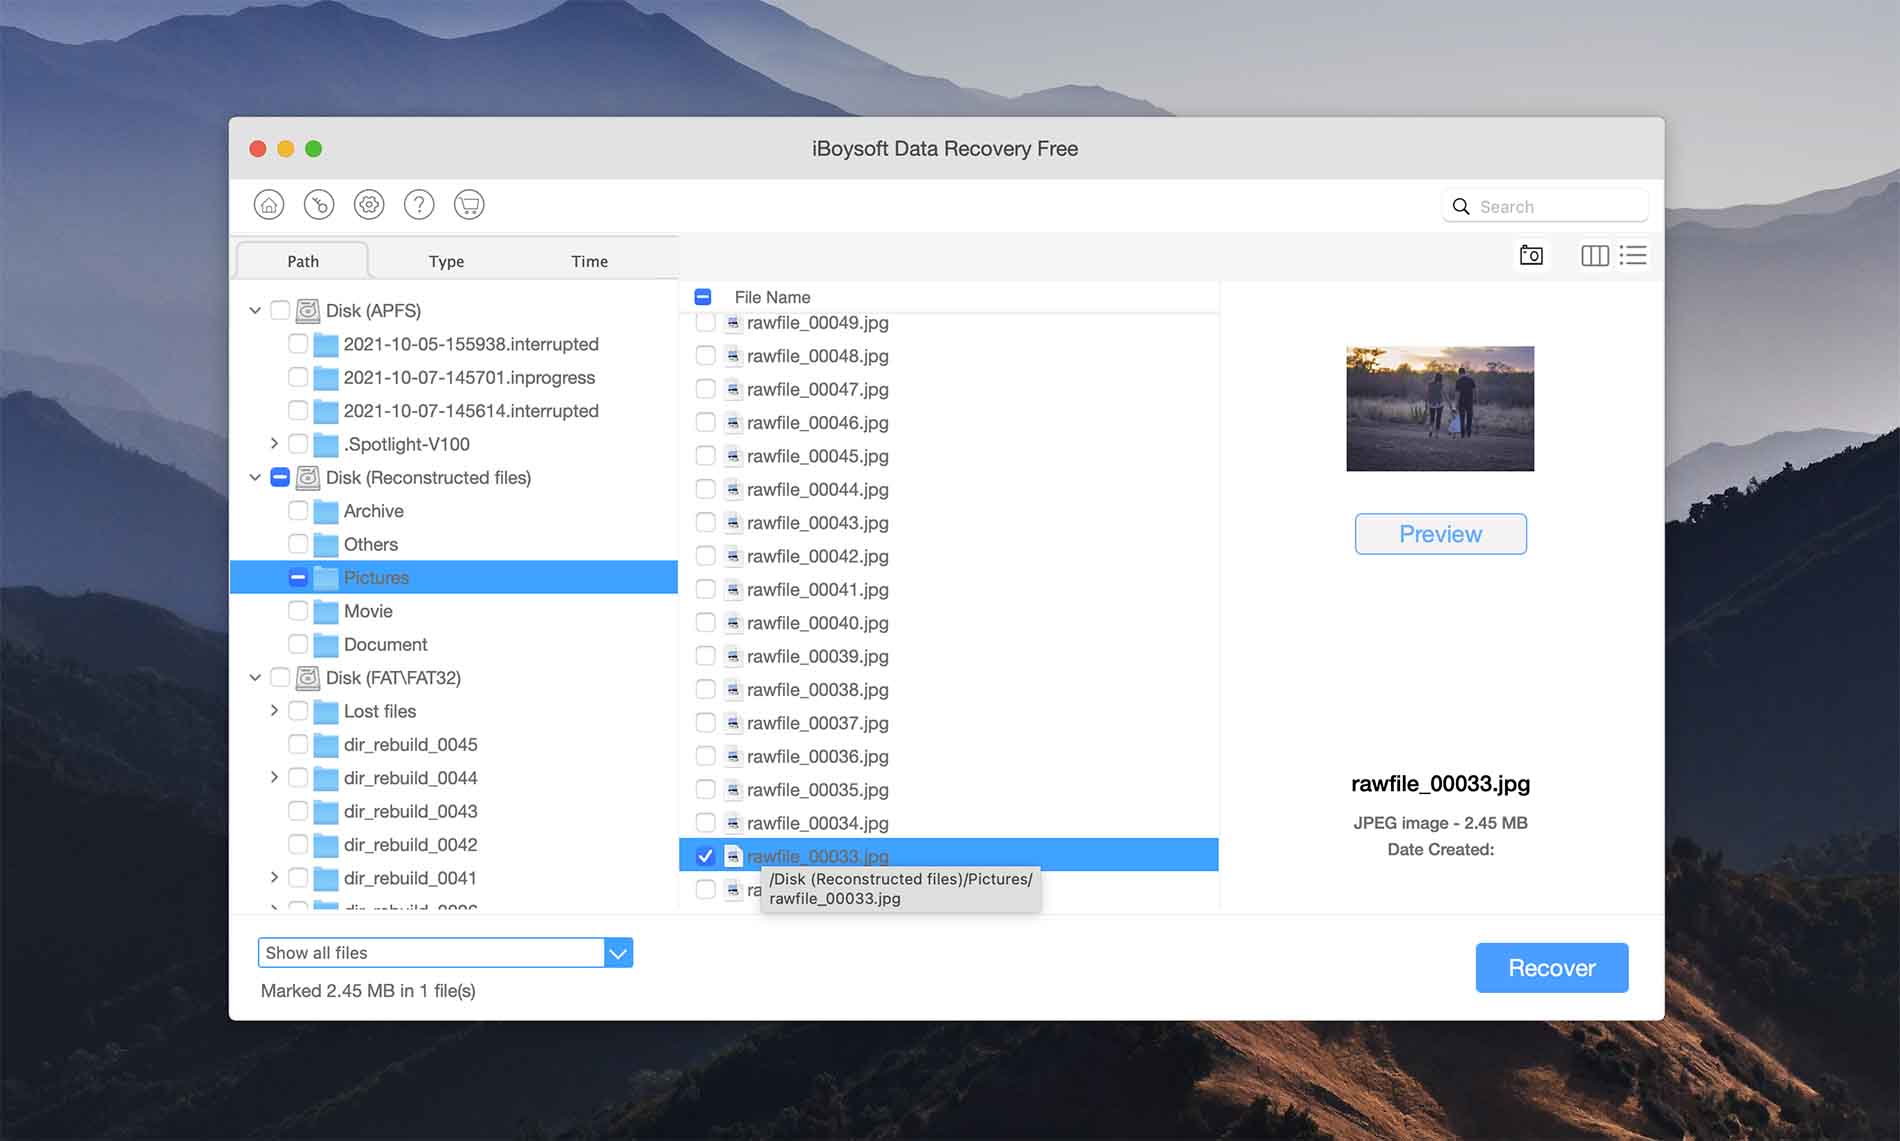
iBoysoft Data Recovery (M3 Data Recovery became an affiliate of iBoysoft now) is a versatile recovery tool for Mac that lets you get back lost and deleted files from a wide variety of storage devices. The application can help you address a Mac that won’t boot or recover files lost from an emptied Trash bin. You can also obtain a version of the software for the Windows platform.
Free Version
The free version of iBoysoft Data Recovery for Mac lets you recover up to 1 GB of deleted data. You will need to upgrade to the paid version of the tool if you want to recover additional data.
- Free 1 GB data recovery
- Compatible with M1, M2 and T2 Macs
- Quick and Deep scans for optimal recovery results
- Free scan and preview of recoverable files
- Scan results can be saved and reloaded
- The license model is expensive
- Last update was quite a while ago
Features
iBoysoft can recover lost files from corrupted or unreadable internal or external storage devices. The tool supports the recovery of files in over 1000 different formats covering all popular media file types. It offers users a simple, three-step recovery process that scans your storage media, previews recoverable data, and recovers them to a safe location.
Supported OS: macOS all versions, Mac OS X 10.11.
How We Tested Data Recovery Software for Mac
All free data recovery tools featured in this article were tested on a real Mac computer using a large sample of file formats. Before testing each data recovery tool, the computer was restored back to its original state to make the comparison as objective as possible.
| Software Name | Limitations | Interface | File Preview | Latest Update |
| Disk Drill | Only preview of found files | Good | Yes | December 22, 2023 (Version 5.4.1425) |
| PhotoRec | — | Bad | No | July 10, 2019 (Version 7.2) |
| UFS Explorer | Works with files 256 KB or less | Average | Yes | April 14, 2023 (Version 9.15) |
| Wondershare | Recover up to 100MB of data | Average | Yes | November 24, 2023 (Version 12.0.19) |
| iBoysoft | Recover up to 1 GB of data | Average | Yes | August 22, 2022 (Version 5.0) |
Free Methods to Recover Deleted Files From Mac
Mac is a great user advocate when it comes to its tools, including when it comes to securing their users’ data. Below are two methods of recovery data using free tools that already come with a Mac.
Method 1: Recover Deleted Files From Trash Folder
Whenever you delete a file, it initially goes to the Trash folder. It stays there until you delete it from within that folder or you manually empty your Trash. If you accidentally deleted your files, they’re likely to be found here.
Unremarkable for anyone familiar with computers… But did you know that Mac also creates a hidden Trash folder on external drives? Below, we’ll demonstrate recovering a file from both the local and external Trash folder.
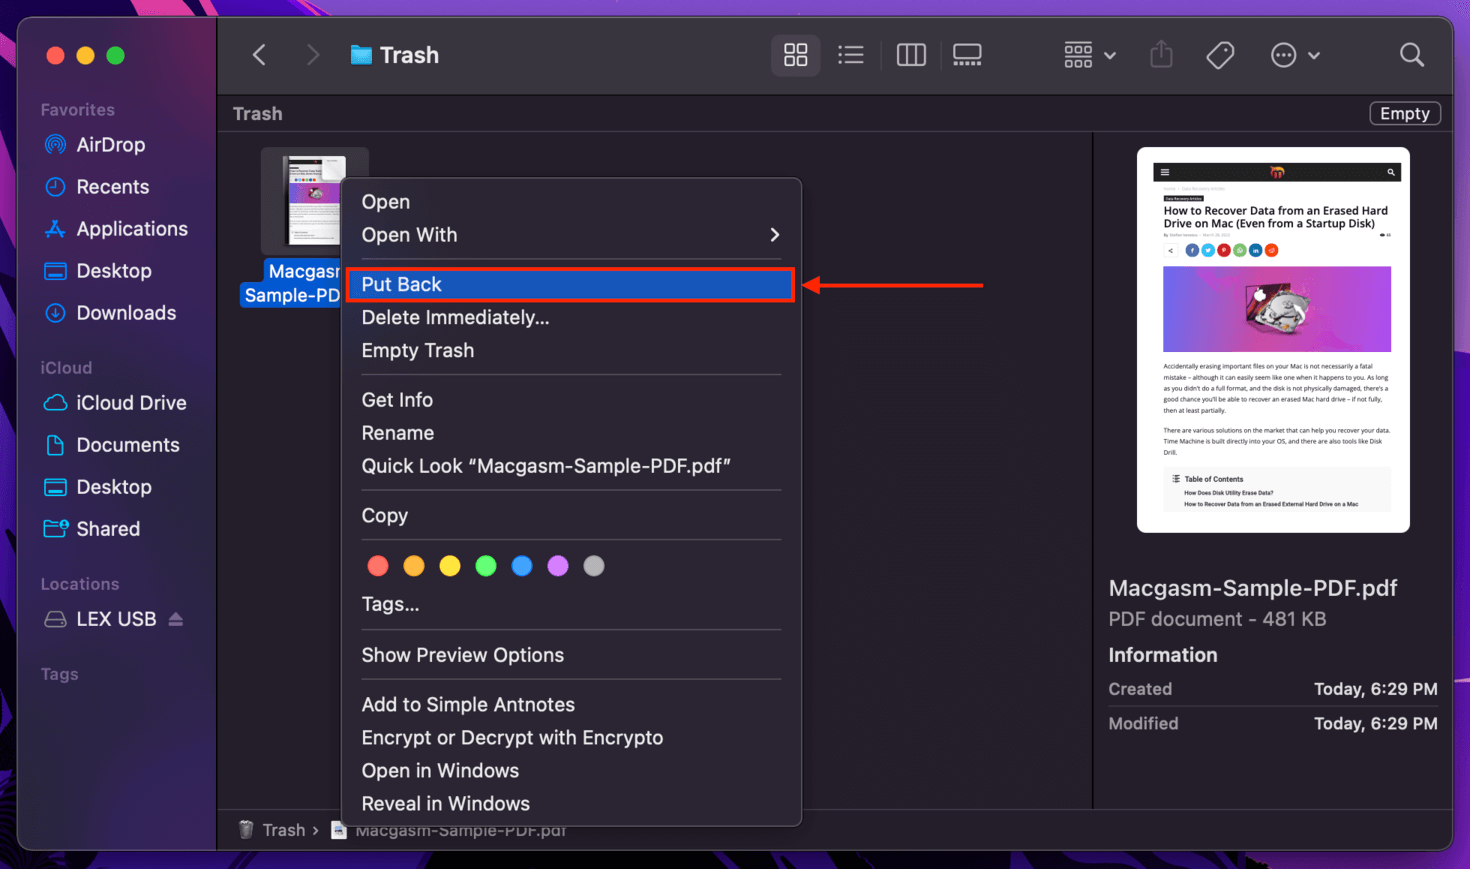
To recover files from local Trash…
Step 1. Click the Trash icon on your dock or navigate to ~/.Trash using Finder Go (Finder > Go > Go to folder…)
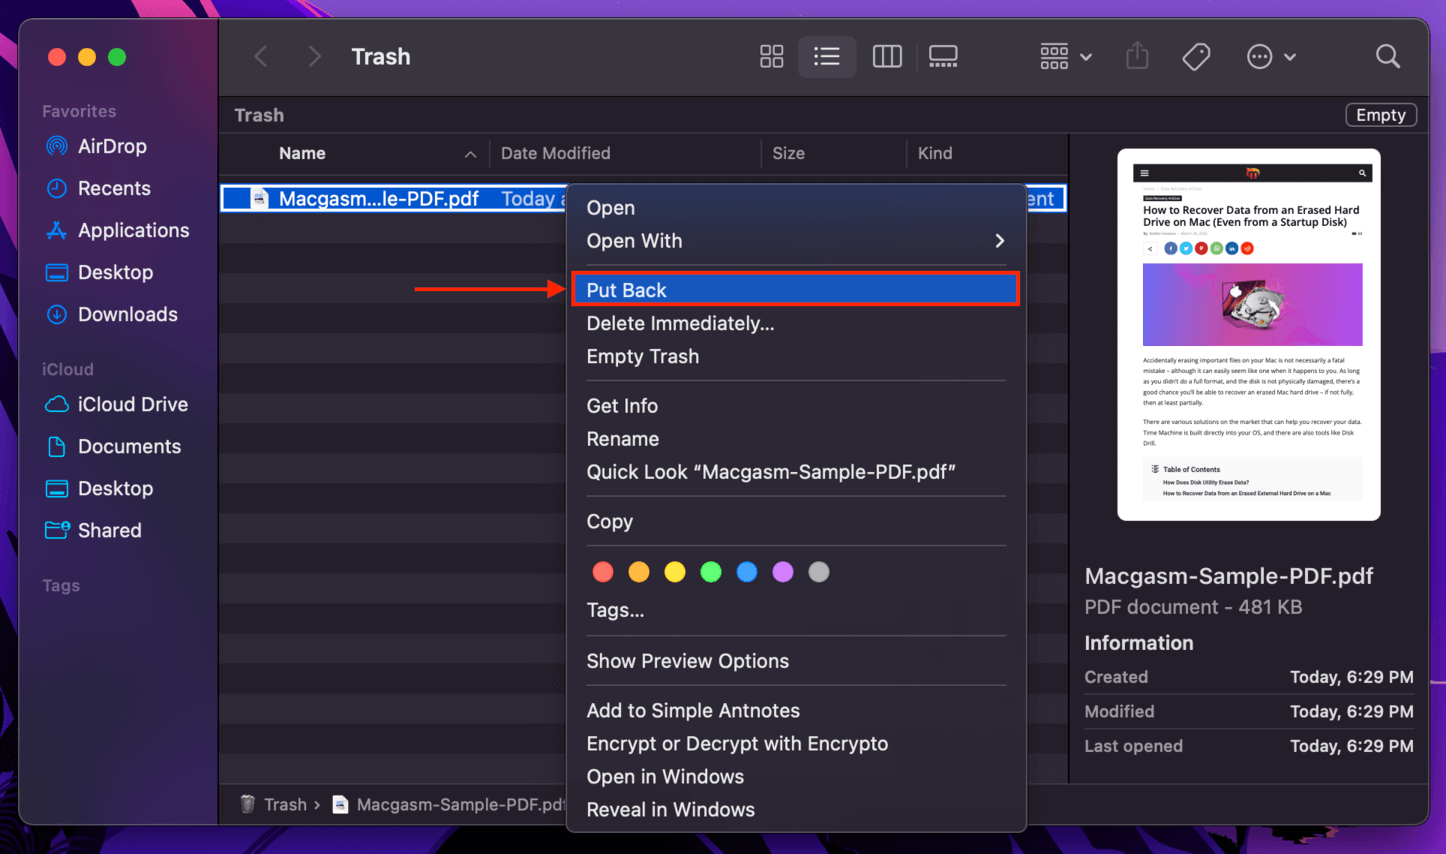
Step 2. Right-click the file you want to recover, then click “Put Back.”
To recover files from Trash on an external drive…
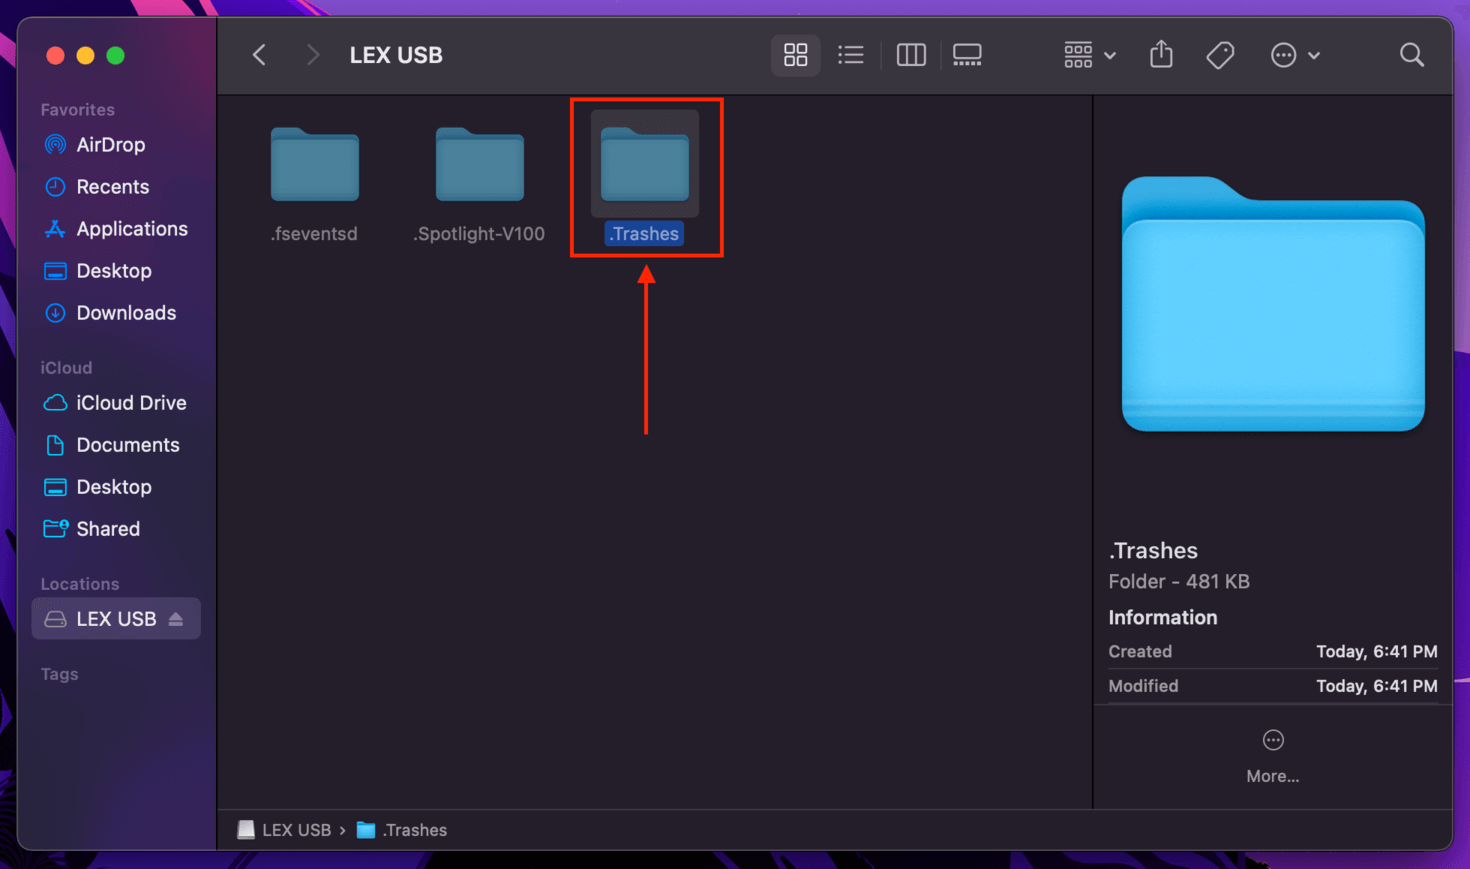
Step 1. Open Finder and navigate to your drive’s home folder.
Step 2. Hit (CMD + Shift + >) to unhide the “.Trashes” folder. Open it, then open the “Trash” folder inside.
Step 3. Just like with the local Trash folder, right-click the file you want to restore and click “Put Back.”
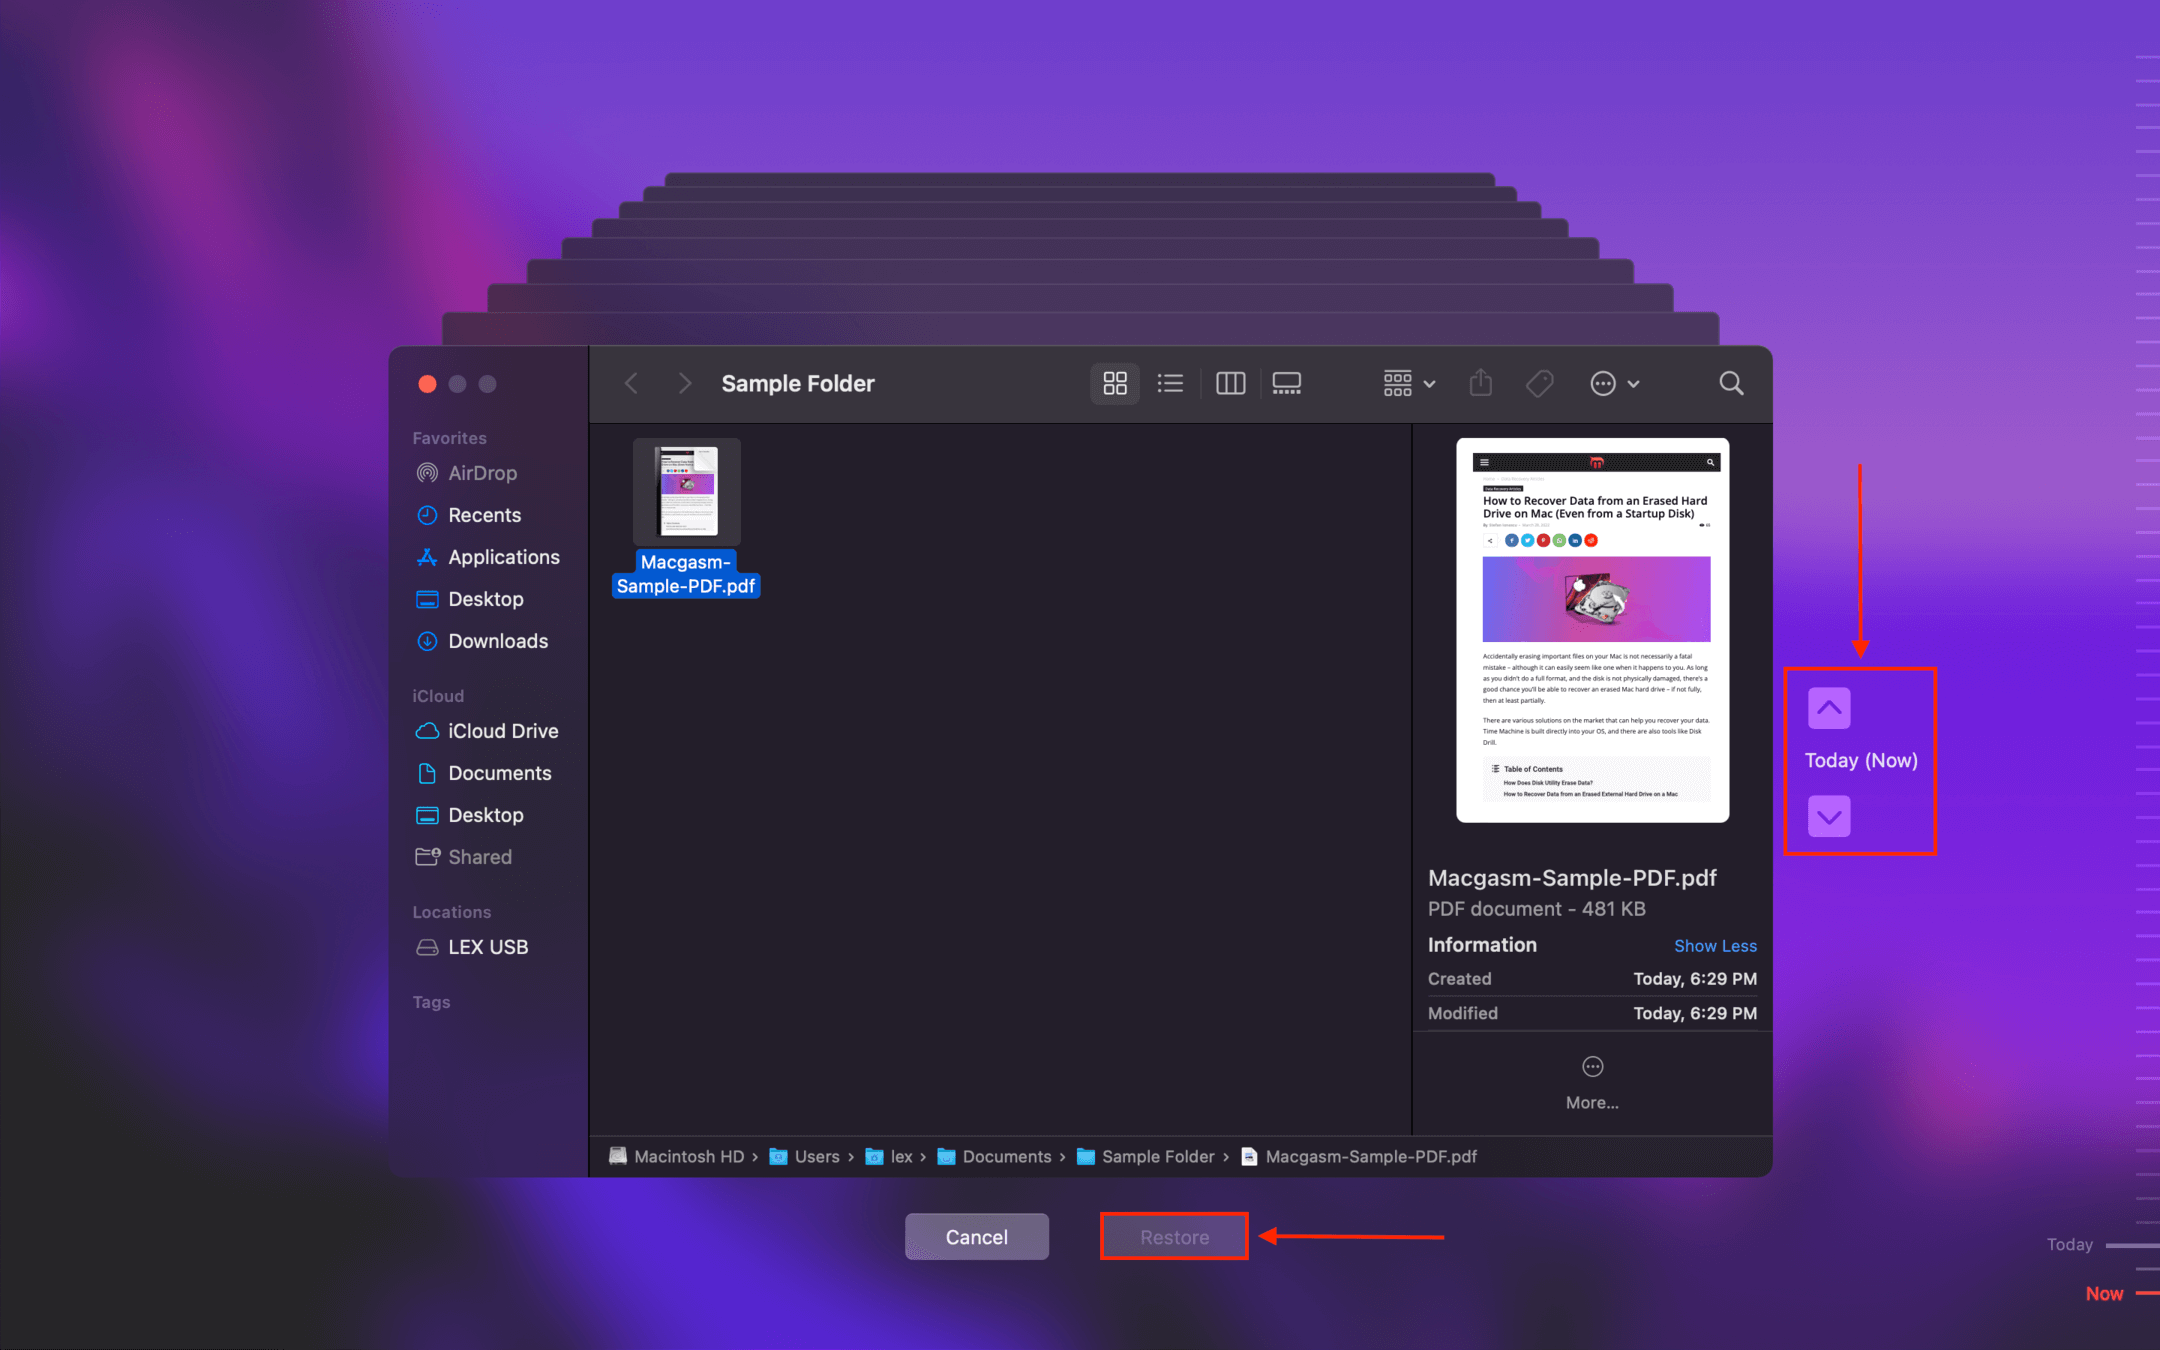
Method 2: Restore Files Using Time Machine
Time Machine is Mac’s powerful backup tool that can track incremental changes to files and folders and restore any version that was recorded in the timeline. However, Time Machine requires the user to manually enable its features – so this section assumes you have a Time Machine backup available.
To restore Time Machine snapshots…
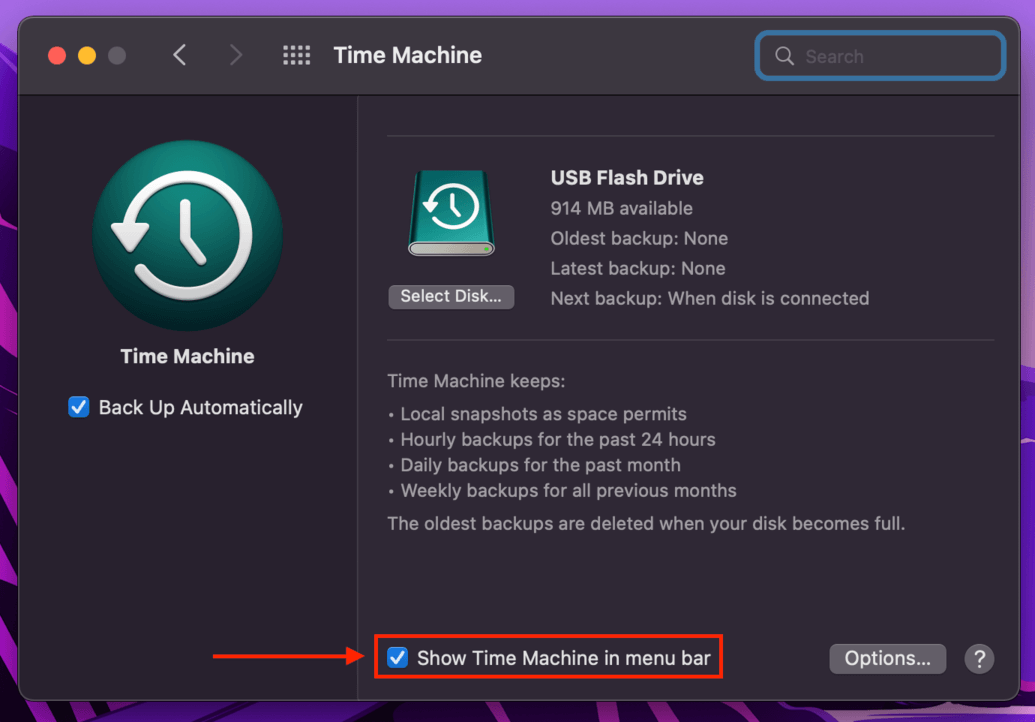
Step 1. Launch System Preferences > Time Machine.
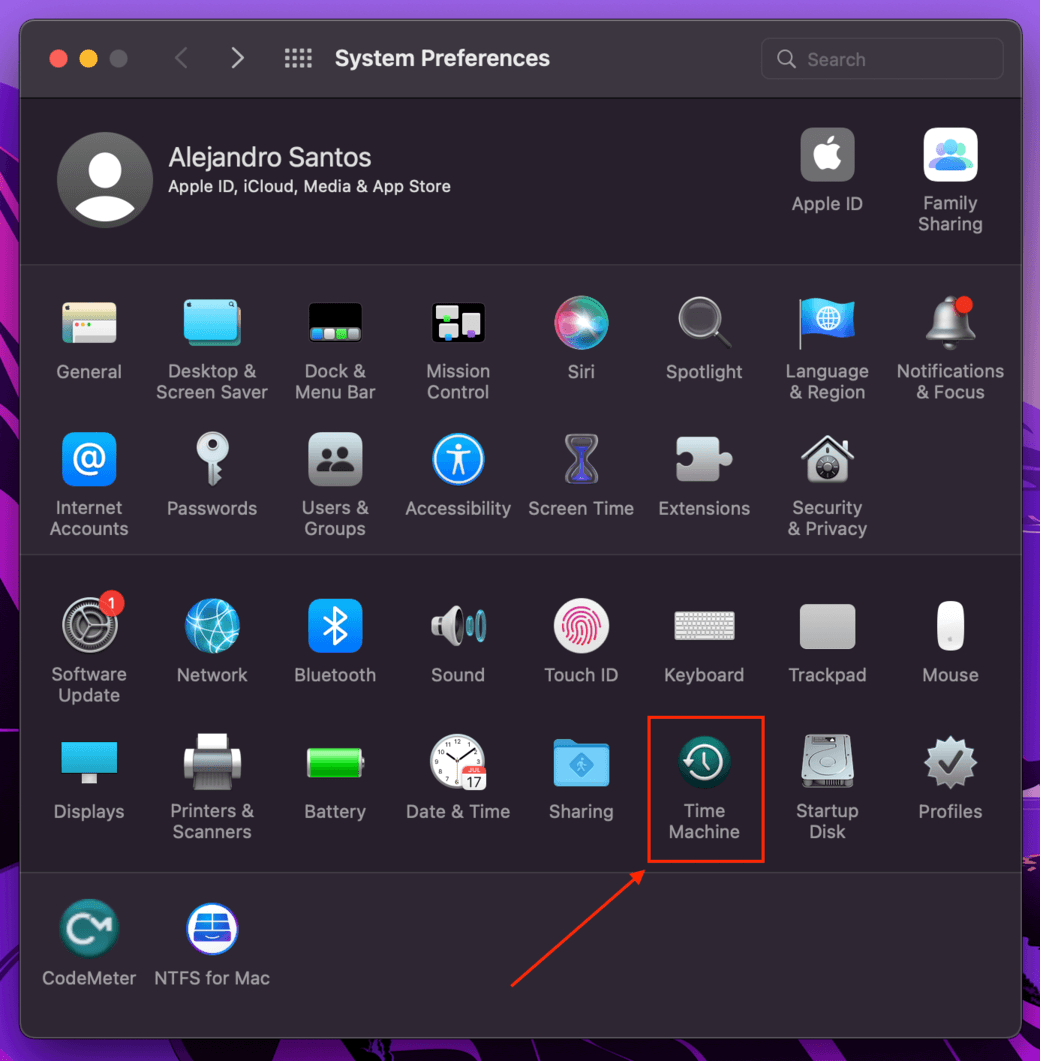
Step 2. On the bottom of the window, tick the box beside “Show Time Machine in menu bar.”
Step 3. Open Finder, then navigate to the folder that contained your missing files.
Step 4. Near the right of the Apple menu bar, click the Time Machine button > Enter Time Machine.
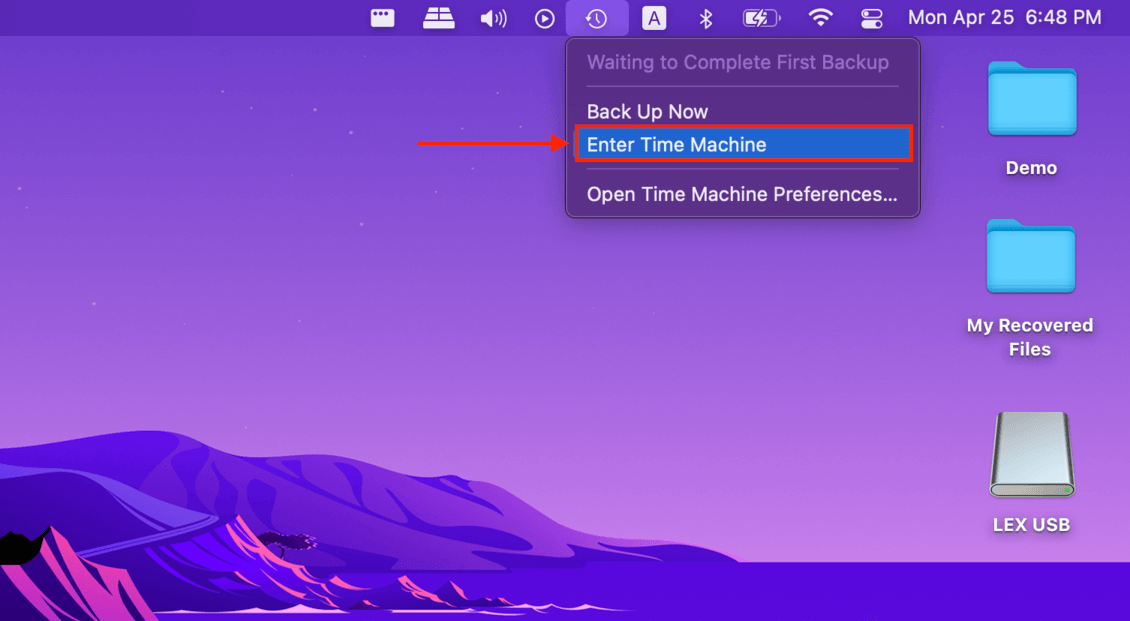
Step 5. Use the arrows on the right to browse through the timeline of your folder until you find the version where your files were still intact.
FAQ:
TestDisk is a completely free data recovery software solution for Mac but is only appropriate for recovering lost partitions. The freeware tool has a companion product called PhotoRec that can recover individual files.
The main issue with these freeware products is that they require users to interact with a command-line interface and have some knowledge about their computer’s internal storage system. Average users may find these solutions difficult to use and will obtain better recovery results using a paid data recovery application.
No, Recuva is designed solely for Windows computers. You can run it on a Mac only with the help of Windows virtual environment.


