
Knowing how to capture a screenshot on a Mac is essential knowledge for all macOS power users. If you consider yourself to be one or would like to join their ranks, then you need to read this article from start to finish because we’re going to get you up to speed on screenshotting on a Mac.
Table of Contents
The Best Ways to Take a Snapshot on a Mac
There’s more than one way to bake a cake, and there’s more than one way to take a snapshot on a Mac.
In this part, we’re describing the most popular screenshotting methods to give you plenty of options to choose from, from straightforward key combinations to sophisticated screenshot software that goes well beyond basic screen capture on a MacBook, Mac, or iMac.
Option 1. Keyboard Shortcuts
macOS may be known mainly for its intuitive, polished user interface, but the operating system also deserves praise for its extensive hotkey support. Most common actions can be quickly accomplished with a few key presses, and the same goes for taking screenshots.
| Keyboard Shortcut | Action |
| Shift + Command + 3 | Whole Screen |
| Shift + Command + 4 | Portion of the screen |
| Shift + Command + 4 + Space bar | Window |
| Shift + Command + 6 | Touch Bar |
Screenshot the Whole Screen on a Mac
If there’s just one keyboard shortcut for snapping a picture on a Mac that you should definitely memorize, it’s the one for screenshotting the whole screen.
- To screenshot the entire screen, press and hold: Shift + Command + 3.

- Release the keys and wait until you see a thumbnail in the corner of your screen.
- Either click the thumbnail to edit the screenshot or wait for the screenshot to be saved to your desktop.
Screenshot a Portion of Your Screen
Sometimes, it’s useful to capture only a small portion of your screen and leave out the rest. Once again, this can be accomplished with a simple keyboard shortcut.
- To screenshot a portion of the screen, press and hold: Shift + Command + 4.

- Release the keys and drag the crosshair to select the area you want to capture.
- Release your mouse or trackpad button and wait until you see a thumbnail in the corner of your screen.
- Either click the thumbnail to edit the screenshot or wait for the screenshot to be saved to your desktop.
Screenshot a Window on a Mac
While you can technically screenshot a single window using the above-described key combination, you can make your life a lot easier (and save a bunch of time) by learning one more command.
- To screenshot a single window, press and hold Shift + Command + 4 + Space bar.

- Release all four keys, move the camera icon over the window you want to capture, and click.
- Wait until you see a thumbnail in the corner of your screen.
- Either click the thumbnail to edit the screenshot or wait for the screenshot to be saved to your desktop.
Screenshot the MacBook Pro Touch Bar
Do you have a MacBook Pro with a Touch Bar? If so, then you can use the following key combination to take a screenshot of whatever your Touch Bar is currently displaying.
- To screenshot the Touch Bar, press and hold Shift + Command + 6.

- Release the keys and wait until you see a thumbnail in the corner of your screen.
- Either click the thumbnail to edit the screenshot or wait for the screenshot to be saved to your desktop.
Option 2. Use the Screenshot Tool
If memorizing a bunch of keyboard shortcuts isn’t your thing, then we have good news for you: all Macs with macOS Mojave or newer come with a free built-in screenshot tool that provides a user-friendly GUI that lets you activate all macOS screen capture methods with a simple click, as well as access a bunch of extra options.
The tool is called Screenshot, and here’s how you can access it and use it:
- To launch the Screenshot tool, press and hold Shift + Command + 5. You can also bring up Launchpad by clicking its icon in the Dock and then launch Screenshot from the Utilities folder.
- By default, Screenshot captures a single window, but you can also tell it to screenshot a specific area on your Mac, capture the entire screen, and more.
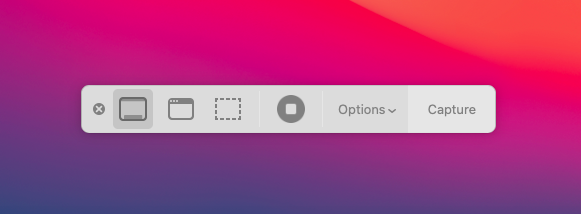
- Screenshot will close when you take a screenshot, but you can also close it manually using the Esc key on your keyboard.
If the Screenshot tool doesn’t meet your needs, then there are many free alternatives for you to explore.
Option 3. Use Professional Screen Capture Software
How often do you take screen captures on your Mac or MacBook? More than once a day? If that’s the case, then you should consider professional screen capture software.
Why? Because applications like Snagit go well beyond what the Screenshot tool in macOS can do, offering a wealth of features to help you capture your screen, add additional context, and share your screenshots with others.
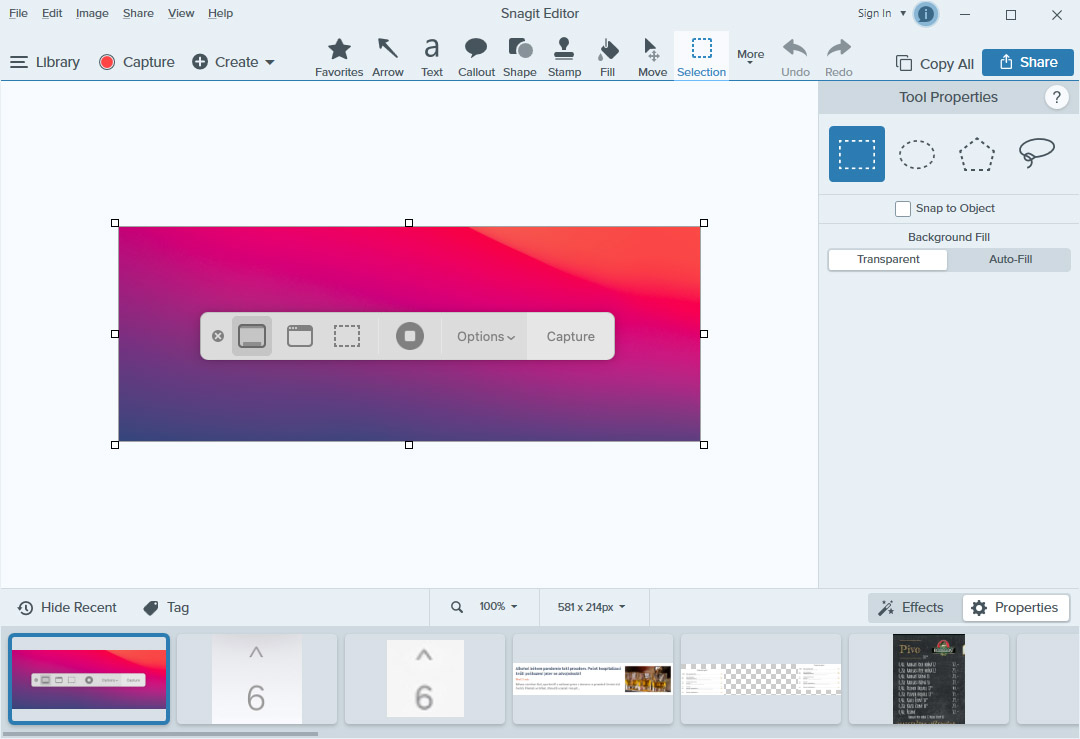
Here are just a few features that make Snagit an excellent choice for all serious screenshotters:
- All-in-One Capture: Provides convenient access to all screenshotting options, allowing you to capture your entire desktop, a region, a window, or a scrolling screen.
- Screen Recorder: Record your screen and export the recording as an MP4 file or animated GIF.
- Grab Text: Automatically extract text from captured macOS and Mac OS X screenshots so that you can edit it using your favorite text editor.
- Annotation: Add a variety of professional visual elements to your screenshots, such as callouts, numbers, arrows, and more.
- Smart Move: Rearrange parts of your screenshots and remove distracting or privacy-compromising elements without third-party image editing software.
As you can see, Snagit offers many great features, and you can test how they work without spending a single dollar by downloading the free trial version from its website.
Where Are Screenshots Saved on a Mac?
You wouldn’t be the first Mac user to screen capture on a MacBook or Mac, only to wonder where the screenshot is saved.
Counterintuitively, macOS doesn’t save screenshots to the Pictures folder. Instead, by default, screenshots are automatically saved to your desktop.
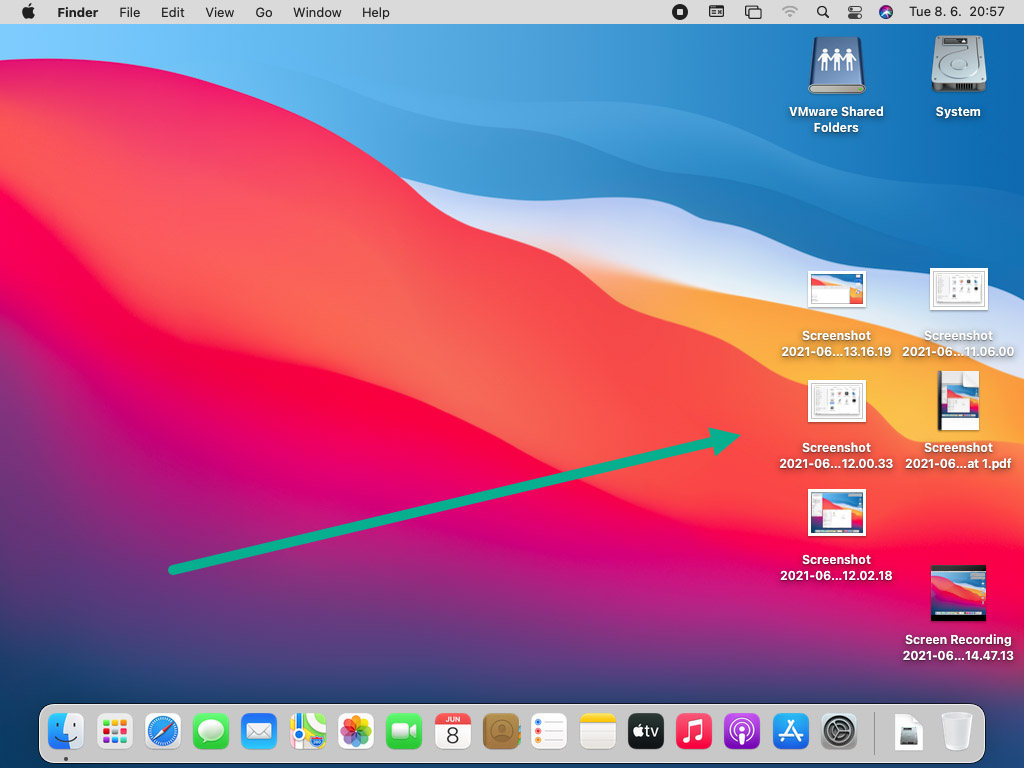
- Screenshot names follow this template: Screenshot + [date] + at + [time]
- Here’s an example: Screenshot 2021-06-08 at 11.06.00
You can, of course, manually move them to any folder you want, but it may be better to change the default location where screenshots are saved instead, which is easy to do.
How to Change Where Screenshots Are Saved on a Mac?
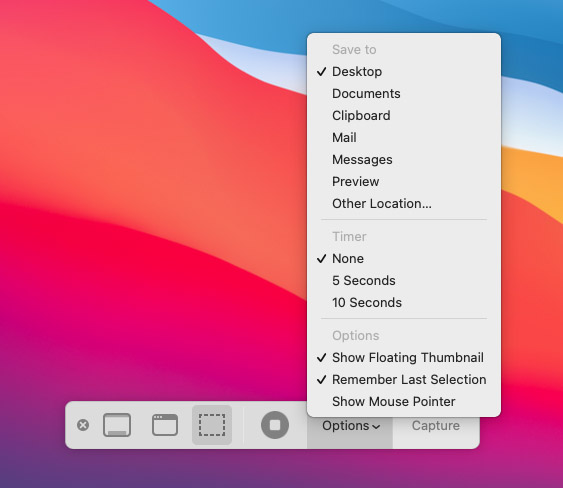
On macOS Mojave or later, you can change the default screenshot location directly from the Screenshot tool:
- To launch the Screenshot tool, press and hold Shift + Command + 5. You can also bring up Launchpad by clicking its icon in the Dock and then launch Screenshot from the Utilities folder.
- Click the Options button.
- Choose one of the available save locations or click Other Location to select a custom folder.
Alternatively, you can change the location of screenshots on your Mac from Terminal:
- Launch the Terminal app from Applications > Utilities.
- Enter the following command (make sure there’s a space after “location”):
defaults write com.apple.screencapture location
- Open Finder and navigate to the location where your new screenshot folder is located.
- Drag and drop the screenshot folder on top of the Terminal window to automatically fill in the directory path.
- Press Enter and restart your Mac.
How to Copy the Captured Screenshot?
Even with the default screenshot location configured exactly according to your preferences, you may sometimes want your Mac to save screenshots to a different folder. To do just that, follow the steps below:
- Open Finder and navigate to the folder where you want to copy your screenshot.
- Take a screenshot using any of the above-described methods.
- Click on the screenshot thumbnail that appears when you take a screenshot and drag it to the Finder window.
To copy a screenshot to the Clipboard, press and hold the Control key while you take the screenshot. You can then paste the copied screenshot anywhere you want using the Command + X shortcut.
How to Edit Screenshots on a Mac
To edit screenshots on your Mac, you don’t need to download a dedicated graphics editor like Adobe Photoshop, GIMP, or Photoscape X. The Preview app, which is the default image and PDF viewer of the macOS operating system, comes with all the essential editing tools you need to annotate and otherwise customize your screenshots.
Draw on Screenshots on a Mac
When we say “draw,” we mean everything from using the pen tool to underline important text to adding arrows to draw attention to important elements to including short text explanations.
All this and more is easily possible using the markup tools included in the Preview app. Here’s what you need to do to access them:
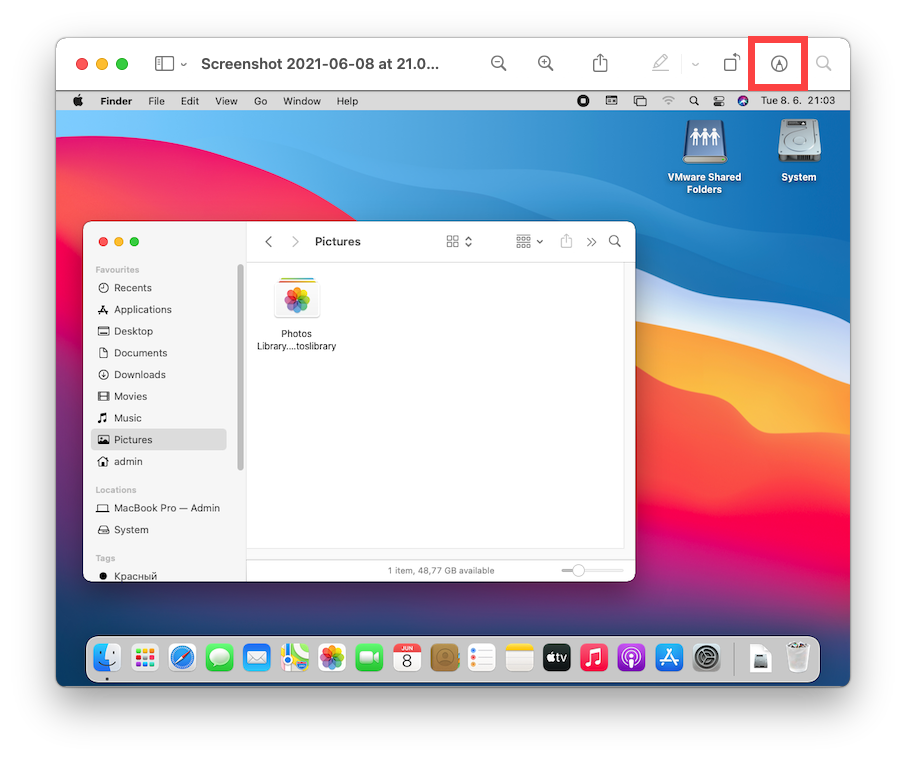
- Double-click on any screenshot to open it in the Preview app.
- Click the Show Markup Toolbar button. You can find it right next to the search bar.
- Explore the available screenshot annotation and editing tools.
It goes without saying that the screenshot editing capabilities of the Preview app are nowhere near as extensive as, let’s say, Photoshop’s, but all the basics are covered quite well.
Crop and Resize Mac Screenshots
After adding annotations, cropping and resizing are probably the most common editing operations applied to screenshots, and the Preview app supports them both.
To crop a screenshot on a Mac:
- Double-click on any screenshot to open it in the Preview app.
- Click the Show Markup Toolbar button. You can find it right next to the search bar.
- Click the Selection Tools button and select the Rectangular Selection tool button.
- Click and drag anywhere on your screenshot to make a selection.
- Finally, click the newly appeared Crop to Selection button.
To resize a screenshot on a Mac:
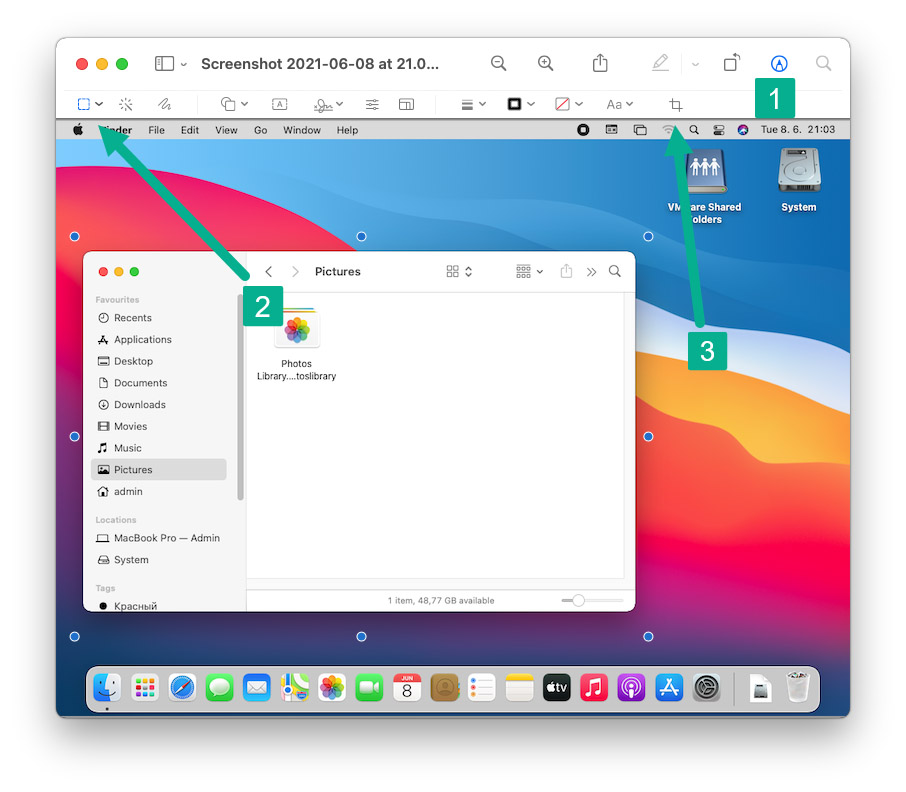
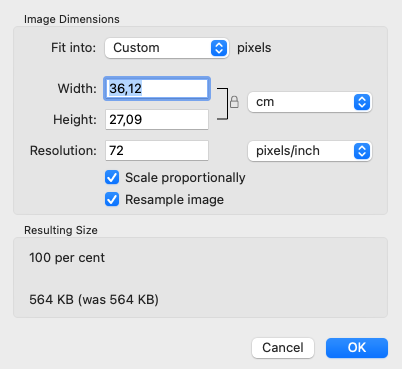
- Double-click on any screenshot to open it in the Preview app.
- Open the Tools menu and select the Adjust Size option.
- Enter the new image dimensions and click OK.
Save a Screenshot in Different File Format
There are many different image file formats, and they all have their advantages and disadvantages. When it comes to screenshots, the two most useful file formats are JPG and PNG. Let’s take a quick look at their main characteristics:
- JPG: Also spelled as JPEG, JPG is the most popular lossy image file format in the world. Without any significant loss in image quality, it can typically achieve a 10:1 compression. However, you can achieve a much higher compression ratio by sacrificing some image quality, making the JPG file format great for web content.
- PNG: Just like JPG, PNG is a raster graphics file format, but its focus is highly efficient lossless data compression. PNG images can be transparent, making the file format a great alternative to Graphics Interchange Format (GIF).
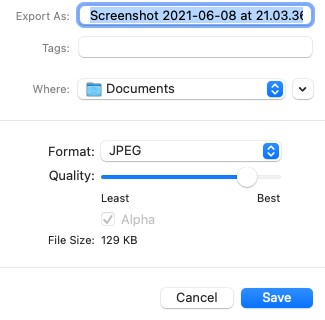
Both JPG and PNG are supported by macOS Ventura, and you can save a screenshot in any of them using the Preview app:
- Double-click on any screenshot to open it in the Preview app.
- Open the File menu and click Export.
- Select the desired file format and click Save.
By default, Mac screenshots are saved in the PNG file format, but you can switch to the JPG file format by entering following command in Terminal:
defaults write com.apple.screencapture type jpg
Just know that you may need to restart your Mac for the command to take effect.
Combine Screenshots into One PDF
Sometimes, it might be handy to combine multiple screenshots into a single PDF file. While this may sound rather complicated, the reality is that it’s anything but that thanks to a handy shortcut present in macOS Ventura. Here’s what you need to do:
- Select the screenshots you want to combine into one PDF file.
- Right-click any of the selected screenshots.
- Choose Quick Actions > Create PDF.
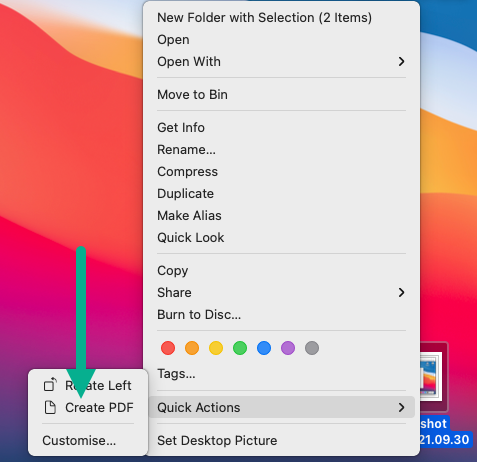
A new PDF file will appear right next to your screenshots, displaying one screenshot per page.
Is It Possible to Take Video Screenshots on a Mac?
Yes, it’s not only possible to take video screenshots on a Mac, but the process is also straightforward. Best of all, you don’t even need to download any third-party software since screen recording capabilities are included in the Screenshot tool.
To take a video screenshot on macOS Ventura:
- Press and hold Shift + Command + 5 to launch the Screenshot tool. Alternatively, you can also bring up Launchpad by clicking its icon in the Dock and then launch Screenshot from the Utilities folder.
- Select either the Record Entire Screen or the Record selected Portion option.

- Click the Record button to start recording.
- Once you’re ready to stop recording, click the Stop button in the Menu bar.
- Your recording will be saved in the default screenshot folder as a .MOV file.
Similar recording capabilities are present in other screenshot tools, including Snagit, which we’ve described earlier in this article.
How to Take High-Resolution Screenshots on Mac?
It’s only natural that you want your screenshots to be as beautiful as possible, and their resolution plays a huge role in their overall appearance. Here are some tips to help you take high-resolution screenshots on your Mac:
- Use the highest display resolution available: The resolution of your screenshots can be only as high as the resolution of your display. That’s why you need to use the highest resolution available. To set the resolution for your primary display, click the Apple menu and go to System Preferences > Display > Display. There, select the Scaled option and pick the highest resolution available.
- Expand the size of the app window: When taking a screenshot of an app, you should expand the app’s window size so that it occupies as much screen real estate as possible. Unfortunately, not all apps allow you to adjust their window size, so don’t be surprised when the size option isn’t available.
- Use the PNG file format: While screenshot resolution doesn’t depend on the used file format, overall screenshot quality does. That’s why you should always use the PNG file format, which supports efficient lossless compression, in favor of the JPG file format.
- Upgrade to a Retina display: As we’ve already said, the resolution of your screenshots can be only as high as the resolution of your display. If you’re already using the highest resolution available, and your screenshots are still too small for you, then you have one more option left: upgrading to a Retina display. Unlike traditional displays, whose pixel density is typically just 72 pixels per inch, Apple’s Retina displays, such as the expensive Pro Display XDR, have a pixel density of over 200 pixels per inch, allowing you to create truly high-resolution screenshots.
As you can see, there are several tips and tricks that you can use to increase the size of your Mac screenshots, so go ahead and experiment with them until you’re satisfied with the results.


