
When you take the time to remove unused apps, delete message attachments, merge and erase duplicate photos, and clear all downloads only to find your iPhone storage full after deleting everything, it’s aggravating.
There may be several reasons that your iPhone storage keeps filling up or doesn’t change as much as you expect after removing all those items. Let’s take a look at these reasons, how to correct them, and help you get that much needed storage space back.
Table of Contents
What Causes iOS Storage to Appear Full After Deleting Everything
If you’re saying to yourself, “I’ve deleted all my apps and still have no storage on iPhone,” then you’re not alone. There are many items that can consume storage space on your device that most people don’t realize.
First, you may simply experience a lag in iOS accurately displaying storage space after you’ve cleaned your device, so it might just need a little time. But you may also have things like residual data from deleted items, files that weren’t completely removed, or ghost (hidden) files that you can’t even see.
So, while you may think that your storage is full but there’s nothing on the phone, it could just be that you can’t see what’s taking up the space or perhaps there’s an issue with iOS you’re unaware of.
Additional Ways to Clean Your iPhone Storage
When you’re ready to regain storage space on your iPhone, after trying everything from A to Z, there are several additional actions you can take. Each pertains to the reasons discussed above to help you clean up your device.
Method 1: Reboot Your iPhone
Just like the technical support person tells you when you’re having computer issues, sometimes a simple reboot can fix a variety of problems. By restarting your iPhone, iOS scans and recalculates your storage space, so you might just see an increase in available space. Think of it as refreshing your iPhone by turning it off and back on.
Step 1.To turn off your iPhone, press and hold the side button on the right and either volume button on the left. For an older model before iPhone X, use only the side button or for an iPhone SE first generation, use the top button.
Step 2.When you see the power-off slider, release both buttons and drag the slider to turn off your iPhone.
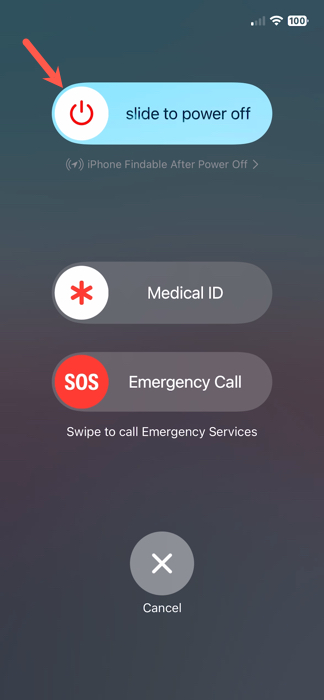
Step 3.Wait approximately 30 seconds and then turn your iPhone back on by pressing and holding the side button on the right until you see the Apple logo.
Step 4.You can then unlock your device as normal and recheck your storage space.
Method 2: Clean Recently Deleted Files, Photos, and Videos
You may not be aware of it, but deleting a file, photo, or video on your iPhone doesn’t immediately remove it from your device. In actuality, these items that you remove go into a folder called Recently Deleted and do affect your iPhone storage space.
Files remain in the Recently Deleted folder for approximately 30 days while photos and videos hang around for about 40 days before they’re automatically and permanently deleted. However, you can manually delete those items which may result in an increase in available iPhone storage space.
Remove Recently Deleted Files
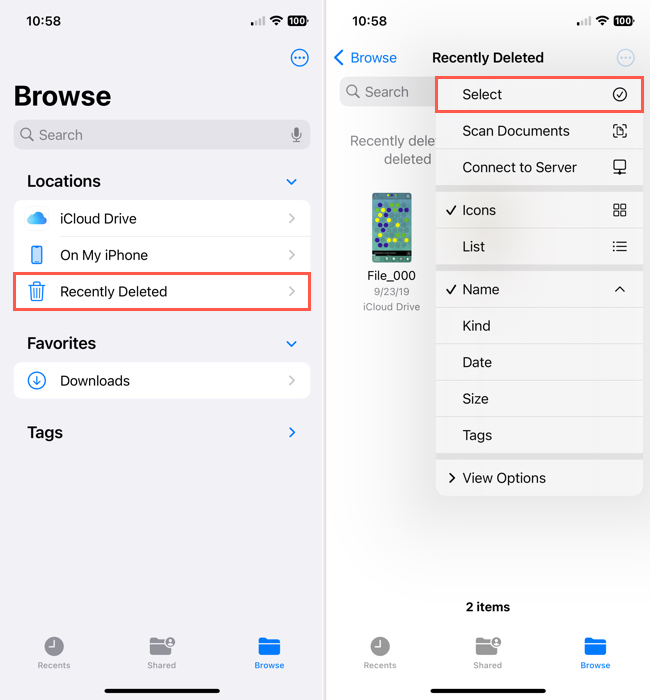
Step 1.Open the Files app and select the Browse tab.
Step 2.Choose Recently Deleted.
Step 3.Tap the three dots on the top right and pick Select.
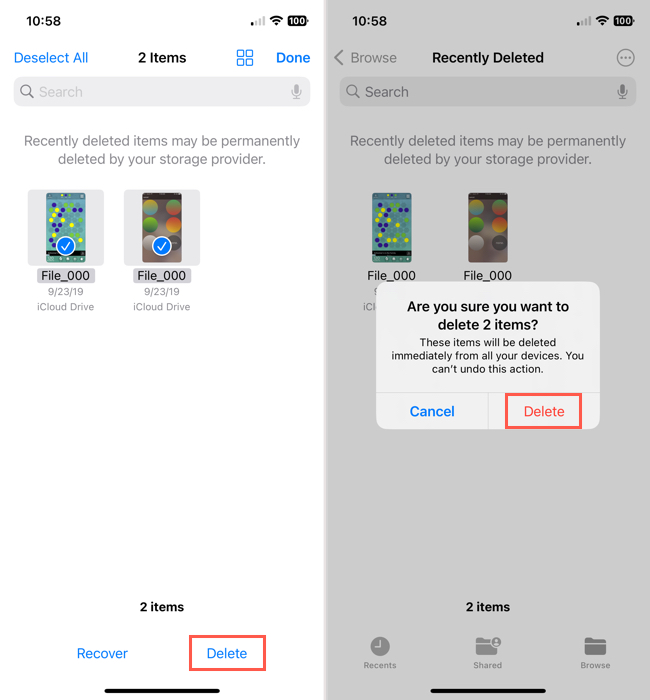
Step 4.Mark each file that you want to remove or tap Select All on the top left for all files.
Step 5.Select Delete or Delete All at the bottom.
Step 6.Confirm that you want to remove the item by tapping Delete.
Remove Recently Deleted Photos and Videos
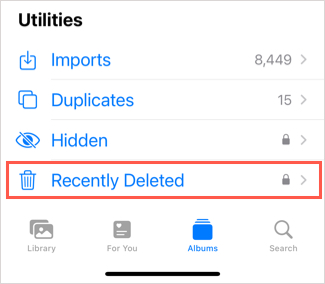
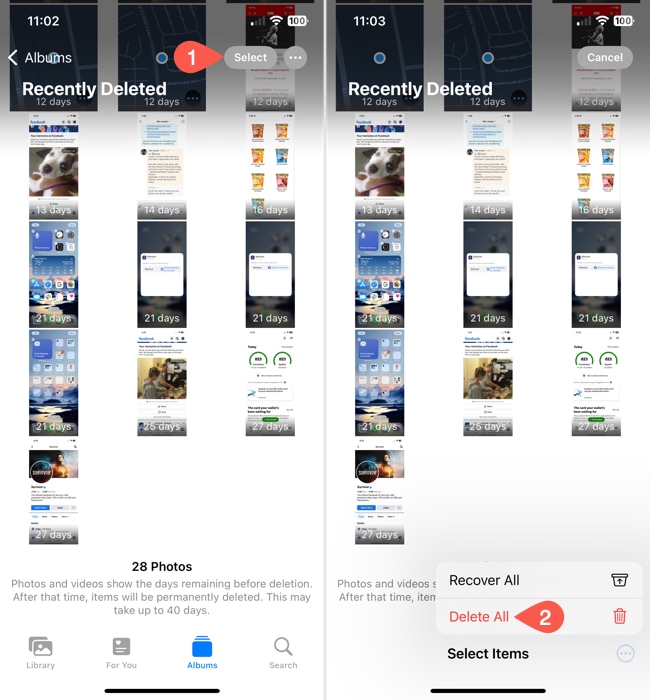
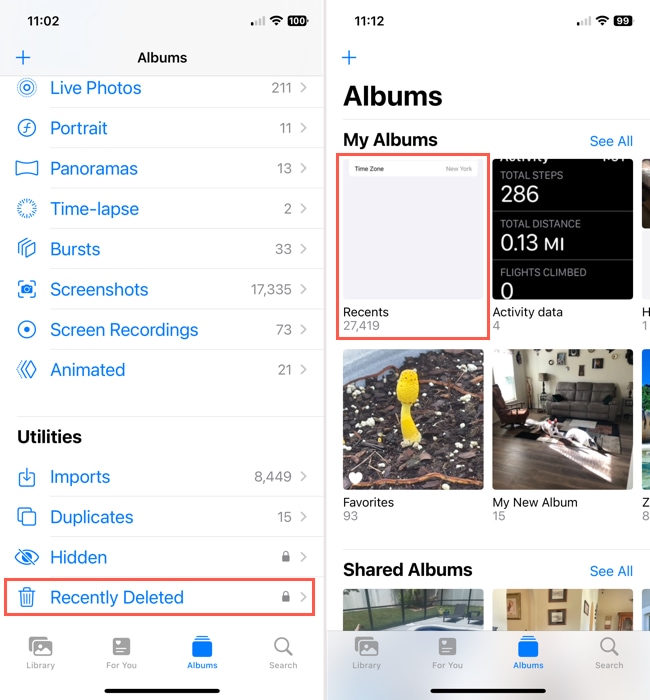
Step 1.Open the Photos app and select the Albums tab.
Step 2.Scroll to the Utilities section and pick Recently Deleted.
Step 3.When the folder opens, you can delete photos and videos one at a time or all at once.
- To delete a single item, select it and tap Delete at the bottom.
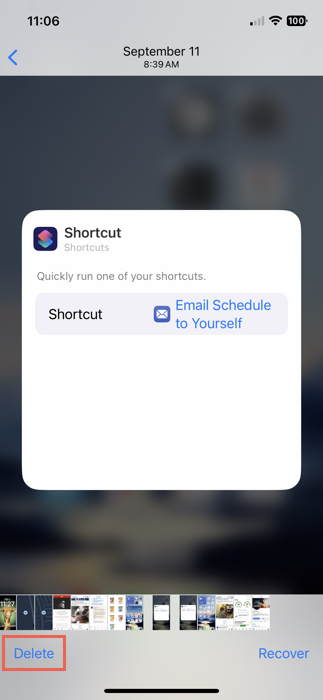
- To delete all items, tap Select on the top right and then Delete All using the three dots at the bottom.
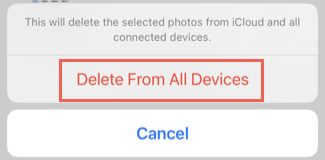
Step 4.Confirm that you want to delete the item by tapping Delete From All Devices.
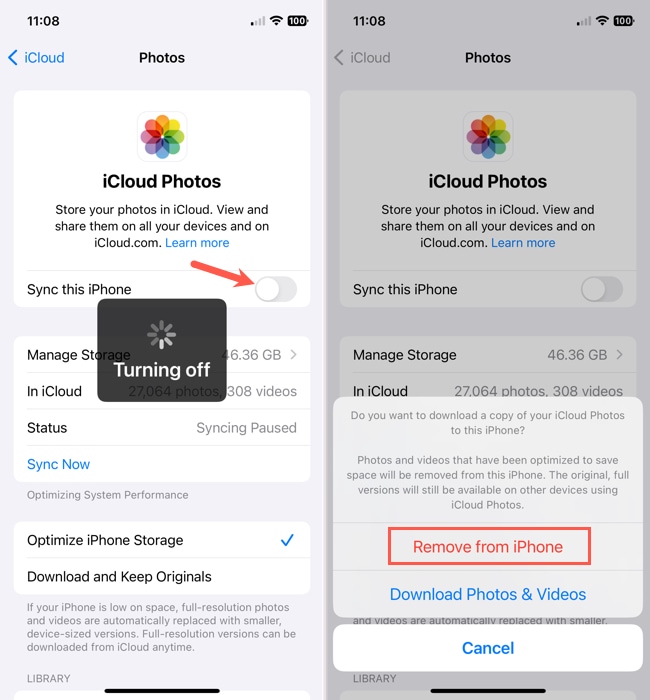
Method 3: Disable iCloud Photo Sync
If you’re syncing your photos and videos to iCloud Photos, you’re already saving storage space on your iPhone. However, copies of your media still remain on your iPhone even if you have the Optimize iPhone Storage feature enabled.
You can turn off the iCloud Photo sync and then delete any photos on your iPhone that you don’t want to keep. Just remember that new photos you capture using your iPhone will exist on that device only.
Step 1.Open the Settings app and tap your username.
Step 2.Select iCloud and choose Photos.
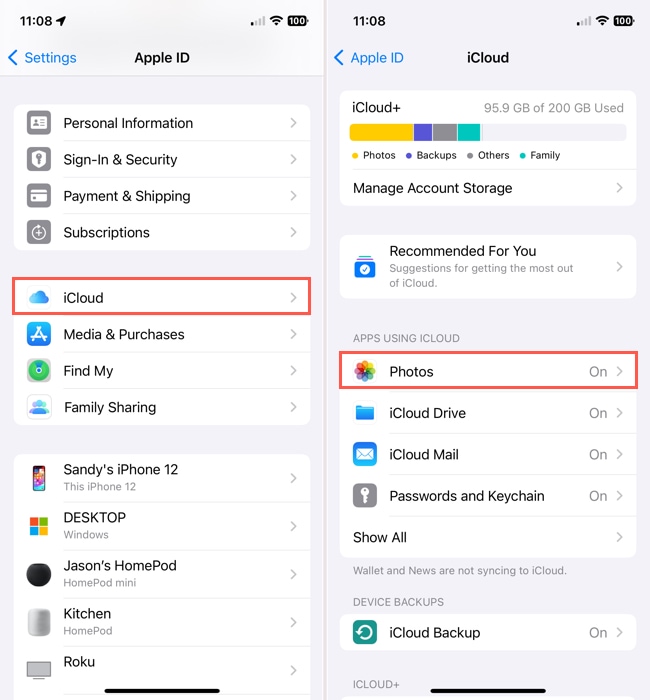
Step 3.Turn off the toggle for Sync this iPhone at the top.
Step 4.In the pop-up that appears, you’ll be asked if you want to download a copy of your iCloud Photos to your iPhone. To delete the photos and videos on your device including those copies from the Optimize iPhone Storage feature, choose Remove from iPhone.
Method 4: Change the Date and Time to Reveal Ghost Files
While a bit of a mystery, there are times when photos or videos you delete from your iPhone return as hidden files. Because you can’t see these files, hence the term Ghost Files, you can’t simply find and remove them. However, there is a workaround you can use which is to change the date on your device and then look for these files.
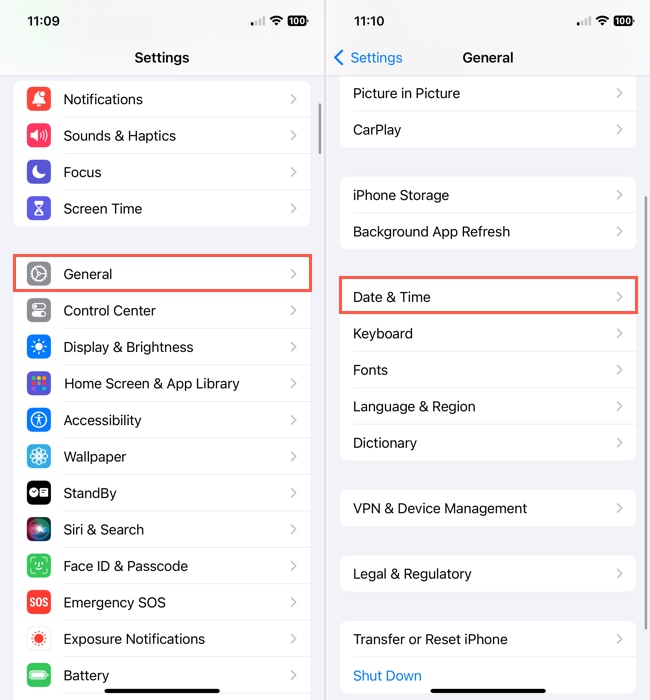
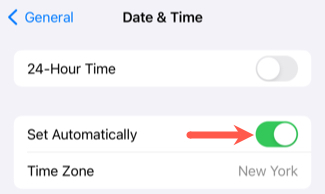
Step 1.Open the Settings app and select General.
Step 2.Choose Date & Time.
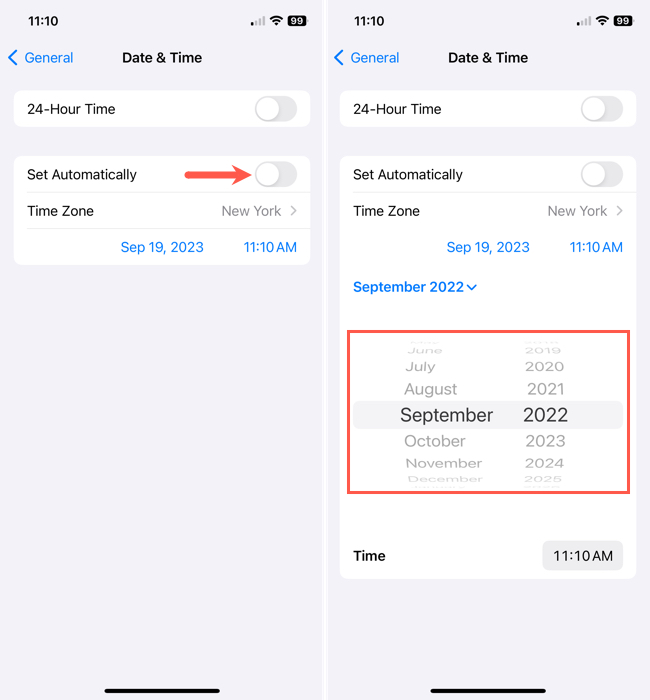
Step 3.Turn off the toggle for Set Automatically.
Step 4.In the field that appears beneath, change the date to a year in the past. You can go back one to two years per your preference.
Step 5.Open the Photos app and review the Recently Deleted folder to see those hidden files reappear. You can also check your Recents album in case some items appear there.
Step 6.Then, delete the photos and videos as described earlier.
Step 7.When you finish, return to Settings > General > Date & Time to reenable the Set Automatically toggle.
Method 5: Factory Reset Your iPhone
If you would prefer to give your iPhone a completely new start or fix any possible iOS issues, you can consider resetting your device to its factory settings. This erases all content from your iPhone and clears the system data, letting you start fresh.
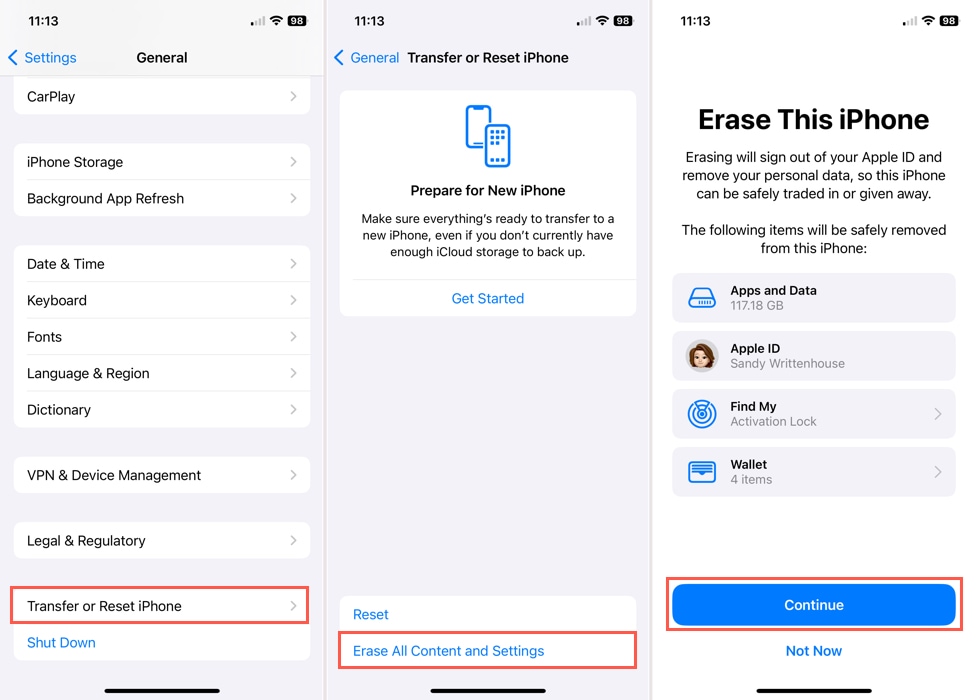
Step 1.Open the Settings app and select General.
Step 2.Scroll to the bottom and choose Transfer or Reset iPhone.
Step 3.Tap Erase All Content and Settings.
Step 4.Review the Erase This iPhone screen and select Continue to proceed.
Step 5.Follow the subsequent prompts to reset your iPhone.
Method 6: Use iPhone Cleaning Apps
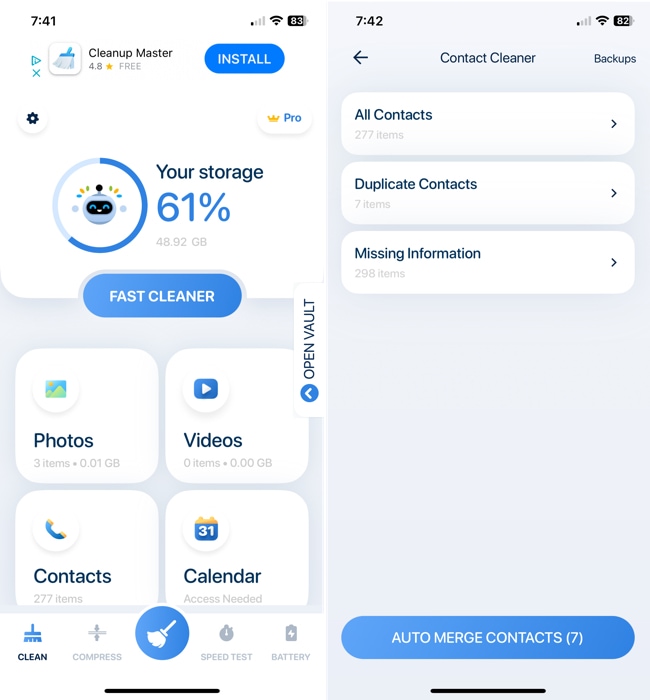
Similar to ghost files, apps you delete from your iPhone can leave residual data behind that you can’t see, for example, app cache. By using a third-party iPhone cleaning app, you can not only rid your device of this type of data, but also remove duplicate photos or contacts and large files at the same time.
Tools to clear iOS storage are plentiful in the App Store. For a great start, take a look at these free apps which have useful features and are easy to use.
- Smart Cleaner: Use the Smart Cleaning tool to identify and remove items such as duplicate photos. You can also perform a manual cleaning of previous calendar events, contacts with missing details, and Safari and app cache.

- Boost Cleaner: Free up space by removing photos and videos that are similar, merging like contacts or deleting duplicates, and finding and removing large files.
Method 7: Contact Apple Support
Maybe you’ve tried everything on this list and more, but your used iPhone storage won’t go down to give you more available space. In this case, it may be time to contact Apple Support.
Use the Apple Support mobile app: One of the easiest ways to contact Apple Support is with the official iPhone app. Once you download the free app, sign in with your Apple ID and choose your device. Then, pick a topic, enter your question, or tap to chat with a representative.
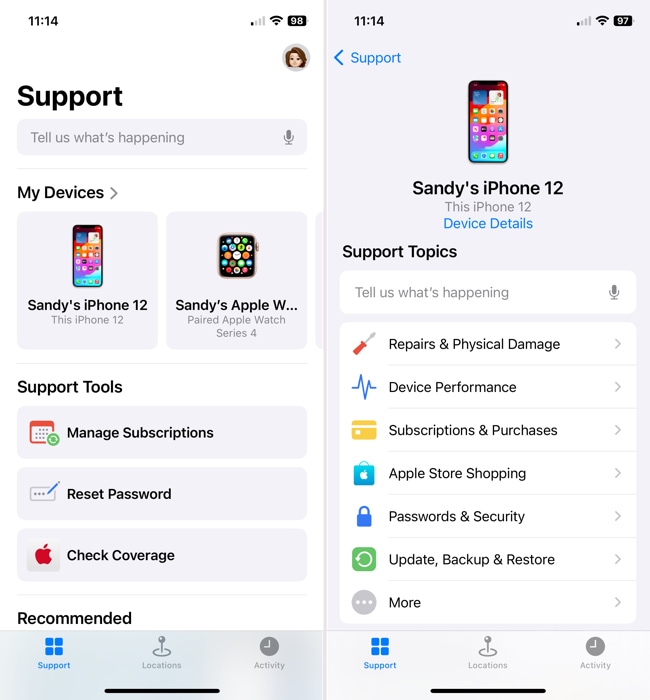
Visit the Apple Support site: If you don’t want to add another app to your iPhone, you can visit the Apple Support website for assistance. Just like the mobile app, you can choose your device and a topic to zero in on the support you need or click to chat with a team member.

Call Apple Support: If you prefer to speak to someone in person, you can call Apple Support. The phone number varies by region, so visit the Contact Apple for Support and Service web page to obtain the number for your area or access the call feature via the Apple Support mobile app or website.

Conclusion
You don’t have to settle for little or no storage on iPhone. So, don’t give up! From clearing recently deleted items and ghost or junk files to rebooting your device or even restoring it to its factory settings, there are more steps you can take besides deleting apps or clearing your downloads.


