
If you use a MacBook released anytime between 2008 and today, you’re likely using an SSD (solid state drive). Or you may be using an external SSD to store data off-site. In either case, if you keep valuable data on an SSD, keep reading.
While more robust than hard drives, SSDs are still subject to decay and damage, indicated by its “Wear Level.” It only worsens the more you use it – until one day, the drive will just stop working. This article will teach you not only how to track your SSD Wear Level but prolong its lifespan using free tools on your Mac.
Table of Contents
What is SSD Wear Level
Do SSD drives wear out? Yes – the life of an SSD is finite. An SSD’s lifespan starts at 100% and decreases each time you erase, overwrite, or save data. This rate of deterioration is referred to in percentage as “Wear Level” or “Wear Leveling Count (WLC).” Technically speaking, SSDs consist of storage blocks or “cells” that are being constantly reused each time we delete and save data.
This behavior decreases the SSD’s wear level – and as your SSD’s wear level gets worse, it will start to misbehave until it eventually stops working altogether.
SSD Wear Leveling and How it Helps
Think of hard drives as file cabinets and the cells as individual drawers. When you use a single drawer to store files over and over again, it wears down faster than its unused counterparts. The cycle continues until the whole cabinet is too damaged to use. This is what Wear Leveling your SSD is designed to work around.
Wear Leveling is a technique SSDs use to distribute usage evenly among cells, prolonging the entire cabinet’s or hard drive’s lifespan as a result. Using a special algorithm, it keeps track of each cell’s write cycles and uses that to choose which cell to next store data. In this way, SSD makes use of all available cells at ideally the same rate.
Most SSDs use either of the two basic types of wear leveling algorithms:
- Dynamic Wear Leveling. Every time you make changes to an existing file, this technique will save the updated data to a new cell. Then, it’ll empty out and reserve the previous cell for future use. Its only downside is the uneven wear leveling caused by the untouched data. In dynamic wear leveling, the data stays on the same cell until you make further changes to it. This ultimately leads to fewer erase/write cycles on that cell compared to others that are frequently written to.
- Static Wear Leveling. This SSD wear leveling algorithm generally works in a similar manner. The key difference lies in how it treats unchanged data to resolve the problem of uneven wear leveling. It does so by moving data that isn’t frequently updated to new cell blocks regularly. This ensures that all cells have the same number of erase/write cycles on them. But the tradeoff of this extra work is slower performance.
However, before you apply either algorithm, you may want to check your SSD’s wear levels to know if you need to secure your data first. Wear leveling rearranges your data – in the process, it may overwrite important files.
How to Measure SSD Wear Level
If you know your SSD’s wear level, you can secure your data before it’s destroyed to the point where only professional data recovery services can restore it. Fortunately, all hard drives and solid state drives have a built-in function called S.M.A.R.T. (Self-Monitoring, Analysis, and Reporting Technology) that logs wear level.
However, the only way a user can access this information is by using software. Below are 2 completely free tools that we highly recommend for your Mac, as well as step-by-step instructions on how to use them.
Method #1: Using Disk Utility
Disk Utility is a built-in macOS tool with a S.M.A.R.T. reporting tool that provides basic information about your drive’s health status. To use it, launch Disk Utility (Finder > Applications > Utilities) and select your SSD from the left sidebar (drive not volume).
In the disk information section underneath the storage bar, you can check your SSD’s S.M.A.R.T. status.
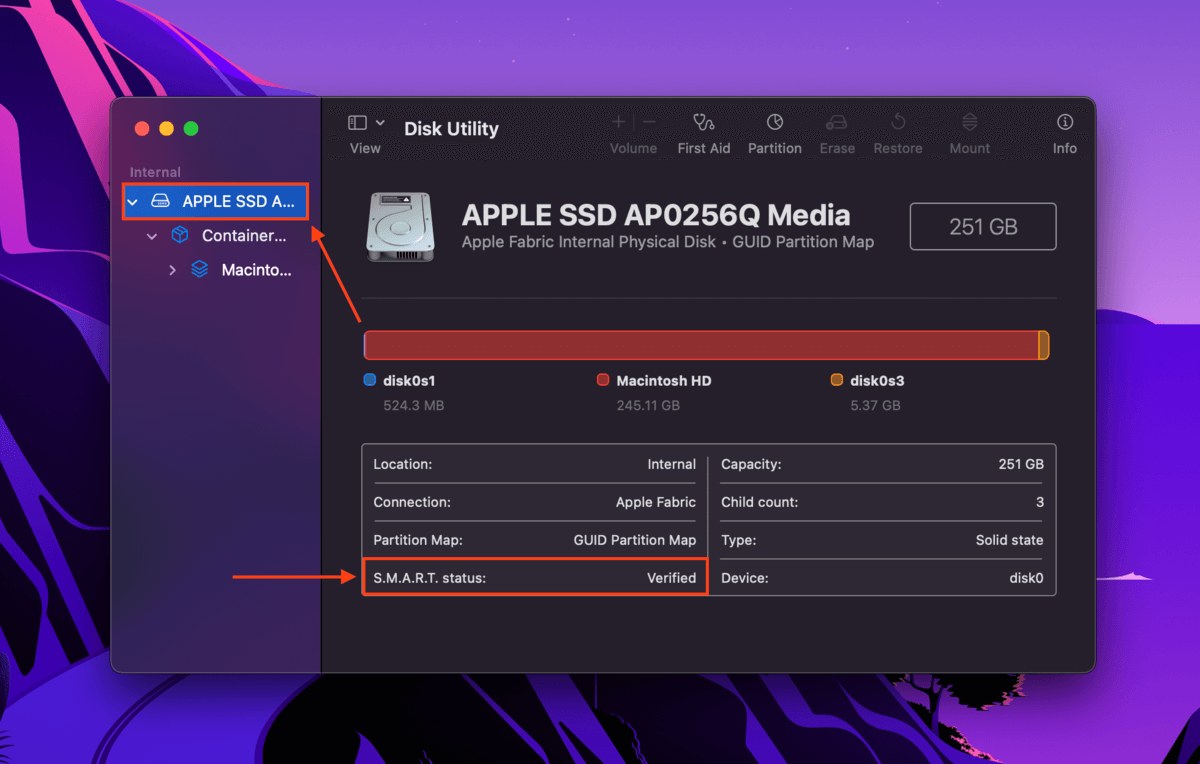
Here’s what each status means:
- Verified – your drive is in good health.
- Failing – your drive is approaching the end of its lifespan; back up your data ASAP.
- Not Supported – Disk Utility cannot provide any information. In this case, you’ll need to use a third-party tool to check your SSD’s wear level. In the next section, we’ll show you the free tool we use for our own drives.
Method #2: Using Disk Drill’s Free S.M.A.R.T. Monitor
Disk Drill is a data recovery software we often use for our recovery articles here at Macgasm. It’s a powerful and reliable tool that offers a 100% free-to-use S.M.A.R.T. function that provides a bit more information than Disk Utility. You don’t need to subscribe or pay to download and use the software.
To check your SSD’s S.M.A.R.T status using Disk Drill:
Step 1. Download and install Disk Drill.
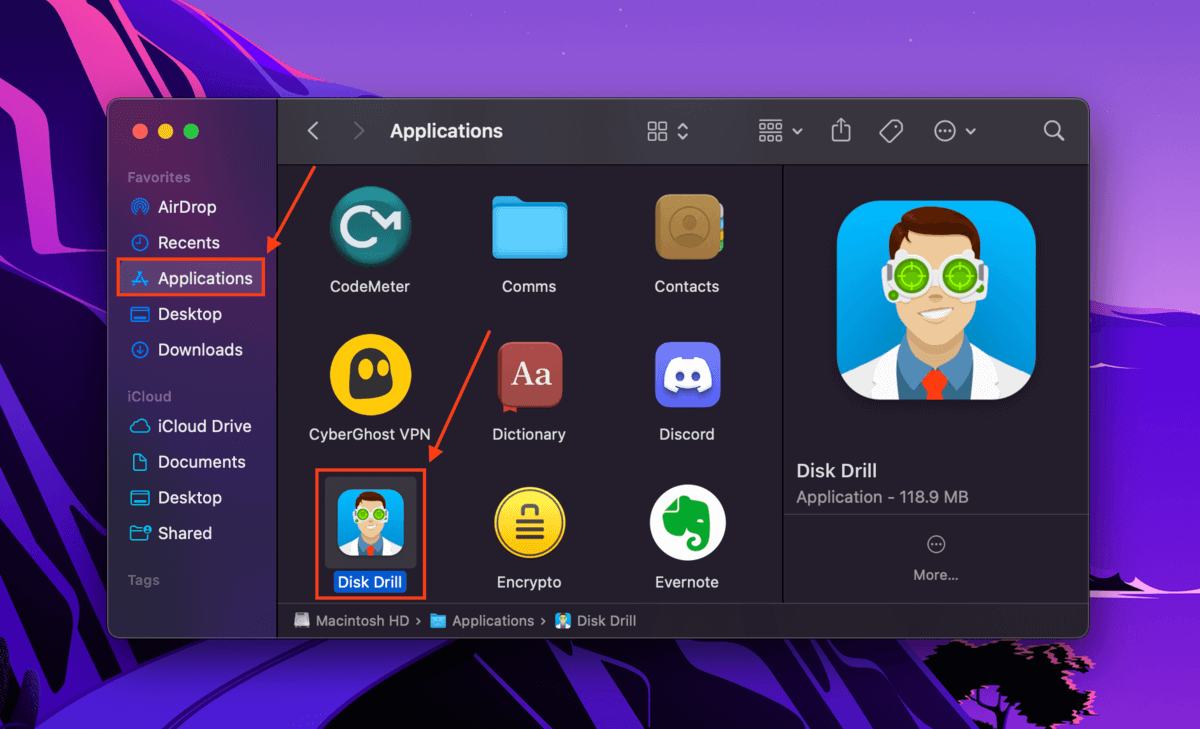
Step 2. Launch Disk Drill (Finder > Applications).
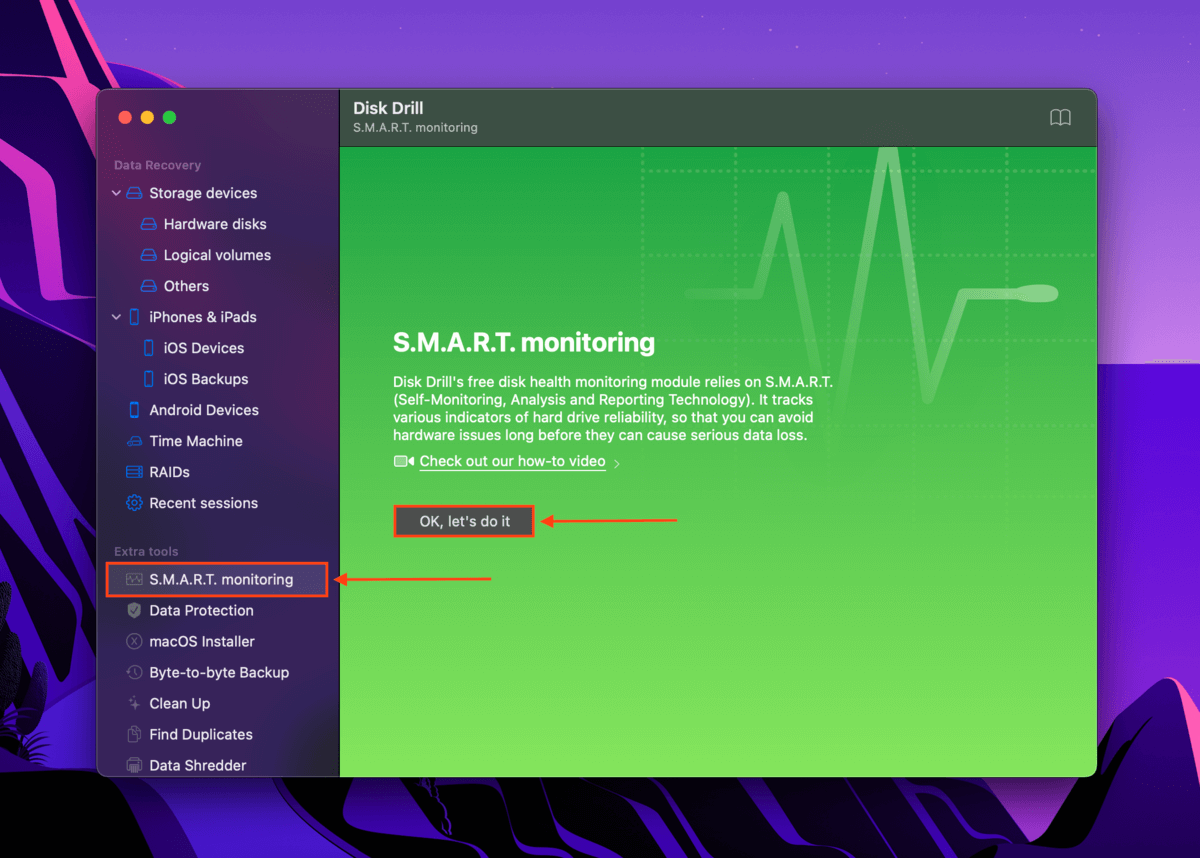
Step 3. On the left sidebar under “Extra tools”, select S.M.A.R.T. monitoring and click OK, let’s do it.
Step 4. Under the S.M.A.R.T. monitoring status, click Turn on.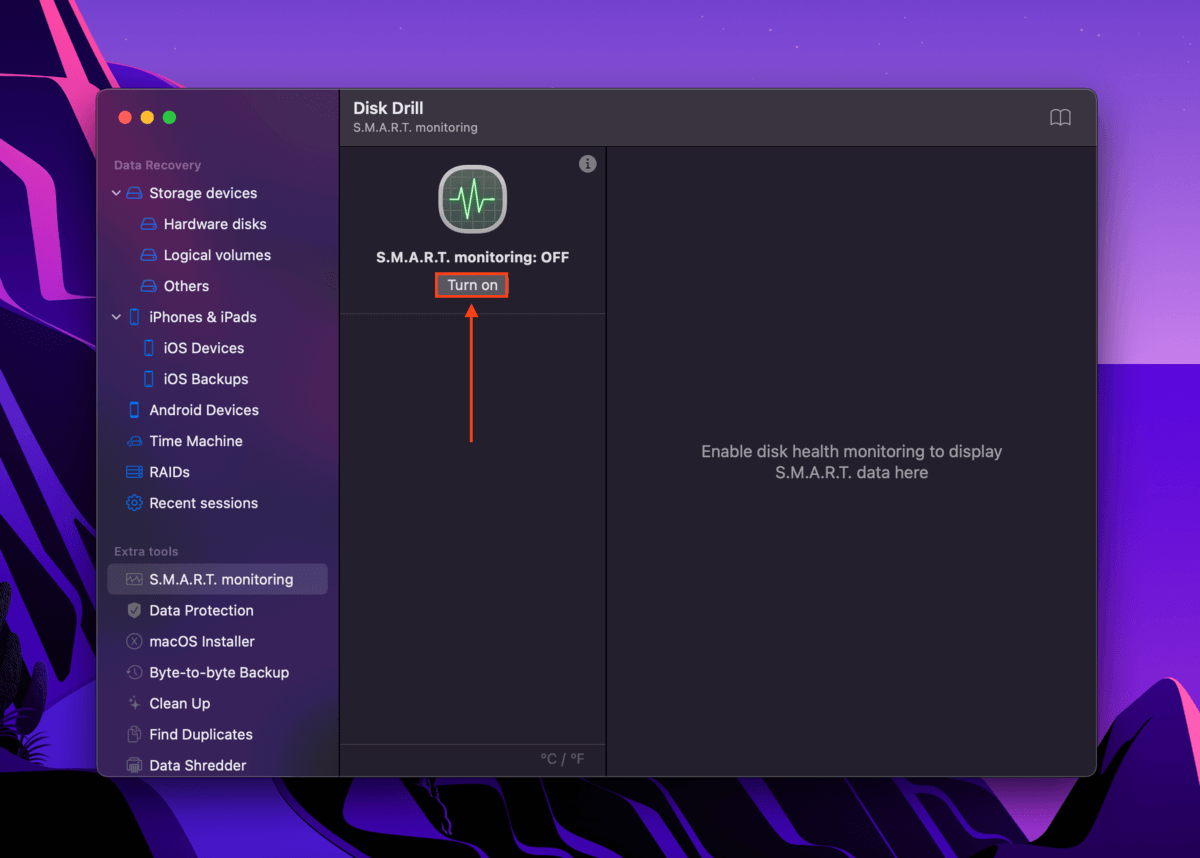
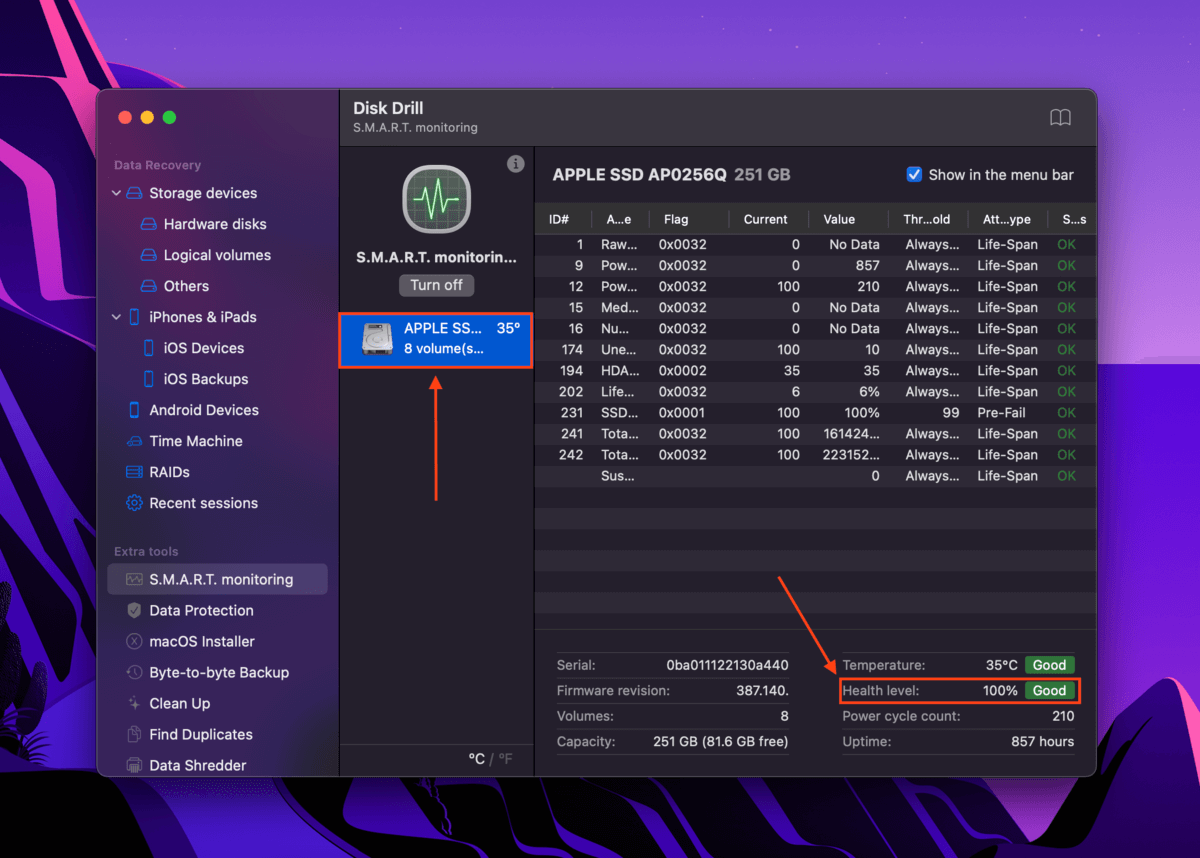
Step 5. Underneath the S.M.A.R.T. monitoring settings, select your SSD. Disk Drill will display in-depth reports about drive performance (which can help mac users report SSD wear with more information). On the bottom-right corner of the screen below the Temperature status, you can see your SSD’s overall health level.
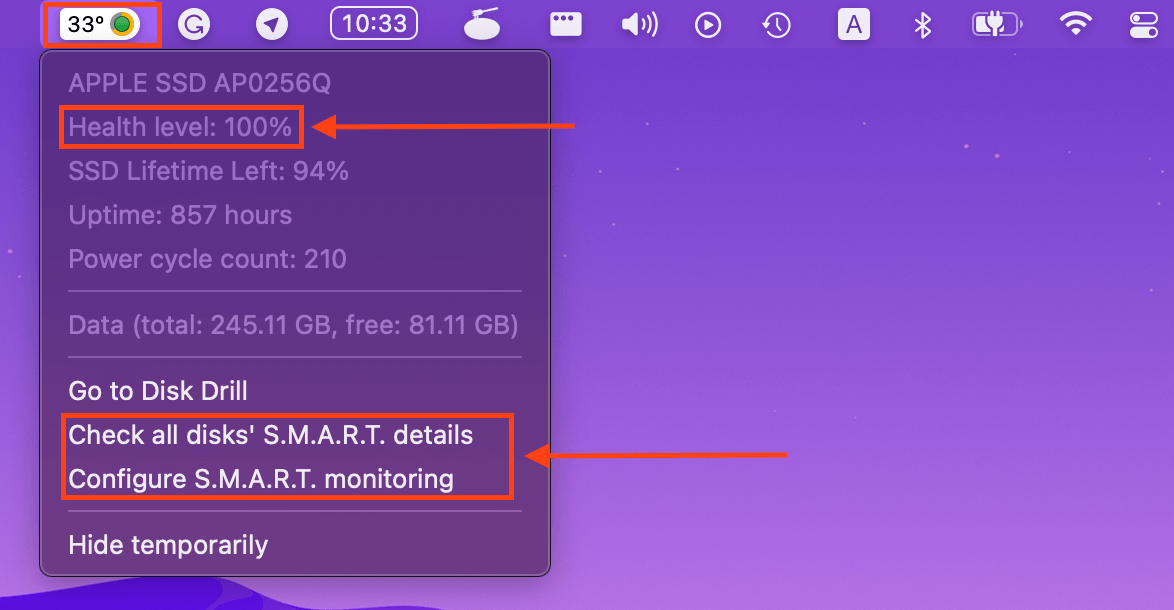
Step 6. You can also click Disk Drill’s S.M.A.R.T. icon on the Apple menu bar to quickly check your drive’s health level and access and configure S.M.A.R.T. in the app.
Conclusion
While there are ways to prolong SSD longevity, all hardware have a finite “Wear Level.” Use the techniques above to get the most out of your drive, but we also advise that you back up your data using tools like Time Machine and Disk Drill’s Byte-to-byte backup. We also suggest looking into cloud storage such as iCloud to lessen the burden of your system drive.


