
If you used the RM command (with or without its extensions) on Mac and deleted files that turned out to be important, you have a limited time frame to recover your data before it’s gone forever. The command is fast and silent, and it completely skips the Trash folder.
In this article are 4 safe methods to recover RM files on Mac, as well as in-depth information about the RM command and the most important factors that affect your chances of recovery. Read on.
Table of Contents
What is RM Command in Mac Terminal
In the context of Unix (Mac) and Linux systems, the RM command is an erase or “remove” tool. It’s handy for users who often work from the Terminal or for quick batch deletion. Depending on how you type it, the RM command can accomplish different things:
| RM Command | Function |
| rm -i | Prompts the user for confirmation before deleting each file. |
| rm -I | Prompts the user for confirmation once before deleting a batch of files. |
| rm -f | Immediately deletes files upon execution without prompting the user for confirmation. |
| rm -r | Deletes directories along with all their content. |
| rm -p | Overwrites files 3 times before deleting them. This technique makes it almost impossible to restore data without professional help. |
| rm -v | Outputs information about the deleted files as they are being removed. |
| rm -d | Deletes a directory only if it’s empty. |
The RM command is a powerful tool that can help users manage their files more efficiently. But what if a user accidentally used the RM command for files they don’t want to delete? Is it still possible to recover their files? Let’s find out in the next section.
Is it Possible to Undo RM Command on Mac?
The possibility of undoing the RM command’s effects on your Mac and recovering your RM files depends on multiple factors that mainly concern overwriting.
The normal behavior of a traditional hard drive is to continue storing the data of deleted files until they get overwritten. The window of recovery occurs between the time of deletion and overwriting. However, the availability of this window depends on the following:
- What RM command you used – The rm -p command overwrites your files before deleting them. This leaves no data for recovery tools to utilize for file recovery.
- What type of drive is installed on your Mac – If your Mac uses an SSD instead of a hard drive, TRIM may be enabled. This setting automatically erases data blocks of deleted files instead of waiting for overwriting.
- What occurred after RM was executed – Even if you didn’t use rm -p specifically, downloading new files or writing new data to your drive (like copying files) may overwrite the deleted files.
As long as your files haven’t been overwritten by rm -p, new files, or TRIM, you can get them back using data recovery software and other DIY methods.
If they were overwritten, recovery software won’t work but you can still restore backups or hire a professional data recovery service.
We’ll cover all of these options in detail in the next section.
How to Recover RM Files on Mac
Due to how powerful the RM command is, to recover deleted files from terminal, you’ll need to either rely on backups or use a third-party tool called data recovery software to extract your files directly from the file system. And as we mentioned earlier in the article, you’ll need to act fast – every minute that passes can eat into your deleted data.
Method 1: Time Machine Backup
Time Machine stores “snapshots” of files and folders in their current state. If you created a Time Machine backup before deleting your data with the RM command, you can restore a snapshot of your files that Time Machine captured before you deleted them.
To recover your RM folders and files using Time Machine:
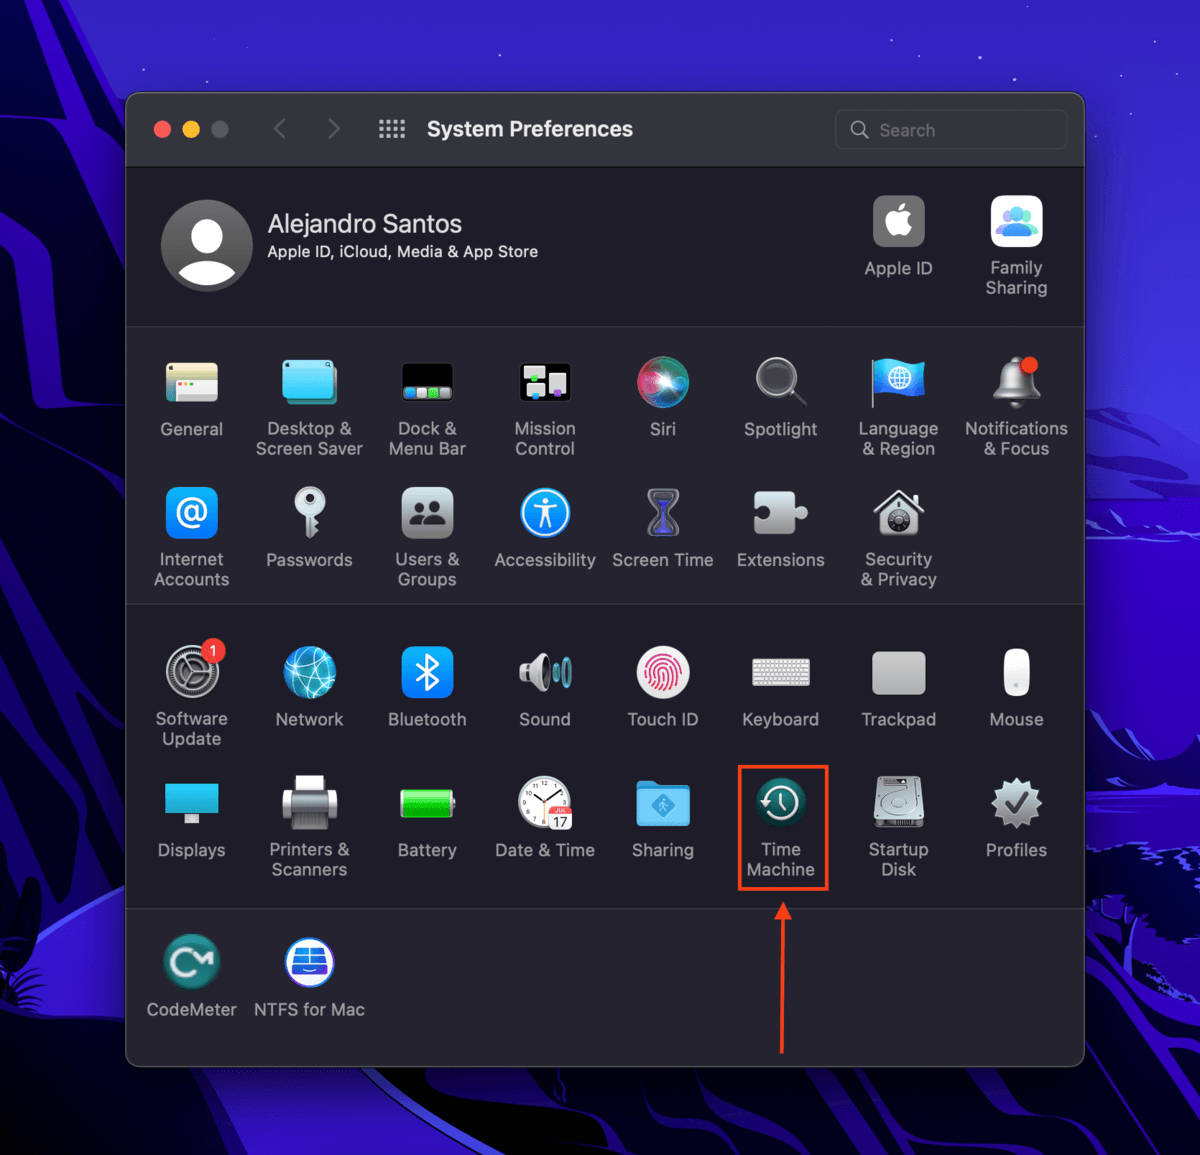
Step 1. Make sure your Time Machine backup drive is securely connected to your computer. Then, open System Preferences > Time Machine.
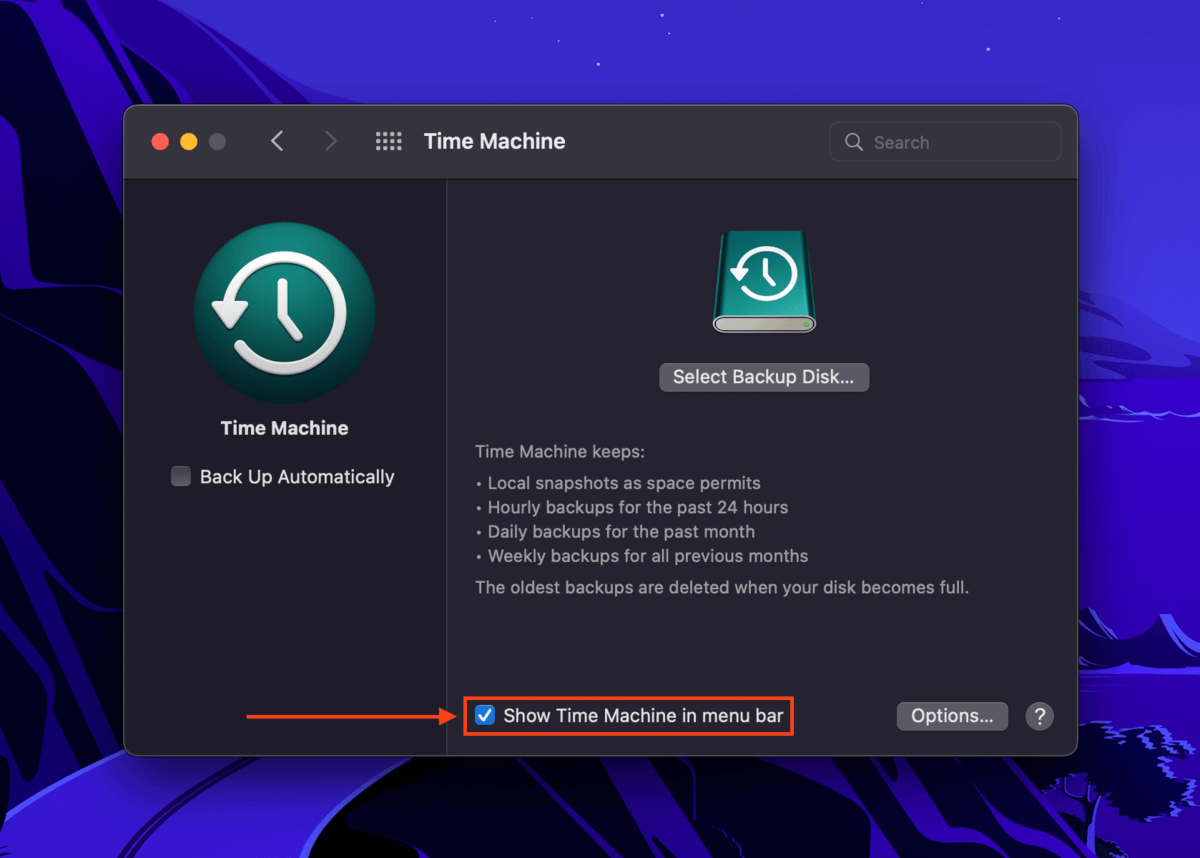
Step 2. Tick the box beside Show Time Machine in menu bar and close the window.
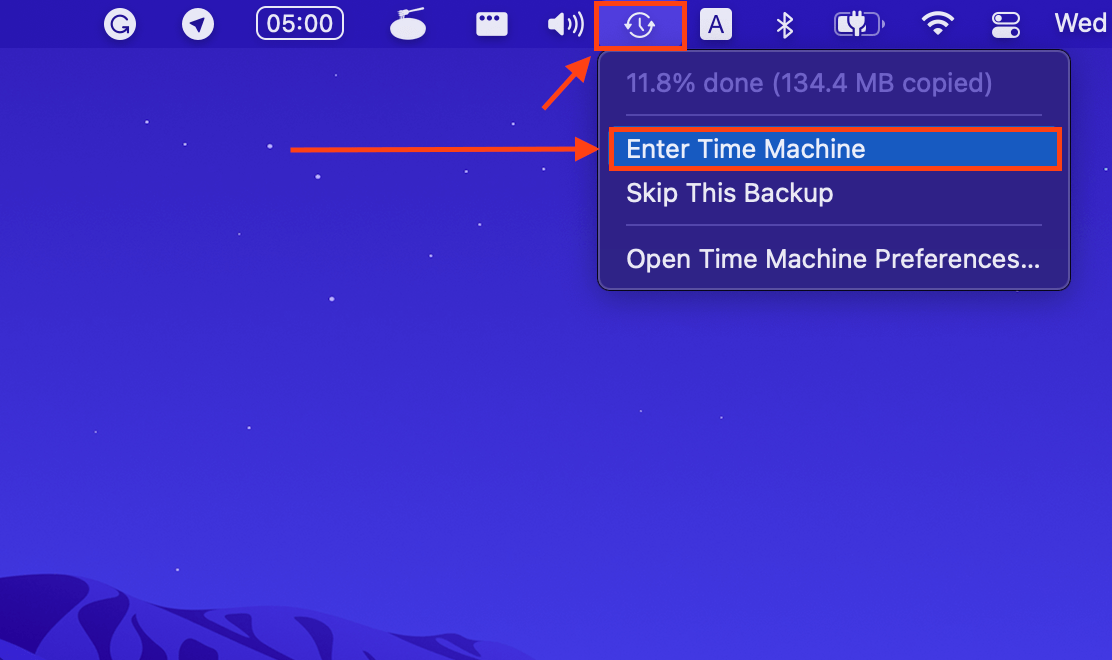
Step 3. In Finder, open the folder that stored the files you want to recover. On the Apple menu bar, click Time Machine button > Enter Time Machine.
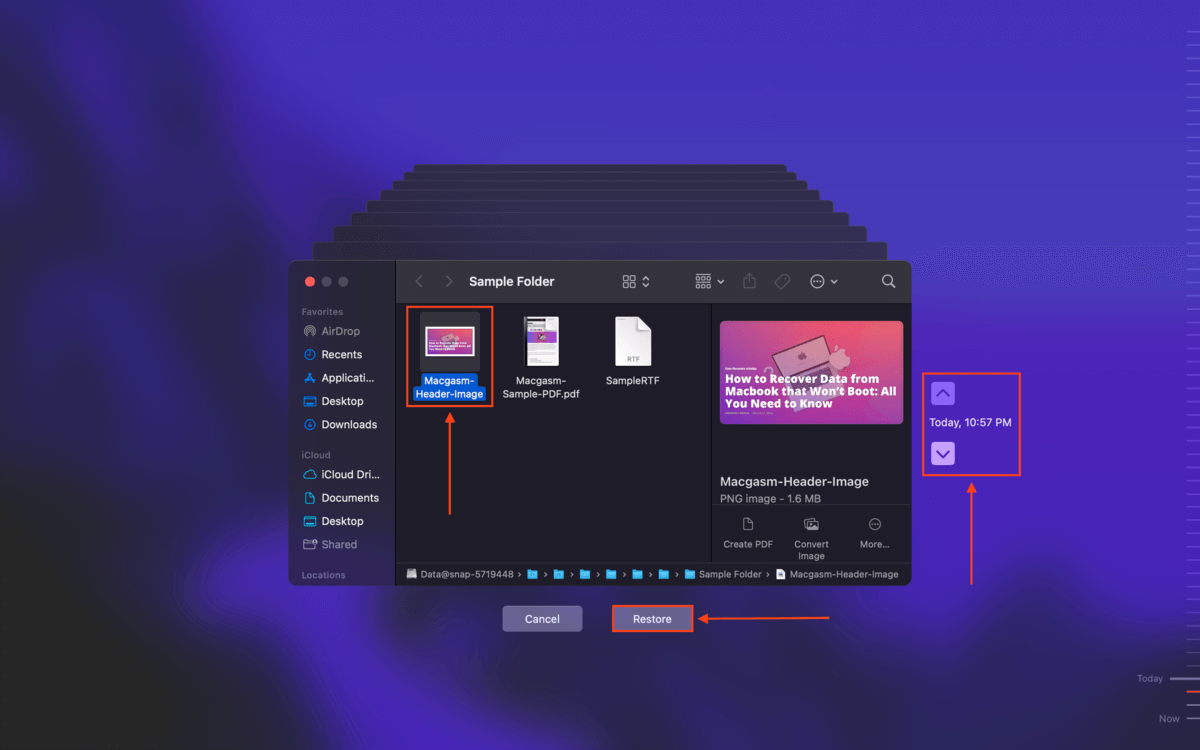
Step 4. To the right of the main window, you can use the arrow buttons to locate the snapshot that contains your deleted files. Click on the files and folders you want to recover and click Restore to return them to their original location.
Method 2: iCloud Backup
If you enabled iCloud for the files and folders you wanted to save, there’s a good chance that they’ve been uploaded to the cloud. Even if you deleted your data from the iCloud folder on your Mac, the iCloud server stores recently deleted data for 30 days.
To recover your data from an iCloud backup:
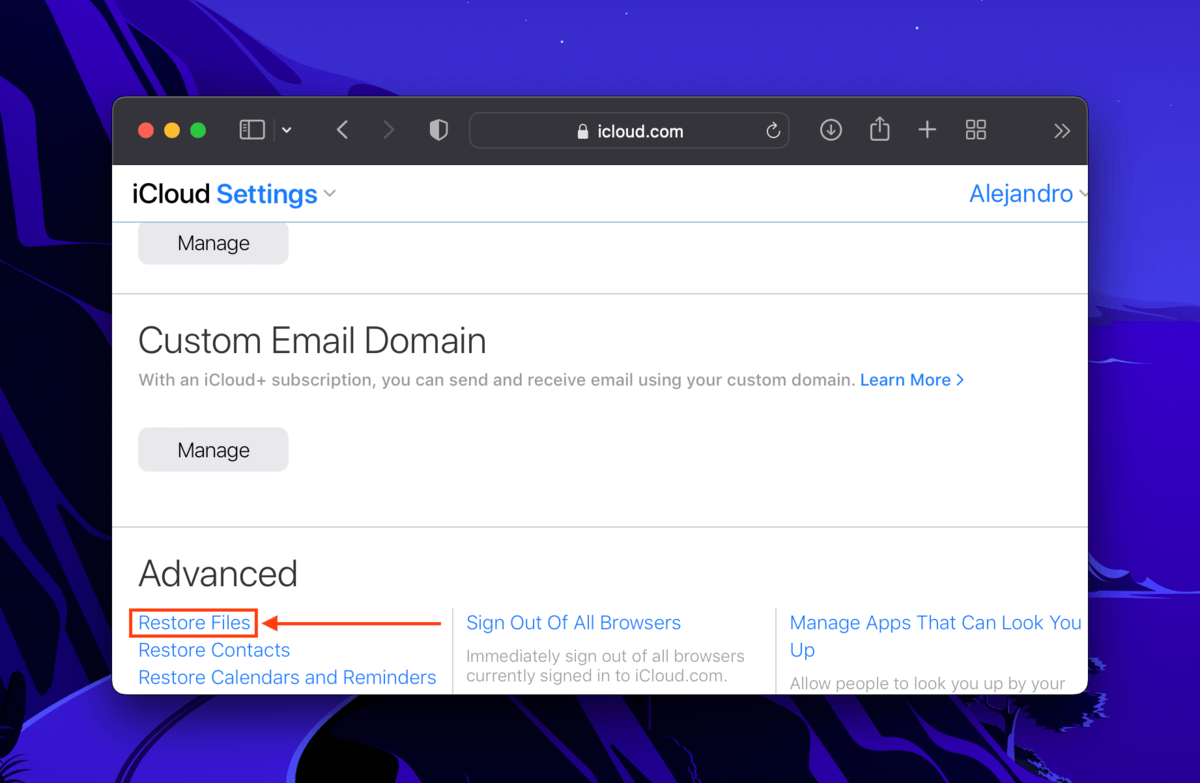
Step 1. Log in to iCloud.com and click Account Settings.

Step 2. Scroll down to the bottom of the page and click Restore Files under the Advanced section.
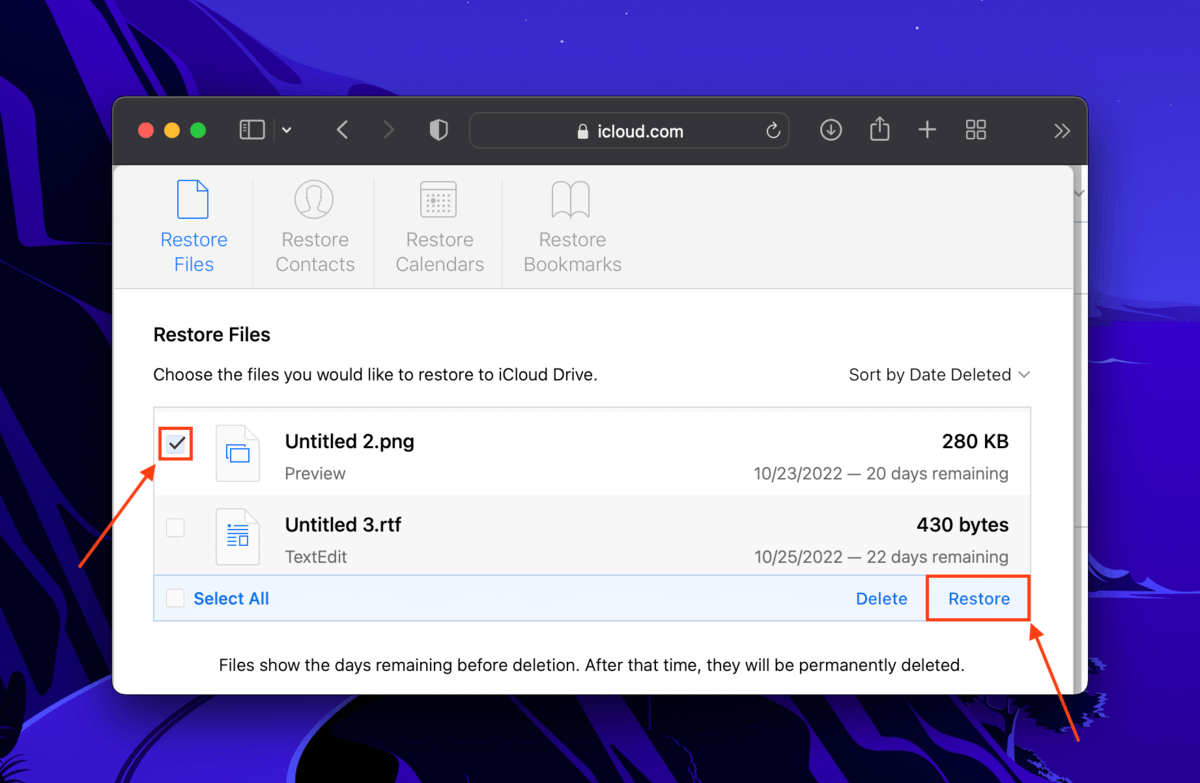
Step 3. Tick the boxes beside the files you want to recover. Then, click Restore. This should send your files back to their original folder.
Method 3: Data Recovery Software
If you were unable to create iCloud or Time Machine backups, you need to use a third-party tool called data recovery software. As long as your files haven’t been overwritten, data recovery software can retrieve and rebuild data directly from your computer’s file system.
For this article, we’ll be using Disk Drill. It’s powerful and easy to use, and it provides excellent support for macOS files and file systems. To use Disk Drill to recover data deleted with the RM command:
Step 1. Download and install Disk Drill.
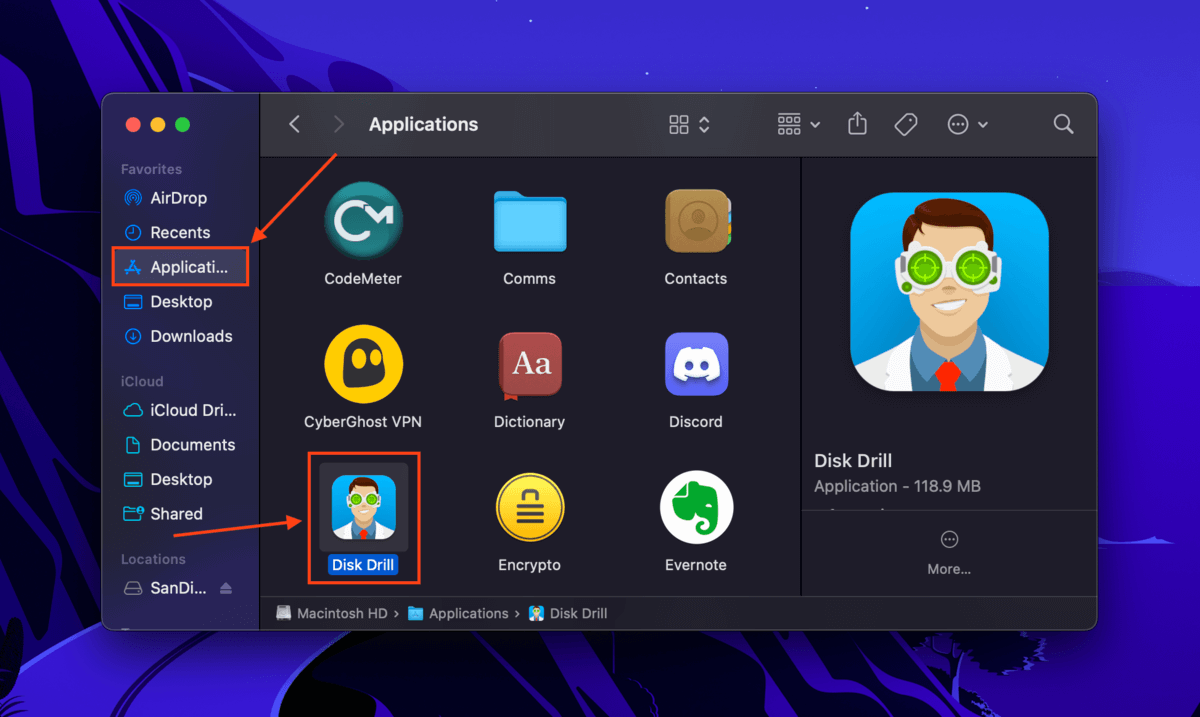
Step 2. Launch the Disk Drill app (Finder > Applications).
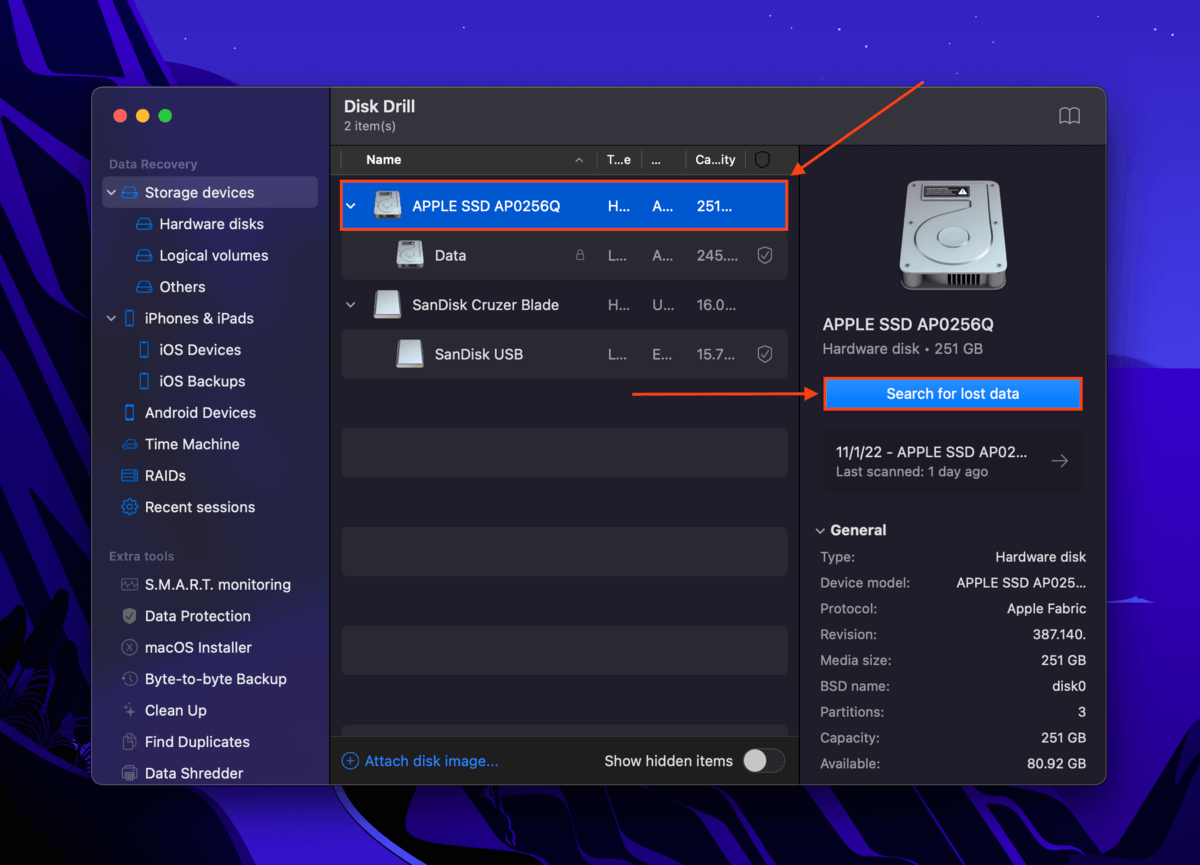
Step 3. From the main window, select your system drive (usually labeled “Apple SSD”). If you executed the RM command on an external drive, connect it to your computer and select that instead. Then, click Search for lost data.
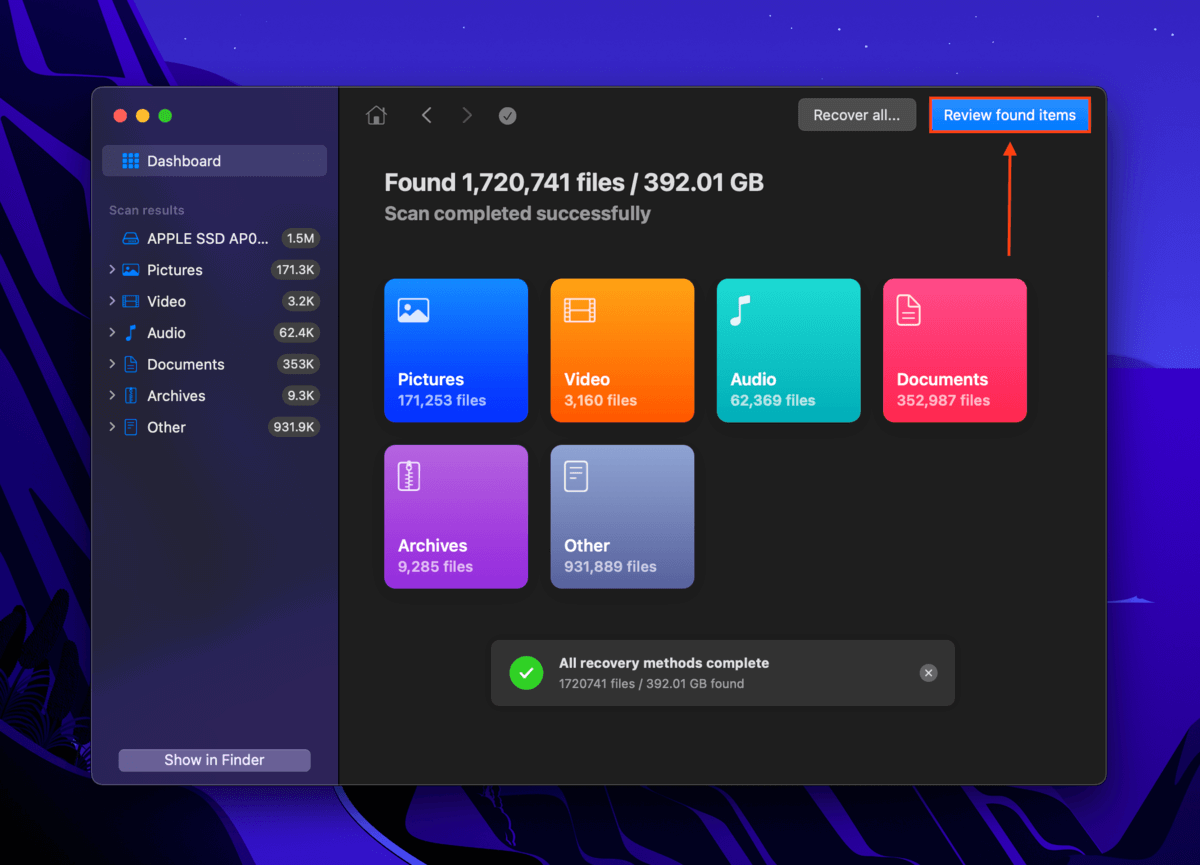
Step 4. Once Disk Drill is done scanning your drive, click Review found items.
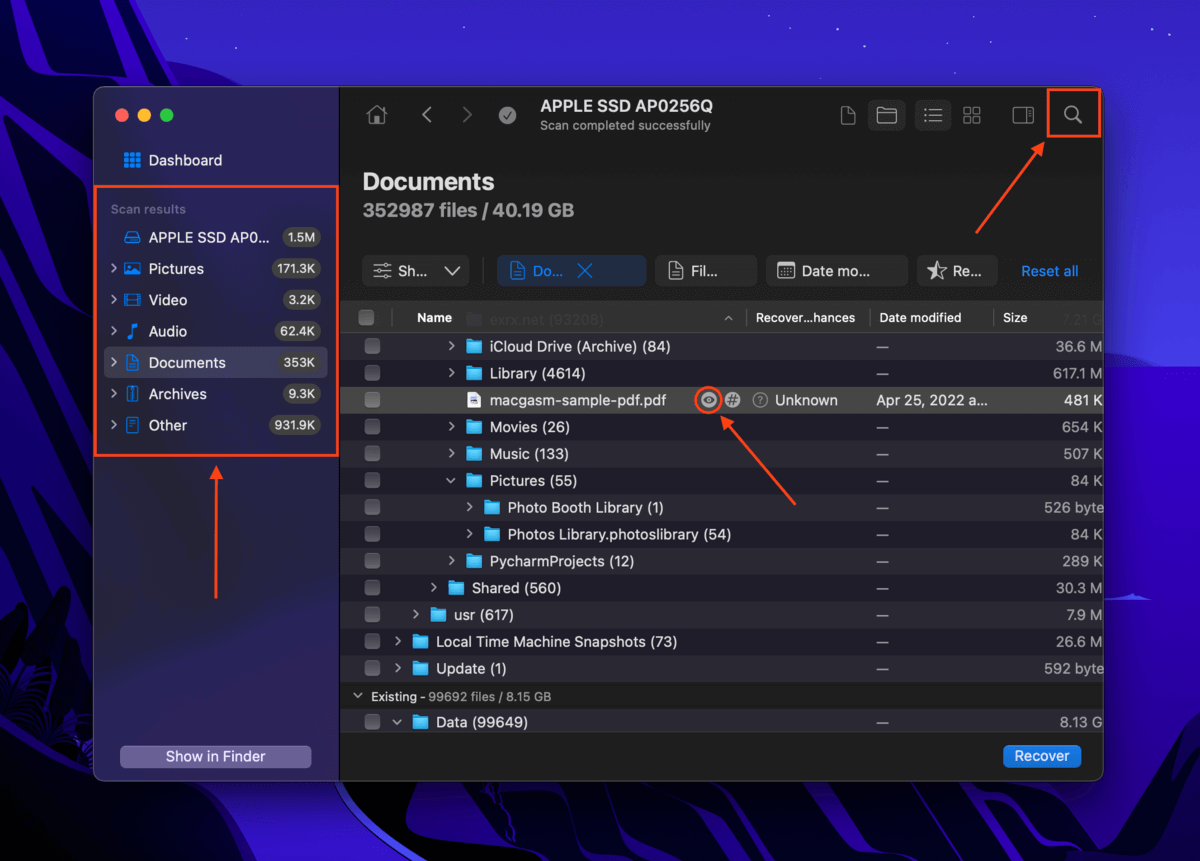
Step 5. Use the search bar (click the magnifying glass in the top-right corner) and the filter sidebar to locate your files quickly. You can also preview your files by hovering your mouse beside their file names and clicking the eye button that appears.
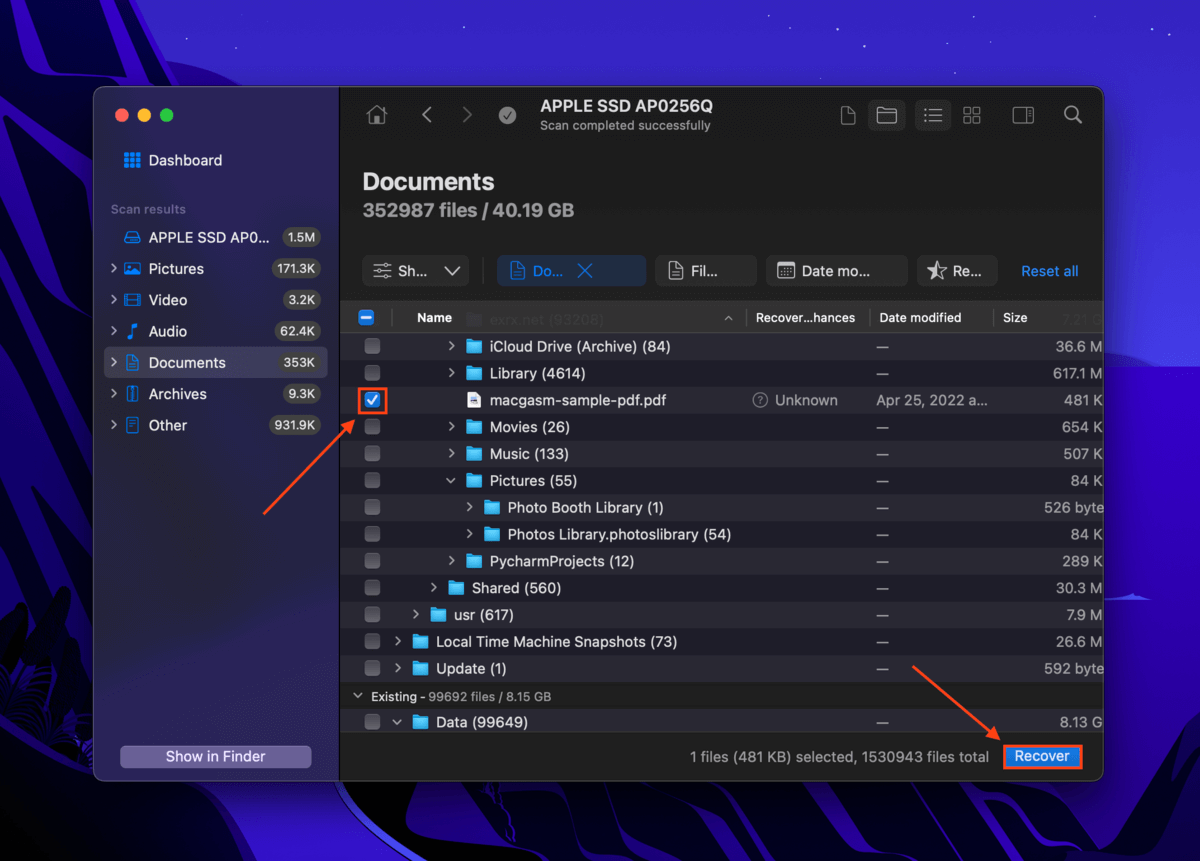
Step 6. Once you’ve found the files you want to recover, tick the boxes in the leftmost column to select them. Then, click Recover.
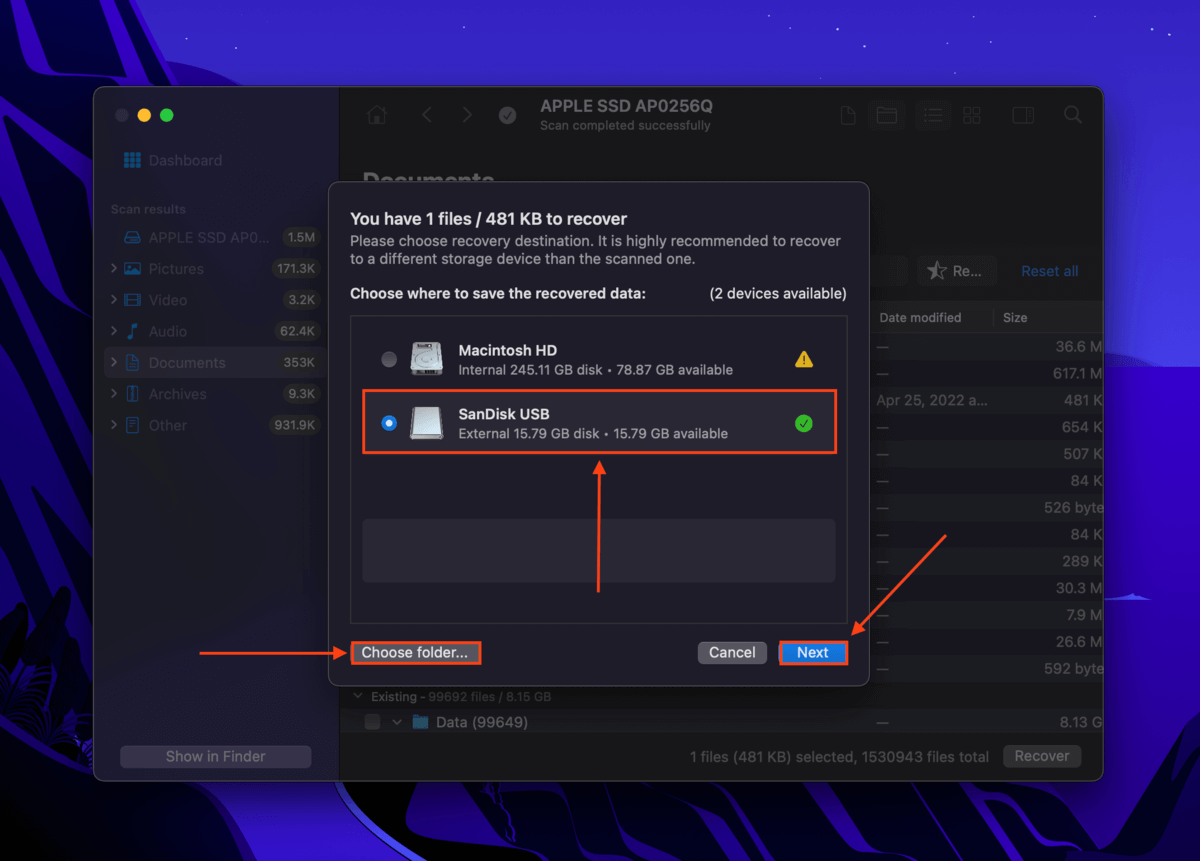
Step 7. In the window that appears, select a location where Disk Drill will save your recovered data. We highly suggest saving it to a separate drive to avoid overwriting your files. Then, click Next to restore your data.
Method 4: Data Recovery Service
Professional data recovery services are teams of data specialists you can hire to recover lost files from your devices. They use advanced tools and special labs to take apart drives and safely extract valuable data.
We recommend hiring a professional data recovery service to retrieve your files if you:
- Want to maximize your success rate
- Want to lower the risk of failure as much as possible (e.g. lost client documents)
- Don’t want to spend time recovering your data yourself
- Have no backups and couldn’t recover data using recovery software
Just make sure that the service you choose has a Class 100 Cleanroom and does NOT charge “per gigabyte” as the recovery process is too complex for that kind of pricing model to make sense.
Conclusion
The RM command is a powerful command line tool that works fast to erase your files. And once those files get overwritten by new data, even the most powerful data recovery software will struggle to recover them. To avoid unwanted (and permanent) consequences from using the RM command, we suggest creating Time Machine and iCloud Backups regularly.
FAQ
To undo RM’s deletion, try the following methods:
- Restore your data from a Time Machine backup.
- Restore your data from an iCloud backup.
- Use data recovery software to restore your data directly from your drive’s file system.


