
By learning how to install macOS on an external hard drive, you can safely test everything macOS 12 Monterey has to offer while preserving your current installation intact.
If you discover that Monterey is too unstable, incompatible, or otherwise unsatisfactory, you can simply format the external hard drive and use it for other purposes, such as storing backups.
Table of Contents
When It Makes Sense to Install macOS Monterey on an External Hard Drive

Seasoned Apple users know that when a new major version of macOS is released, things do always go smoothly. It’s not uncommon for users to see their Macs become less stable than a hormonal teenager going through a caffeine crash. At the same time, new versions of macOS always introduce attractive new features, and it’s understandable if you want to try them as soon as possible.
When you install macOS on an external hard drive, you can get your hands on the latest and greatest features without the risk of making your computer unusable. Here are some situations where this approach can be especially useful:
- 🧪 Testing: It’s always a good idea to test if a new version of macOS is compatible with all apps you rely on, and you can do just that by installing macOS on an external SSD or HDD.
- 👨💻 Separating your work life from your personal life: By having two operating systems, you can elegantly separate your work life from your personal life to avoid embarrassing issues with mixed-up email attachments and other similarly unpleasant problems.
- 💽 Backup system: It’s essential to back up all important files so that you can recover them in the event of a data loss incident, but you may also want to consider setting up a backup operating system on your external drive so that you can minimize downtime as much as possible.
Of course, you don’t actually need a good reason to install macOS Monterey on an external drive. Just being curious and wanting to learn something new and potentially useful is the best reason you can have.
Step 1. Prepare Your External Hard Drive
To successfully install macOS on an external drive, the drive you want to use must be suitable for the task ahead.
More specifically, it must be at least 64 GB large (the more storage space you have, the better) and formatted using the GUID partition scheme and the APFS file system (Mac OS Extended is no longer supported)
Unless you’re 100% sure that your external hard drive is freshly formatted based on the above-described requirements, we recommend you go through the following preparation steps:
- Connect the external hard drive to your Mac.
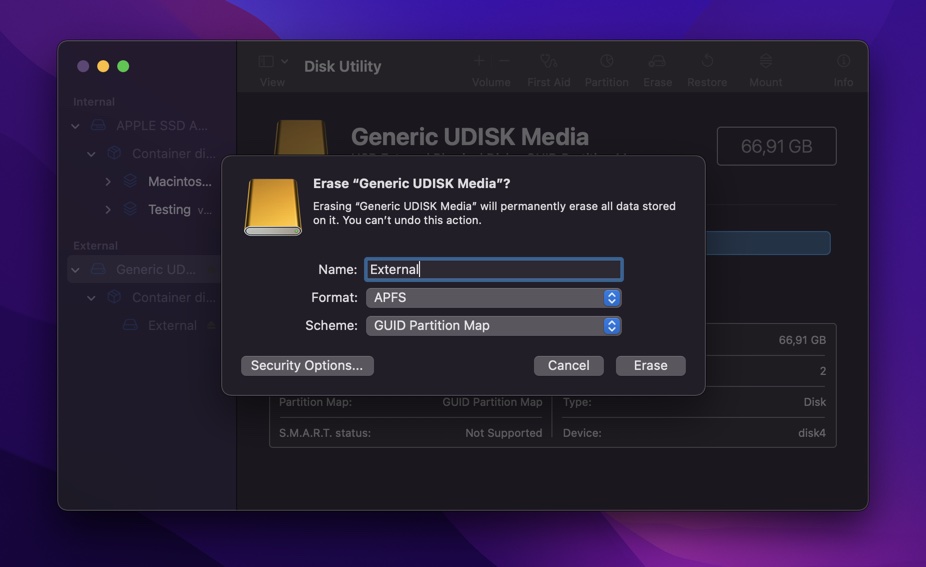
- Launch Disk Utility (located in Applications -> Utilities).
- Click View and choose the Show all devices option.
- Select your external hard drive (not just a single partition).
- Click Erase.

- Give the external hard drive a suitable name and select “Mac OS Extended (Journaled)” as the drive’s format and “GUID Partition Map” as the drive’s partition scheme.
- Click Erase and wait for Disk Utility to prepare your external drive for you.
The process may take a while, depending on the size and speed of your drive. Be patient and don’t interrupt it.
Step 2. Download the macOS Monterey Installer
This step is the easiest one because you can download the macOS Monterey installer directly from the App Store:
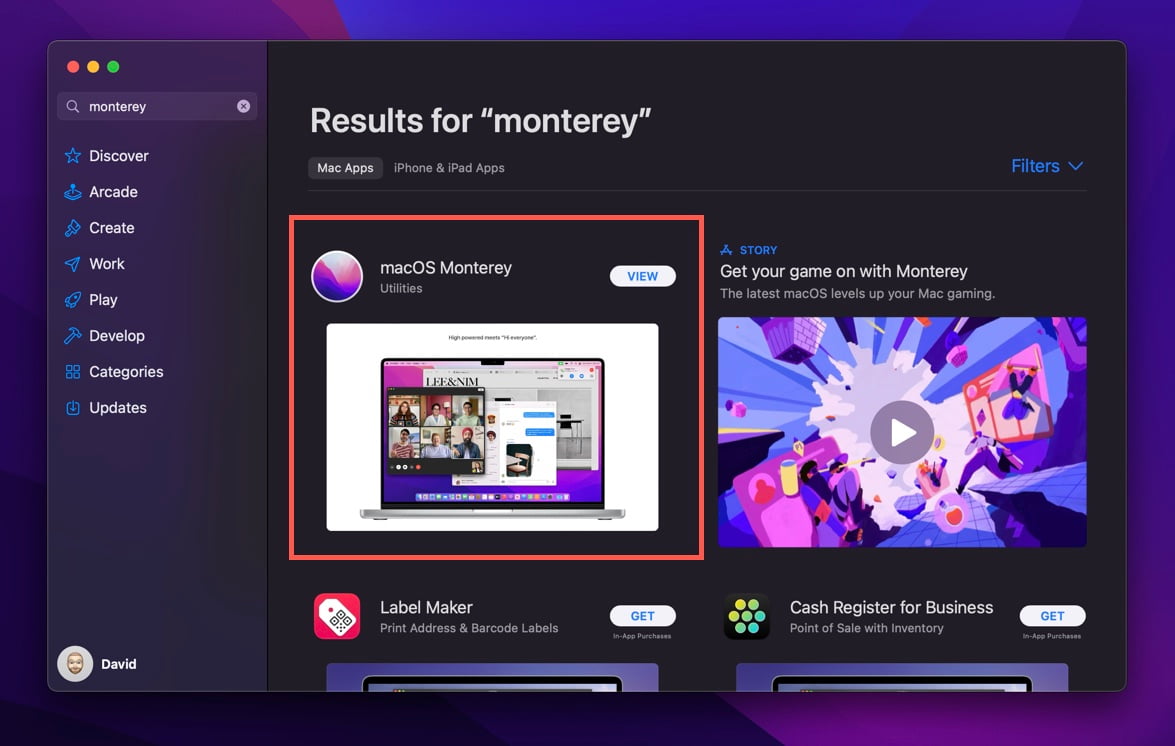
- Launch the App Store on your Mac.
- Click the search bar, type in “macOS Monterey,” and hit Return.
- Select the search result named “macOS Monterey.”
- Click the Get button and wait for the macOS Monterey installer to download.
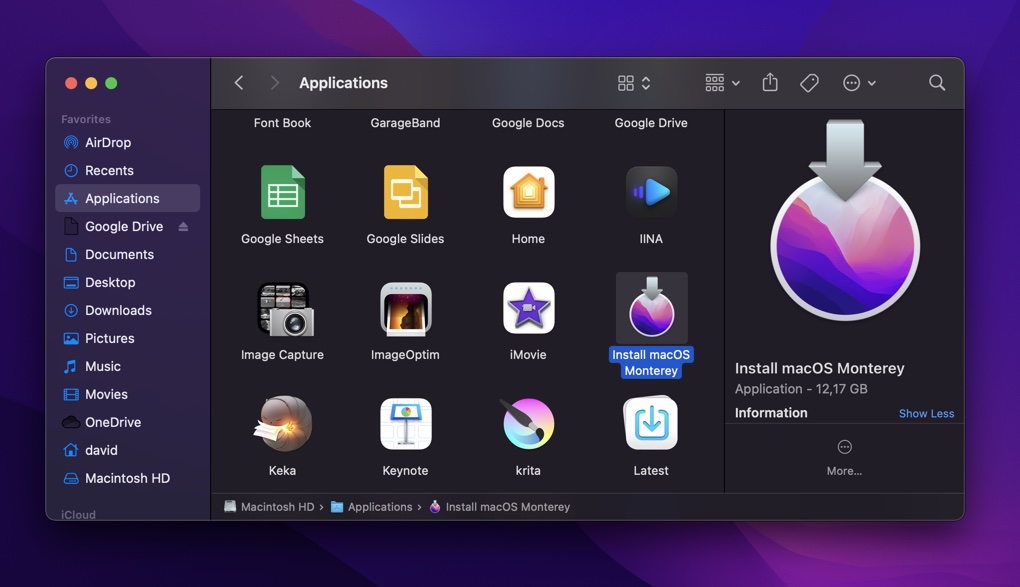
Just like all apps downloaded from the App Store, the downloaded installer can be found in the Applications folder. Its name is “Install macOS Monterey.”
Step 3. Install macOS on Your External Hard Drive
You’re now ready to install macOS Monterey on your external hard drive. Before you do that, we recommend you verify that your Mac can actually run Monterey.
Here’s the official list of supported devices:
- iMac – Late 2015 onwards
- iMac Pro – 2017 onwards
- Mac Pro – Late 2013 onwards
- Mac mini – Late 2014 onwards
- MacBook – 2016 onwards
- MacBook Air – 2015 onwards
- MacBook Pro – 2015 onwards
If your Mac isn’t on the list of supported devices, then you can still install Monterey on it, but the process is significantly more complicated than we can describe here.
Assuming your Mac is compatible with Monterey, here’s what you need to do to install macOS on your external hard drive:
- Open Finder.
- Go to Applications.
- Launch the “Install macOS Monterey” app.
- Click Continue and then Agree.
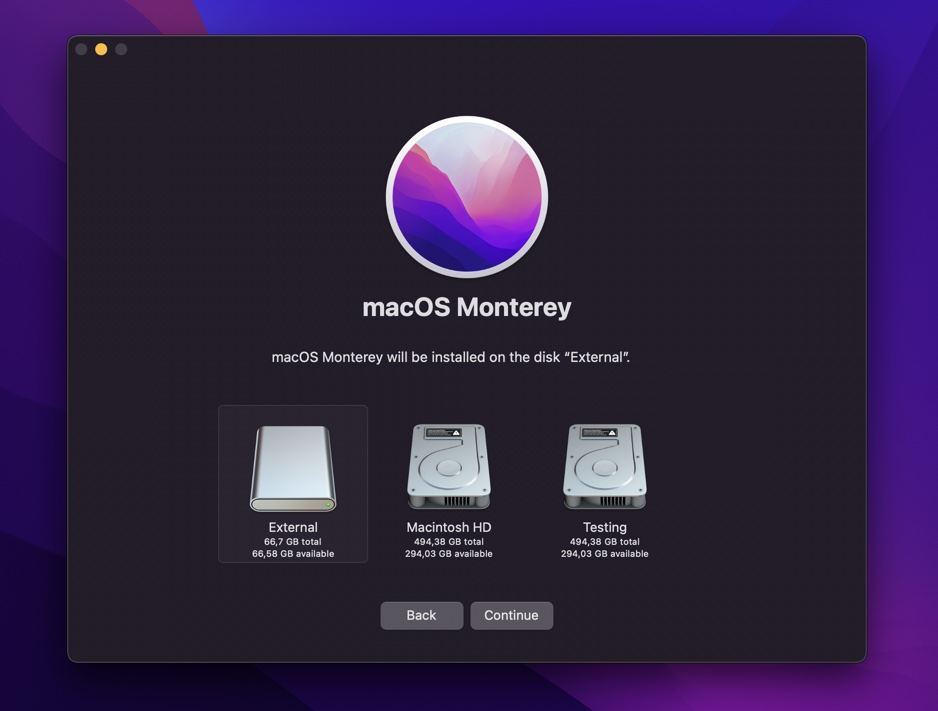
- When you arrive on the drive selection screen, click Show All Disks.
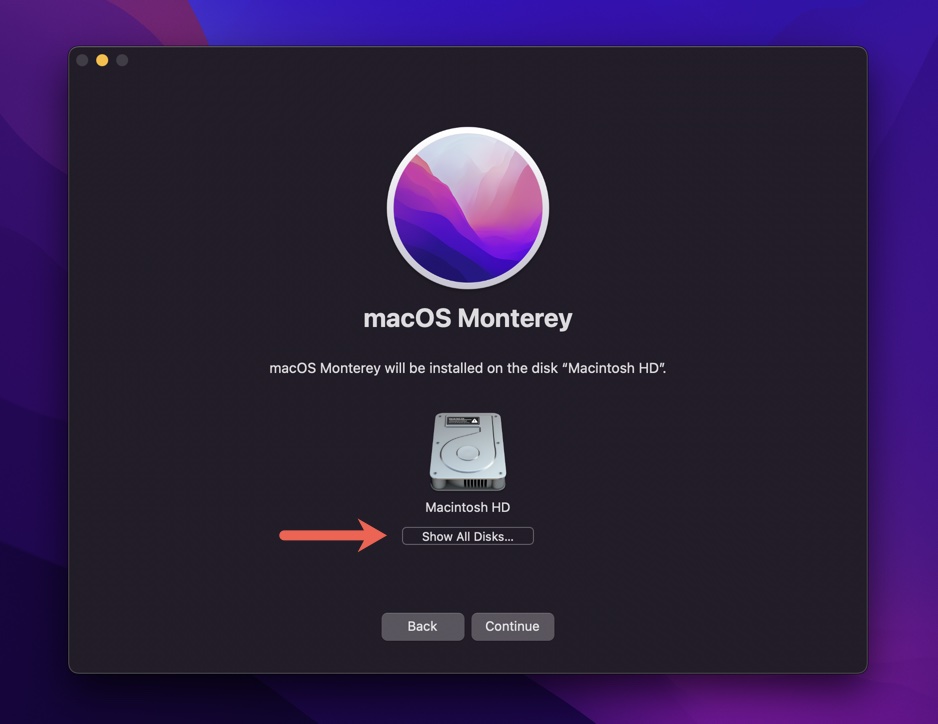
- Select your external hard drive and click Continue.
- Select a user to set as the owner of the new volume and optionally copy the user’s account settings.
- Click Install to proceed.
Make sure you’re connected to a power source if you’re installing macOS Monterey to an external storage device from a MacBook to avoid issues with your battery reaching 0% at the worst moment possible.
Alternative: Create a Bootable Drive with macOS Monterey (Using Disk Drill)
The above-described method isn’t the only way to install macOS Monterey on an external hard drive. The downloaded installer can be used to create a bootable USB drive that you can connect to any Mac to perform a clean install, access built-in recovery tools, and more.
The easiest way to create a bootable drive with macOS Monterey is with Disk Drill, a powerful data recovery app with a ton of extra functionality provided at no cost. Here’s how it works:
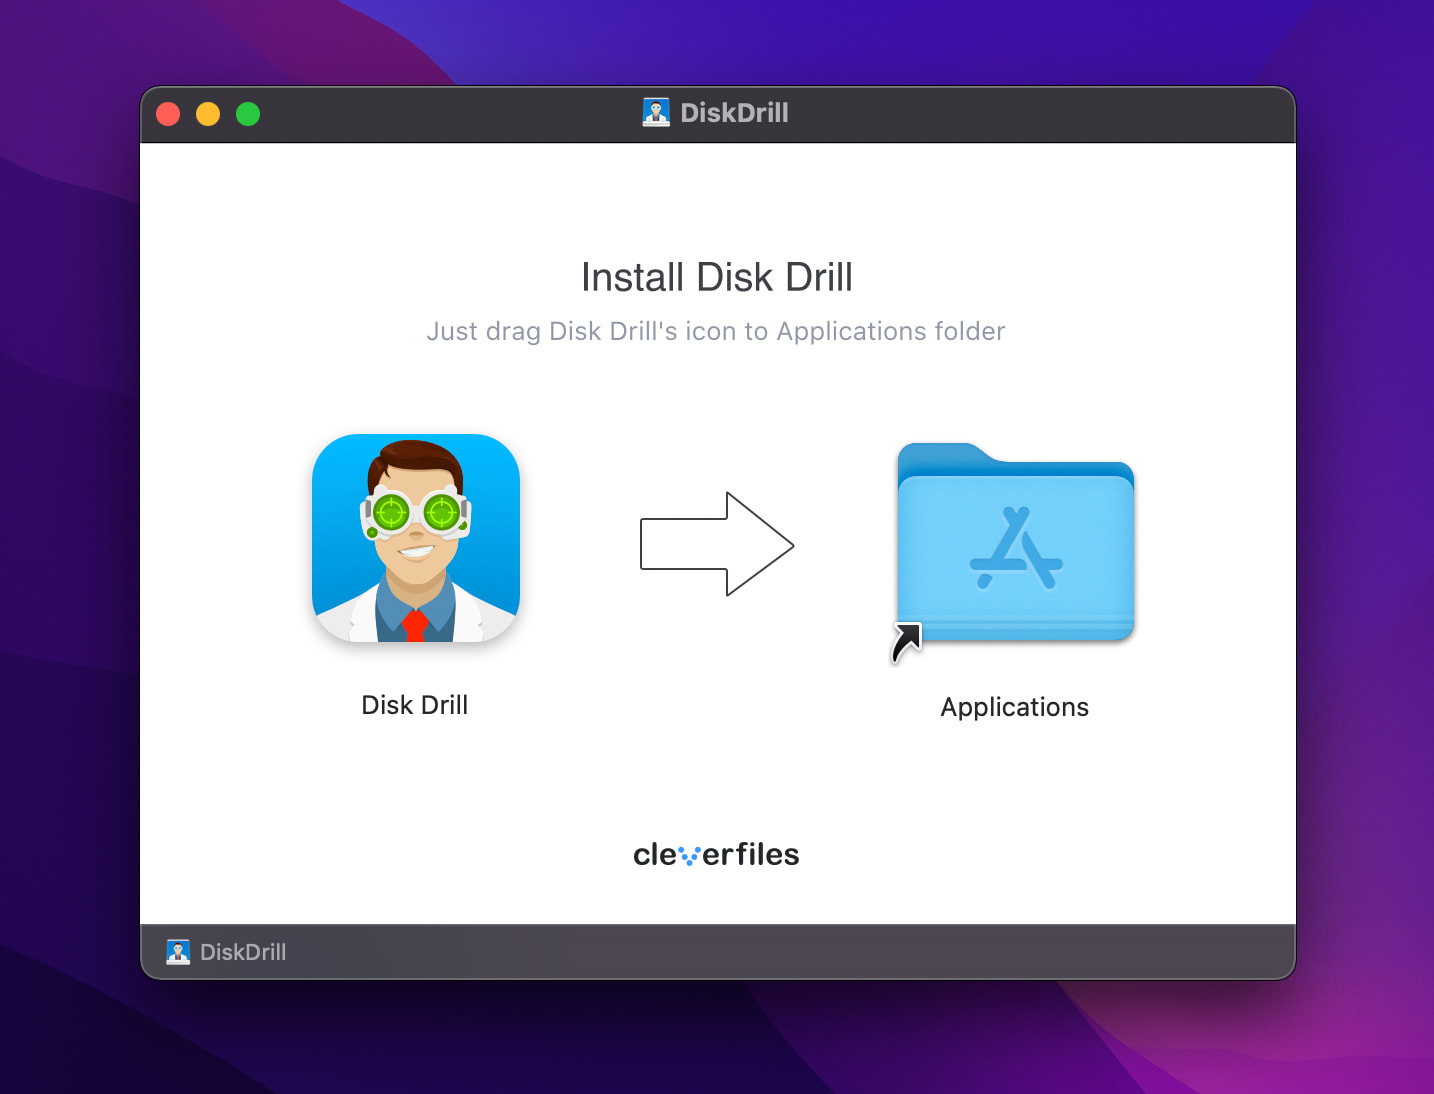
- Download and install the free version of Disk Drill.
- Launch Disk Drill and go through the initial configuration to give it all the necessary permissions.
- Select the macOS Installer extra tool from the left pane.
- Add the macOS Monterey installer and choose a suitable USB flash drive (it must be at least 16 GB large).
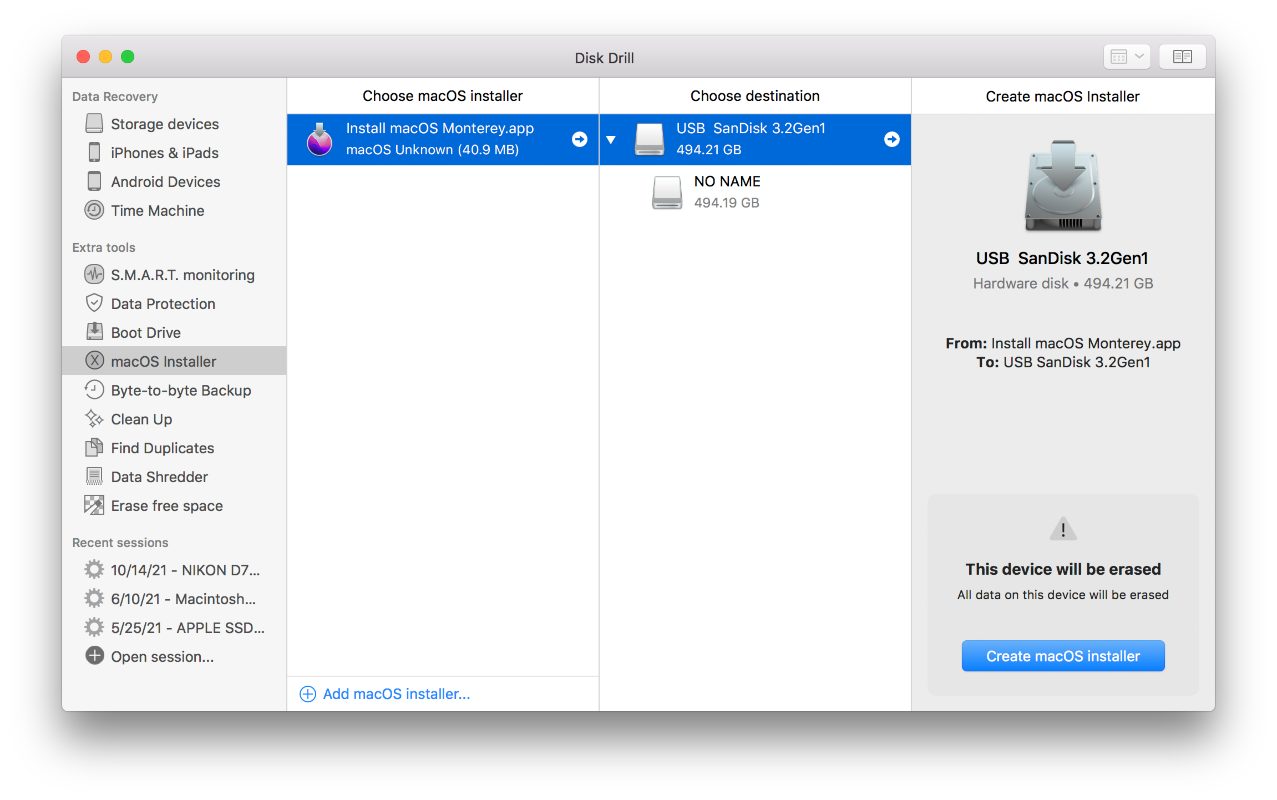
- Let Disk Drill make your USB flash drive bootable.
Performing a clean install from a bootable USB flash drive isn’t as straightforward as using the installer to start a Mac from an external drive.
To actually boot a Mac from an external USB drive, your startup security settings need to be updated. This comprehensive guide on how to clean install macOS covers the entire process step by step.
Step 4. Boot from the External Hard Drive
Now that macOS Monterey is installed on your external hard drive, it’s time to tell your Mac to boot from it. Luckily, macOS makes this simple:
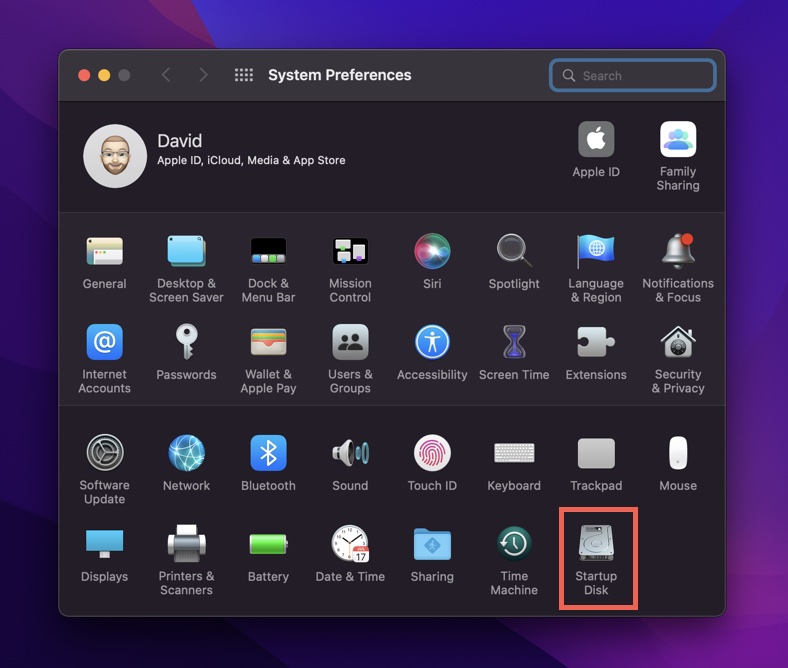
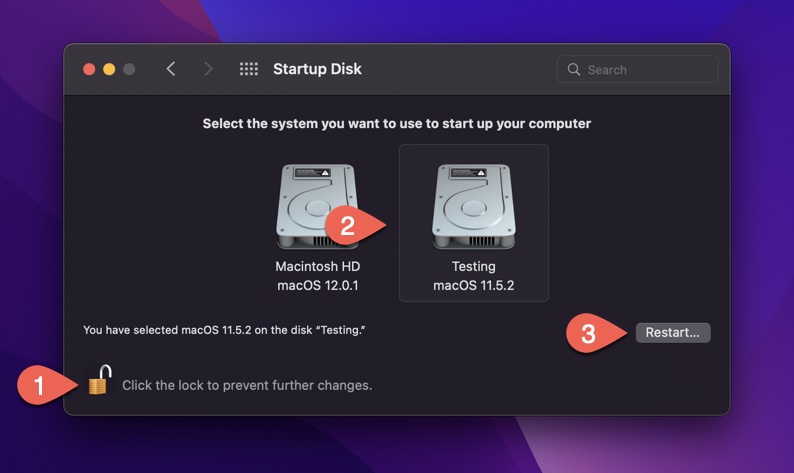
- Launch System Preferences.
- Go to Startup Disk.
- Unlock the preference pane by clicking the lock icon.
- Select your external hard drive.
- Click Restart.
This will change your startup disk for every startup, allowing you to use the external hard drive instead of the main one.
If you intend to boot from the external hard drive only occasionally, you can change your startup disk once:
- Apple silicon: Turn off your Mac and then press and hold the power button until you see the startup options screen.
- Intel-based Macs: Turn off your Mac and then press and hold the Option key as you press the power button. Don’t let go of the Option key until you see the startup options screen.
Warning for users of Mac models with the Apple T2 Security Chip:
Macs with the Apple T2 chip have an additional security option enabled by default that prevents them from booting from an external drive.
To disable it, you need to:
- Start from macOS Recovery (Press and hold Command-R immediately after you press the power button to turn on your Mac).
- Choose Utilities > Startup Security Utility from the menu bar.
- There, select “Allow booting from external media” under External Boot.
You can also disable the Secure Boot option, but that’s not necessary unless you want to install a third-party operating system.
Is It Possible to Install macOS Monterey on an External SSD?
Yes, it’s possible to install macOS Monterey on any suitable external SSD, despite some early adopters experiencing issues with this setup during the Monterey beta program.
Here are the requirements your external SSD must meet to be suitable for the installation of macOS Monterey:
- It must have a storage capacity of at least 64 GB.
- It must be formatted as APFS.
- It must be connected to your Mac using the fastest interface and cable available.
The last requirement is where many users make a mistake, connecting their fast external SSD to a slow USB hub, only to encounter issues when trying to install macOS on the external SSD or start their Mac from it.
Conclusion
Installing macOS Monterey on an external hard drive is something anyone can learn to do just by following the instructions provided in this article. This useful skill can then help you avoid the issues Mac users sometimes experience when they upgrade their main system without a backup to fall on.


