
As we’ll explore in the next section, there are situations where you might want to format a USB drive to FAT32. Fortunately, Mac has built-in tools that let you do this. On the other hand, formatting a storage device will always wipe any data on that drive – there’s no way around it.
In this article, we provide step-by-step instructions (with screenshots) on how to format a USB to FAT32, as well as how to recover the data that was wiped during the process. Read on.
Table of Contents
Introducing the FAT32 Format
FAT32 (File Allocation Table32) is a file system. A file system is a method that the disk will use to organize data. FAT32 has a file size limit of 4 GB, and can support a partition size of up to 32 TB. What makes it so popular as a file system is that it is the most cross-platform compatible among all file systems. It works with both older and modern computers, as well as other devices like consoles.
FAT32 can mostly be found in portable storage devices such as:
- USB flash drives
- External hard drives
- Memory cards
- etc.
In some cases, a device may ask you to format your USB drive to FAT32 in order to make it compatible. Or maybe your drive was corrupted and you want to clean it by formatting it (and you chose FAT32 for its compatibility). Unfortunately, formatting a USB on Mac (and any other device) wipes all the files and folders from that drive – but using data recovery software, you can simply restore them.
How to Format a USB to FAT32 on Mac
If this is your first time formatting a storage device, it might sound a bit intimidating. Fortunately, Mac provides intuitive (and free) tools built right into the operating system. Below, we’ll cover Disk Utility and Apple Terminal. Disk Utility has a user-friendly GUI (graphical user interface), while Terminal is a spartan command line system. For both apps, the entire process only takes 5 steps. Here’s how to format a USB drive to FAT32 on Mac:
Disk Utility
Disk Utility is a powerful and easy-to-use disk management tool that lets you format, partition, repair, and mount/unmount storage devices. Let’s try using Disk Utility for format a flash drive to FAT32 on Mac:
Step 1. Make sure your USB drive is securely connected to your Mac.
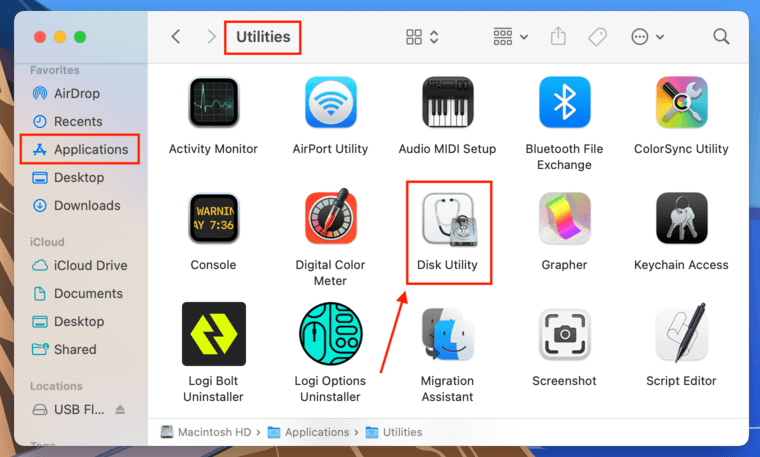
Step 2. Open Disk Utility by opening Finder > Applications > Utilities, and double-clicking Disk Utility.
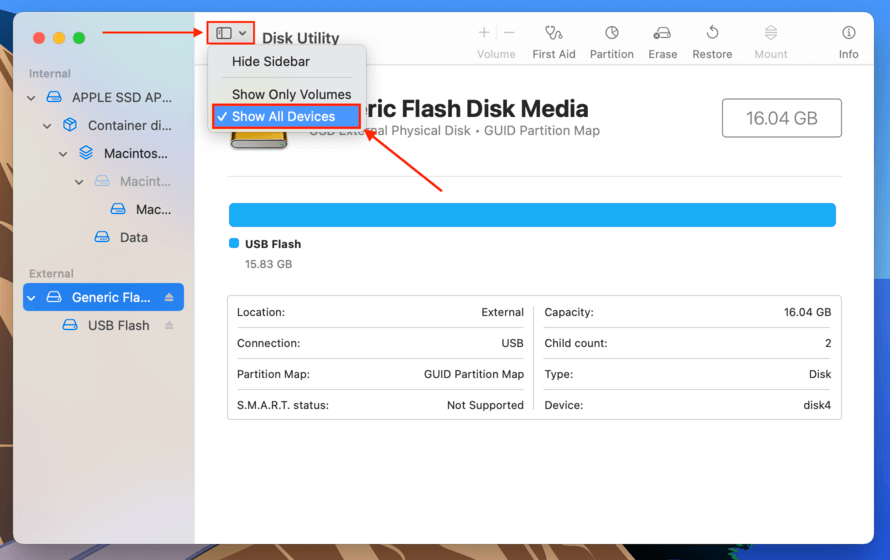
Step 3. On the Disk Utility window, click the “View” button and click “Show All Devices.”
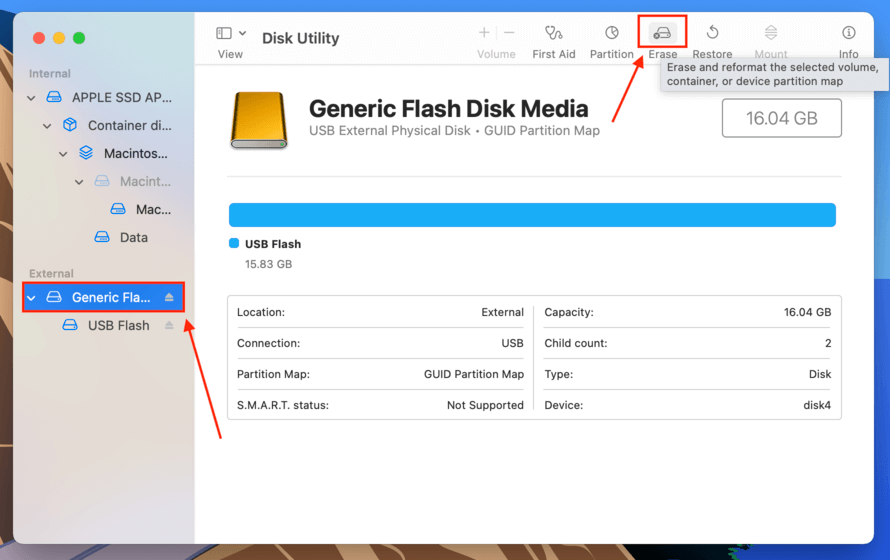
Step 4. Select your USB drive on the left sidebar, then click the “Erase” button near the top of the window.
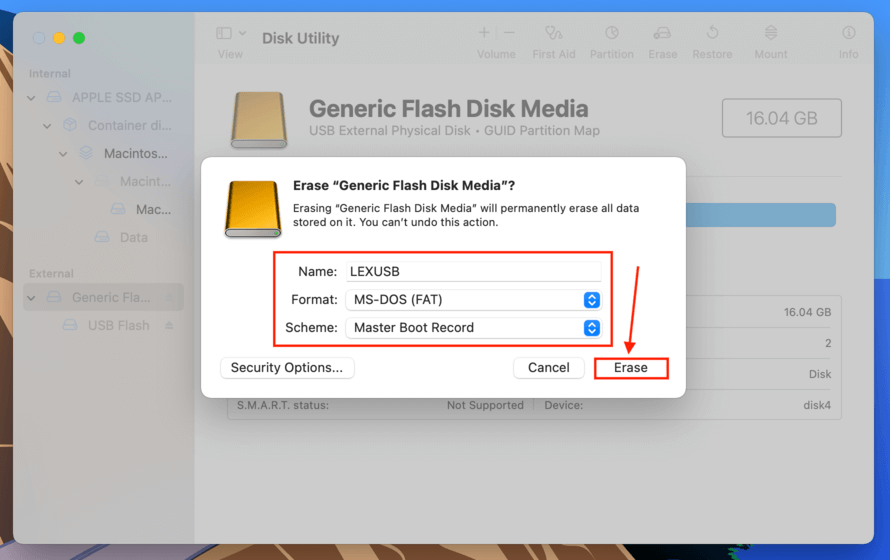
Step 5. Choose a name, select MS-DOS (FAT) for the format, then Master Boot Record for the scheme. Then, click “Erase.”
Terminal
Terminal is another powerful native Mac tool, but it’s a lot less visual than Disk Utility. In fact, you use it mainly by typing in commands. But the steps to format USB from Terminal are still relatively straightforward as long as you follow our guide below:
Step 1. Make sure your USB is securely connected to your Mac.
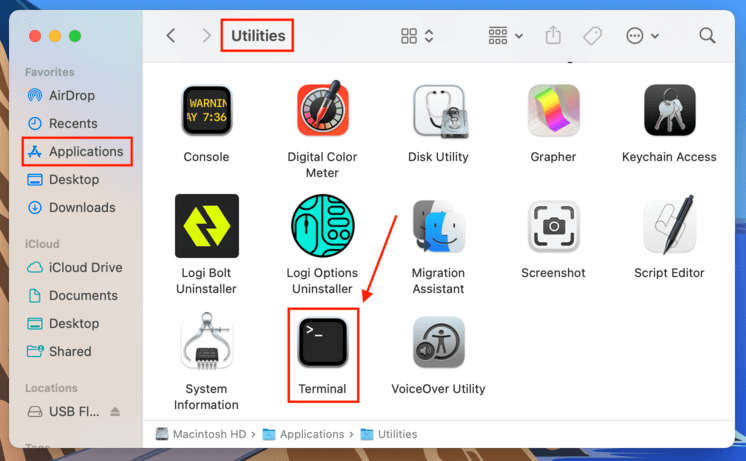
Step 2. Launch Terminal by opening Finder > Applications > Utilities, and double-clicking terminal.
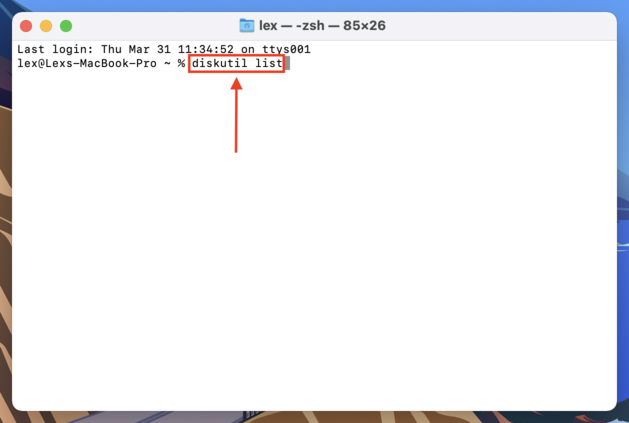
Step 3. Type the following command and press return:
diskutil list
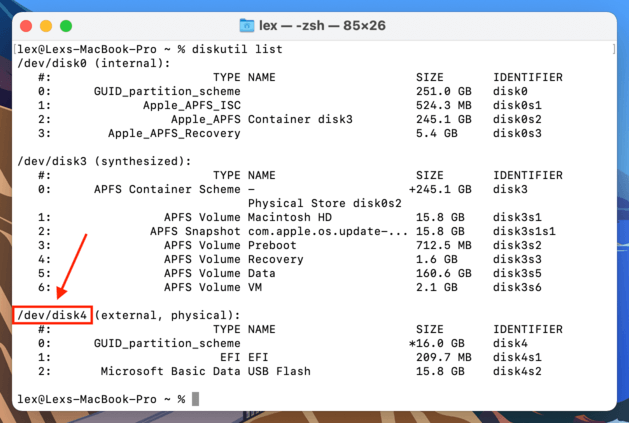
Step 4. Identify your USB’s disk name from the list of drives and take note of it. In my case, my USB’s disk name is “/dev/disk4”.
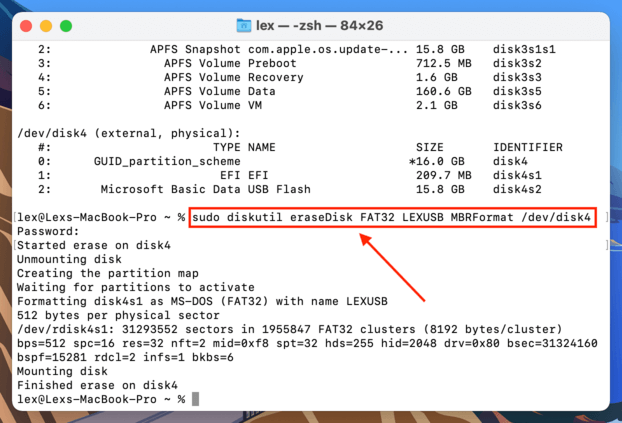
Step 5. Type the following command and press return:
sudo diskutil eraseDisk FAT 32 MBRFormat LEXUSB /dev/disk4
Replace “LEXUSB” with what you want to name your drive, and replace “/dev/disk4” with your own USB’s disk name.
How to Recover Data Lost From a Flash Drive During Formatting
After you format to FAT32 on your Mac, the files on your flash drive will naturally be wiped from the disk. However, that data is still embedded in the file system. We can use software to restore data from your flash drive by extracting and reconstructing that data.
We’ll be demonstrating this process using a software called Disk Drill. We often recommend Disk Drill on this site because we’ve had a high success rate when recovering all sorts of devices, and its minimalistic GUI makes it easy-to-use for anyone. To recover your flash drive on Mac, do the following:
Step 1. Connect your USB drive to your Mac.
Step 2. Download and install Disk Drill.
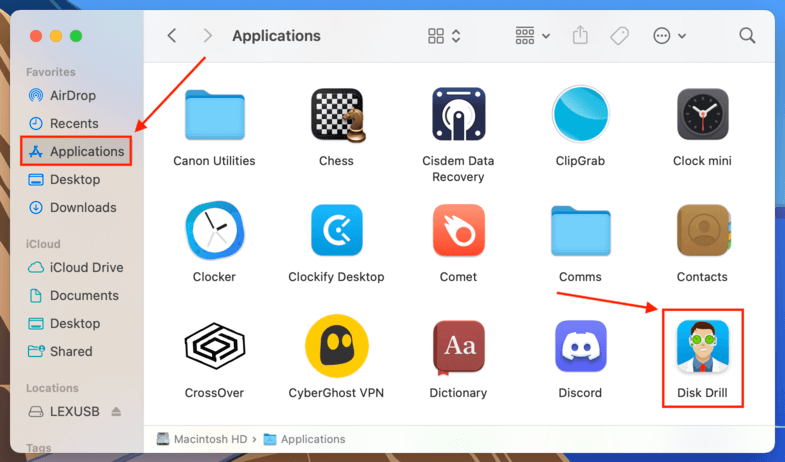
Step 3. Launch Disk Drill by opening Finder > Applications > Disk Drill.
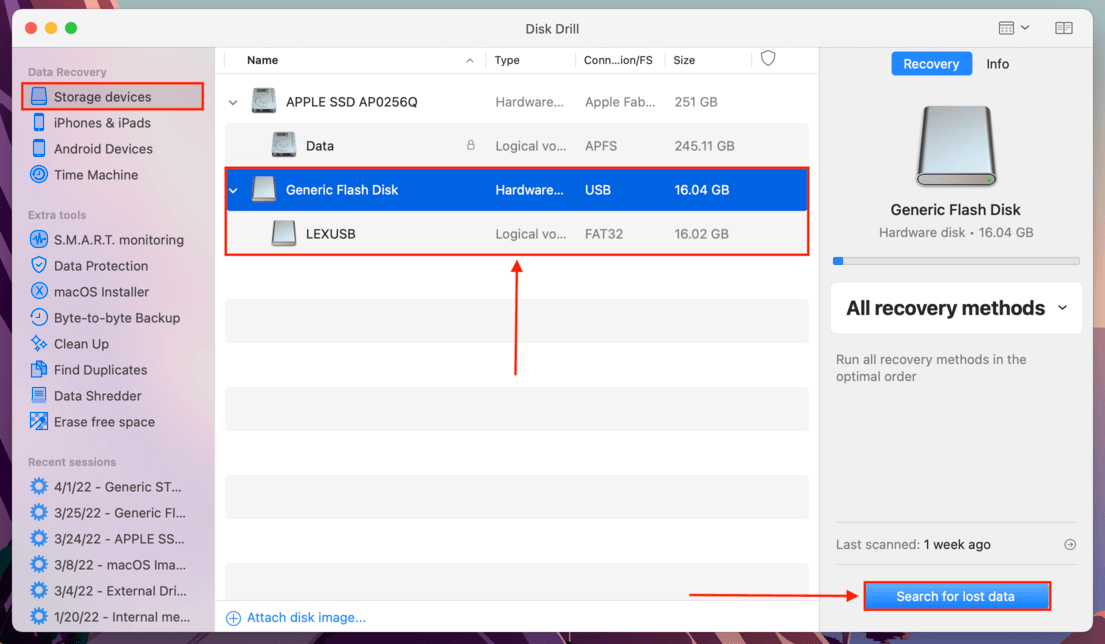
Step 4. Select your USB drive from the list, then click “Search for lost data.”
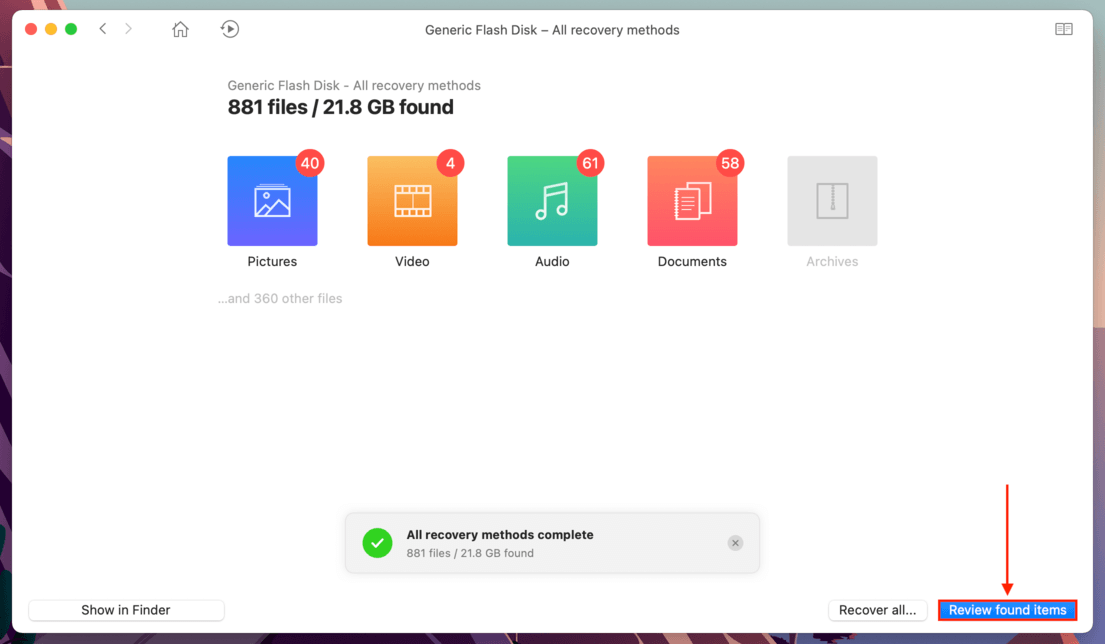
Step 5. Wait for Disk Drill to complete its scan. Then, click “Review found items.”
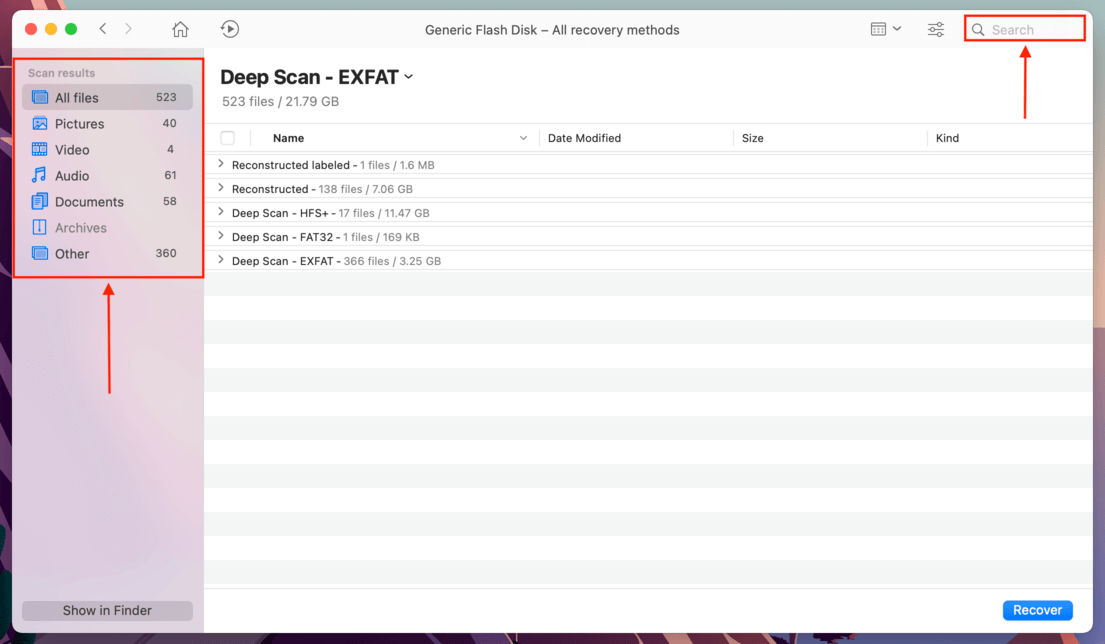
Step 6. You can use the filter sidebar on the left-most side of the window, as well as the search bar on the top-right corner of the window to find your files more efficiently.
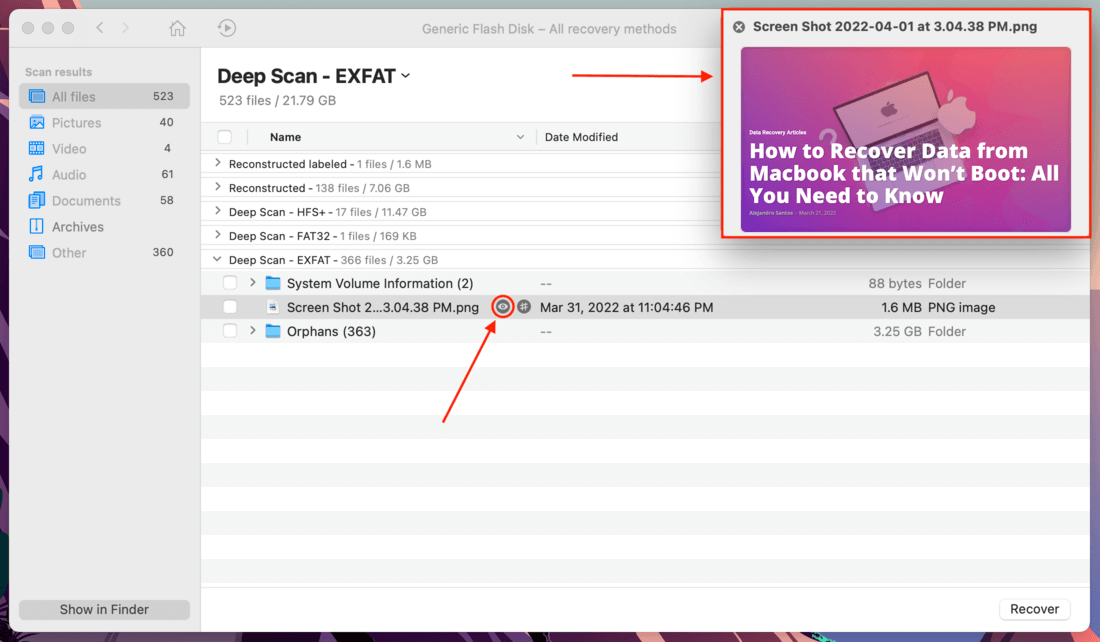
Step 7. You can also preview your files by placing your mouse pointer on the right side of their file names, and clicking the eye button. This will open a separate window displaying your file preview.
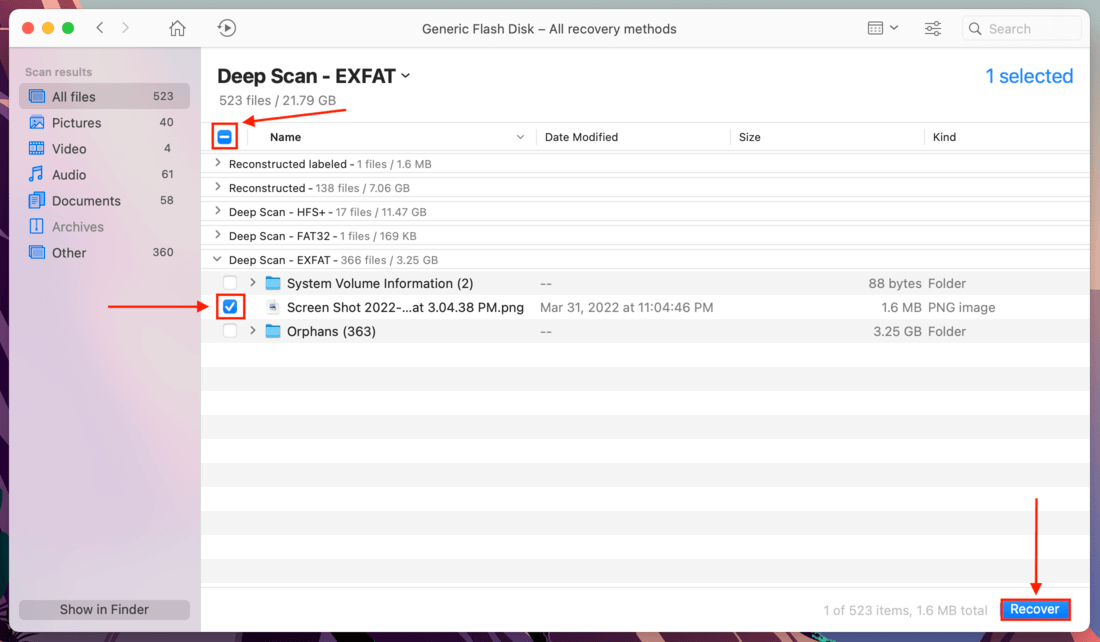
Step 8. Select individual files using the checkboxes, or click the “master checkbox” at the top of the left-most column to select all files. Then, click “Recover.”
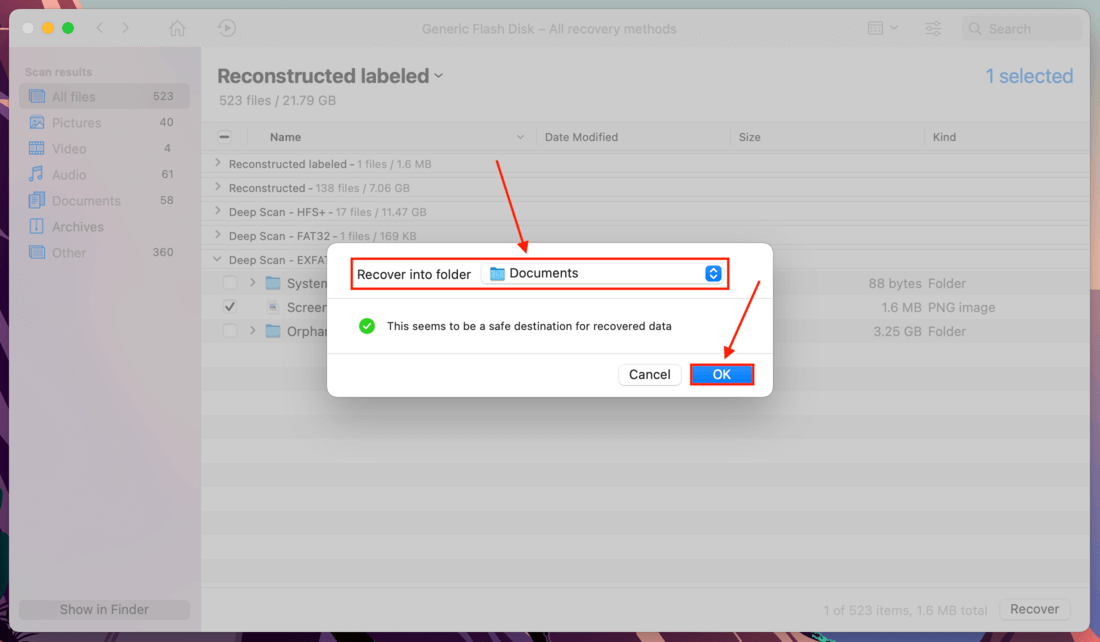
Step 9. On the dialogue box that appears, select a folder location on your computer where Disk Drill will save the files you selected. Do not save it to your USB drive, as that may overwrite existing data. Then, click “Erase.”
FAQ
- Use Disk Utility’s “Erase” feature.
- On Terminal, identify your disk using the following command:
diskutil list
Then, type the following command and press enter:
sudo diskutil eraseDisk FAT 32 MBRFormat LEXUSB /dev/disk4
Change “LEXUSB” to what you want to name your hard drive, and change “/dev/disk/4” to your drive’s disk name.


