Sooner or later, you’ll have to format your drive. There are a bunch of reasons why you would want to do this: it’s getting slower, it got infected by a virus, it uses an incompatible file system – we’ll go into more detail below.
Formatting a drive wipes your data, so it’s an intimidating process. And when you do format it, which file system is best? This article answers all these questions and teaches you how to format your Toshiba external hard drive for Mac… With and without losing data.
Table of Contents
What is Formatting and Why You Need It
Formatting a drive (especially an old drive) almost always makes it perform faster, and it may be imperative to the drive’s health. Here are the specifics:
- Use for OS – If you want to use a hard drive for your operating system, it needs to be formatted to make room for the new file system and all the prerequisites to run macOS.
- Remove viruses – Reformatting your Toshiba exernal hard drive will wipe everything, including viruses and other harmful programs. When your antivirus can’t keep the infection at bay, formatting usually does the trick.
- Fix corruption – If you experience the following: RAW drive, “sector not found” error, being prompted to format the drive, messed up file names, “invalid media type” error, or an unmountable drive – you’re likely dealing with corruption. For severe cases of corruption, formatting is the only way to make the drive usable again.
- Change file system – If you use the wrong file system, you won’t be able to use your drive with macOS. You have to format it to a compatible file system to use it with your Mac. More on this in the next section.
What Format to Select for Toshiba Hard Drive
Mac works with a lot of formats, but we also want to consider the purpose of that hard drive to determine the best file system to use. FAT32, exFAT, HFS+, APFS… Acronyms are confusing. But we did our best to break down each file system so you can make a confident decision when choosing.
| File System | Description |
| FAT32 | FAT32 is hailed as the “most compatible” file system and it’s one of the oldest formats still in use. We no longer recommend formatting anything to FAT32 due to its 4 GB per file limit, but it’s worth knowing because it’s still widespread. FAT32 (and its successor ExFAT) was made for external storage. |
| ExFAT | ExFAT is a lightweight and reliable file system for storage devices. It’s the modern replacement for FAT32, and it doesn’t have the limit of 4 GB per file. You will mostly find this format in newer USBs, memory cards (for both smartphones and cameras), and external drives. It’s compatible with macOS, Windows, Linux and other known operating systems. |
| HFS+ | HFS+ (also called Mac OS Extended) is Apple’s native file system for mechanical hard drives. It’s “smarter” than ExFAT and FAT32 with more safety features, healing capabilities, security against fragmentation and more. But this is because it was made to store the operating system on an internal hard drive. For that, it’s perfect… Not so much for external drives. It’s not as lightweight as ExFAT, and you can’t use an HFS+ drive with Windows. |
| APFS | APFS is Apple’s newest file system designed for internal SSD’s (solid-state drives). It’s perfect for storing the operating system on new Macs, but it’s not so great for external drives – you can’t use it with Windows either. |
All things considered, we recommend that you format your Toshiba external hard drive to ExFAT for an efficient data storage and transferring system that works with both macOS and Windows machines.
How to Format Toshiba External Hard Drive for Mac
The macOS native tool, Disk Utility, makes a perfect Toshiba hard drive format utility, especially for corrupted drives. Even if your Toshiba hard drive is not showing up on Finder, it may appear in Disk Utility.
However, formatting completely wipes the data on your drive. This is what makes it so effective at cleaning logically damaged disks. If your data is important to you, make sure to create a backup first.
Step 1. Launch Disk Utility (Finder > Applications > Utilities).

Step 2. Click the “View” button and select “Show all devices.”
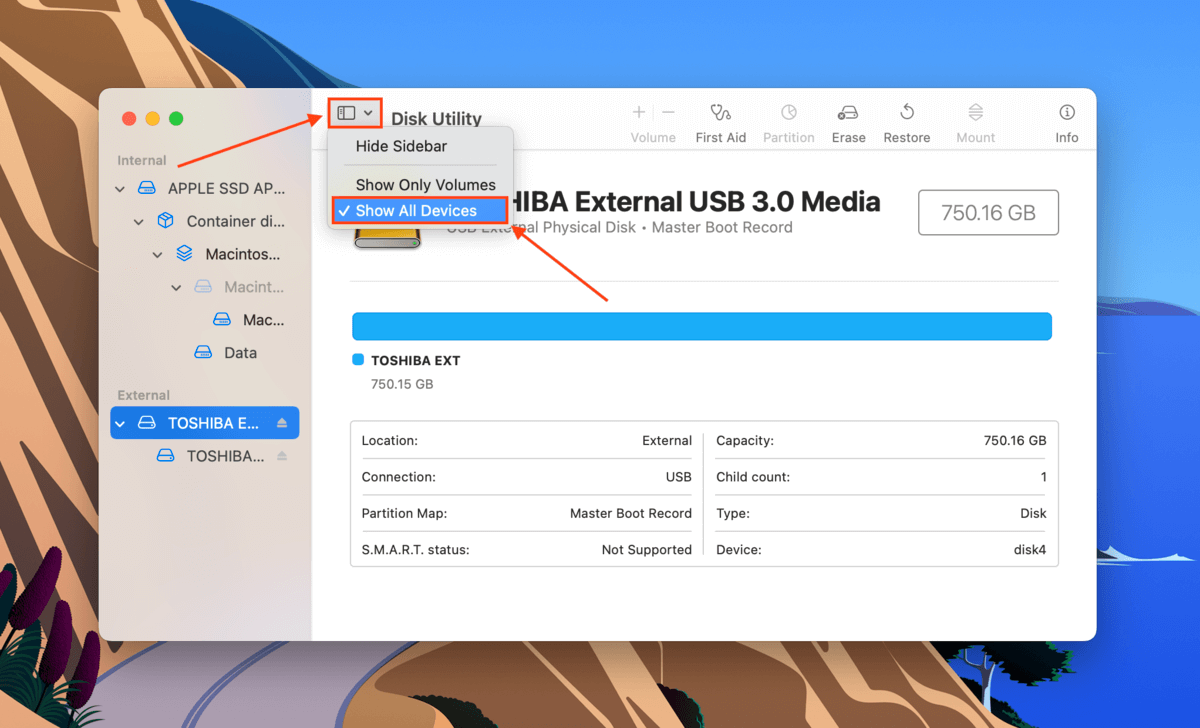
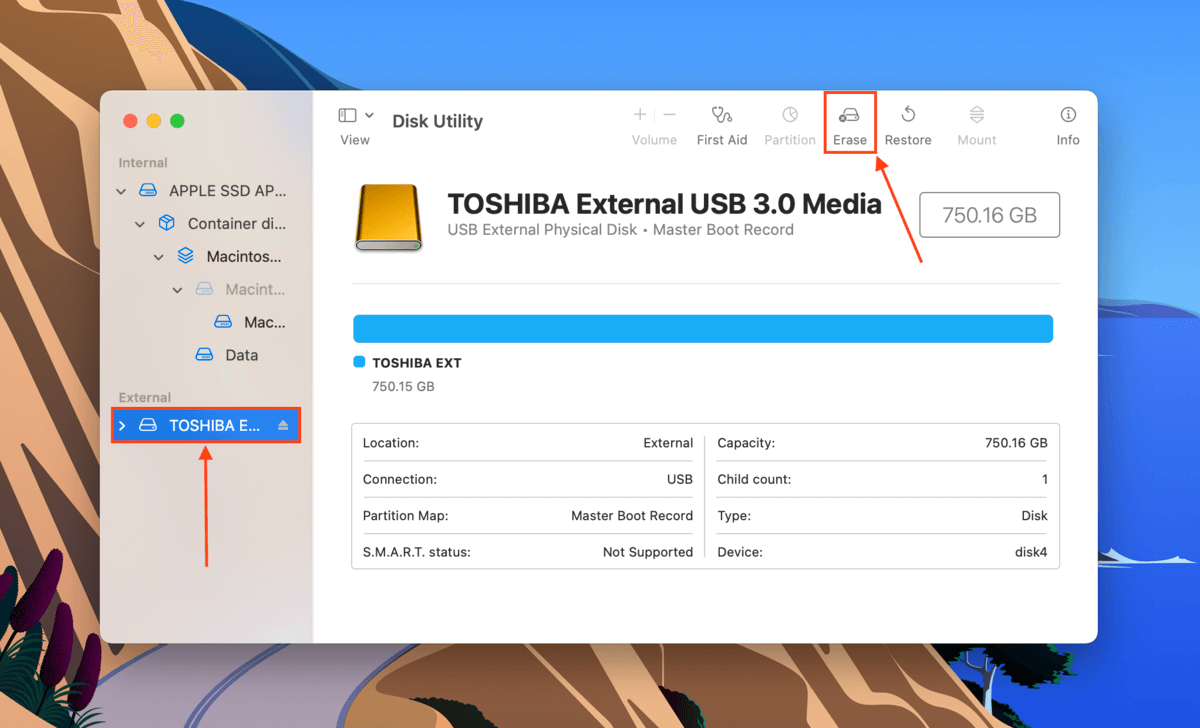
Step 3.From the left sidebar, select your Toshiba hard drive. Then, click the “Erase” button.
Step 4. Name your drive, choose GUID Partition Map for the scheme, and choose ExFAT for the format (Why ExFAT? Read this section of the article). Then, click “Erase” to reformat your Toshiba external hard drive.
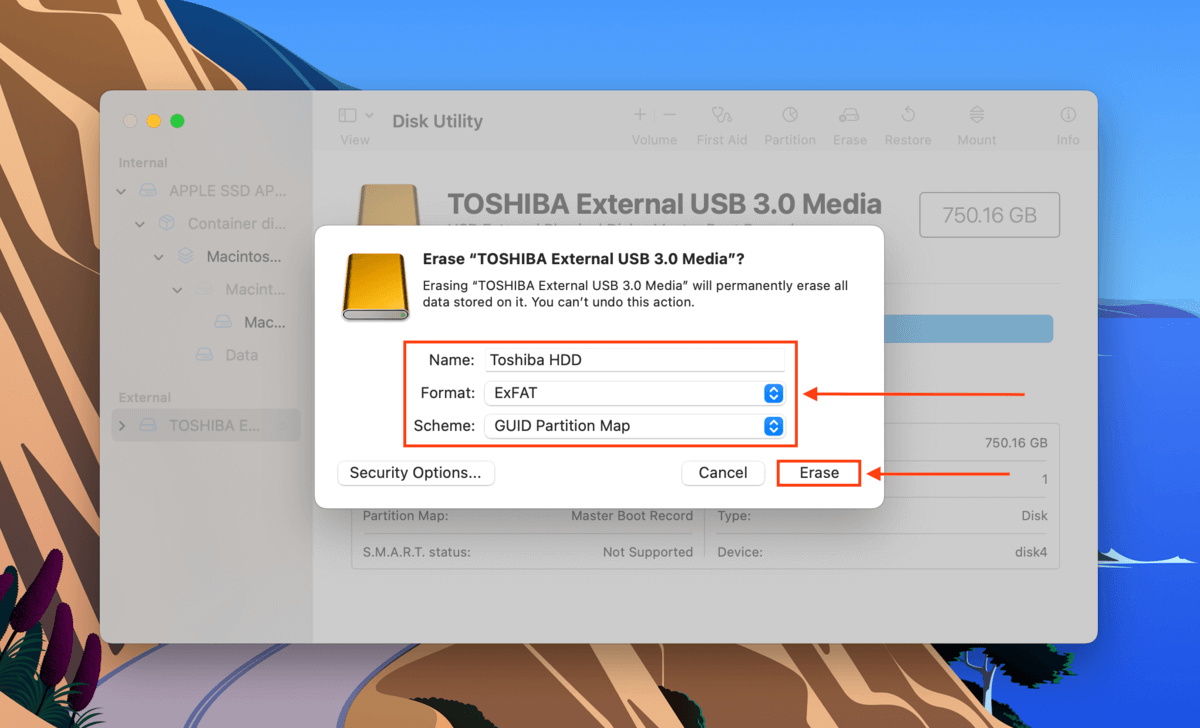
The GUID Partition Map/GPT works best with UEFI-based systems (which is the default for most modern machines). For older machines, you may want to use the MBR scheme. For more information on GPT and MBR, read this article from How-To Geek.
How to Recover Data Lost After Formatting Toshiba Hard Drive
Even after formatting your drive, you still have a chance to recover most of your data. Just make sure to stop using it immediately after formatting. Do not save any new files to it. For this task, we need to use data recovery software to directly extract the data from the file system.
For this article, we’ll be using Disk Drill. It’s highly effective at recovering data from external hard drives, and it has a user-friendly GUI so it’s perfect for users of any level. Here’s how to use it:
Step 1. Download and install Disk Drill.
Step 2. Launch Disk Drill (Finder > Applications).
![]()
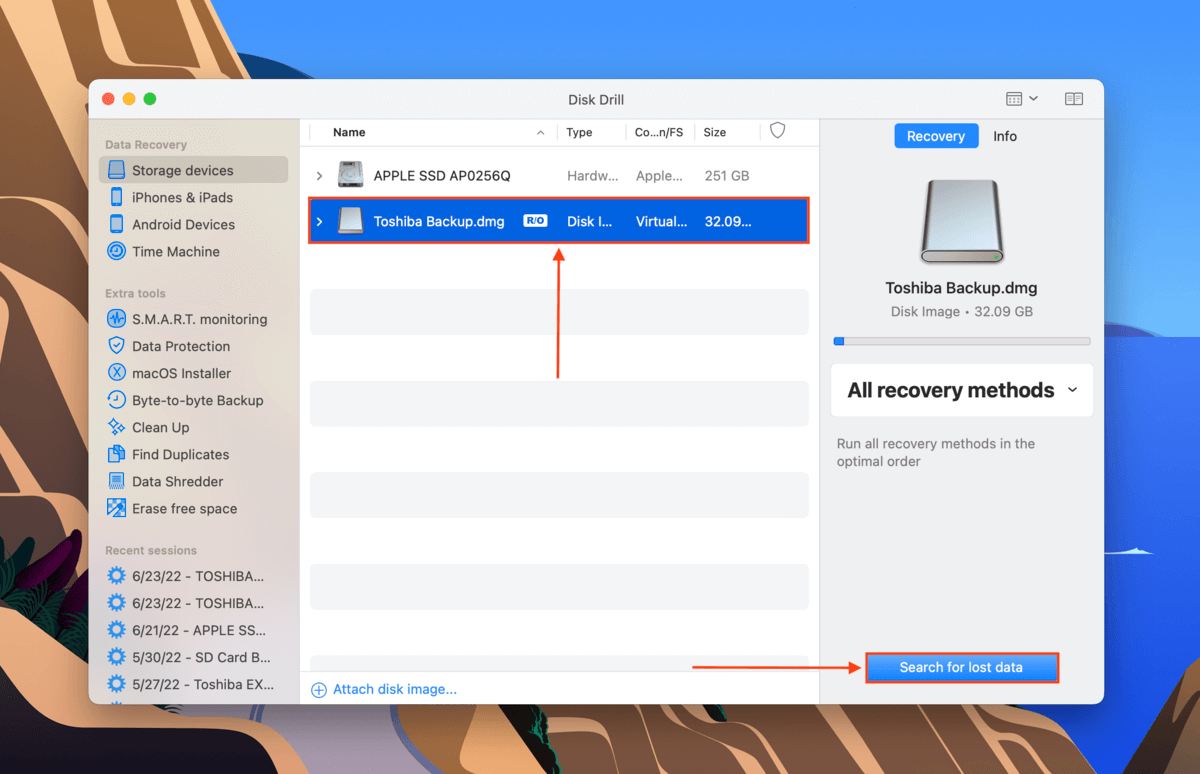
Step 3. In the middle pane, select your Toshiba hard drive (or disk image) and click “Search for lost data.”
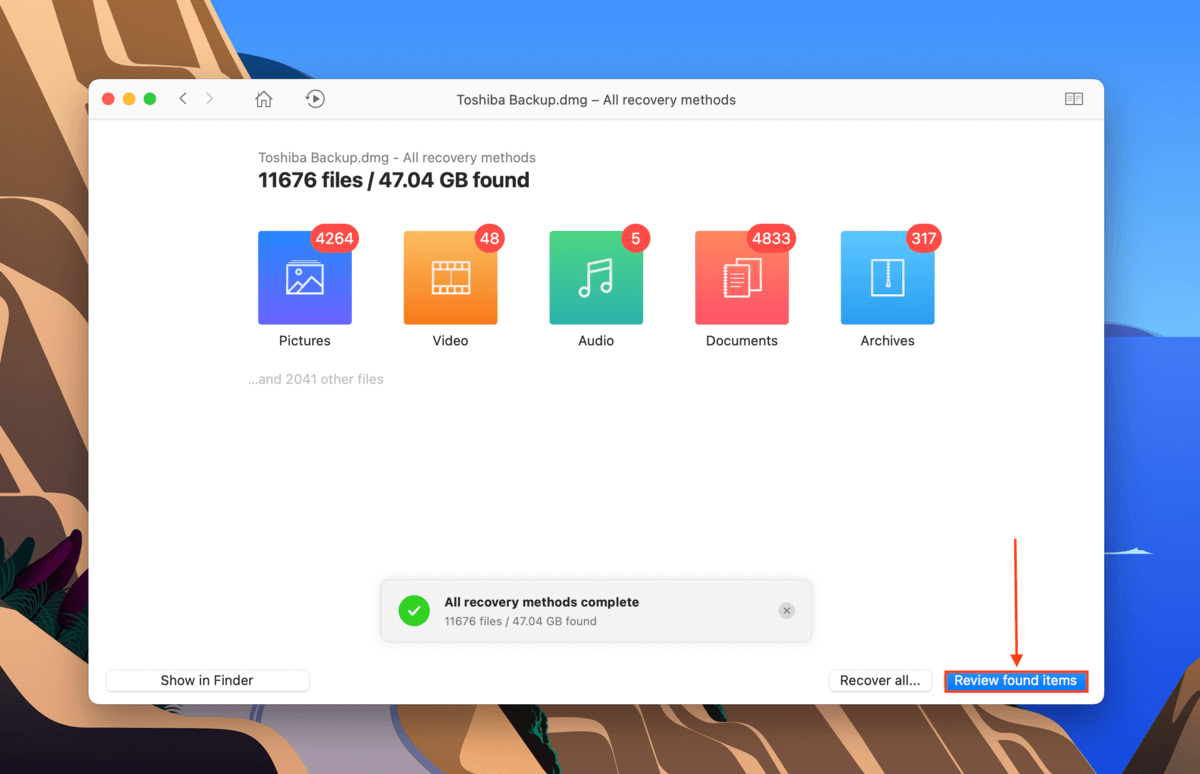
Step 4. Wait for Disk Drill to complete its scan, then click “Review found items.”
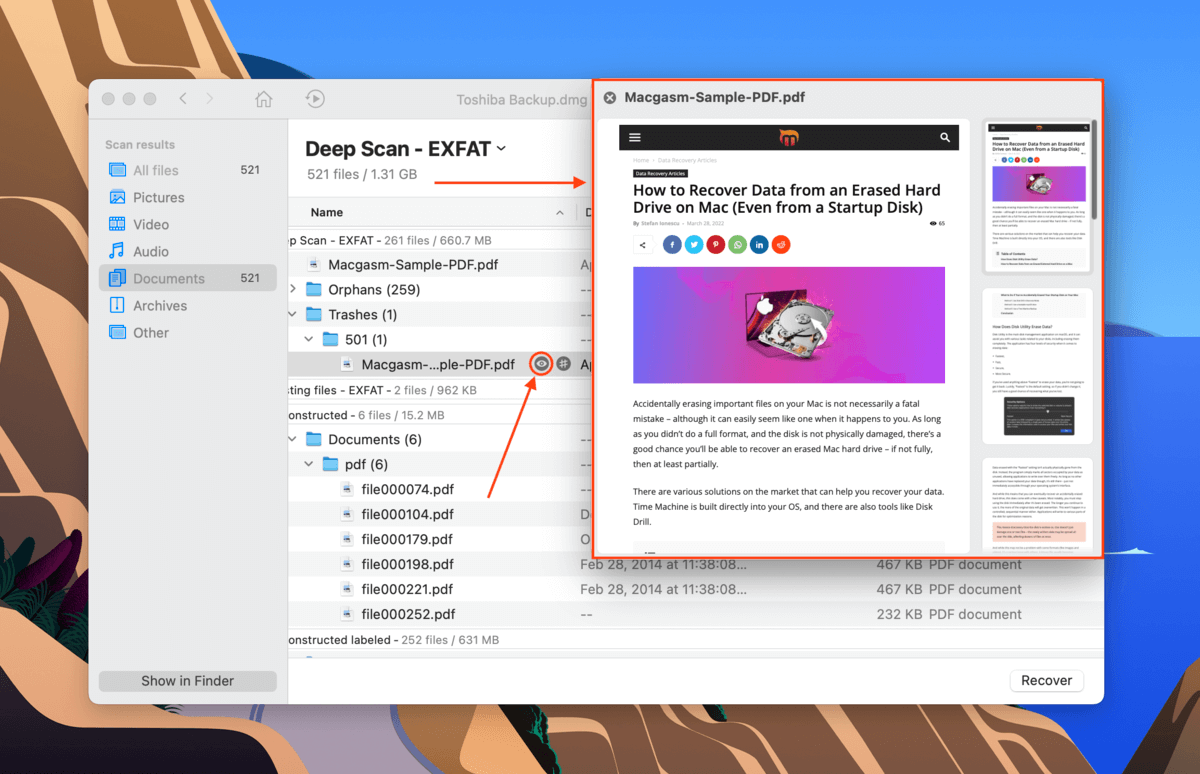
Step 5. In this window, you can use the search bar and the left sidebar to filter the scan results.

Step 6. You can also preview your files. Hover your mouse pointer to the right of any file and click the eye button that appears.
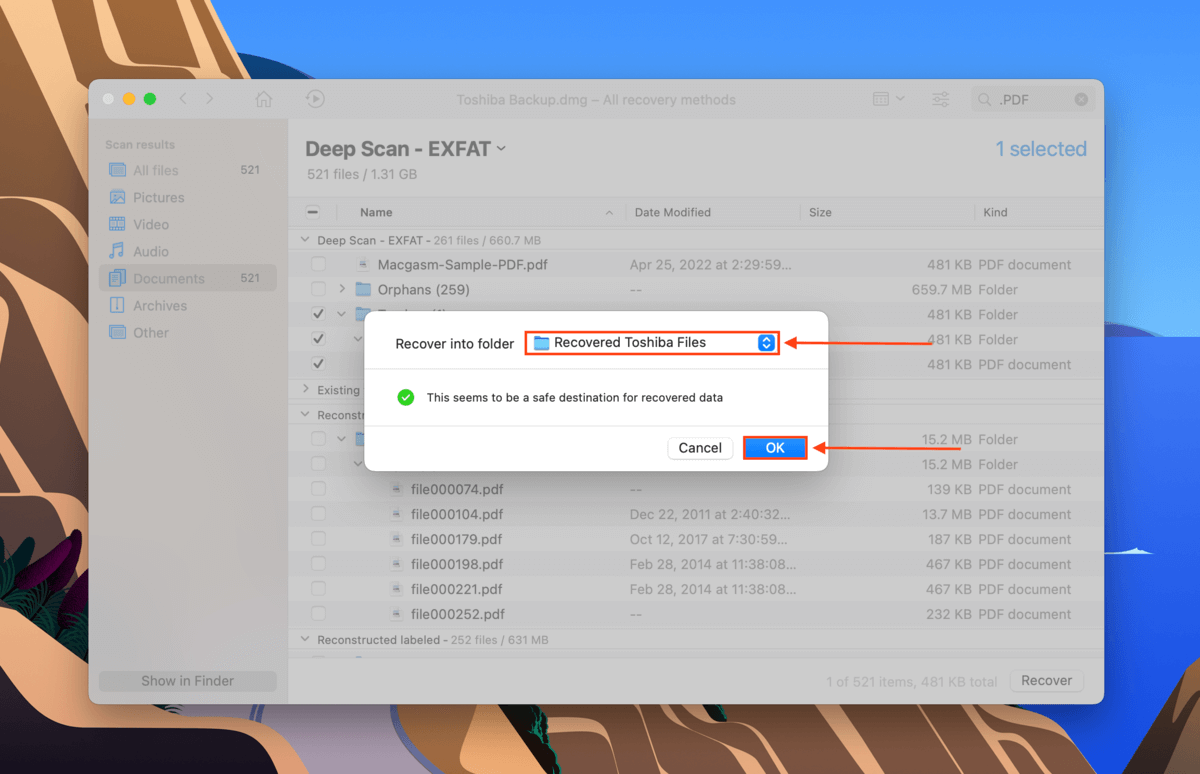
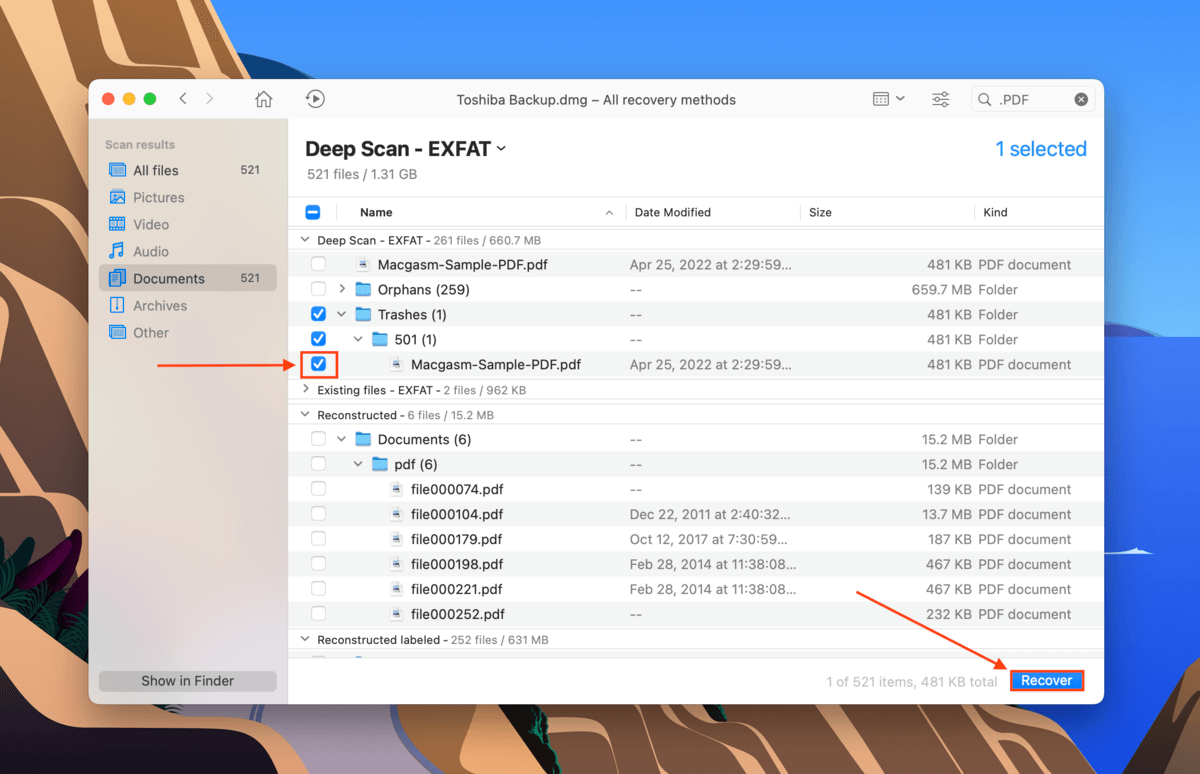
Step 7. Use the boxes in the left-most column to select the files you want to restore, then click “Recover.” You can also leave all the boxes blank and click “Recover all.”
Step 8. Select a location on your computer where Disk Drill will save the restored files. Then, click “OK.”