
Mac’s Recovery Mode is a native feature that lets you access powerful recovery tools that can help you repair your MacBook, preempt data corruption and data loss, completely erase a drive for a clean installation, restore backups, and more.
However, not all users are familiar with Recovery Mode as a MacBook rarely gets damaged to a point where you need to use it. This article is a simple but in-depth guide about Recovery Mode, its native utilities, and recovering data.
What is Recovery Mode on Mac
Mac OS Recovery Mode special state where the operating system gives you access to native recovery tools such as Time Machine, Disk Utility, Terminal, and more. Here are some of the situations where it’s useful:
- Your startup disk (the disk that loads your operating system) is corrupted.
- You experience startup failures.
- You want to format your startup disk and reinstall macOS.
- You need to load your Mac in safe mode.
- You have to restore a Time Machine backup.
There are two different ways to access Recovery Mode on Mac depending on what chip your MacBook model uses.
How to Restart in Recovery Mode for MacBooks with Intel Chips:
- Reboot your MacBook.
- As it boots, hold (CMD + R) until one second after you see the Apple logo.
How to Boot Into Recovery Mode for MacBooks with Apple Silicon Chips:
- Shut down your MacBook.
- Once it’s off, press and hold the power button until you see “Loading startup options.”
Does Recovery Mode Delete Everything on Mac?
No, Recovery Mode does not delete everything on Mac – at least by itself. It is just a state or mode that lets users access special tools, but it does not do anything by itself. However, there are certain tools that can delete data on your Mac, namely:
Time Machine.Once your Mac’s storage nears full capacity, Time Machine deletes the oldest backup first.
Disk Utility.Disk Utility’s Erase feature allows you to format disks, which completely deletes the data on it – in Recovery Mode, particularly, it can “Erase” the actual startup disk where you are loading your operating system from.
Terminal.With certain commands, the Terminal can also allow users to format disks similarly to Disk Utility’s erase function, which deletes all the data on that disk.
The Reinstall macOS option does NOT delete any data – it just does a new installation of macOS on your machine. If you need help on how to do this, we wrote a complete guide on how to reset your Mac without losing data.
How to Recover Accidentally Lost Data on a Mac
As we’ve discussed in the last section – Recovery Mode doesn’t necessarily erase data on its own, but some of its tools can. Fortunately, data recovery software can easily restore that data, even if you did a complete format using Disk Utility or Terminal commands. For this article, we’ll be using a software called Disk Drill. Here’s how to do it:
Step 1If you’re worried that your startup disk may be corrupt, plug in an external storage device where you can save recovered data later.
Step 2 Download and install Disk Drill.
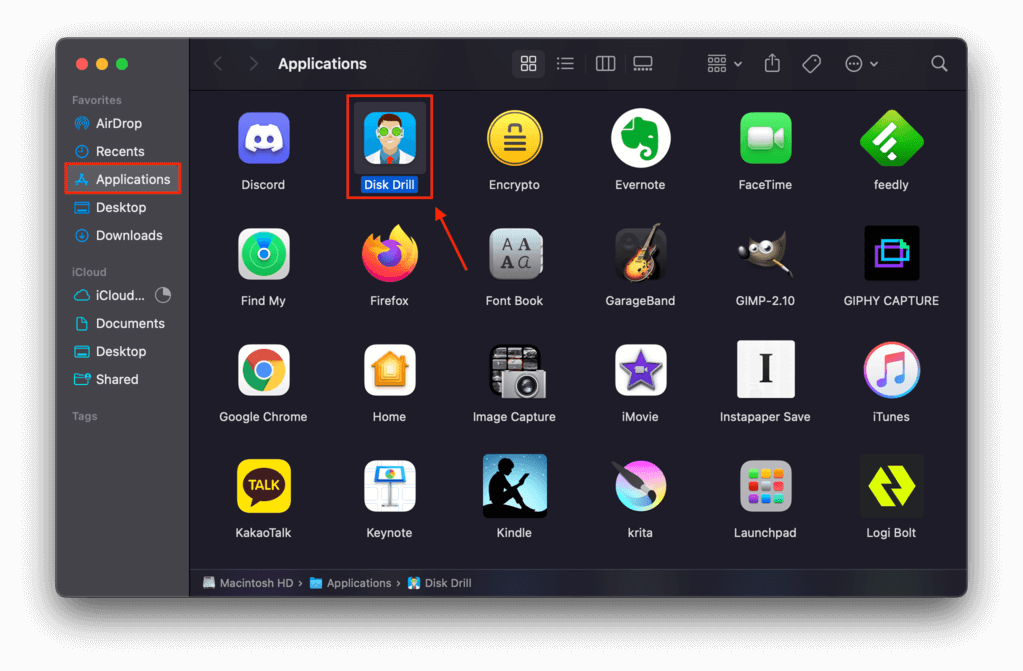
Step 3Launch Disk Drill by opening Finder > Applications and double-clicking the Disk Drill app.
 Step 4 Select the disk or drive where your deleted files were last saved, leave all settings to default for the best results, then click “Search for lost data.”
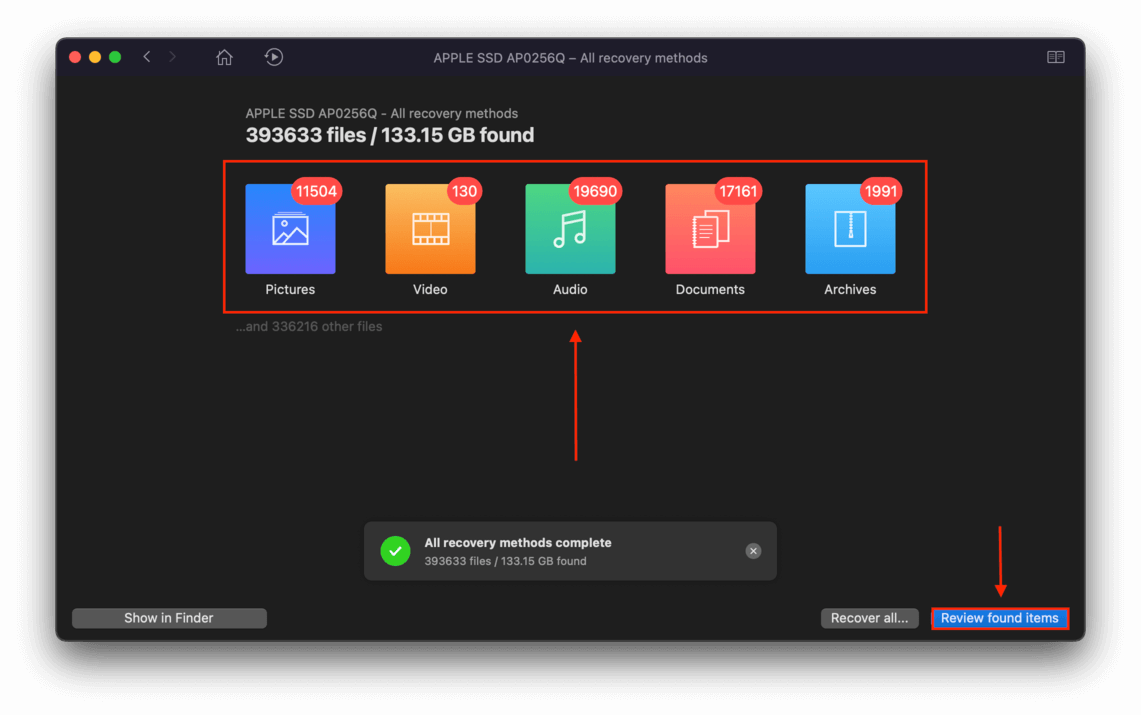
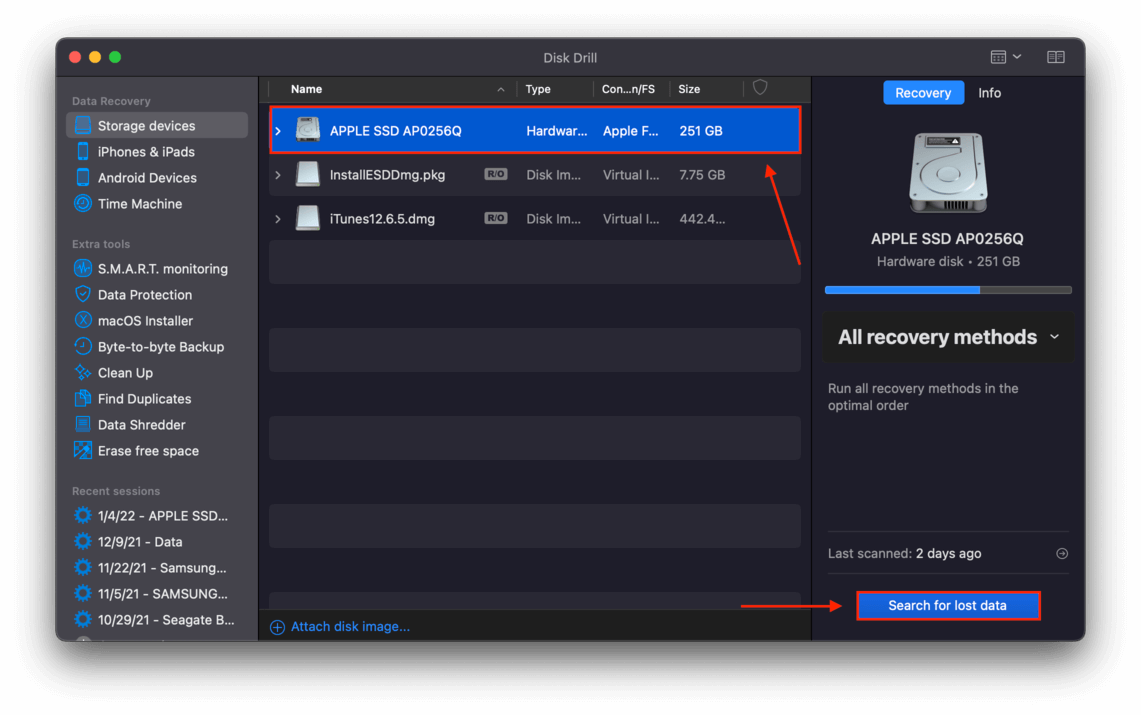 Step 5 At this point, you can browse through the files that Disk Drill already found by clicking the icons of file types, or you can wait for Disk Drill to complete its scan and click “Review found files.”
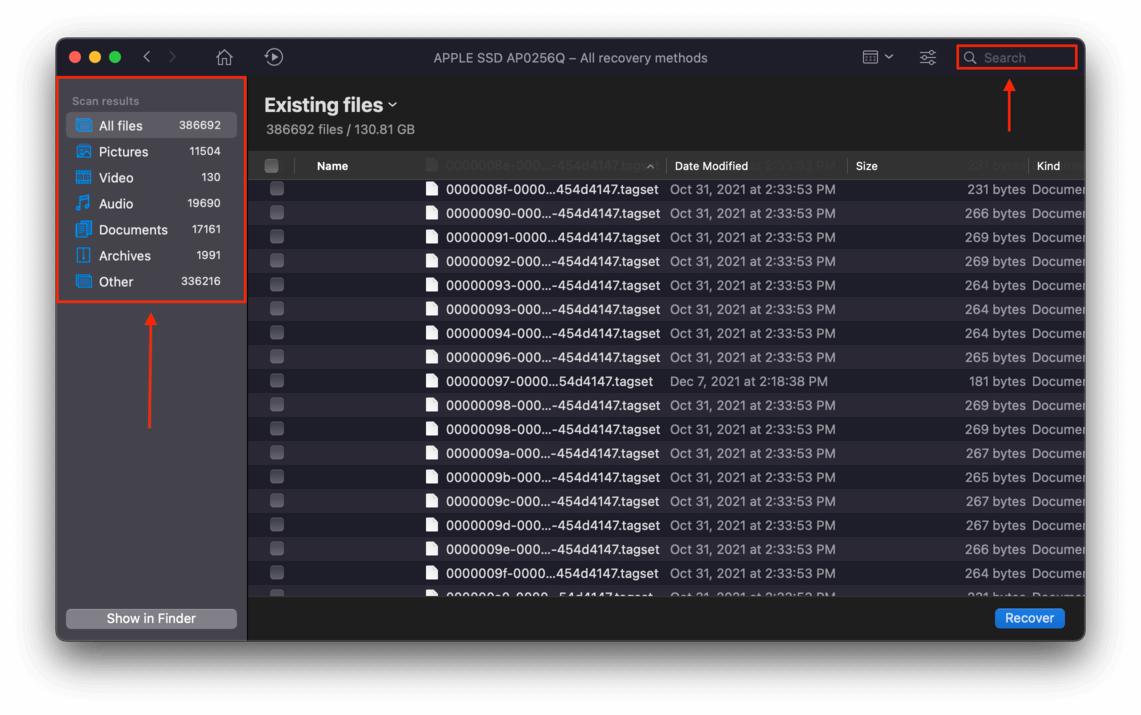
 Step 6 Disk Drill will show all the files that it found. You can narrow down the results by using the file type filters on the left sidebar, or by using the search bar on the top-right corner of the window.
 Step 7 You can also preview files by hovering your mouse pointer beside the filenames and clicking the eye button that appears.
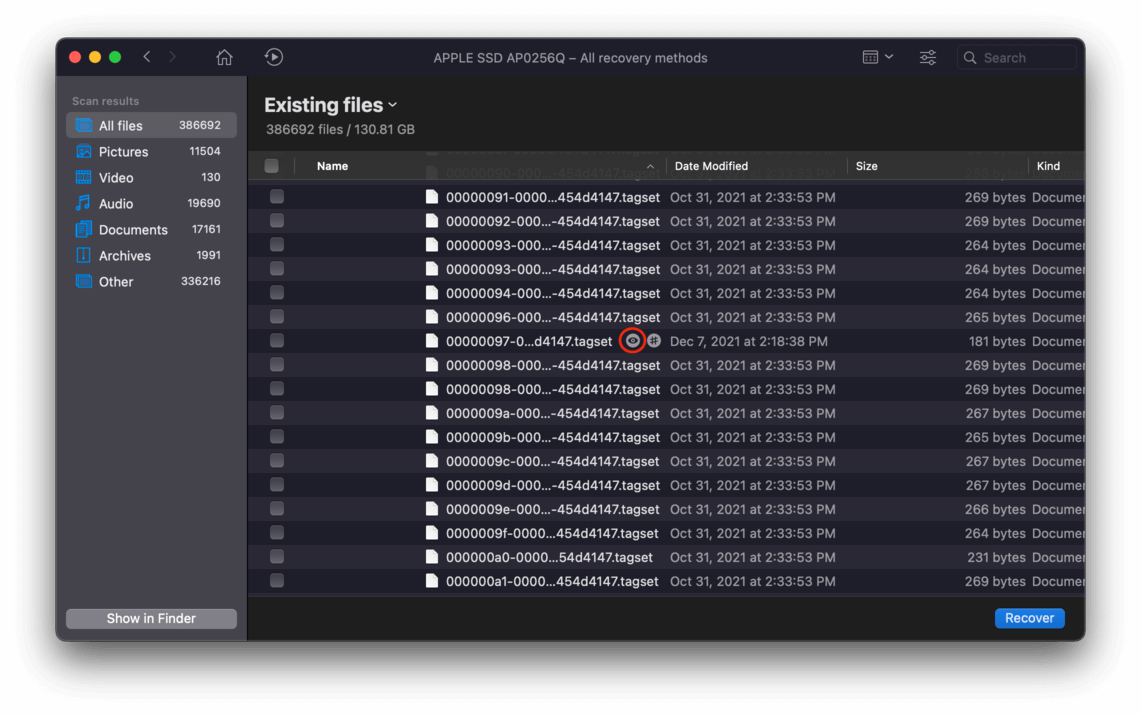 Step 8 Select the files you want to recover by clicking the checkboxes beside the file, or you can recover all the data Disk Drill found by clicking the “Check All” box beside the “Name” category header. Once you’re satisfied with your selection, click the “Recover” button on the bottom-right corner of the window.
 Step 9 On the dialogue box that appears, use the dropdown menu to select where you want to save these recovered files. Again, if you’re experiencing corruption on your startup disk, choose a location on an external storage device.


