
After a few years of enjoying your MacBook, you’re eventually going to have to reset it. Maybe you’re encountering slowdowns or some apps are not installing properly. A reset returns it to factory settings, essentially to the state it was when you first bought it.
Resetting a MacBook is easy, but can be intimidating for users who’ve never experienced resetting or reformatting a computer before – especially if there’s important data on your device. We provided an easy-to-follow, step-by-step guide so you can confidently reset your Mac without losing data.
| Step | Name |
| Step 1 | Backup Your Mac with Time Machine |
| Step 2 | Reset Your Mac |
| Step 3 | Restore Data From the Backup |
Table of Contents
Why You May Need to Reset MacBook to Factory Settings
Apple made it easy to factory reset MacBooks for a reason – normal usage will eventually force you to perform a factory reset. Here are a few good reasons why:
🐌 Improve Performance
You might be experiencing slowdowns or freezing whenever you use your Mac – this isn’t normal, and you don’t have to tolerate it. There could be too much clutter in the filesystem causing conflicts, or you might even have installed unwanted apps and forgot about it.
⚡ Reoptimize
With older machines, you might find that some apps aren’t running properly, and some don’t even run at all. A factory reset reinstalls the OS, ensuring that the file system is fully optimized to run programs correctly. It also allows you to perform a clean update, so you won’t encounter any software-related problems until the next time you need to reset.
🧹 Clean
If you have any viruses (unlikely, but possible), a factory reset will 99% of the time solve your problem. It completely erases your hard disk, getting rid of any harmful and unoptimized software.
How to Reset Mac Without Losing Data
Resetting a MacBook Pro to factory settings is a straightforward process. However, it’s always better to be precise when important data is involved. Follow these steps restore to factory settings without losing data:
Step 1. Backup Your Mac With Time Machine or Other Backup Solutions.
A factory reset completely erases your hard disk. If you care about the data on your Mac, you need to perform a backup so you can restore it later.
- Plug in a separate storage device. If you backup your data to your MacBook, the factory reset will delete it.
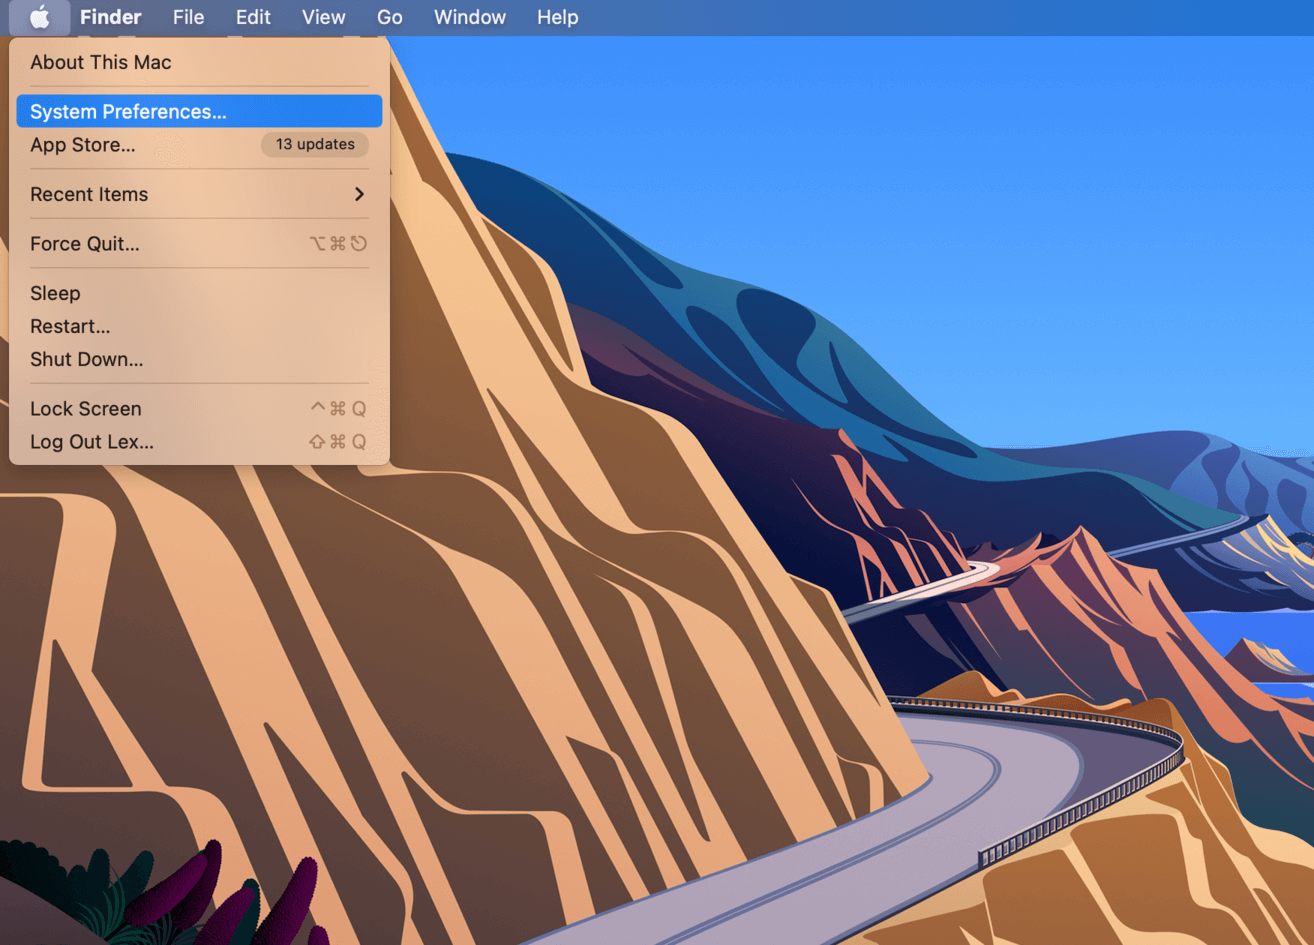
- Open Time Machine by clicking the Apple symbol on the top left corner of your screen and select System Preferences.
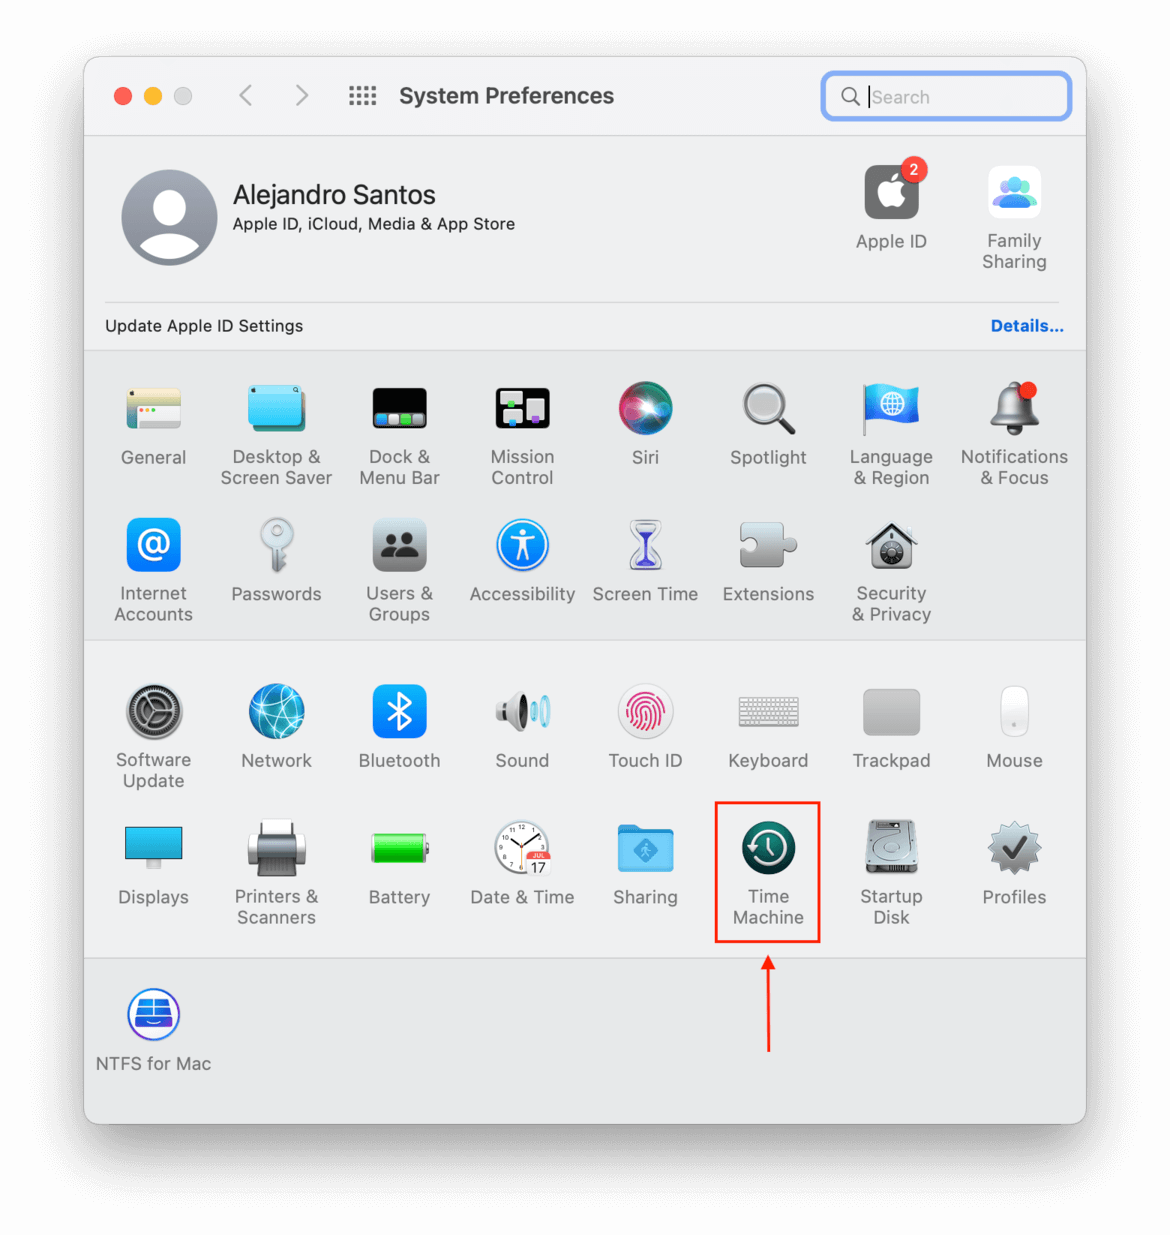
- From the System Preferences window, select Time Machine.
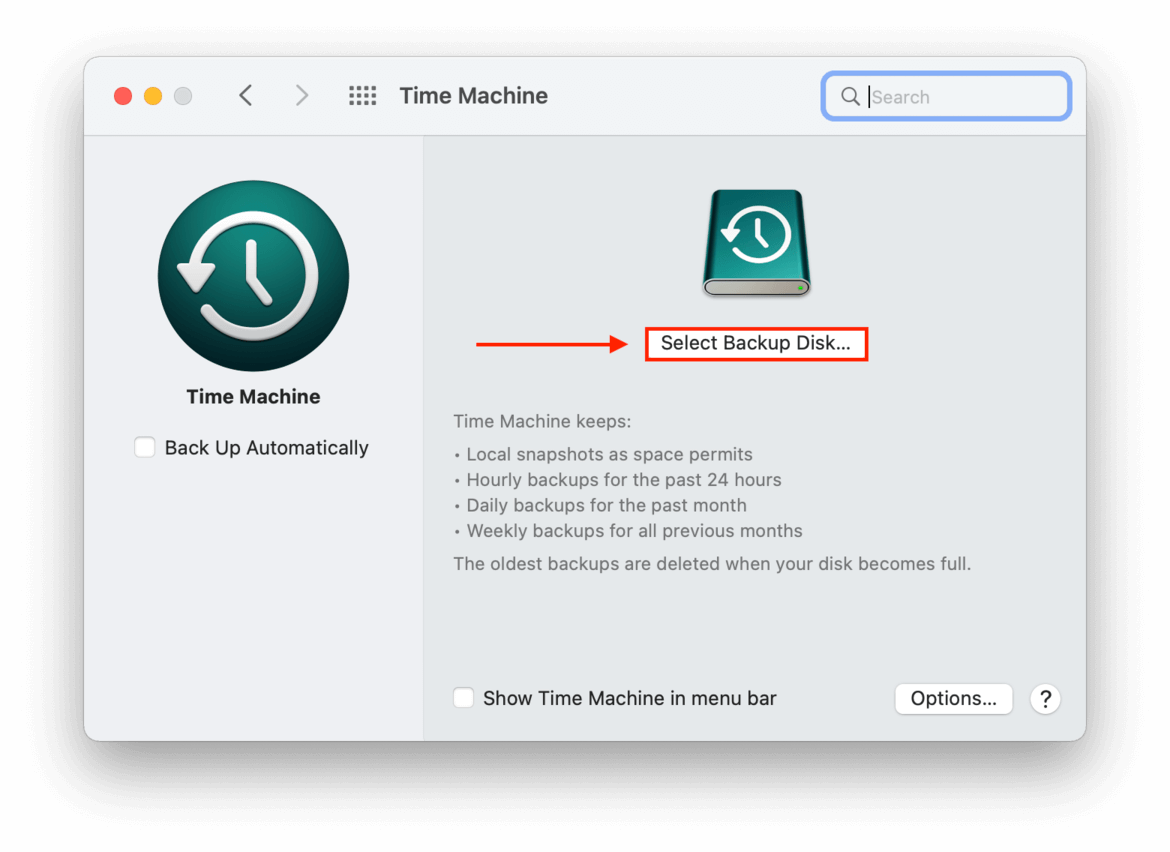
- Click “Select Backup Disk…”
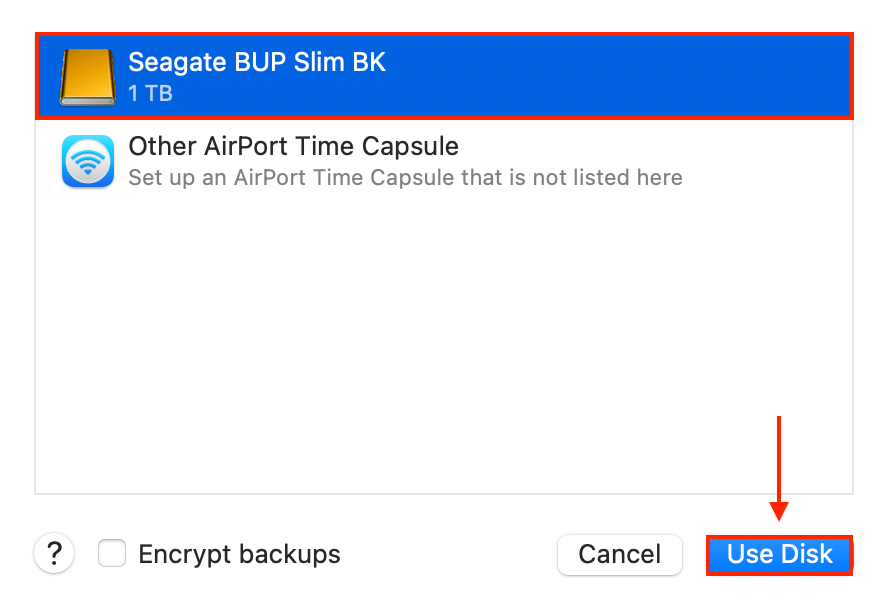
- On the popup that appears, select your external storage device, and click “Use Disk.”
- Sign out of all your active apps and unplug your external storage device to prepare for the next step.
Step 2. Reset Your Mac
Once you’ve backed up your data, you can safely proceed with the resetting process. It’s easy – just follow these steps so you don’t get lost along the way.
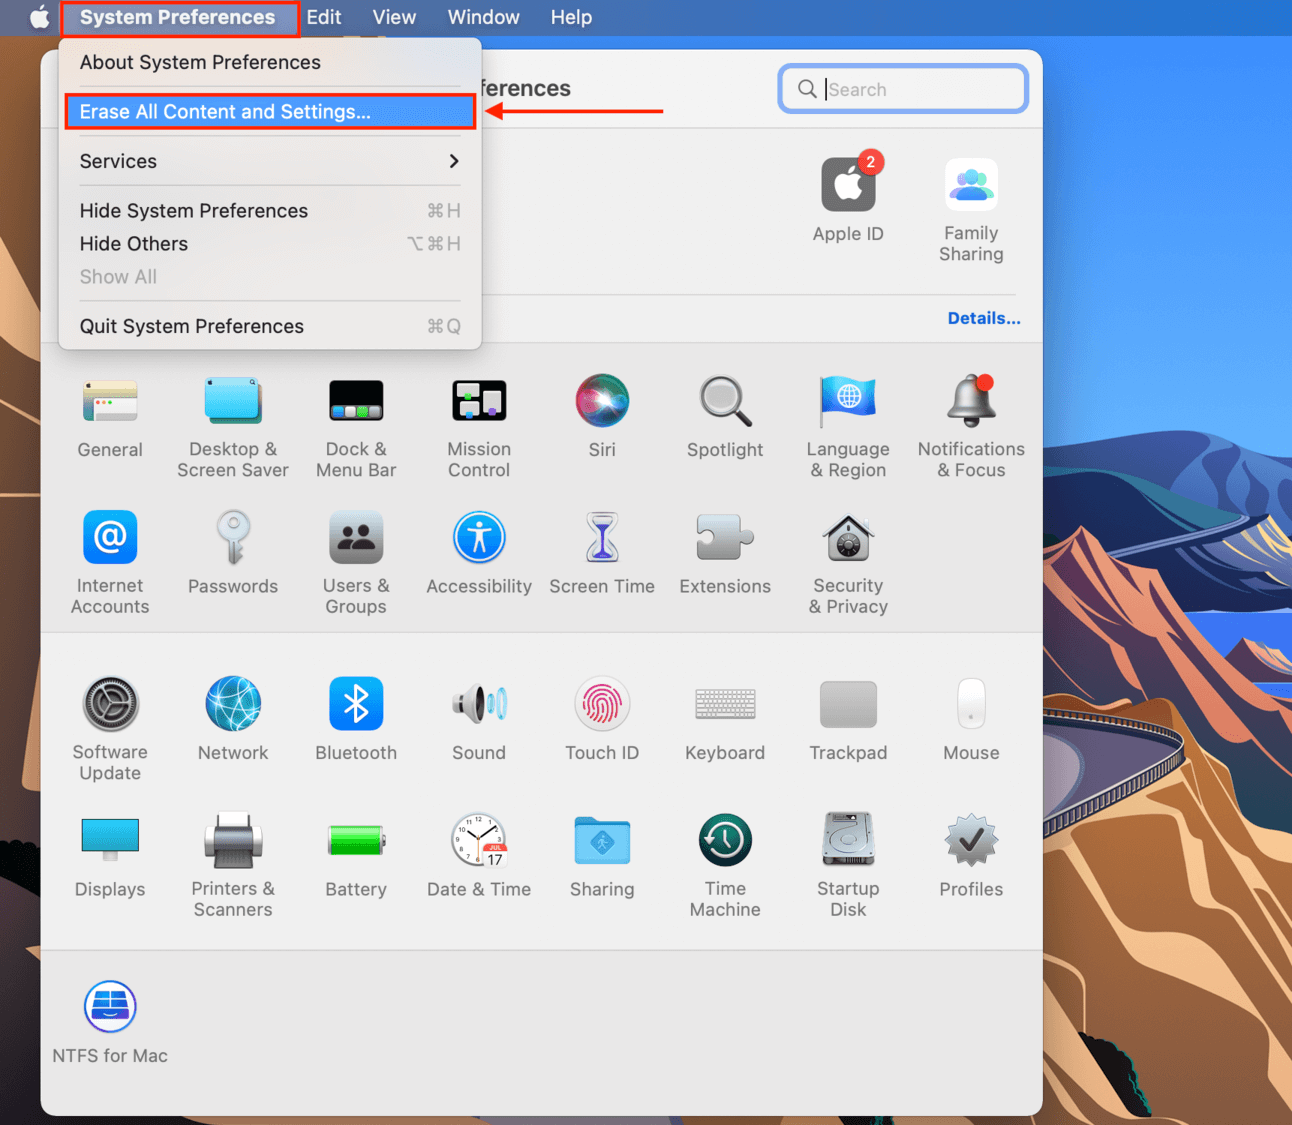
- Open your Apple menu > System Preferences.
- On the top left corner of your screen beside the Apple menu, click System Preferences > Erase All Content and Settings…
- If prompted, enter your password.
- On the Erase All Content & Settings window, note everything that will be erased and click the “Continue” button at the bottom right corner.

- Once you click continue, all your apps will close automatically. You’ll be asked to sign out of your iCloud account to proceed.
Step 3. Restore Data From the Backup
Once the reset is complete, you’ll go through a familiar setup process – essentially, how you setup your Mac when you first took it out of the box. Once you’re back on the desktop, you can proceed with restoring your data using an app called Migration Assistant.
- Plug in the external storage device where you stored your media.
- Open Finder by clicking its icon on your dock.

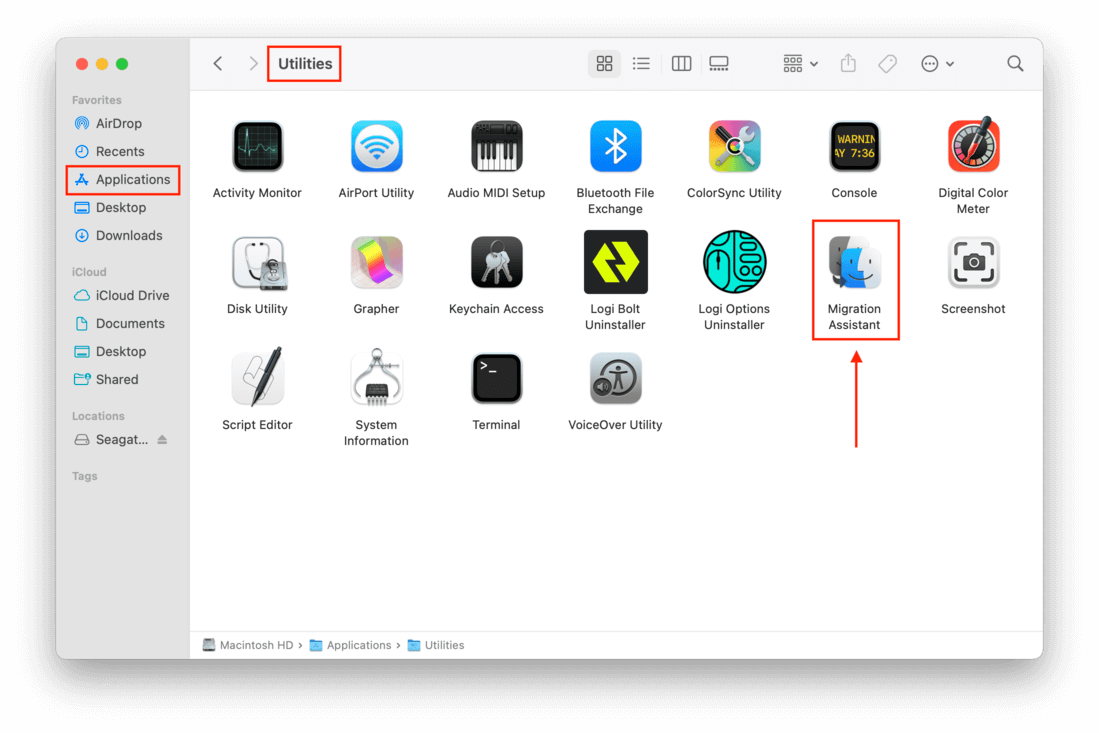
- Navigate to the Applications folder > Utilities > Migration Assistant app.
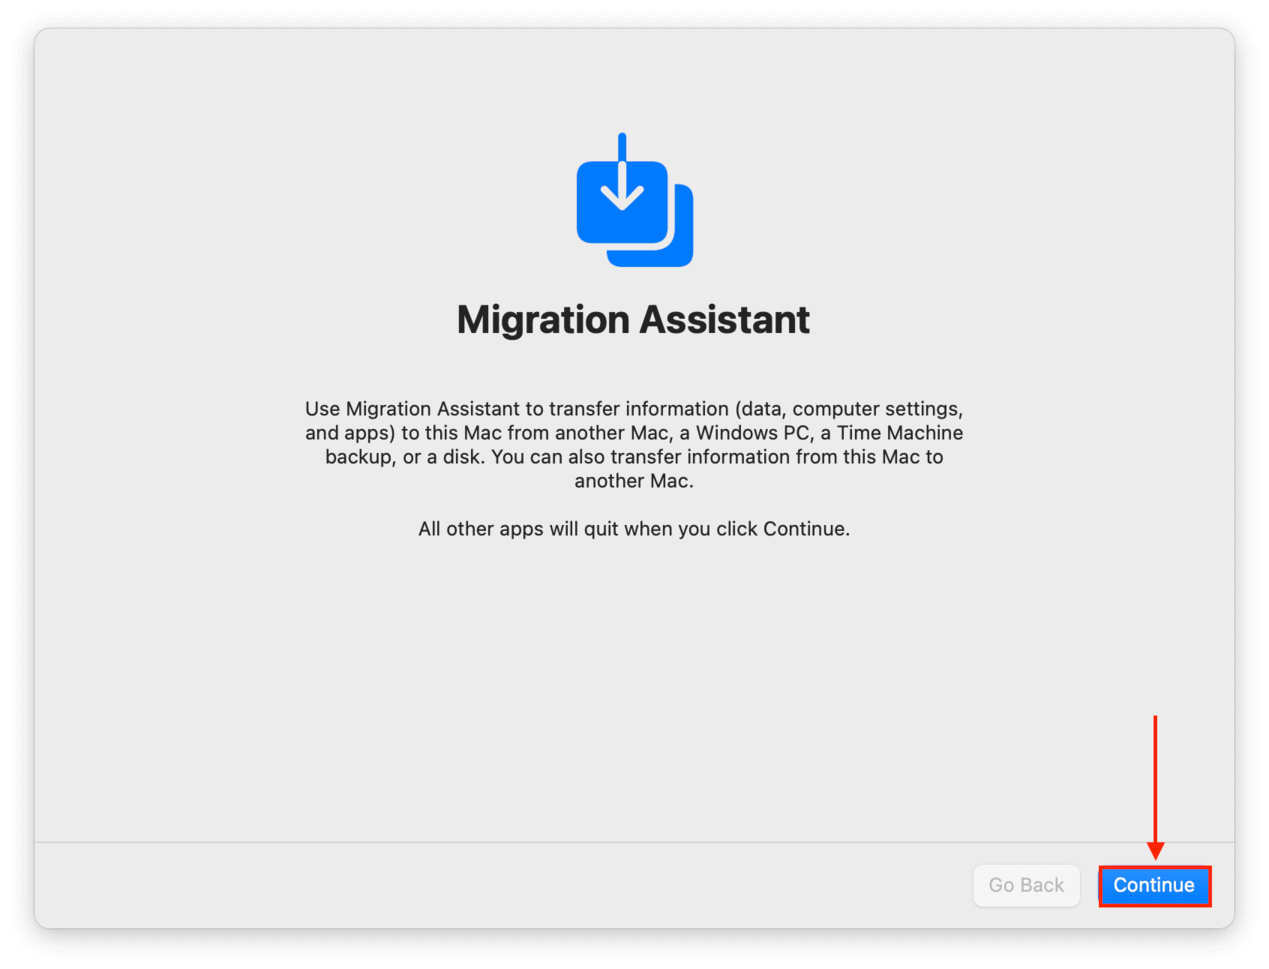
- Close all your open applications, then click “Continue” on the initial Migration Assistant window.
- At this point, it’s a straightforward process. Select your Time Machine backup and click “Continue.”
- Choose the information you want to transfer – such as user accounts, applications, folders, system settings, etc. – then click Continue.
- Simply wait until the process is complete. It can take a few minutes to a few hours, depending on how much data is being transferred.
What to Do if You Lost Data After Factory Resetting
Technology is not always 100% predictable – and as humans, we are even less so. If something went wrong during the backup and reset and you find that your data is missing, you can recover data from your MacBook Pro by yourself with special tools. For this article, we’ll be using the Disk Drill app.
Step 1. Download and install Disk Drill.
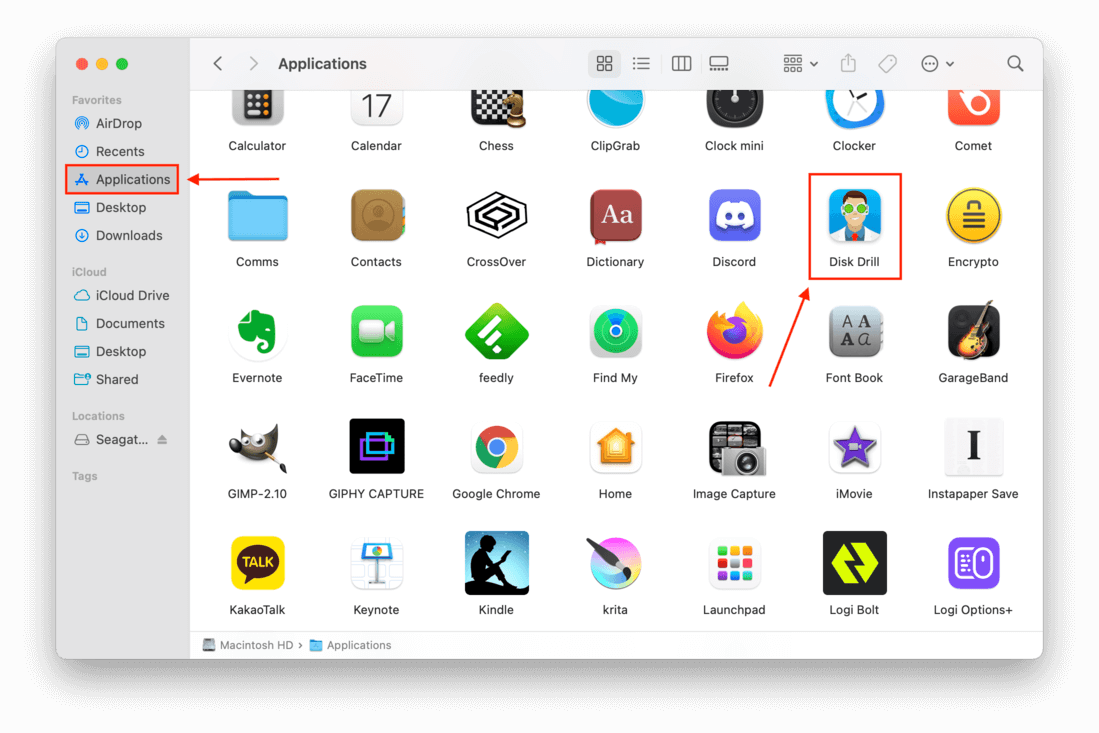
Step 2. Launch Disk Drill by opening Finder > Applications > Disk Drill app.
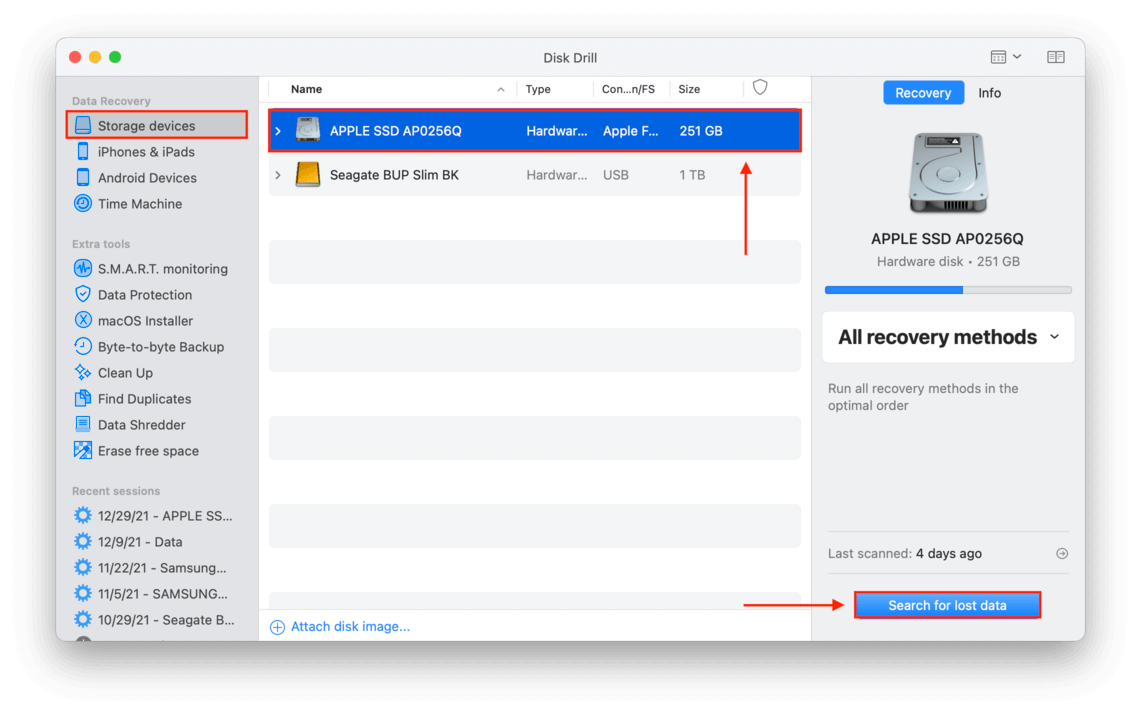
 Step 3. Select the drive that originally stored your data. Leave all settings to default, then click “Search for lost data.”
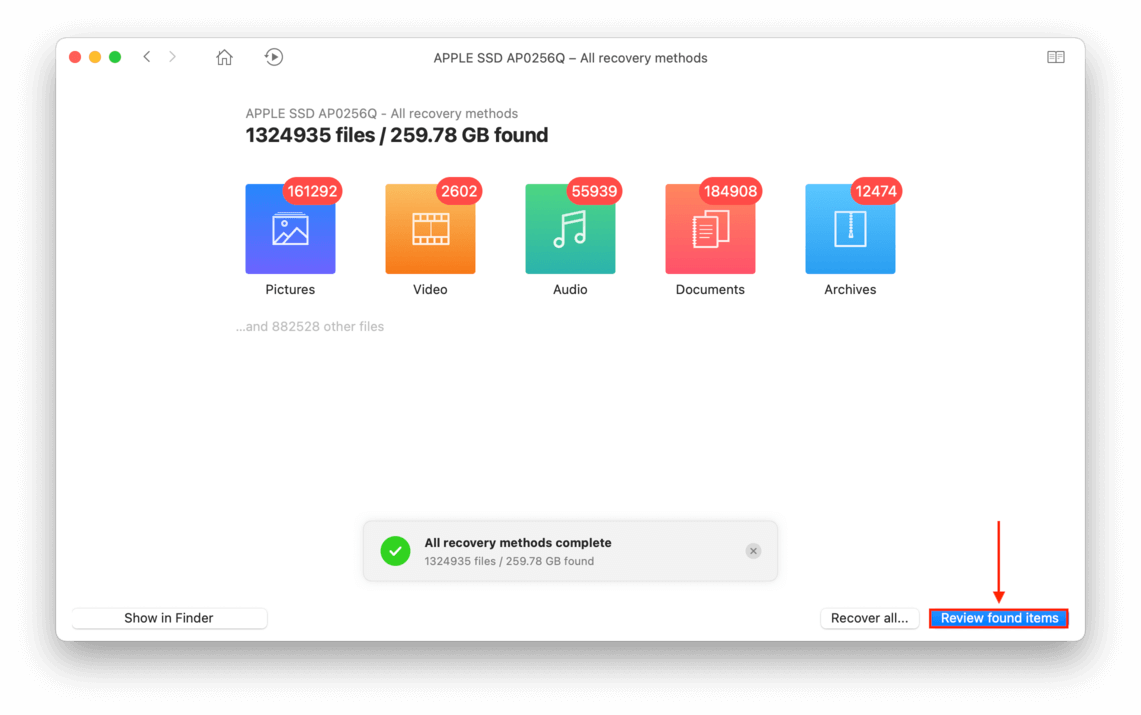
 Step 4. Wait for the scanning process to complete, then click “Review found items.”
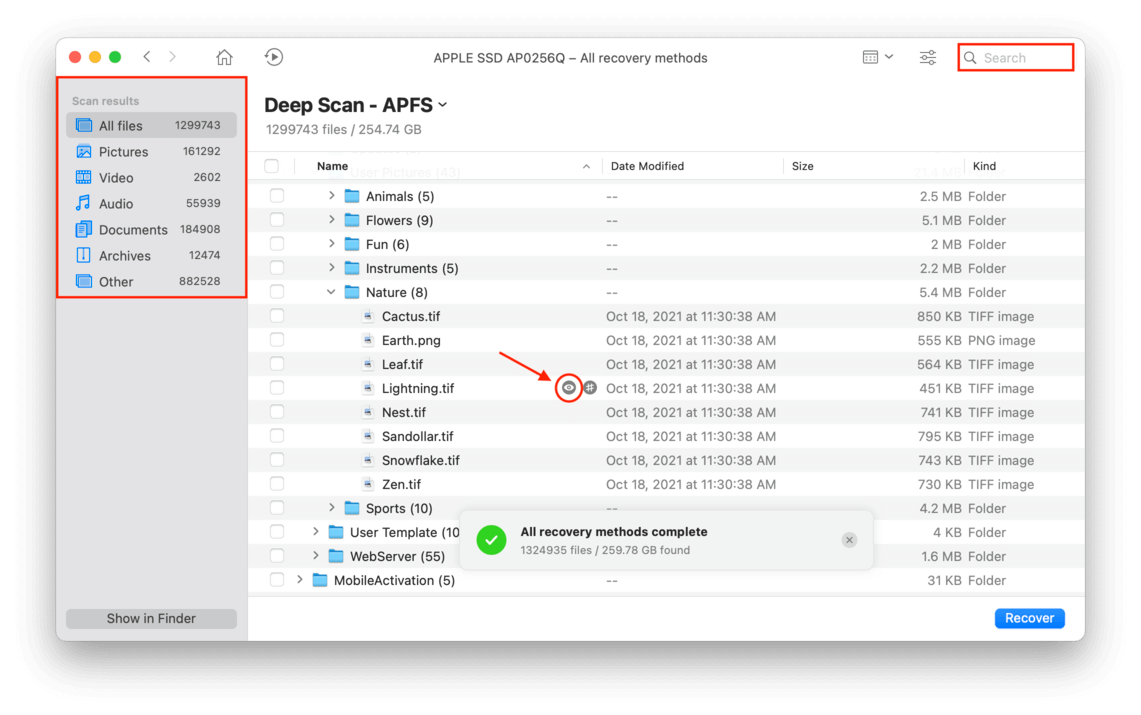
 Step 5. Browse the files that Disk Drill managed to find by using the search bar, filtering by file type, or by simply scrolling through the results. You can also preview found files by hovering your mouse pointer beside the filenames and clicking the eye button that appears.
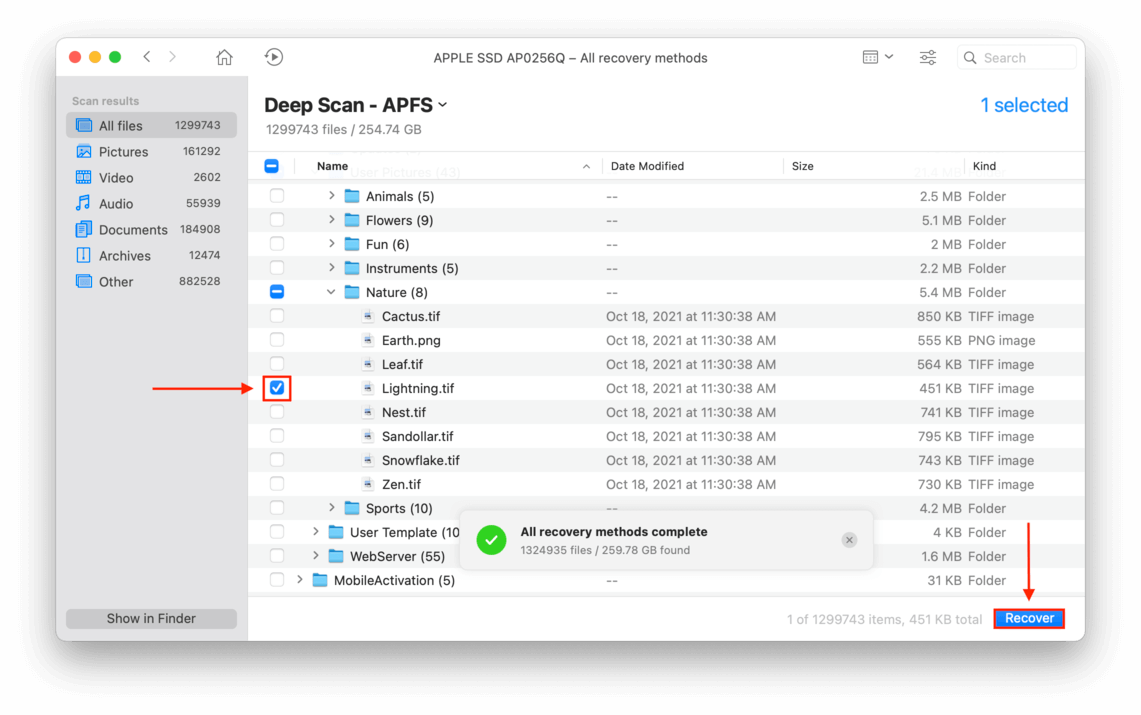
 Step 6. Select the files you want to recover by ticking the boxes on the left, then click “Recover.”
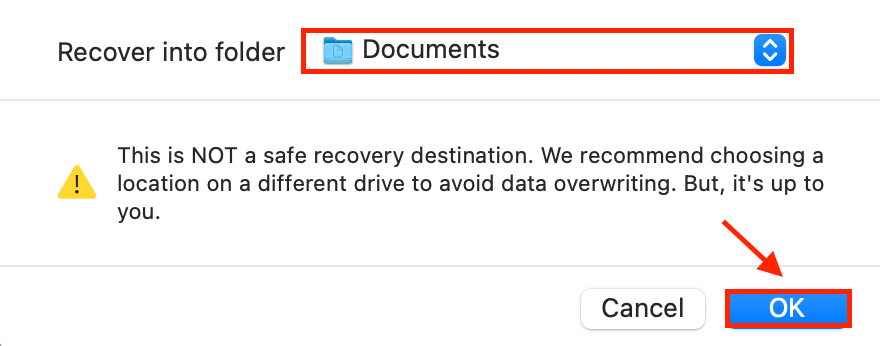
 Step 7. On the popup that appears, choose the destination folder for the recovered files. If you’re worried about overwriting other lost data, save your data to an external storage device. But if you already found all the data you want to recover, you can save the files to your internal drive. Click “OK” to start the recovery process.
Is There Any Difference in the Process for MacBook Air
There is a difference in the process, especially if you’re using a device with an Intel-based chip instead of an Apple Silicon one (M1 and above). Luckily, it’s still very simple. Here’s how to do it:
Step 1. Plug in the external storage device where you saved your backup.
Step 2. Make sure your MacBook is turned off. Then press CMD + R, then press the power button to initialize macOS Utilities.
Step 3. Click “Restore from Time Machine Backup” and click “Continue.”
Step 4. Review the information presented on the window and click “Continue.”
Step 5. From the list, click your Time Machine backup and click “Continue.”
Step 6. Select your most recent backup and click “Continue.” That’s it!
Conclusion
To restore a MacBook Pro to factory settings is a simple process, especially when working with MacBooks that use the new Apple Silicon chip – but always remember to back up your data first, as any computer process will never be 100% predictable.


