
Picture this: You’re sitting in front of your trusted Mac, ready to tackle a work project, edit irreplaceable family pictures or videos, or perhaps listen to your music collection. You grab your WD My Passport external portable hard drive, connect it to your Mac, launch Finder, and start looking for your data.
But no matter how hard you look, the data is nowhere to be found. Have you accidentally deleted the data? Has someone borrowed your drive and formatted it? Is corruption to blame? It doesn’t matter because the steps you need to follow to retrieve lost files from WD Passport for Mac are always the same, and we explain them in this article.
Table of Contents
Is It Possible to Recover Data from WD My Passport?
You’ve lost important files from your WD My Passport and you’re wondering, “Can I get my data back?” The good news is, yes, in most cases, you can. But, the success of data recovery largely depends on the situation at hand. Let’s look at some common scenarios:
- Accidental deletion or formatting: Deleted or formatted files aren’t gone forever. Your Mac doesn’t immediately wipe them out; even if your files don’t end up in the Trash folder, the space they occupy is just marked as available, but the actual data is still there. So, unless new data overwrites it, you have a good chance of recovery.
- Disconnection during data transfer: Pulling out your drive mid-transfer is a risky business that can lead to partial file loss or corruption. But don’t lose hope just yet. Recovery software can often piece together what’s left and restore most of your files.
- Malware attack: Malware can wreak havoc on your files and mess them up in all sorts of ways. For example, there are strains of malware that mark files as hidden—those are easy to recover from. However, there are also strains of malware that encrypt your files using military-grade encryption algorithms—those might be impossible to recover from.
- Changing partition size: Resizing partitions is a sensitive process, and one mistake can lead to data loss. The data often remains intact and recoverable. However, it might not be possible to recover it with meta information (such as file names and EXIF data) intact.
- Physical damage: Now, this one’s tricky. If your drive took a tumble or got a drink spilled on it, the chances of recovery can be slim. Physical damage often requires professional help, and even then, the result is anything but guaranteed.
Regardless of which of these scenarios you’re dealing with, you should always stop using the disk immediately after you notice the loss to up your chances of getting your files back. This helps prevent overwriting—the most common cause of irreversible data loss.
How to Find Files on My Passport for Mac
Before we explain how to retrieve lost files using Western Digital recovery software for Mac, you should double-check that the files are really lost.
Instead of rummaging through your WD My Passport drive folder by folder like a treasure hunter searching for lost loot, we recommend you take advantage of Finder’s search feature, making it your own personal Sherlock Holmes.
If you remember the names of your lost files, then you can do the following:
- Launch Finder.
- Click the magnifier glass icon in the top-right corner.
- Type in the name of the file you’re searching for and press Return/Enter.
- Specify that you want to search only the external drive.
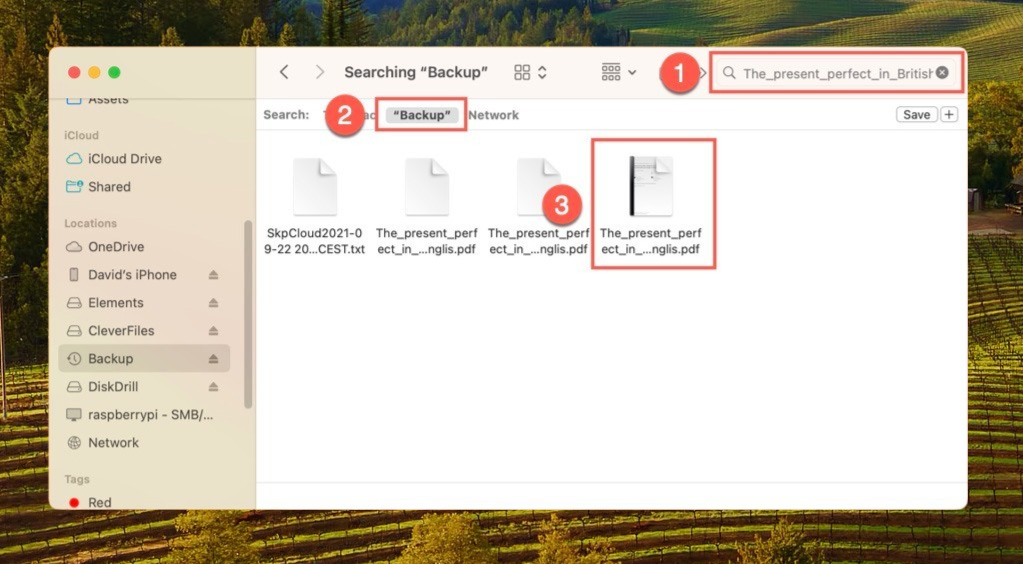
- Look for your files.
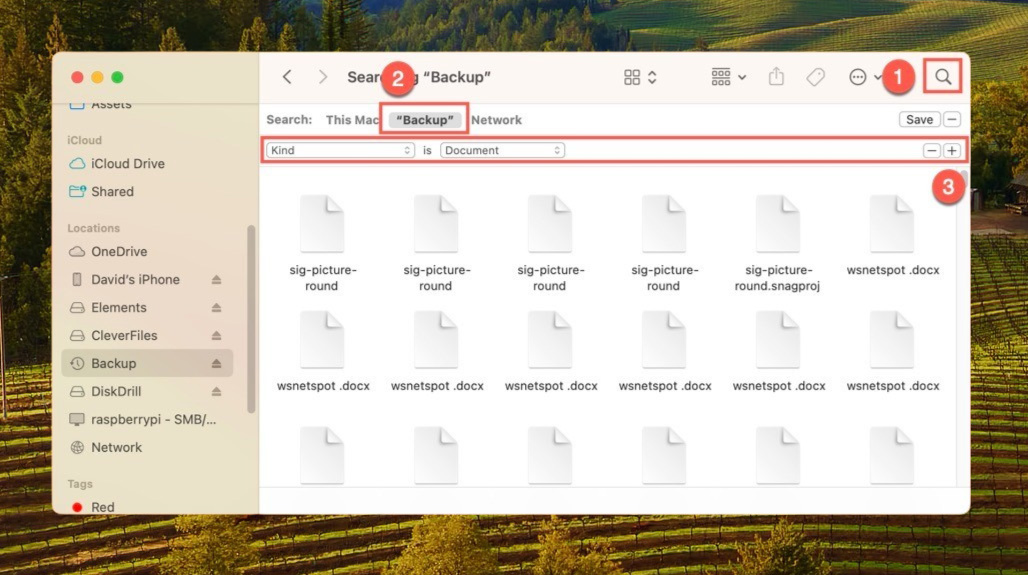
If you don’t remember the names of your lost files, then you can tell Finder to find all files of the same file type:
- Launch Finder.
- Click the magnifier glass icon in the top-right corner and type in any search term you want (you can immediately delete it).
- Specify that you want to search only the external drive.
- Click the Plus icon below the search bar.
- Choose Kind in the far-left pop-up menu.
- Specify the kind of files you want Finder to locate.
How to Retrieve Files from My Passport on Mac
Okay, so your data is really nowhere to be found, which means it’s time to retrieve it. We will describe two methods: one inexpensive (WD My Passport for Mac data recovery software) and the other one potentially costly (data recovery services). Obviously, we recommend you start with the first method and consider the second one only as a last resort.
Method 1: Use Data Recovery Software
To recover data from a WD My Passport drive, you need to connect the hard drive to your Mac and use a suitable data recovery software application to retrieve lost data from it.
For the purposes of this article, we’re using a data recovery software application called Disk Drill, which we selected because of its ease of use, great performance, and generous free trial version that lets you preview all recoverable files without paying.
Here’s how to recover lost data using Disk Drill from a WD My Passport drive:
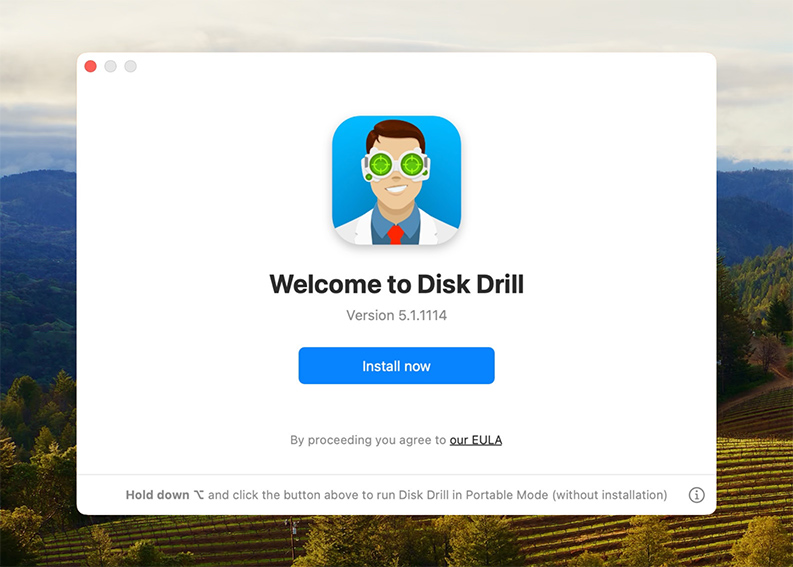
- Download Disk Drill from its website. You then need to install it on your computer. Simply double-click the downloaded installer file and drag the Disk Drill icon to the Applications folder as instructed.
- Connect your WD My Passport drive to your Mac. Make sure it’s snug and recognized. Unfortunately, Disk Drill (or any other data recovery software) can’t recover data from a storage device your Mac is unable to recognize and communicate with.
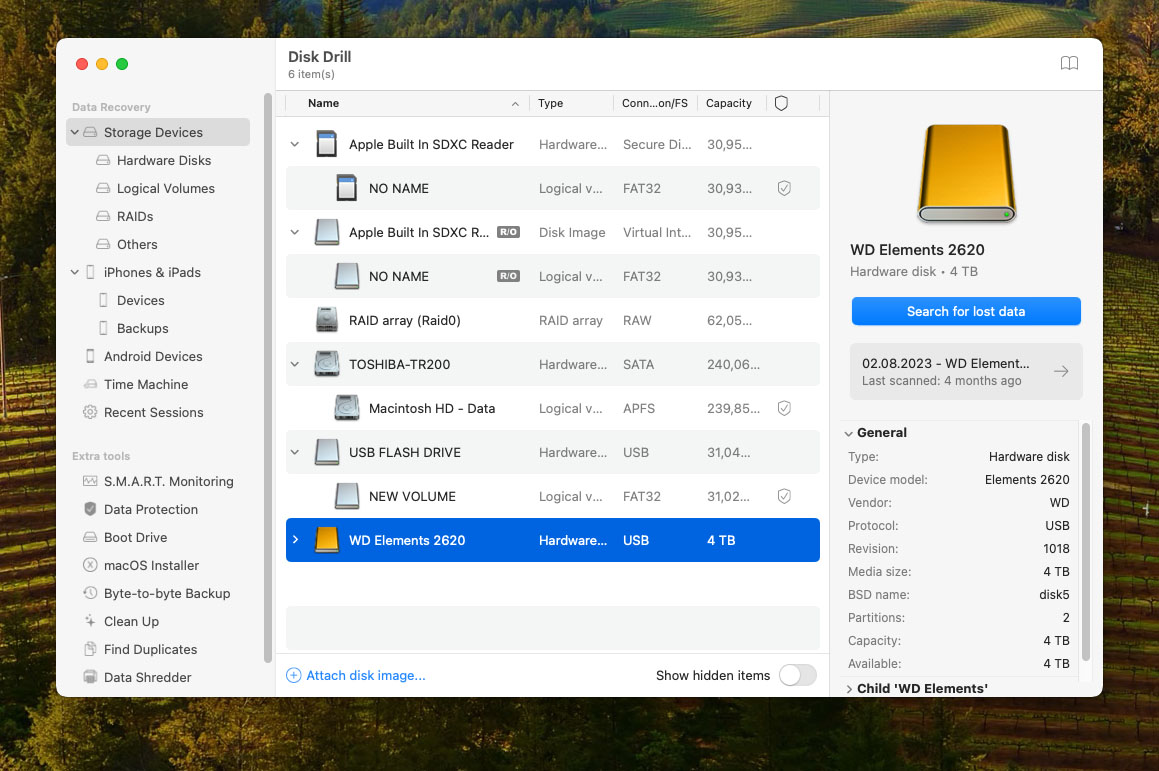
- Launch Disk Drill and look for your WD My Password drive in the main window. Select it and then click the Search for lost data button in the bottom-right corner to scan it.
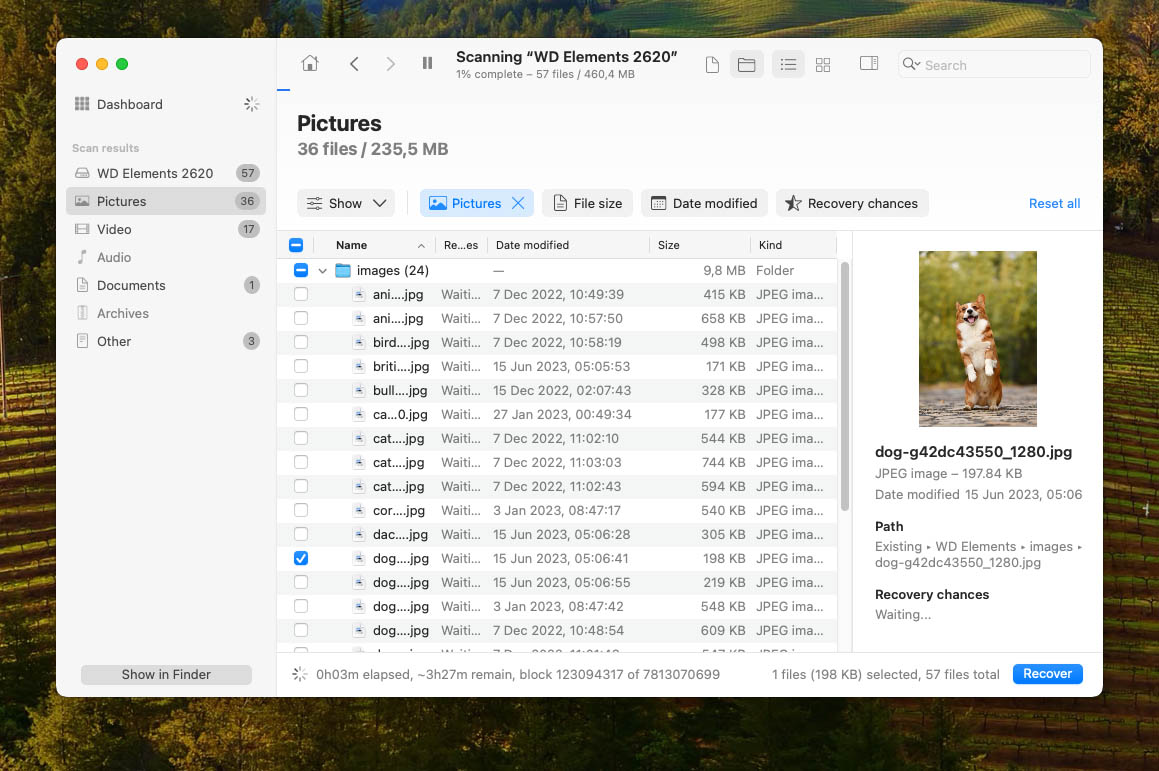
- After the scan, you’ll see a list of files you can salvage. Browse through and pick the ones you need back. How? By clicking the checkboxes next to them. It’s that simple!
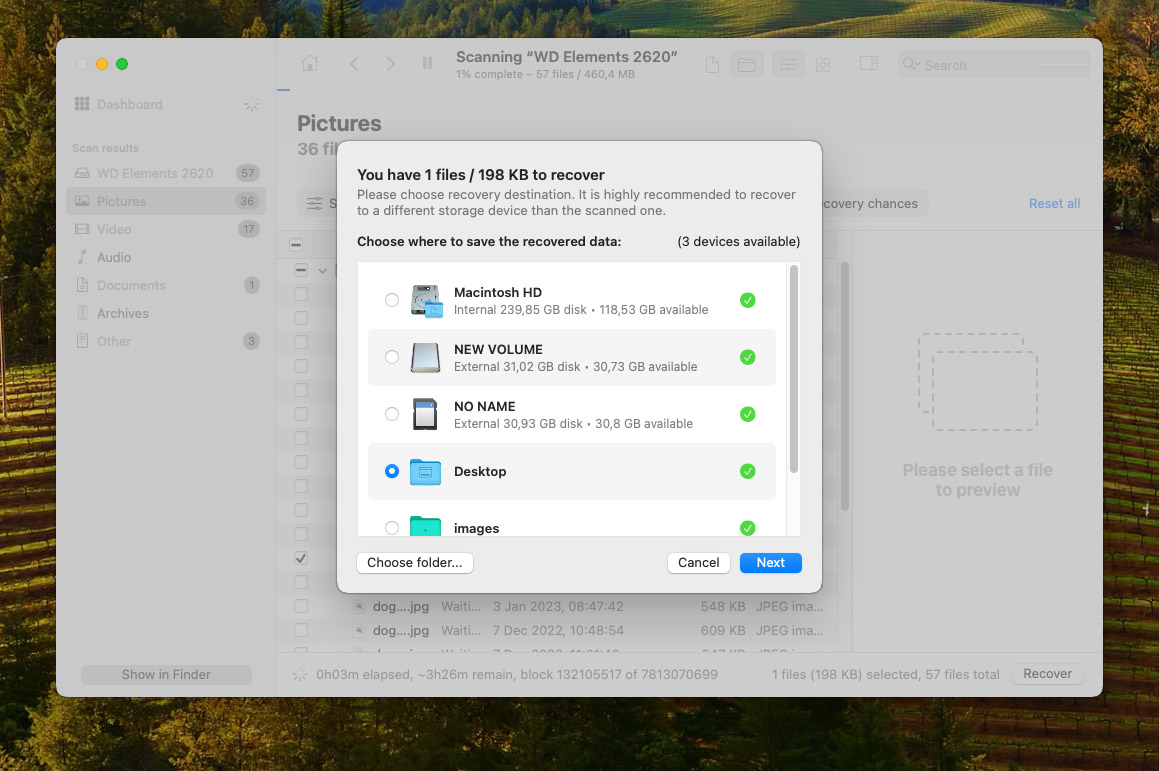
- Are you happy with your selection? Then click the Recover button in the bottom-right corner. Now, this is crucial: choose a different location to save the recovered files. Saving them back on the WD My Password drive could lead to the overwriting of the same data you’re trying to save.
Method 2: Use a Data Recovery Service
Has your DIY data recovery attempt made you feel like a stranded sailor in the middle of a data ocean? Don’t worry! A rescue boat in the form of data recovery services is just an email or phone call away. As you can guess, data recovery services specialize in recovering valuable data from storage devices like your WD My Passport drive.
From solving simple cases of accidental deletion or formatting to performing complicated repairs of physical damage, data recovery services can tackle just about every cause of data loss and succeed even where DIY solutions fail.
As a Western Digital customer, you can retain the warranty status of your drive if your data recovery service of choice provides you with written verification of the data recovery job on its company letterhead, as explained on Western Digital’s support page.
Western Digital has several data recovery partners around the world:
- Americas: Secure Data Recovery Services, DriveSavers Data Recovery, Datarecovery.com, Ontrack Data Recovery
- Europe, Middle East, and Africa: Datarecovery.com, Secure Data Recovery Services, DriveSavers Data Recovery, Ontrack Data Recovery
- Asia, Pacific, and Japan: DriveSavers Data Recovery, Datarecovery.com, Secure Data Recovery Services, Ontrack Data Recovery
Just remember that data recovery services come at a cost, and that cost can be quite substantial. If the lost data is very valuable to you, then spending a larger sum of money to get it back might be a good deal. But if the data is expendable, then we recommend you give data recovery software one more try and, if it fails to deliver the desired results, cut your losses.
How to Avoid Losing Data on WD My Passport Drives in the Future
Great, you’ve just nailed the recovery of your precious files. But let’s make sure you don’t have to go through that stress again. Here are some straightforward, no-nonsense tips to keep your data safe on your WD My Passport drive:
- ⚠️ Handle with care: Your hard drive is a delicate piece of tech. Avoid dropping it or jostling it around in your bag. A gentle touch goes a long way in keeping your data safe.
- 🌡️ Avoid extreme temperatures: Your WD My Passport isn’t a fan of extreme temperatures. Keep it cool and dry, away from direct sunlight or heaters.
- ⏏️ Don’t just yank it out: We’ve all been there, in a hurry and just pulling out the drive. But take a moment to right-click on the drive in Finder and hit Eject before disconnecting so that all read/write operations can finish.
- 💿 Back up regularly: Make backing up a regular thing. Use Time Machine or another backup software to create copies of your files. This is the only way to protect against data loss caused by physical damage.
- 💻 Keep your software updated: You should always promptly install all macOS, app, and firmware updates because they often address issues that can cause data loss.
By following these tips, the chance of you encountering data loss issues with your WD My Passport drive will be significantly reduced.
Conclusion
Recovering data from your WD My Passport drive on Mac doesn’t have to be a nightmare. With easy-to-use data recovery software like Disk Drill, it can be a matter of a few simple steps. And if that fails, then you can always contact a data recovery service and pay experienced professionals to have a go at it.
FAQ
To save files stored on your Mac to your WD My Passport drive:
- Connect your WD My Passport to your Mac using a USB cable.
- Open Finder on your Mac and locate the WD My Passport drive.
- Drag and drop the files you want to save to your WD My Passport from your Mac to the drive.
Follow these steps to install WD Discovery on your Mac:
- Download the latest version of WD Discovery for Mac from the official website of Western Digital.
- Open the downloaded installer file.
- Follow the on-screen instructions to install the software.
- Launch the WD Discovery application from your Applications folder.
To restore deleted or lost files from your WD My Passport drive:
- Download and install Disk Drill on your Mac.
- Connect your WD My Passport to your Mac using a USB cable.
- Launch Disk Drill and select your WD My Passport from the list of available drives.
- Click Search for lost data and wait for the scan to finish.
- Choose the files you want to recover and click the Recover button.
There are several potential problems that could cause your WD external hard drive to not show up on your Mac, including:
- The drive is not properly connected to your Mac.
- The drive is corrupted or damaged.
- The drive uses a file system that’s not compatible with your Mac.
- The drive doesn’t have a file system (is raw).
- There’s something wrong with your Mac.
To access your WD Password on Mac:
- Connect your WD Passport to your Mac using a USB cable.
- Launch Finder.
- Select your WD Passport from the list of available locations.


