
All solid-state drives (SSDs) have a finite lifespan because the flash cells inside them eventually wear out and become unreliable. Typically, this isn’t an issue because most SSDs become obsolete much sooner than what it takes the average user to exceed the advertised lifespan, which is indicated in terabytes written over time (TBW).
Now, some users of M1 Macs are reporting serious issues with the overuse of their SSDs. Their reports are especially worrying because Apple decided to solder the SSD chip directly onto the motherboard, making it impossible for users to replace it. If you own an M1 Mac, you should learn how to check SSD health so you can determine how much time it will approximately take for your hard drive to become unreliable.
Table of Contents
M1 Mac Excessive SSD Usage Issues
Recently, several M1 Mac power users have shared alarming usage reports indicating extremely high drive writes over a relatively short time.
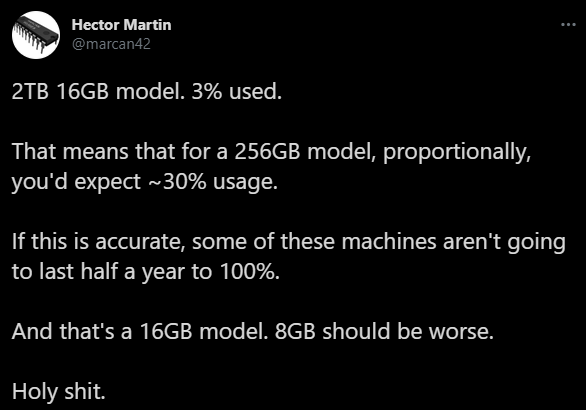
Based on the wear of the SSD inside his 2 TB M1 Mac, developer Hector Martin calculated that 256 GB models could exceed their TBW in less than half a year. That doesn’t mean that they would instantly become unusable, but their users could experience major stability issues and, in extreme cases, data loss.
We know that Apple uses Toshiba TLC NAND flash chips for its SSD drives, which should endure up to 3,000 write cycles per physical sector based on the current lithography process.
While that may not sound like much, it’s important to realize that SSDs don’t degrade when reading data—only when writing new data. What’s more, modern SSDs use wear-leveling technology to distribute data evenly across all physical sectors, prolonging the total lifespan.
Because of all these factors, most estimates put the age limit for SSDs around 10 years. Even basic 256 GB SSDs come with a 150 TBW rating. Such SSDs can write over 80 GB of new data every day for 5 years before potentially becoming unstable, so M1 Mac users should theoretically have nothing to worry about.
Unfortunately, it seems that something is causing some M1 Macs to write far more new data than what’s normal. It could be the fact that the M1 chip is using internal storage for memory swap, or it could be an undiscovered bug in macOS Big Sur or some app used by all affected users.
Regardless of what causes the excessive wear, all M1 Mac users should test SSD health using an SSD diagnostic tool, and we recommend three such tools in the next section of this article.
Methods to Check SSD Health on Mac
There are multiple ways to check the health of an SSD on a Mac. Let’s take a closer look at one free and one paid SSD health checker so you can pick the one that fits your needs the best. But before we do that, we need to explain how to perform a basic SSD smart status check on macOS.
Method 1: Check SMART Status on macOS with Disk Utility
As a Mac user, you can quickly and easily check the SMART status of any SSD using Disk Utility. The only caveat is that Disk Utility provides only a rudimental overview of your disk’s health, essentially telling you only if it’s in good or bad health.
How to perform a SMART SSD test with Disk Utility:
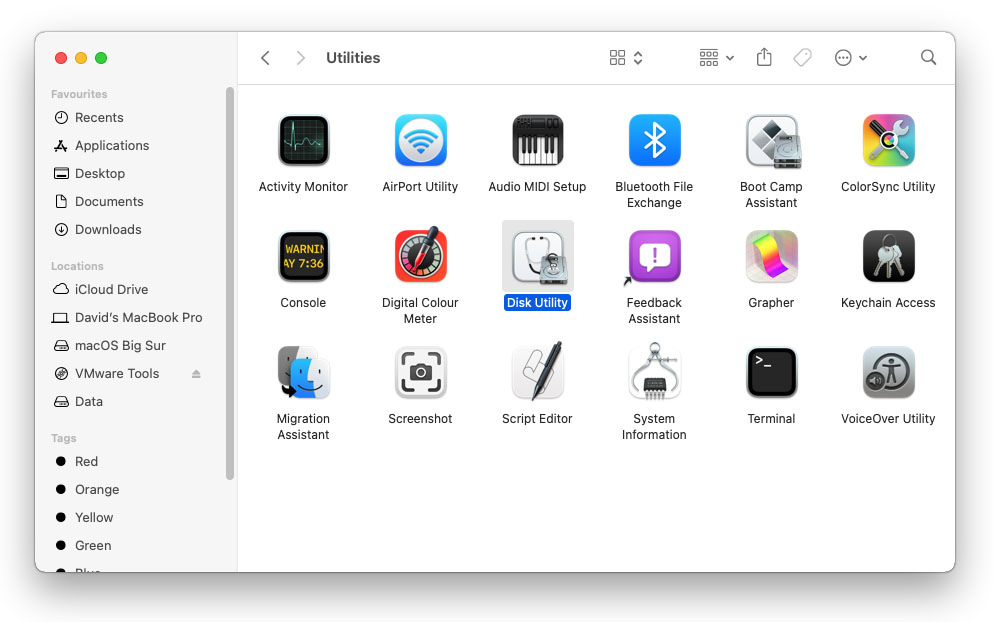
- Launch Disk Utility (you can find it in the /Applications/Utilities/ folder).
- Select your SSD from the left pane.
- Look for a field called “S.M.A.R.T. status” in the information section at the bottom of the main pane.
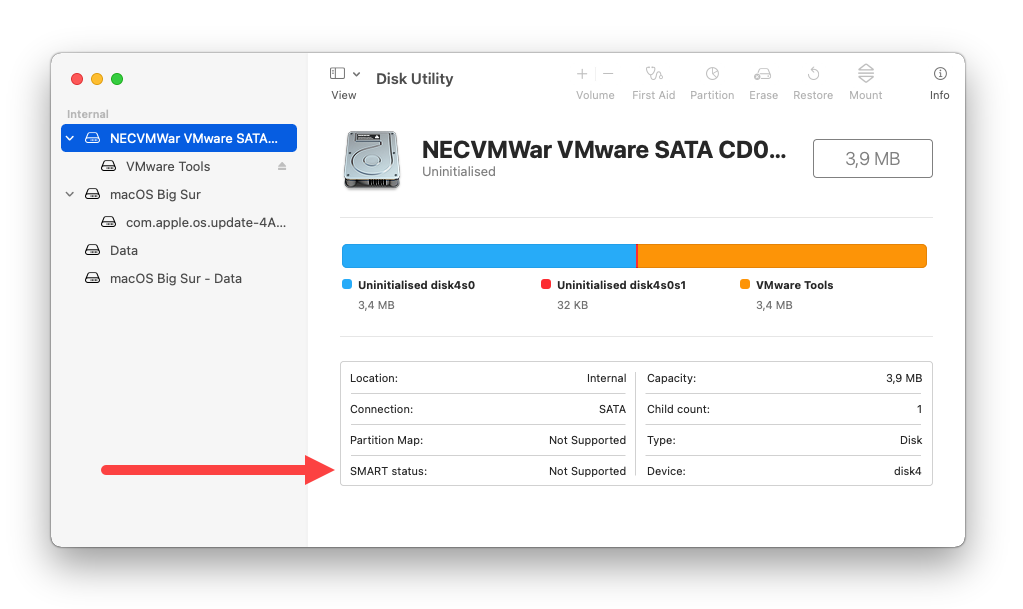
- If the field reads “Verified,” then your SSD is healthy. If it reads “Failing,” then there’s something wrong with it. And if you see “Not Supported,” then your SSD doesn’t provide any information about its health.
Method 2: Use a Paid SSD Drive Checker (DriveDx)
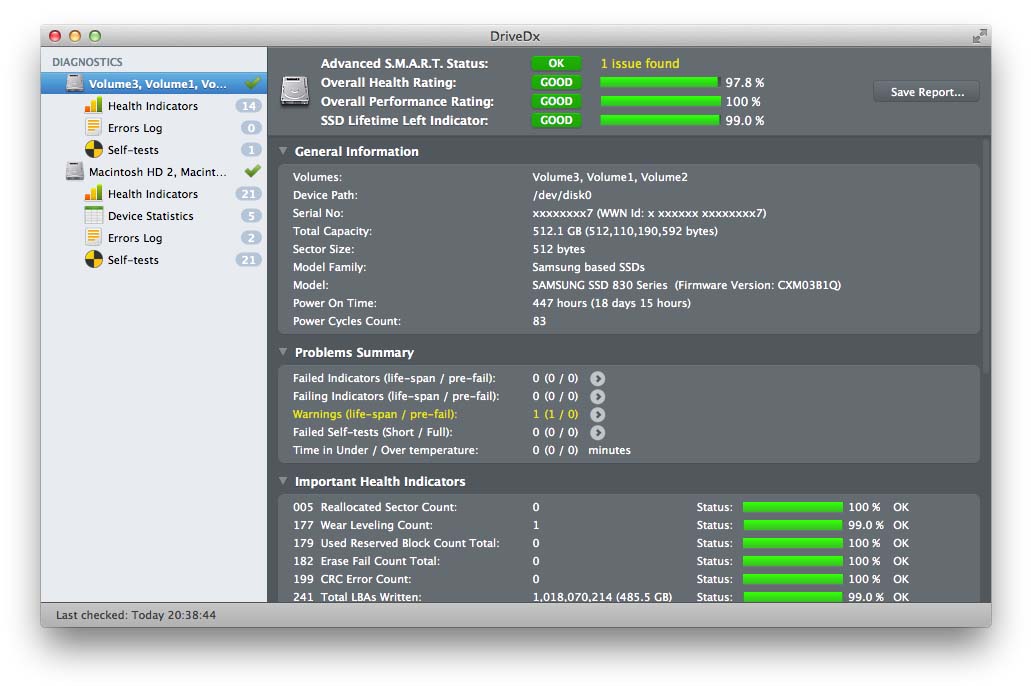
DriveDx is an advanced SSD health monitor capable of analyzing the current state of the drive using all available health indicators, such as SSD wear out/write endurance, I/O errors, pending sectors, reallocated bad sectors, and others.
The tool is aimed at power users and IT professionals, and its price reflects this. The good news is that there’s a free trial that lets you test drive all main features, and you can download it directly from DriveDx’s official website.
How to perform a SMART SSD test with DriveDx:
- Download and install
- Click the DriveDx icon in the Menu bar.
- Select the Open DriveDx Application option.
- Select your SSD and study the available drive health information to determine its condition.
Method 3: Download a Free SSD Health Utility (Disk Drill)
If you want more information about the health status of your SSD than what Disk Utility can provide but don’t want to spend money on a paid SSD health monitor like DriveDx, then our third method is for you. Disk Drill is a popular data recovery tool that comes with a bunch of free extra disk tools, including a capable SSD health utility.
Disk Drill is intended for complete beginners and advanced users like, and using it to check the health of any SSD drive couldn’t be simpler:
- Download and install Disk Drill.
- Launch the app.
- Select the S.M.A.R.T. monitoring tab in the left pane and turn this function on.
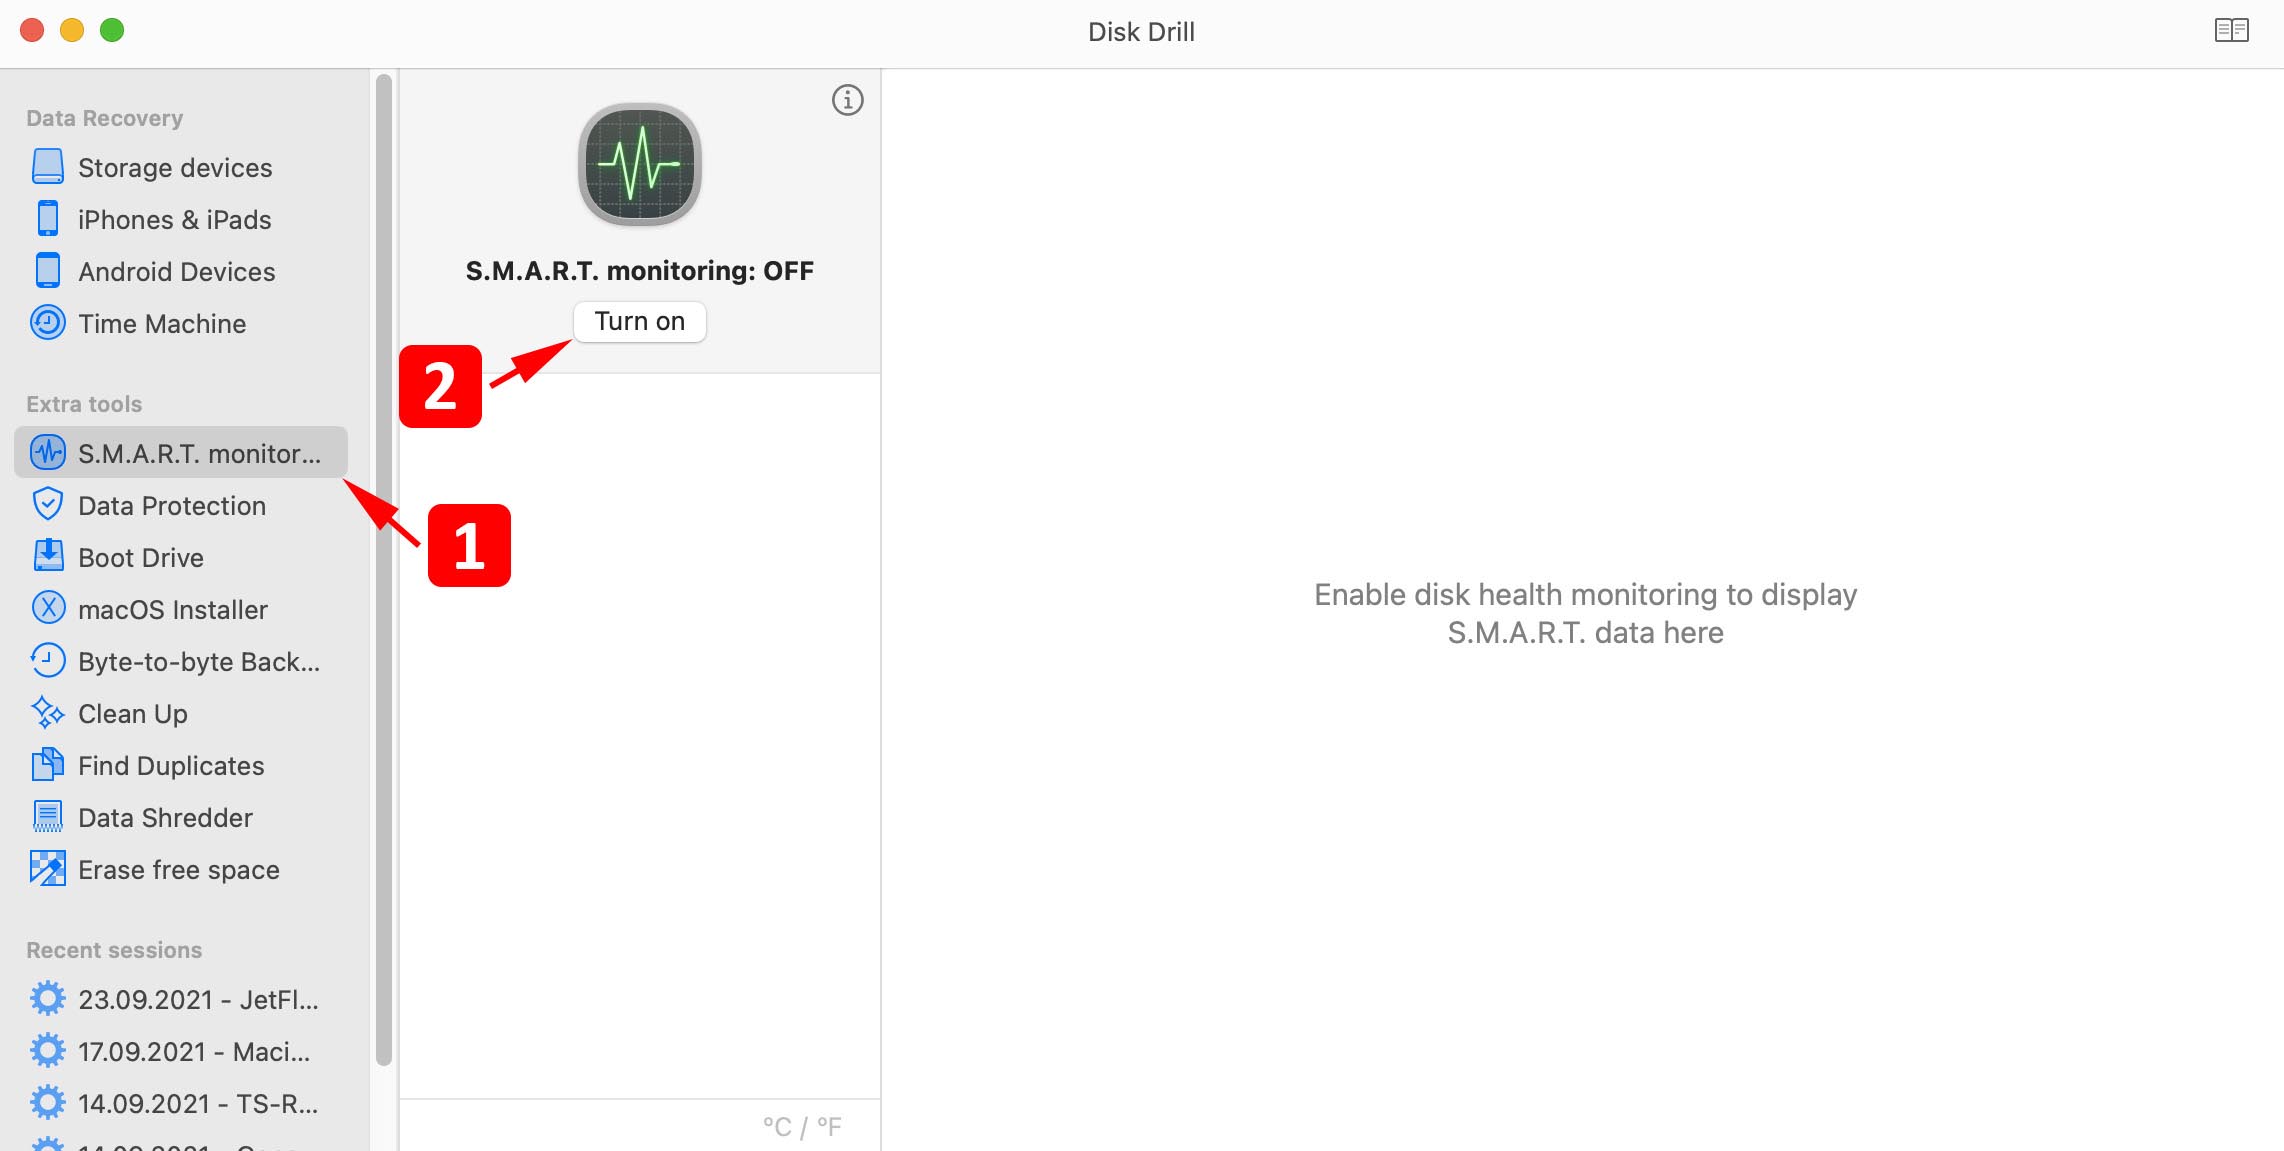
- Select your SSD to display information about it.
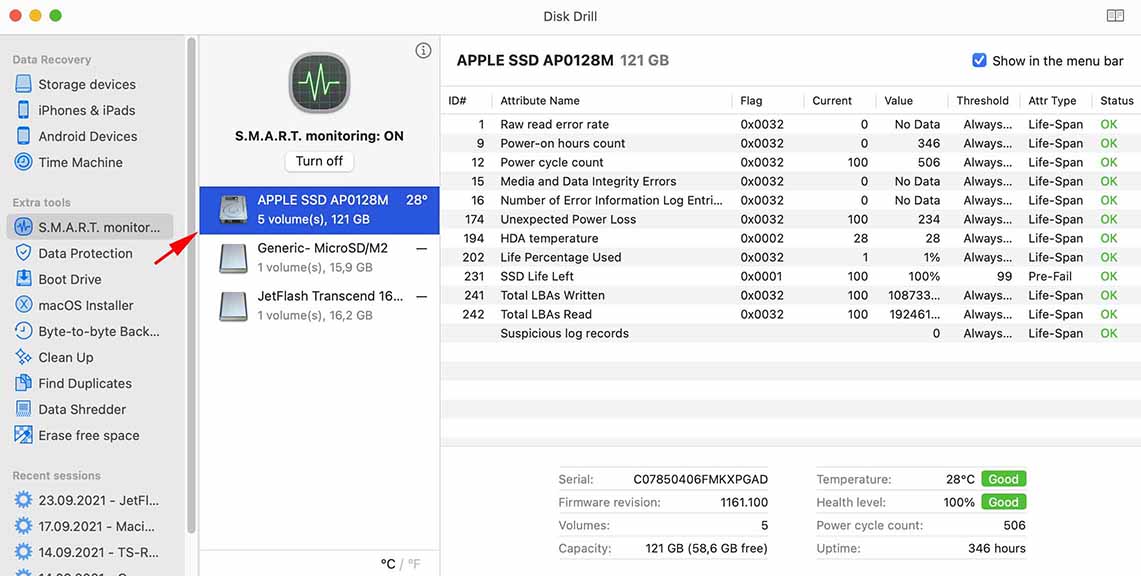
Disk Drill indicates the overall health status of a drive using two different colors:
- Green: means that S.M.A.R.T. status is active and no problems are detected.
- Red: means S.M.A.R.T. is active and bad sectors or other S.M.A.R.T. issues have been detected.
As we’ve already explained, Disk Drill is primarily a data recovery tool, which means that you can use it to get back lost files from a failing SSD that has become unreliable. It also comes with useful backup tools that can help you protect important files from data loss. You can download it for free from its website.


