
Does Disk Utility show an unintialized disk on your Mac? A brand-new drive might appear this way the first time you plug it into your Mac, but if this is happening to a drive that was previously in use – it’s a sign of malfunction.
And when your drive malfunctions, any data saved on it is in the danger zone. So act fast. In this article, we’ll show you how to fix and secure your data from an uninitialized disk on Mac.
Table of Contents
What Does Initialize Disk Mean?
A brand-new, unused disk may sometimes come as uninitialized. That means it’s a completely blank drive with no partitions and no boot information. To initialize a disk on Mac prepares it for usage as either a system drive or a storage device by setting the partition style and identifying boot partitions (if used as a system drive).
Only once you initialize a hard drive on Mac can you format it with a file system like APFS or HFS+ and use it to boot Mac or store your data. We’ll show you how to initialize your drive in the following sections.
What Causes Disks to Go Uninitialized on Mac?
If your drive was previously working and only recently showed up as initialized, your drive is likely malfunctioning in some way. Here are the most common issues that lead to an uninitialized drive:
- Improper connection – If your drive isn’t properly connected to your Mac, your Mac can’t communicate with the disk correctly. Your Mac may be unable to recognize the disk’s file system or partition information, making it appear uninitialized.
- Malware – Malware can corrupt your drive’s file system or partition table, making it unrecognizable to your Mac. In this case, your drive appears uninitialized because your Mac cannot interpret the corrupted data.
- Bad sectors – Like malware, bad sectors can result in the corruption of your drive’s file system or partition information. Your Mac needs to interpret this data to properly communicate with your drive – otherwise, your drive will not show up and work as expected.
- Corrupted partition – Your Mac needs to recognize your drive’s partition information to properly identify and access the partition in the first place. If that data gets corrupted, your drive may show up as uninitialized, not display its partitions properly, etc.
How to Recover Data from Uninitialized Disk
Before attempting to repair your drive, we highly encourage you to secure your data first. This is because the methods used to fix an uninitialized drive may lead to permanent data loss.
You can recover an uninitialized hard drive or even an uninitialized internal disk on Mac by retrieving your data directly from its file system using data recovery software. To demonstrate this process, we’ll be using a tool called Disk Drill.
You can technically use any data recovery software you want, but Disk Drill will also allow us to create an image backup of the drive in the same app. We can then use Disk Drill’s data recovery tool to extract data from the backup file instead of from the drive itself – which greatly increases our chances of recovering 100% of the lost data.
Step 1.Download and install Disk Drill.
Step 2.Connect your drive to your Mac and launch Disk Drill (Finder > Applications).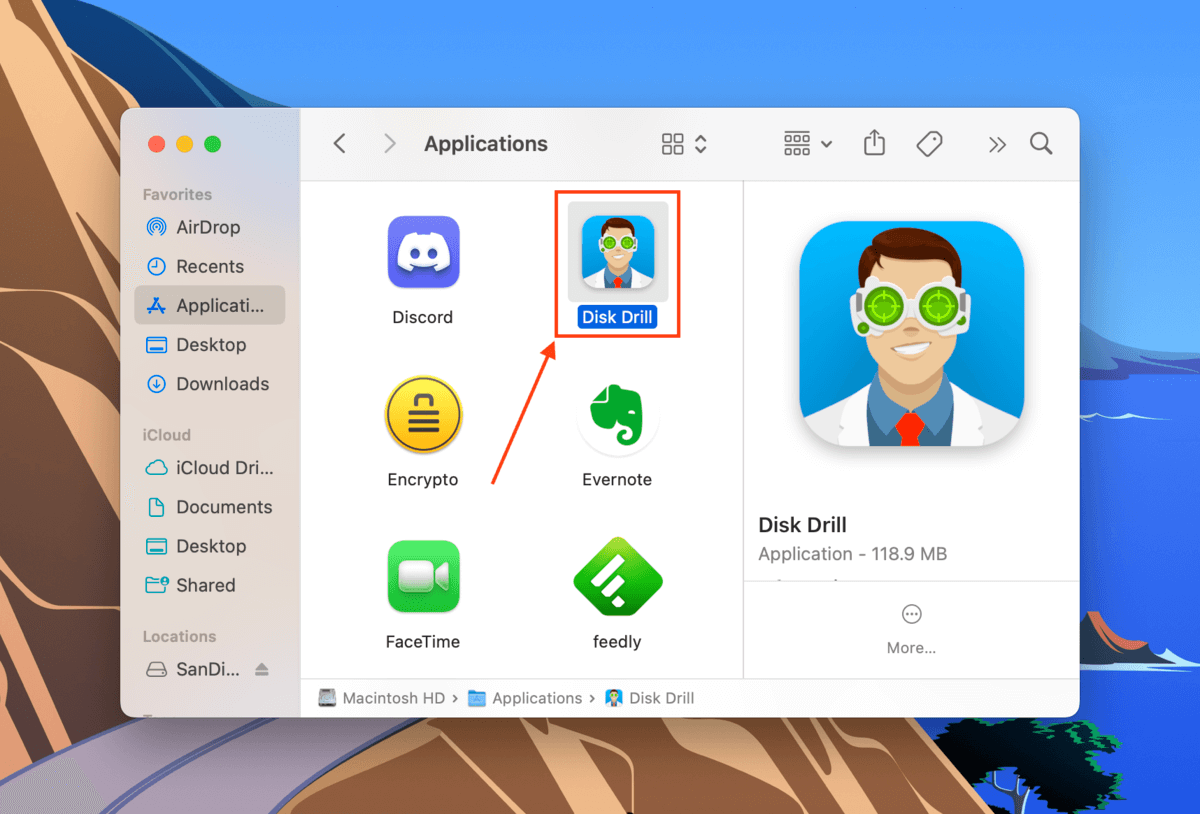
Step 3.Select Byte-to-byte Backup in the left sidebar under the Extra tools section. Click OK let’s do it.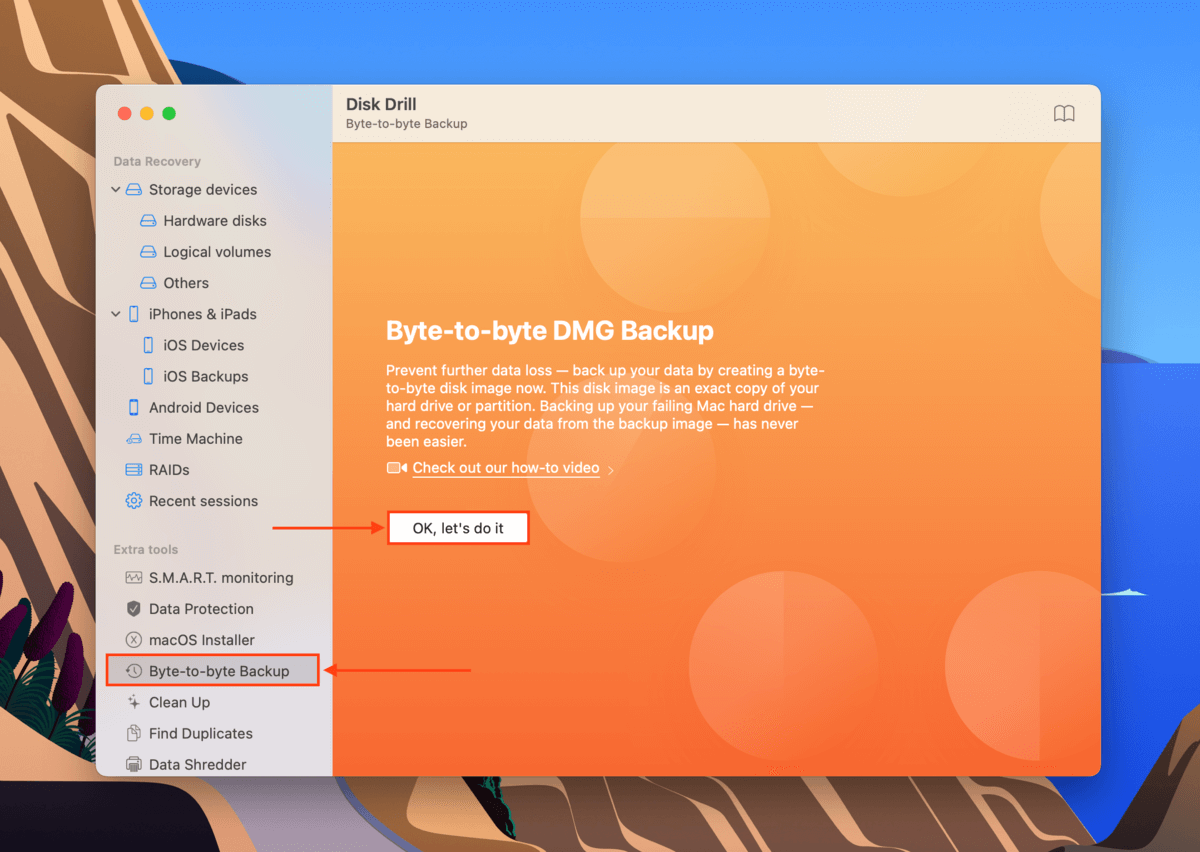
Step 4.Select your drive and click Create backup.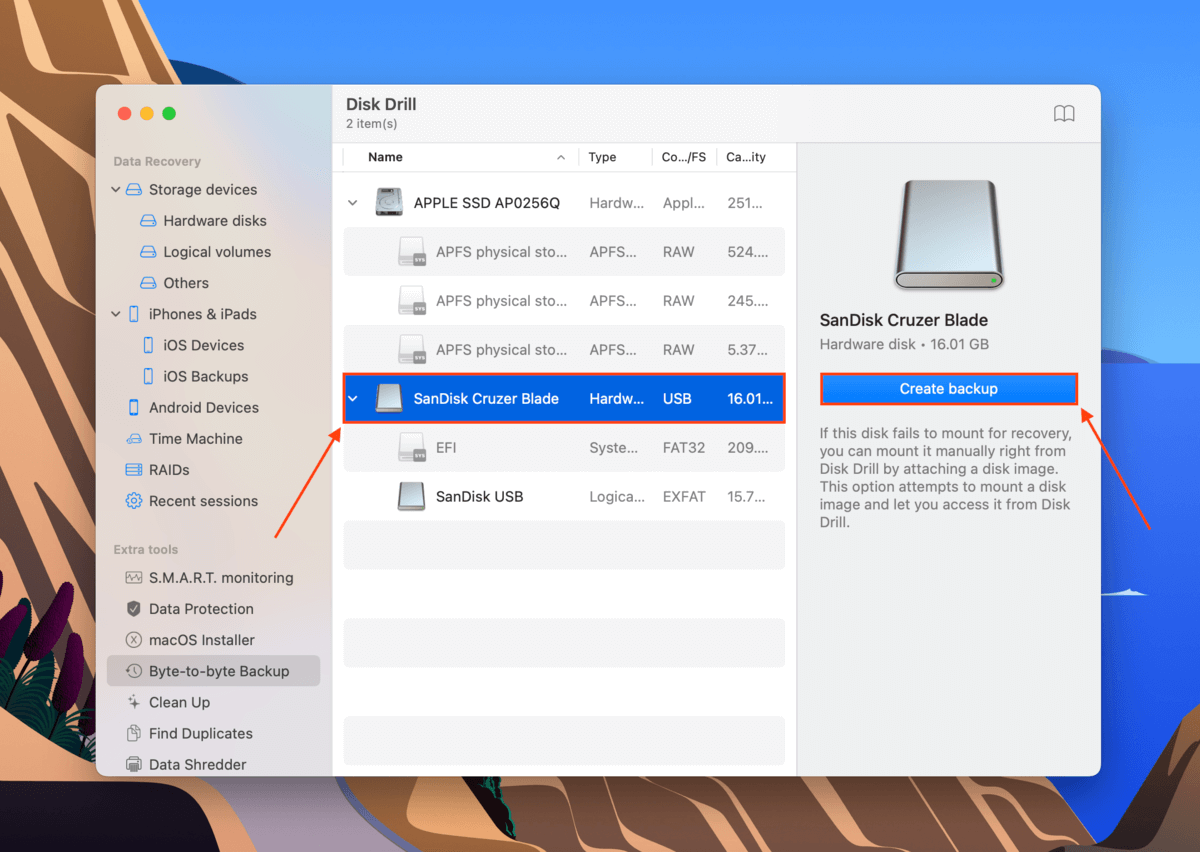
Step 5.In the dialogue box that appears, name your image backup file and save it to a folder on your Mac. Once the backup has been created, return to Disk Drill’s initial window. At this point, you may also safely eject your uninitialized drive.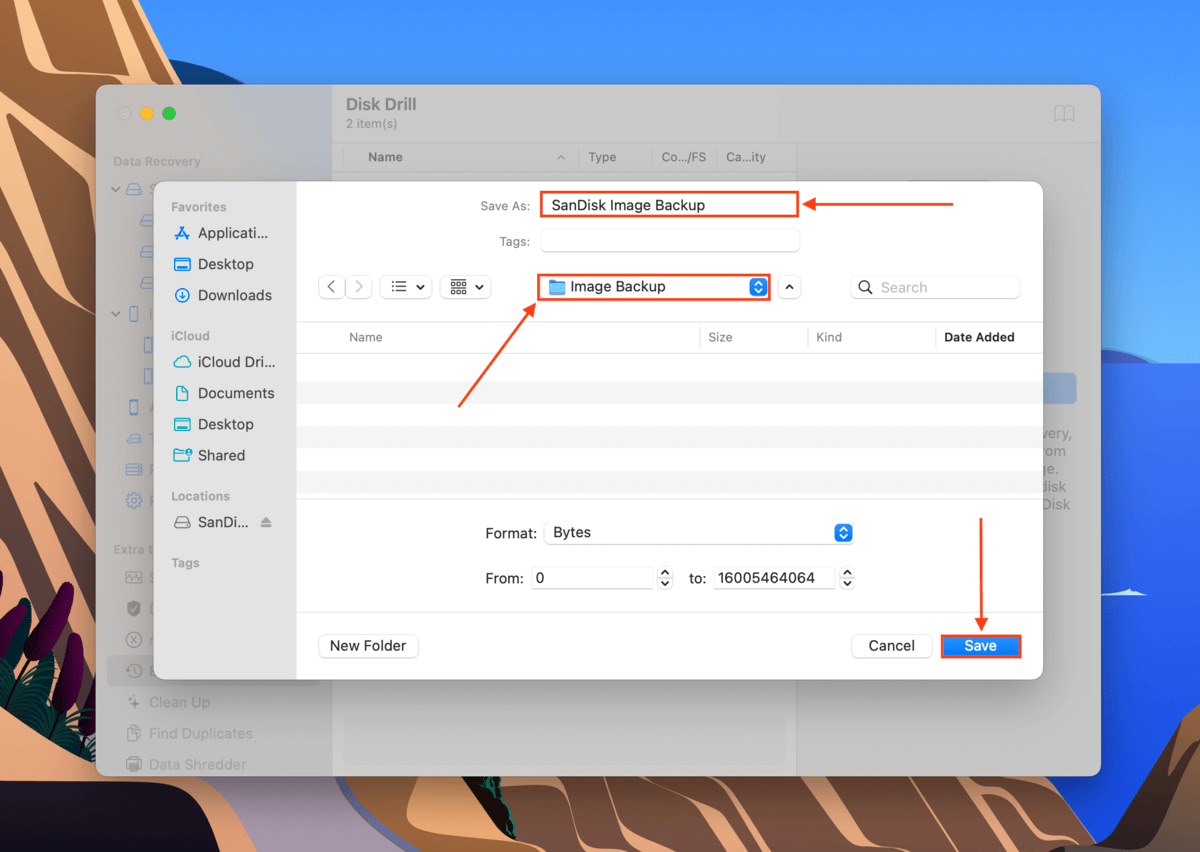
Step 6.Click Storage Devices in the left sidebar under the Data Recovery section and click Attach disk image… near the bottom of the window.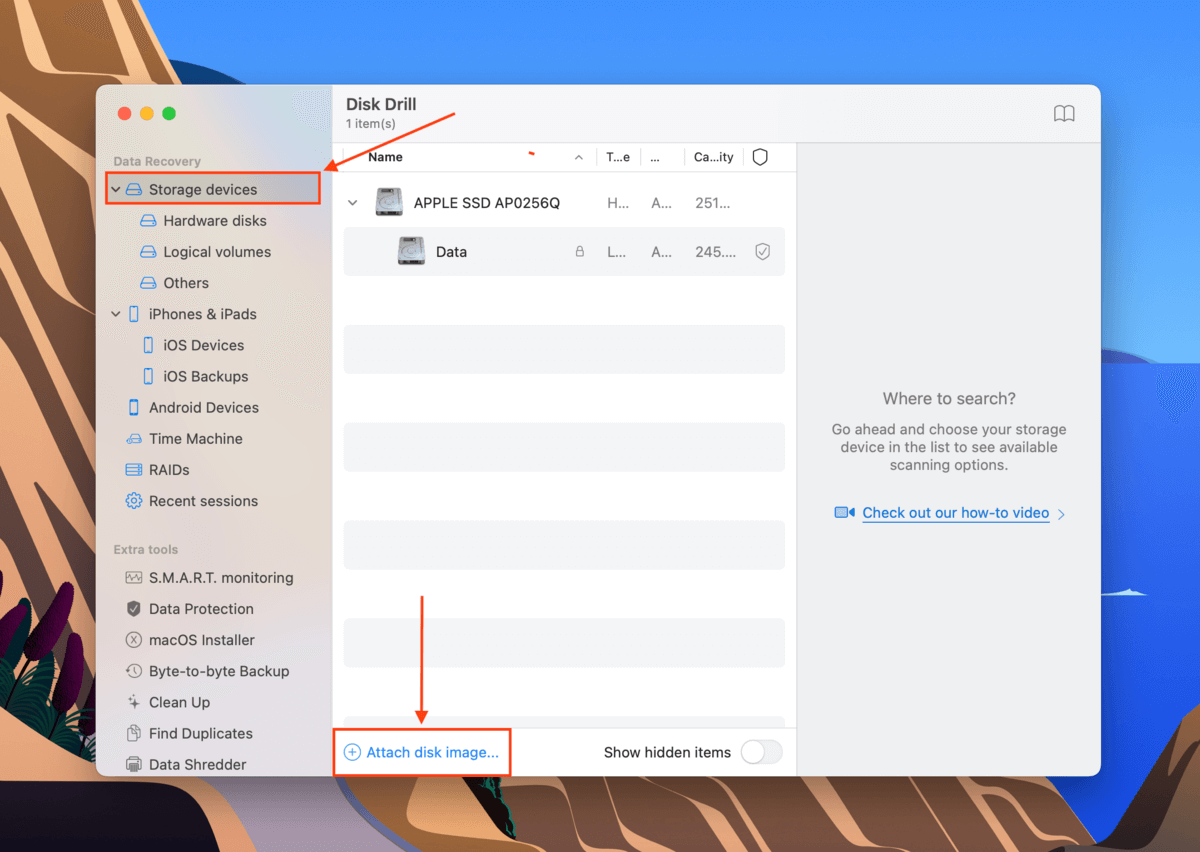
Step 7.Locate your image backup, select it, and click Attach to add it to the list of drives.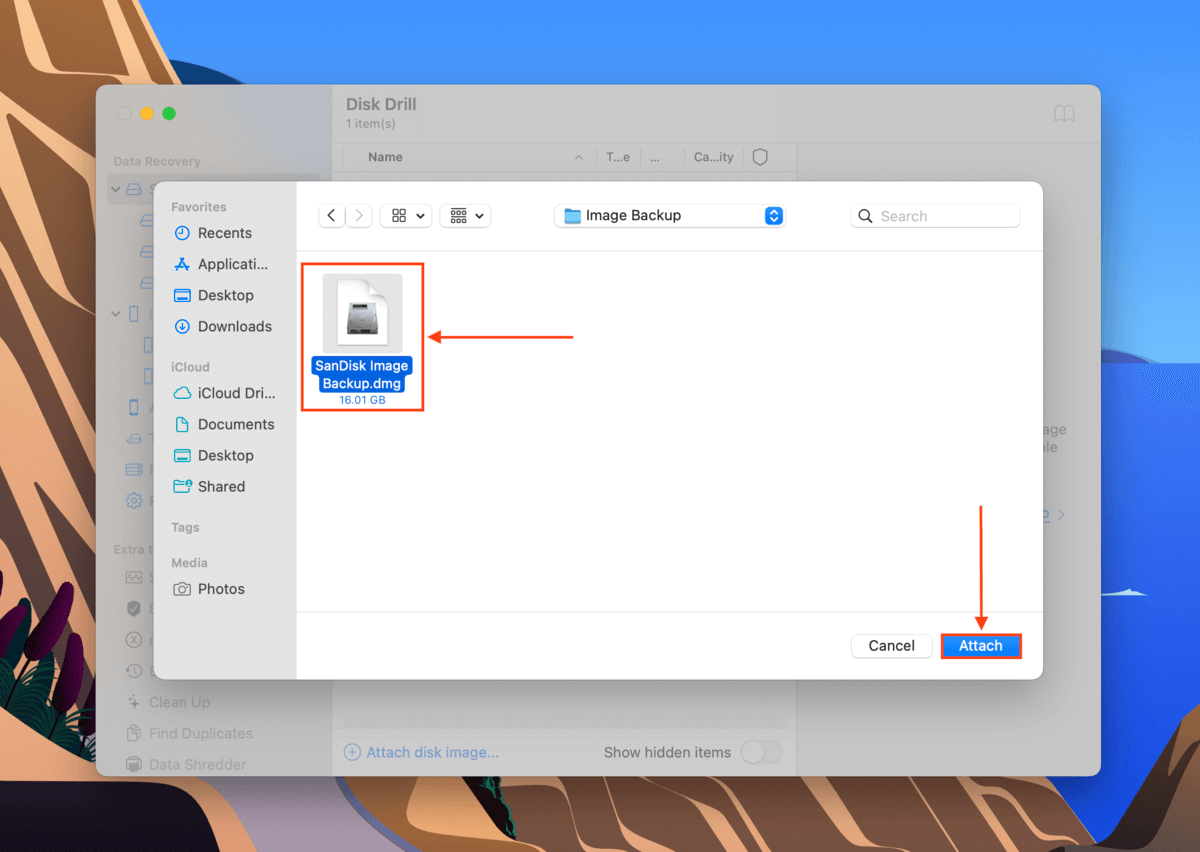
Step 8.Select backup disk image from the list of drives and click Search for lost data.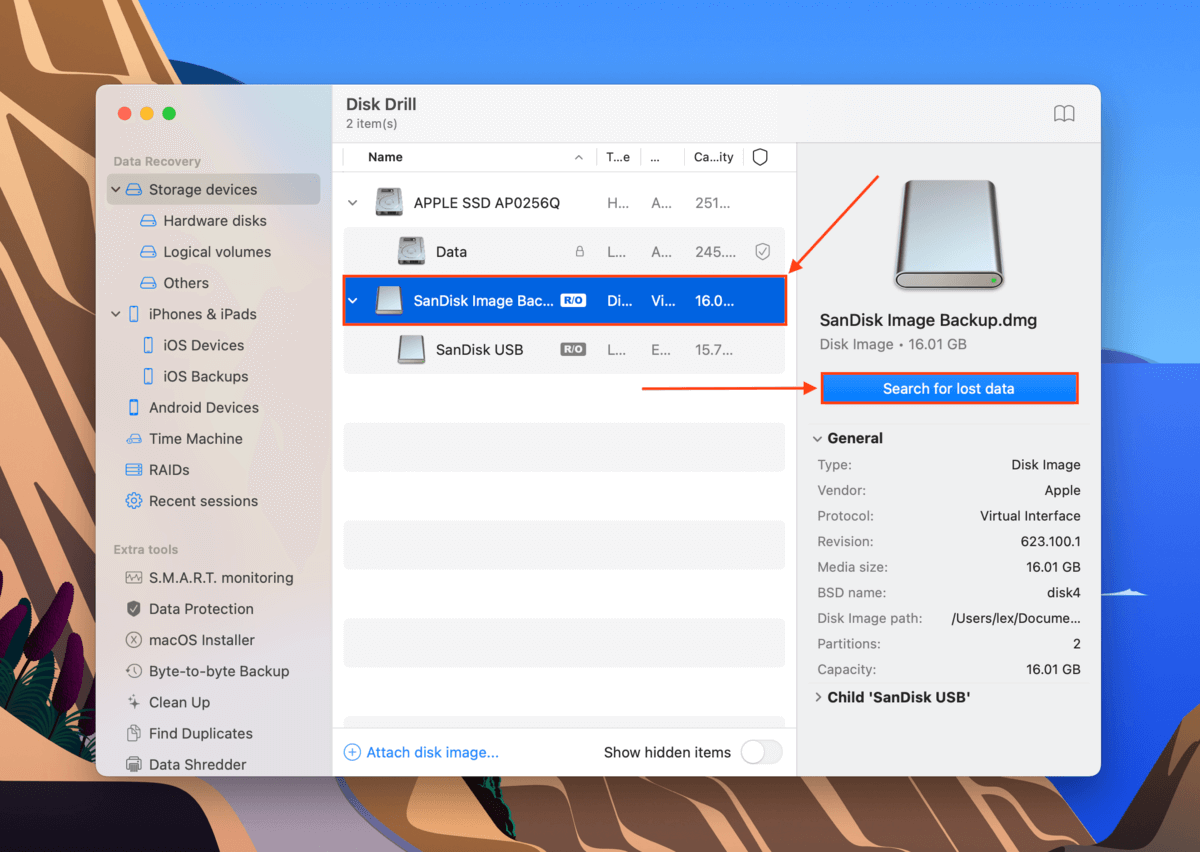
Step 9.Wait for the scan to complete, then click Review found items.
Step 10.In this window, you can use the search for specific files by name or extension or you can filter found files by type. You can also preview files by hovering your mouse pointer beside a file name and clicking the eye button that appears.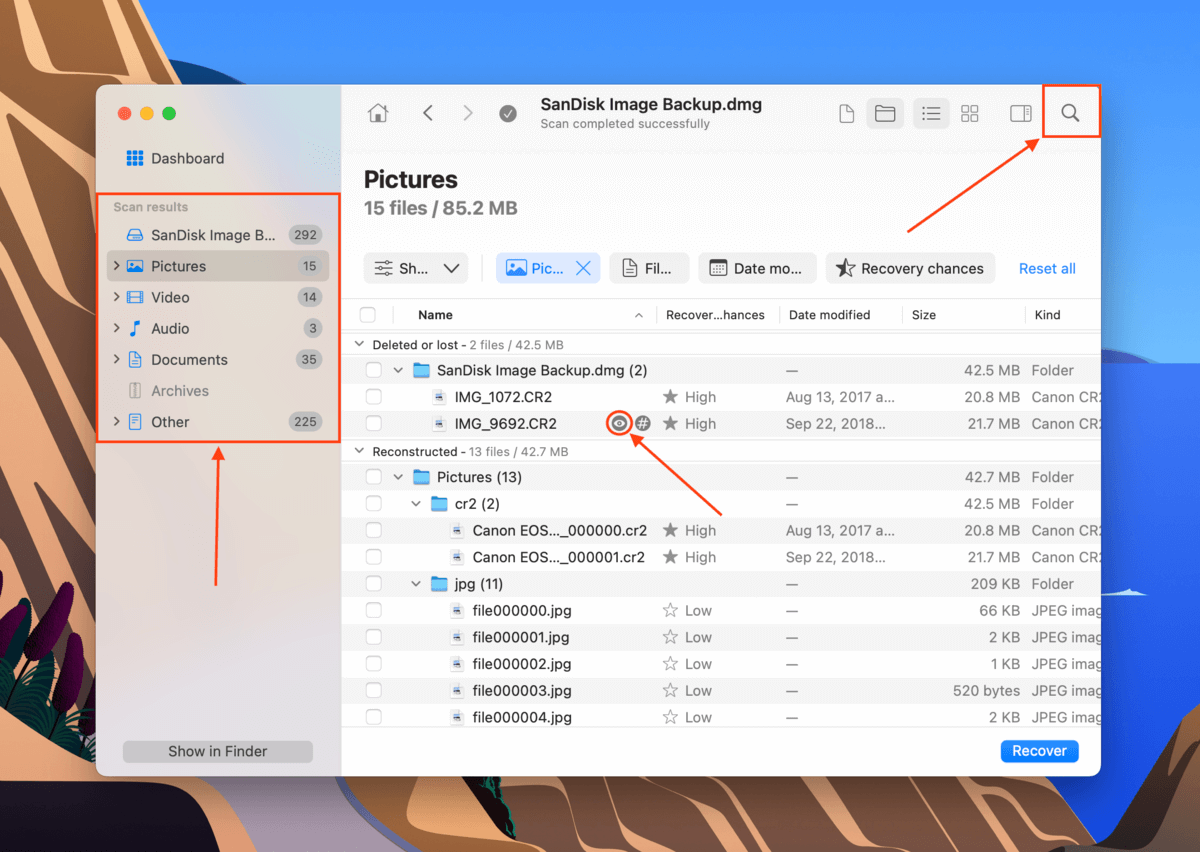
Step 11.Use the boxes in the leftmost column to select the files you want to restore and click Recover. You can restore all your files by not selecting anything and clicking Recover all.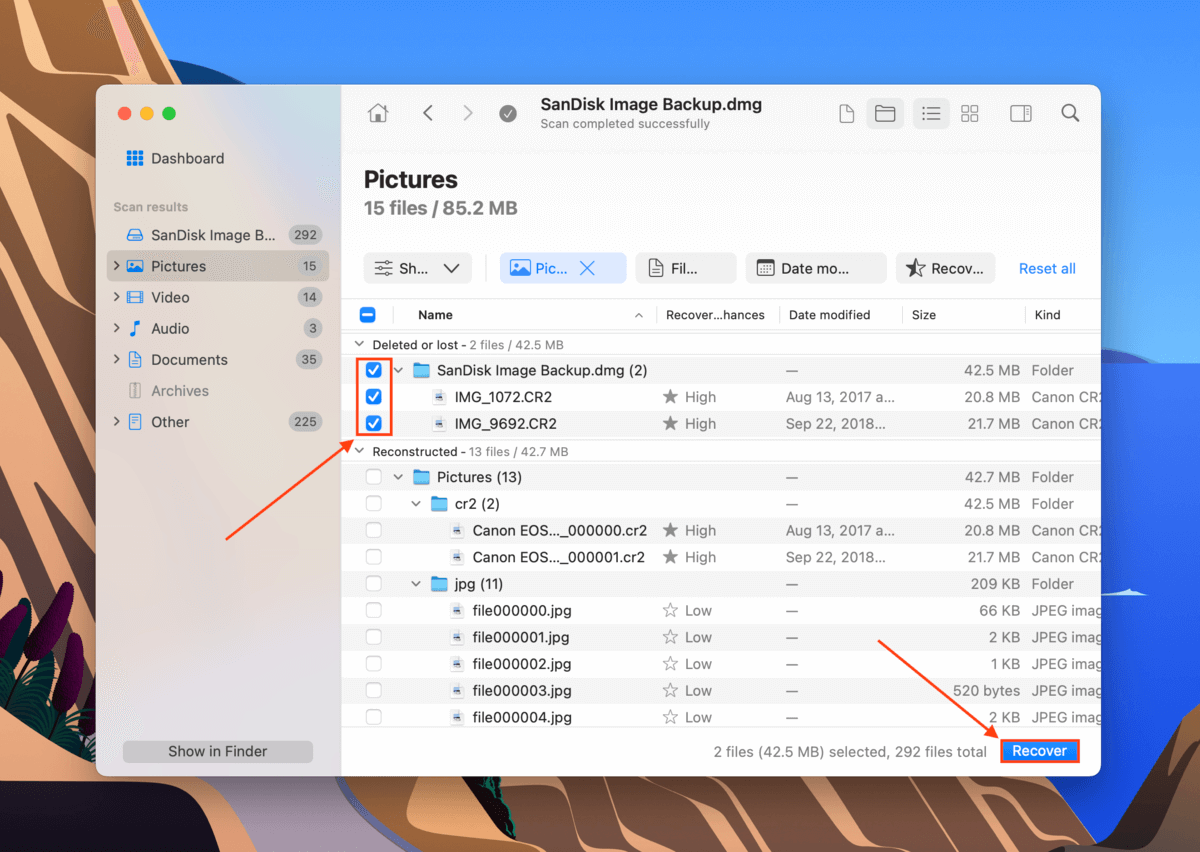
Step 12.Choose a location on your Mac where Disk Drill will save the recovered files. Then, click Next to proceed with the recovery.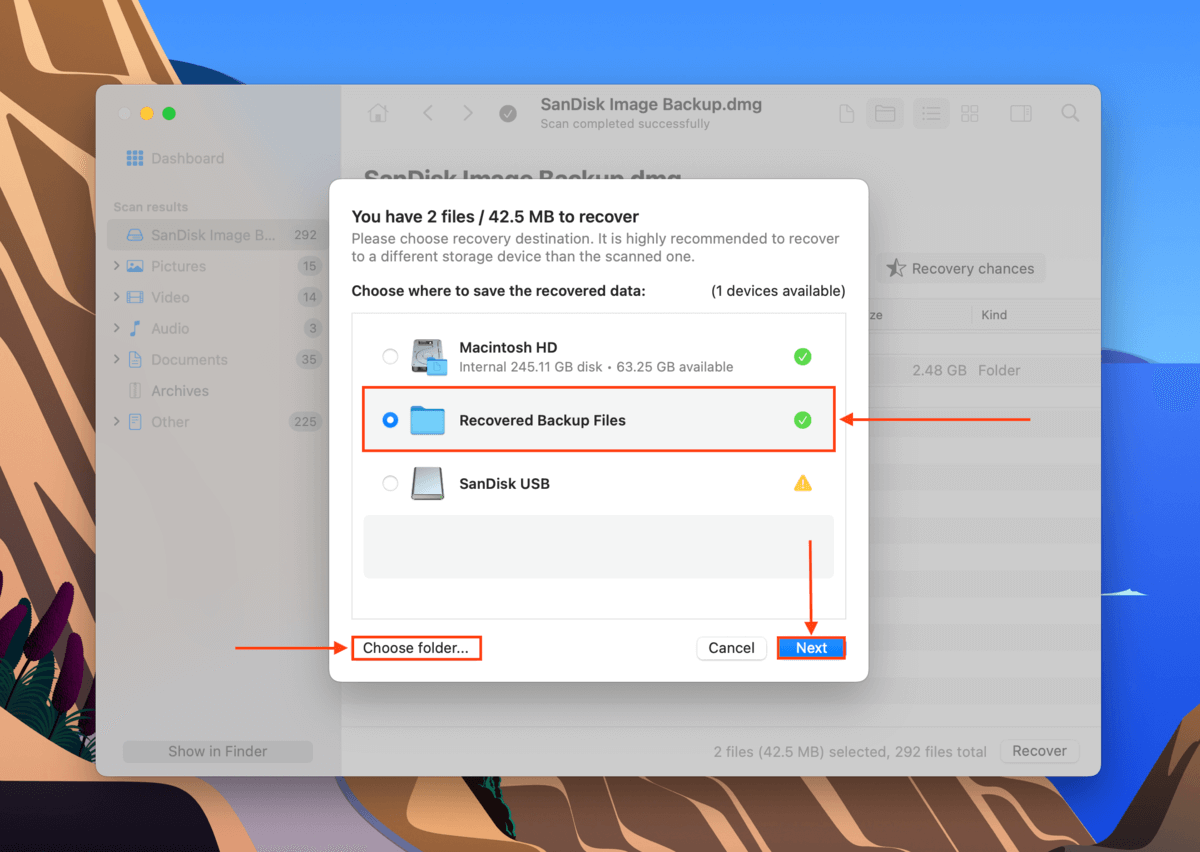
How to Initialize a Hard Drive on Mac
In some scenarios, you only have to connect your uninitialized drive to your Mac – macOS will then prompt you to begin the process with Disk Utility. But if that doesn’t happen, you can do it manually.
There are 2 ways to initialize a hard drive on a Mac: (1) using Disk Utility and (2) using the Terminal app. We’ll show you both methods below.
Method 1: Using Disk Utility
Disk Utility is a native Mac tool that provides disk management tools that can easily be used with its graphical user interface. If Disk Utility can access and interact with your drive, use this method.
To initialize an external hard drive on a Mac is straightforward. Once you connect your uninitialized disk to your computer, macOS should prompt you on its own with a pop-up to begin the process with Disk Utility. However, if it doesn’t, you can launch Disk Utility yourself (Finder > Applications > Utilities).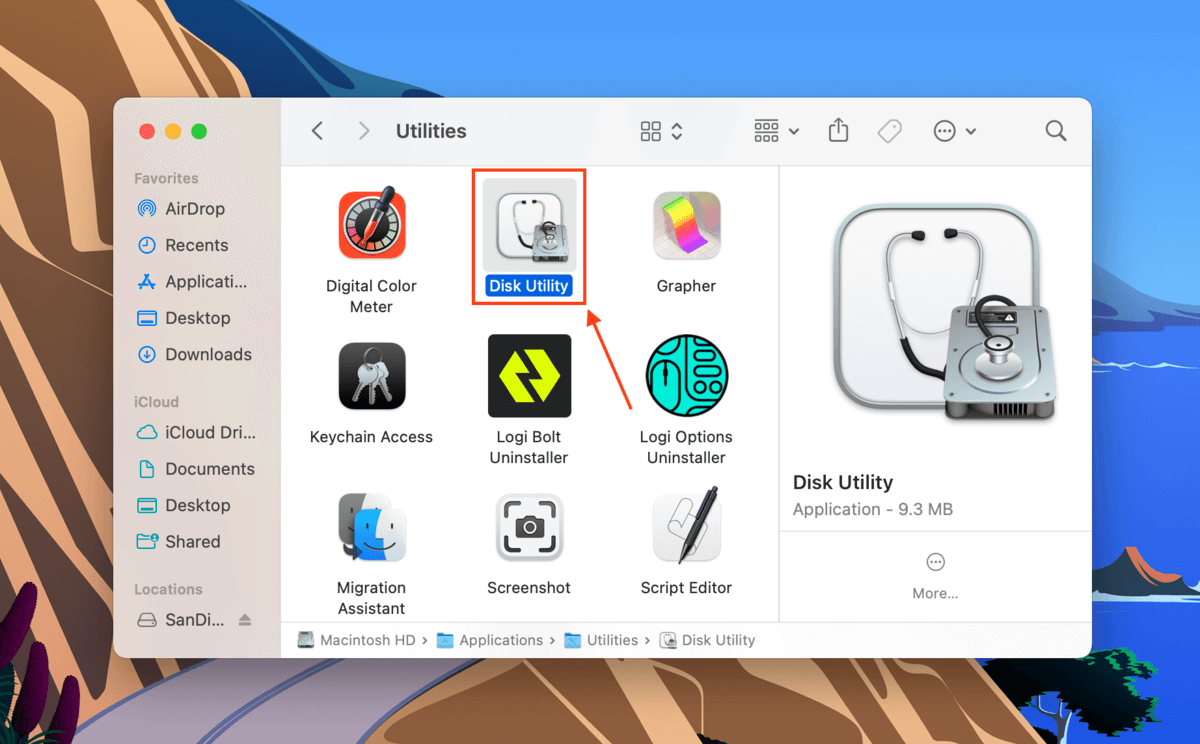
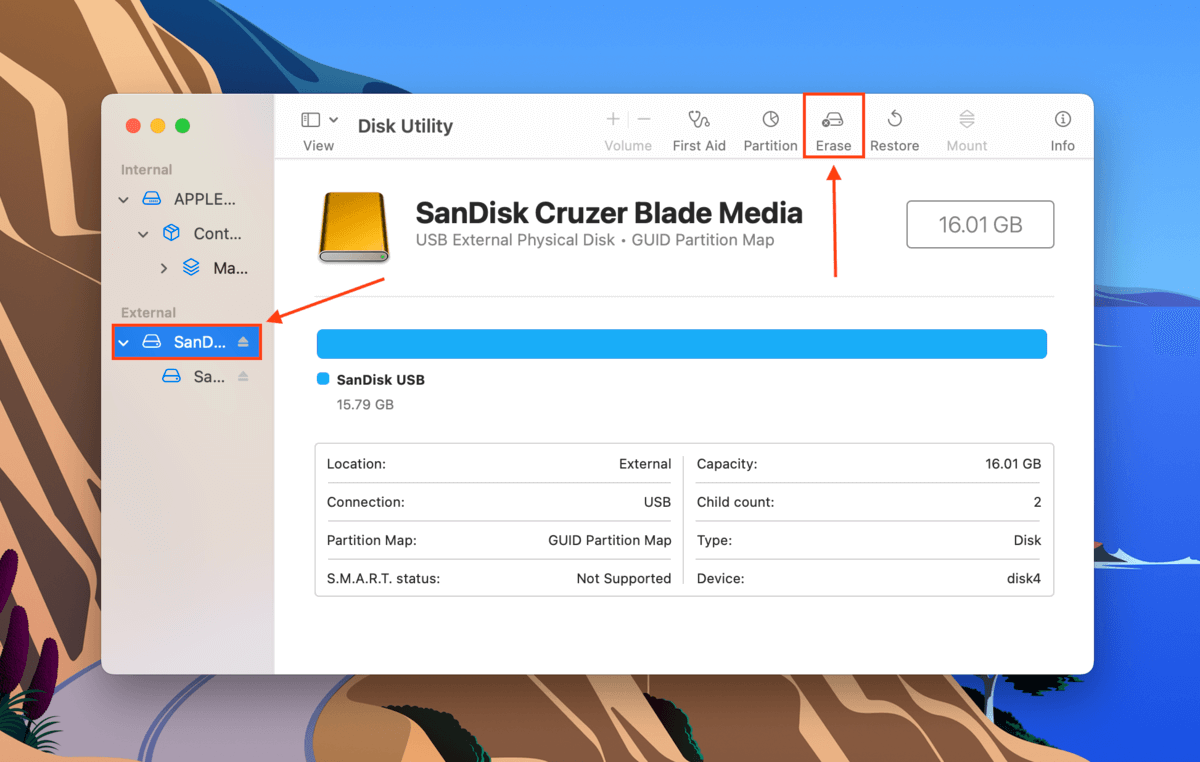
- On the left sidebar, select your drive. Then, click the Erase button at the top of the window – a new window should pop up.
- Name your drive, select its format (we recommend APFS for a Mac system drive and ExFAT for general storage), and select a scheme. Click OK to begin the formatting process.
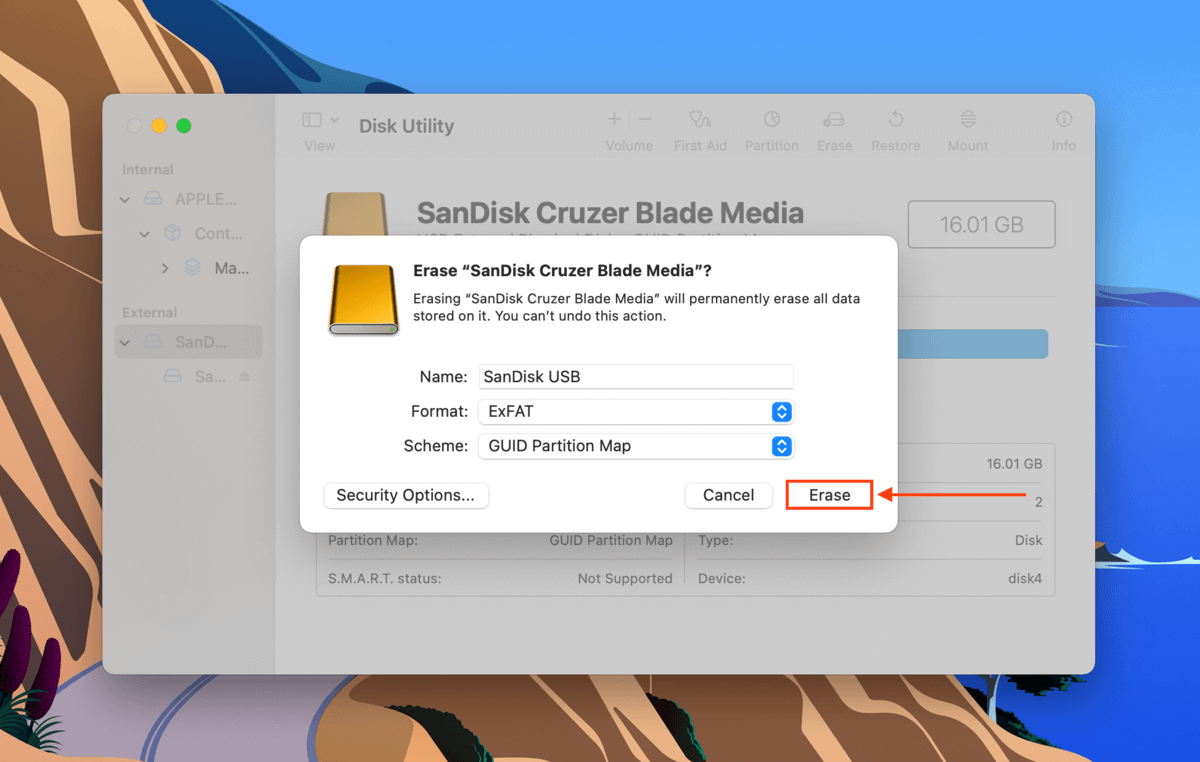
- Once your drive is formatted, initialization is complete. You should be able to use it with your Mac to store data or boot macOS.
Method 2: Using Terminal
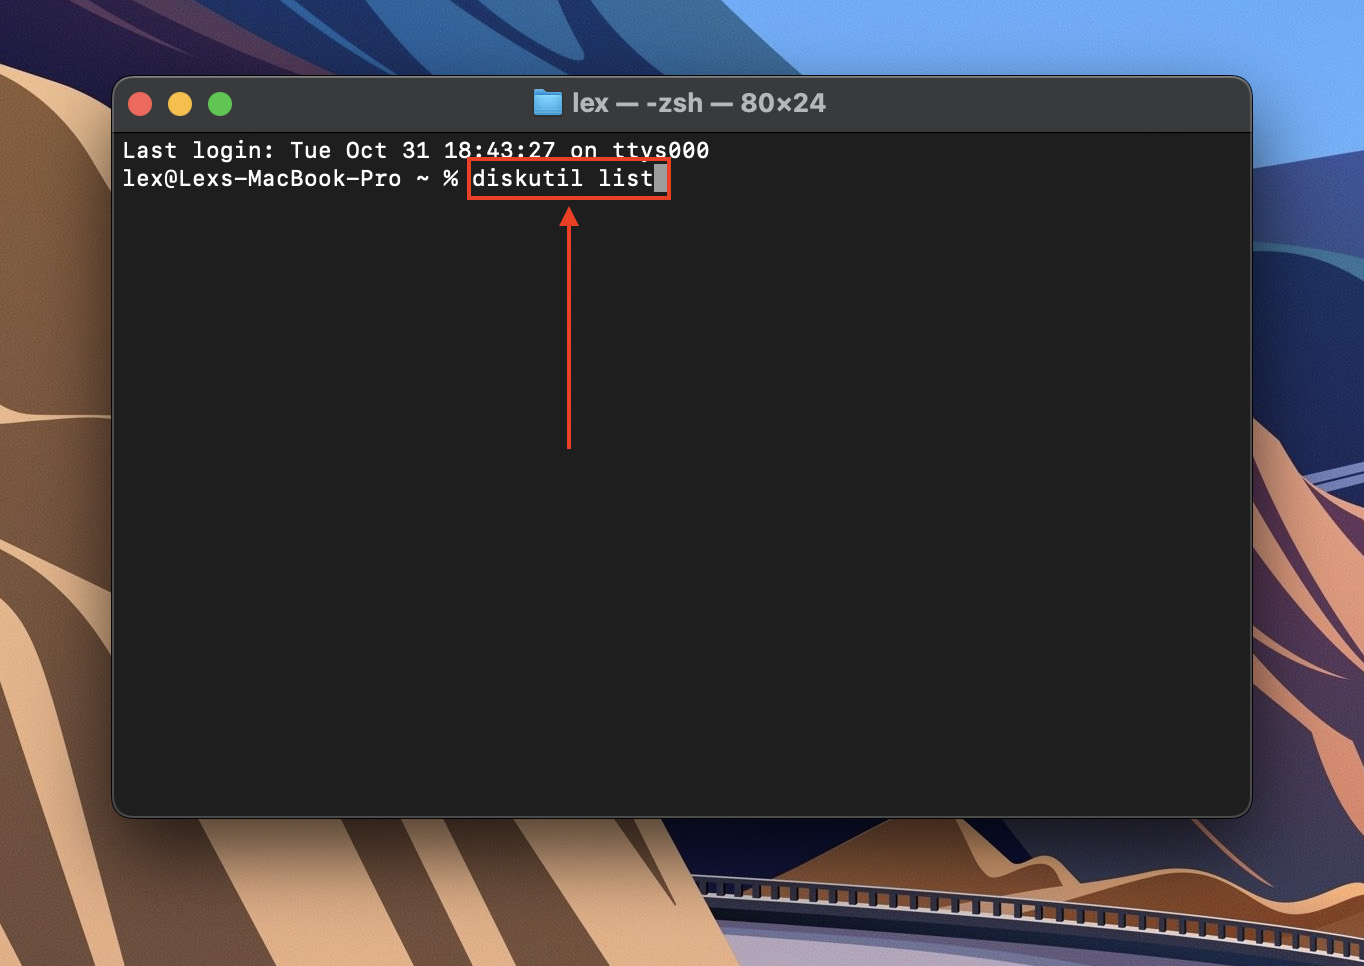
Disk Utility may not always work for uninitialized disks – the Mount, Erase, and First Aid tools would be unavailable. In this situation, the Terminal app can “brute force” initialization.
- Open the Terminal app (Finder > Applications > Utilities). Then, type diskutil list command and hit Return
- Note your drive’s IDENTIFIER (make sure it’s the first entry in the IDENTIFIER column for your drive). Then, type the following command and hit Return:
diskutil eraseDisk JHFS+ MyDrive disk4
Replace JHFS+ with your desired file system, MyDrive with whatever you want to label your drive, and disk4 with your own drive’s IDENTIFIER.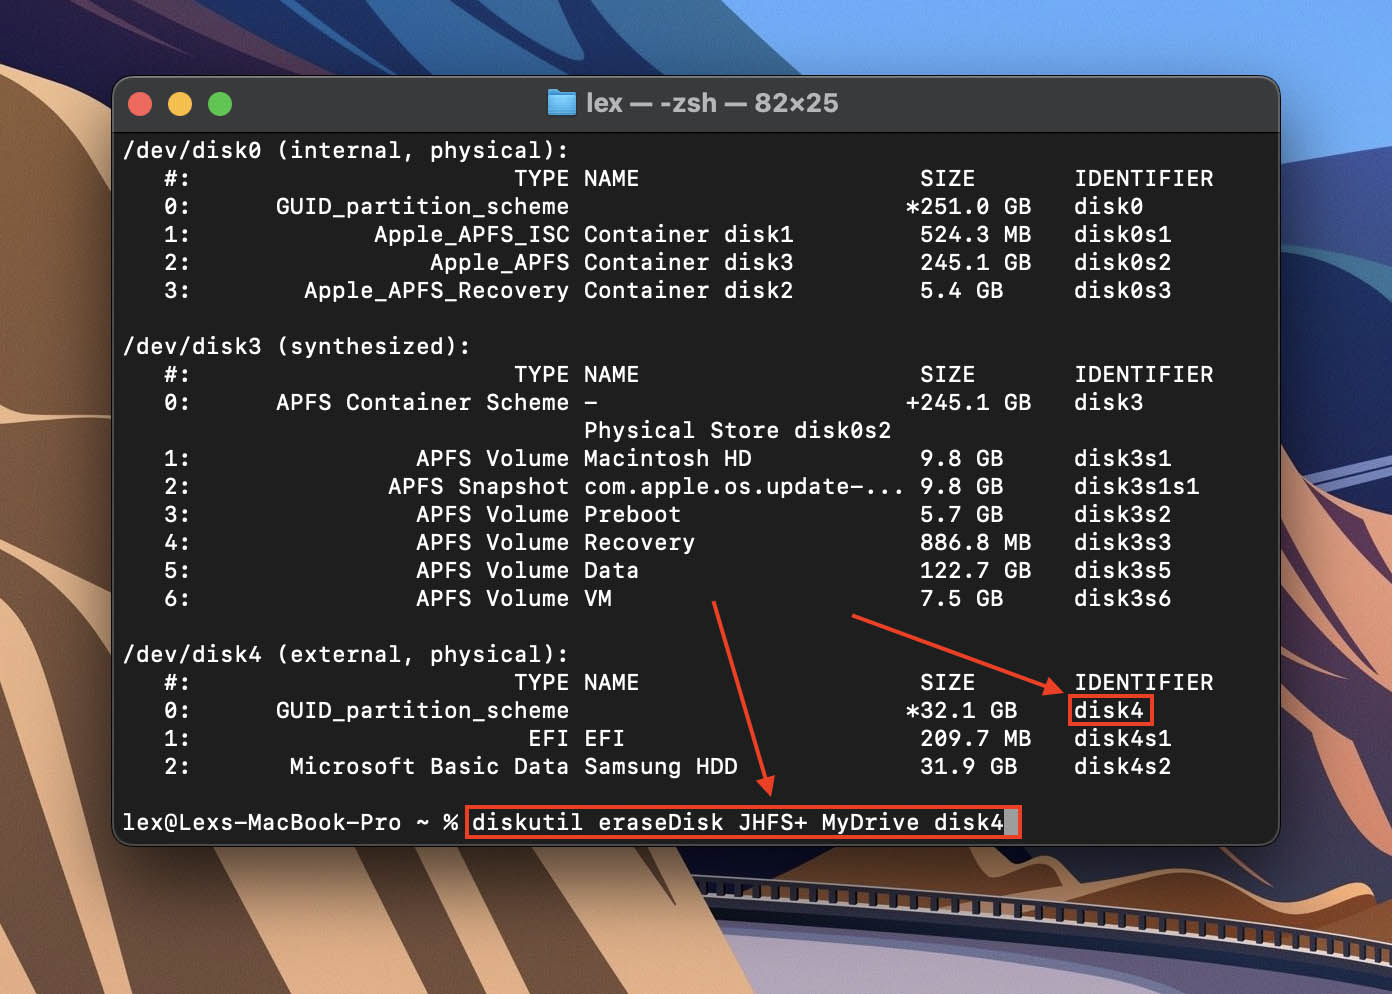
How to Fix Drive that Can’t be Initialized
Suppose you have previously used your drive to boot macOS or as a storage device, yet your external hard drive won’t initialize. In that case, your drive may be infected, corrupted, or otherwise logically damaged. Below, we’ve prepared 5 different fixes you can try on your Mac.
Fix #1: Restart Your Mac and Reconnect Your Hard Drive
Whenever you connect a drive to your Mac, the operating system has to mount it for it to be accessible to the user. However, there are cases where macOS doesn’t have the resources to execute that process. This may result in errors and the drive not showing up on your Mac.
Restarting your Mac can clear up enough resources for it to mount your drive, and reconnecting your drive will restart the process.
Fix #2: Update Your Mac Drivers
If you haven’t updated macOS in a while, the drivers that are responsible for mounting your drive and allowing you to read and write to it may be outdated too. To update your drivers, you need to update macOS.
To update macOS, launch System Preferences > Software Update.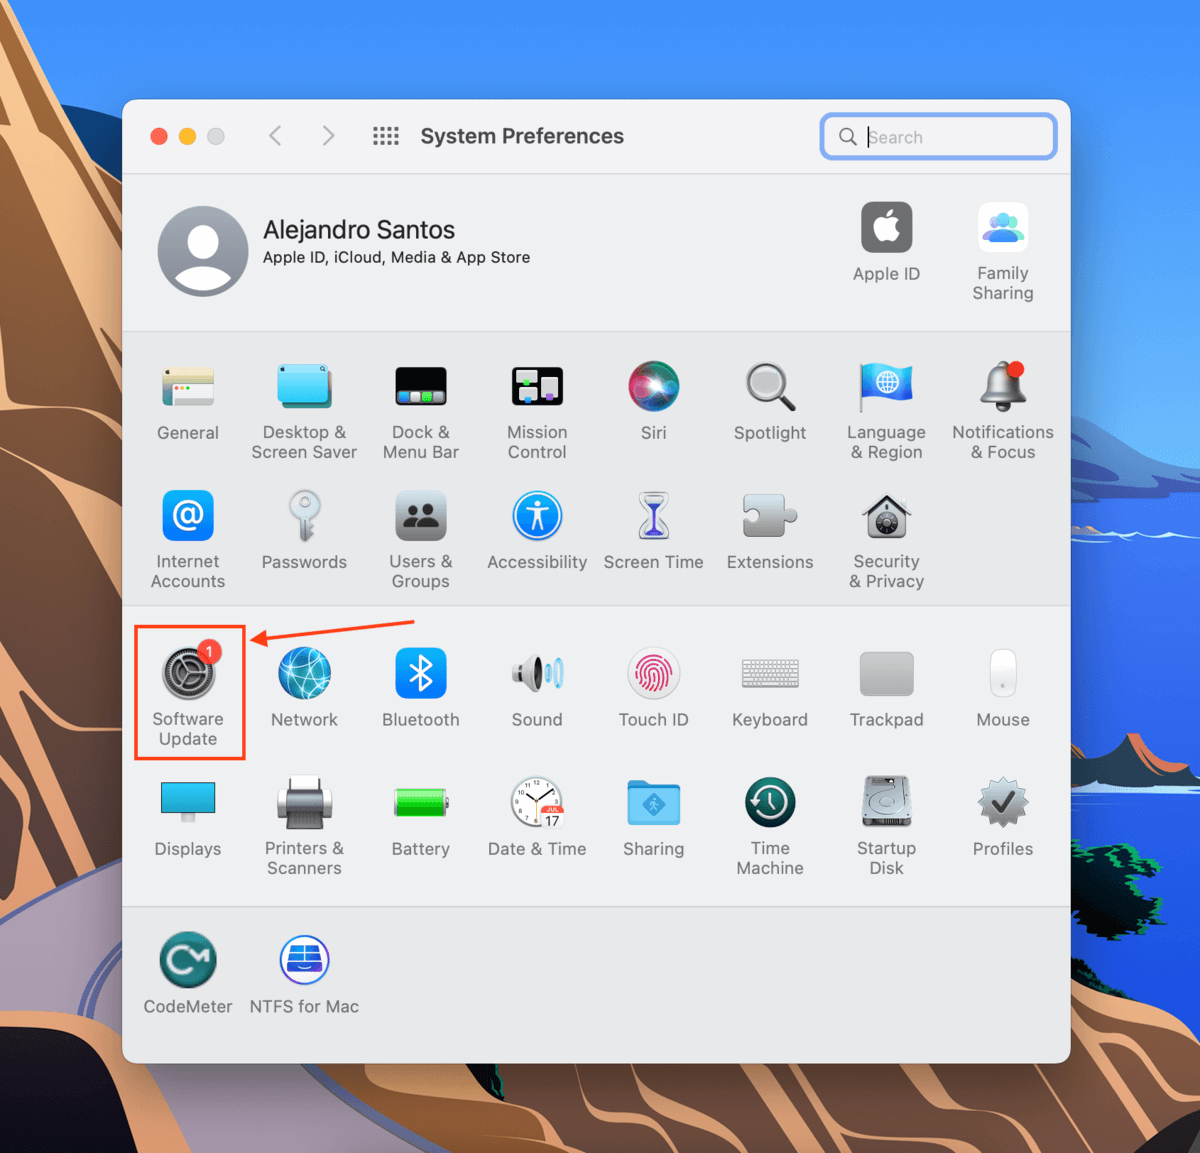
Fix #3: Run First Aid on Your Drive
Your drive may also appear as uninitialized if it’s logically damaged. For example, it was infected by a virus. Or maybe a power outage caused your Mac to shut down while you were transferring data to and from your drive, resulting in corruption.
Fortunately, Disk Utility provides a First Aid tool that automatically diagnoses and repairs disk errors. There’s a limit to what it can do, but it’s a powerful utility.
To use it, launch Disk Utility (Finder > Applications > Utilities) and select your drive from the left sidebar. Then, click the First Aid button at the top of the window.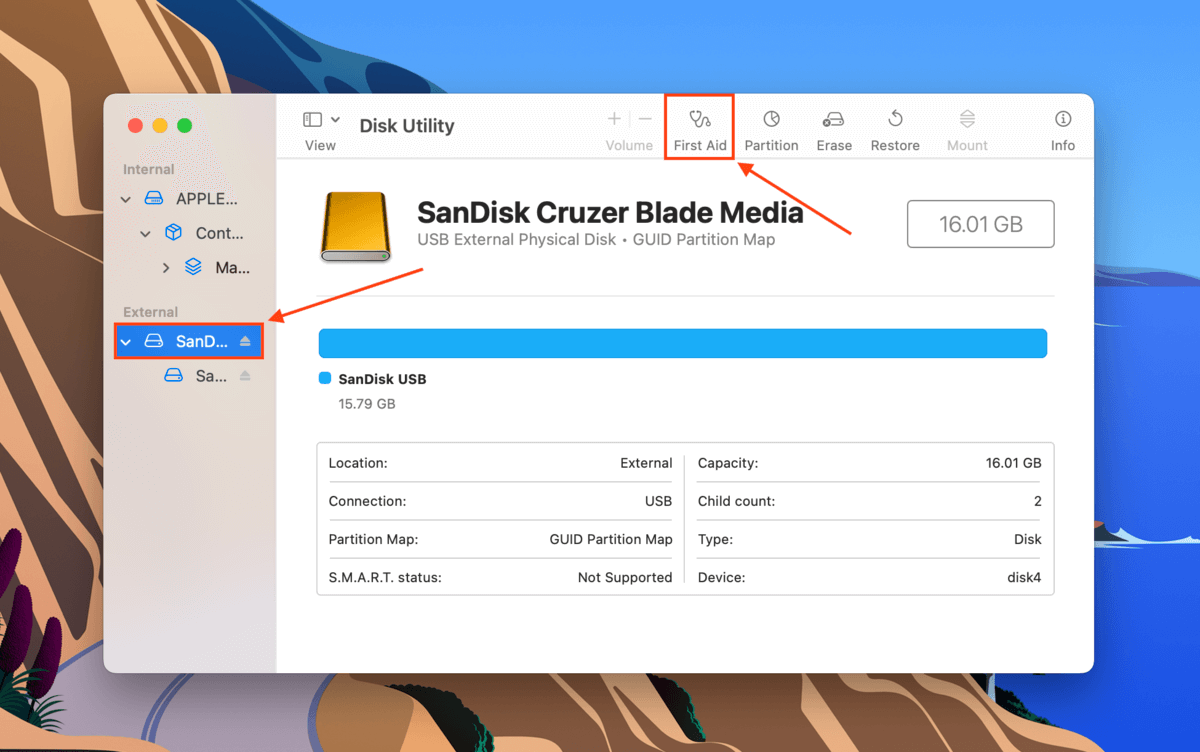
When prompted, confirm, then check if your drive shows up properly in Disk Utility and in Finder.
Fix #4: Reinstall MacOS
Reinstalling macOS might be a good idea for some users, especially those with older Macs. Bugs, viruses, or system tweaks (or a combination of them) may have made your operating system unstable, thus affecting the mounting process.
Fortunately, Macs have a built-in recovery system that allows users to reinstall macOS without any additional software or tools. To access it, you need to boot into macOS Recovery.
For Apple Silicon Macs:
Step 1. Shut down your Mac.
Step 2.Press and hold the power button until you see “Loading startup options” onscreen.
Step 3.Select Options and click Continue, then follow the reinstallation wizard.
For Intel-based Macs:
Step 1.Shut down your Mac.
Step 2.Press the power button, then press and hold (Command + R) until you see the recovery system window.
Step 3.Select Reinstall and click Continue, then follow the reinstallation wizard.
Fix #5: Format Your Drive
If none of the above fixes work, your last resort may be to format your drive. Formatting will erase all the data still present on the disk, along with any bugs and viruses hiding in its file system. Fortunately, Disk Utility has a tool for this too.
To use Disk Utility to format your drive, follow the instructions in the How to Initialize a Hard Drive on Mac section of this article.
Conclusion
Unfortunately, an uninitialized disk due to malfunction is common. Even if you maintain your drives properly, factors out of the user’s control (such as data decay or power outages) can cause it at any time. We encourage you to routinely back up your data using Time Machine and an image backup tool like Disk Drill.
FAQ
To fix an uninitialized disk on Mac, try the following methods:
- Restart the Mac and reconnect your drive.
- Update macOS.
- Use Disk Utility’s First Aid tool.
- Reinstall macOS.
- Format your drive.
Initializing a hard drive prepares it to be used by macOS by setting partition styles and boot information. To fully initialize a drive, it also needs to be formatted – which erases any data still present on the disk.


