
SanDisk is one of the go-to choices when it comes to portable flash memory like pen drives and SD cards. However, no storage device is immune from data loss. Accidental deletion, virus infections, improper usage, and physical damage can lead to your files being deleted from a SanDisk SD card or flash drive.
Luckily, you can get this data back if you act quickly and use the right tools. Use our in-depth guide below to know all about how you can recover data from SanDisk SD cards and flash drives on a Mac.
Table of Contents
How to Mount Sandisk Device if Mac Doesn’t See It
Most of the time, your SD card or flash drive should connect with no issues. There can be reasons though that you aren’t able to see it.
Let’s talk about how to troubleshoot if your SD card won’t mount:
- Restart Your Mac. Restarting your Mac can help with connectivity issues among many other things and it’s easy to do.
- Check the Port. If you can’t get your SD card or flash drive to connect, try using another port on your computer if you can. Another thing that I would recommend would be to use a different Mac and see if that makes a difference. You should also visually inspect both the SD card or flash drive for debris and clean it out with some compressed air.
- Try Another Device. If your external device won’t connect, try using another one that you own as it could be the storage device itself. Hopefully, this isn’t the case, as that will make data recovery harder, but it’s a good way to figure out what’s going on.
If your SD card is connecting, let’s take a look at Sandisk data recovery on Mac.
Can Data from a SanDisk Device Be Recovered?
Yes. Lost data can usually be recovered if you act quickly and use a good data recovery program. But, there are factors that can affect the chances of data recovery. The primary factor is—the reason for data loss.
If the files went missing due to accidental deletion, malware attacks, and accidental Quick Formatting, you can easily get those files back using data recovery software. However, the extent of data recovery reduces as you write new files to the drive after the files were deleted.
Data loss due to physical damage, or a Full Format is substantially more difficult to undo, and in numerous instances, impossible. Here, you should avoid using DIY data recovery methods as it can further damage the drive. Instead, contact a professional data recovery service in your area.
How to Recover Data from Sandisk Devices
There are several ways to get back deleted data from SanDisk devices. The method you use will primarily depend on what caused the data loss. If it was a simple case of accidental deletion, you’ll likely find your files in the macOS Bin. If not, you can always use specialized data recovery tools to successfully recover your files.
We’ll take a look at the possible routes to SanDisk data recovery in the sections below:
Method 1: Recover Files From the Trash
The first place you should look for files deleted from your SanDisk device, is the macOS Bin, or Trash. Unless you used the Option + Command + Delete shortcut to delete your files, they will be moved to the Trash, where they remain until you manually restore them or empty the Trash.
Here’s how to restore deleted files from a SanDisk flash drive or SD card, using the Mac Bin/Trash:
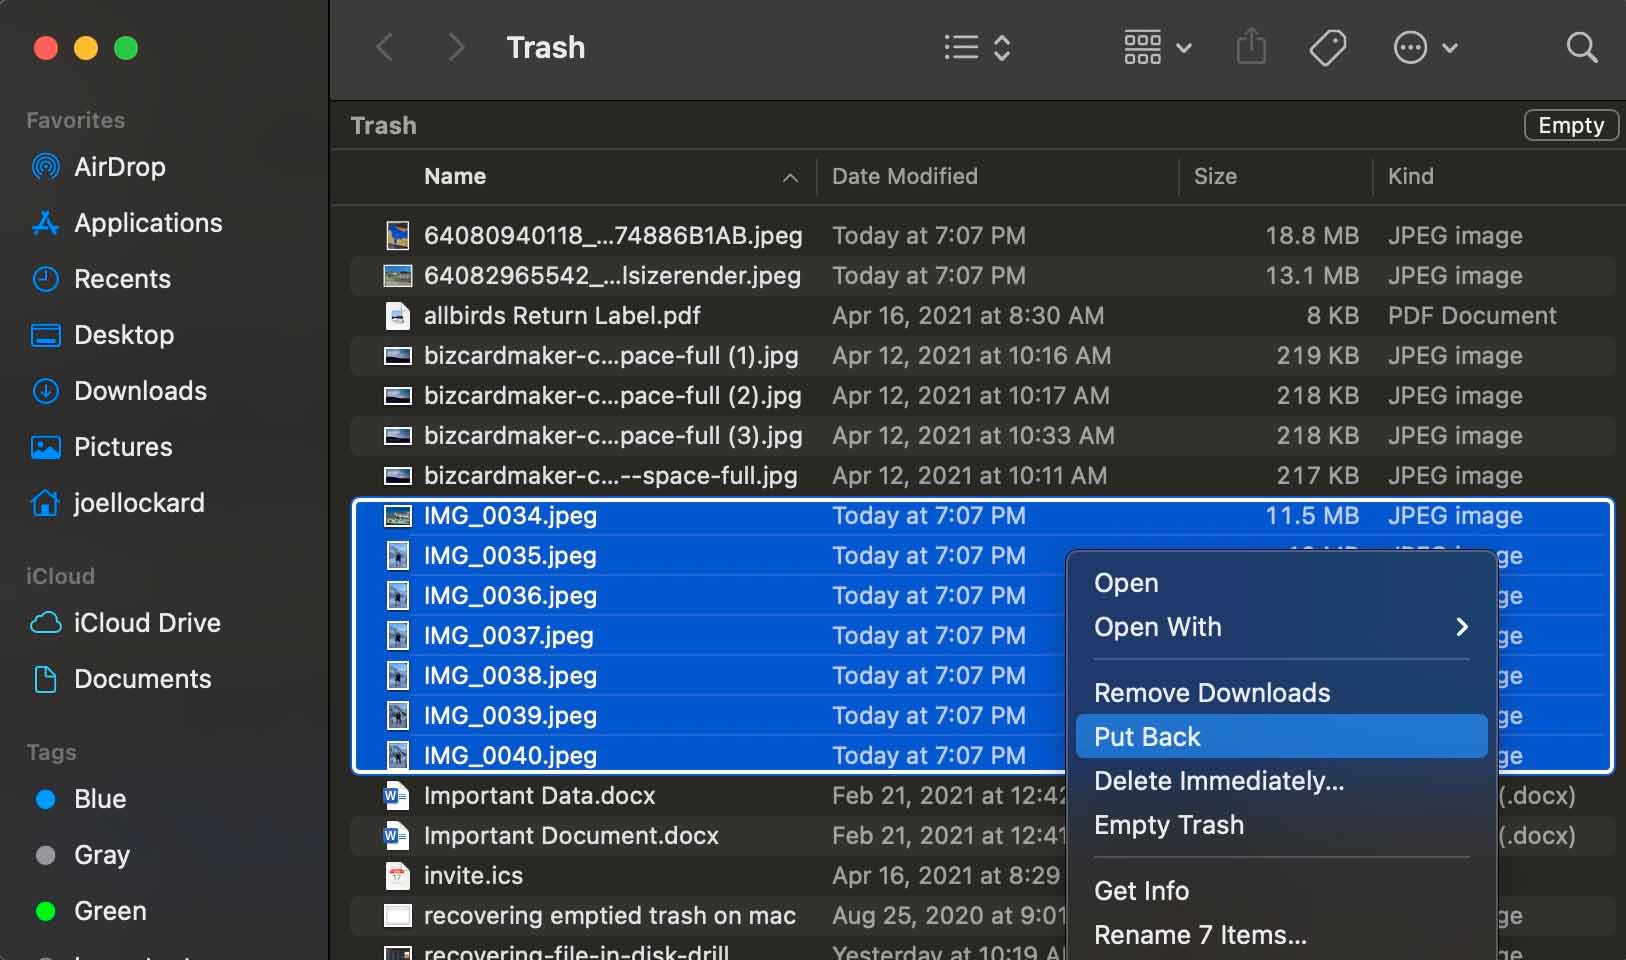
Step 1. Launch the Trash to view the contents of it.
Step 2. Look for the data that you want to recover from your SD card or flash drive. I am recovering some pictures in this example, but there are many other types of data that you can recover. When you find the data, click on it and choose Put Back.
If you can’t find the data in your Trash, then let’s take a look at how to use the Sandisk Data Recovery Tool to get the data back.
Method 2: Recover Data Using Sandisk Data Recovery Tool
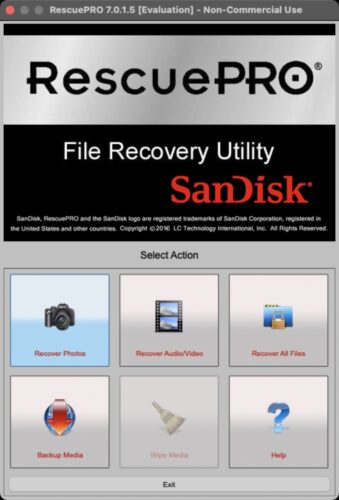
SanDisk has a dedicated data recovery tool, SanDisk RescuePRO, that you can use to recover permanently deleted data from SanDisk flash drives and SD cards. While it’s not the most user-friendly data recovery tool out there, it does get the job done in most cases of data loss.
Step 1. Download and install RescuePro. I am using the Mac version in this article but there is also a PC version available as well.
Step 2. After you have launched the app, you will be greeted by the dashboard where you will have multiple options. In this example, I am going to recover photos as that is most likely what people will want to recover.
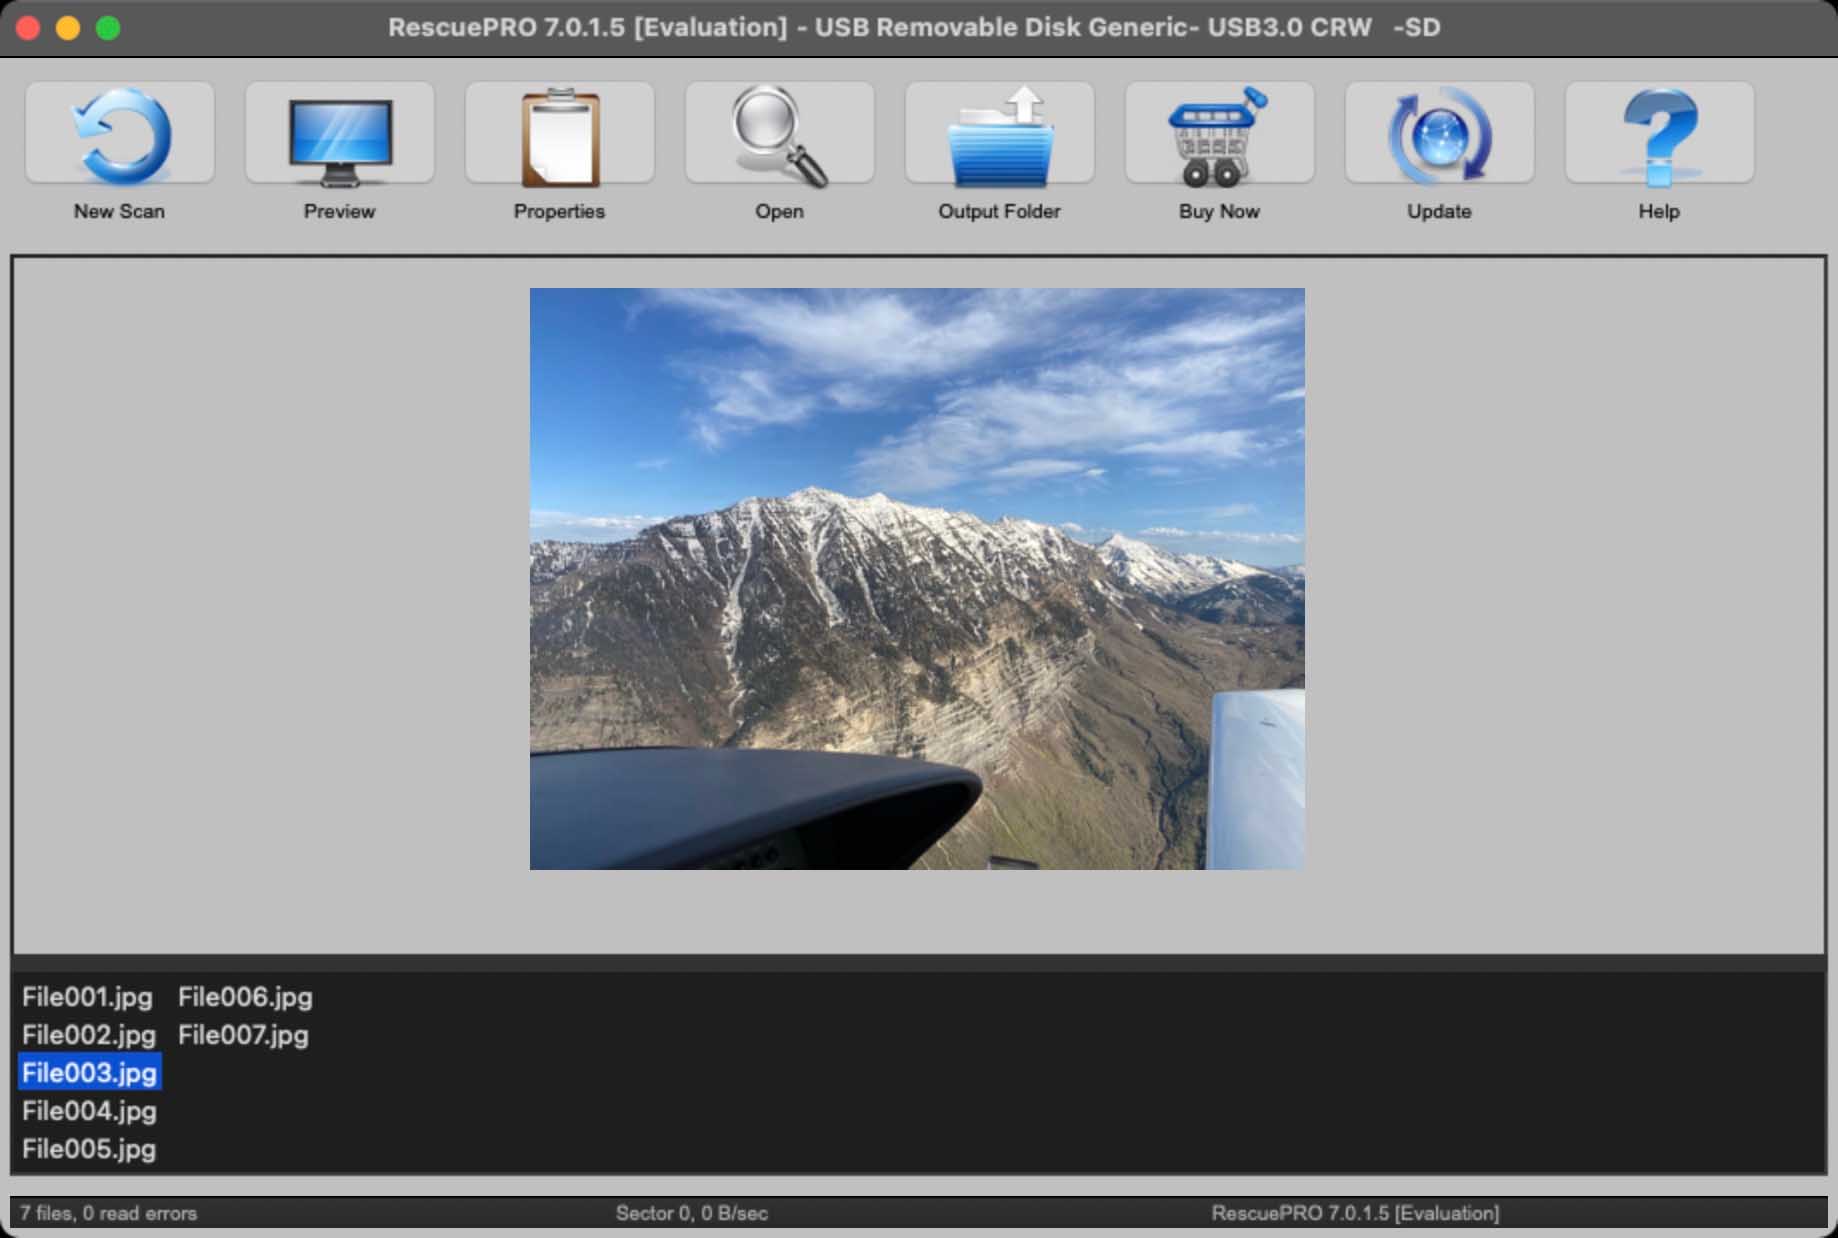
Step 3. After selecting photos, you will want to choose “USB Removable Disk Generic- USB3.0 CRW -SD” or something along the lines of that. When recovering data on my Mac, that is the name of my SD card so yours may be slightly different. Then click the start button to start the Sandisk recover utility.
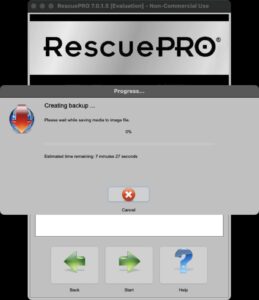
Step 4. The scan process will then start and how long this will take will depend on how much data that you have to scan.
Step 5. After the scan process has completed, you will then be able to review the items that RescuePro was able to find for you. You can click the name of the files to go through them and then use Open to view them.
That’s it! There isn’t much to it when it comes to Sandisk recovery on your Mac. The app does what it says it will do.
It’s important to know that SanDisk RescuePRO doesn’t let you recover any files for free. The free trial lets you view the recoverable data, but not recover any of it. Combine that with the limited data recovery capabilities (it can only recover data from flash drives and SD cards) and a sub-par UI, it’s difficult to justify the $39.99 and $59.99 price tags for the Standard and Deluxe versions respectively.
At this price point, many users would prefer a more modern data recovery program that supports all types of storage drives and file systems. We take a look at one such data recovery tool in the next section.
Method 3: Recover Data Using Disk Drill
When it comes to data recovery tools, it’s always best to choose one that has a proven track record and has an easy-to-use UI. Often, you could be panicking because you lost some important data, and a complicated data recovery program will only add to the stress.
For this tutorial, we opted for Disk Drill. The program ticks all the boxes of a good data recovery tool—a minimalist, uncomplicated UI, an advanced data recovery algorithm, and compatibility with all major storage device types and file systems. It also lets you preview files before recovery for easier selection. Disk Drill is available for both Windows and macOS.
Here’s how to use Disk Drill to recover data from a SanDisk SD card or flash drive:
Step 1. Download and install Disk Drill onto your Mac.
Step 2. Launch Disk Drill and select the storage device that you would like to recover the data from. In this example, we’re going to scan the SD card but you can also scan your Mac’s hard drive as well as external hard drives.

Step 3. Wait for the scan on your storage device to complete.
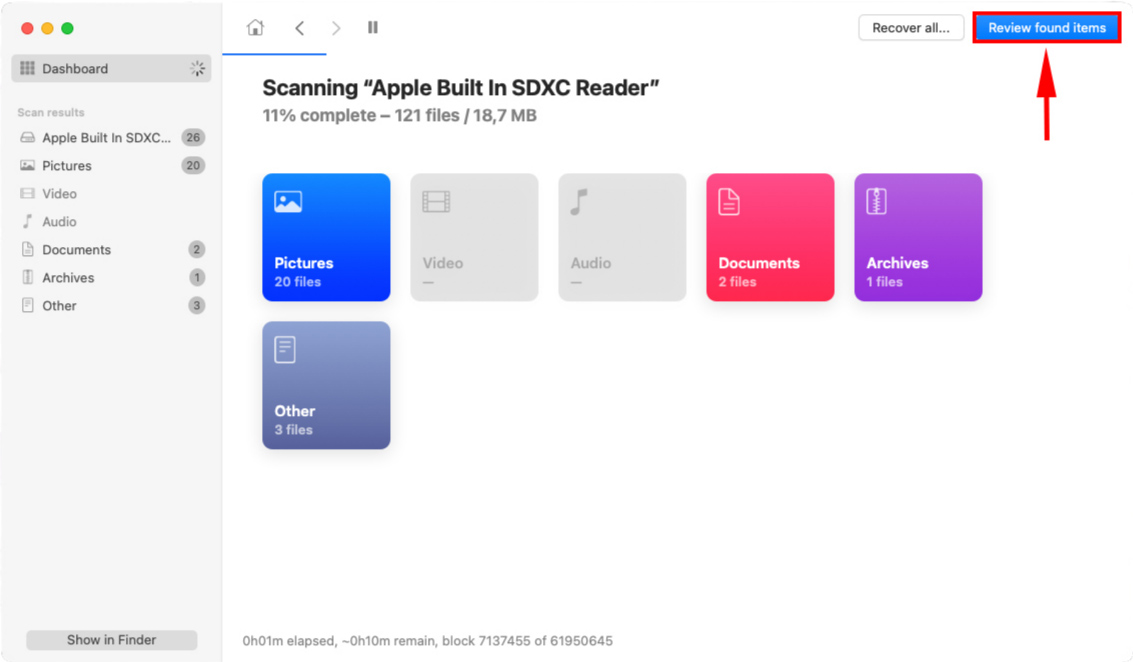
Step 4. After the scan has completed, you can review the items that Disk Drill was able to recover from your SD card.
Step 5. Select the files that you would like to recover and click on the blue Recover button.
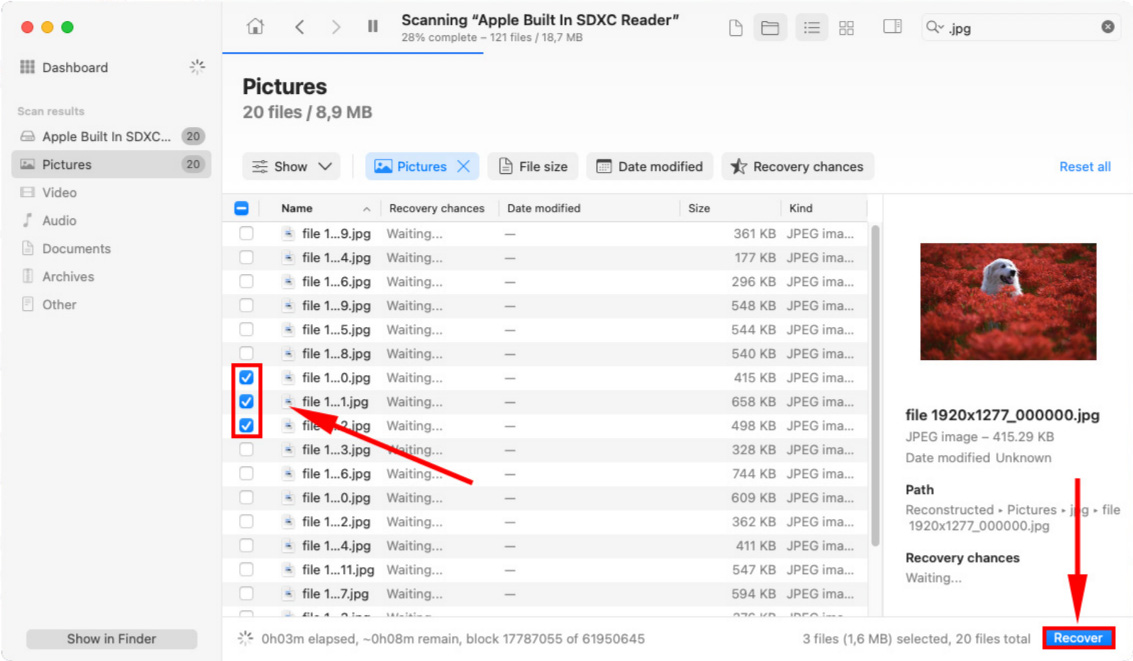
The experience of using Disk Drill is much more intuitive and easy. You get to use an interface that is beautiful and feels much more modern. Not only that, but with the preview feature if you’re able to see the file then you should be able to recover it back onto your Mac.
There are many other features that Disk Drill offers and you can refer to the comparison of the best data recovery software where Disk Drill came out on top as the best choice. YOu should take a look at that article to learn more about data recovery and to see the options that are out there!
Conclusion
Typically, data loss from a SanDisk SD card or flash drive is reversible. However, the chances of recovery may decrease if the device was continuously used even after suffering data loss. Before turning to professional data recovery tools, it’s best to first check the macOS Bin/Trash for the deleted files. If that doesn’t bear any fruit, you can always use third-party data recovery tools like Disk Drill or SanDisk’s very own data recovery tool, RescuePRO. In case of physical damage, avoid DIY methods and contact a data recovery professional as soon as possible.
FAQ
TestDisk and PhotoRec are two excellent programs that can help you recover data from your SD card for free on macOS. Do keep in mind that these tools don’t have a GUI, so it will take some time to get used to them.
In addition to this, you could always check the macOS Bin/Trash for the deleted files. If the files are present there, right-click on them and choose the Put Back option.


