
Is your Samsung Portable SSD not showing up on Mac? Unfortunately, this is a common issue not only for Samsung drives but for all external storage devices. There are also multiple possible reasons why this happens, which can make it difficult for casual users to diagnose and repair their drive.
In this article, we provide 5 reliable fixes you can do yourself if your Samsung portable SSD is not detected by Mac. We’ll also show you how to restore data from a faulty SSD before fixing it. Read on!
Table of Contents
Why is my Samsung SSD Not Recognized on Mac?
Samsung is a great brand for SSDs but just like any other storage device, they are still prone to issues like corruption, disk errors, wear and tear (the cable), lack of support for older drivers, and more. Any of these issues may be the reason why an external drive won’t show up on Mac.
The instructions in this article are applicable to all Samsung SSDs, including their popular T-Series products:
| Model | USB Type | Speed | Available Sizes |
| Samsung Portable SSD T1 | 3.0 (Type-C) | Up to 450 MB/s | 500 GB, 1 TB, 2 TB |
| Samsung Portable SSD T3 | 3.1, 3.0 (Type-C) | Up to 450 MB/s | 250 GB, 500 GB, 1 TB, 2 TB |
| Samsung Portable SSD T5 | 3.1, 3.0 (Type-C) | Up to 540 MB/s | 250 GB, 500 GB, 1 TB, 2 TB |
| Samsung Portable SSD T7 | 3.2 Gen 2 (Type-C) | Up to 1,000 MB/s | 500 GB, 1 TB, 2 TB |
Before attempting to fix your SSD, however, it’s imperative that you first restore and secure your data. Tampering with a drive that is not working properly may result in permanent data loss, even if you do end up fixing it. We’ll show you how to do this in the next section.
How to Recover Data from Samsung Portable SSD
If Disk Utility detects your SSD and displays its volume correctly, you can scan it using data recovery software. However, if your SSD shows signs of corruption, it’s better to first create a backup image and scan that instead of the SSD directly (to avoid further logical damage).
There are loads of data recovery software on the market, but we’ll be using an app called Disk Drill because it can do both backup and recovery. It’s also super easy to use and supports all major file systems, including APFS, HPFS+, ExFAT, and FAT32 – one of which your SSD is likely using.
Step 1. Connect your Samsung Portable SSD to your Mac.
Step 2. Download and install Disk Drill.
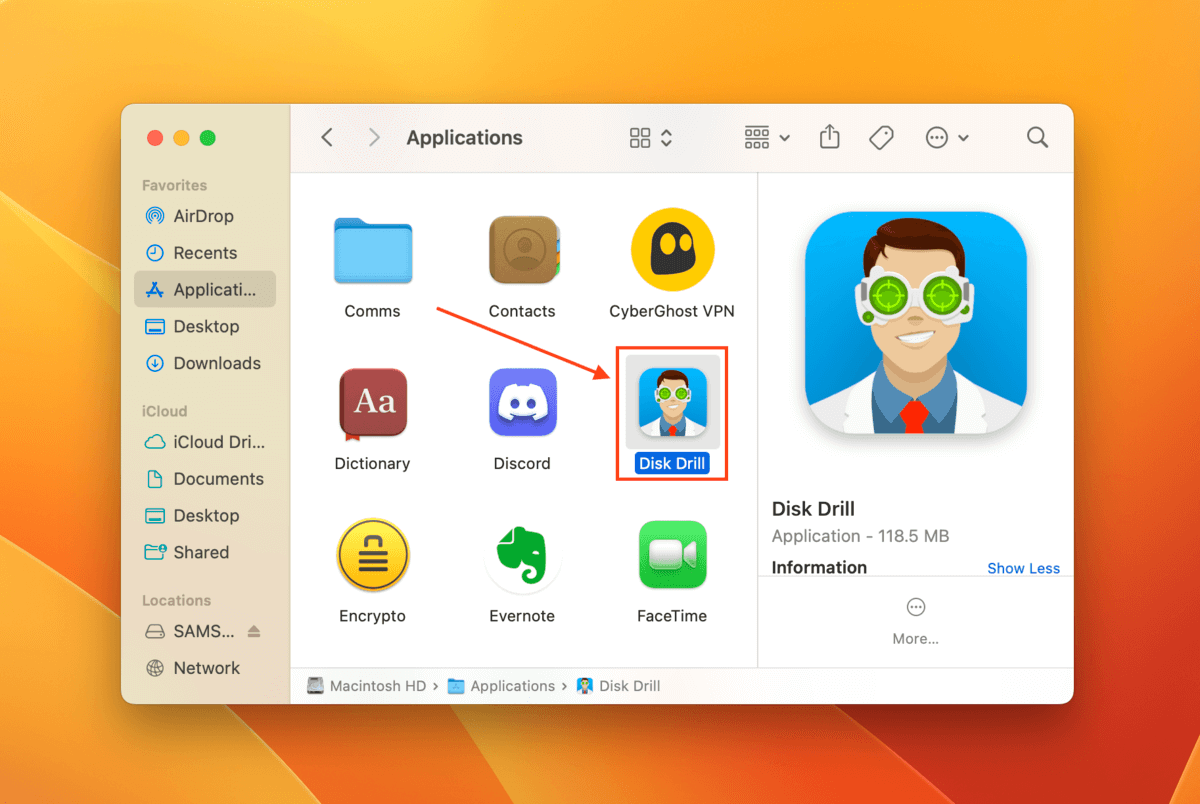
Step 3. Launch Disk Drill (Finder > Applications).
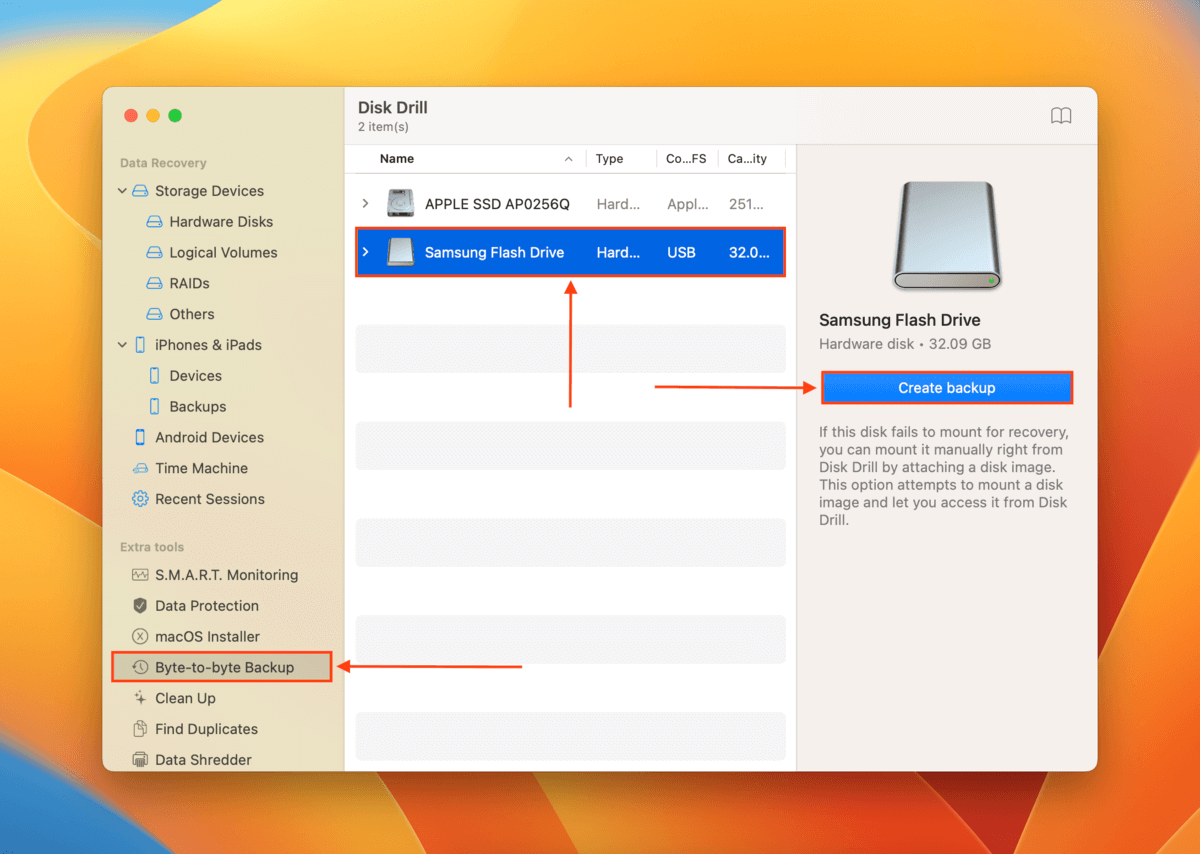
Step 4. On the left sidebar, click Byte-to-byte backup (if this is your first time using this tool, click OK let’s do it). Then, select your SSD from the list of drives and click Create Backup.
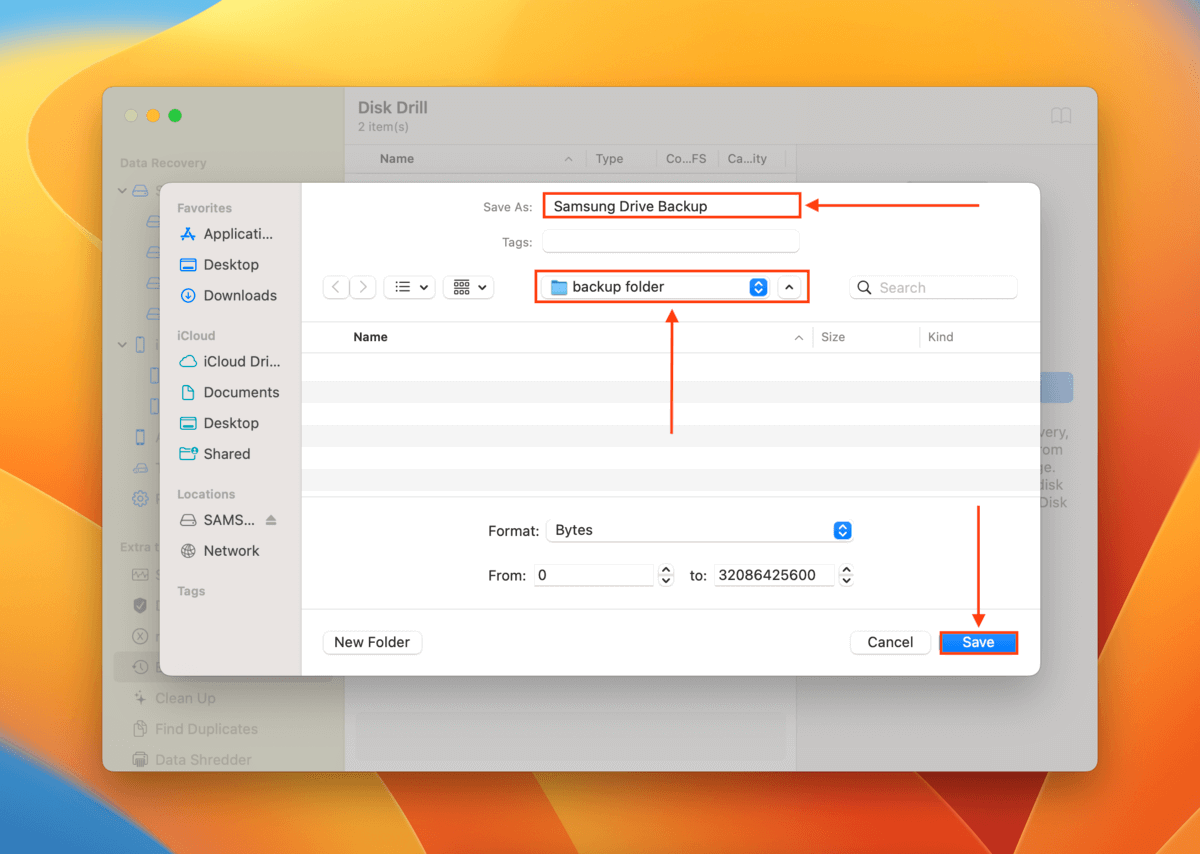
Step 5. Name your backup file and choose a location on your Mac where Disk Drill will save the recovered files. Then, click Save.
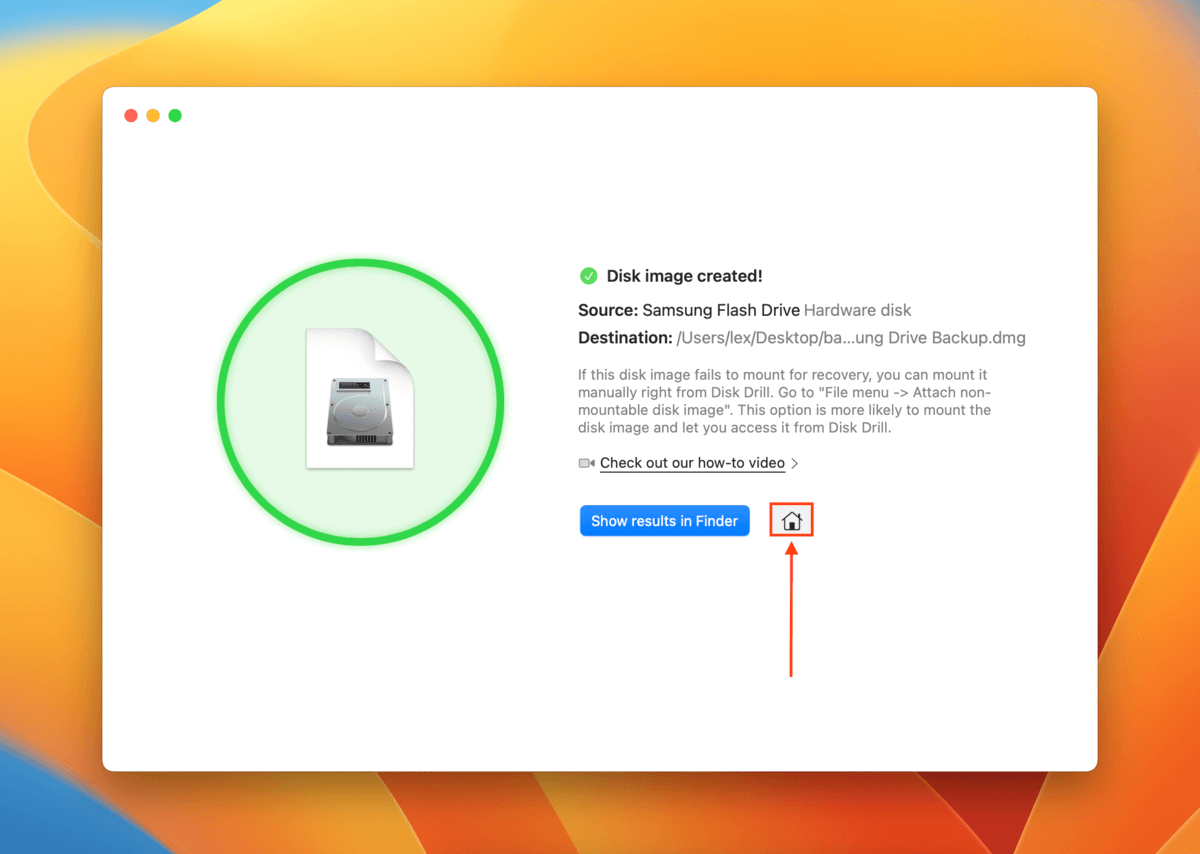
Step 6. Once the backup creation process is complete, click the home button to return to the main window.
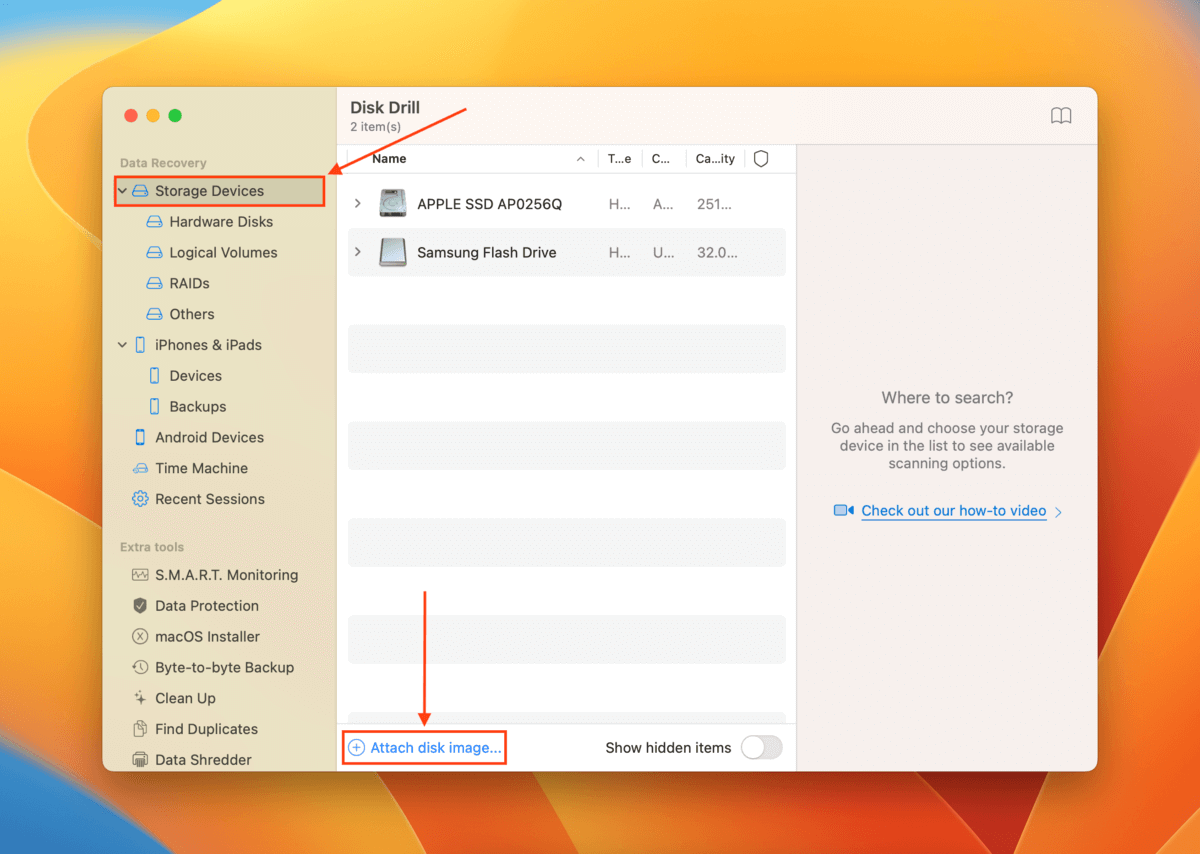
Step 7. On the left sidebar, click Storage Devices under the Data Recovery section. Then, click Attach disk image near the bottom of the window.
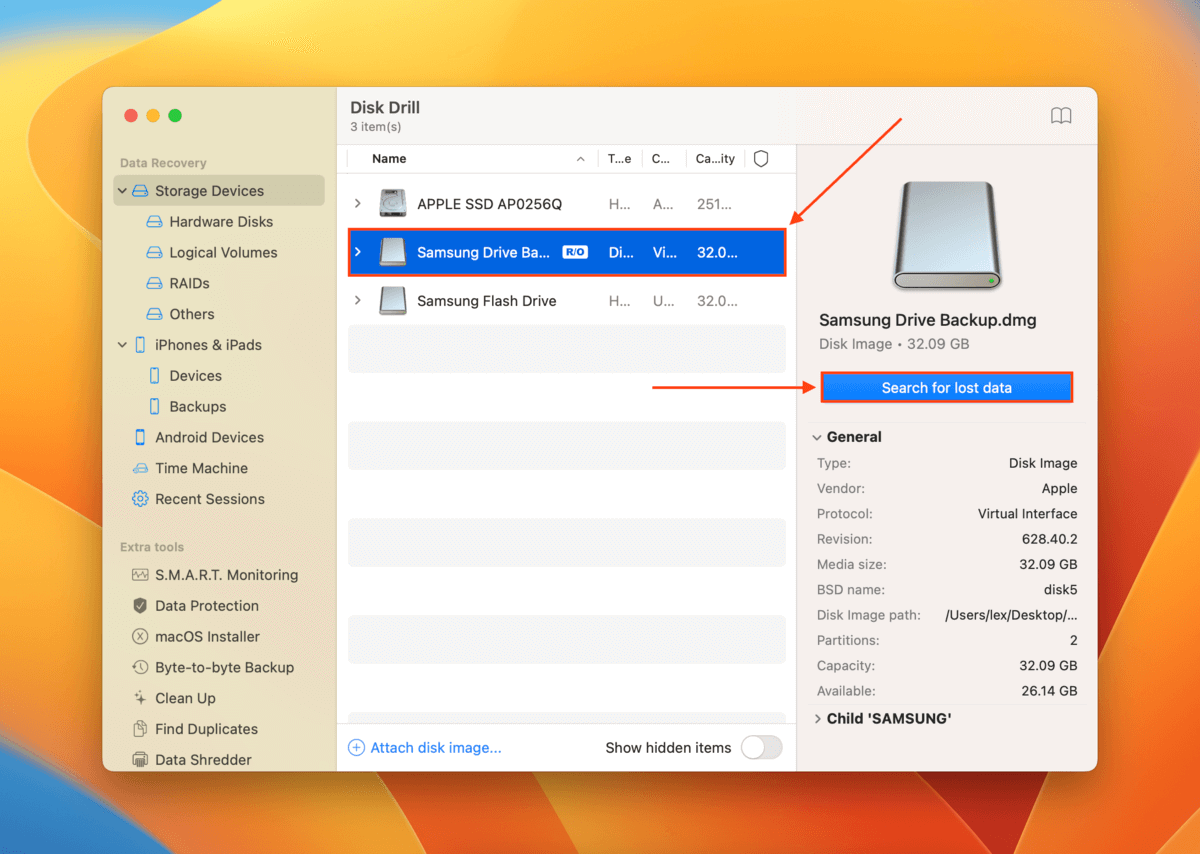
Step 8. Select the backup file we created in steps 5 and 6 and click Attach.

Step 9. Select the backup file we attached in step 9 and click Search for lost data.
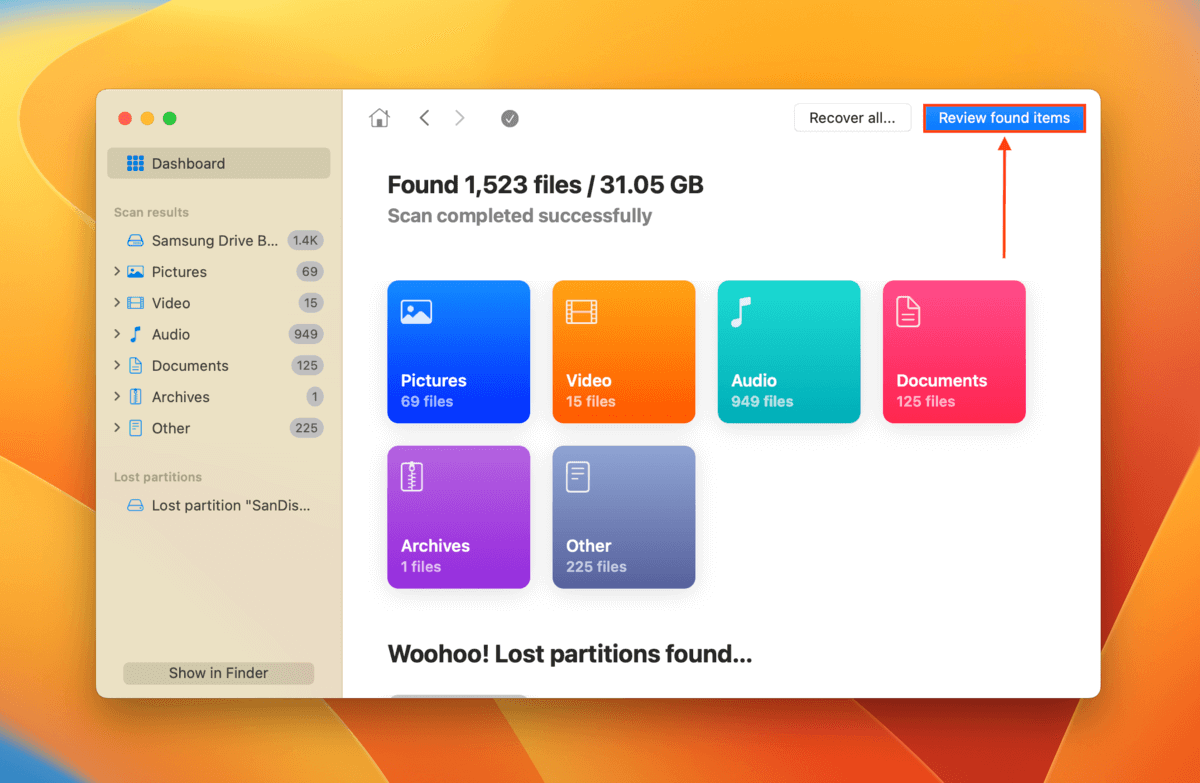
Step 10. Wait for Disk Drill to complete its scan and click Review found items.
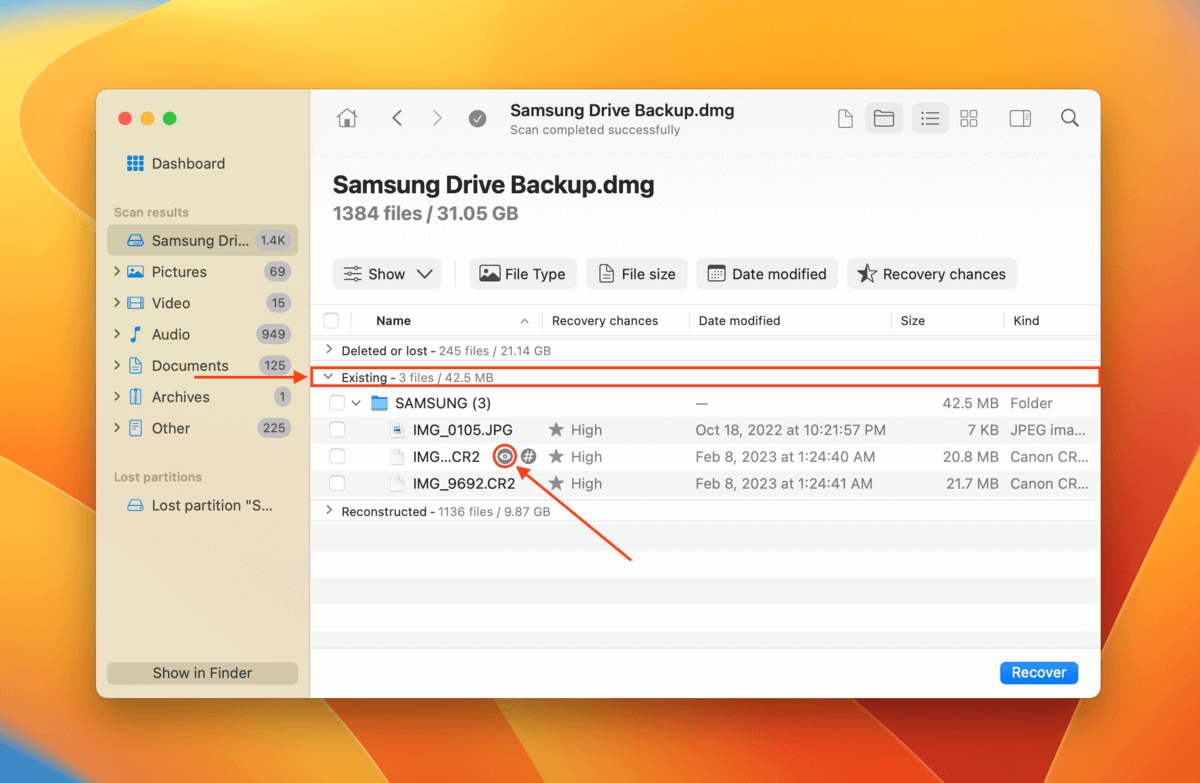
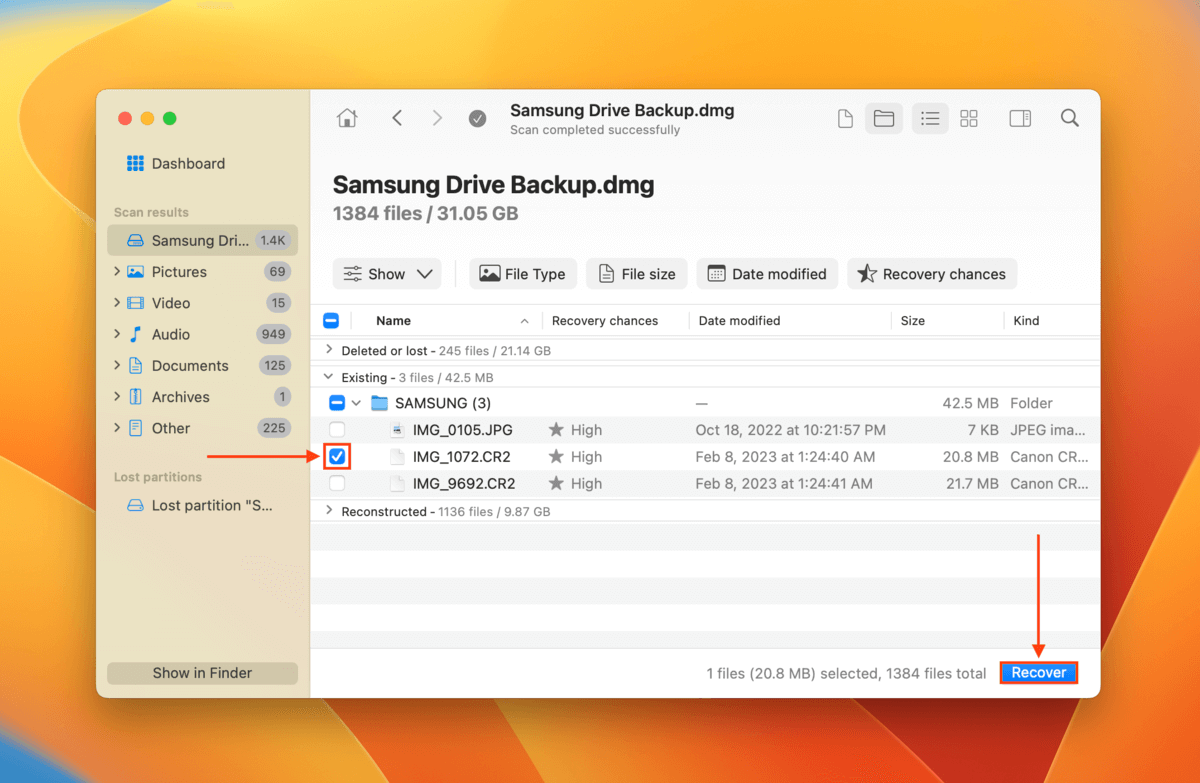
Step 11. Expand the Existing tab to view files that were present on your SSD when the backup was created. You can also check the Deleted or lost and Reconstructed tabs if you suspect some of your files have been corrupted or deleted. You can preview your files by hovering your mouse beside any file and click the eye button that appears.
Step 12. Select the individual files or folders you want to restore or tick the box in the column header beside the Name column to select all items. Then, click Recover.
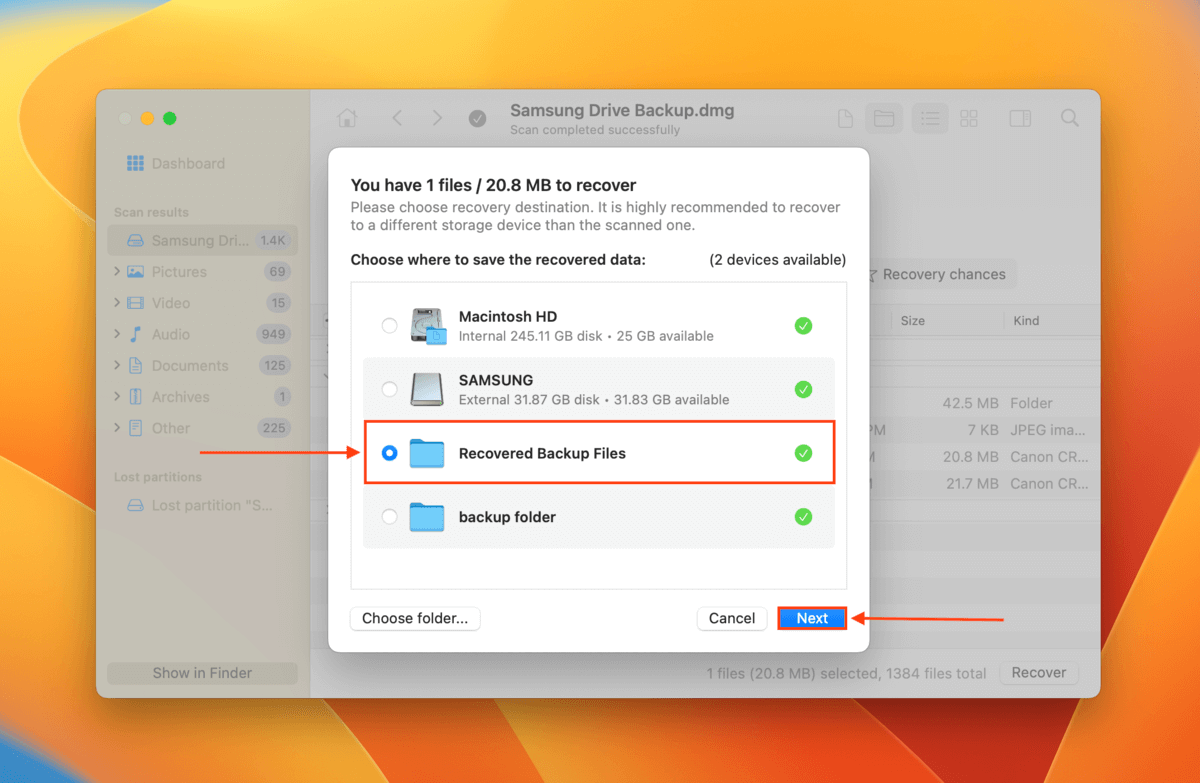
Step 13. Choose a location on your Mac where Disk Drill will save the recovered files. Then, click Next to proceed with recovery.
How to Fix Samsung Portable SSD not Detected on Mac
Depending on the reason why your Samsung Portable SSD won’t open on your Mac, there are a couple of easy fixes that you can try yourself. In this section, we’ll guide you through 5 of them. However, note that some fixes may cause data loss (for ex. repairing disk errors). We highly encourage you to restore your data before proceeding with the methods in this section.
Fix 1: Reboot Your MacBook
When you connected your Samsung Portable SSD to Mac, did you have a lot of apps open or processes running in the background? It’s possible that these took up most of your MacBook’s memory, preventing your Mac from establishing the connection.
Disconnect your SSD, close all apps and background processes, and reboot your Mac. Then, reconnect your SSD before opening anything else on your Mac so it has enough memory to establish the connection.
Fix 2: Try Another Cable
If you haven’t replaced your SSD’s cable in a while, wear and tear might have rendered it unable to properly connect to your Mac. Try changing your cable or test other ports on your Mac.
Fix 3: Check/Update Your Drivers
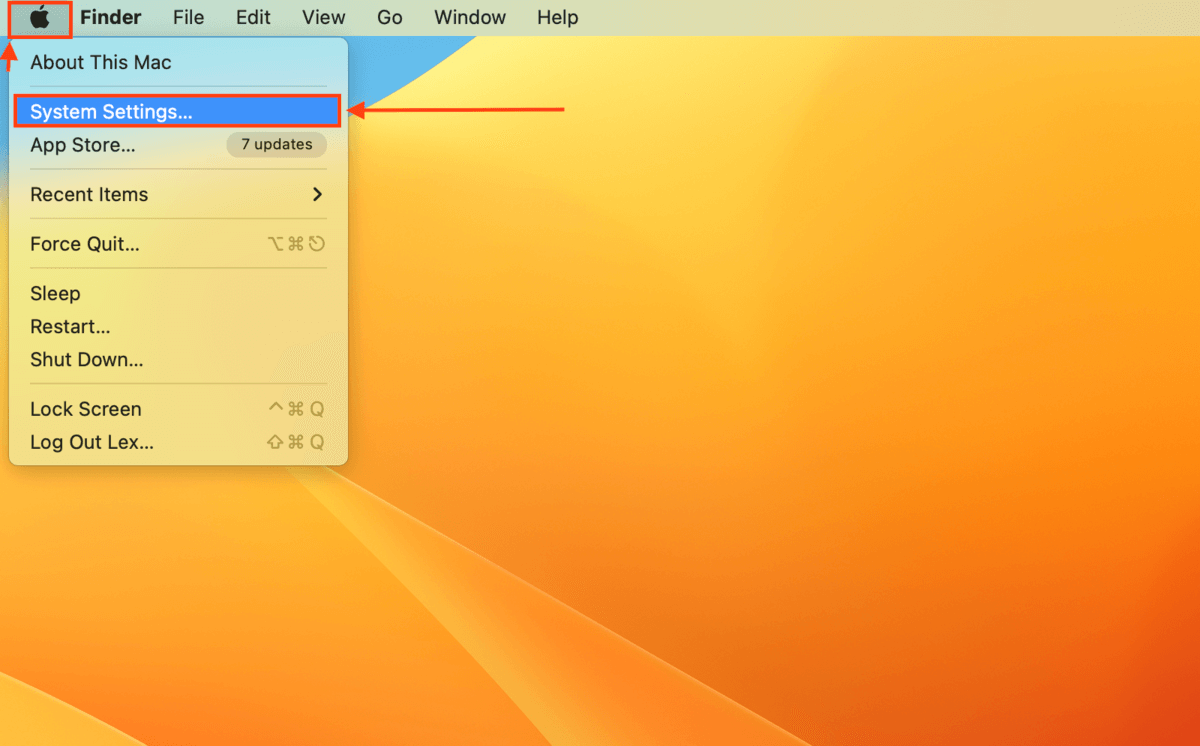
Your Mac may struggle to read your SSD with outdated drivers. In fact, issues with the Samsung T7 not being recognized on Mac M1 are common for users running macOS Big Sur. Firmware updates are included in macOS updates, so you need to update macOS itself. To do this, open the Apple menu > System Settings…
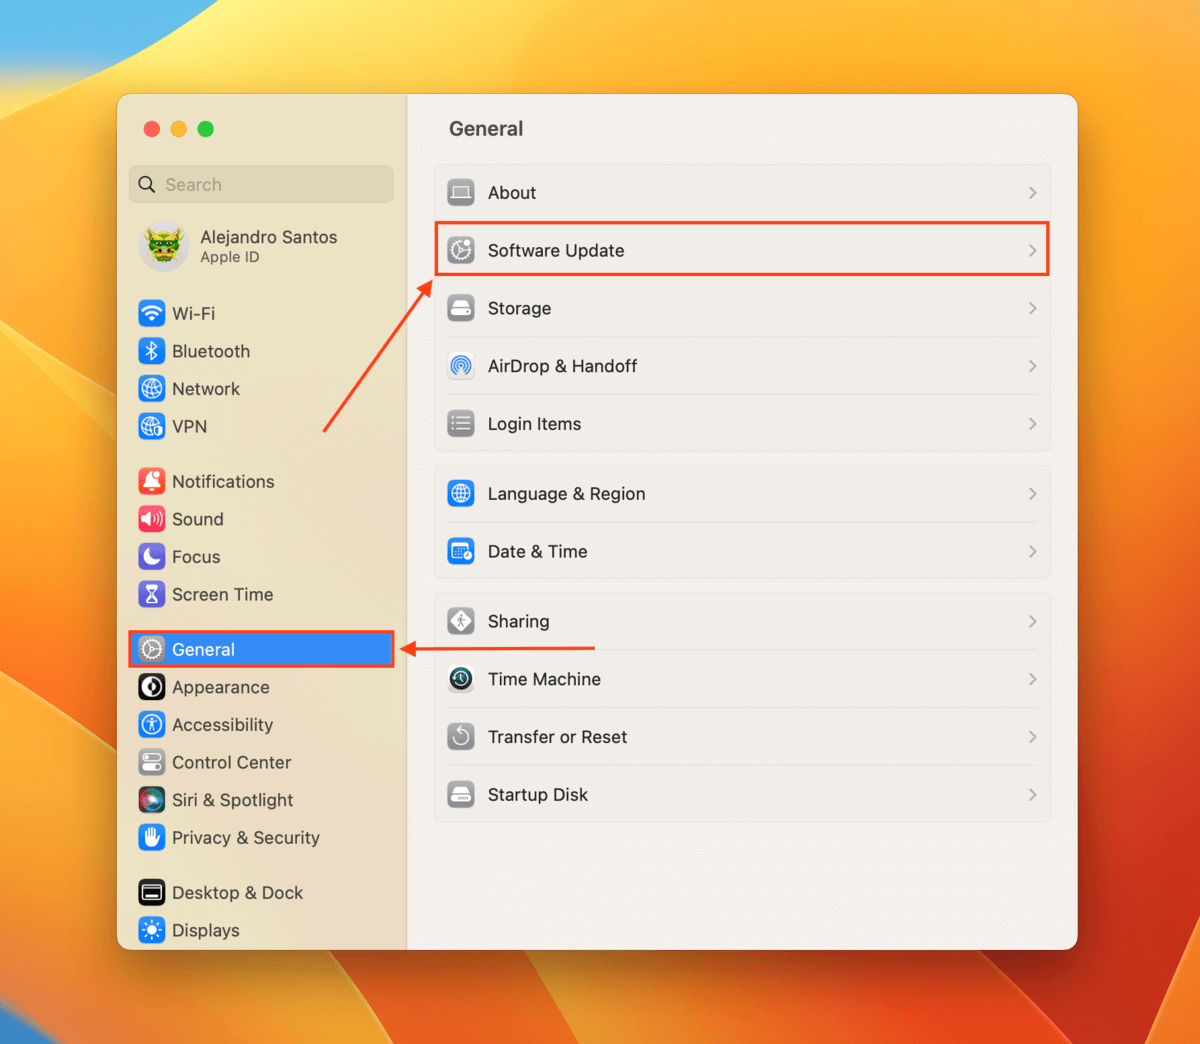
On the left sidebar, select General and click Software Update on the right pane. Then, follow the on-screen instructions.
You should also download the Samsung Portable SSD software that is compatible for your version of macOS, which optimizes your computer for using the drive.
Fix 4: Check Your Mac’s Security Settings
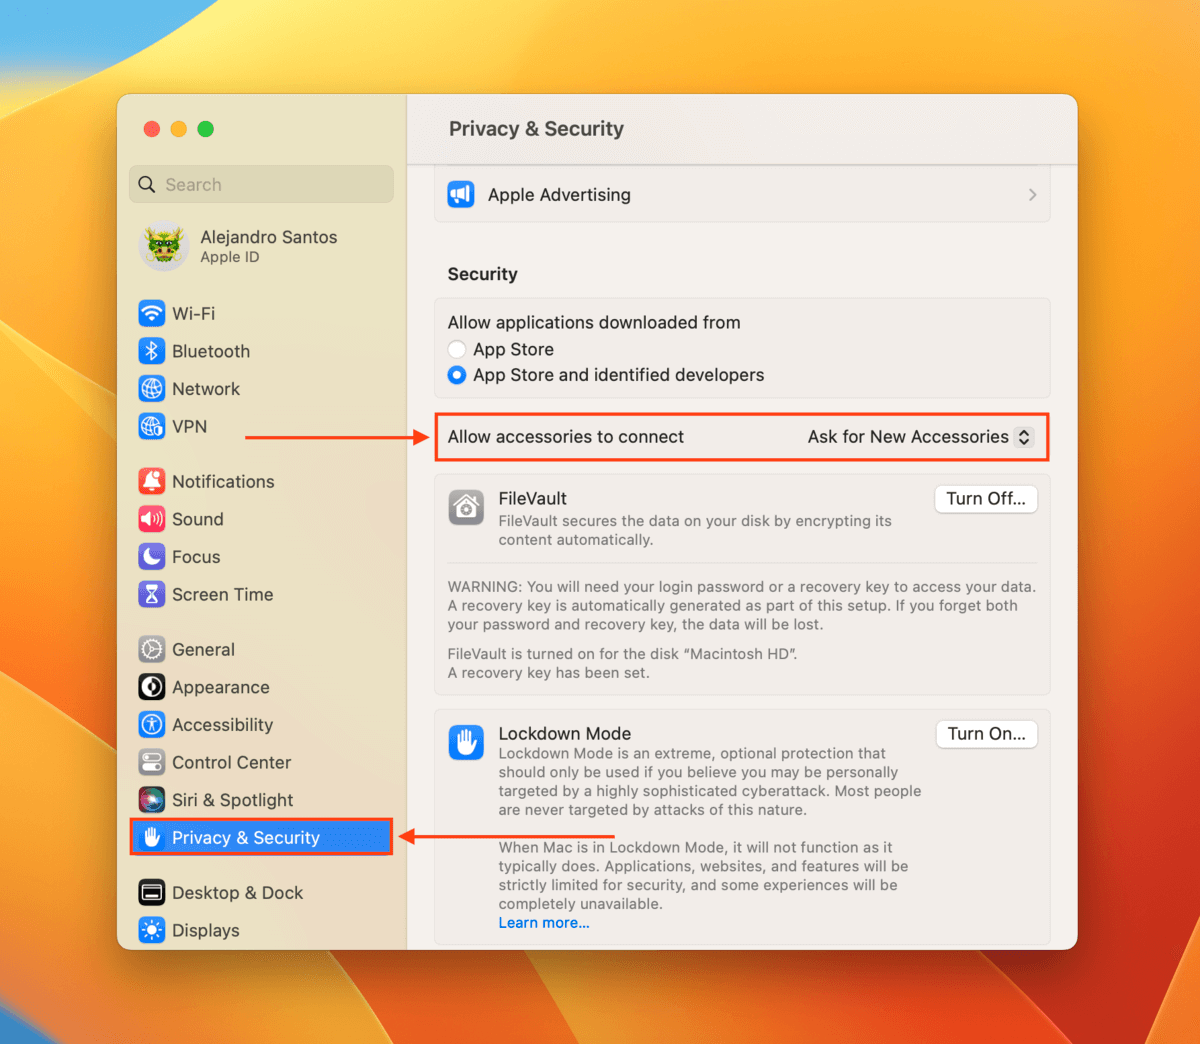
For your own safety, your Mac may restrict access to and from accessories it’s not familiar with. If this is the first time using your Samsung Portable SSD with your Mac, see if your security settings blocked the connection. To do this, open the Apple menu > System Settings…
On the left sidebar, select Privacy & Security and scroll down on the right pane until you see the Security section. The Allow accessories to connect setting will tell you if it blocked access to your SSD (and you’ll be able to allow it from here).
Fix 5: Run First Aid
MacOS comes with a bunch of self-troubleshooting and repair tools, with First Aid being one of the most useful. It will scan the target drive and automatically fix any disk errors it finds. To use First Aid, open Disk Utility (Finder > Applications > Utilities).
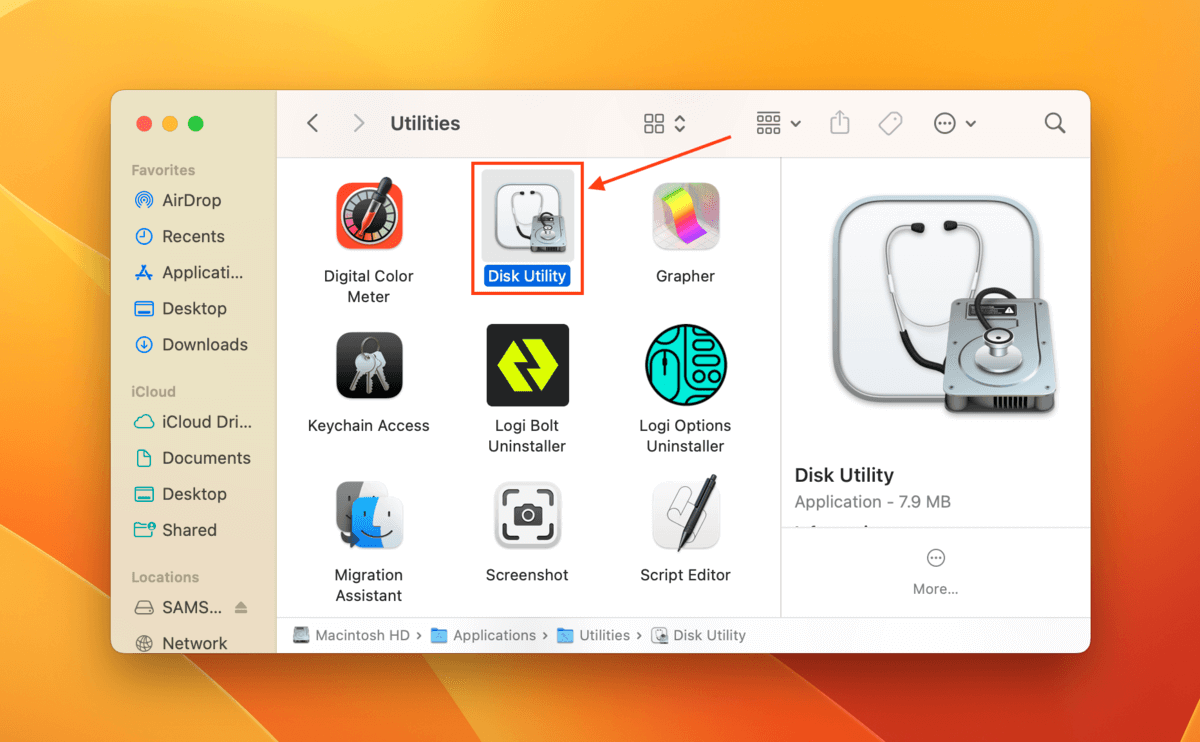
Then, select your drive from the left sidebar and click First Aid at the top of the window. Confirm when prompted.

Conclusion
Samsung SSDs are fast and reliable, but they aren’t immune to common issues that affect all external storage devices. While most of these issues are fixable, they will likely result in data loss so make sure you recover your files before trying them. In fact, we highly encourage you to routinely create backups using Time Machine to avoid any data loss in the future.


