
It’s easy to spend hour after hour building the perfect presentation for wooing clients, communicating complex ideas, or showcasing unforgettable vacations. But accidentally deleting or losing those files can feel like a punch in the gut.
Luckily, there are ways to recover Keynote presentation files.
This guide focuses on how to restore deleted or unsaved Keynote files from your Mac computer. Inside, we’ll look at Keynote’s autosave feature, how to browse version histories, and four other methods of data recovery to bring your presentation back to life.
Table of Contents
Does Keynote Autosave?
Thankfully, Keynote comes with a built-in autosave feature. This feature saves your work every few minutes so that if the program crashes or if you accidentally leave without saving, your work won’t necessarily be lost. When Keynote restarts, it’ll load the most recent autosave version.
To restore your most recent version using Keynote’s autosave:
- Open your file.
- Click File in the menu bar, then Revert to, then Previous Save.
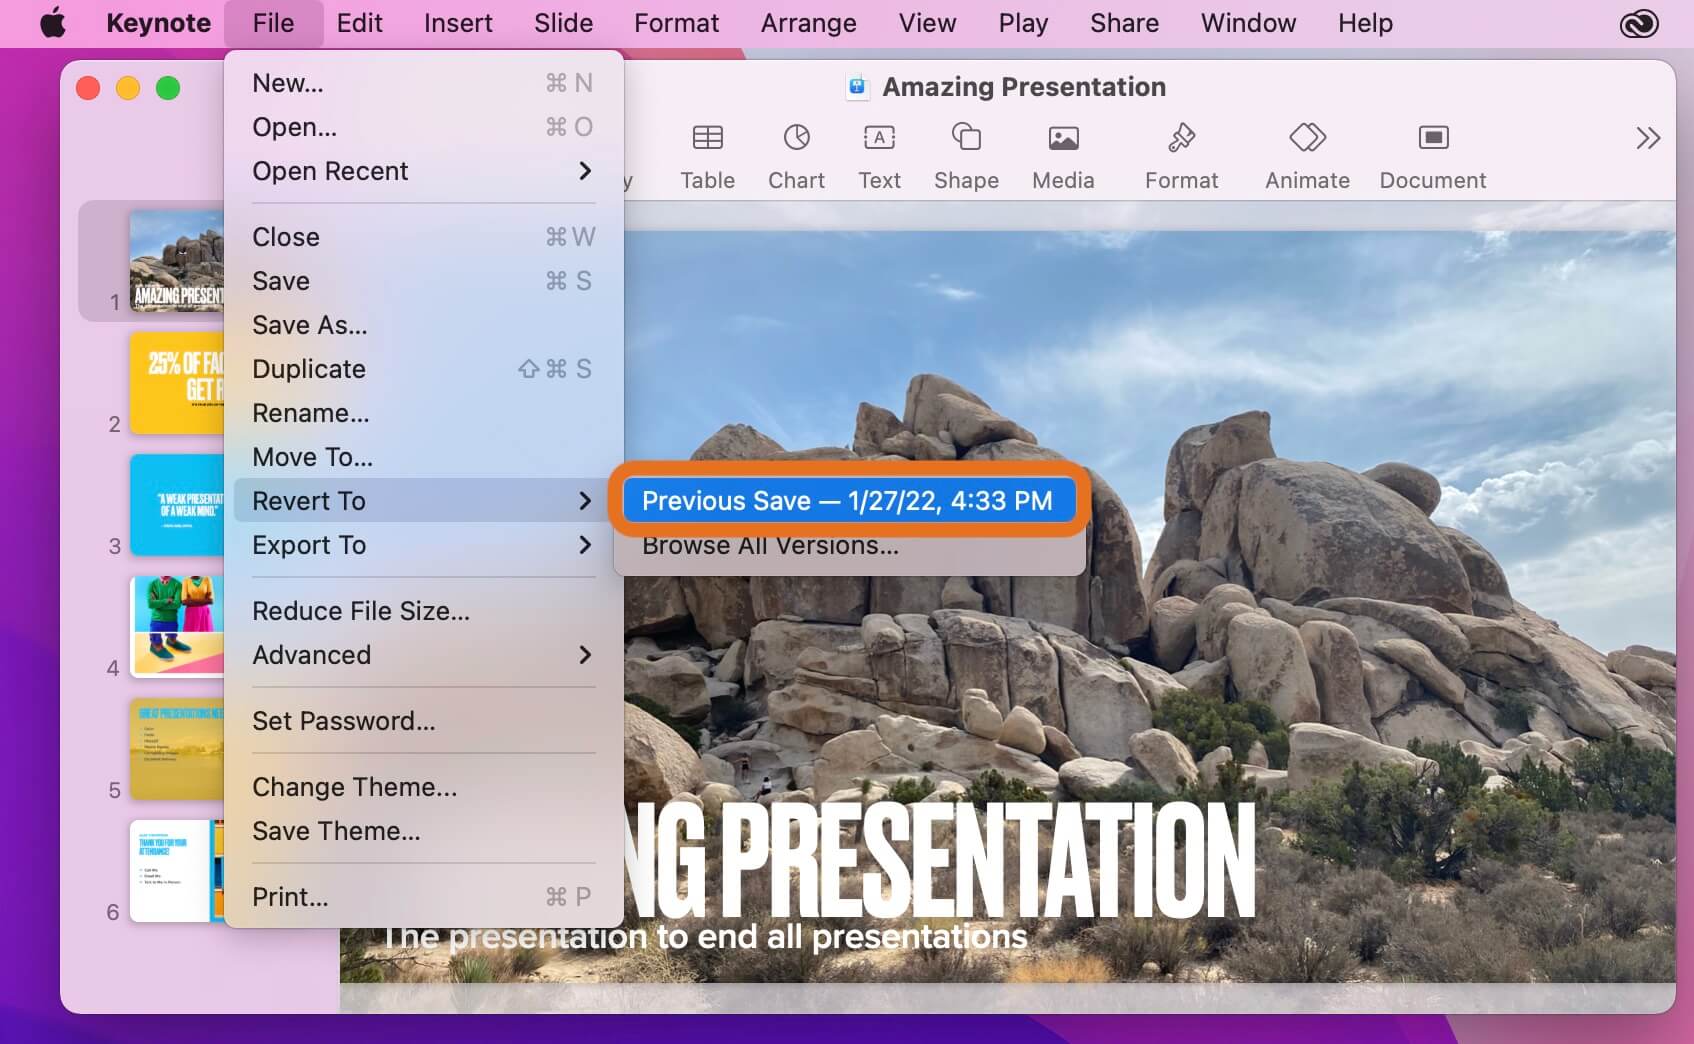
- You’ll then lose all changes since your previous autosave and revert to that version.
Since your Mac actually stores past versions of your Keynote file saved by the autosave feature, you can also restore your presentation to an even earlier version.
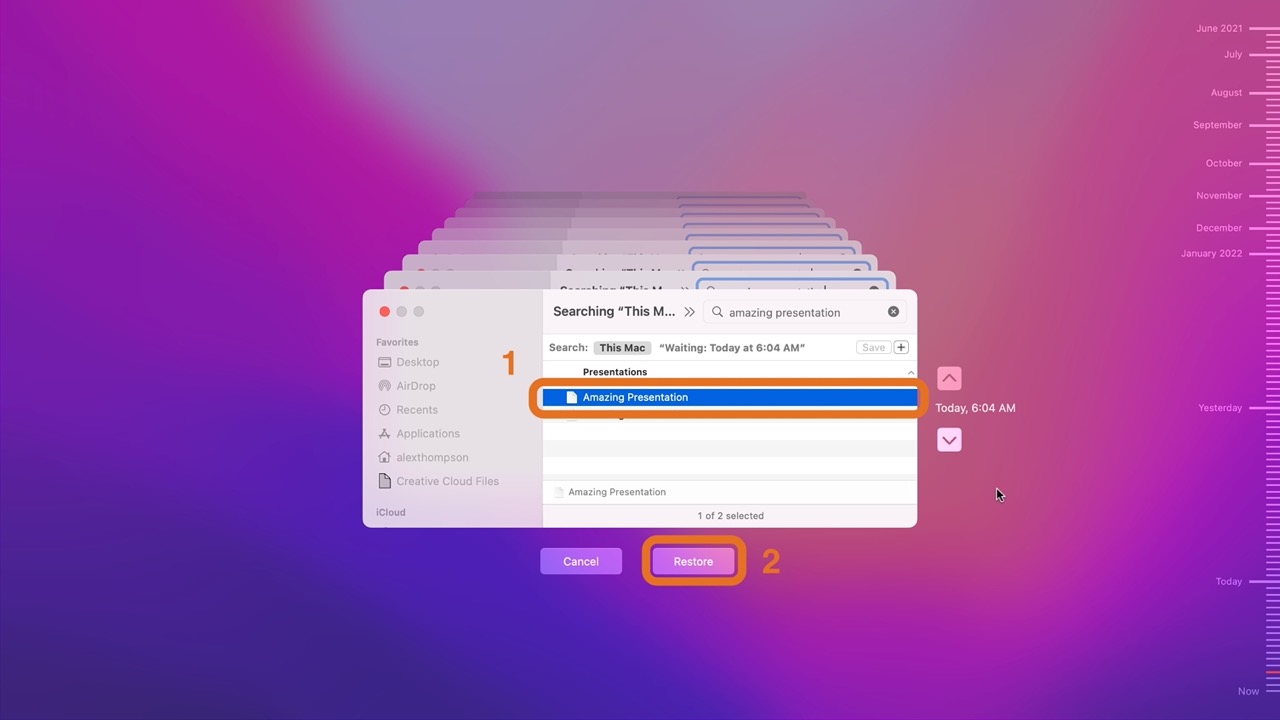
To restore a previous version from your Keynote version history:
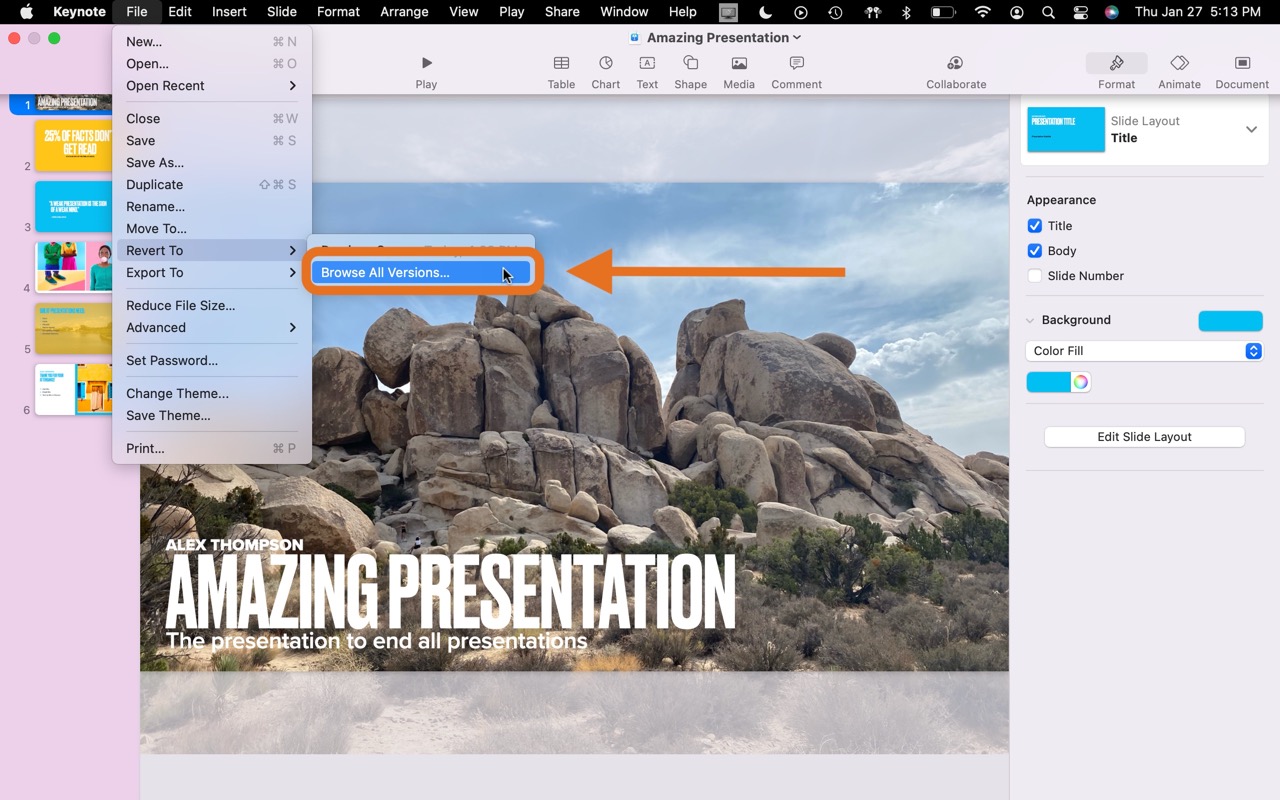
- Open your Keynote file.
- Click File in the menu bar, then Revert to, then Browse All Versions….
- After clicking Browse All Versions, you can navigate previous versions through the timeline to the right, the arrows next to the versions, or just by clicking the background versions.
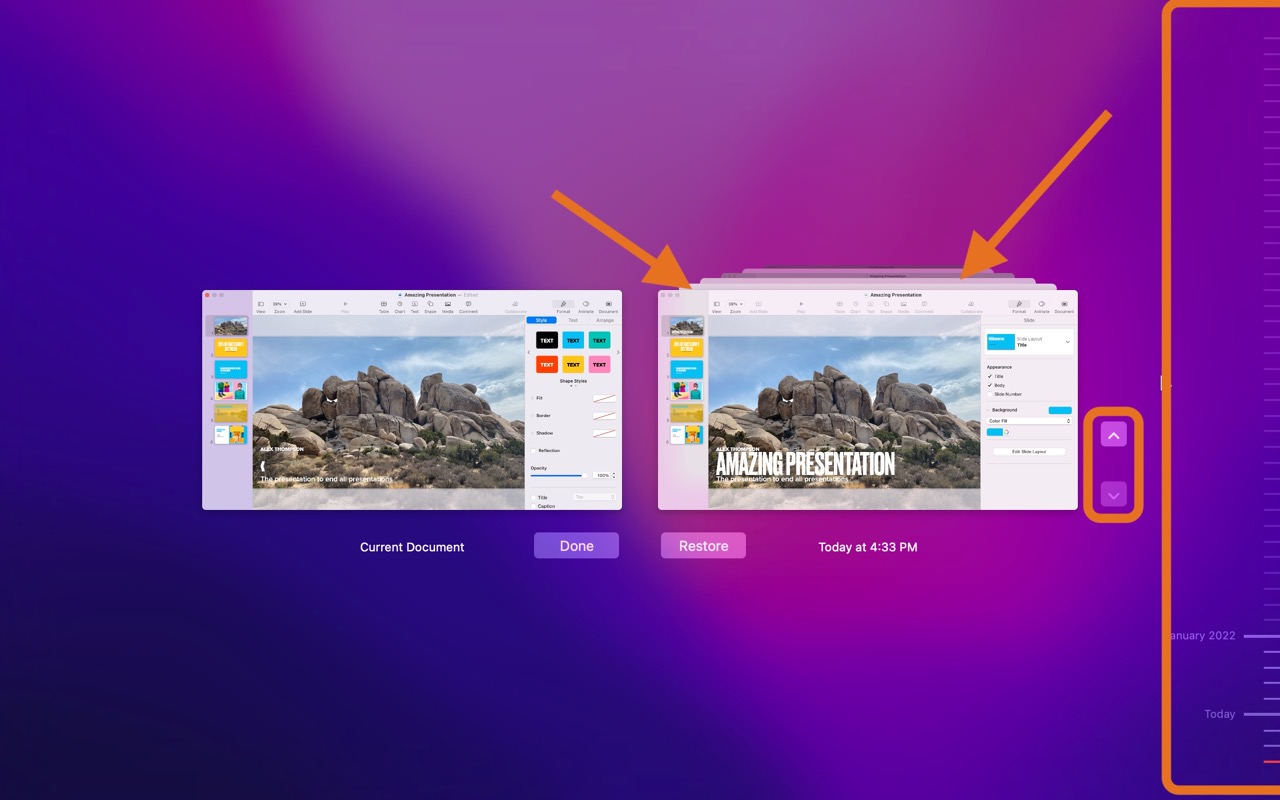
- Find the version you’d like to restore and select it.

- You can look through all the different slides to make sure it’s the right Keynote version. Once you’ve confirmed it’s the right one, click Restore.

How to Recover a Deleted Keynote File on Mac
If you can’t recover your Keynote files using the autosave feature, don’t panic. Just as you can recover PowerPoint, there are still a few other methods you can use to restore your Keynote presentations.
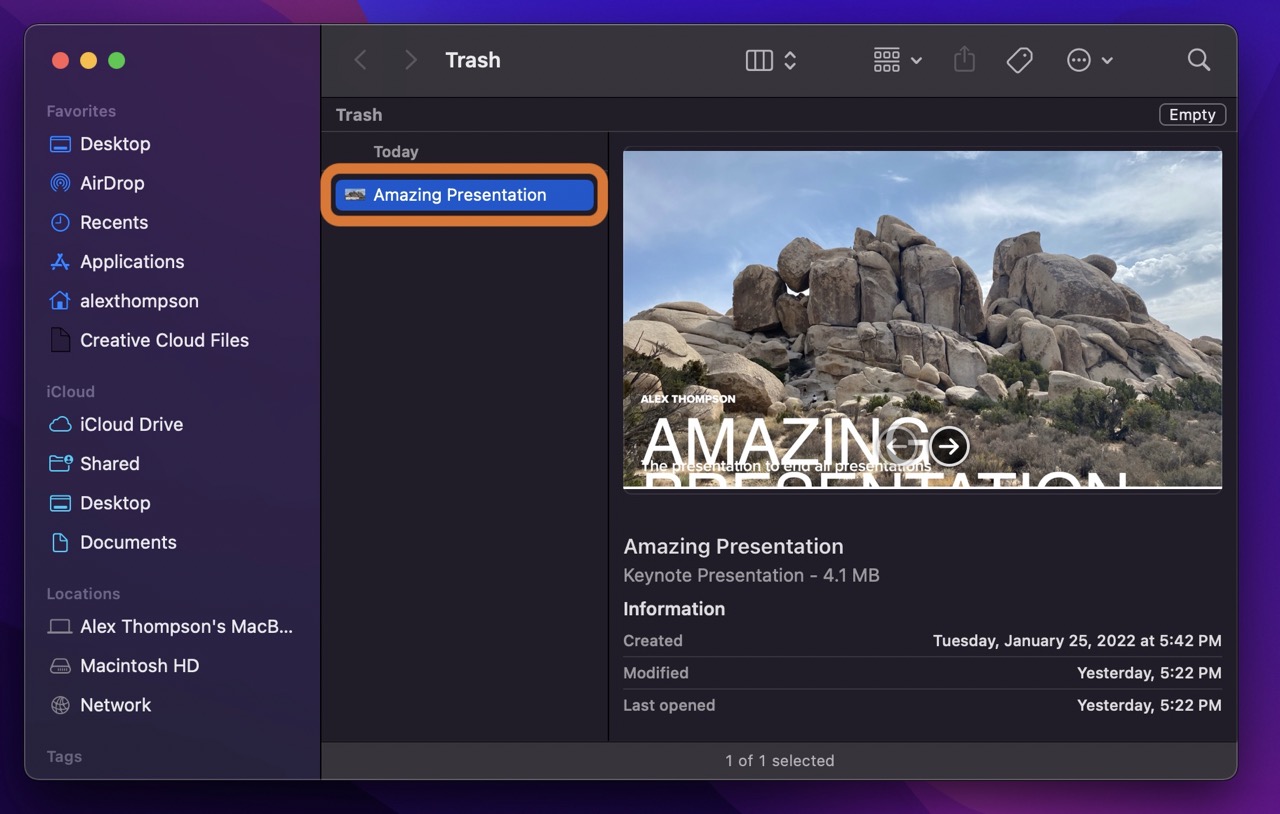
Method 1. Check the Trash Bin
The Trash Bin is the first place to look for your deleted Keynote document.
Apple developers created this special folder to give users a “second chance” for recovering files they deleted accidentally. If you’ve deleted a file, it moves to the Trash Bin, where it remains until you manually delete it (“empty the trash”) or until the system automatically removes it due to space constraints.
Unless you’ve emptied your trash after accidentally removing your Keynote file, you’ll likely find your deleted presentation in the Trash Bin.
To restore your Keynote file from the Trash Bin:
- Locate and click the Trash folder in your dock.
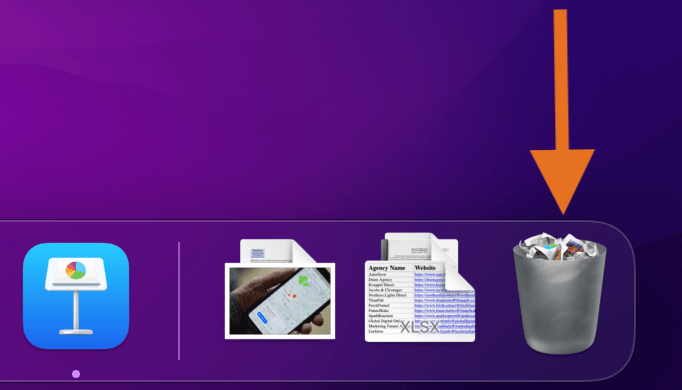
- Search through the files inside for your Keynote presentation.
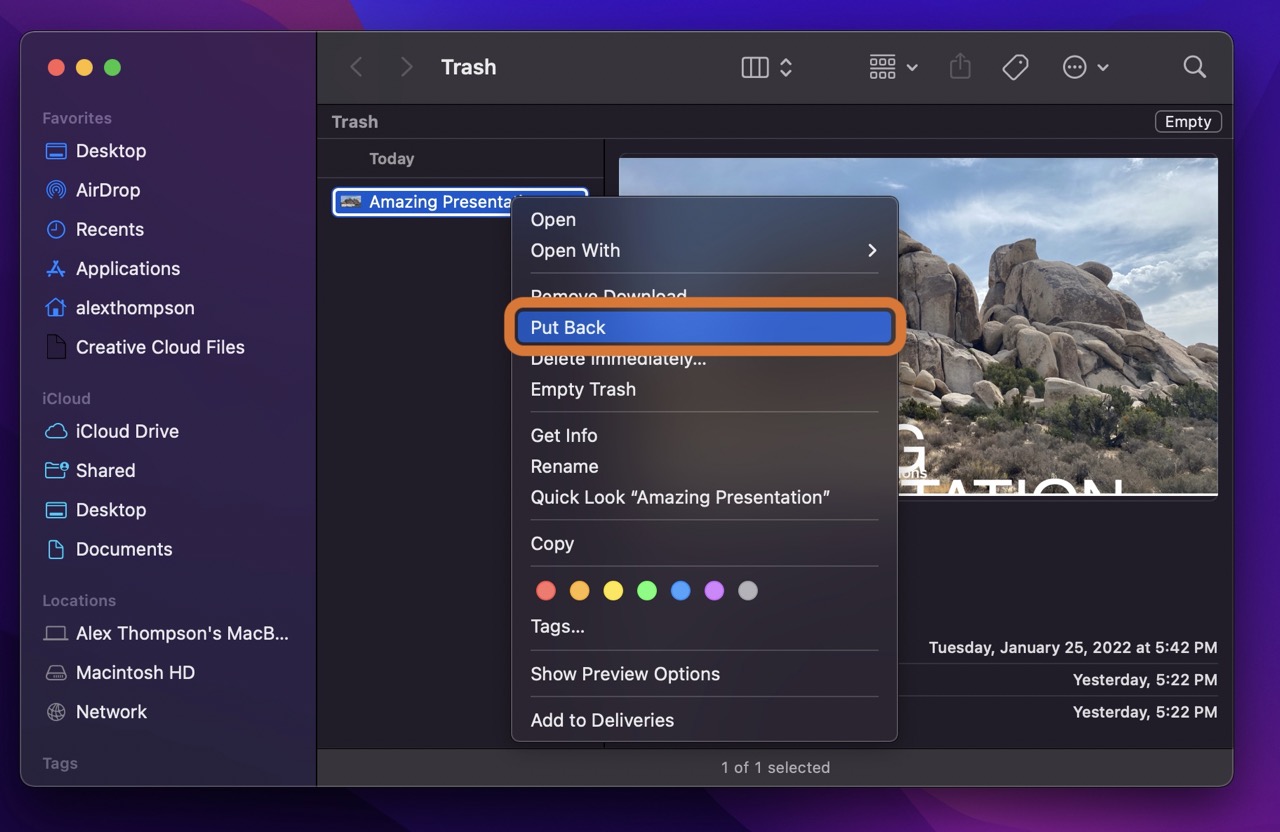
- Once you’ve located the file, right-click it, and select Put Back. Doing so will restore the file to its original location, and you can then use and modify it normally.
Method 2. Use Data Recovery Software
If you’ve already emptied your trash, the next step is to try data recovery software.
When you delete a file, that file just becomes earmarked to be overwritten, not necessarily removed from your drive. As such, you may still be able to recover these files with data recovery software.
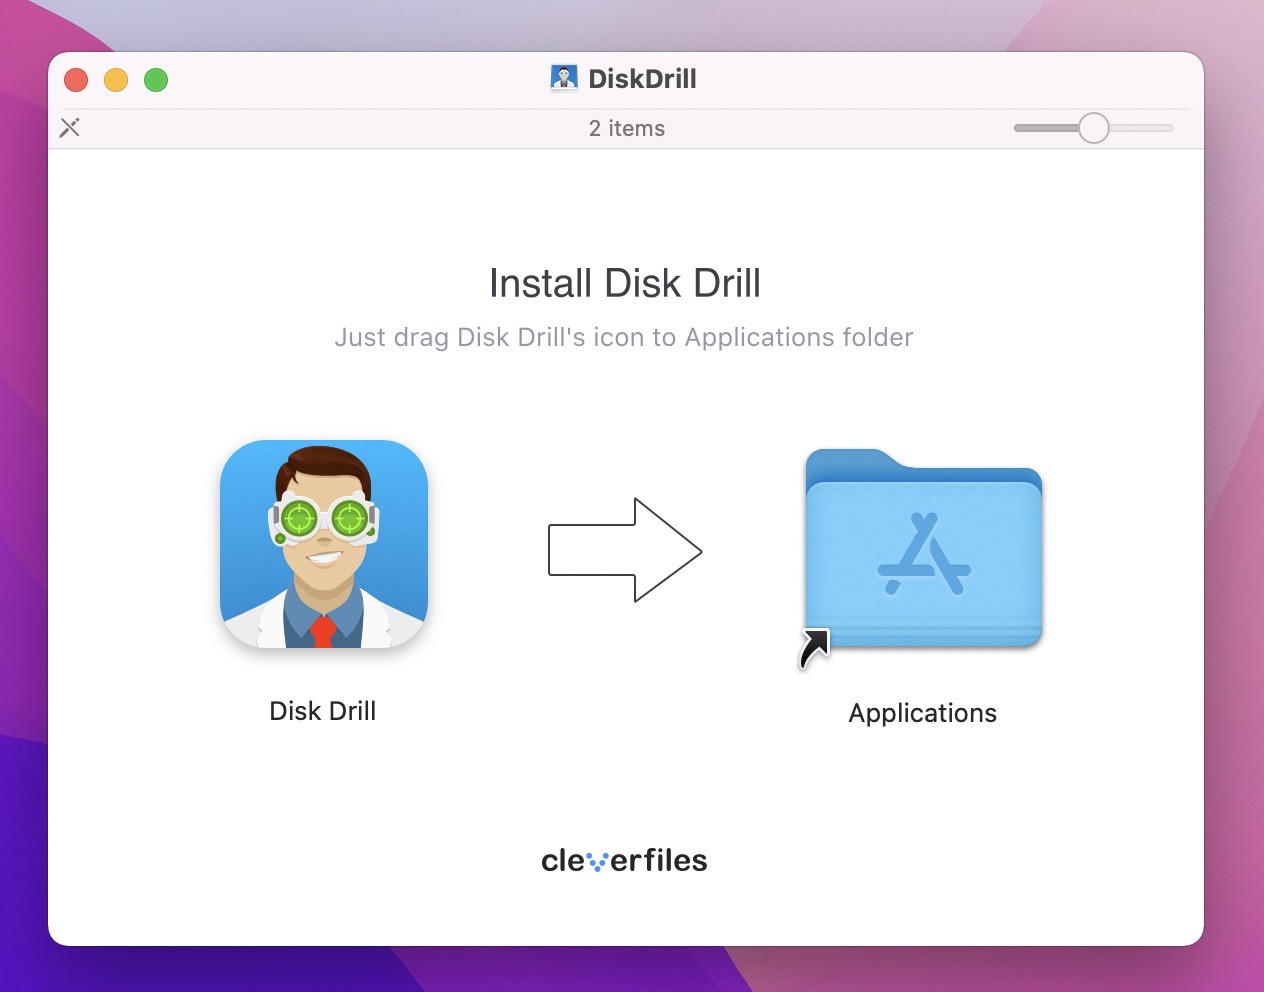
Disk Drill is a powerful yet user-friendly data recovery software used by experts and amateurs alike.
To recover your Keynote presentation using Disk Drill:
- Download Disk Drill and install the program.
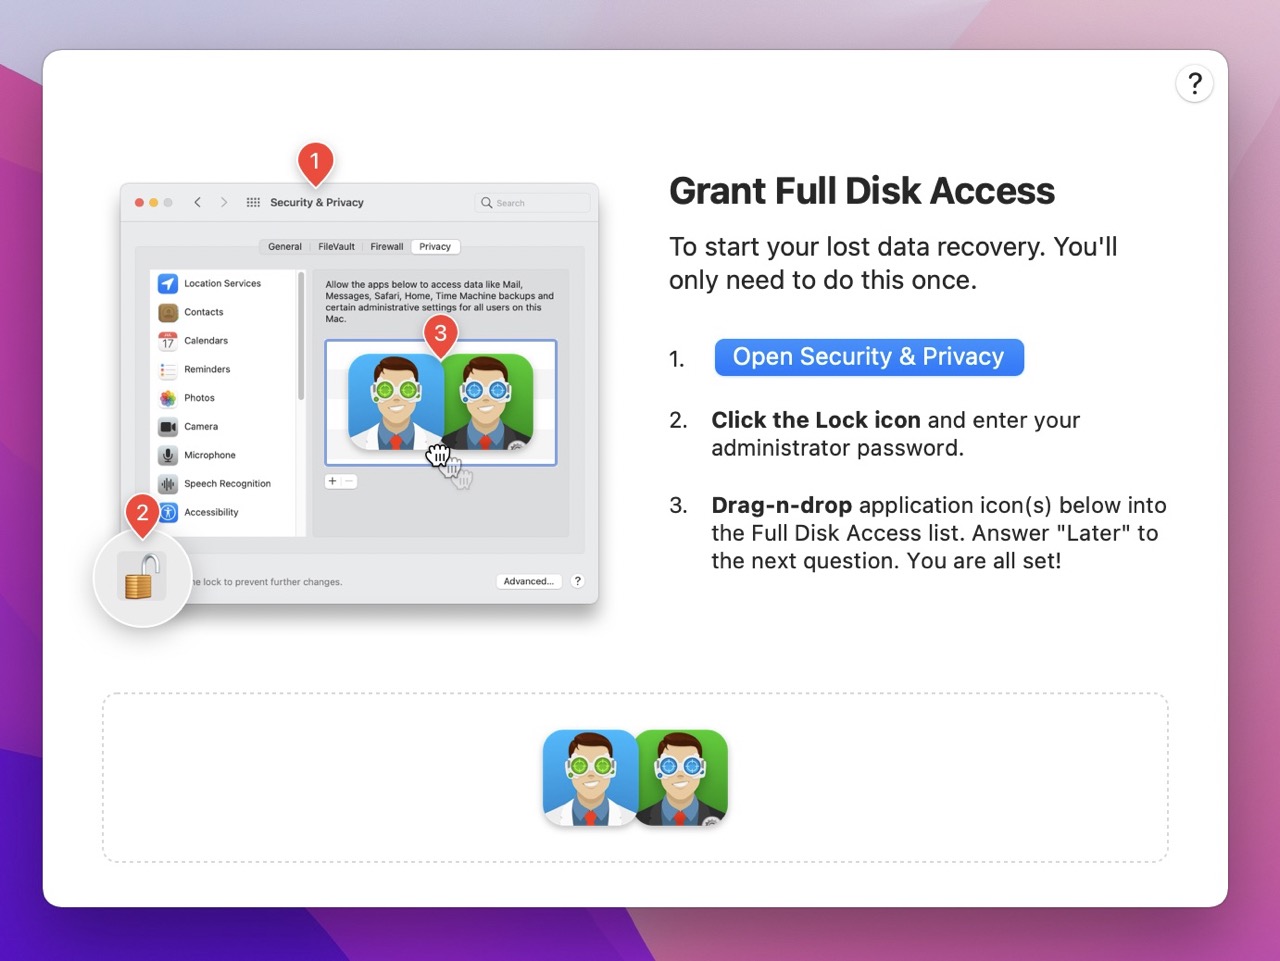
- Grant Disk Drill the appropriate permissions. These permissions are required in order for the program to have the access it needs to find your missing files.
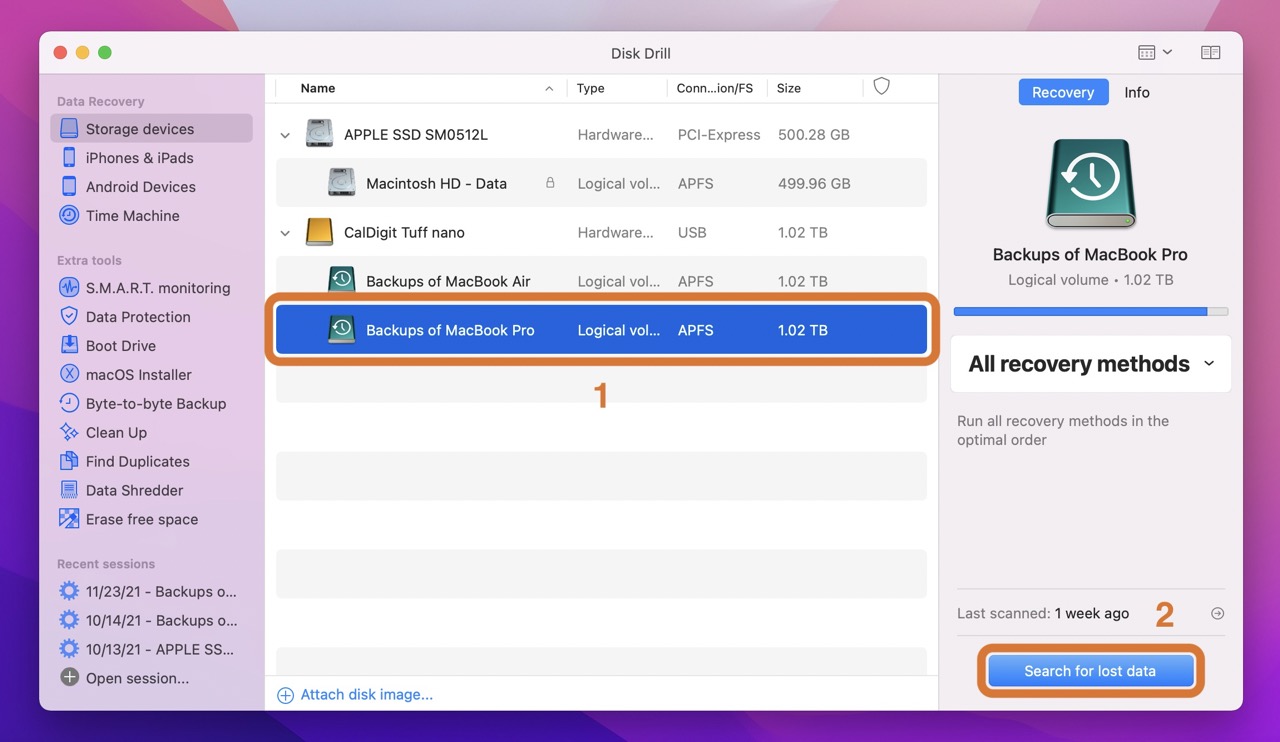
- Select the drive where you were storing your Keynote presentation. Then click Search for lost data.
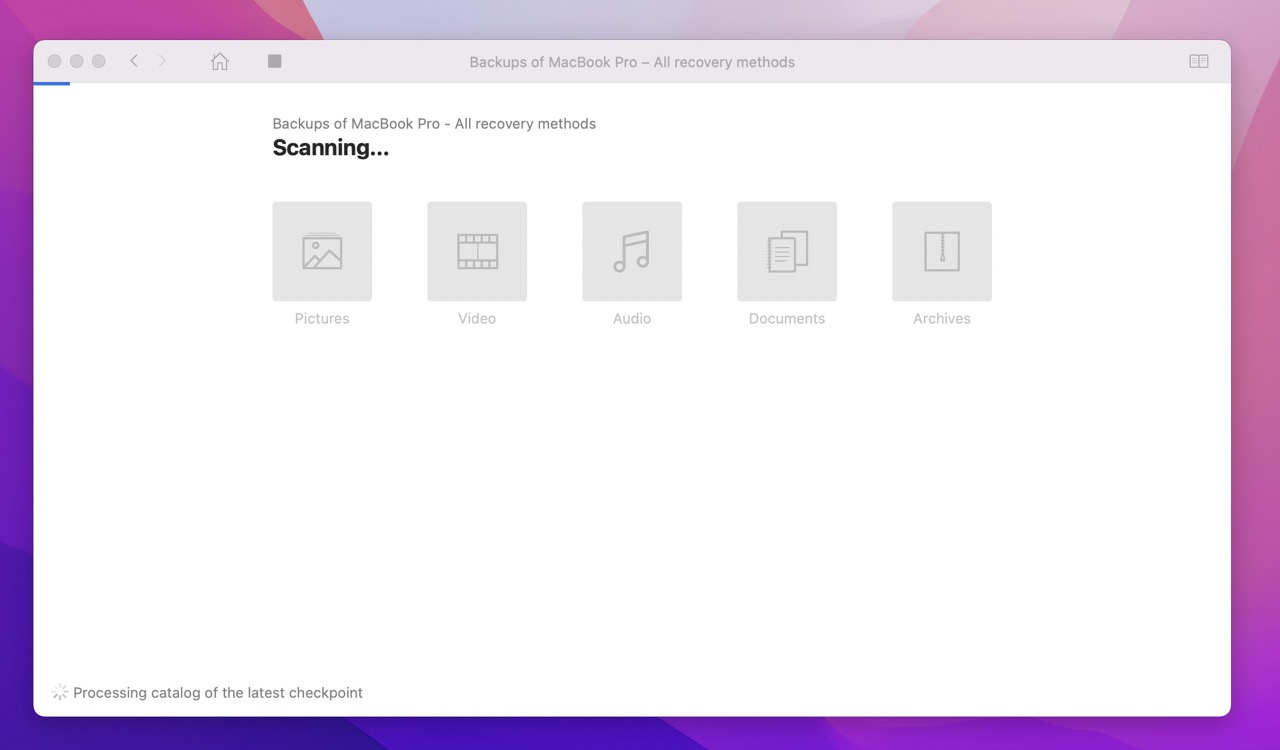
- Wait for the scan to finish. It might take a few minutes, depending on how full the drive is.
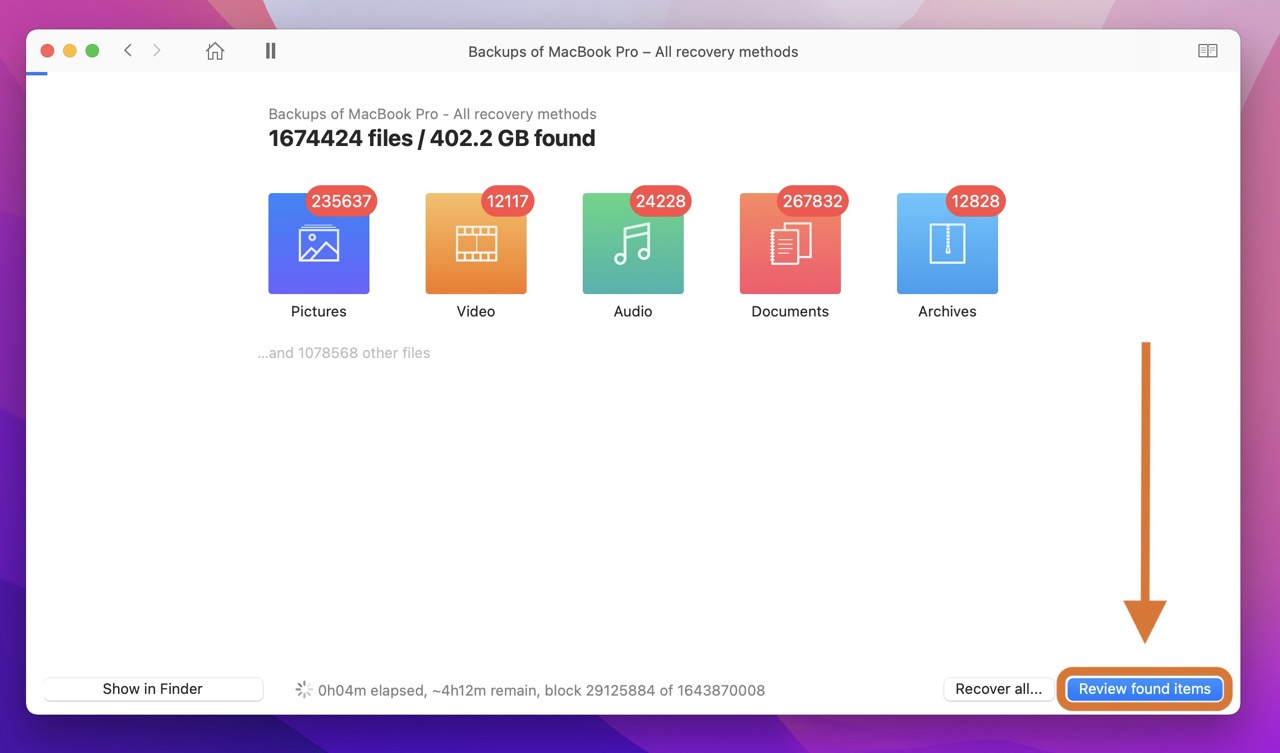
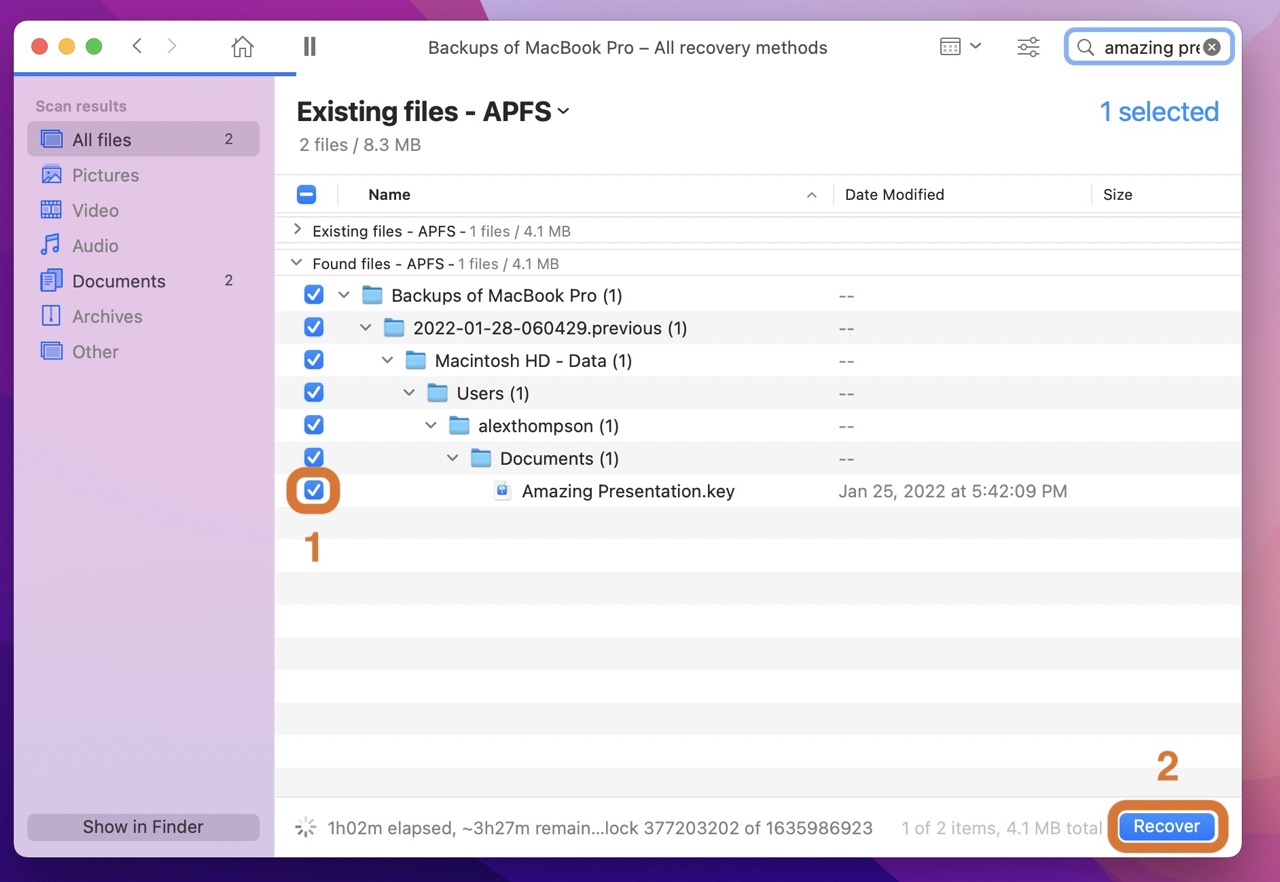
- Once the scan is complete, click Review found items.
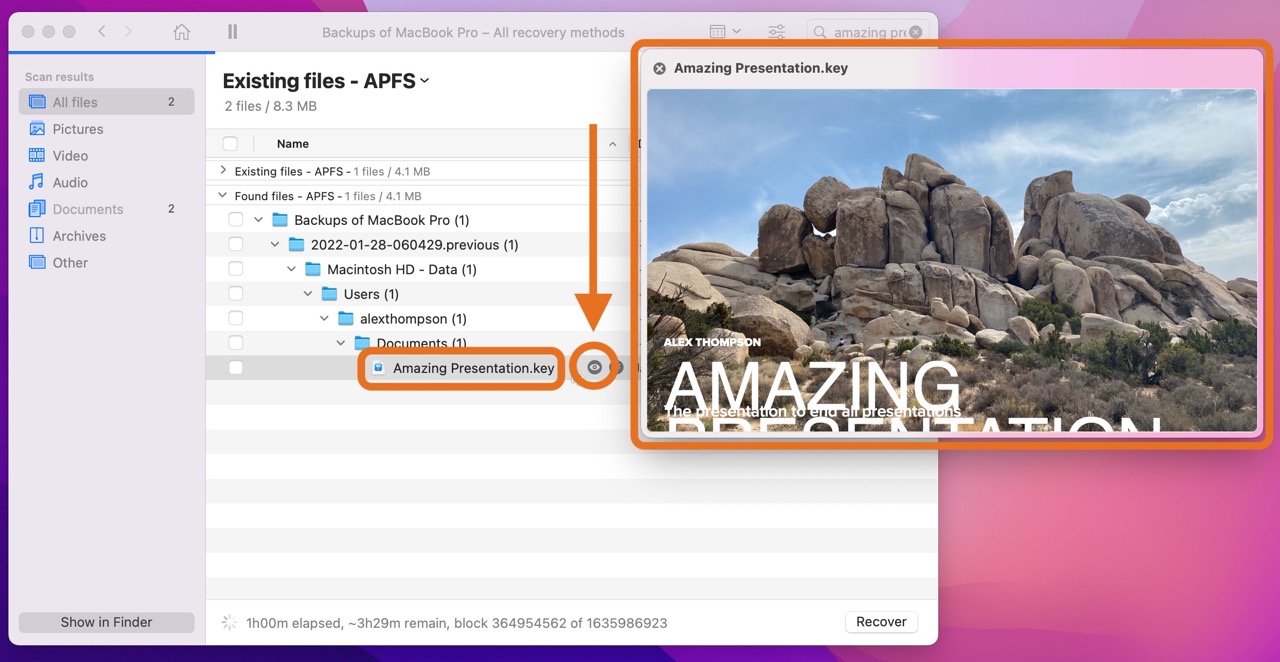
- Locate your deleted Keynote file. You can use the small “eye” icon next to the name to preview the file and ensure it’s the correct document.
- Once you’ve made sure you found the right file, select it and click Recover.
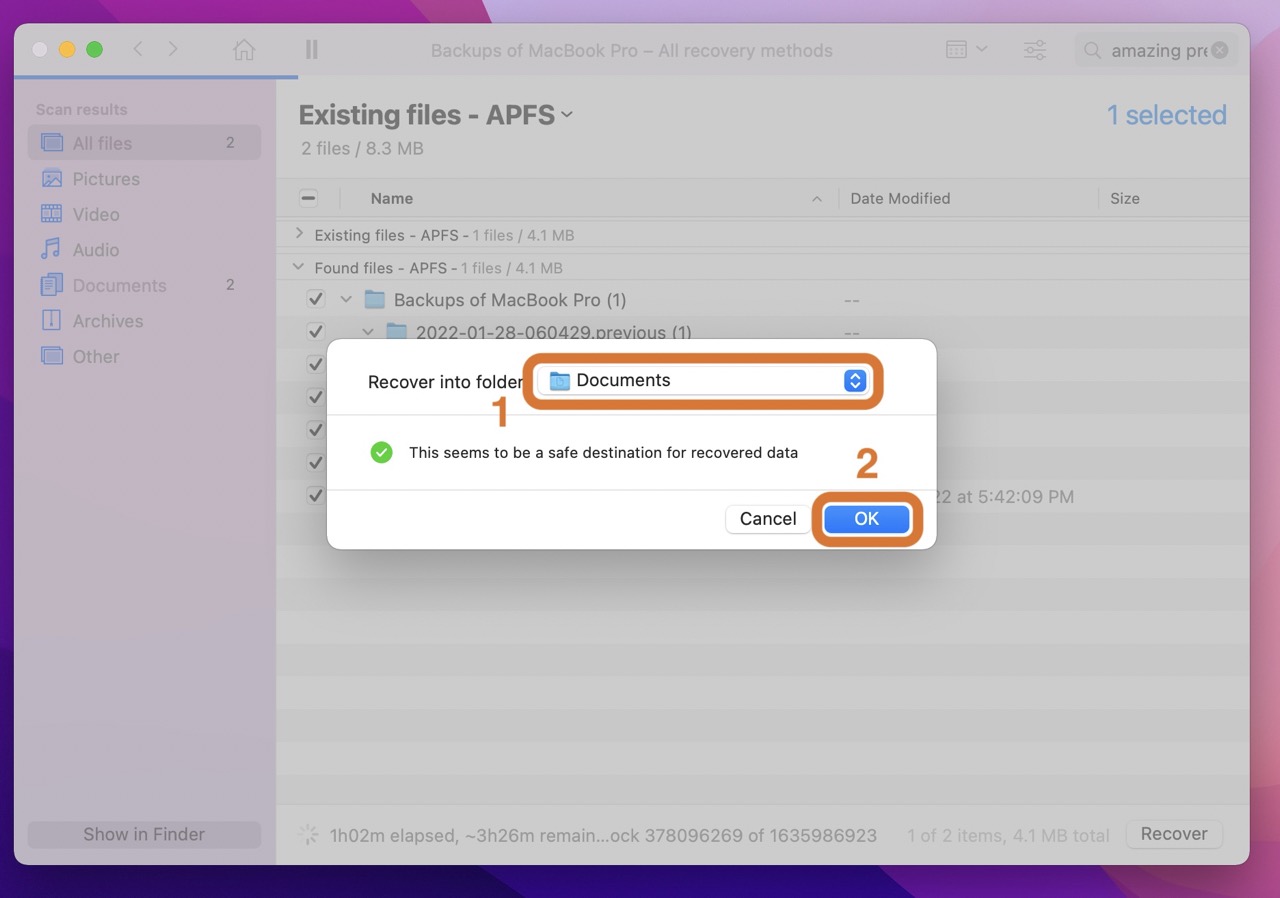
- Choose where you’d like to restore the file. Be aware that restoring to the same drive may cause corruption. You’ll see an indicator in the window that lets you know if your selected location is a safe restore point. Once you’ve selected your restore destination, click OK. Then you can use your file like normal.
Method 3. Locate the Temp Folder
Even if Keynote is not responding or Keynote won’t open, you can still access temporary folders to get your files back.
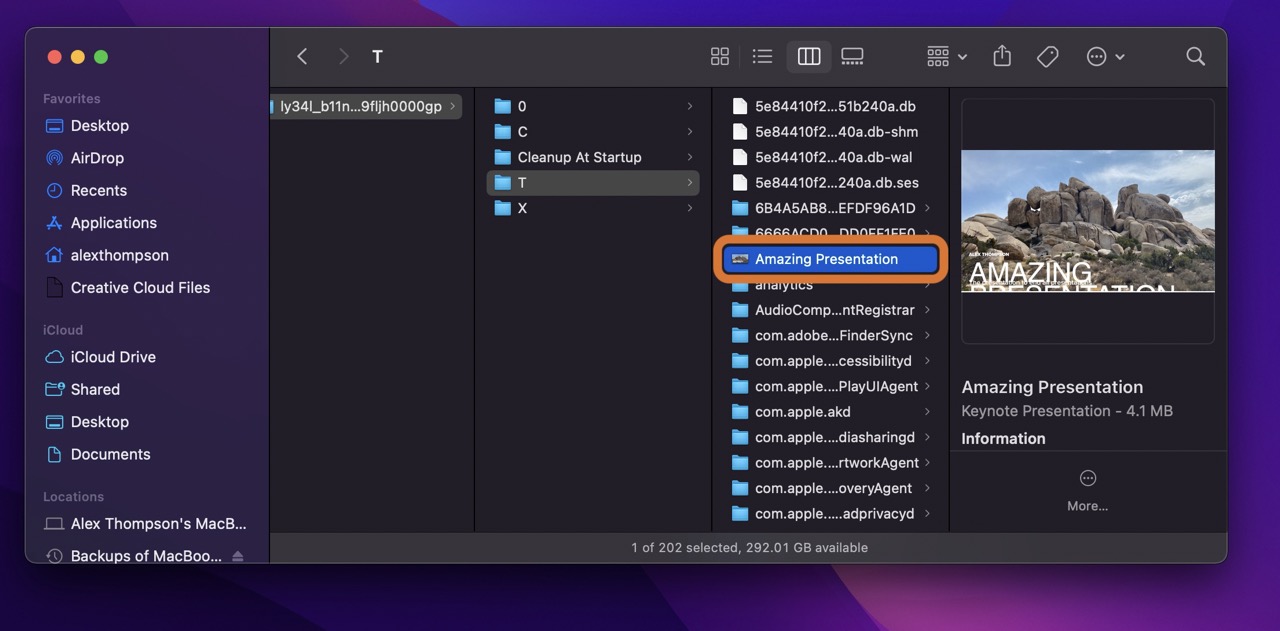
Temporary folders or TMP folders are those which hold files used by an application during installation or removal. They’re also home to files an application uses on a temporary basis. If you cannot locate your file using other means, it may still be housed in these internal folders.
The best way to access these temporary files is by using Terminal, Apple’s utility that allows you to interact with your Mac using a command-line interface. It may look technical at first glance but using Terminal (especially to just open temporary files) is easy.
To restore your Keynote document by accessing temp folders:
- Open Terminal either through Finder or by using Spotlight (Command + Space).

- Once in Terminal, enter the command open $TMPDIR and hit Enter.
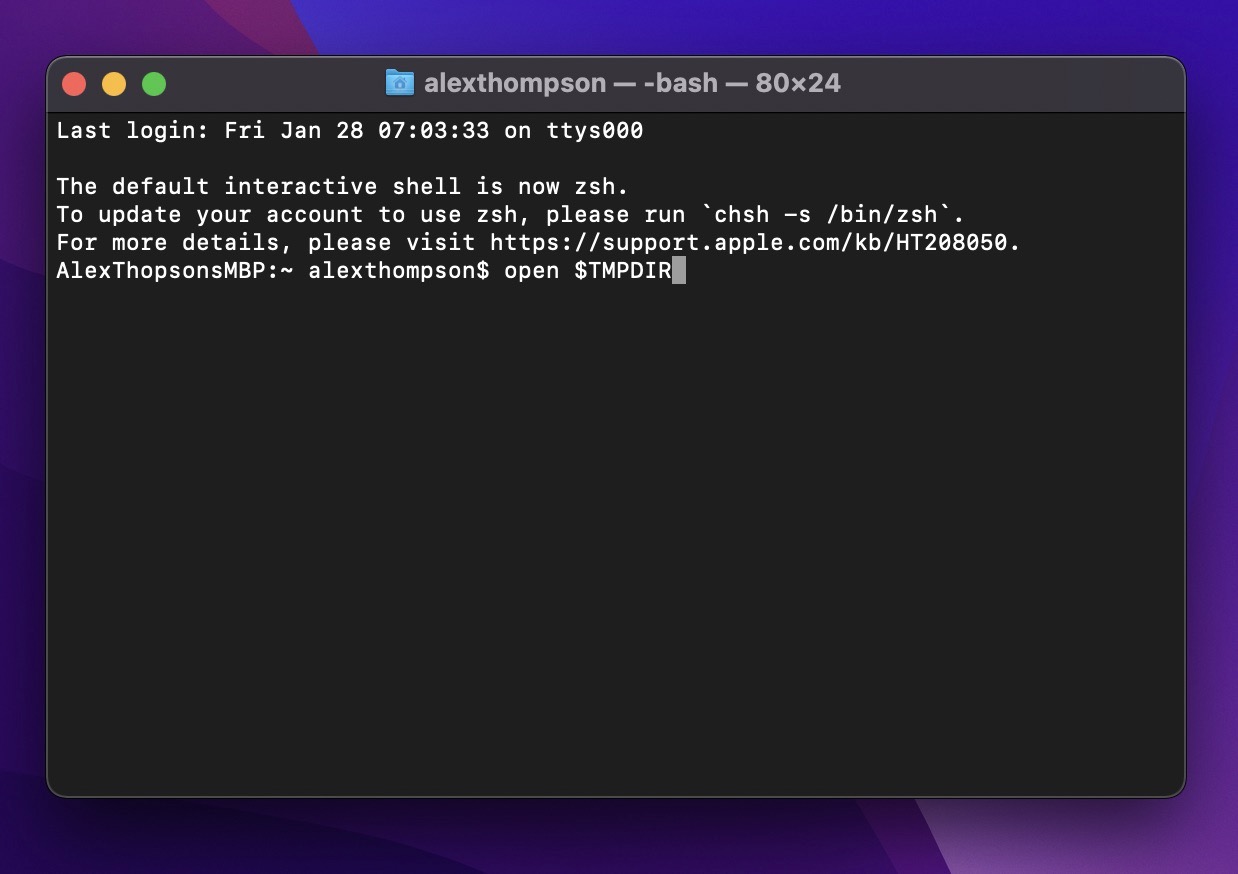
- Search through the files and folders to find your Keynote presentation. Then open it and save it to a new location.
Method 4. Restore From Time Machine
There is one more method to recover deleted Keynote presentations—Time Machine backups. But in order to use it, you need to configure it beforehand.
As a result, if you save a Keynote presentation and Time Machine runs a backup, you can access that backed-up version straight through Time Machine—even if you’ve already deleted your Keynote file.
To restore a Keynote file from Time Machine:
- Open Time Machine by clicking the icon in the menu bar. Then click Enter Time Machine.

- Find the backup you’d like to restore from. You can navigate backups using the timeline to the right, the arrows, or the background windows.

- Locate the backup you’d like to restore from and your Keynote presentation. Select it and then click Restore.
Wrapping Up
Keynote is a fantastic program for creating and editing presentations on the Mac. And if you accidentally delete your Keynote file, it can mean hours upon hours of hard work down the drain.
Thankfully, the Keynote document recovery methods covered in this guide are effective ways of restoring your presentation without the help of a professional data recovery specialist.


