
So your iMovie project disappeared… Once you’ve calmed down and lowered your blood pressure, continue reading this article for 6 different ways to recover a deleted iMovie project.
Our methods include using free native apps on your Mac to do a simple restore, as well as using a premium data recovery tool for a deeper scan and to recover corrupt and missing files on iMovie.
For each method, we wrote easy-to-follow steps accompanied by screenshots. Whether you accidentally deleted iMovie projects, formatted a drive, or maybe even had your files corrupted somehow, at least one of these methods will work.
Table of Contents
Where do deleted iMovie projects go?
The short answer? It depends on what’s been done to it so far.
Here’s the long answer. Deleted iMovie projects are copied to your library as events with the same file name. To access them, refer to Method #2: Check Your iMovie Library.
If you delete those files from Finder, they go into the Trash Bin – they stay there until you decide to manually empty the trash bin or right-click the file and choose “Delete Immediately”.
If you haven’t done either of those, you can easily recover your iMovie project from the trash bin using Method #4 Undelete iMovie Projects from the Trash Bin.
If you did empty your trash bin, they’re living in your drive waiting to be accessed until they get overwritten by other files. You can use an advanced data recovery tool like Disk Drill to do a deeper recovery that works even if your files (or your entire drive) get corrupted or infected by a virus – proceed to Method #5 Recover iMovie Projects using Data Recovery Software (Disk Drill).
We have even more methods you can try, so read on.
Method #1 Try to find your iMovie project on your Mac
Here are the locations where iMovie files are usually stored or sent:
- iMovie Backups folder
- Movies folder
- Trash bin
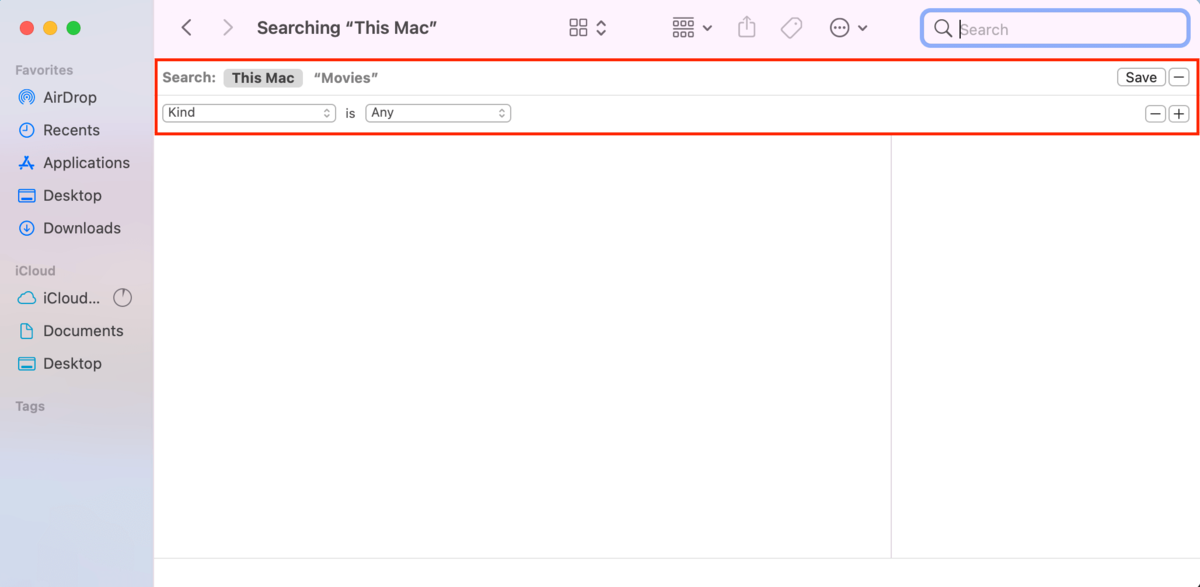
If you can’t find your files there, do a system-wide search using Finder. Here’s how:
- Open Finder by clicking its icon on the dock.
- Press CMD + F to open the advanced search bar.
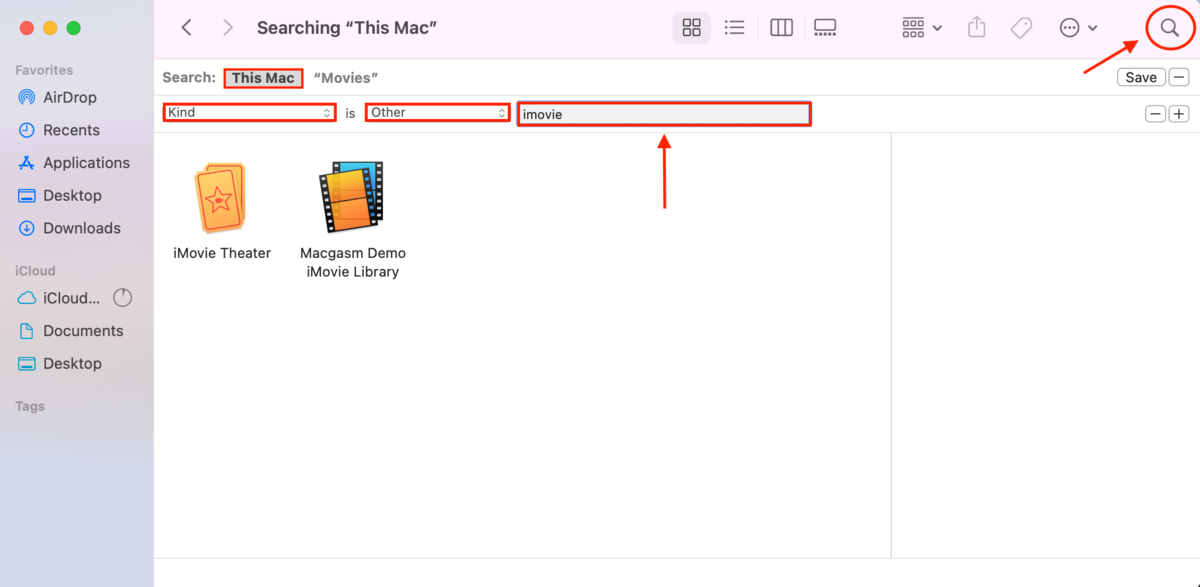
- On the same bar, choose “Kind” for the first property, “Other” for the second property, and in the empty field that appears on the right, type “imovie.” You can filter the results further by clicking the magnifier button at the top right corner of the window and typing your file names.Make sure you are conducting the search for your entire Mac, and not just the folder where you hit CMD + F (in my case, I’m in the Movies folder).
Method #2 Check Your iMovie Library
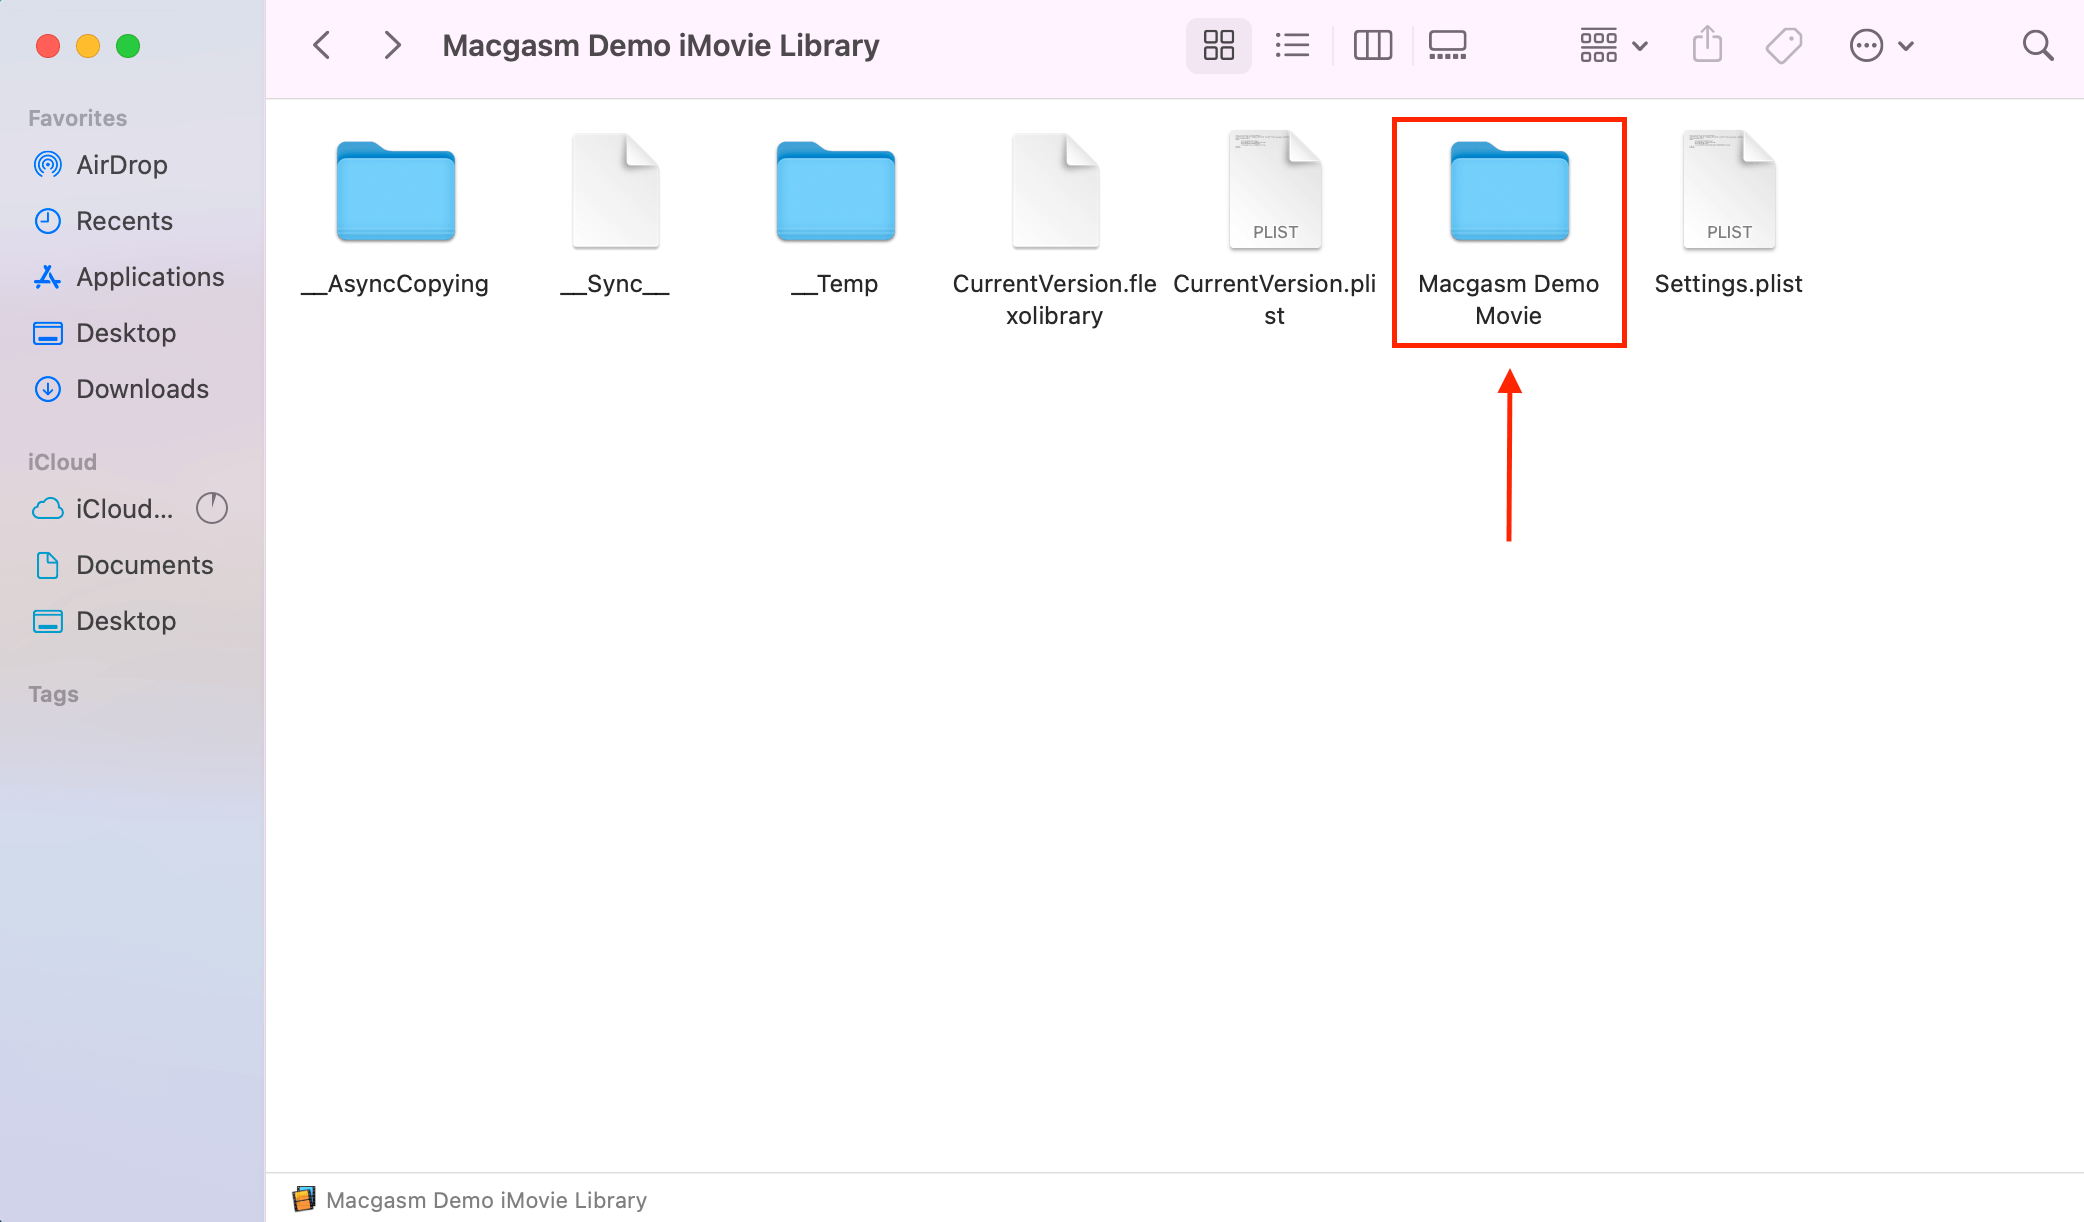
The way iMovie stores projects is by creating a library file that contains your projects and their assets. Even deleted projects are saved as events in your libraries, and they show up while working in iMovie or as package files inside library folders. Here’s how to access them:
- Open Finder by clicking its icon on your dock or by pressing CMD + Space and typing “Finder.”
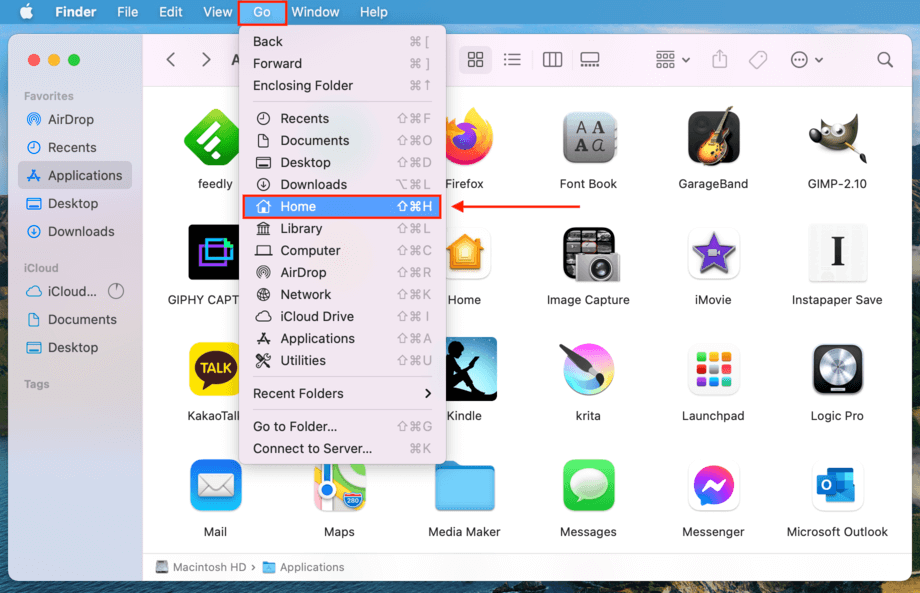
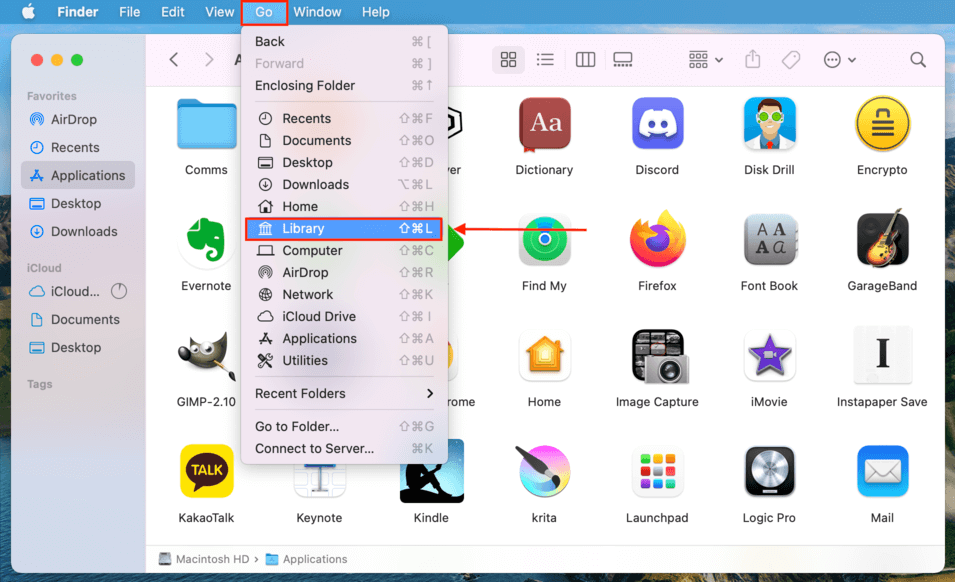
- Click “Go” on the menu bar and click “Home.”
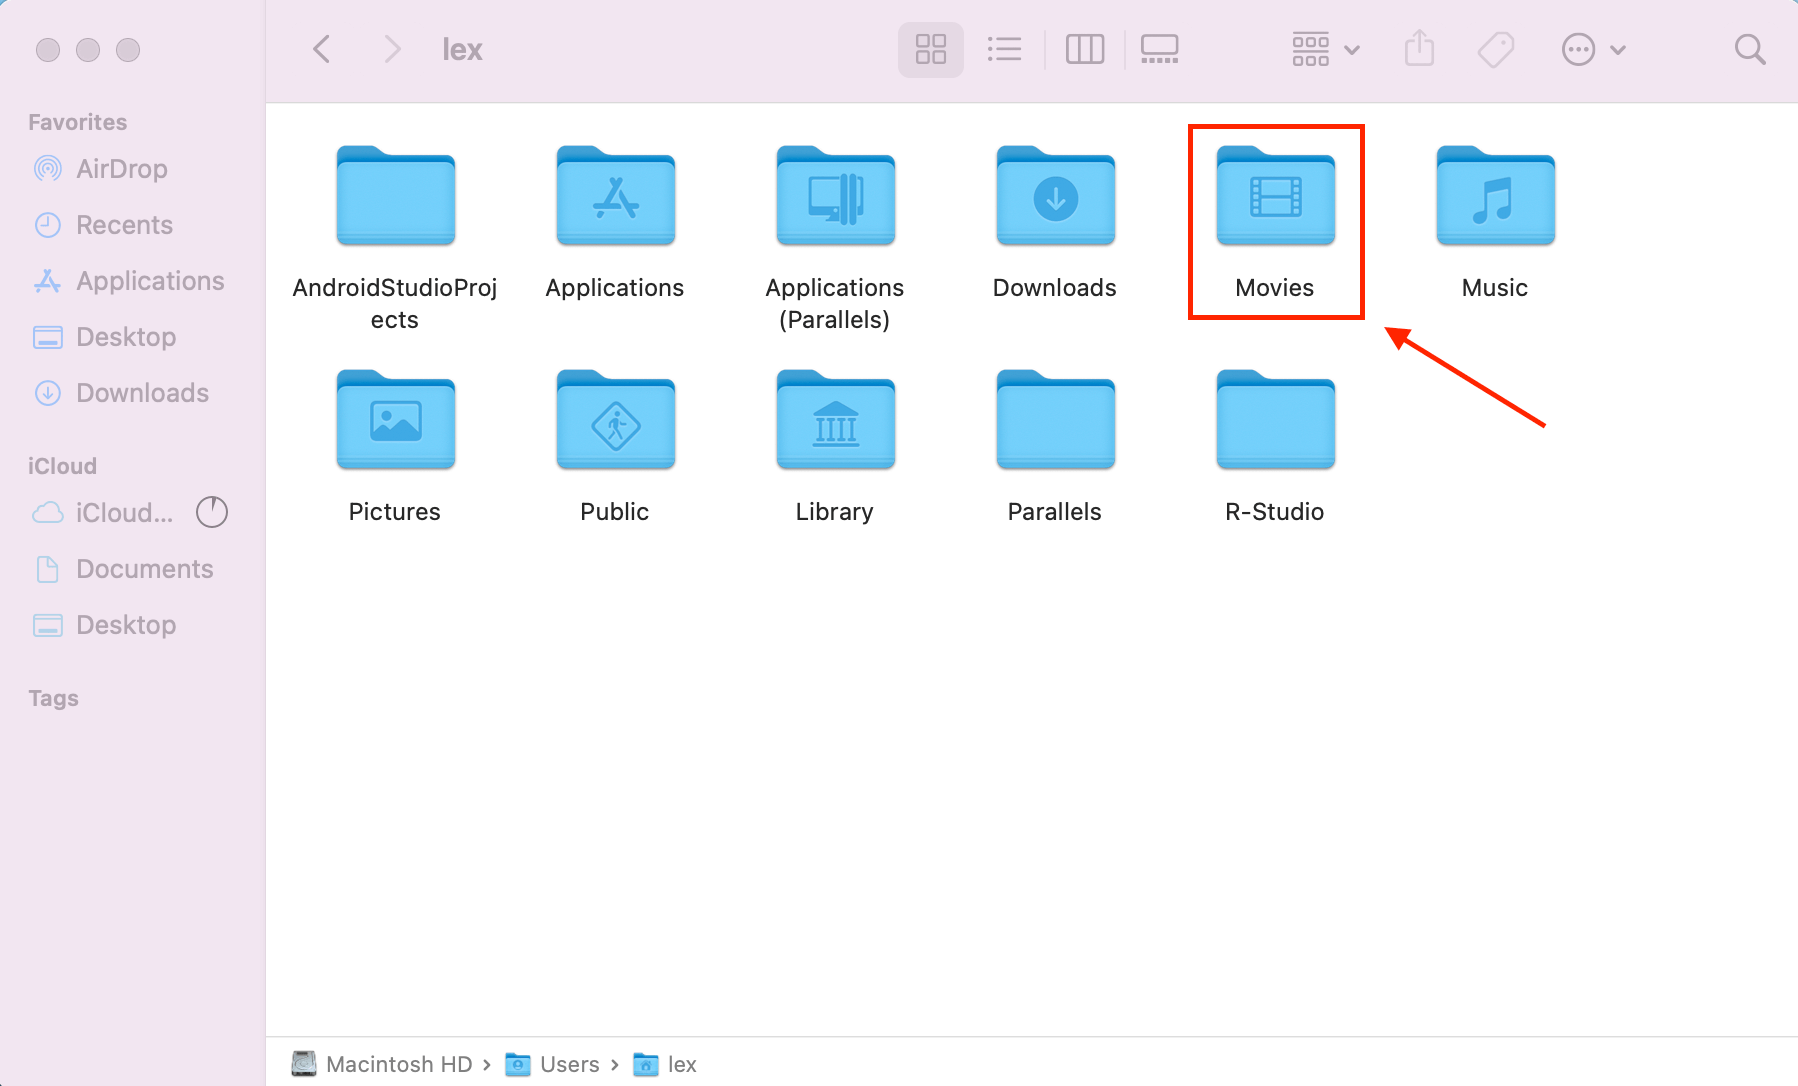
- Open the Movies folder.
- Right Click “iMovie Library” and click “Show Package Contents.”
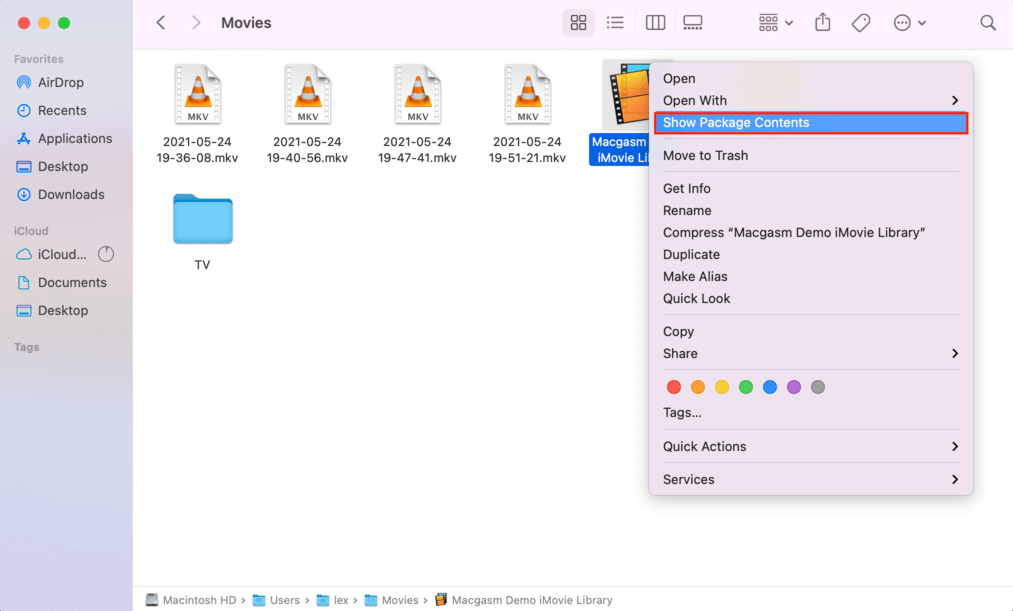
- Locate your iMovie project and its assets.
Method #3 Scan Your iMovie Backups Folder
iMovie automatically backs up data as you use it. It has a special backup folder that’s located pretty deep in your file system, but we’ll take it folder by folder with screenshots so you don’t get lost.
iMovie backups are located at this address:
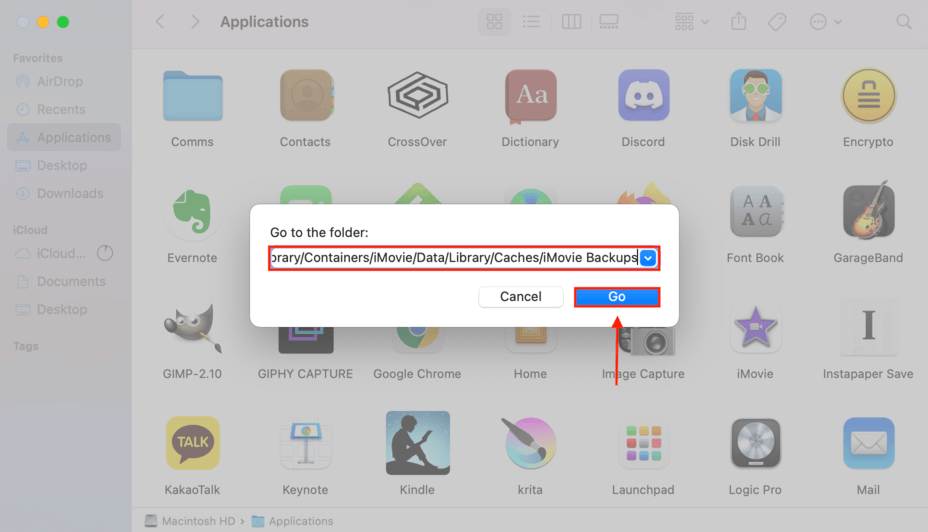
/Users/”your user”/Library/Containers/iMovie/Data/Library/Caches/iMovie Backups
There are two ways you can access it.
Use “Go to Folder”
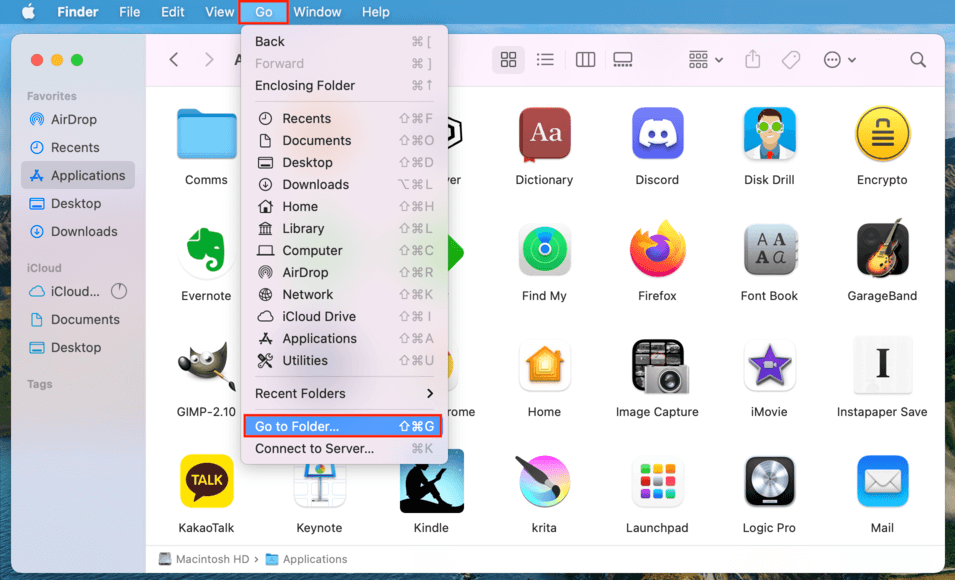
- Open Finder by clicking its icon on your dock or by pressing CMD + Space and typing “Finder.”
- On the menu bar, click Go > Go to folder…
- Copy-paste the above address to the allotted space on the popup.Make sure you replace “your user” with your actual Mac user profile name. For example, mine is “Alex” – my nickname for Alejandro, the Spanish version of Alexander.
/Users/Alex/Library/Containers/…/iMovie Backups - Click Go. You’ll arrive at the iMovie Backups folder where you can look for your projects and assets.
Go through the folders manually
- Open Finder > Go (Menu Bar) > Library.
- Locate the Containers folder and open it.

- Locate the iMovie folder and open it. I suggest using List view to find it more easily.
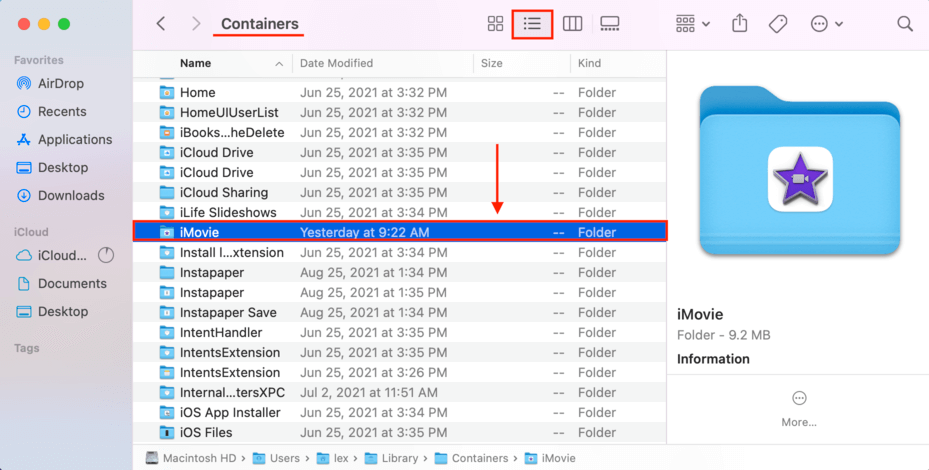
- In the iMovie folder, open the Data folder > Library > Caches. This is where the iMovie Backups folder is stored.

Method #4 Undelete iMovie Projects from the Trash Bin
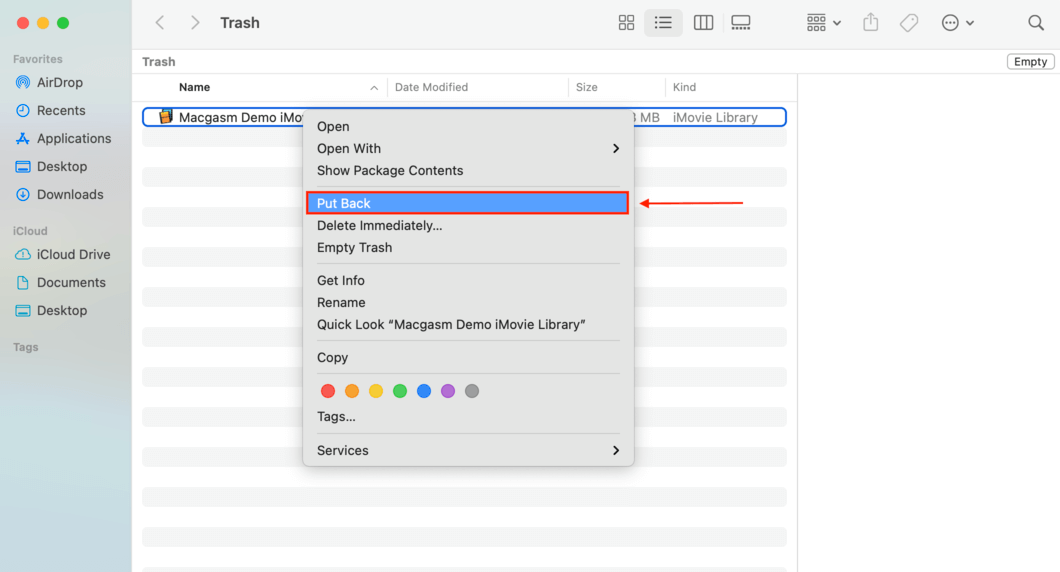
Files in your trash bin stay there until you manually delete them or empty the trash.
- Open your trash bin using the icon on your dock.
- Locate your file by scrolling through the contents or use the search function at the top right corner of the window.
- Right-click the file and click Put Back.
 If you accidentally emptied your trash bin, your files are still residing inside your drive, ready to be overwritten by new data. In this case, don’t worry – you still have a chance to recover them. Read on.
Method #5 Recover iMovie Projects using Data Recovery Software
When everything has gone completely wrong and you format your drive by accident, emptied your trash bin – thus deleting your videos, or got hit by a nasty virus that corrupted your files… It’s time for a more robust solution.
Disk Drill is an advanced data recovery tool used by massive organizations, forensics professionals, and home users like you and me. Here’s how to use it to recover a deleted iMovie project:
- Download and install Disk Drill free from the Cleverfiles website.
- Plug in another storage device (like a USB stick) – I’ll tell you why later.
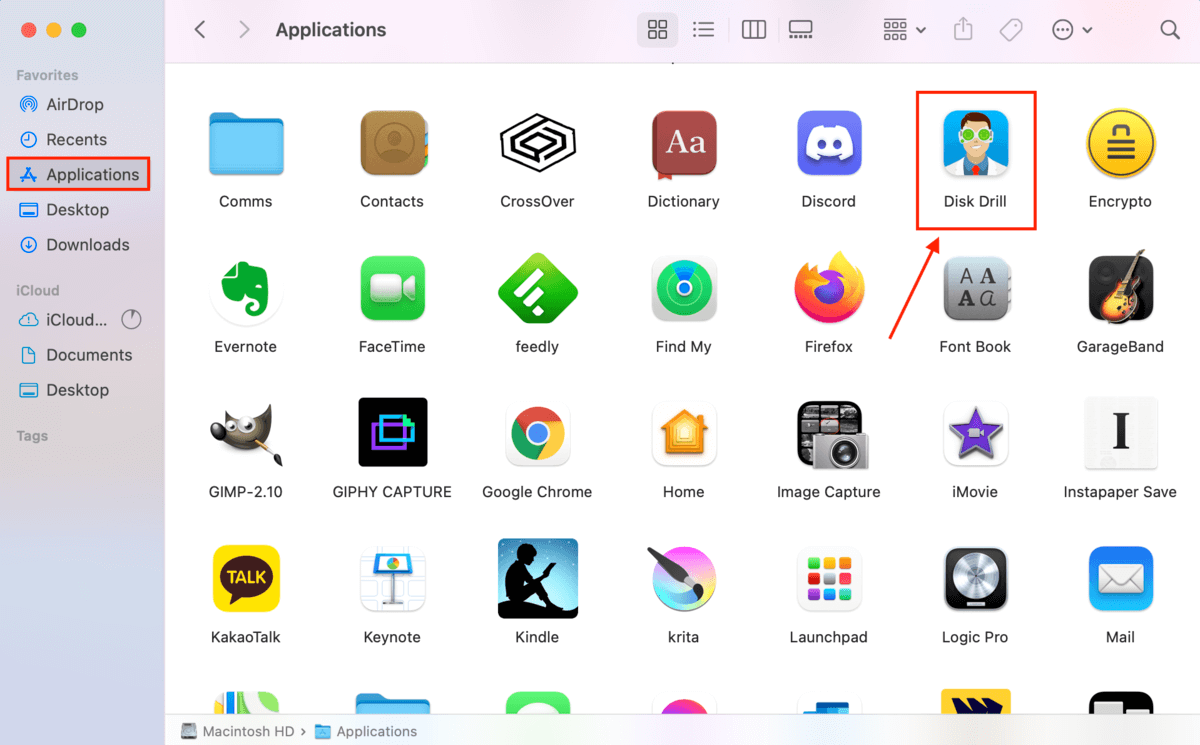
- Open Disk Drill by double-clicking its icon in the Applications folder.
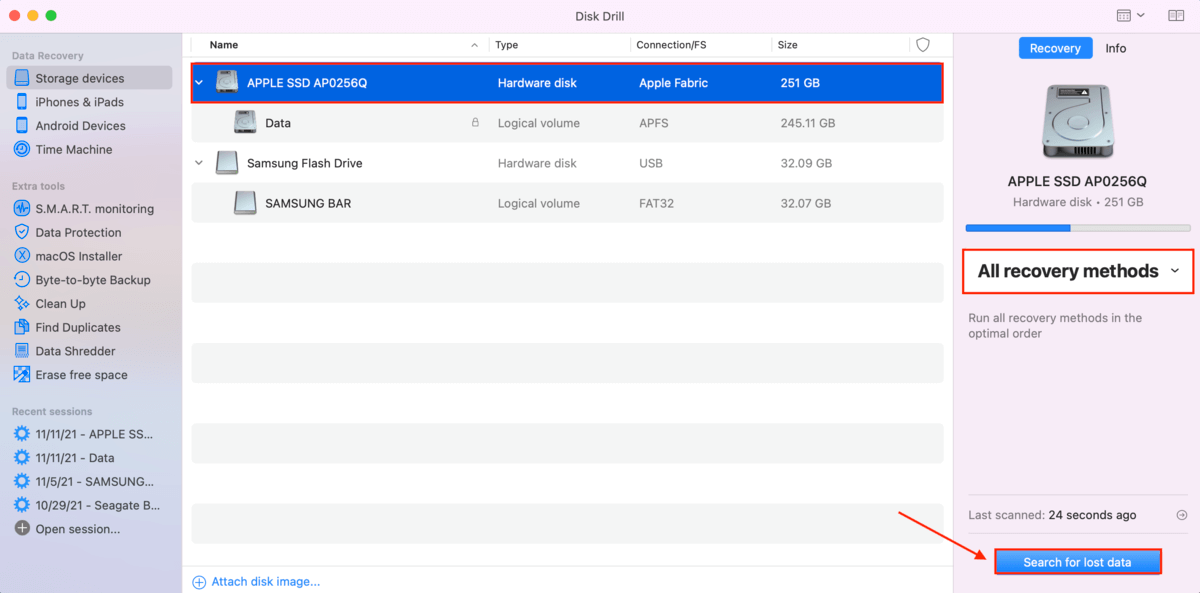
- Choose the drive or partition where you last saw your iMovie project. For this example, we’ll be using the “All Scanning Methods” setting. Click “Search for lost data.”
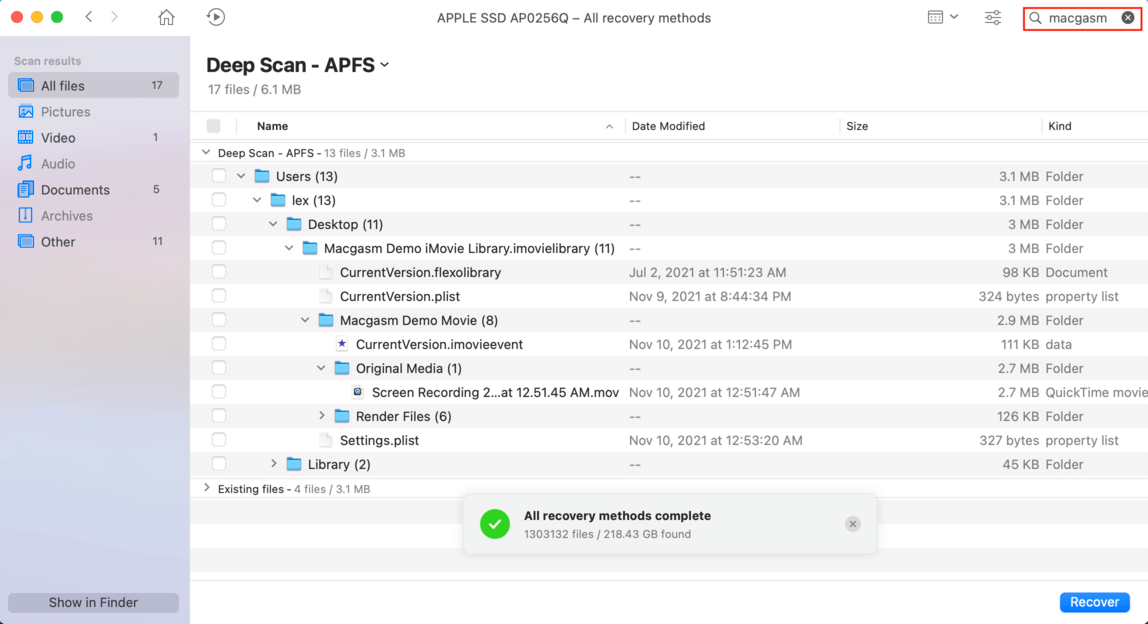
- Wait for Disk Drill to complete the scanning process, then click the “Review found items” in the bottom right corner.

- Disk Drill will reveal the files it found. If you remember the name of your file, try filtering the results by name using the search bar on the top right corner.
- Hover your mouse pointer over the space beside your file to reveal an eye button, which lets you preview the file.

- Once you’re done previewing your files, click the “Recover” button at the bottom right corner of the window.
- Choose a destination folder that is different from the one you’re recovering – this is to avoid overwriting data. Now aren’t you glad I told you to connect a separate storage device?
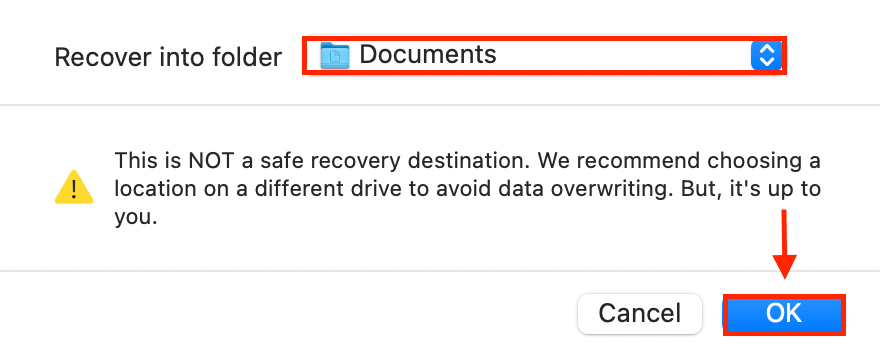
- Once you click “OK”, congratulations! You’ll have your files restored to their original place.
Method #6 Restore iMovie Files using Time Machine
Time Machine is a free native Mac app that lets you backup and restore files. If you set up Time Machine before losing your iMovie project, skip to How to Recover your iMovie backups using Time Machine. If you haven’t… Best start now!
How to Backup your iMovie projects using Time Machine
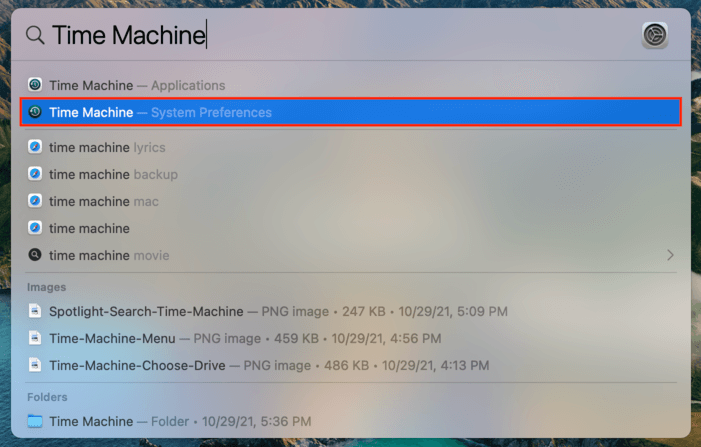
- Open Time Machine by double-clicking its icon in the Applications folder or by using Spotlight Search (CMD + Space).
- Tick the box beside “Back Up Automatically” and click “Select Backup Disk…”
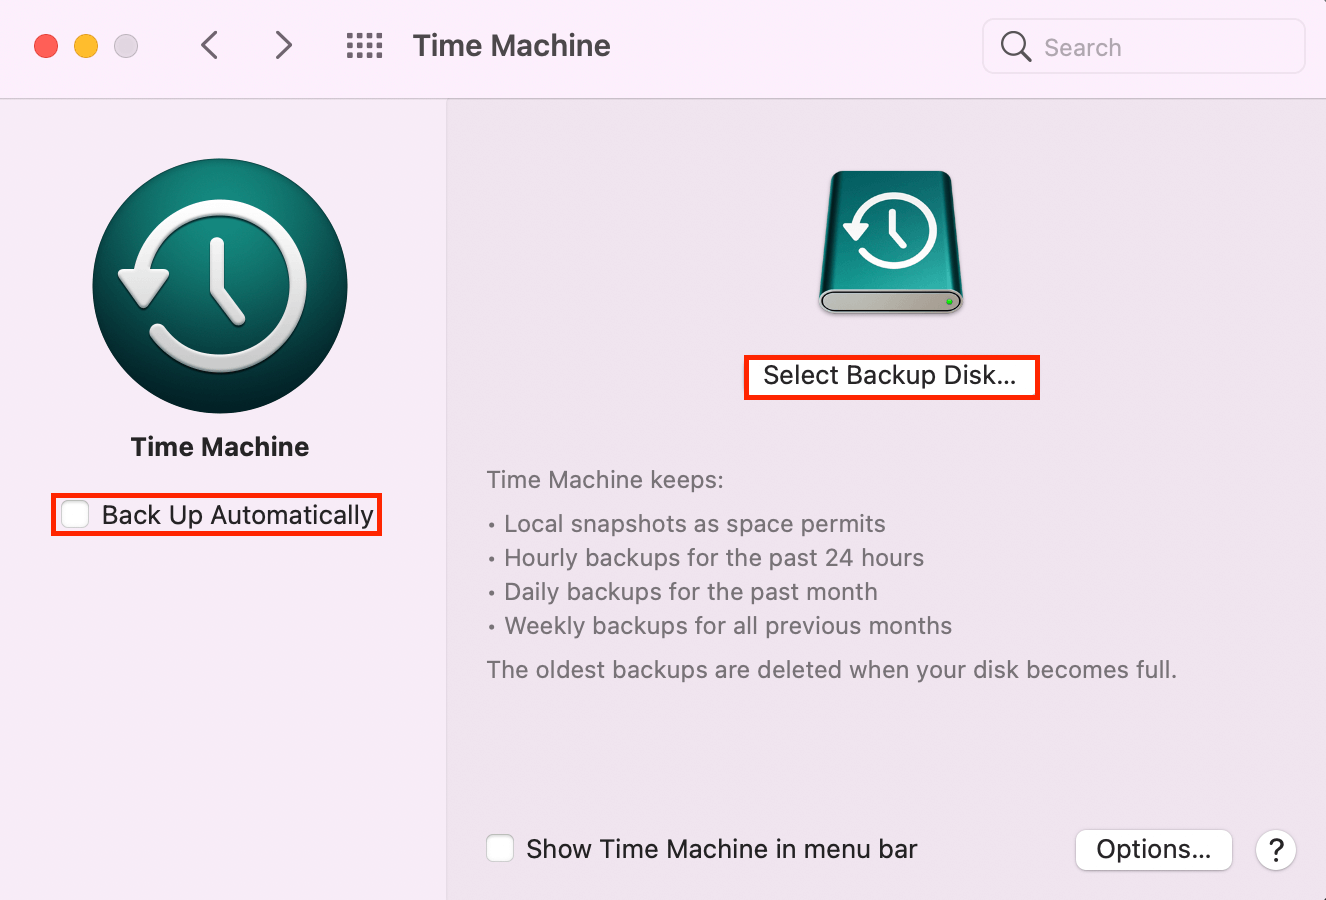
- Select the drive where you want to store your backups and confirm.
How to Recover your iMovie backups using Time Machine
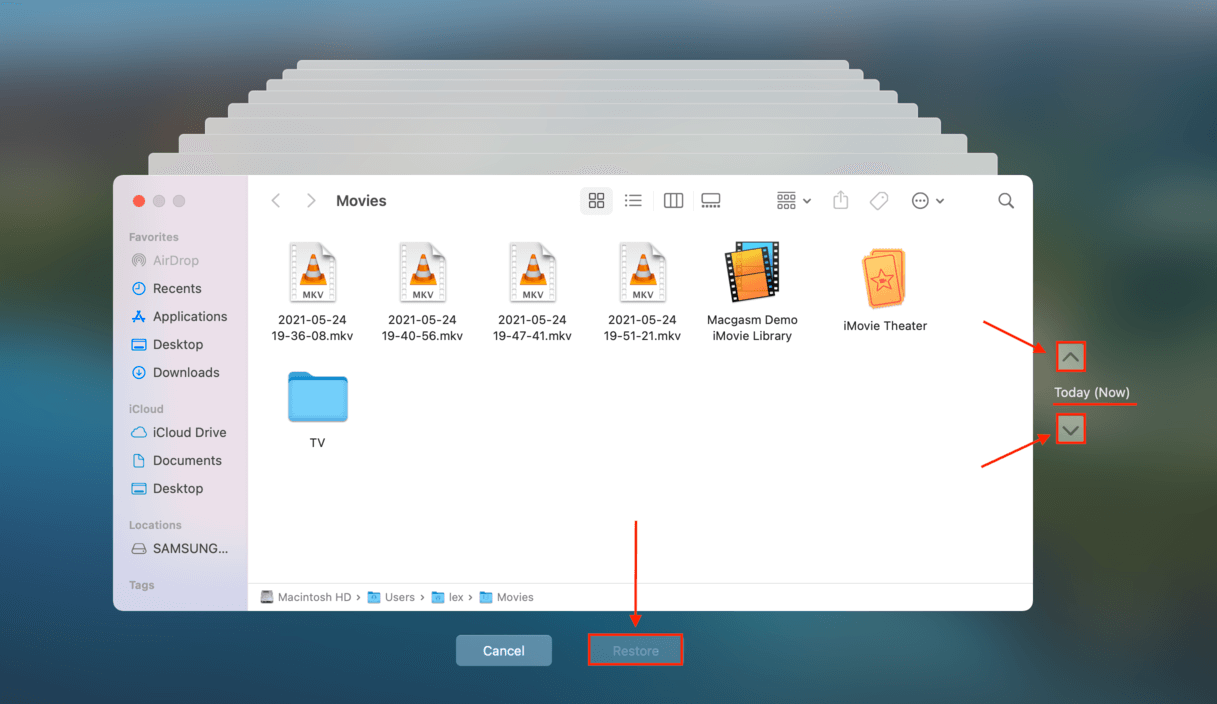
- Open Time Machine by double-clicking its icon in the Applications folder or by using Spotlight Search (CMD + Space).
- Choose the drive that contains your backup.
- Scroll through the snapshots by clicking the arrows on the right and click “Restore.”
How to recover deleted iMovie projects on iPhone
Just like for the Mac, iMovie projects are stored in the iPhone’s file system as assets within iMovie libraries. Disk Drill works for the iPhone (and Android devices) the same way as it does with Macs, and it’s on our list of the best iPhone recovery software.
Here’s how to use Disk Drill to recover deleted iMovie projects on your iPhone:
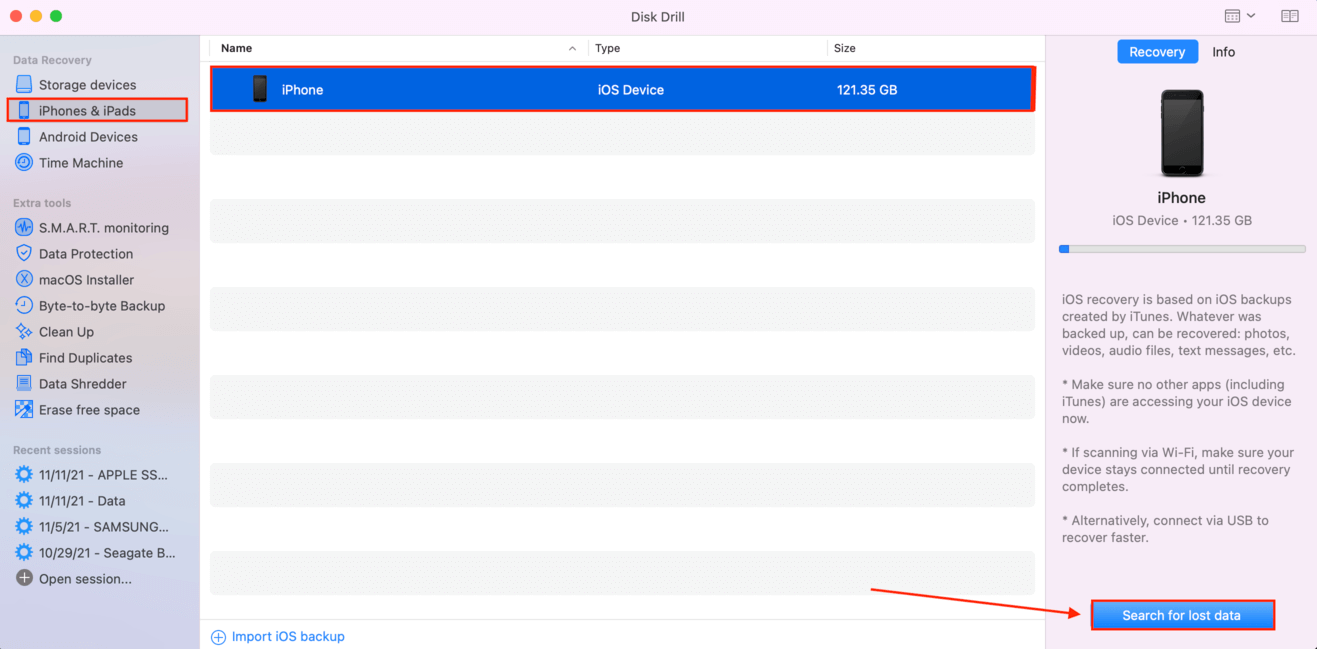
- Connect your iPhone to your Mac.
- Open Disk Drill by double-clicking its icon in the Applications folder or using Spotlight Search (CMD + Space).
- Select your device and click “Search for lost data.”
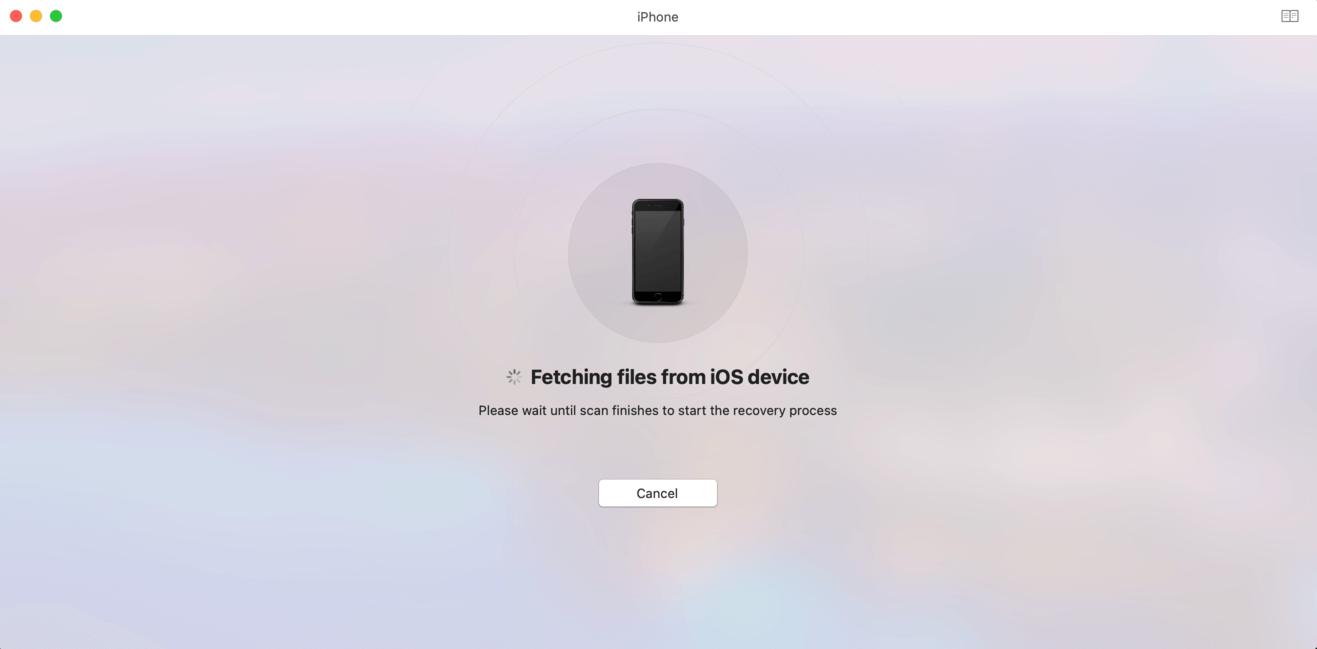
- Wait for Disk Drill to complete its scan.
- Select the data you want to recover and click “Recover.”
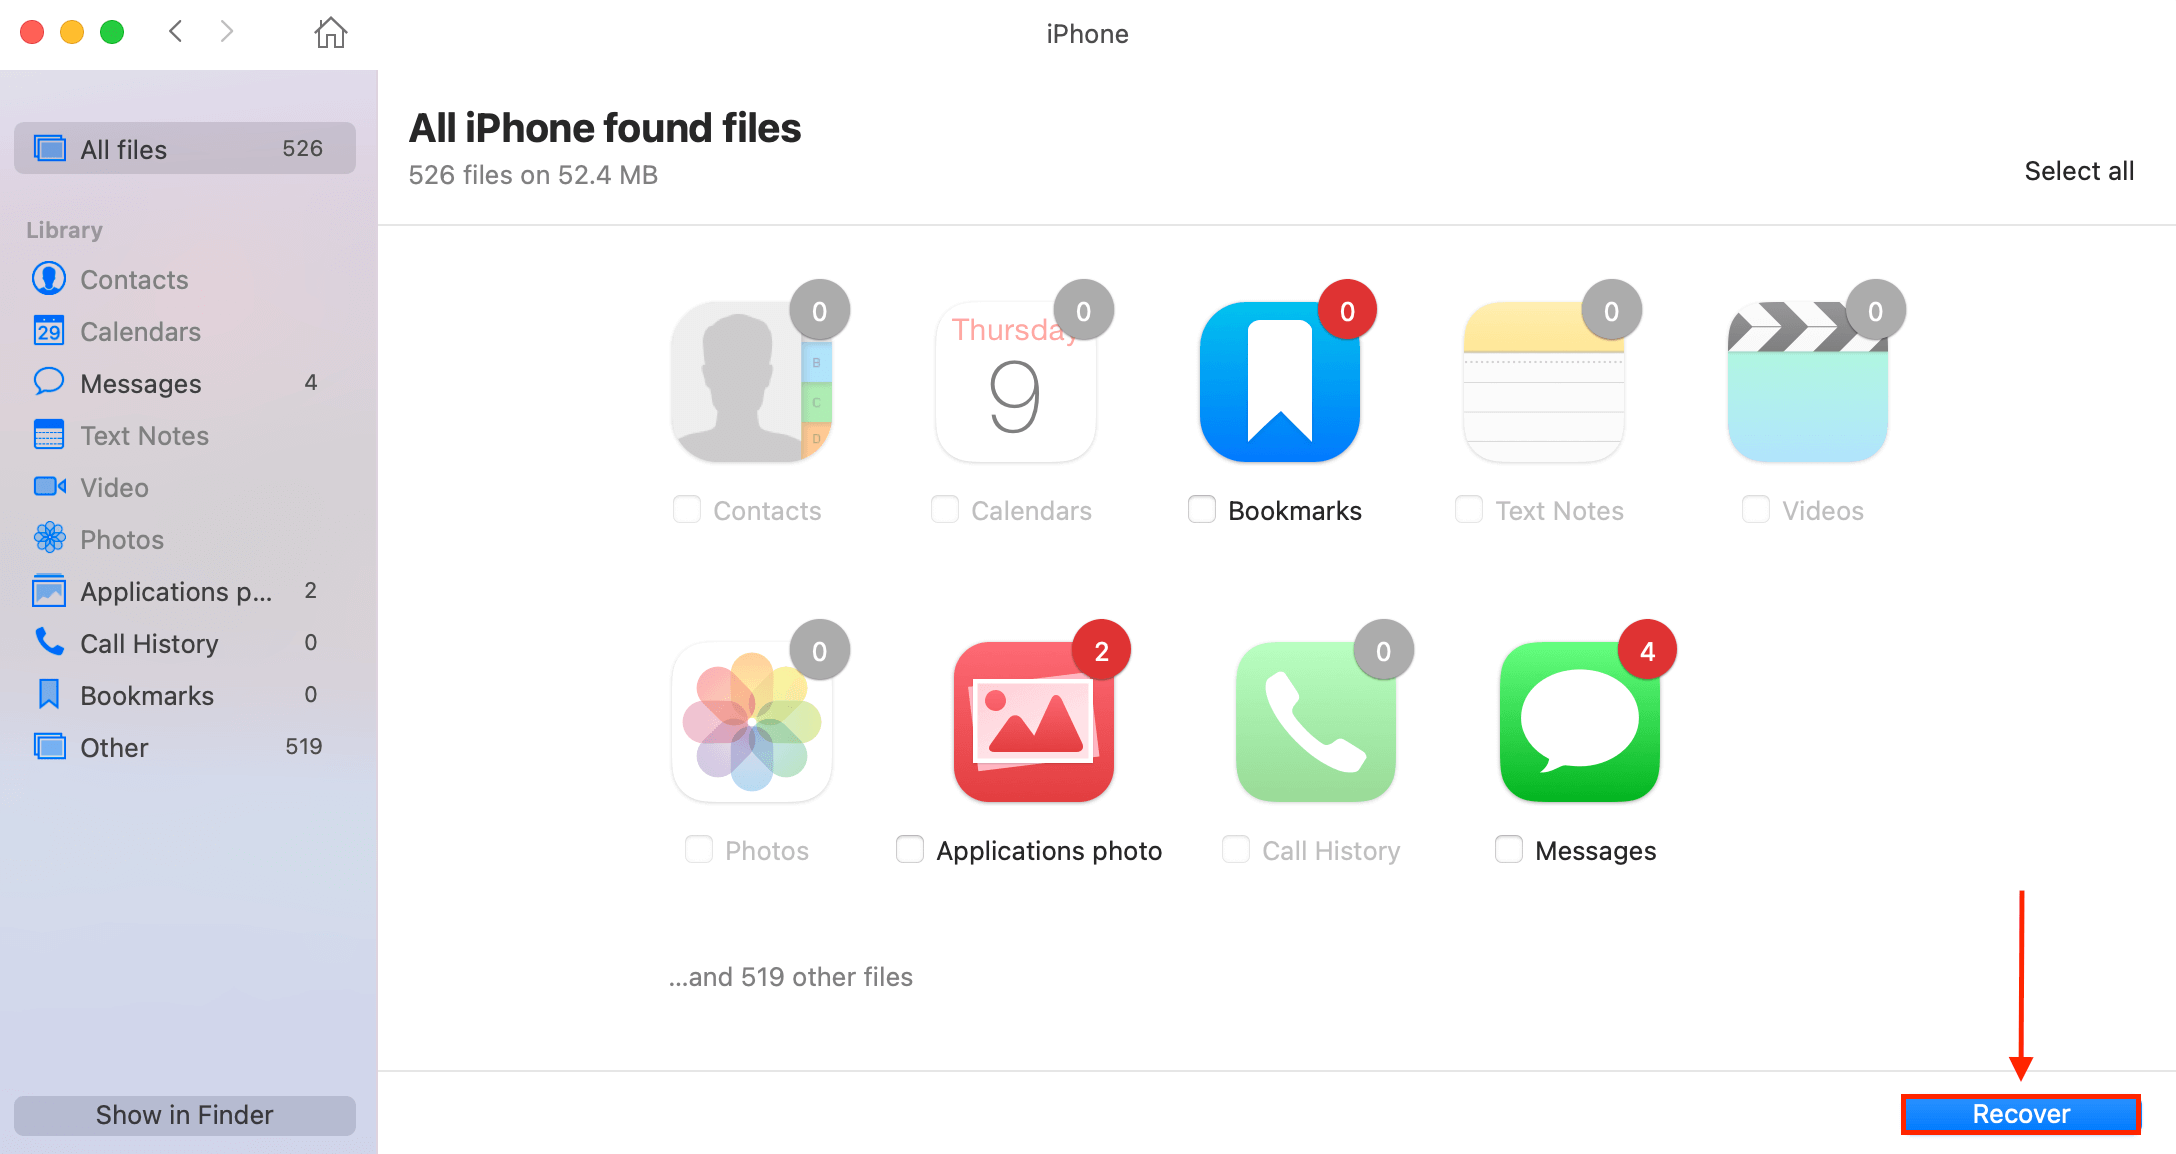
- Select the destination folder for your recovered files.

FAQ
Yes, iMovie saves automatically to the iMovie Backups folder while you use the app. However, it’s better practice to always copy your libraries to a separate storage device or use system-wide backup tools like Time Machine or Disk Drill.
For this article, we figured out a few ways to scan our machine for iMovie projects (even deleted ones). In summary, we can:
- Use Finder’s advanced search function (Finder > CMD + F)
- Browse iMovie libraries (Finder > Go > Home > Movies > Right-click an iMovie Library > Show Package Contents)
- Browse the iMovie Backups folder (Finder > Go > Library > Containers > iMovie > Cache)
- Use data recovery software like Disk Drill to conduct a deeper scan of our drives
Conclusion
iMovie projects typically take some intentional effort to disappear forever – but to stay on the safe side, save copies of your libraries to a removable storage device.


