
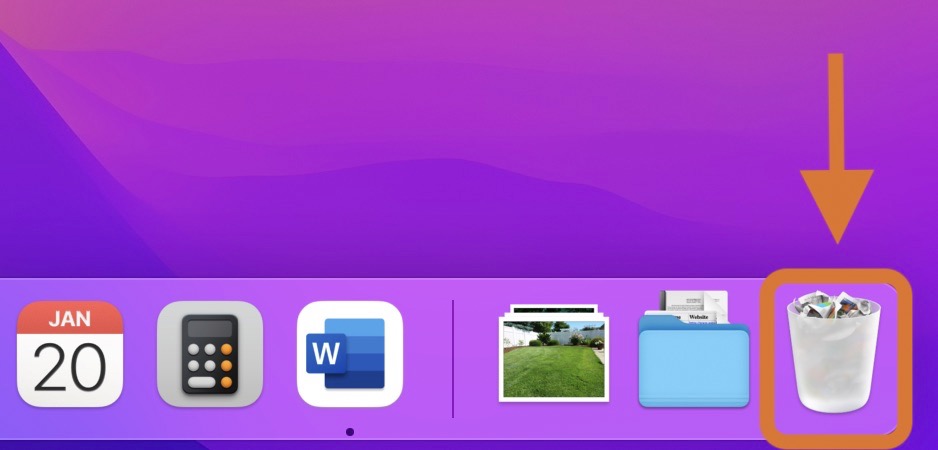
Most (if not all) Mac users are familiar with the Trash Bin. It’s the folder where your “deleted” files go before you get rid of them permanently. But there’s another quicker way to wipe your files permanently. And that’s Delete Immediately on Mac.
This guide shows you how to use the Delete Immediately feature, how it compares to the Trash Bin, how to recover files wiped accidentally using Delete Immediately, and how to fix a common (yet frustrating) Mac problem.
Table of Contents
What Is Delete Immediately on Mac?
The Mac “Delete Immediately” option is a way to get rid of a file or folder from your computer without using your Trash Bin. Mac OS X El Capitan (OS X 10.11) introduced this feature way back in 2015, and it’s still on all later macOS versions.
Rather than sending your file to the Trash (where you can then permanently delete it), Delete Immediately wipes it instantly, effectively skipping the Trash altogether. It’s a handy feature that lets users speed up the process of deleting files.
There are three ways to access the Delete Immediately option.
Using the Immediately Delete Command on Mac:
- First, select your file.

- Then use the keyboard shortcut Command + Option + Delete.
- You’ll then see a confirmation window where you can choose to delete or cancel.

Accessing Delete Immediately Through the Menu Bar:
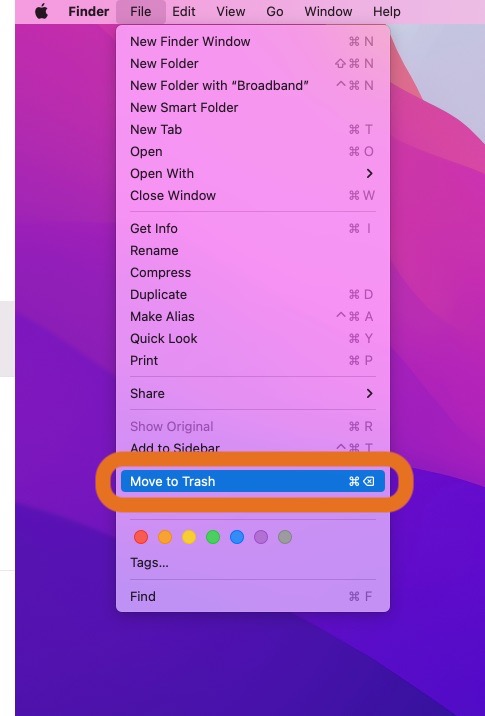
- Select your file and choose File from the Menu Bar.
- You can’t find Delete Immediately at first (left image). Hold down the Option key to reveal Delete Immediately where Move to Trash used to be (right image).
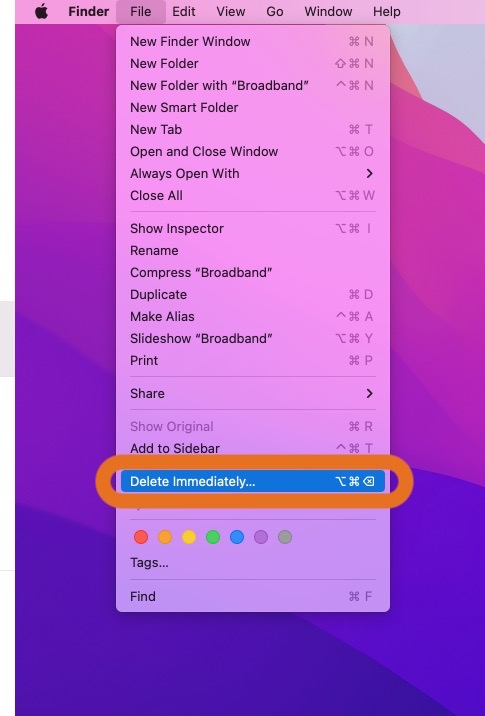
- Once you select Delete Immediately, you’ll be able to delete or cancel the action.
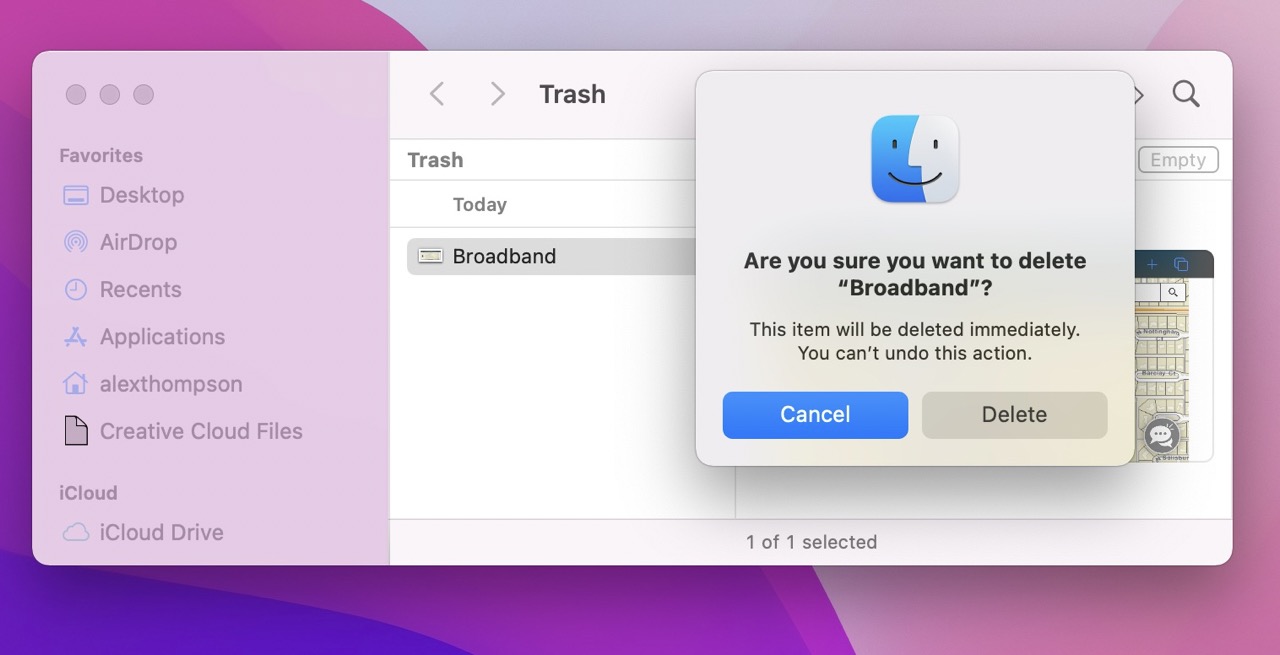
Through the Trash:
- Open the Trash Bin and select your file.
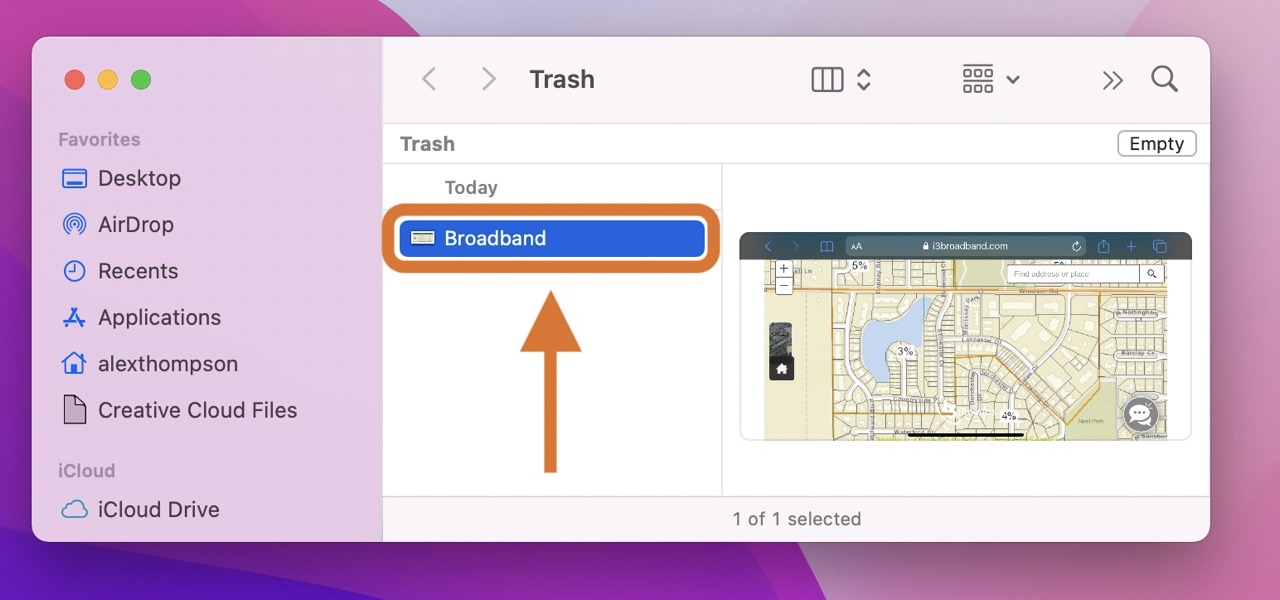
- Right-click your file and choose Delete Immediately.
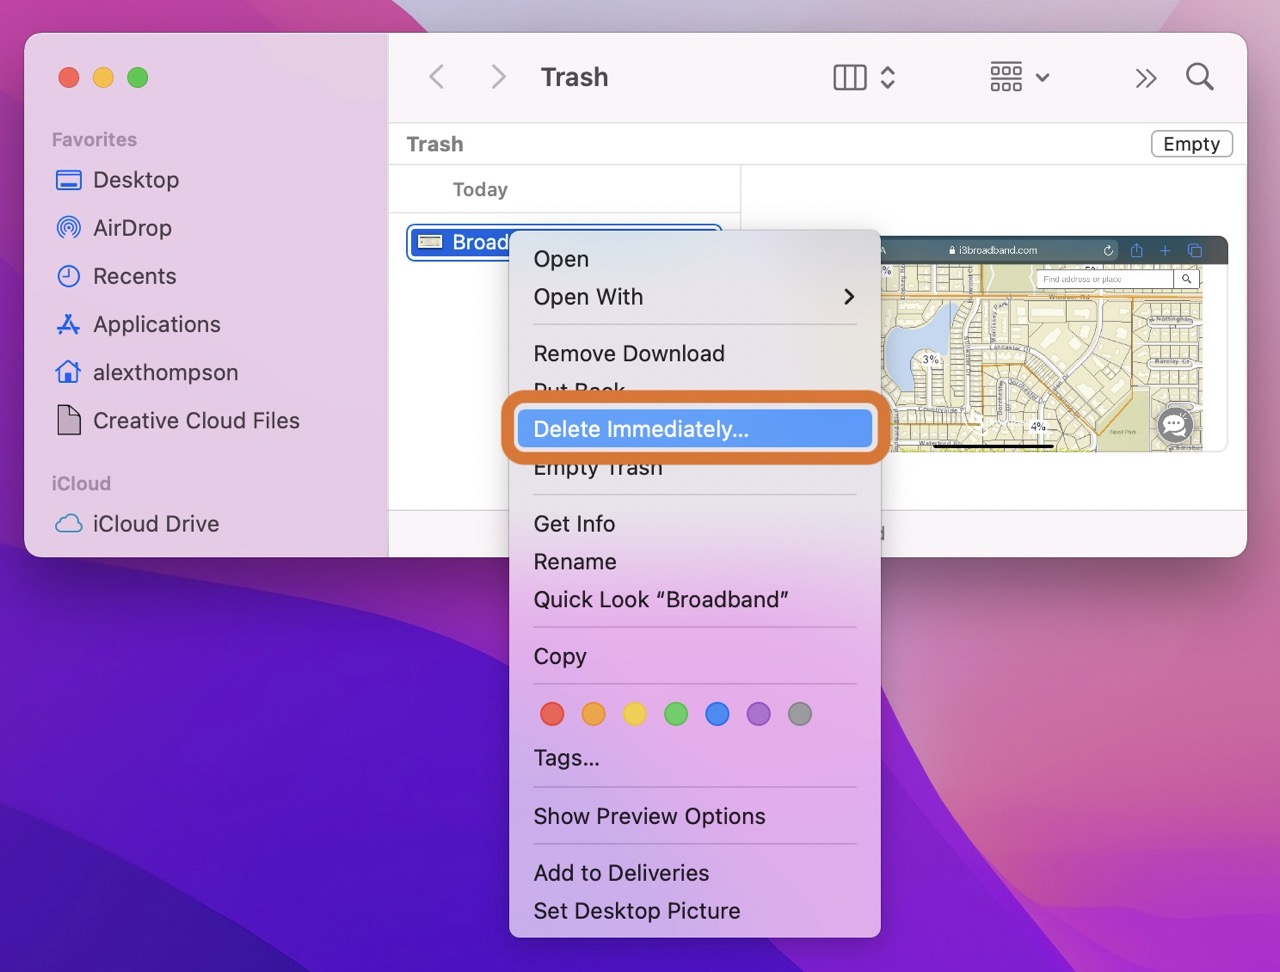
- Delete the file or cancel the action.
Delete Immediately vs. Empty Trash Comparison
When you delete a file normally, it sends that file to the Trash Bin, where you can then empty the trash to delete the file permanently.
So, you may be wondering what the differences are between Delete Immediately vs. empty the trash. And truth be told, there isn’t much of a difference. Both options effectively accomplish the same thing.
The only real difference is in the number of steps it takes to achieve the same effect.
To fully delete a file using the Trash Bin, you must:
- Select the file.
- Send the file to the trash using the menu bar, the keyboard command for delete on Mac (Command + Delete), or by dragging the file to the Trash Bin.
- Open the Trash Bin.
- Select the Empty option.
- Then, confirm the action.
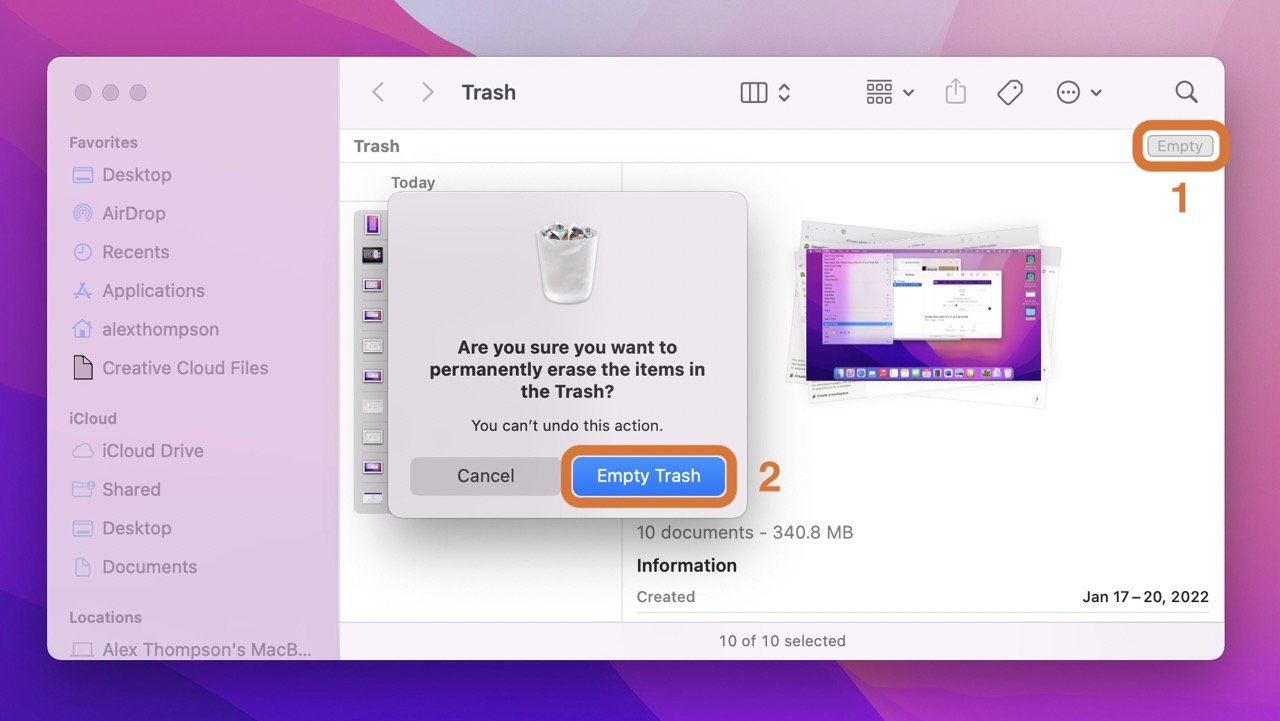
That’s five steps total.
You can accomplish the same thing using the Delete Immediately keyboard shortcut in just three steps. It’s not much of a difference. But when you’re deleting lots of files (or if you’re just a keyboard shortcut lover), that small difference adds up.
How to Recover Files That Have Been Deleted Without Trash
Unfortunately, there aren’t any native options on Mac OS to undelete files you’ve gotten rid of using the Delete Immediately option.
That being said, Delete Immediately and even emptying your Trash Bin doesn’t actually wipe files off your hard drive—not yet anyway. Instead, it just earmarks that hard drive space as vacant. And that means your system can write new data to the area where your files once lived.
Thankfully, that means you can use data recovery software to restore those files.
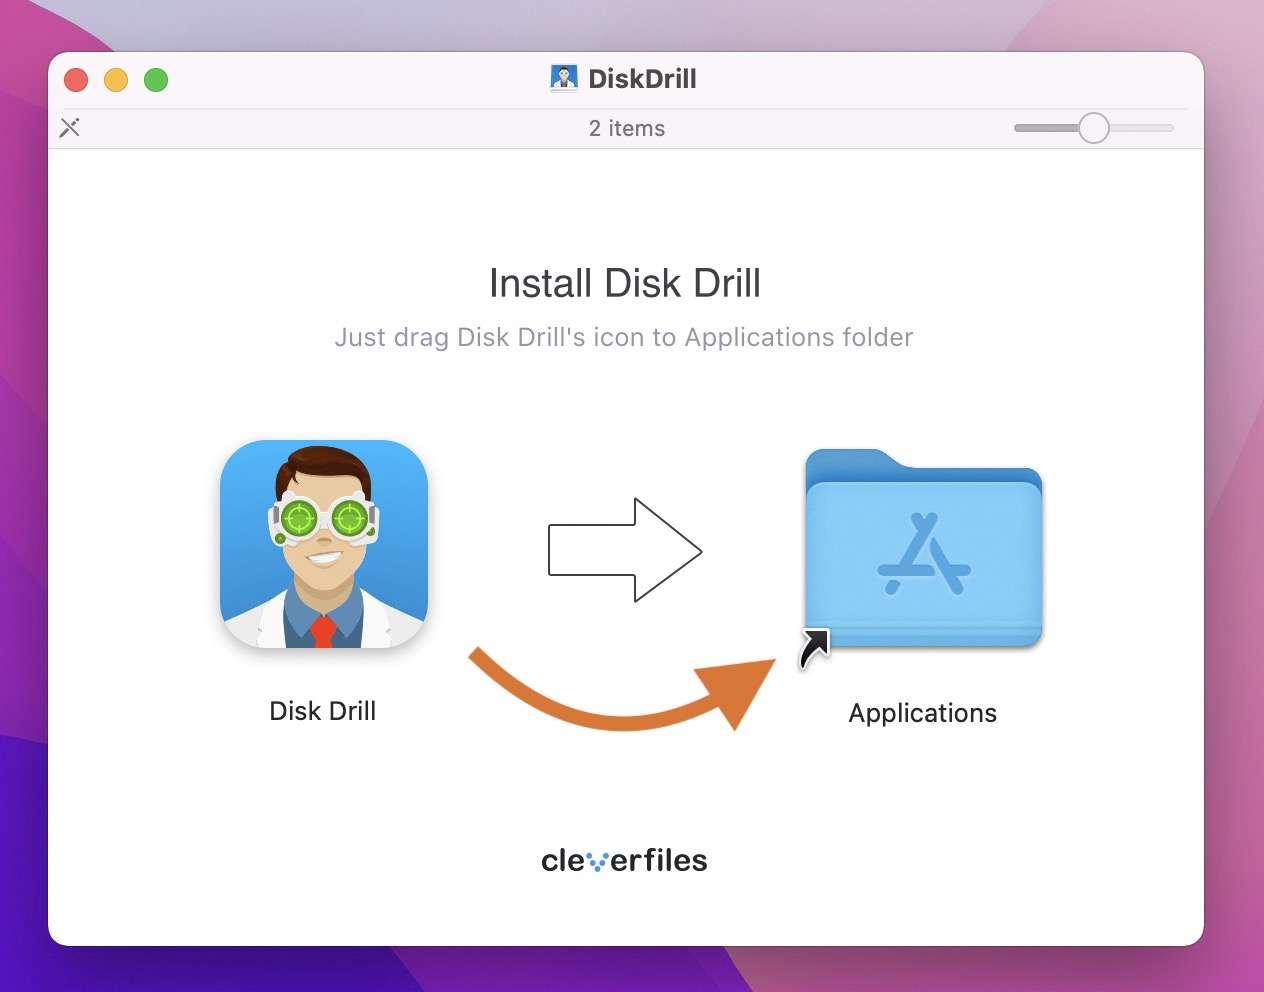
Disk Drill’s user-friendly interface, powerful recovery capabilities, and wide-ranging features make it a favorite among data recovery experts and novices alike.
How to undo delete on Mac and recover lost data using Disk Drill:
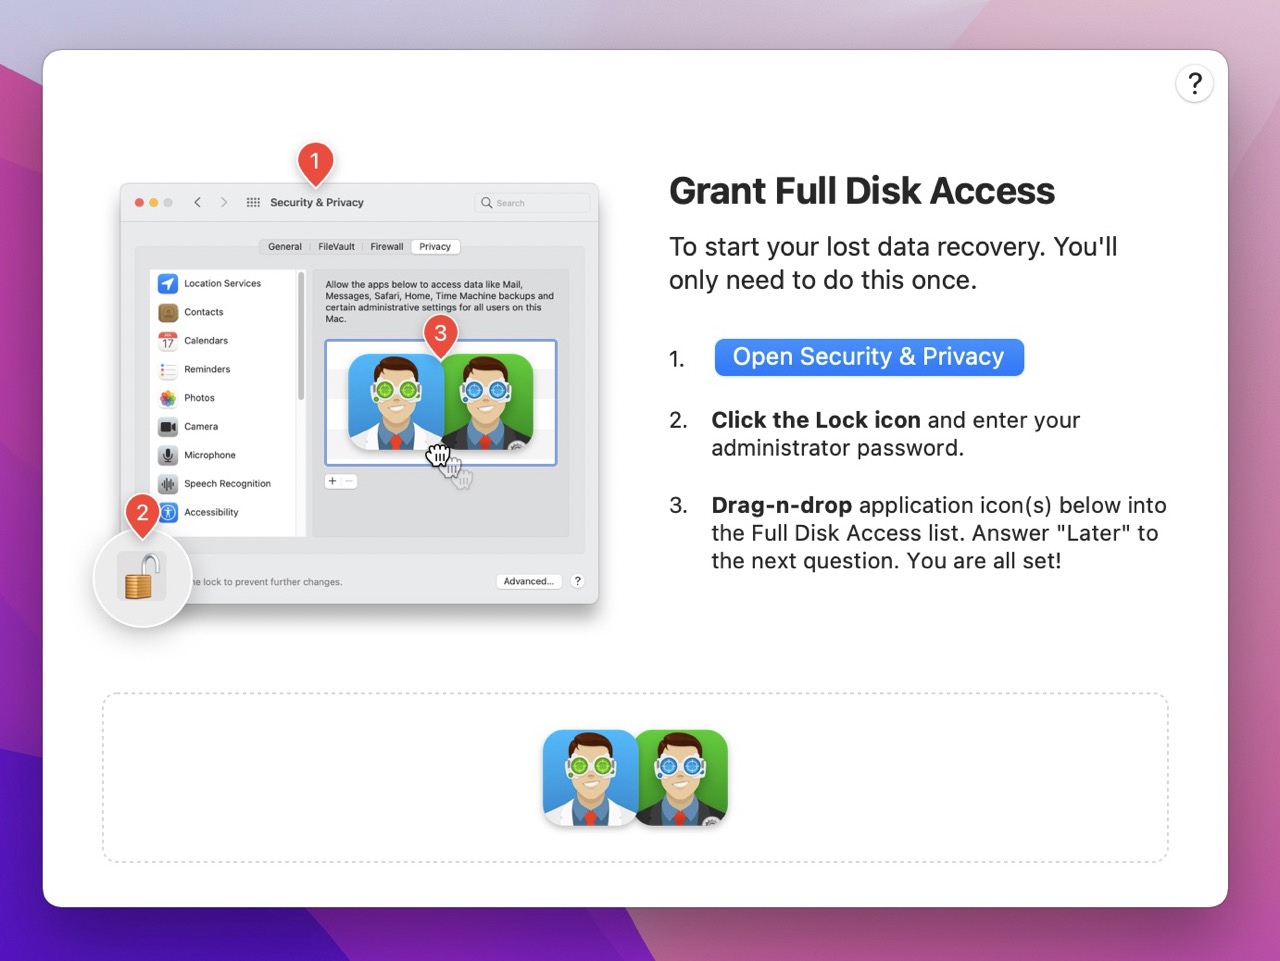
- Download and install Disk Drill.
- Grant Disk Drill full disk access (required for recovering lost data).
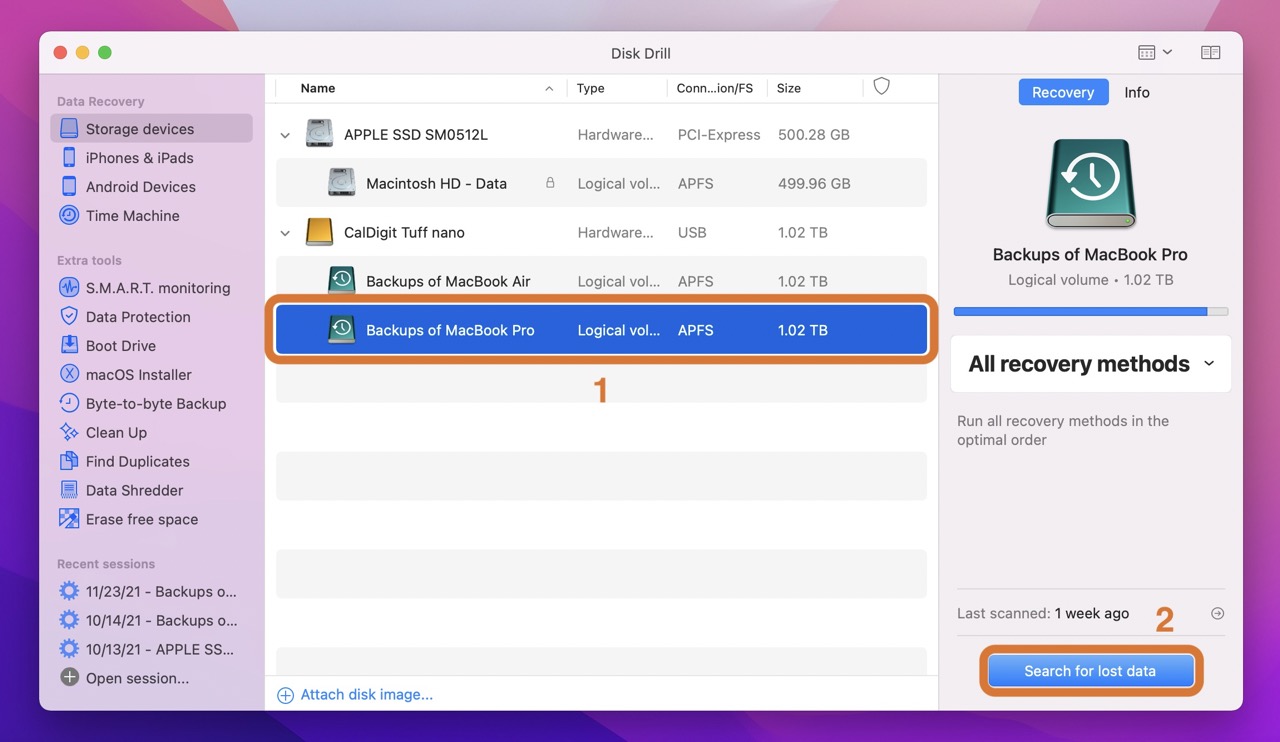
- Select the drive on which you used the delete immediately command and click Search for lost data.
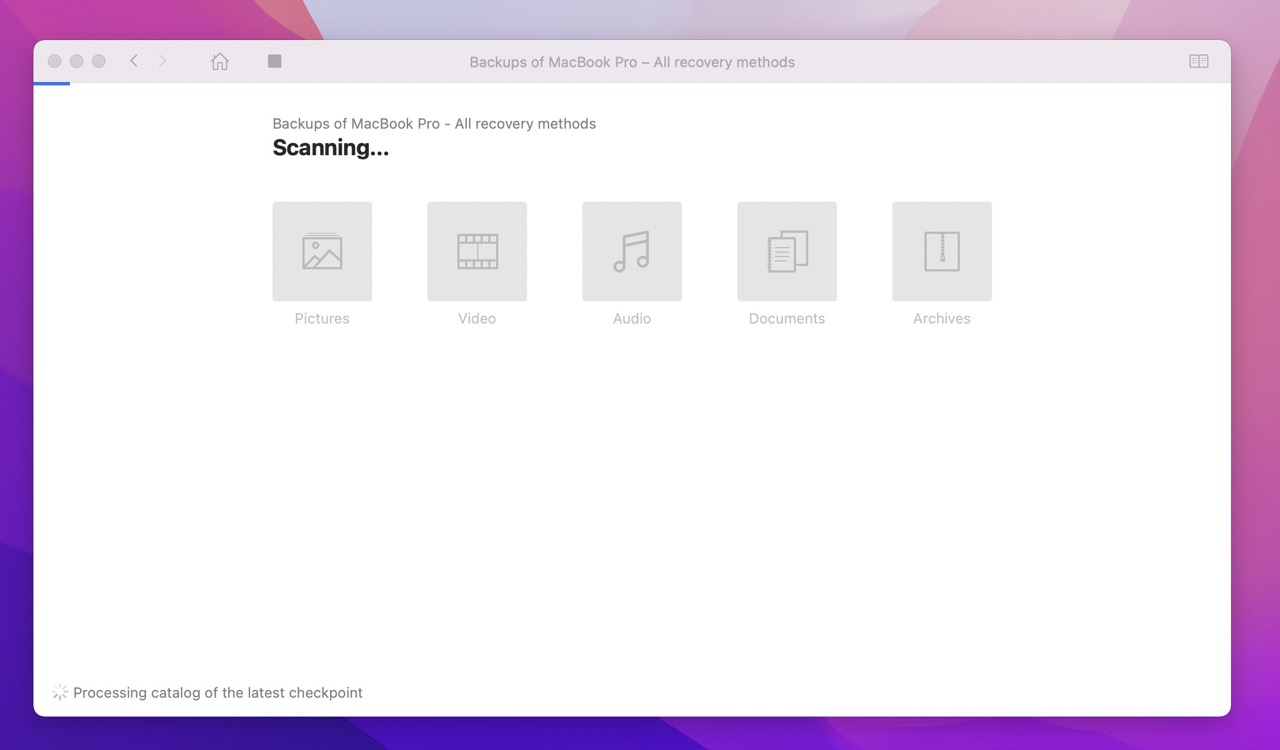
- Wait for the scan to finish (it may take a while, depending on how much data the drive is storing).
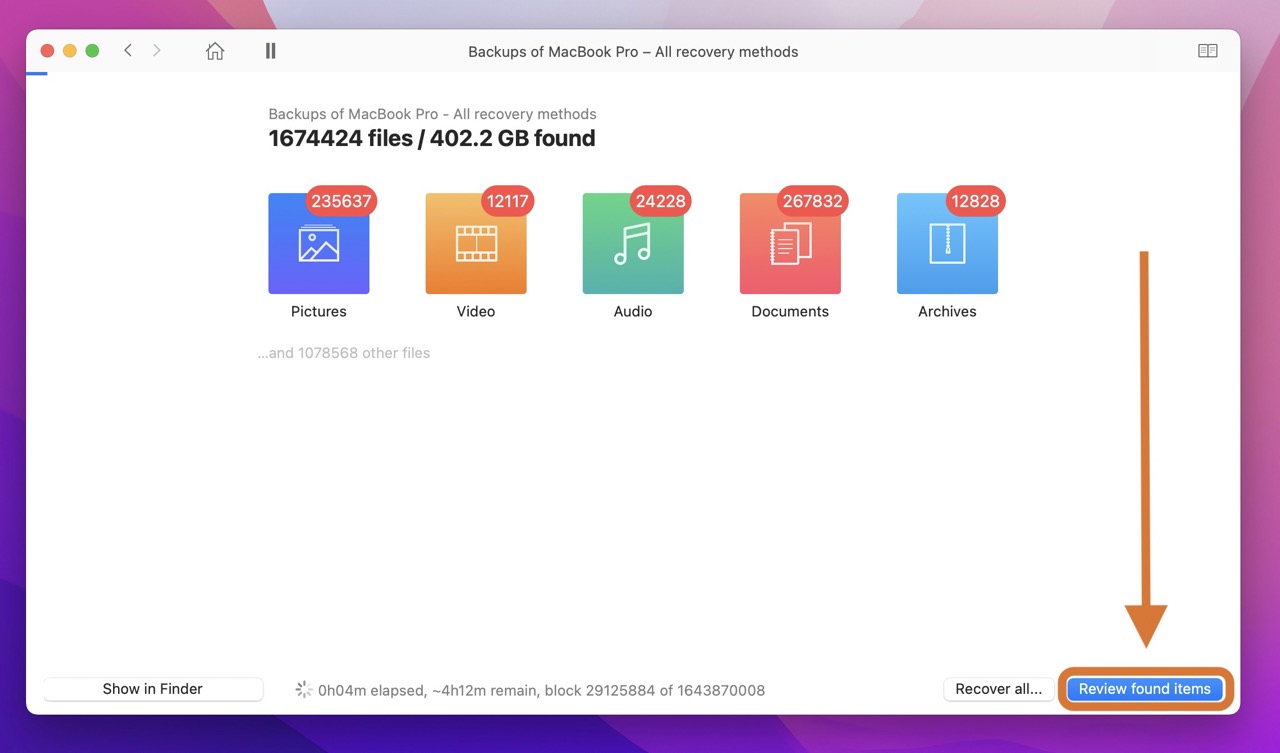
- Once the scan is complete, select Review found items.
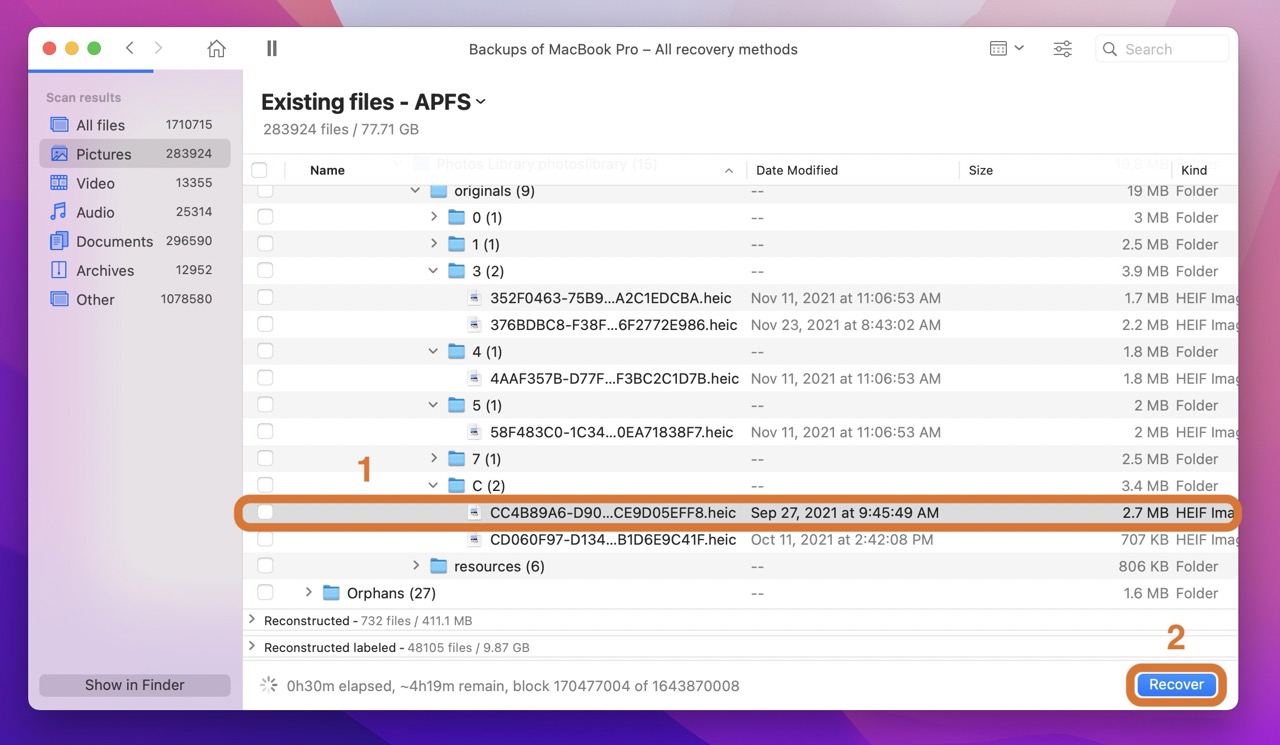
- Find your missing file. You can click the small “eye” icon next to the file name to preview the file.
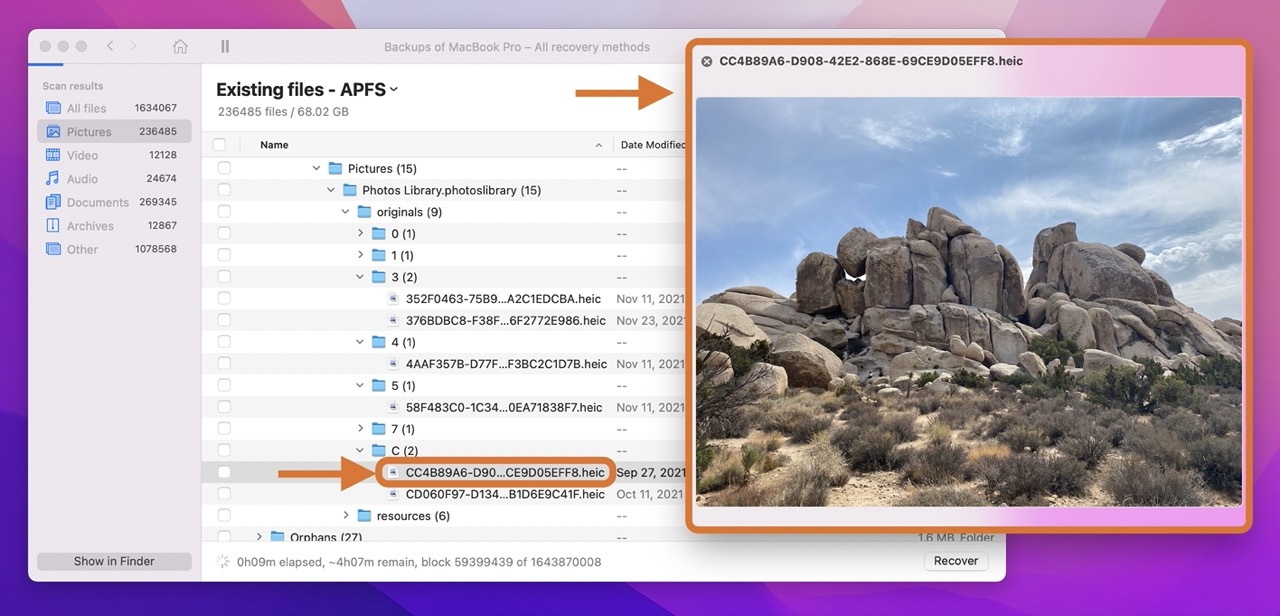
- Select the file and click Recover.
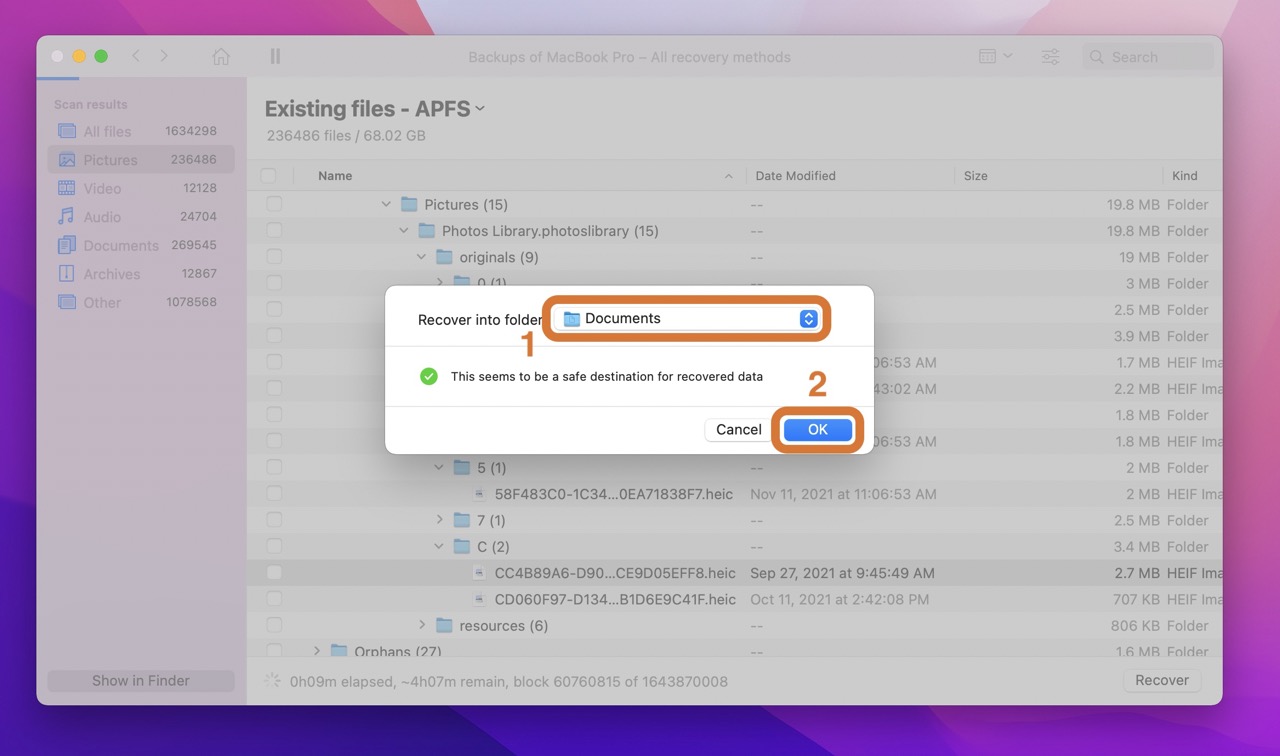
- Choose a destination for the file and click Ok.
How to Stop Mac From Deleting Trashed Files Immediately
While Delete Immediately is a useful feature in some cases, it’s only a good thing when you actually want to skip using the trash.
However, some Mac users in the past have run into a frustrating problem—their system is immediately deleting files users just want to send to the trash.
The problem here is the permissions for the Trash Bin aren’t working as they should. Ultimately, the operating system cannot write files to the Trash Bin folder. And as a result, it automatically moves to the next step—permanent deletion.
To fix these permission problems, you need to use Terminal:
- Launch Terminal by finding it in the Applications folder, searching for it in Launchpad, or using Spotlight (Command + Space) to bring it up.

- Enter the command
sudo rm -ri ~/.Trash
- Hit return.
- You may see a prompt to enter your user account password. Enter it and hit return again (the password will not fill in on the screen for security reasons).
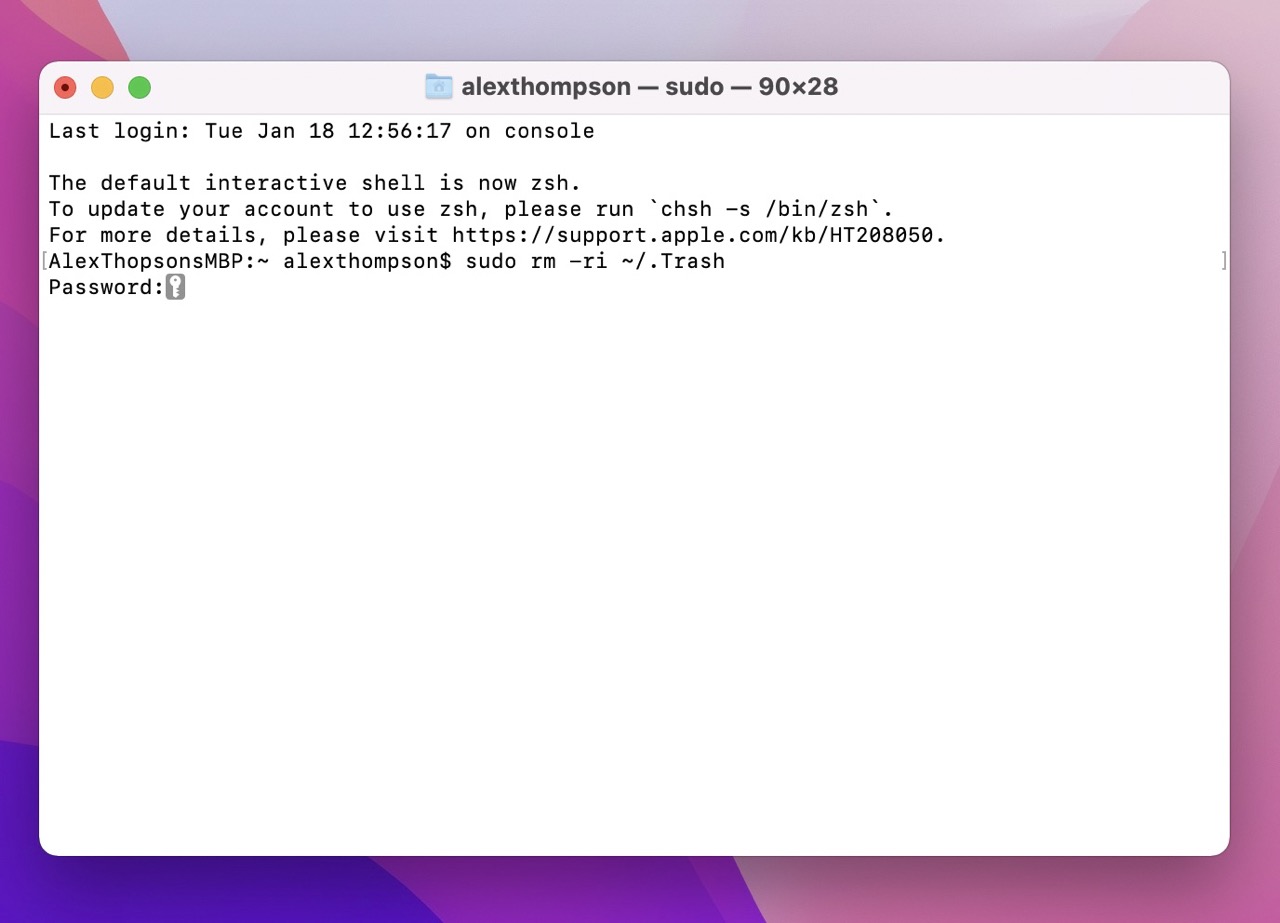
- You’ll then see a prompt to remove any files or folders within the Trash Bin. Type “yes” and hit return again.
- Next, you’ll see a prompt to remove the Trash Bin itself. Type “yes” and hit return one more time.
- Now, log out of your account and log back in. Your Trash Bin should now have the correct permissions and should work normally.

Wrapping Up
Delete Immediately is a useful feature, especially if you want to get rid of your files quicker than using the Trash Bin. And with this guide, you now know how to get the most value out of this handy Mac capability.


