
QuickTime player allows you to record your screen on your Mac, edit the recordings once they’re done, and also watch videos. In addition to that, you can also use it on your iPhone or iPad as well. It’s quite a powerful application, and it comes built right into your Mac.
However, it can be confusing sometimes as to where QuickTime Player videos are saved to. I have used QuickTime Player for submitting homework assignments, and sometimes I save the videos and sometimes I accidentally have deleted them.
If you’re wondering, “How do I recover deleted QuickTime Videos?” then you’re in the right place! In this article, we’re going to take a look at how to recover unsaved or deleted QuickTime videos and get them back onto your Mac.
Table of Contents
Where Does QuickTime Save Screen Recordings?
QuickTime Player videos save where you tell them to. Each time that you create one, you then save it just like you would a Word document or any other file that you have created. Due to this, you may accidentally save the file to the wrong place or not know where you saved it.

When it comes to changing the QuickTime default save location, it is best to create a routine for when you save videos. I would recommend creating a folder on your desktop so that anytime you need to save a video, you can save it to the same location. This will help you make sure that you don’t save it to the wrong place in the future.
Methods to Recover QuickTime Recordings on Mac
Let’s take a look at some of the best methods for recovering unsaved or deleted QuickTime videos on our Mac and get them back.
We’re going to take a look at checking the Trash, using Time Machine, and using Disk Drill which is a powerful data recovery application.
Recovering QuickTime Recordings by Checking the Trash
The first thing that I would do to recover unsaved QuickTime recordings would be to check the trash and see if it was accidentally deleted. This is a super quick and easy way to recover deleted QuickTime files.
Step 1. Launch the Trash.

Step 2. Once inside the Trash, you want to look for files that end in .mov as those will be QuickTime Player movies or screen recordings.
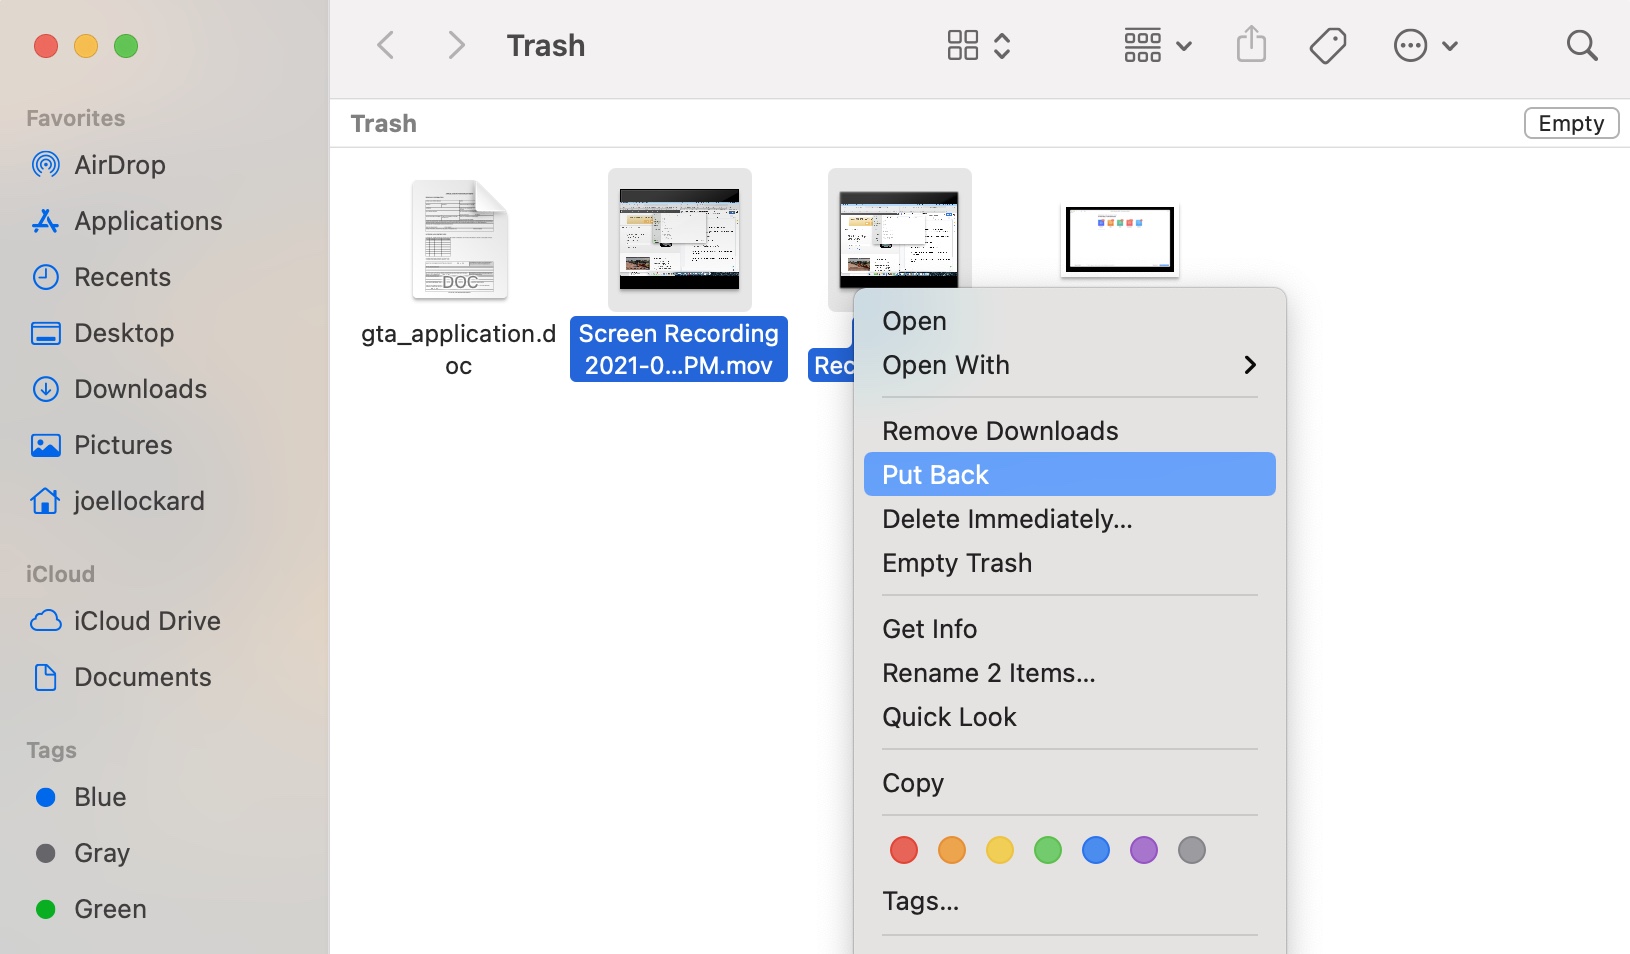
Step 3. Once you have found the deleted QuickTime video, highlight the ones that you want to recover and then choose Put Back. You can get the Put Back menu to come up by right-clicking on the files.
Most of the time I find that I either didn’t save the QuickTime file or I accidentally deleted it so this step is usually all that is needed for me to find it and get it back.
If you weren’t able to find your movie or screen recording, let’s move to using Time Machine to recover the file.
How to Recover Unsaved or Deleted QuickTime Recordings From Time Machine
I have grown to really enjoy using Time Machine. I hadn’t used it for years and I never thought much of it as I never thought that I would be the one to lose data on my Mac. I was wrong though. I started using it as I thought it was finally time to start backing up and then after using it for a couple of months, I had an instance where I lost data and had to recover from it.
Time Machine is a built-in backup feature that comes built-in as part of macOS. Time Machine automatically makes hourly backups for the past 24 hours, daily backups for the past month, and weekly backups for all previous months. The oldest backups are deleted when your backup disk is full.
Let’s walk through how to recover deleted QuickTime files using Time Machine, it’s actually quite easy.
Step 1. Plug-in the external hard drive that you back up your Mac with. Mine is a cheap one that I got online, but it has served me wonders over the past couple of months.
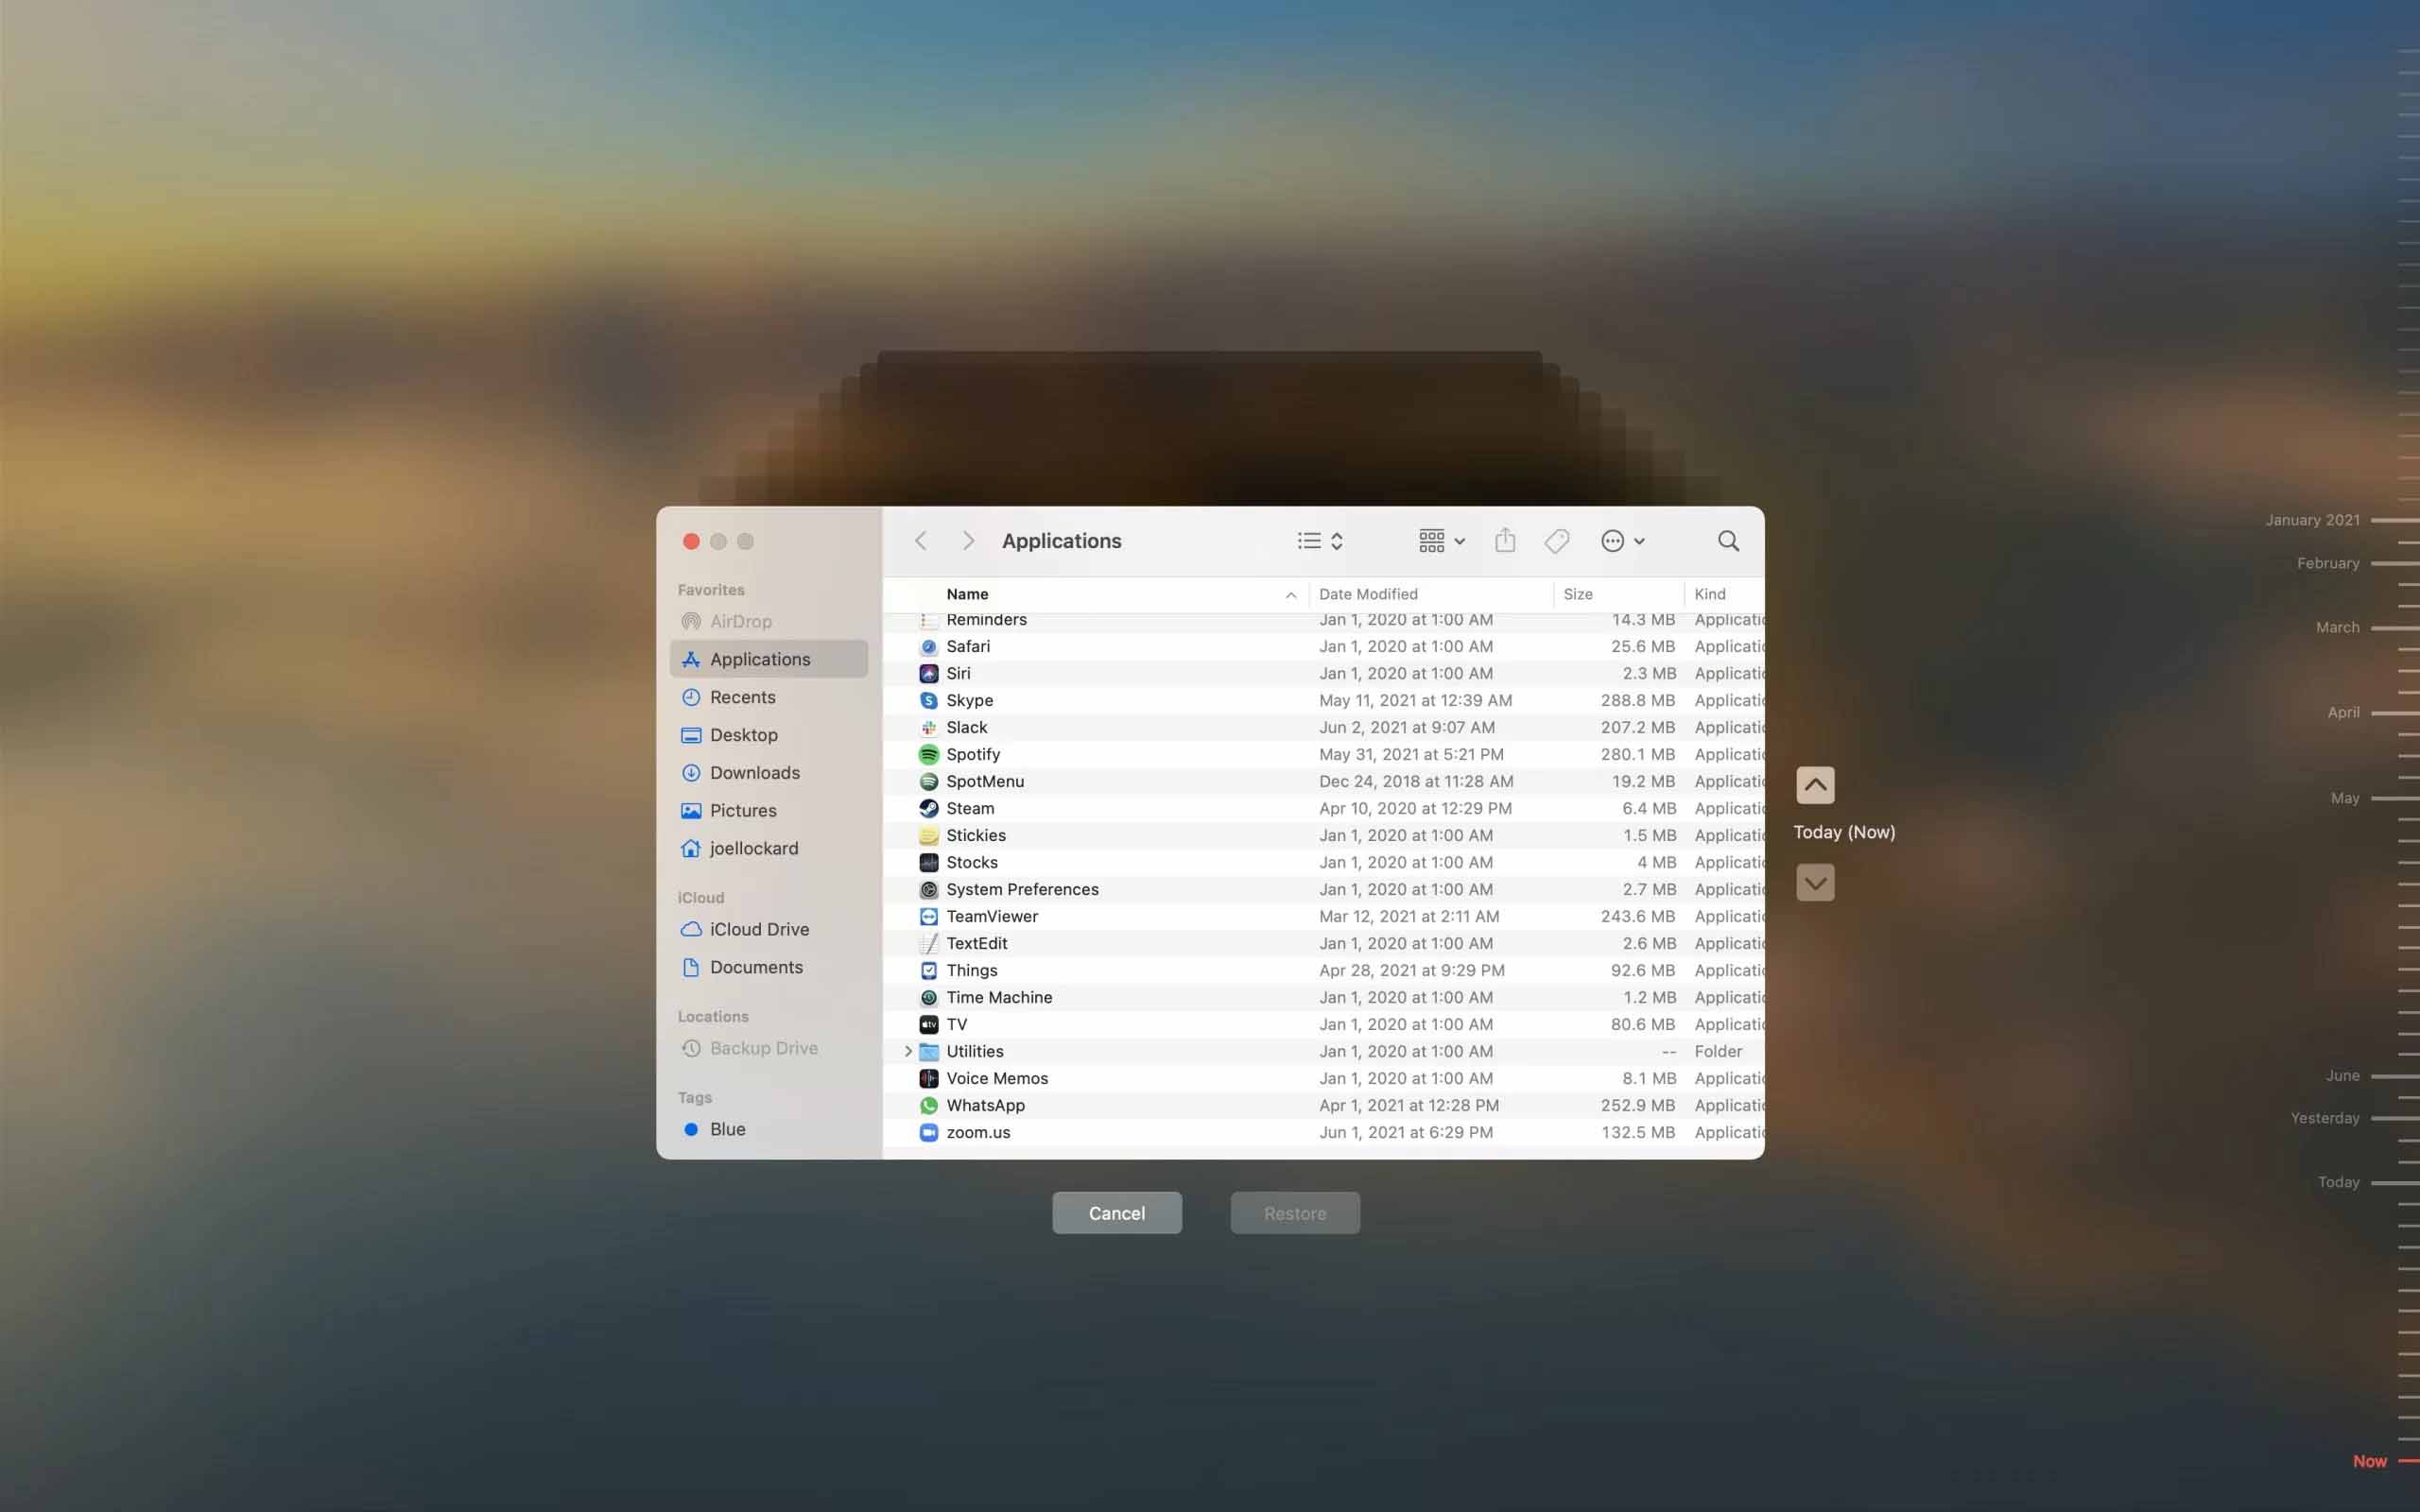
Step 2. Launch Time Machine. You can find Time Machine in your Applications folder on your Mac.
Step 3. You then will have the ability to scroll on the lower right-hand side, where you can select a previous date on your Mac. You can see that mine goes all of the way back to January. I can look through my timeline and use Time Machine to recover deleted QuickTime recordings. Just find what you would like to recover and then click on the Restore button.
Using Time Machine is one of the most effective ways to recover deleted QuickTime files on Mac. It has the highest success rate when it comes to data recovery.
If you’re not already backing up your Mac, I would recommend that you start doing so. You can find external hard drives for quite cheap these days, and it’s something that is worth your time.
How to Recover Unsaved or Deleted QuickTime Recordings Using Disk Drill
If you weren’t able to find your file in any of the above methods, then it’s time to turn to data recovery software to recover the deleted QuickTime file.
Data recovery software enables us to find and recover unsaved QuickTime snapshots, screen recordings, or videos even after we have deleted the files from our Mac. This is possible as the data is still there, just not accessible to us.
In this example, I am going to use Disk Drill as our data recovery software program. We have used it on the past to recover deleted videos on our Mac and it has worked well.
Disk Drill will allow you to recover data on your Mac even after it has been deleted. In the steps below, I will walk you through how to use it.
Step 1. Download and install Disk Drill onto your Mac.
Step 2. Launch Disk Drill and select the storage device that you would like to recover the file from.
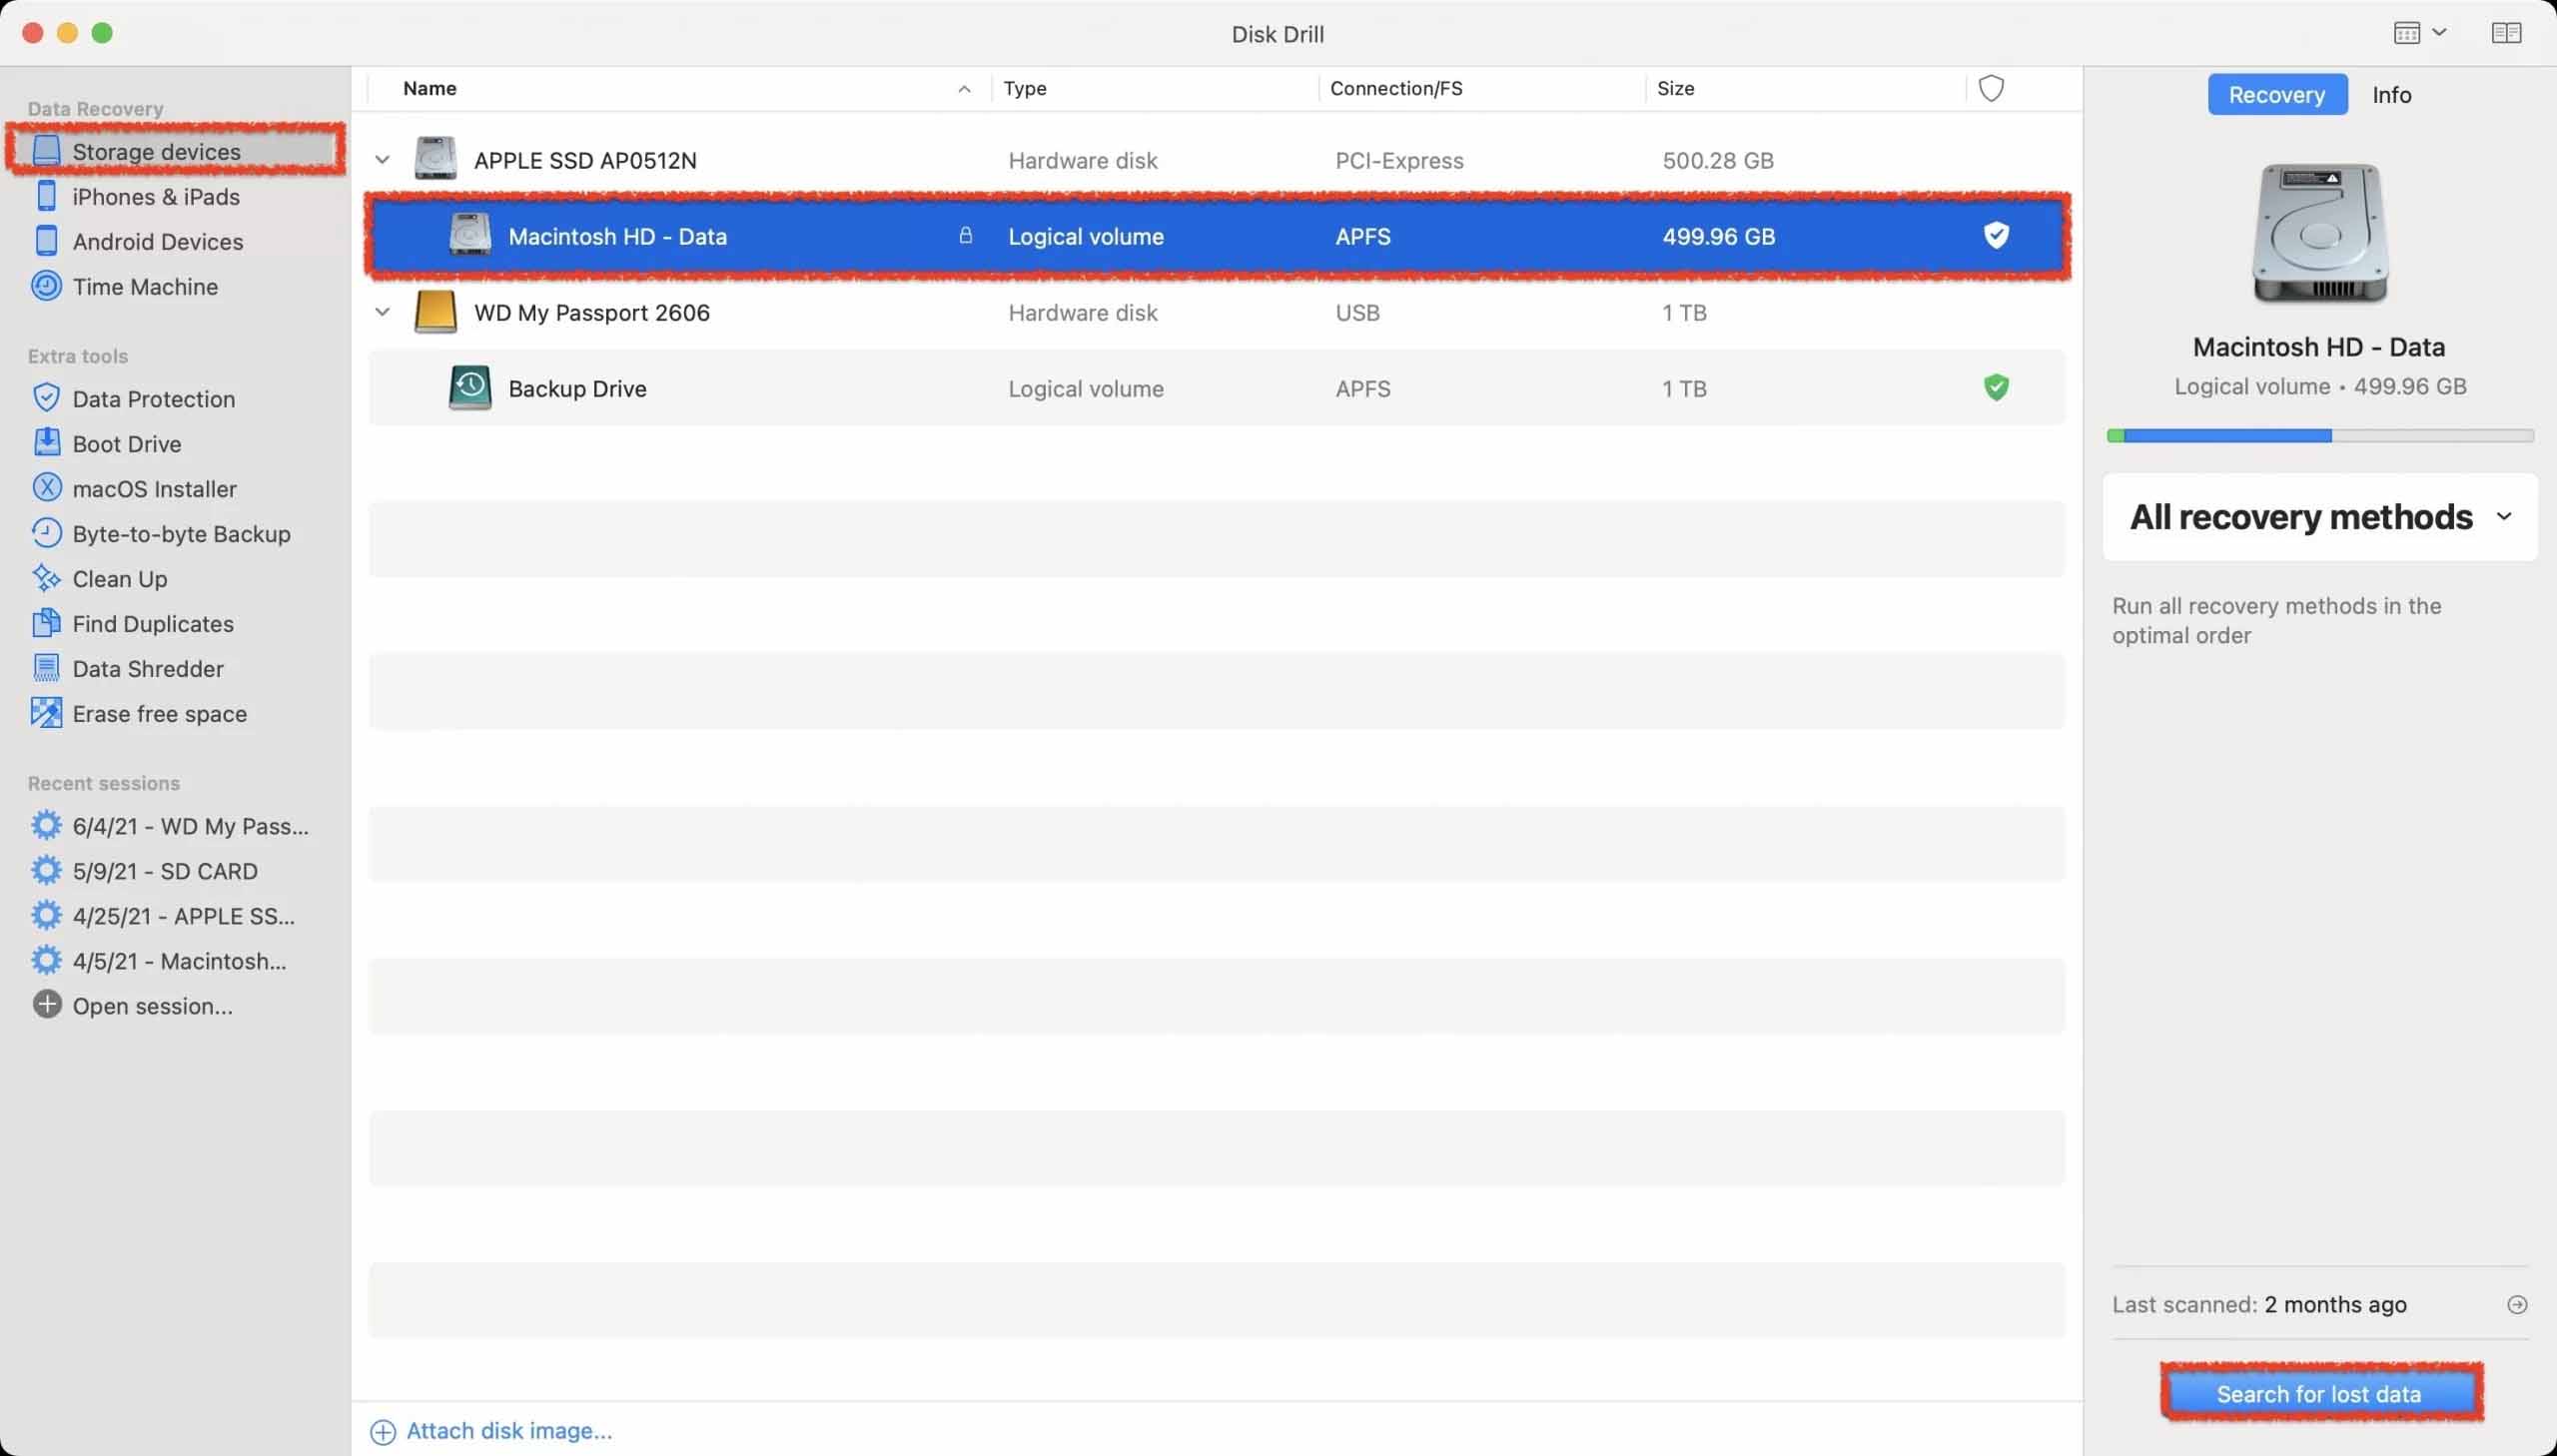
Step 3. After you have selected the storage device, Disk Drill will scan your Mac. This can take some time depending on how much data that you have.
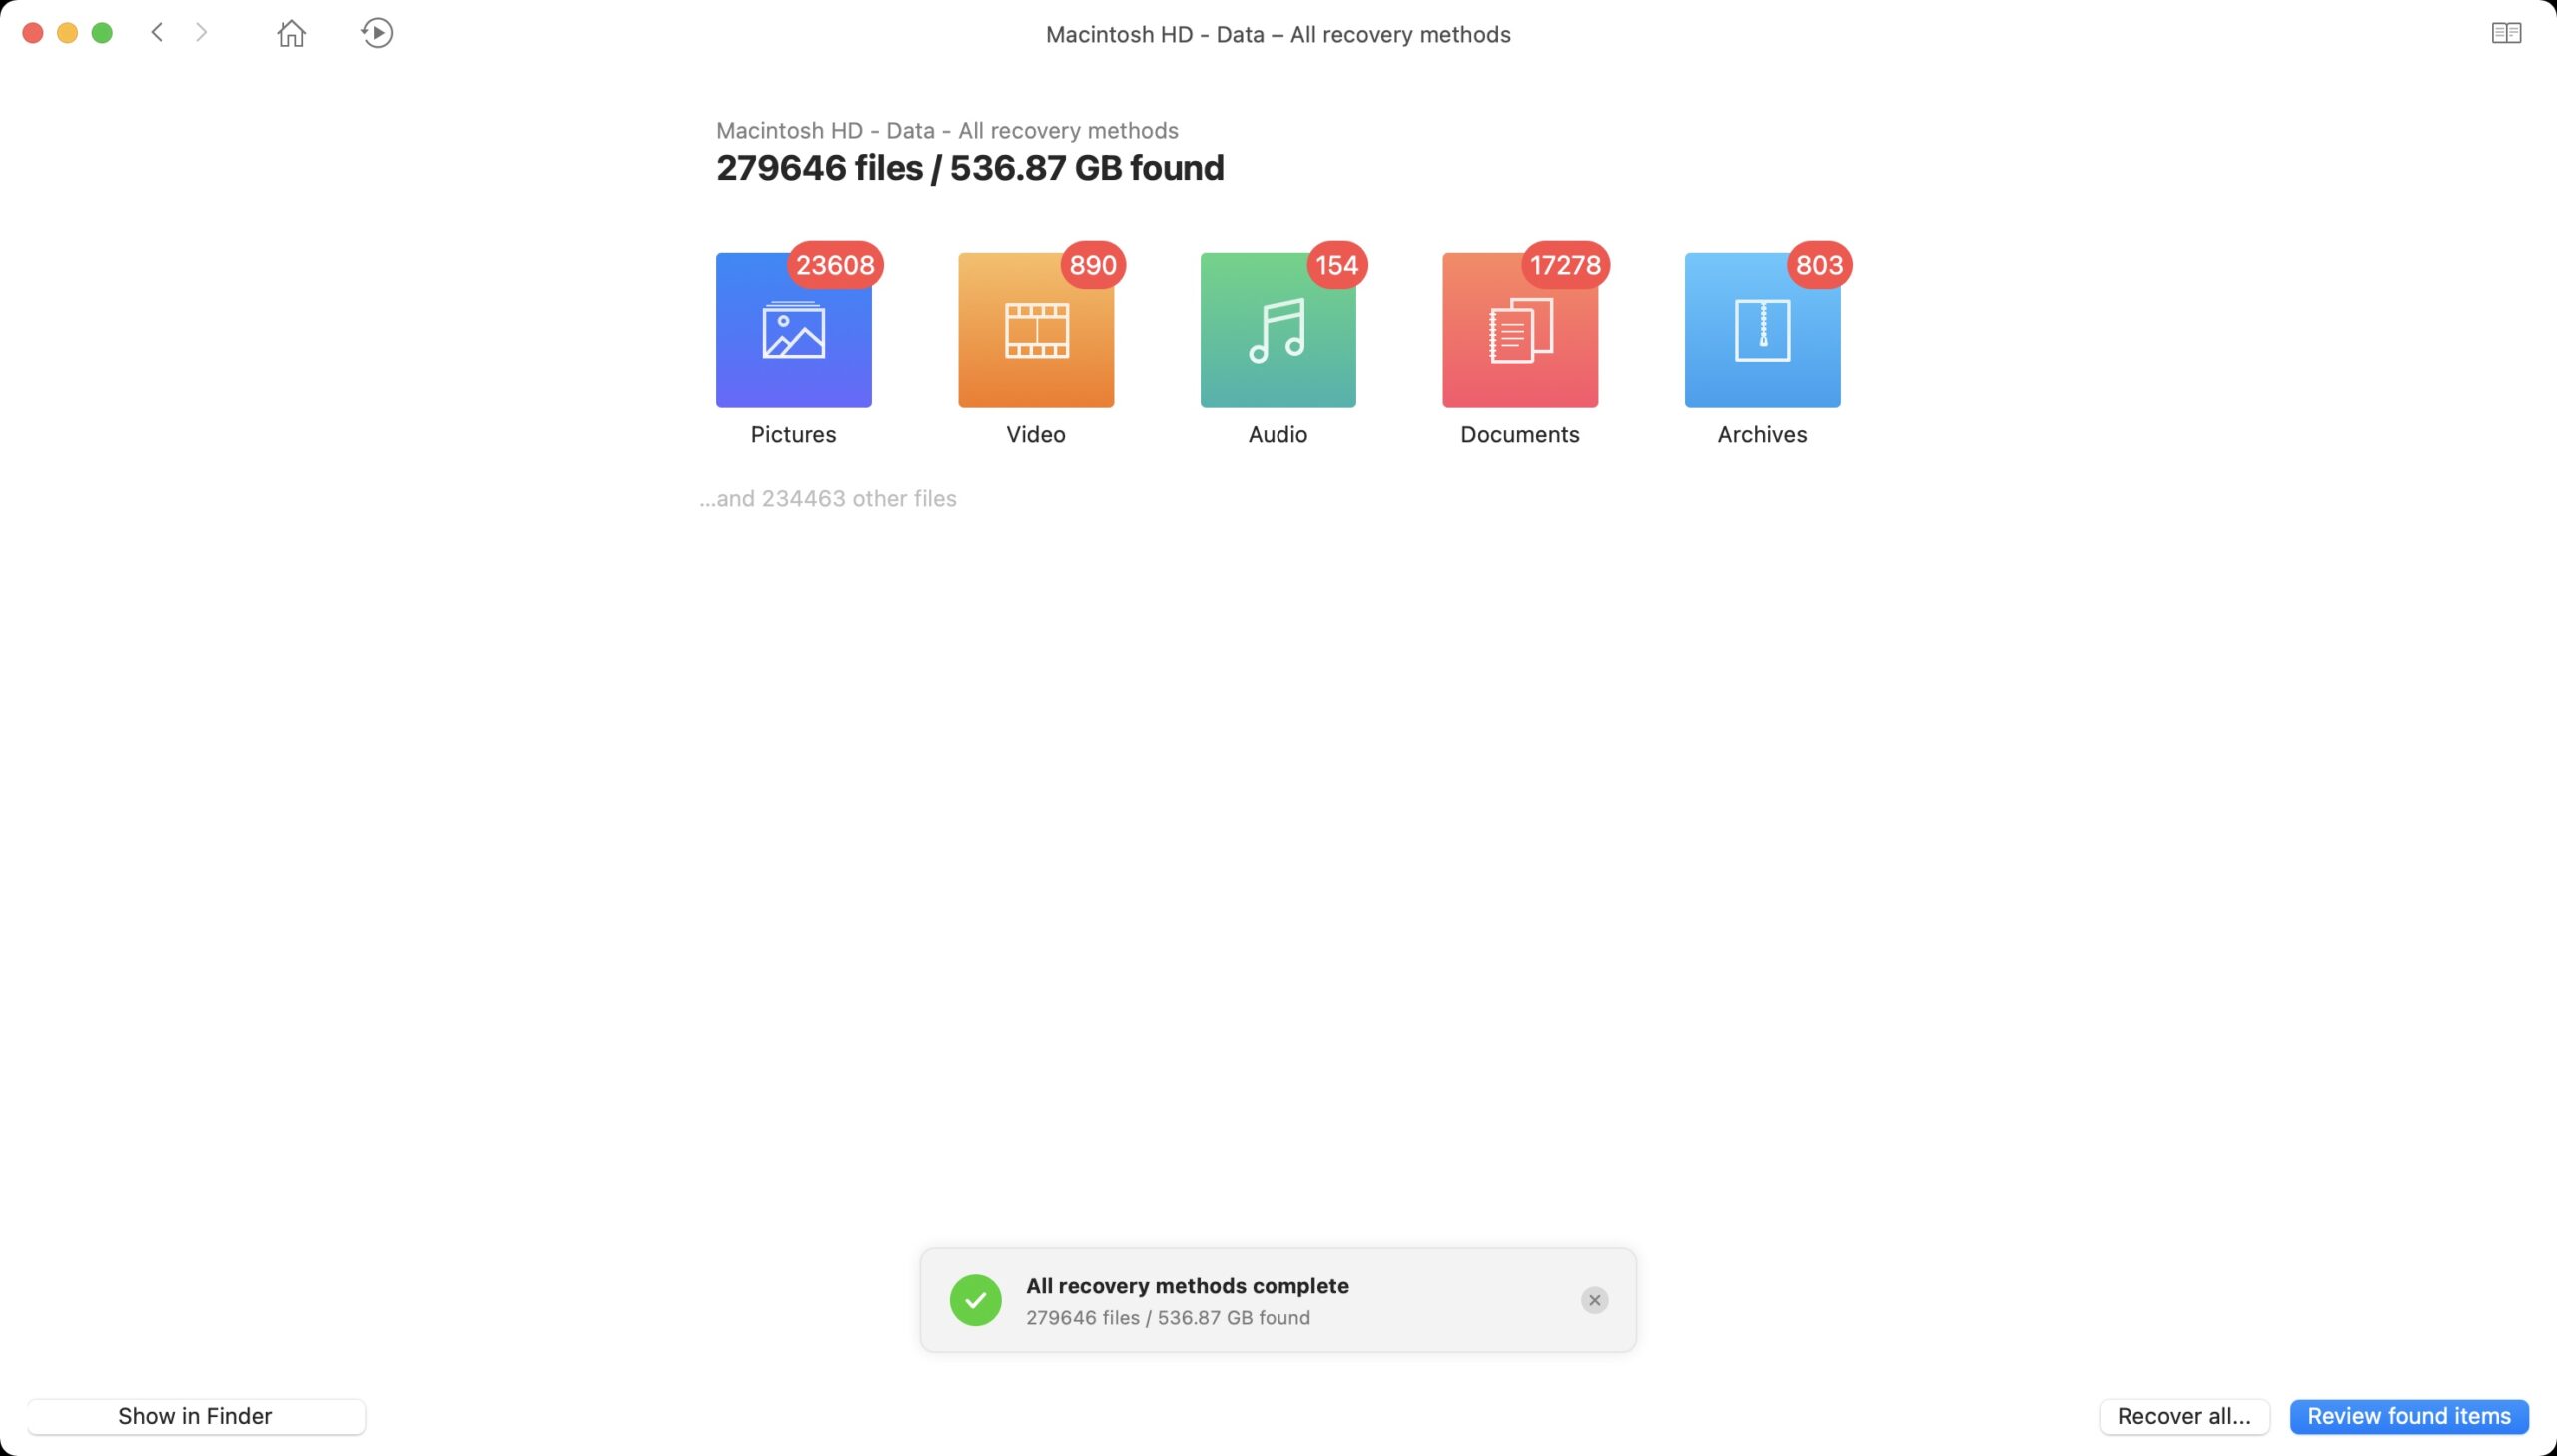
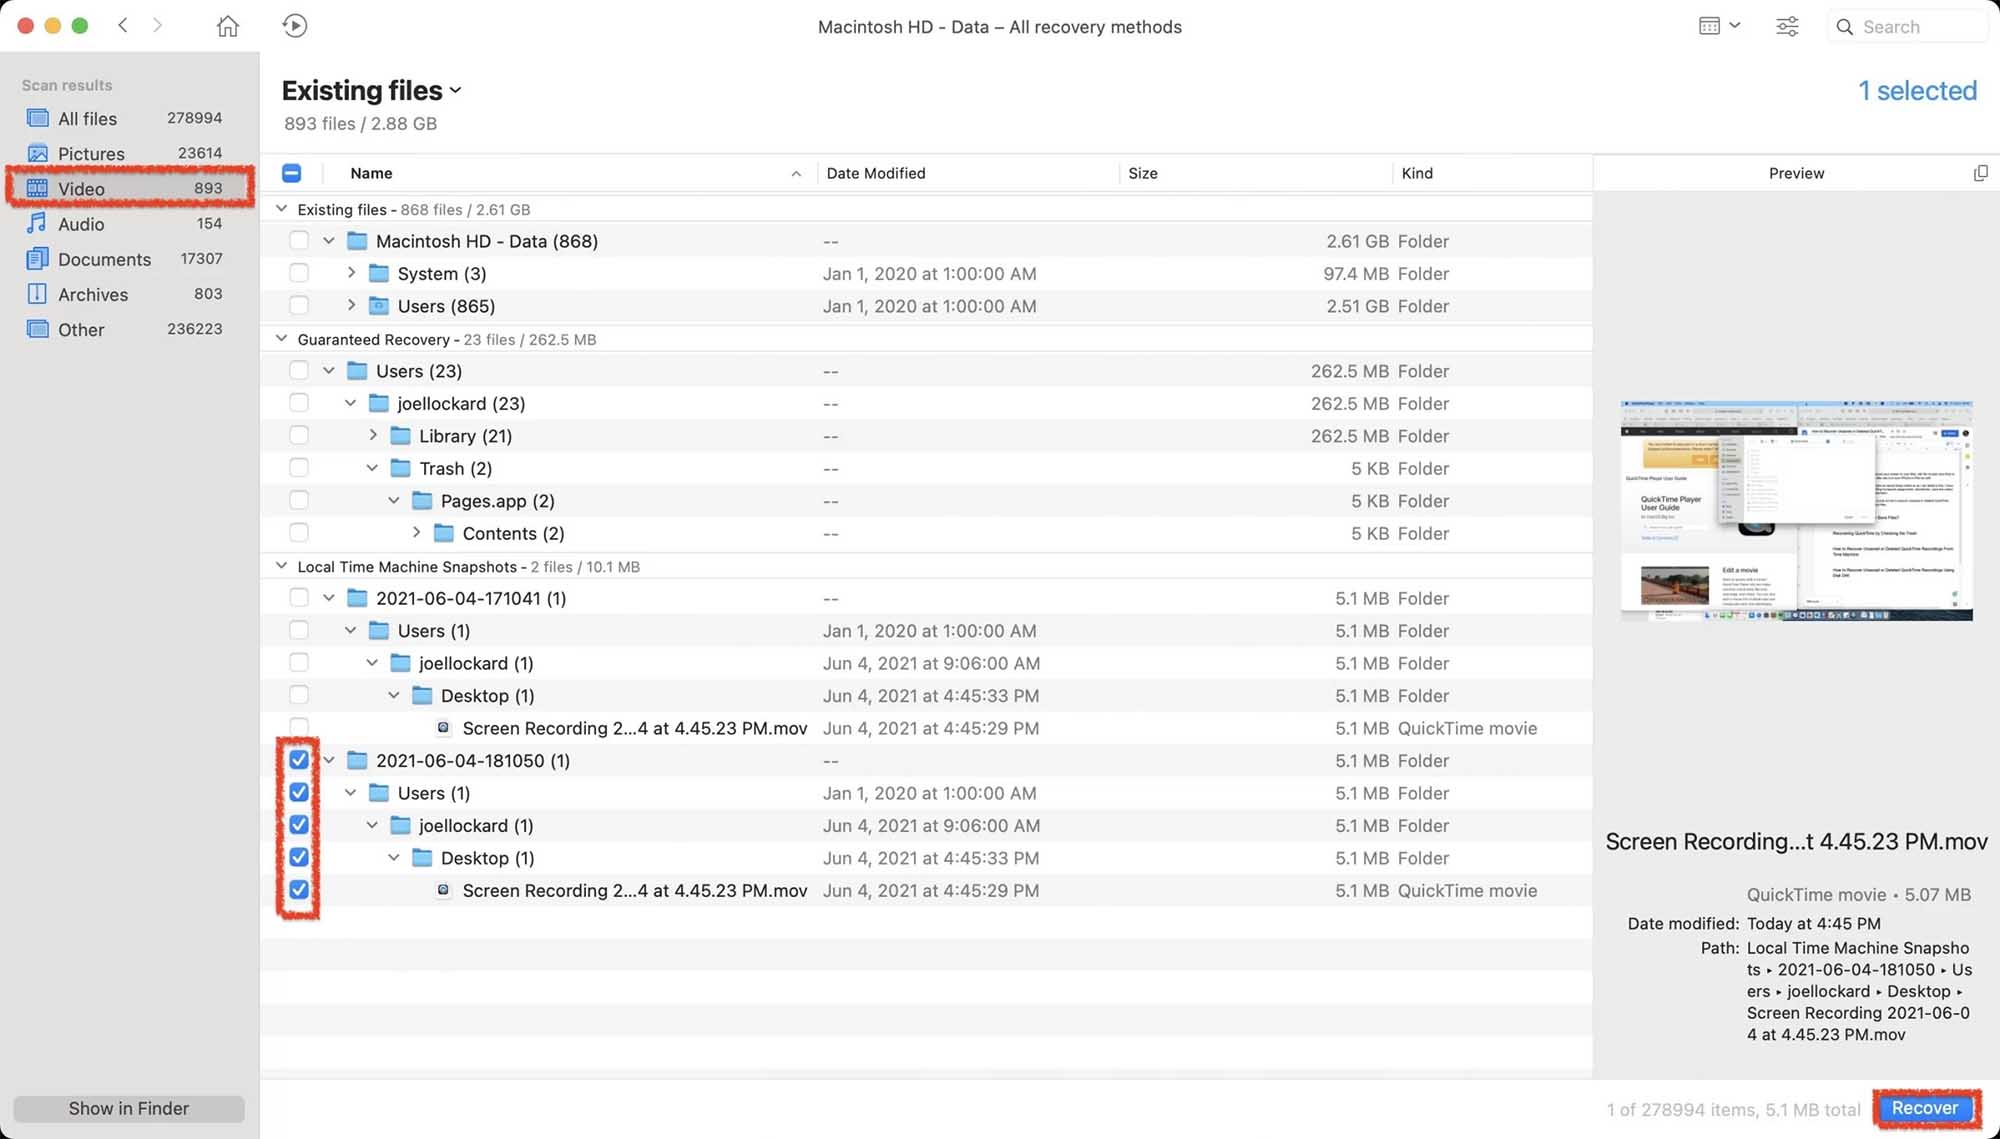
Step 4. After the scan process has completed, you can click on review found items and look through what Disk Drill was able to find, and see if you can recover the lost file on your Mac.
Step 5. In this example, I am recovering a QuickTime Player screen recording. Using the preview function, I can see a nice clear preview of the video before I recover it. There is also a search box in the upper right-hand side of the screen that you can type in the name of your file to search for it. Click on the blue Recover button to recover the file and put it back onto your Mac.
You’re done! It’s pretty easy to recover deleted QuickTime files on Mac and it only took us a few steps to do that!
Another thing that I really like about using Disk Drill is that the interface is simple and easy to understand. If you ever have any issues with data loss in the future, keep in mind that you can also use this for your iPhone or any other device that you own. We have a complete recovery guide that goes much more in-depth into what we looked at today.
Conclusion
Knowing more about QuickTime Player and being able to recover deleted screen recordings and videos makes you not just a better Mac user, but one that knows how to save time should something not be where you thought that it would.


