
RAW file recovery, such as with CR2 or NEF files, requires a bit more nuance than “normal” or compressed file recovery, such as with JPG or PNG files. Not only are they proprietary and more complex (which we’ll talk about a bit more later in the article), but they are even more susceptible to permanent data loss than their compressed counterparts.
However, recovery is possible as long as you have the right tools. In this article, we’ll show you how to recover RAW files from an SD card on Mac.
Table of Contents
What is a RAW Photo?
A RAW photo is an uncompressed and unprocessed image file commonly used by DSLRs and other high performance cameras.
They are often bigger (in file size) compared to standard photo formats because they hold way more data such as detailed information about color, exposure, and more. This is why photographers save photos in RAW format – it preserves as much detail as possible, resulting in high quality images.
Camera manufacturers use their own proprietary RAW format. Some common examples are:
CR2 – Canon
NEF – Nikon
ARW – Sony
RW2 – Panasonic
ORF – Olympus
RAF – Fujifilm
PEF – Pentax
DNG – Leica
SRW – Samsung
When it comes time to process and share these image files, they are often converted to JPEG or PNG formats, which are smaller in size and universally compatible (and can be viewed on smartphones, computers, apps, etc.).
Common Reasons Why RAW Files Get Deleted
There are only 4 common reasons why raw files get deleted – for 3 of them, DIY raw data recovery is possible. Review the bullets below to check if you should proceed to recover the raw files yourself or think about calling a professional:
- Accidental deletion. If you accidentally deleted your RAW files, that means you can’t access them via Finder. However, that data is still on the disk – you just need a special tool that can extract and restore it.
- Formatting. Just like accidentally deleted data, RAW files that were lost due to formatting still exist on the disk and will remain there until they get overwritten.
- Corruption. Corruption is commonly followed by data loss. It can be caused by virus infections, software issues, and interruptions during read and write processes – for example, a sudden power outage.
- Physical damage. SD cards can be damaged due to heat, water, and breakage, often making them unreadable. In this case, send your memory card to a data recovery center, who are better-equipped to restore your data without causing further damage.
Is it Possible to Recover RAW Photos?
Yes! It’s possible to recover RAW photos with the right tools – namely, data recovery software. But your software of choice will have to work a bit harder than usual. Here are some factors to consider:
- Size of RAW files – Due to how much information they store, RAW files are usually much bigger than compressed files. That means their data is more likely to be “fragmented” or scattered, which recovery software may struggle with.
- Proprietary file types – RAW photos are specific to the camera manufacturer – unlike file types like JPG and PNG, which are standardized and universally supported by most software.
- Complexity of data – RAW files lack certain attributes that make compressed files easier to restore – such as a well-defined file structure or built-in error correction.
In summary, you need software that can handle severe fragmentation, supports a wide range of RAW file types from multiple manufacturers, and is smart enough to work around common RAW file attributes.
How to Recover RAW Files With Data Recovery Software
As we briefly touched on in the last section, data that gets deleted still remains on the storage device’s disk. It’s just inaccessible through Finder. However, we can use data recovery software to extract and restore that data using a simple interface.
For this article, we’ll be using Disk Drill – an app we’ve used here at Magcasm hundreds of times for computers, hard drives, smartphones, and more. Disk Drill is great as raw data recovery software because you can preview most raw files within the app. It’s super easy-to-use too, so you can easily follow the steps below.
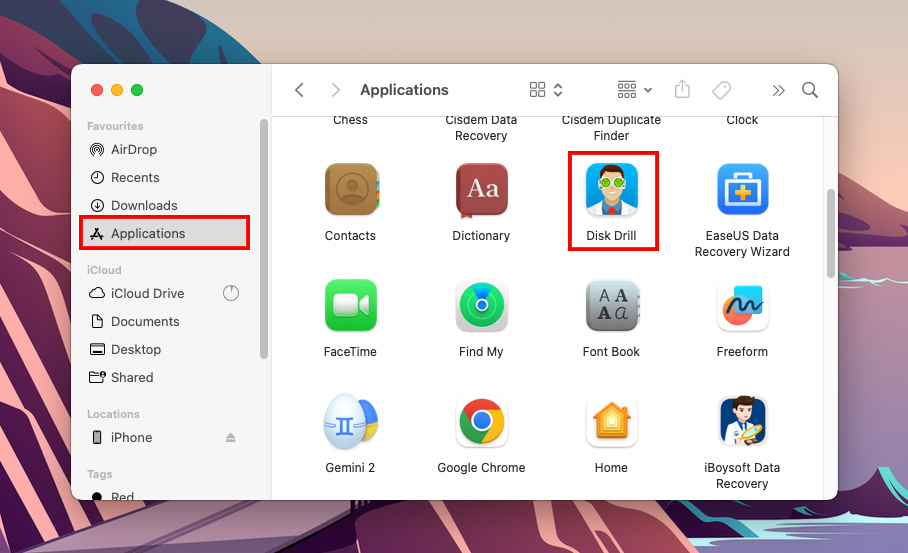
Step 1. Download and install Disk Drill.
Step 2. Launch Disk Drill (Finder > Applications > Disk Drill).
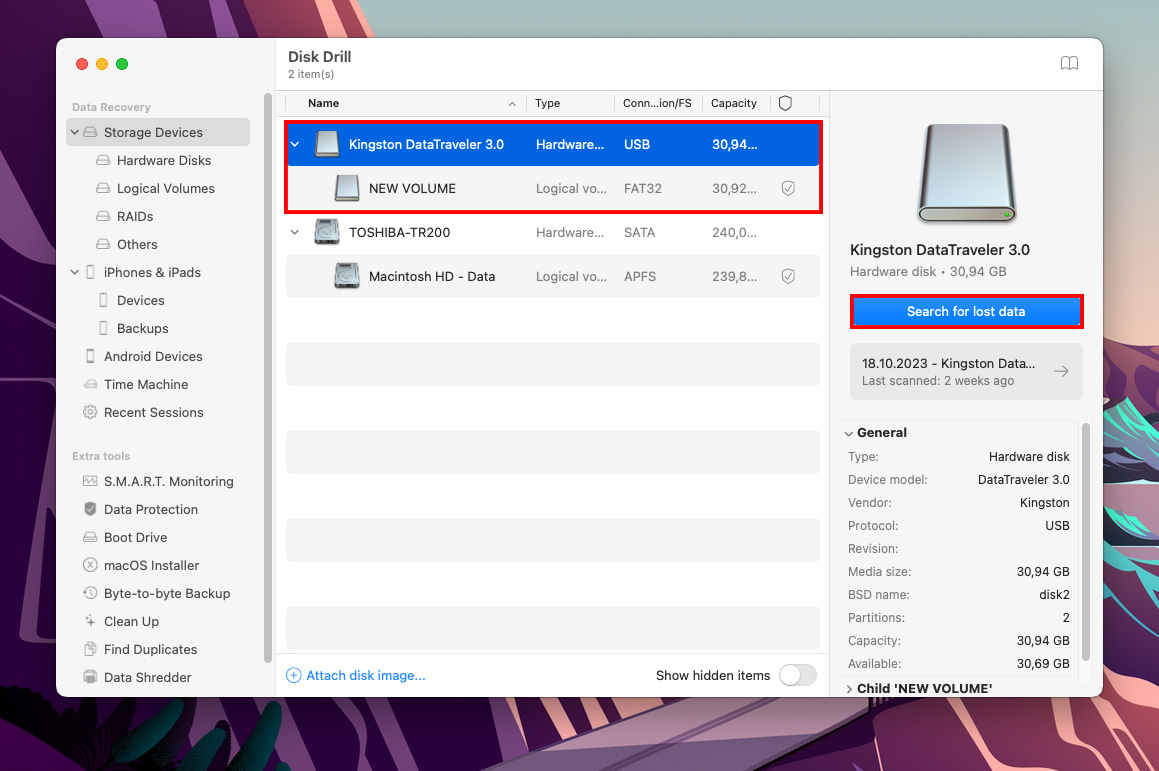
Step 3. On the main window pane, select your storage device (SD card may appear as “Generic Storage Device” if you’re using a USB-type card reader). Then, click “Search for lost data.”
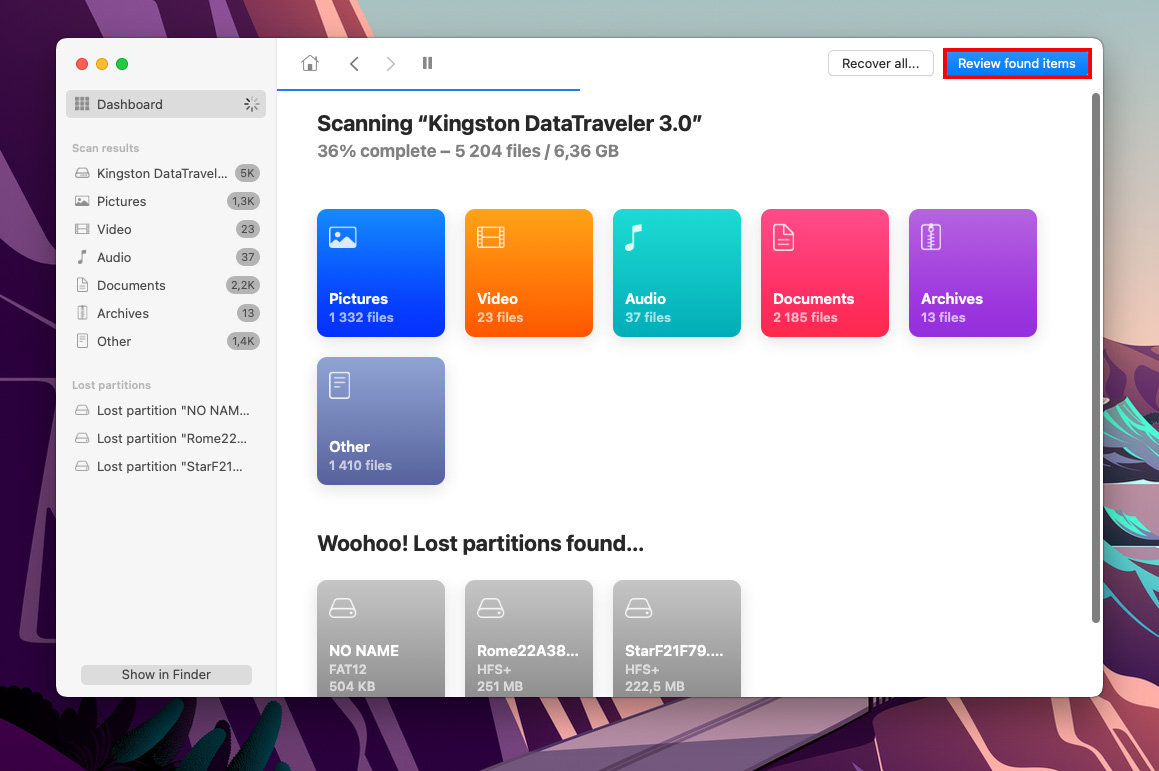
Step 4. Wait for Disk Drill to complete the scan. Then, click “Review found items.”
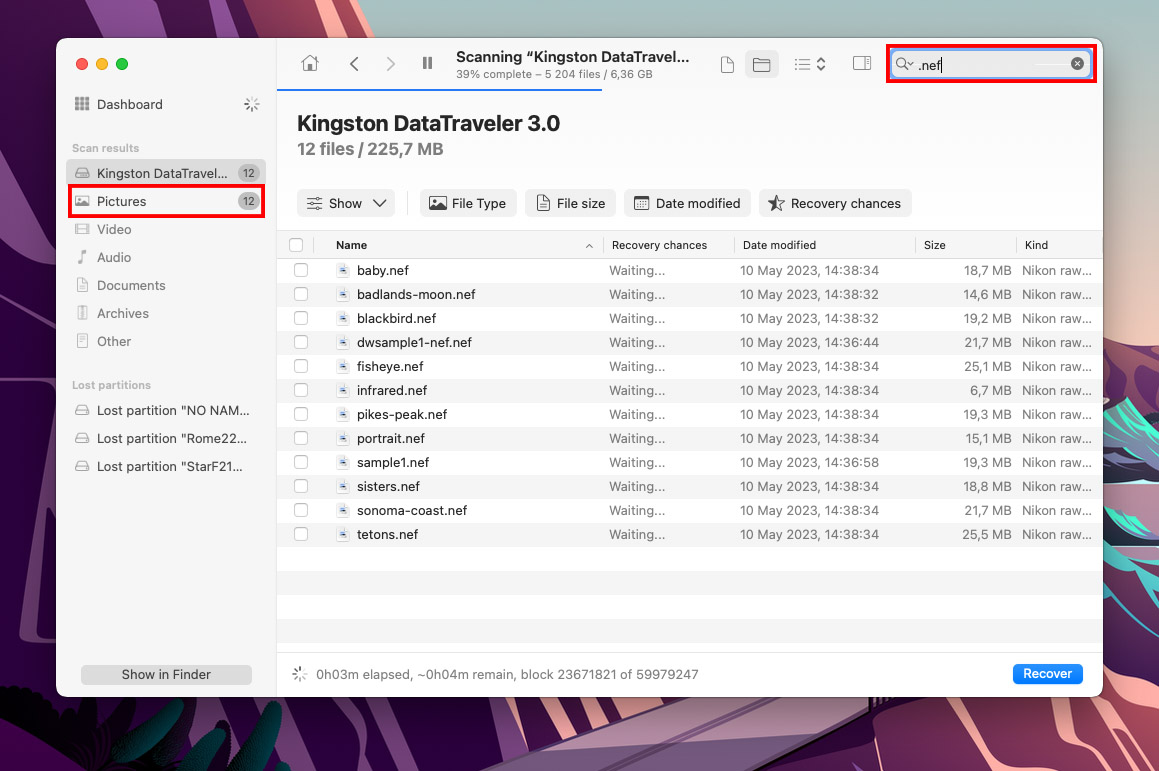
Step 5. On this window, Disk Drill will display all the files it found. You can use the search bar and file type sidebar to filter the results. Let’s try filtering the list to display only Nikon RAW files:
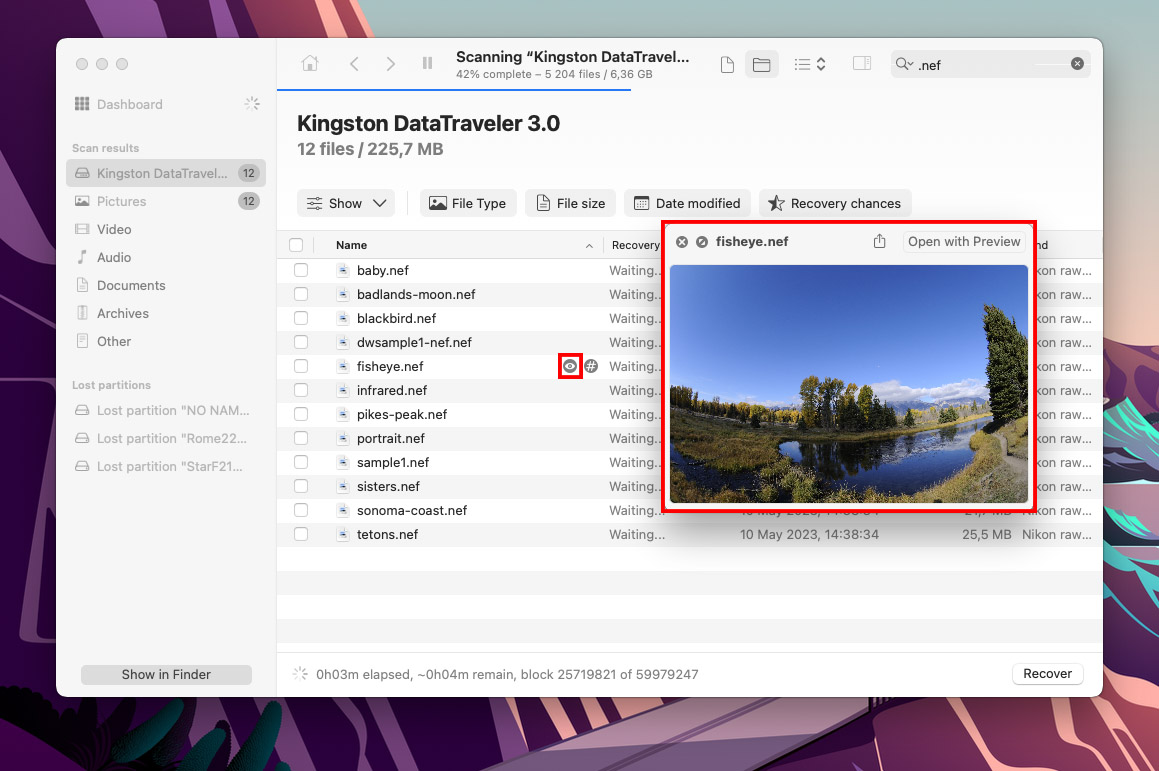
Step 6. In some cases, data recovery software won’t be able to retrieve exact file names. To check if you got the right files, hover your mouse pointer next to the file names and click the eye button that appears.
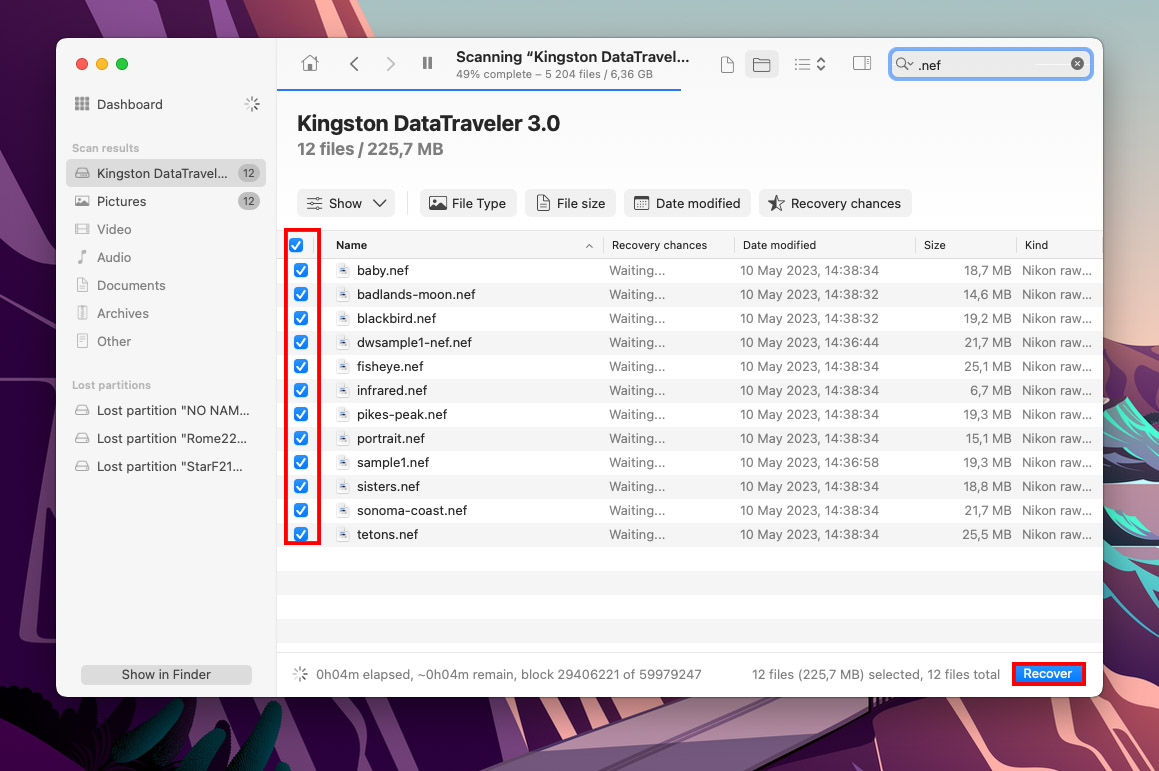
Step 7. Tick the boxes beside the files you want to restore, then click “Recover.”
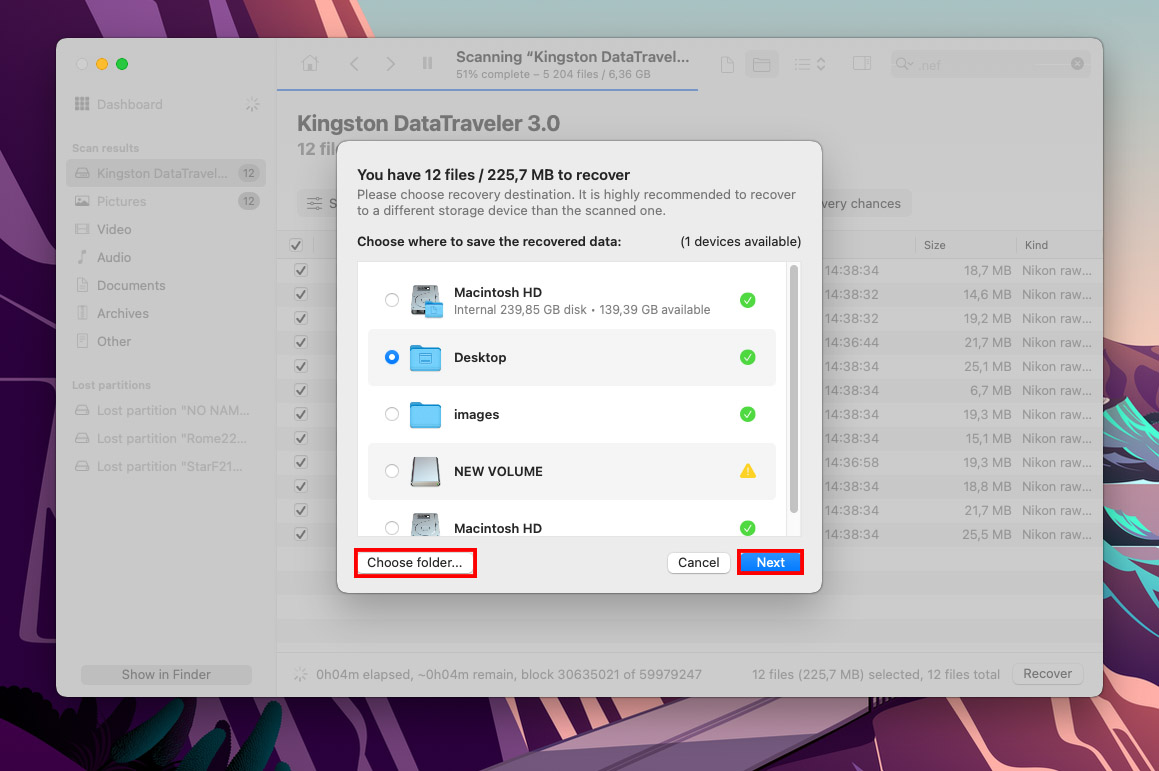
Step 8. Choose a location on your computer for Disk Drill to use as a destination folder. Don’t save it to the device you’re scanning. Then, click “Next”
Conclusion
In summary, RAW file recovery is difficult but very possible with the right tools – especially if you do it ASAP and you haven’t saved new files to the SD card in question (which may cause overwriting). You just need to make sure that the software you use is optimized for RAW photos’ special attributes and it supports your camera’s manufacturer’s RAW format.
However, recovery is not 100% guaranteed in most scenarios. To avoid this problem in the future, make it a regular habit to back up your photos if they’re important to you and take care of your SD card!


