
MacBook Air data recovery is simple enough if everything works as intended. But what if your MacBook won’t boot? Or your drive is severely damaged? Or worse – what if your MacBook Air is totally dead?
There are ways around all of those problems… But knowing the correct method to recover your MacBook Air in your specific situation will make things a whole lot easier. In this article, we teach you how to restore your MacBook Air data no matter its condition. Read on.
Table of Contents
What Storage Options Are There on a Macbook Air
If you have a Macbook Air, chances are it has a factory-installed SSD, although earlier versions had the more traditional HDD. Each has its own pros and cons, but the key difference in relation to MacBook Air recovery lies in how it behaves when you delete files.
Let me explain.
When you delete a file on a MacBook Air hard drive, it doesn’t immediately get erased. Instead, the hard drive “earmarks” the data as “free space” that can be used by new data. Before new data gets written to that space, we can still retrieve the old data.
On the other hand, SSD uses the TRIM command, a tool that optimizes data deletion. When it is enabled, macOS commands your SSD to erase the file as soon as you delete it. If you don’t act fast, chances at successful recovery diminishes.
This is why it’s considered easier to recover a MacBook Air hard drive than it is an SSD.
TRIM command is enabled by default on factory-installed SSDs. If you want to disable this command, launch the Terminal app (Finder > Applications > Utilities), then type the following command hit return:
sudo trimforce disable
How to Recover Data From a MacBook Air That is Bootable
If you can boot your MacBook, your chances of recovery are higher compared to non-booting Macs; the latter tends to have other complications (which caused it to not boot in the first place) that make recovery tougher.
The process also takes fewer steps because you don’t have to deal with working around the missing OS environment.
Finally, macOS itself provides multiple ways to restore data – having access to its tools will give you better opportunities. We’ll show you how the most effective methods of doing so in the guide below.
Method 1: Recover Deleted Files Using Data Recovery Software
Data recovery software is a powerful tool that lets users extract data directly from the file system, during the window where your old data has been earmarked to be overwritten but not yet erased.
There are a number of data recovery software to choose from online, but we’ll be using Disk Drill for this article. It’s highly effective and super easy to use, even for beginners – we also used Disk Drill to recover data from a MacBook Pro in another article. Here’s how to use it to recover deleted files from your MacBook Air:
Step 1. Download and install Disk Drill into your MacBook Air.
Step 2. Launch Disk Drill (Finder > Applications).
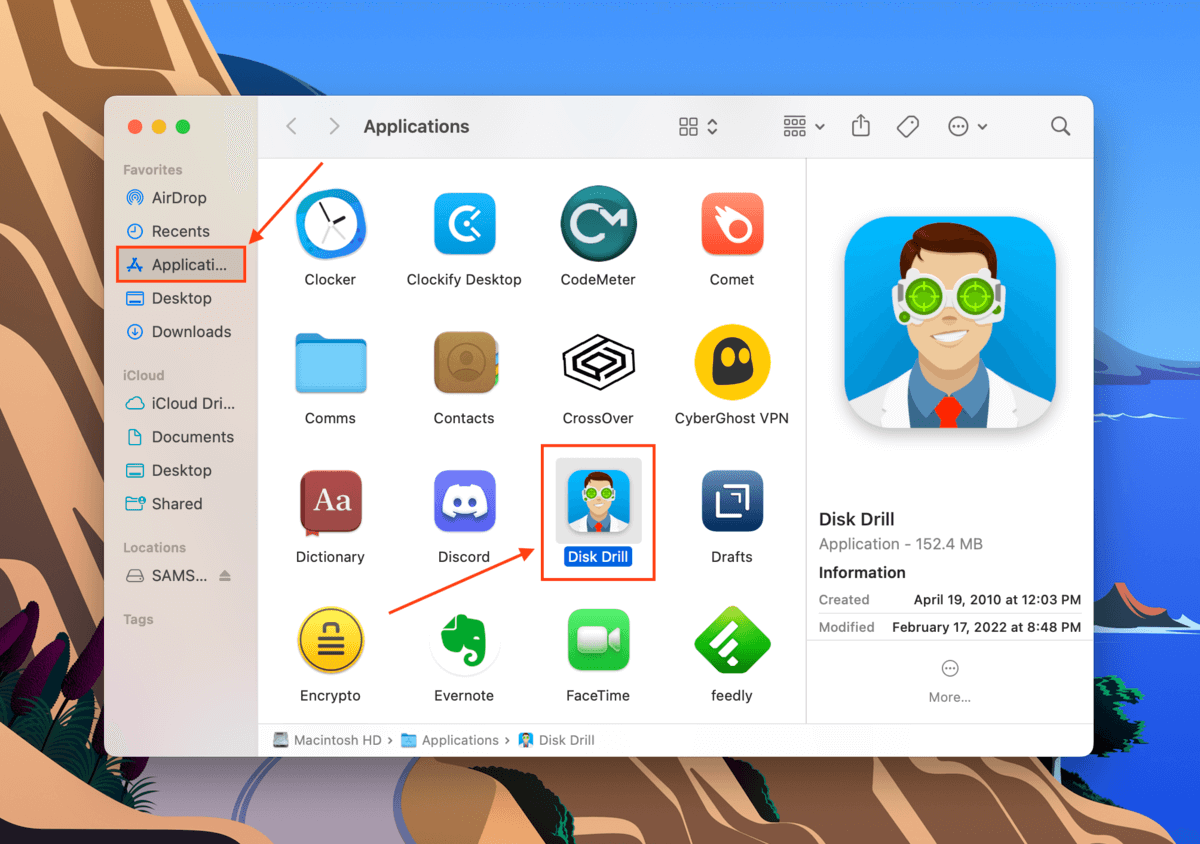
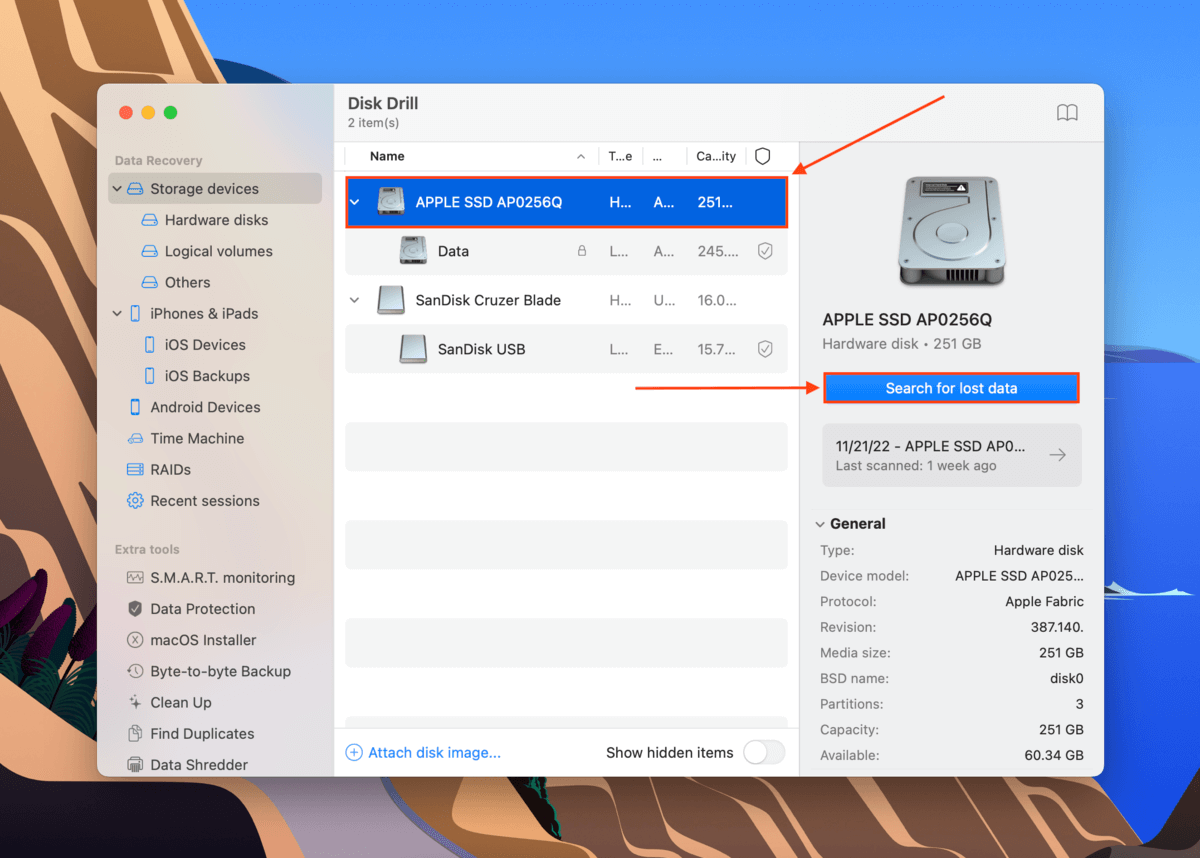
Step 3. On the Disk Drill window, select your system drive – it should be labeled as “Apple SSD” or something similar. Then, click “Search for lost data”
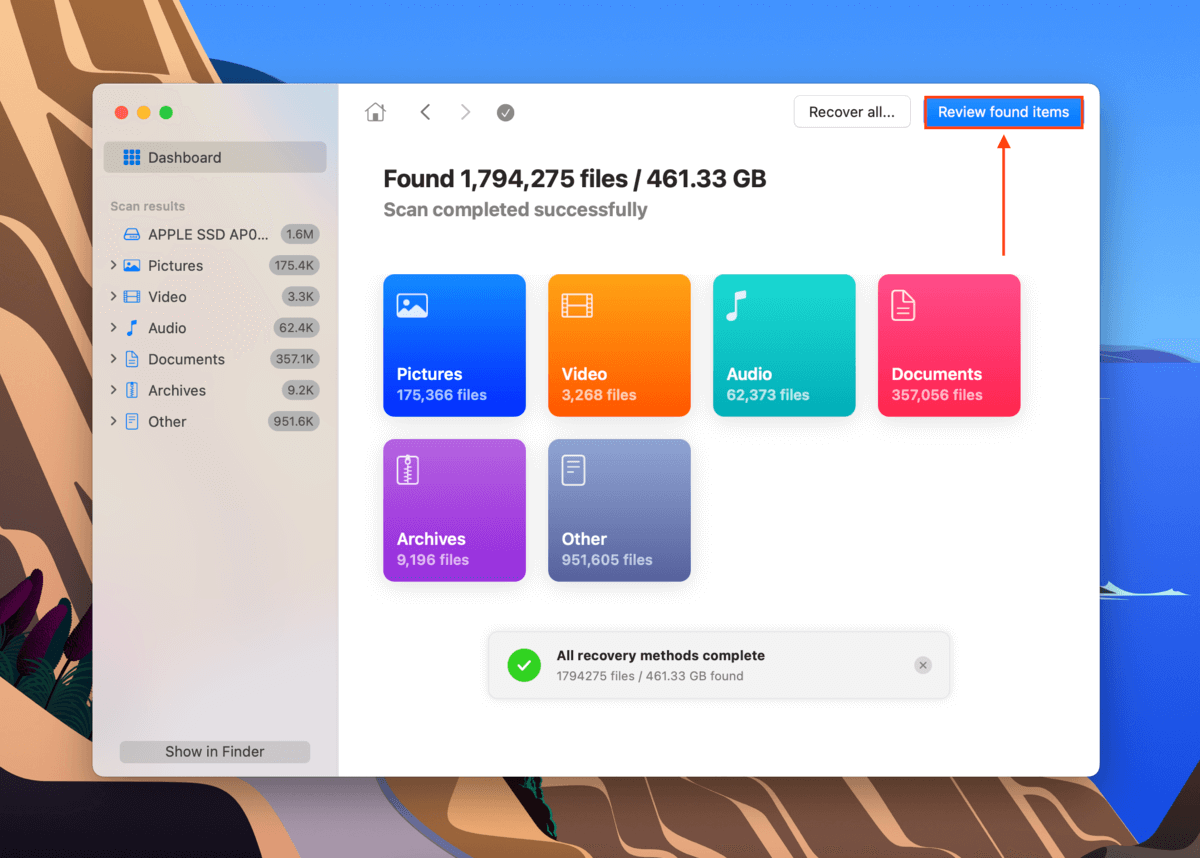
Step 4. Once the scan is completed, click “Review found items” to preview the recoverable files.
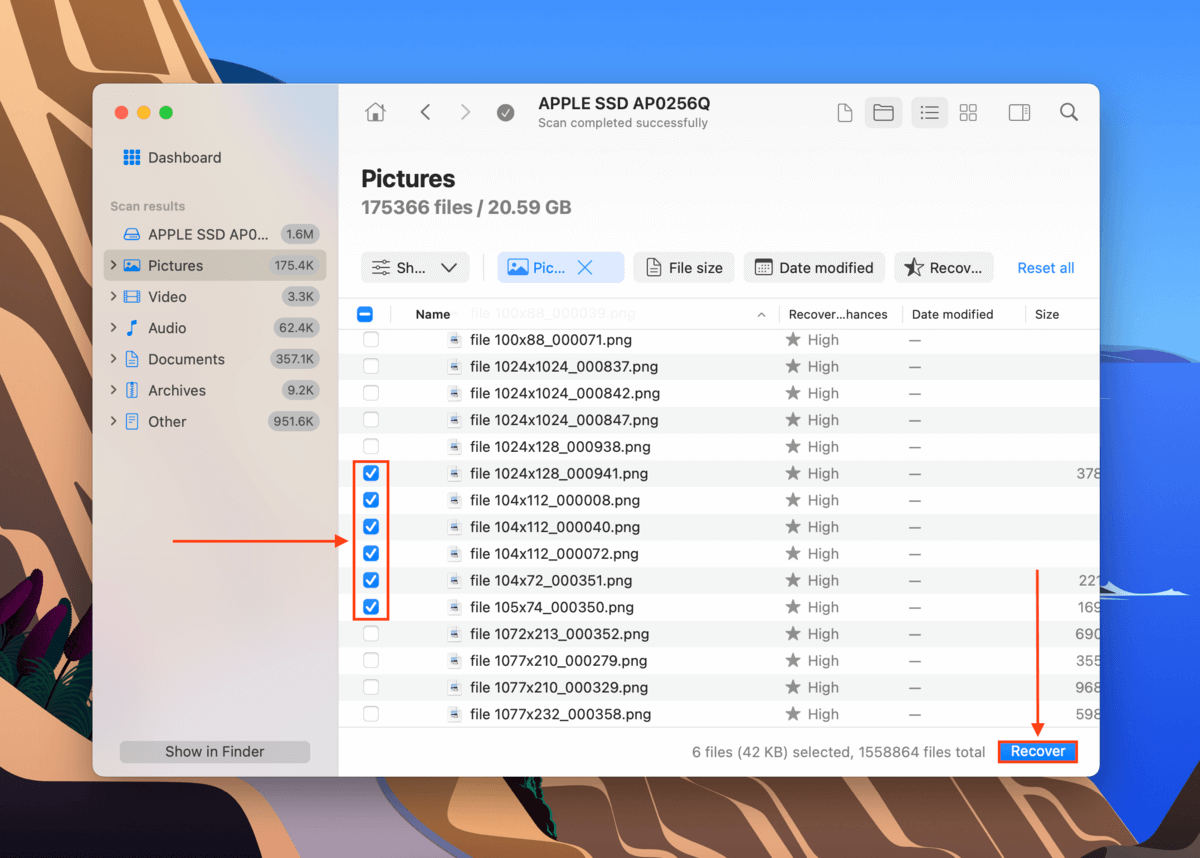
Step 5. Use the search bar in the top-right corner of the screen to look for your file by its name or extension. Click on the eye button beside the file name to preview the file. The file name may have changed during the scanning process.
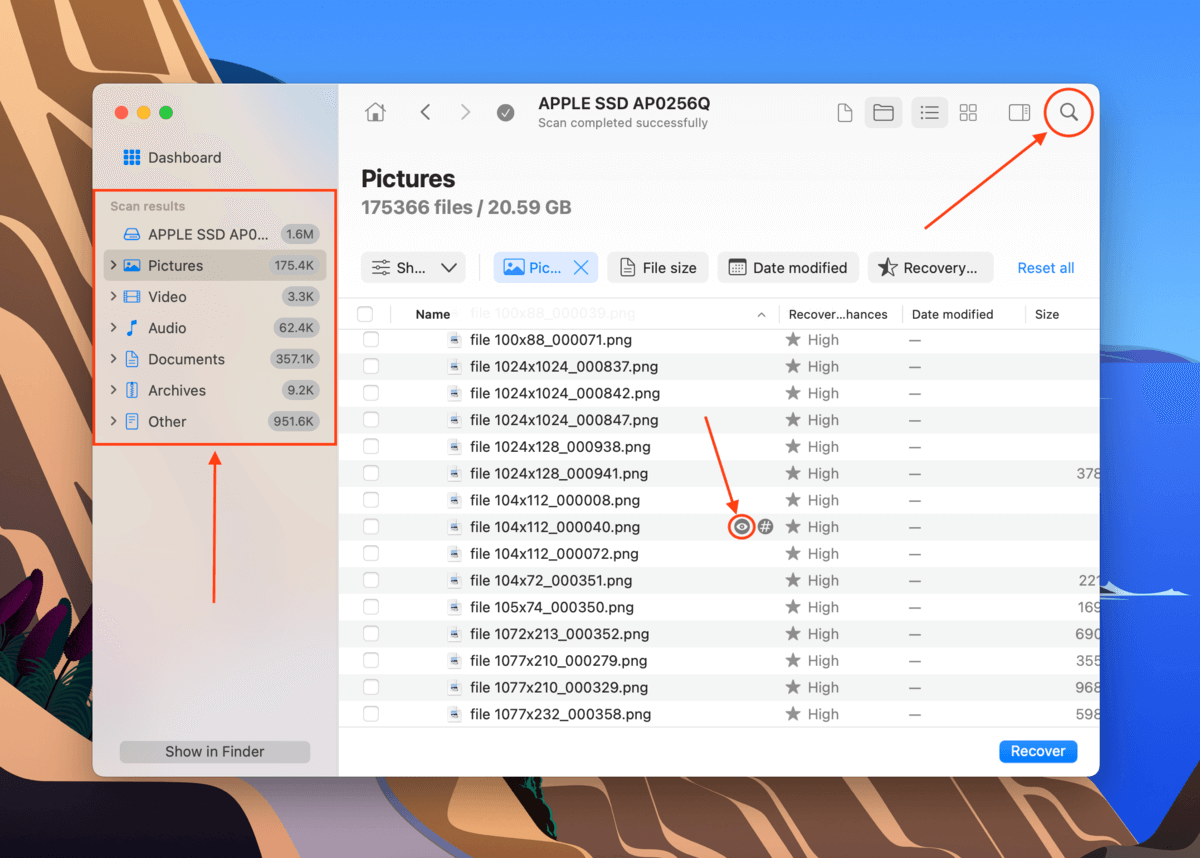
Step 6. Tick the checkbox next to the name of the recoverable file before clicking “Recover”. Alternatively, you can click “Recover All”
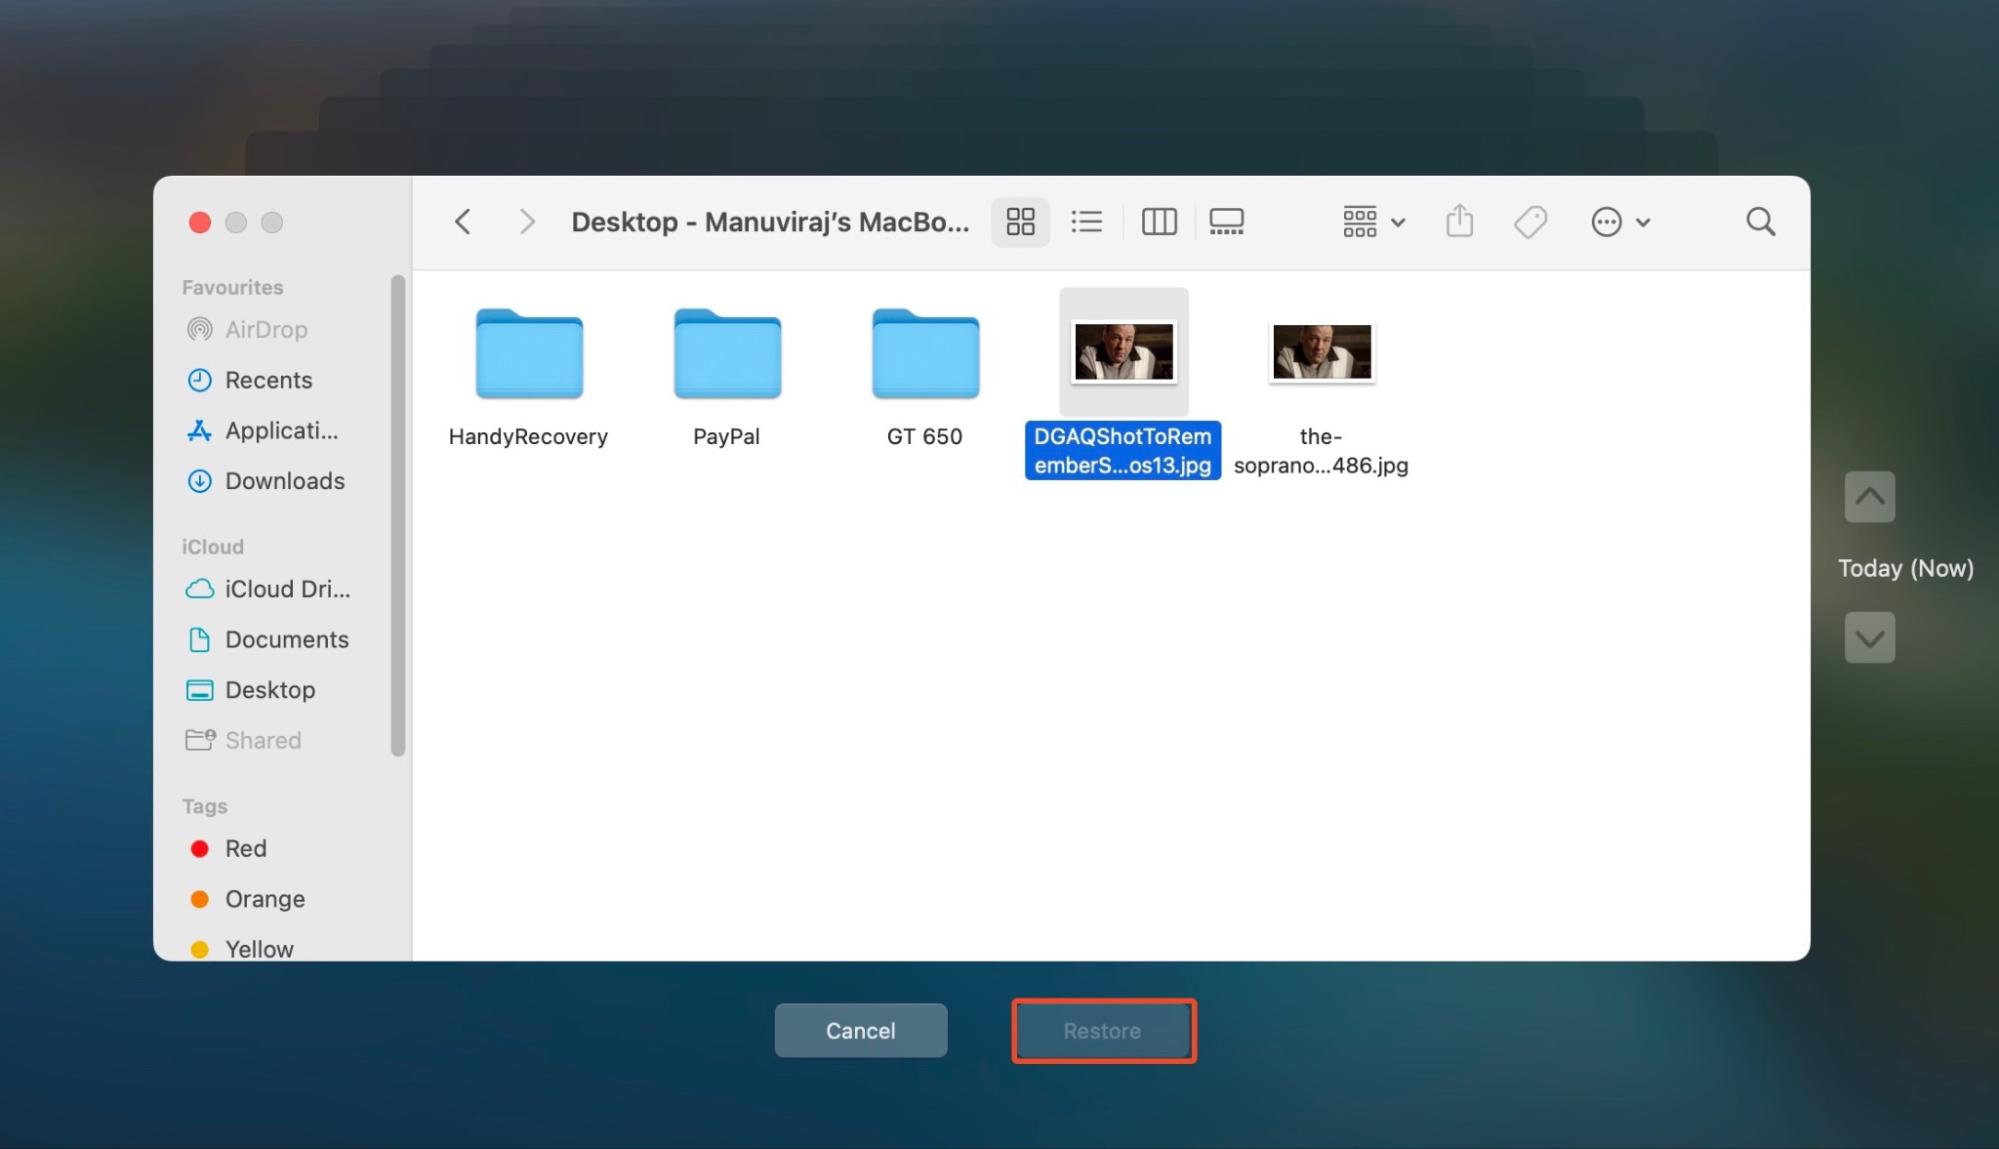
Step 7. You will be asked to choose the destination folder for your recovered file/s. This folder must be located in a different drive to avoid overwriting any existing data.
Method 2: Recover Data From a Time Machine Backup
If you created a Time Machine backup before your files went missing, you have a very good chance of getting all your files back (as long as you still have the backup available). Using Time Machine, you can not only recover your files or folders, but you can also restore the version you prefer.
We’ll show you how to restore your deleted files using Time Machine in the guide below.
- Connect your Time Machine backup drive to your Mac. Then, on the Apple menu bar, click the Time Machine button > Browse Time Machine backups.
- Navigate to the folder where your missing files and folders were last stored. Then, use the arrows on the right to travel back in time to before your files went missing.
- Click the files or folders you want to recover and click Restore.
Method 3: Utilise App-Specific File Recovery Option
Depending on the app used to create and save the file, it may have a built-in tool that will allow you to restore that file. Here are some of the common utilities present in apps like Pages, Keynote, etc:
- Revert to – Replace the current version of your file with the version that you last saved or opened.
- Restore an earlier version – Select one of the earlier versions of the file to restore.
- Autosave tool – Automatically saves your file based on certain parameters (such as time passed or new edits). It may also produce temporary data during the creation of autosave files, which you can sometimes find and copy from the Temp folder on your Mac.
What To Do if I Can’t Boot my MacBook Air
If you can’t boot your MacBook Air, recovery may still be possible but the process is a bit more complicated. There are different methods to do so depending on the equipment you have available. We’ll demonstrate each of them in the sections below with step-by-step instructions.
Method 1: Recover Data From Unbootable MacBook Air Using Disk Drill
If your MacBook Air refuses to boot, you can instead boot into macOS from an external USB. On that “portable” copy of macOS, we can then download and install Disk Drill and use it to scan your internal drive.
It takes a bit of preparation to install macOS onto a USB, but don’t worry – we go through every single step below (with screenshots):
Step 1. Plug in your external storage device to a working MacBook. Ensure that you have enough space to save your macOS and your backup.
Step 2. Go to Disk Utility (Finder > Applications > Utilities > Disk Utility)
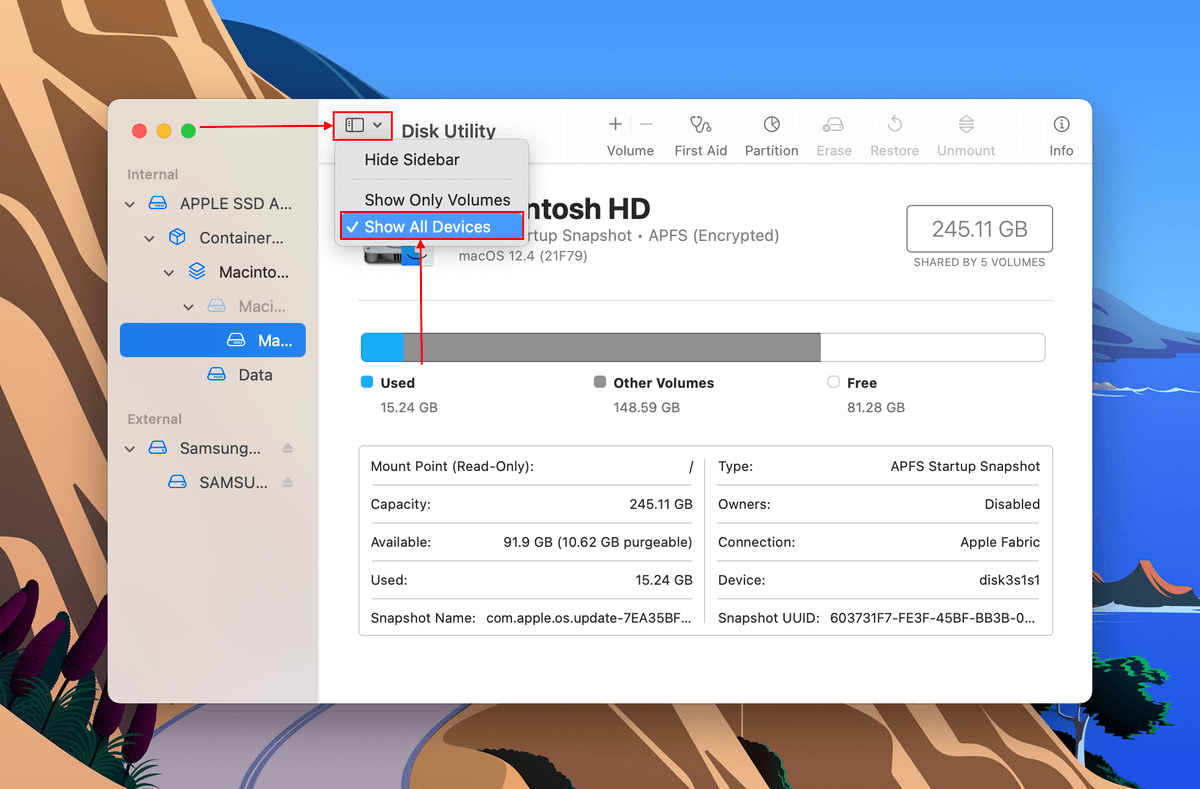
Step 3. Click the sidebar button on the top right corner of the Disk Utility window, then click “Show All Devices.”
Step 4. On the left sidebar, click on the external drive. Then, click “Erase”.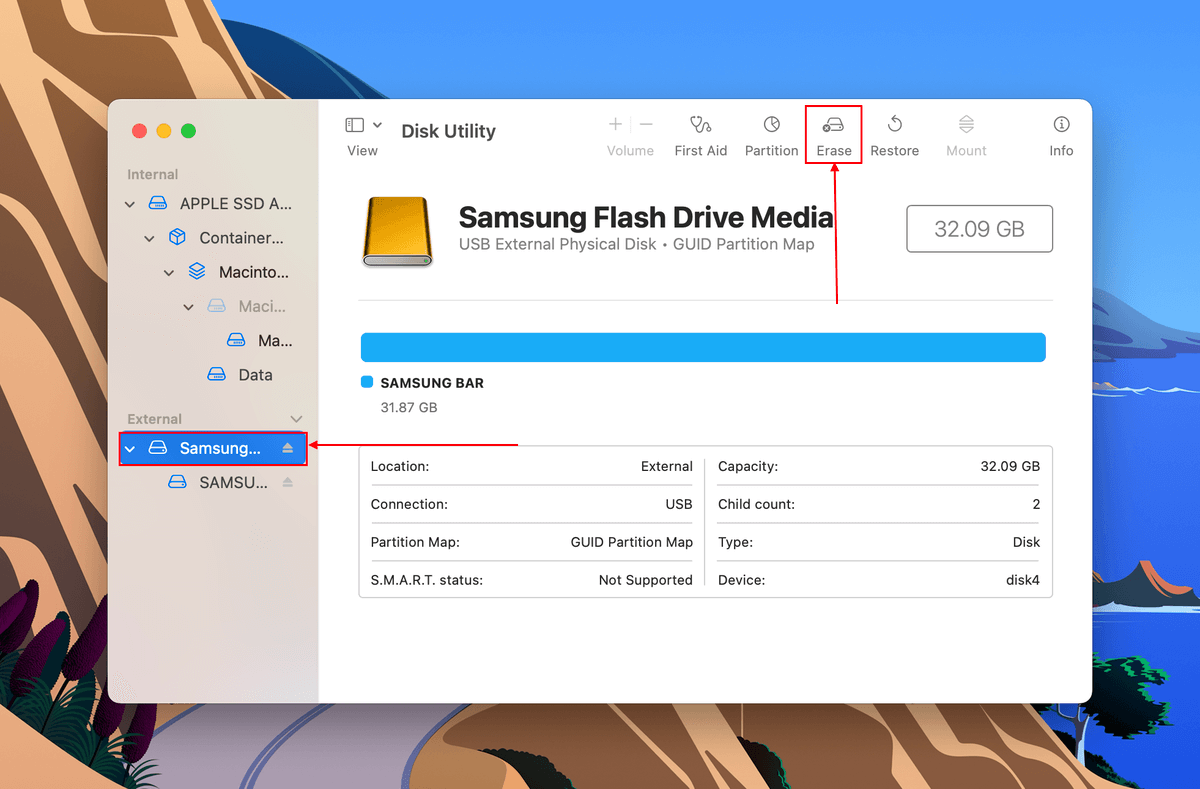
Step 5. In the dialogue box, you will be asked to name your drive. Also make sure you select AFPS for the format and GUID Partition for the scheme for compatibility with macOs.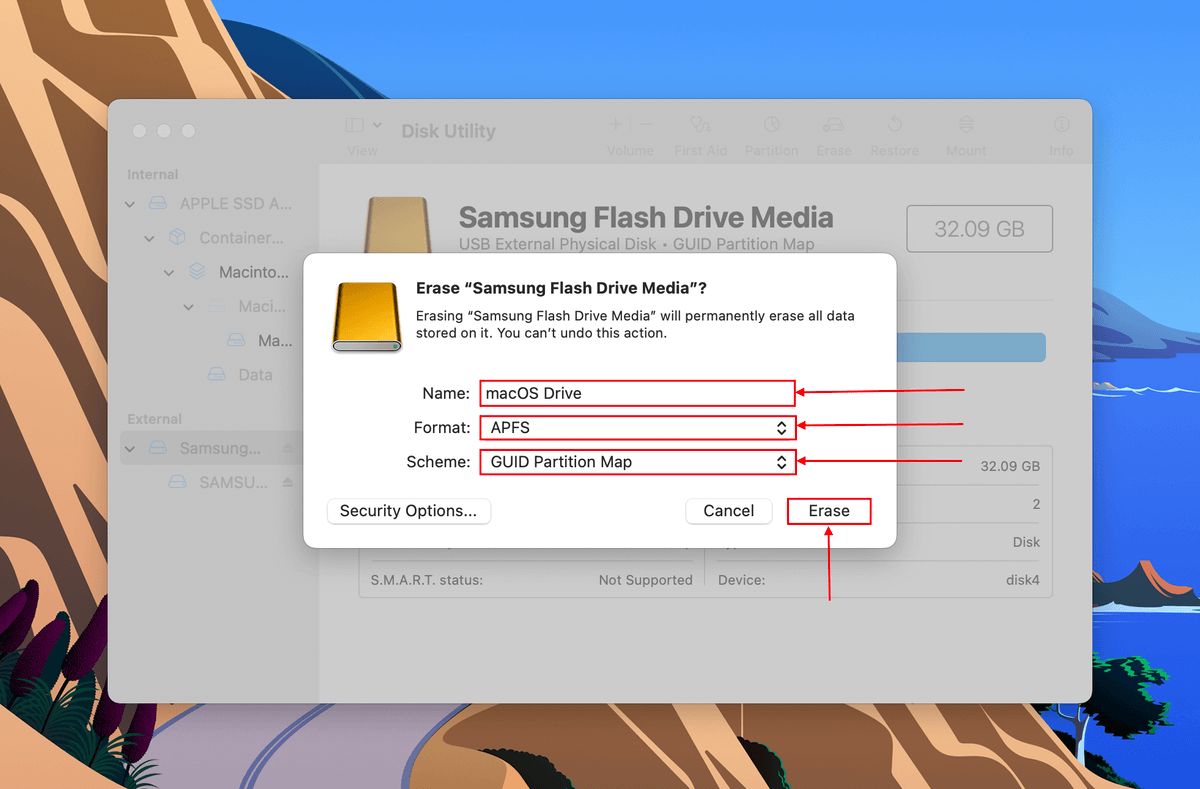
Step 6. From the App Store, download macOS Monterey installer (or your preferred version), but don’t install it yet.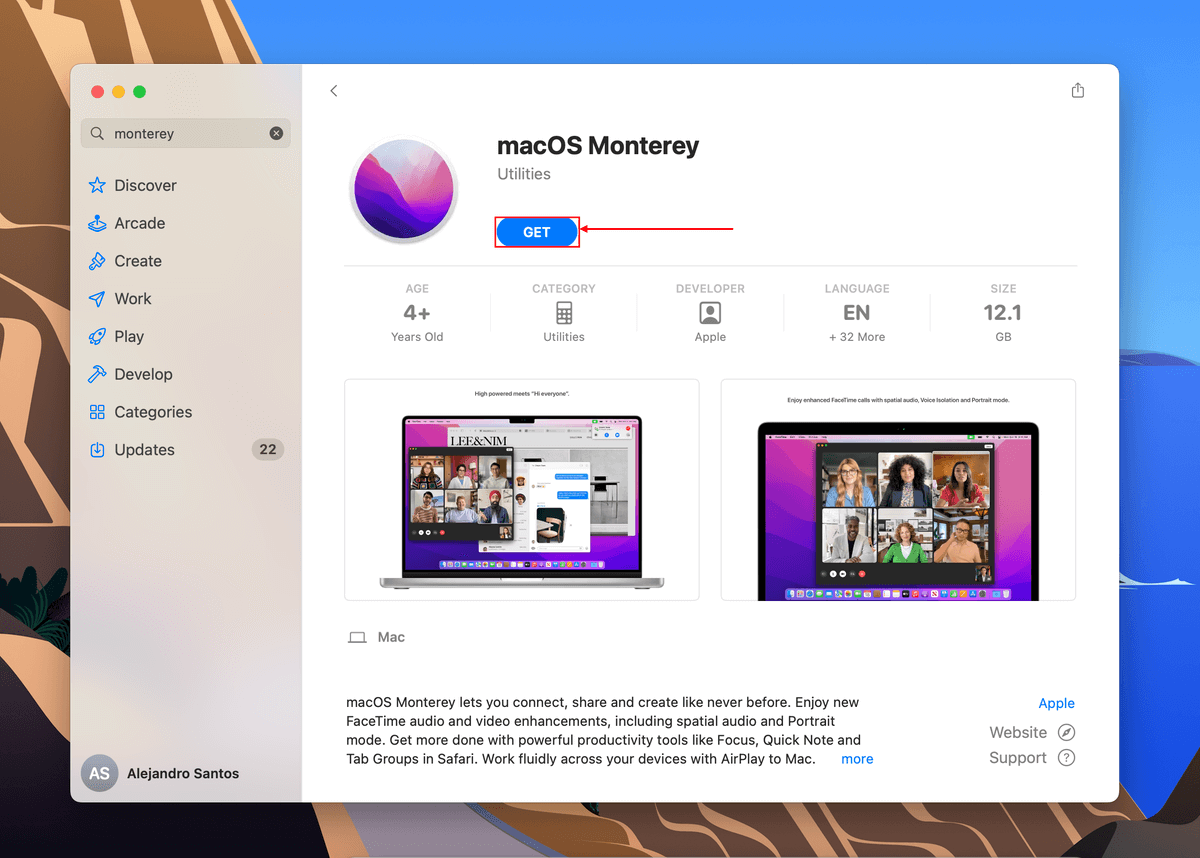
Step 7. Once downloaded, go to Finder > Applications. Then, double-click on the installer icon to run it.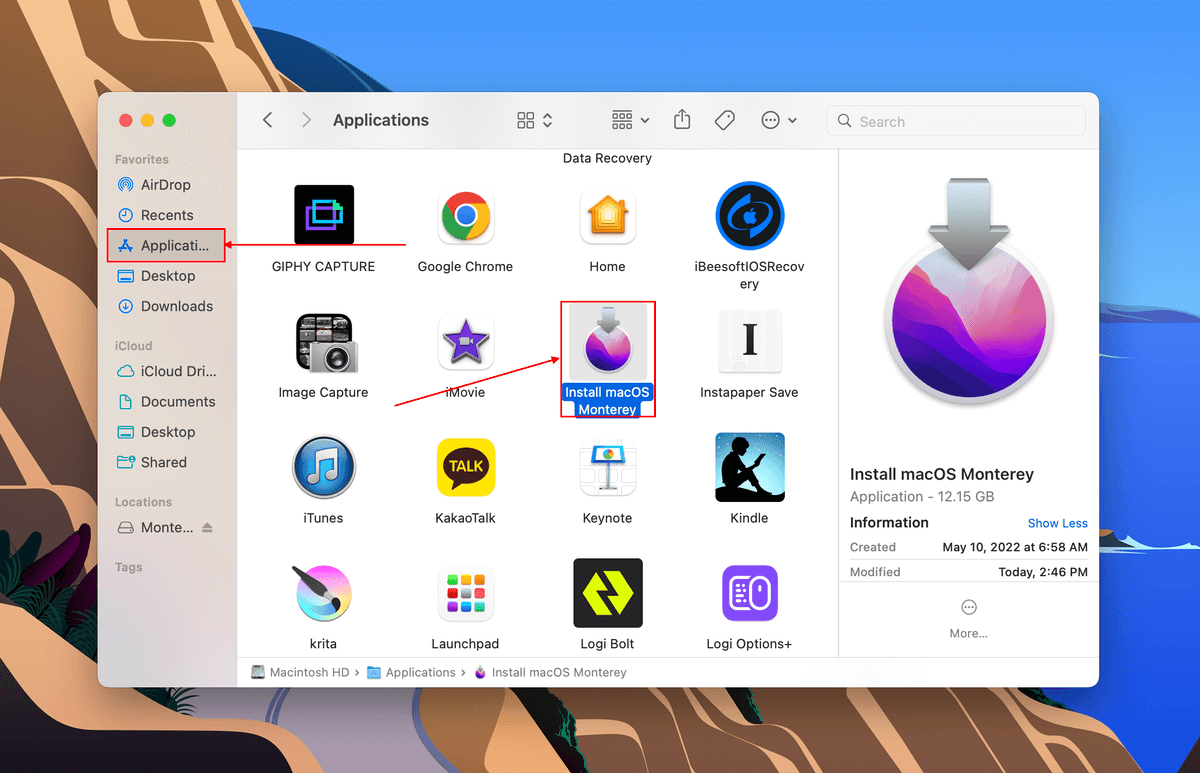
Step 8. Click “Continue.”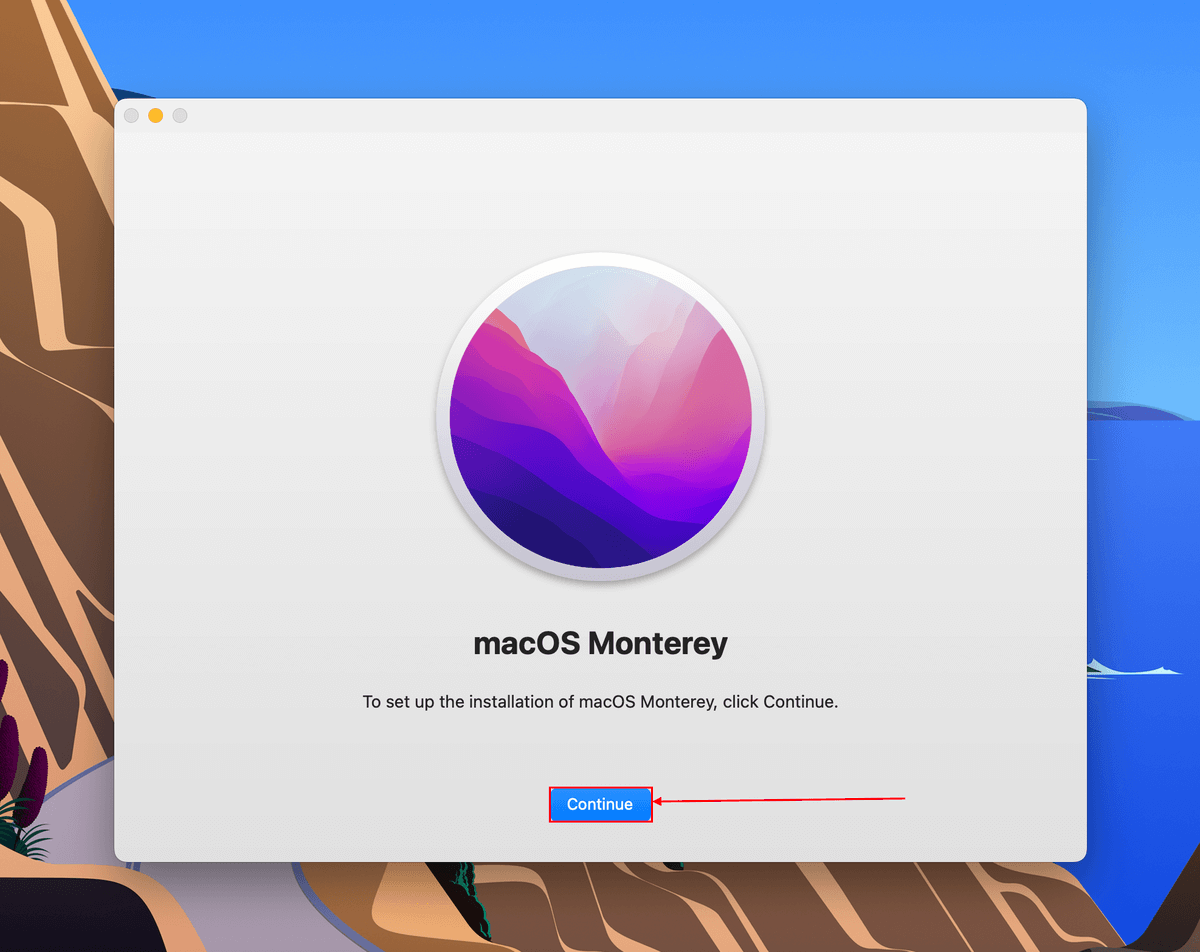
Step 9. Click “Agree” once in the main window, and again in the confirmation dialogue.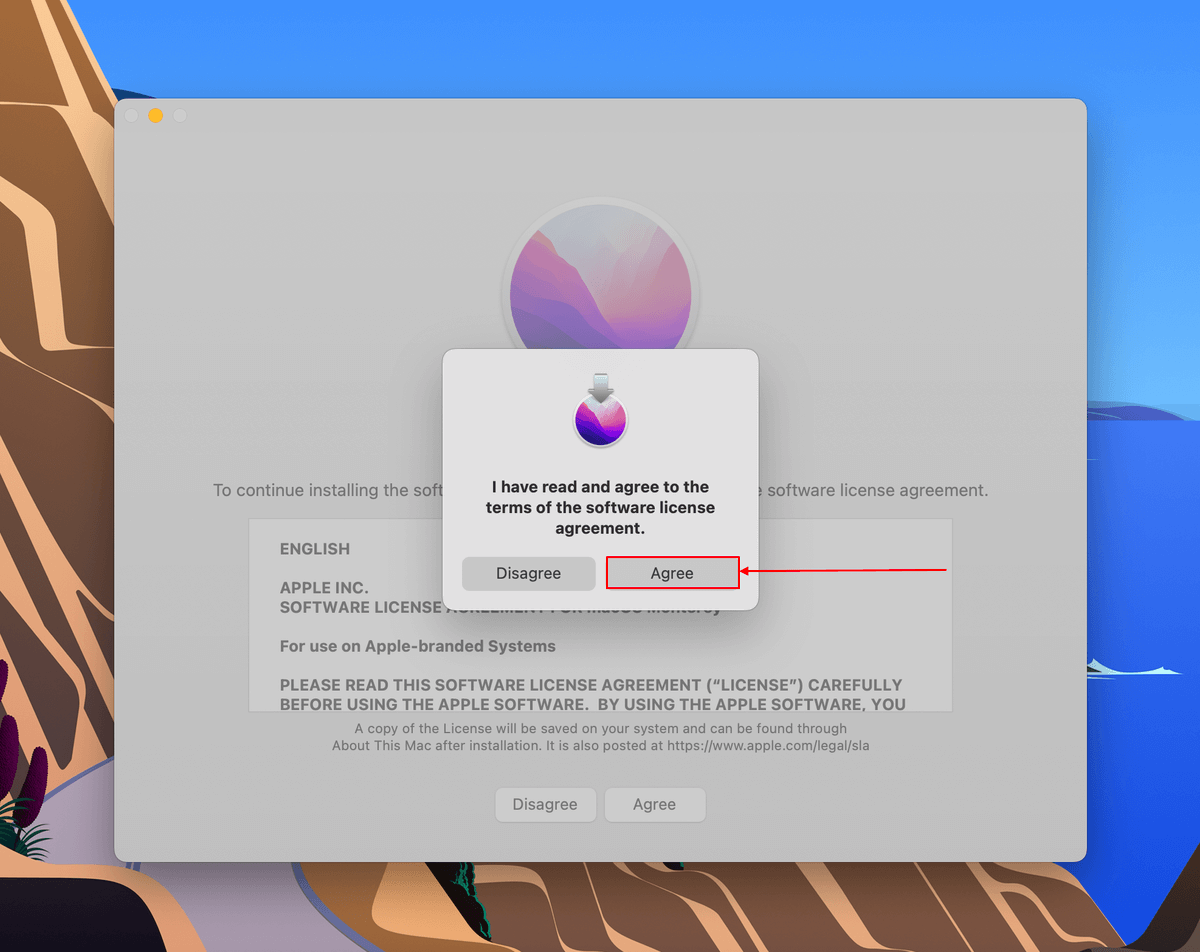
Step 10. Click “Show All Disks…”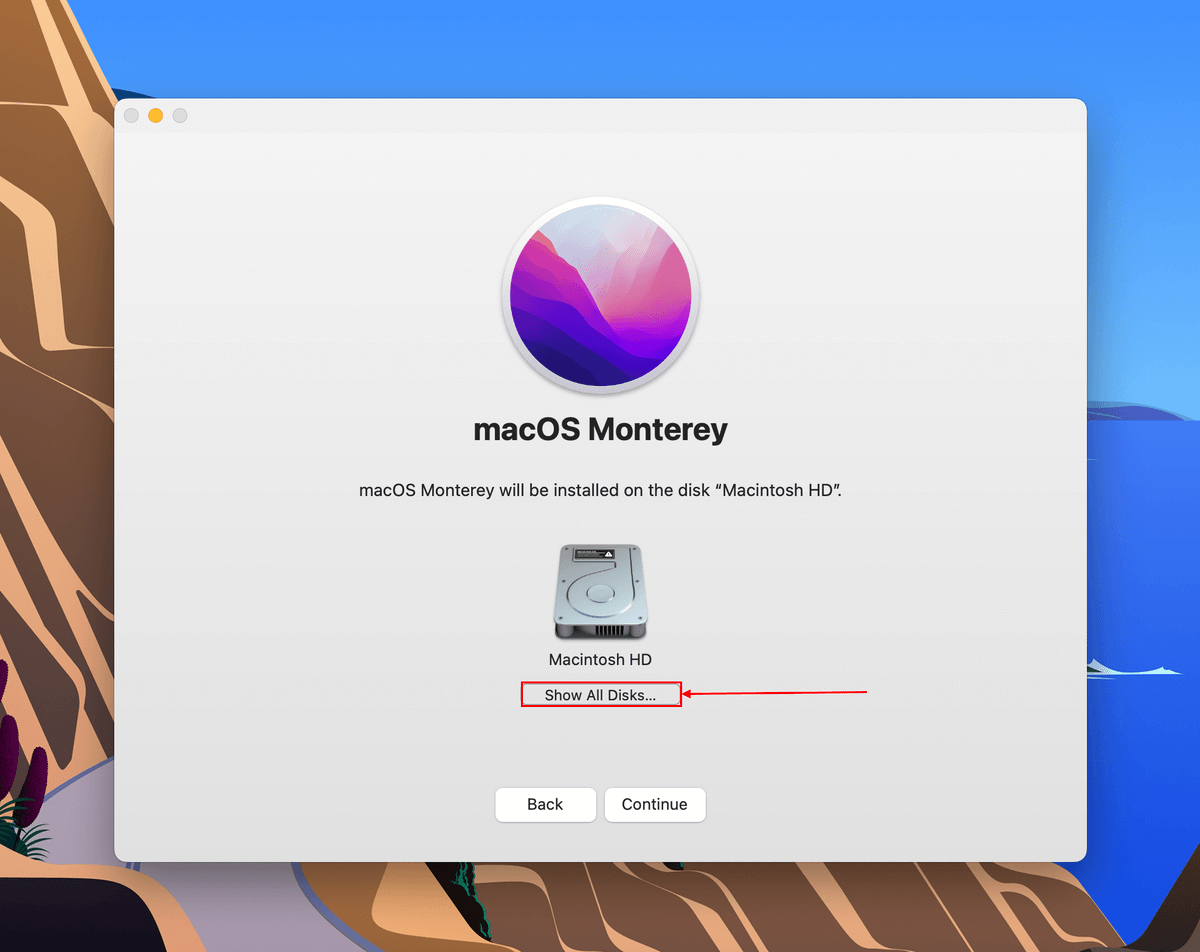
Step 11. Select the “Monterey USB” disk we formatted earlier, then click “Continue.”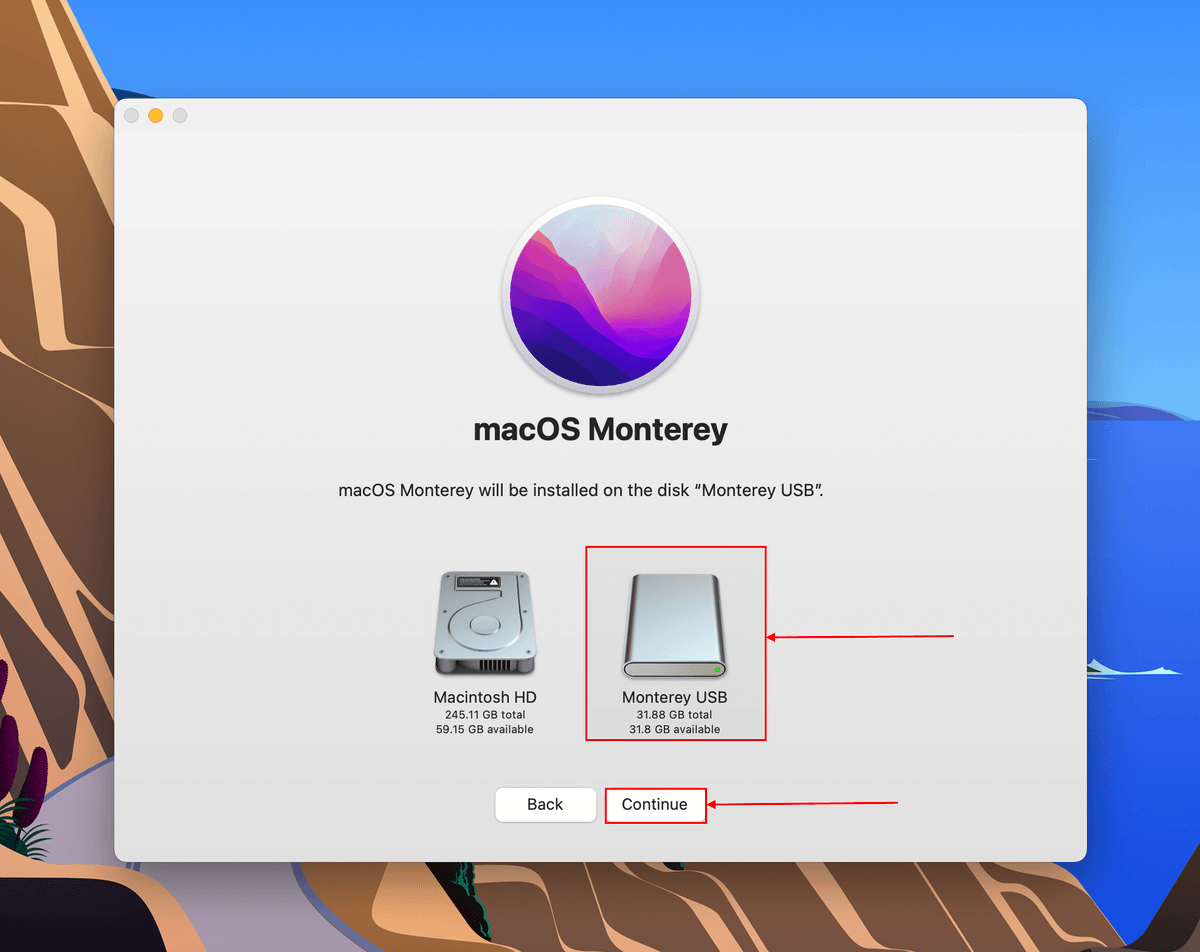
Step 12. Select your profile, then click “Install.”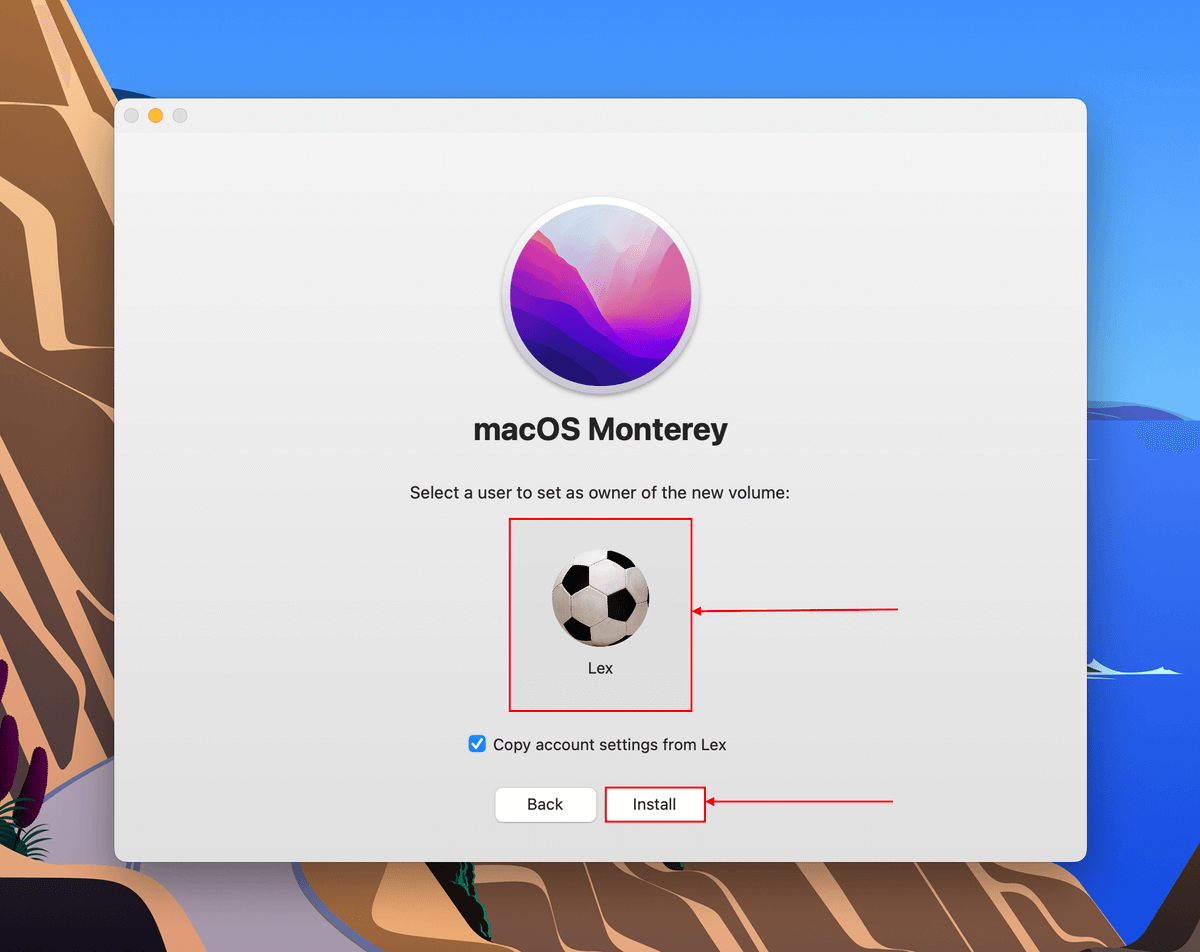
Step 13. Once the installation is complete, shut down your Mac and hold the power button until you see “Loading startup options.” You can then choose which drive to boot from.
Step 14. Once booted, download and install Disk Drill (Finder > Applications). Follow the standard procedure set in the preceding section to scan and save a backup of your data. Note that Disk Drill will recognize your internal drive as an external drive in this case.
Method 2: Recover Data From Severely Damaged MacBook Air Hard Drive or SSD
DIY data recovery methods have their own limitations. If your hard drive or SSD is physically damaged, we advise that you send it to a professional data recovery center for damage and cost assessment. Their specialists have the right tools and experience to help you in extreme data loss situations.
Method 3: Recover Data From a Dead MacBook Air with Backup
The only surefire way to recover data from a dead MacBook Air is by retrieving this data from a Time Machine backup. This method requires you to have set up Time Machine beforehand and to have access to another Mac (Windows computers don’t support HFS+ and APFS formats).
If you connect your Time Machine backup drive to another Mac, you should be able to access its contents through Finder. Here’s how:
Step 1. Connect your Time Machine backup drive to a working Mac.
Step 2. Open Finder, then select your Time Machine backup drive on the left sidebar.
Step 3. Double-click “Backups.backupdb”, then double-click the folder labeled with your Mac’s name.
Step 4. In this location, you’ll see folders labeled with their respecive backup dates. You can browse these folders to locate the files you need.
Conclusion
Third-party apps and macOS itself provide many tools that can help you recover lost data. And while recovering files from a booting MacBook Air is the easiest, it’s still possible even in the worst-case scenario (where your Mac isn’t booting at all).
However, your chances of successful recovery also depend on other factors, such as data overwriting or severity of corruption (brought on by whatever caused your MacBook to die). With this in mind, we highly encourage you to create regular backups of your important data – and if you’re relying on recovery without backups, make sure to avoid saving any new files to your Mac before until you’ve secured your data.


