
iTunes is a useful tool for backing up local data from your iPhone, iPad, and iPod devices – such as messages, call logs, photos, settings, etc. It also makes it very easy to restore this data onto your device as long as you have the backup file.
iTunes stores these files in a backup folder stored locally on your Mac. Unfortunately, any number of factors can cause this folder to disappear – which means all your data disappears along with it. This article explores the backup folder, how to recover it in case it does get deleted, and how to use it to restore your files with iTunes.
Table of Contents
How to Find iTunes Backup on Mac
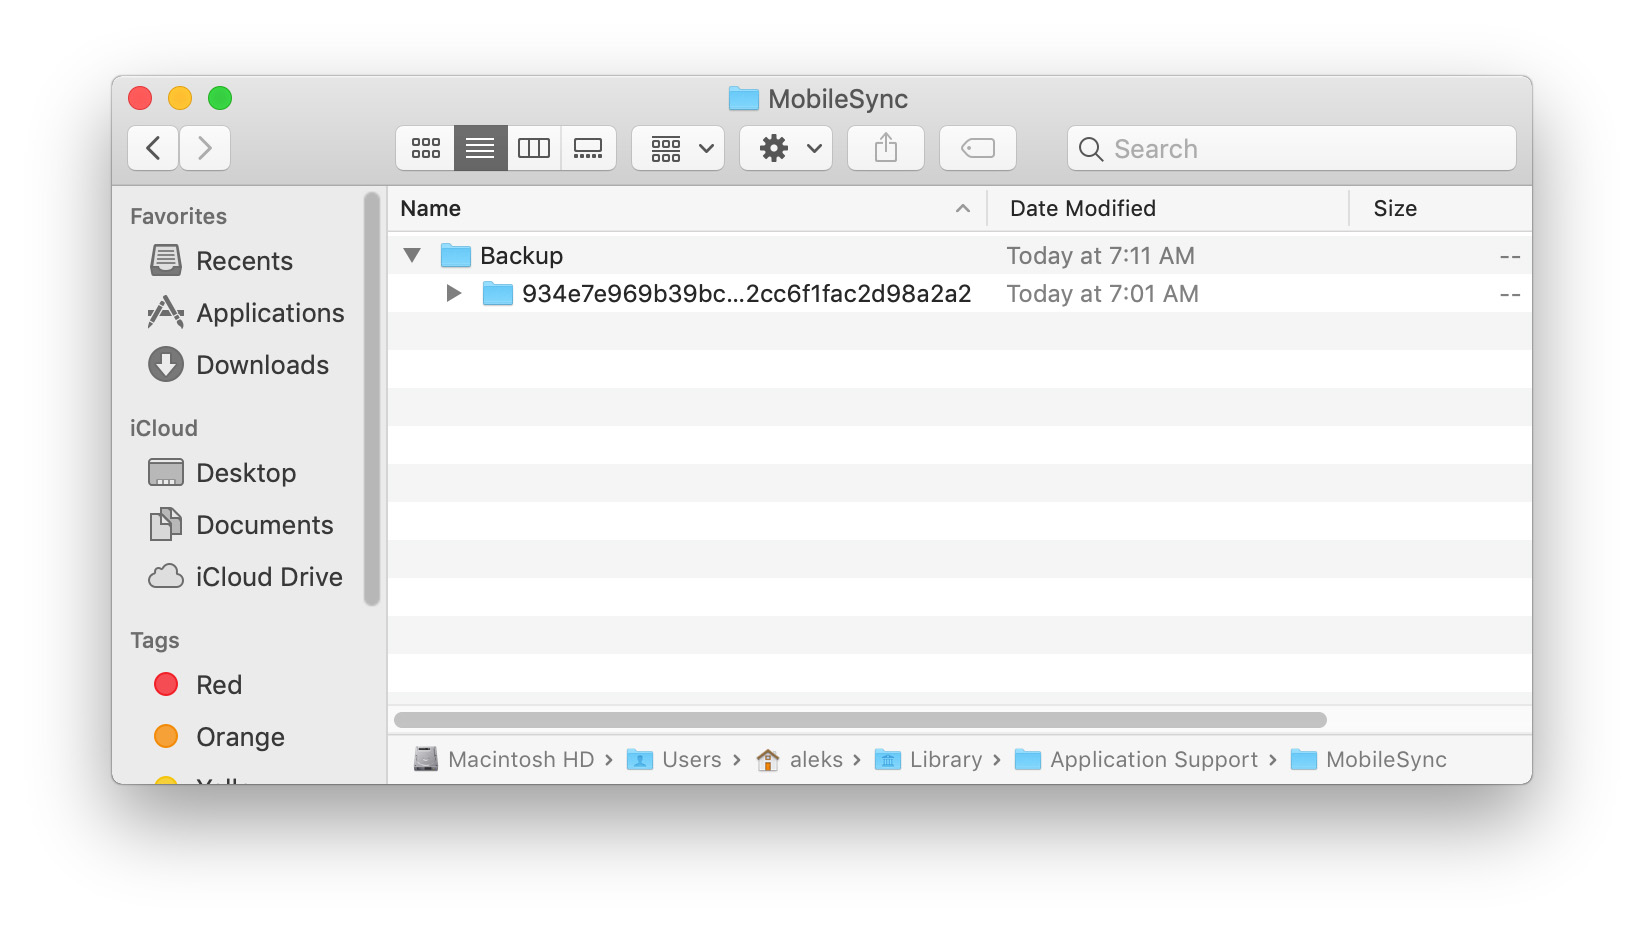
The iTunes backup folders (and simply iPhone or iPad backup folders for macOS Catalina and above), are stored in the “MobileSync” folder, which is located in the ~Library folder of your Mac – this is set up by default.
These folders have names that look like strings of names and numbers. For reference, here’s what they look like:
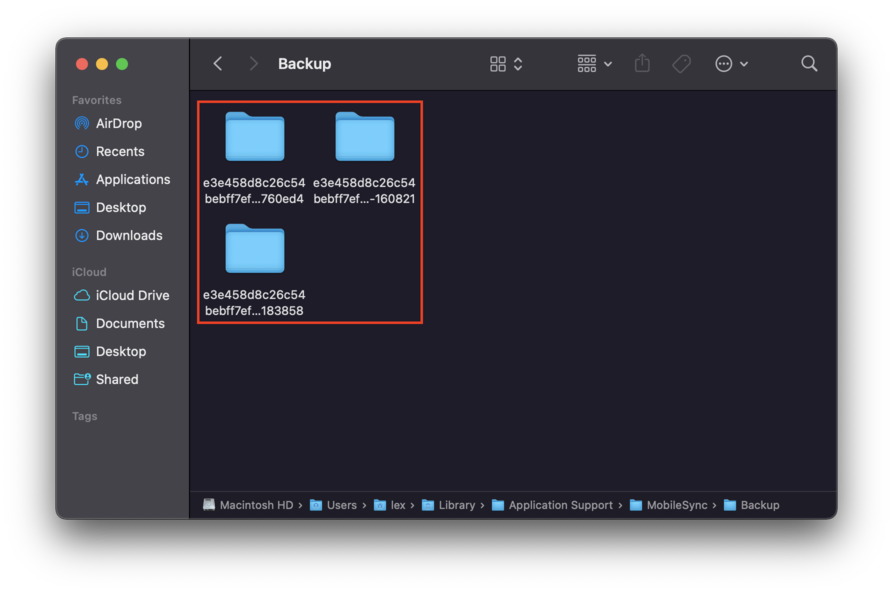
As you can see, folder names are strings of random letters and numbers. To find them via Finder, navigate through the following locations:
Step 1. Open Finder by clicking its icon on your dock.
![]()
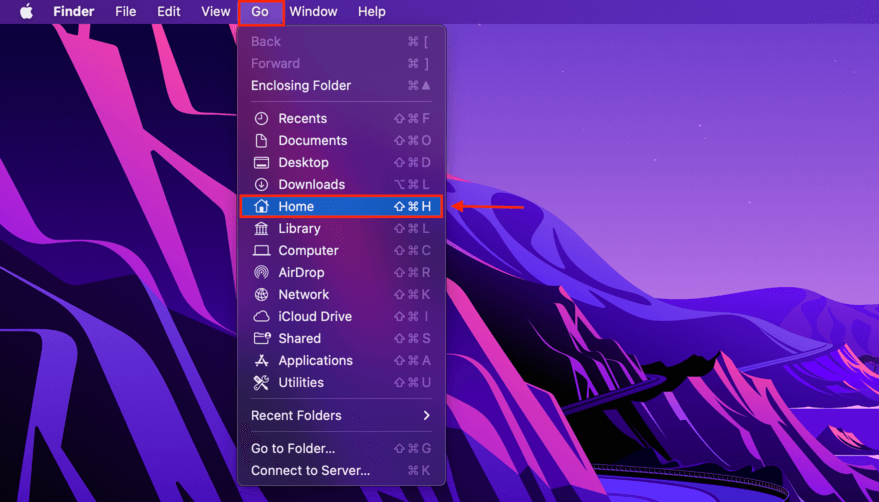
Step 2. On the Apple menu bar, click Go > Home.
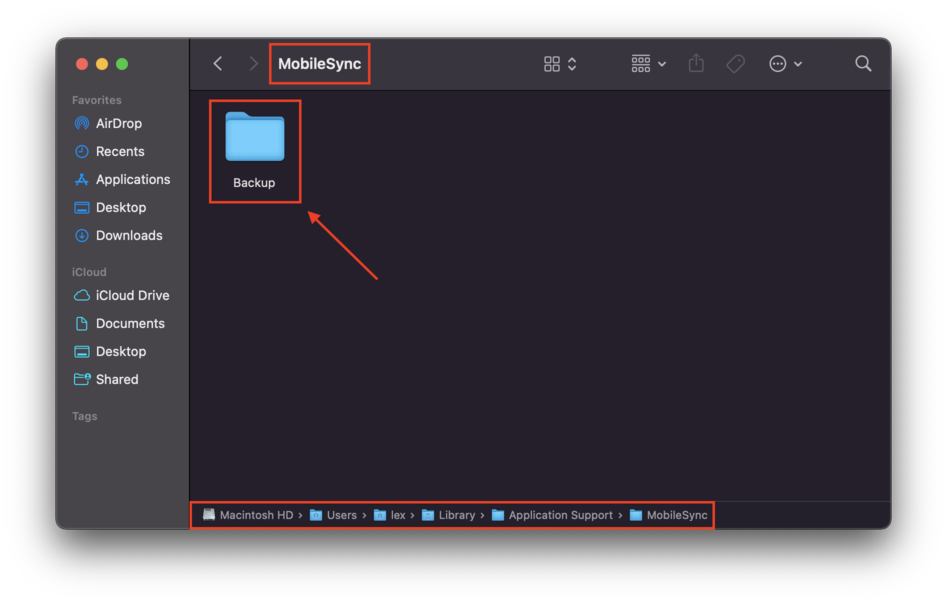
Step 3. In the home folder, navigate to Library > Application Support > MobileSync > Backup.
If it’s not there, you may have accidentally sent it to the Trash folder. If you have already emptied it, you can still recover your files from Trash – just act quickly.
How to Recover a Deleted iTunes Backup
If you accidentally delete your backup folder, you can use certain tools to recover it. This is doubly important if you suspect that your drive is getting corrupted – once that corruption affects your backup files, it will be impossible to recover your data. And even if you simply deleted it by accident and it’s still stored in your filesystem, using that drive will eventually result in overwriting that data. So if your backup is missing, do this ASAP.
For this article, we’ll be using the data recovery tool Disk Drill. You can also use it to recover any deleted files on mac. To recover deleted iTunes backup, follow this guide:
Step 1. Download and install Disk Drill.
Step 2. If the deleted iTunes backup is saved on an external storage media, plug that in.
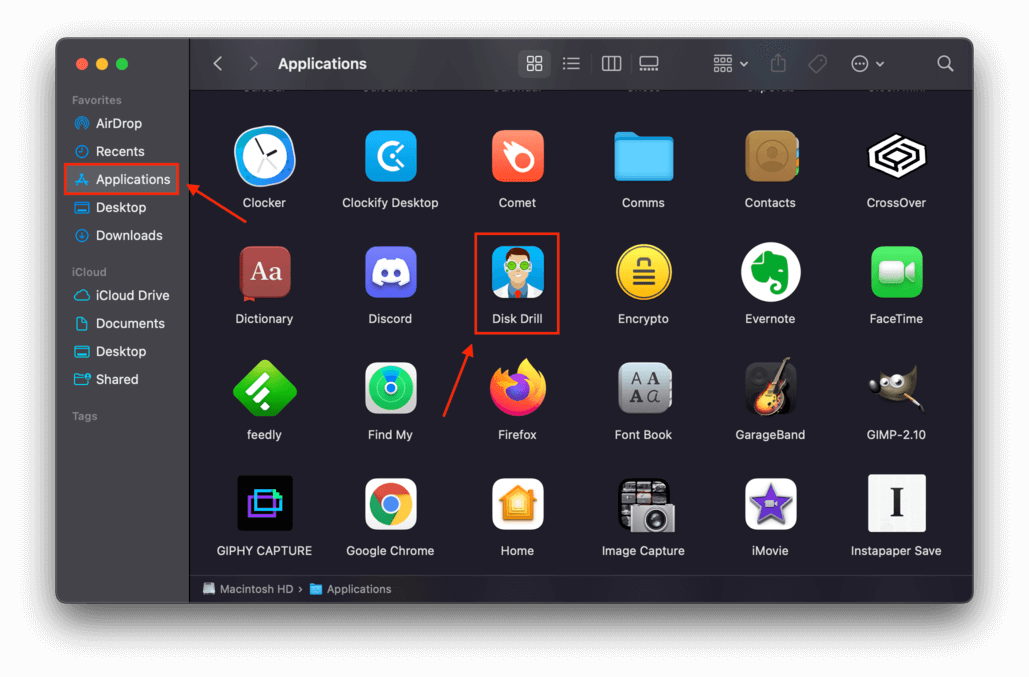
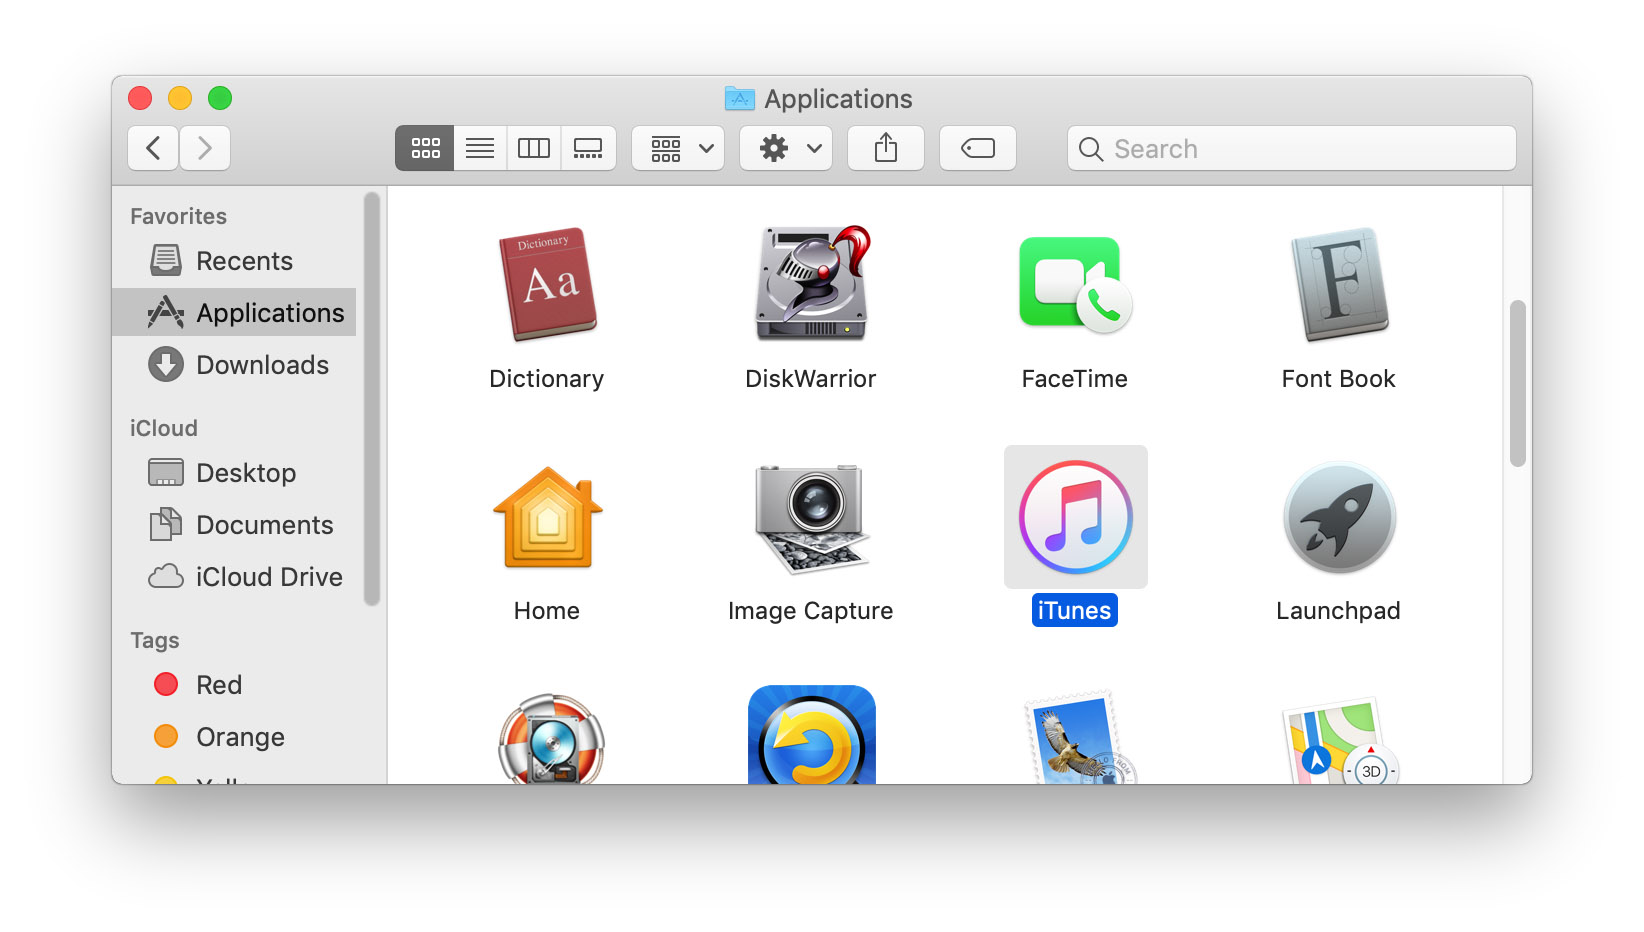
Step 3. Launch the Disk Drill app by navigating through Finder > Applications > Disk Drill, and double-clicking its icon.
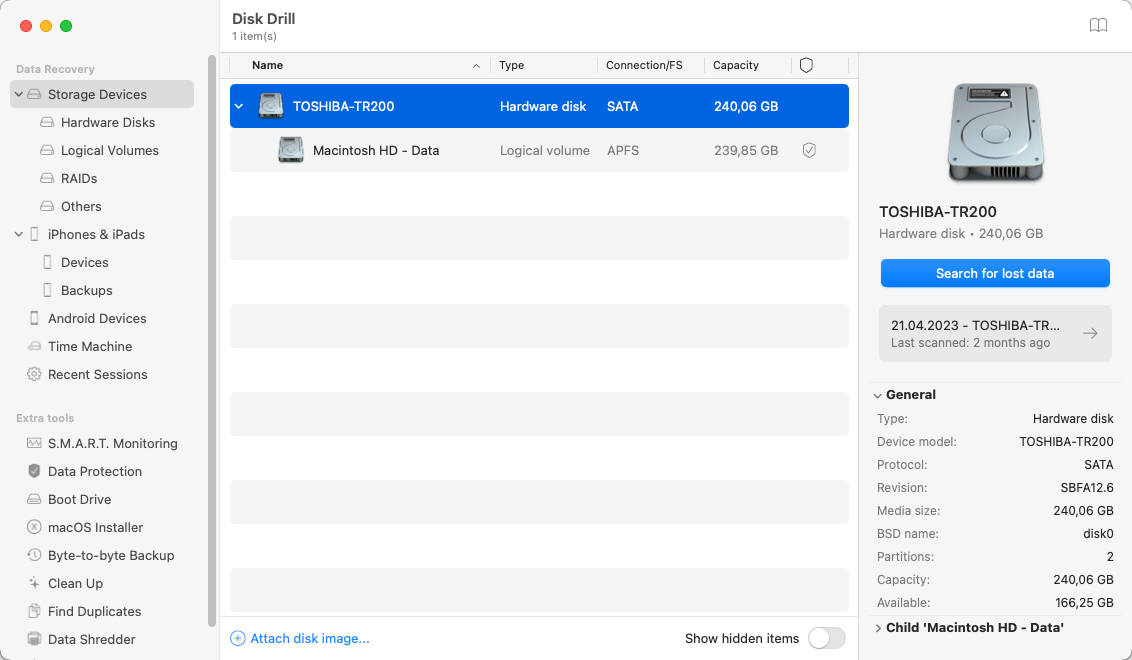
Step 4. Select the drive where you last saved your iTunes backup. Leave all settings to default for the best results, then click Search for lost data in the right panel of the app.
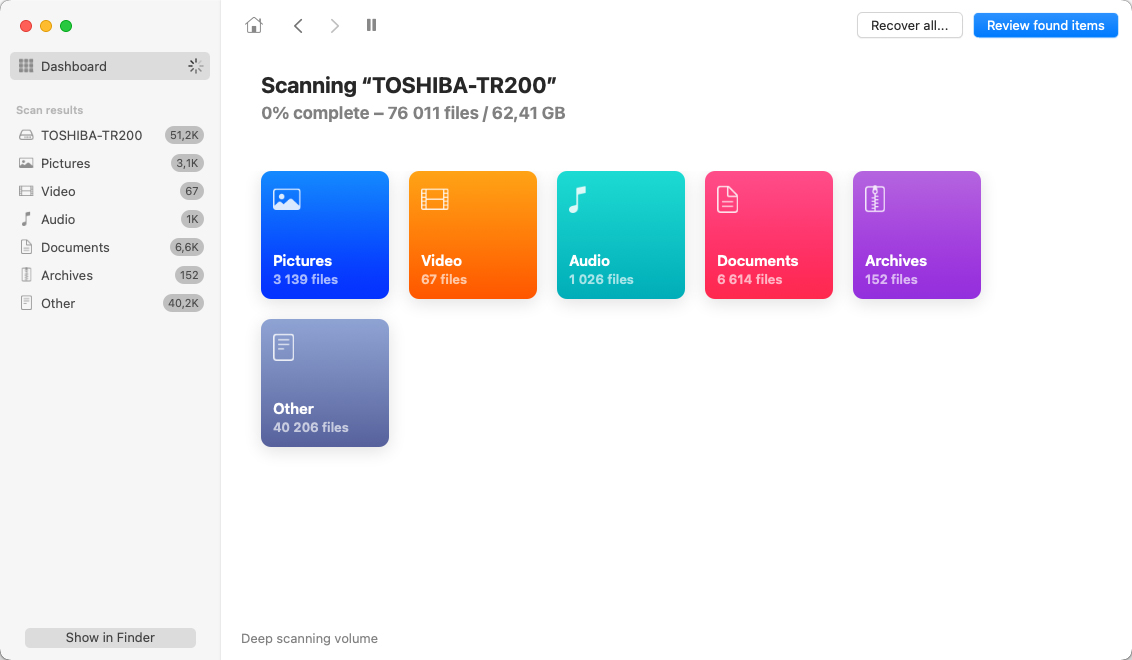
Step 5. Wait for Disk Drill to complete the scan, then click Review found items.
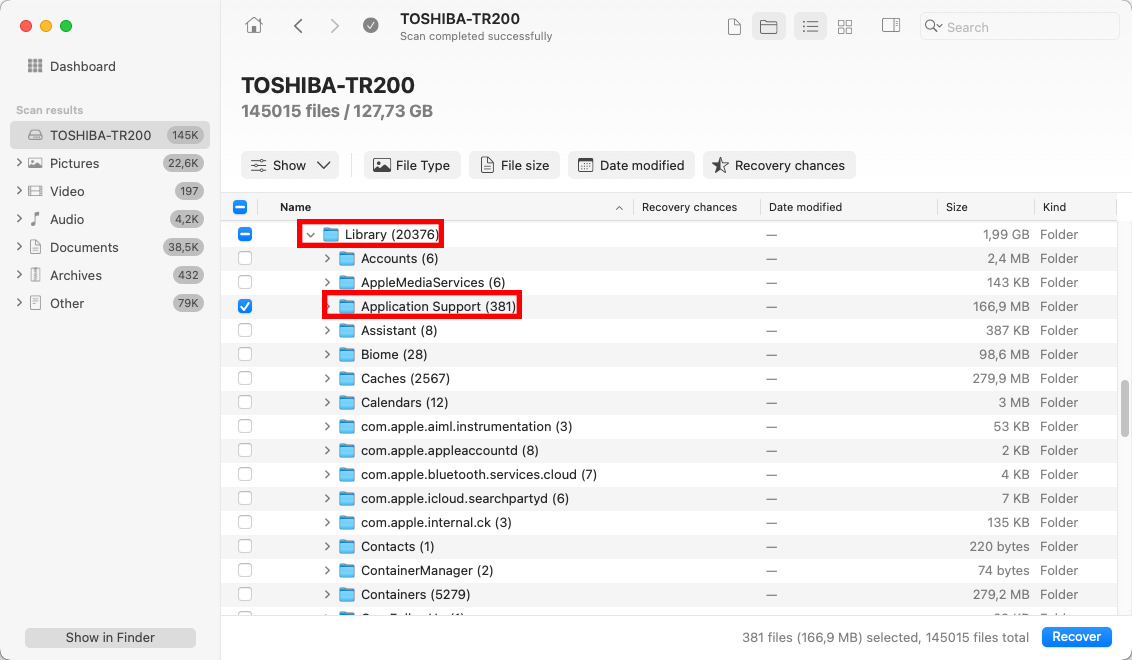
Step 6. Browse through the list of found data or type “backup” in the search bar at the top-right corner of the window. Disk Drill typically shows recovered data in a nested folder structure, so keep your eyes open for any of the following folders: “Library”, “Application”, “Mobile Sync”, or “Backup.”
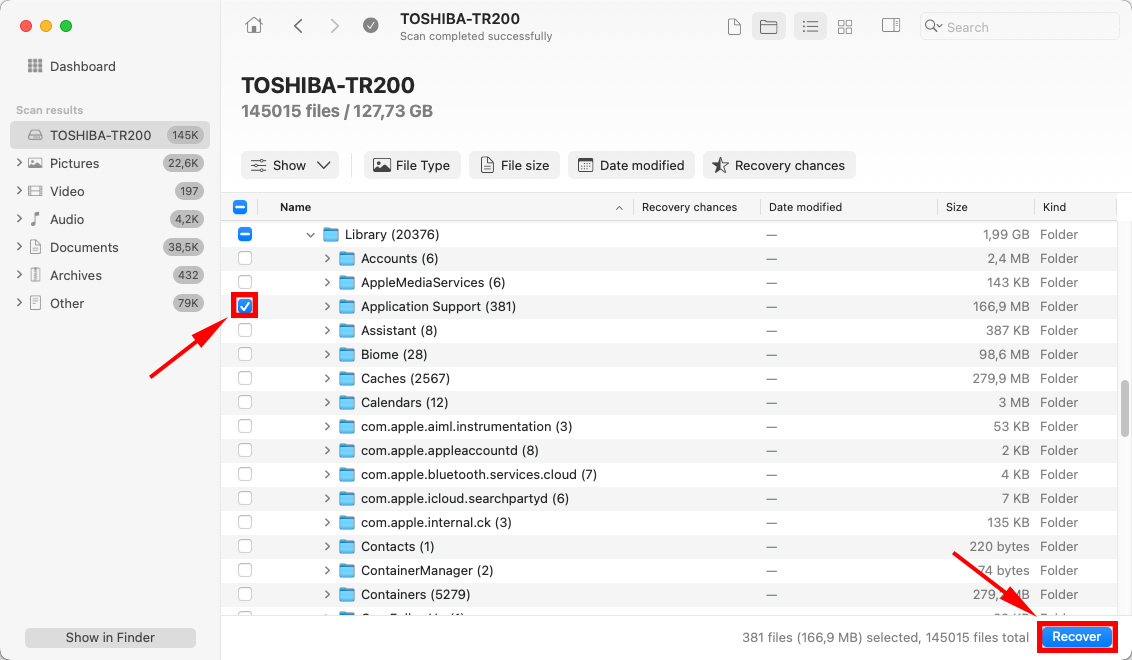
Step 7. To proceed with recovery, tick the checkbox to the left of any of the folders we mentioned in the last step, then click Recover.
Step 8. On the popup that appears, choose a location on your computer to save the folder, then click Next to proceed with recovery.
Step 9. Copy the files or folder to Library > Application Support > MobileSync > Backup. Once done, you can now restore your iTunes backup using the data you just recovered. Proceed to the next section of this article for the full guide.
How to Restore Files From iTunes Backup
When you have the backup file available, you can easily restore it using iTunes. Make sure that you have your backup file somewhere on your device, preferably in ~/Library/Application Support/MobileSync.
While iTunes can restore data from anywhere on your Mac, MobileSync is the default folder. This simply makes it easier for iTunes to locate the backup. To navigate to this location, jump to the How to find iTunes backup on Mac section by clicking here. To restore a backup from iTunes, follow this guide:
Step 1.Connect your iPhone, iPad, or iPod to your MacBook.
Step 2.Open iTunes by opening Finder > Applications > iTunes and double-clicking its icon.
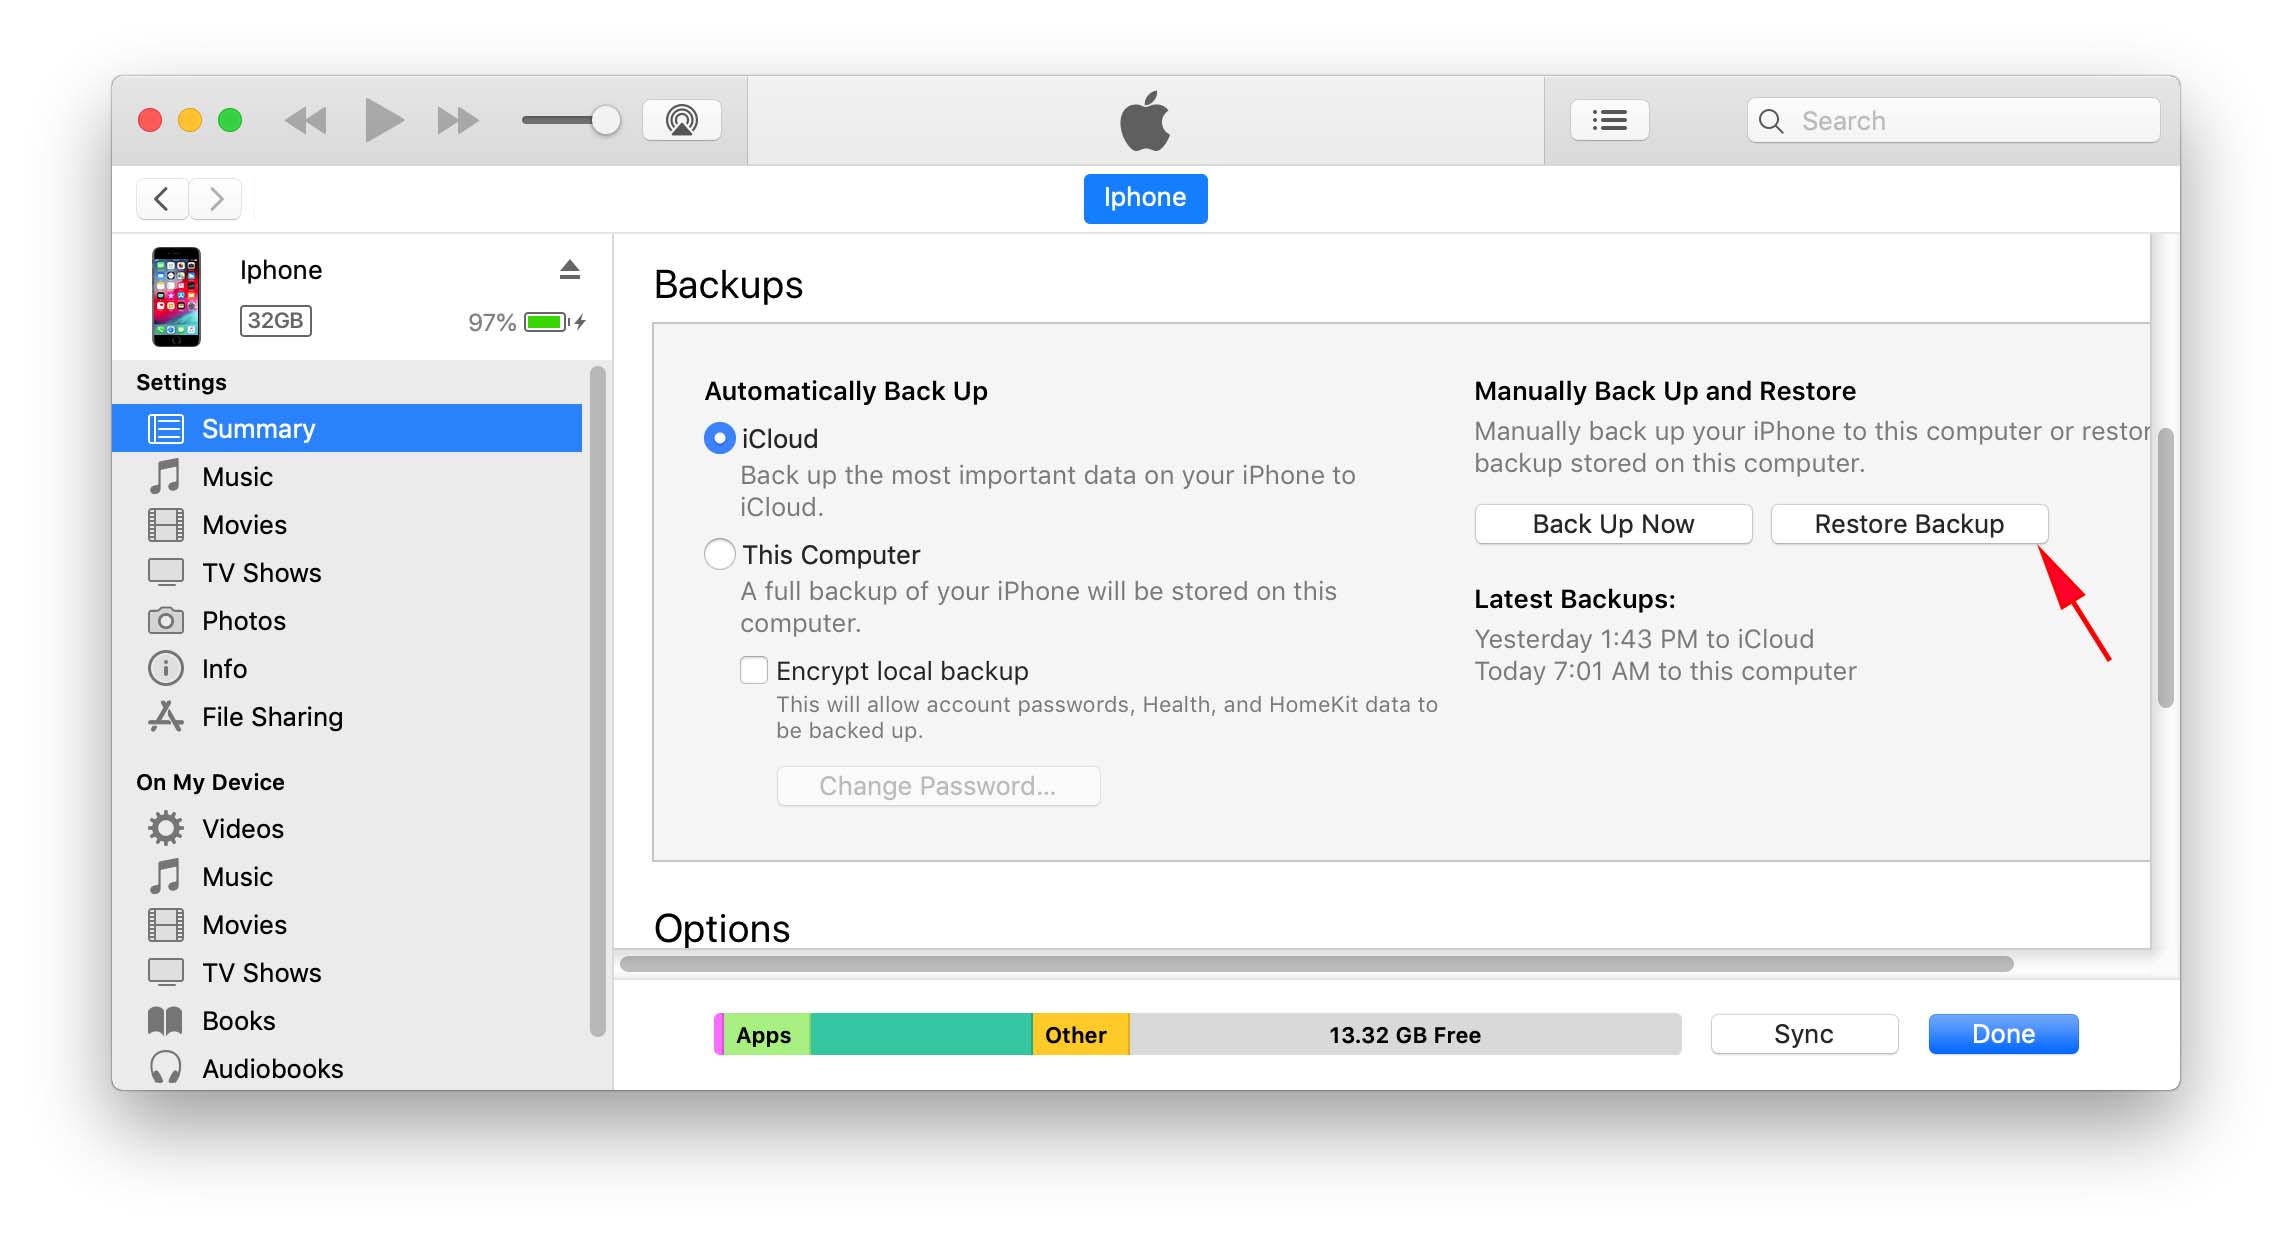
Step 3.Click on your device’s icon near the top of the screen (beside the music icon).

Step 4.Click the “Restore Backup…” button under the “Backups” section.
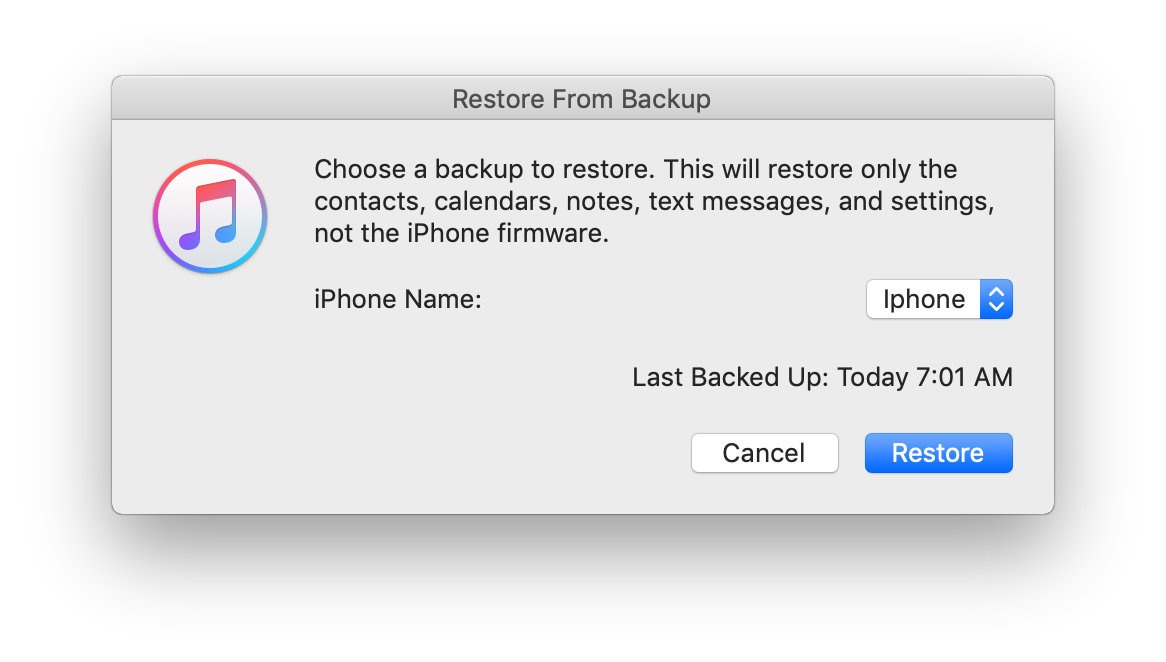
Step 5.Using the dropdown menu, find your backup in iTunes, then click the “Restore” button.
Step 6.Wait for your device to restart and sync with the computer again. Once it’s done syncing, you can safely disconnect your newly restored device.
Conclusion
Whether you’re using iTunes (macOS Mojave and below) or Finder (macOS Catalina and above) to backup your Apple devices, this guide will work. The location of your backup folder remains the same, and the process is largely similar. Disk Drill will also work for Finder backups just as well as iTunes backups – just make sure to act quickly, so your data doesn’t get overwritten as you continue using your Mac.
FAQ
Here are possible reasons why you can’t restore your iPhone from an iTunes backup and what to do about them:
- Corrupt backup – Your iTunes backup may have become corrupted. Use an alternative backup. If you don’t have one, use data recovery software. You can also try contacting Apple support.
- Incompatible backup – Your iOS or iTunes may be outdated. Try updating first.
- Bad internet – Your network may be disrupting the restore process. Make sure you have a strong connection before attempting to restore.


